

Page 1
1-Port USB 2.0 Print Server
Model # APSUSB211
Quick Installation Guide
Ver. 1B
Page 2
Section 1
Connecting the Print Server
Warning: Only a USB printer may be connected to the USB port of the Print Server . Connecting any
other USB device to the Print Server may damage the Print Server . Do not plug the power cord to the
Print Server until you have reached Step 4 of this section.
Note: Before proceeding with the steps below , please verify that the printer operates properly on each of
the computer that will be printing through the Print Server.
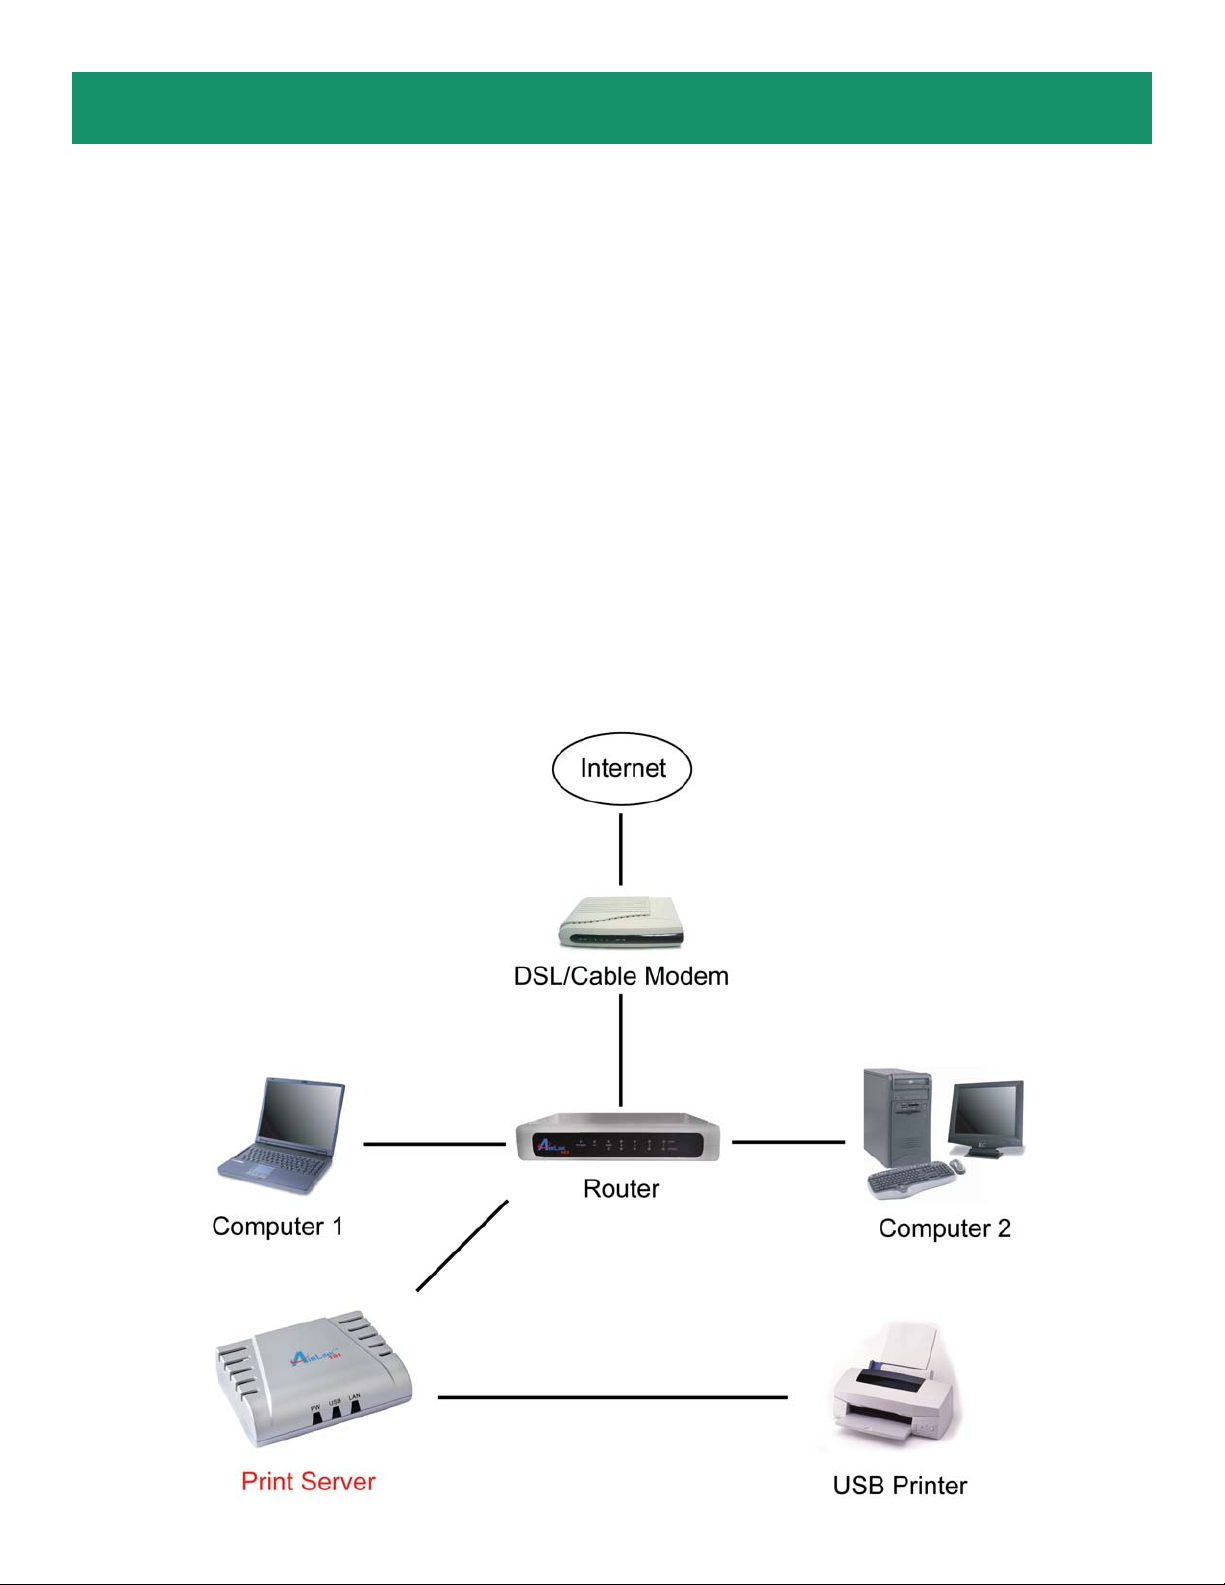
Step 1Connect one end of the Ethernet cable to the RJ-45 port of the Print Server and attach the other
end of the cable to a router .
Step 2 Make sure the printer is powered OFF, then connect one end of the USB cable to the USB port of
the Print Server and attach the other end of the cable to the USB port of the printer.
Step 3 Power ON the printer .
Step 4 Plug one end of the power cord into the Print Server and the other end into an electrical outlet.
Page 3
Section 2
Installing PS Utility
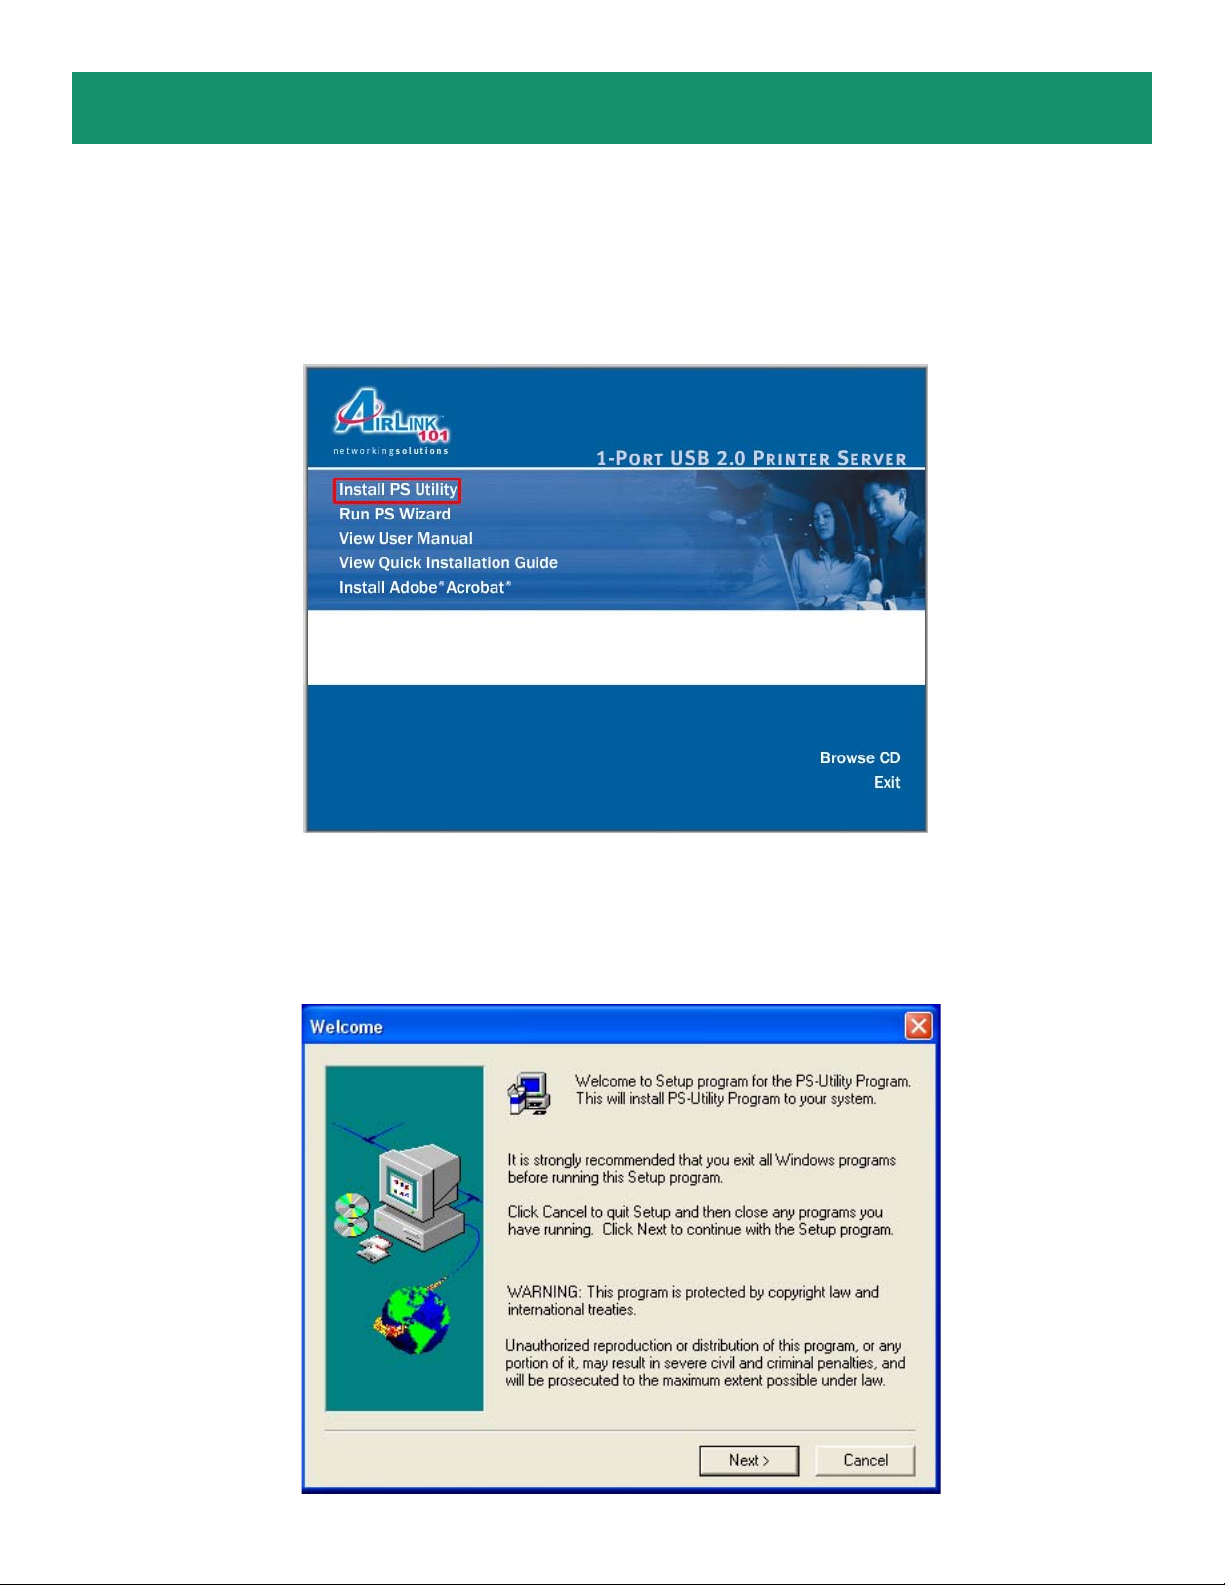
Step 1 Insert the provided CD and wait for the autorun screen to appear .
Step 2 Click on Install PS Utility.
Note: If the autorun screen does not appear automatically , go to Start, Run, type D:\autorun.exe
(where D is the letter of your CD drive) and click OK.
Step 3 Click Next.
Page 4
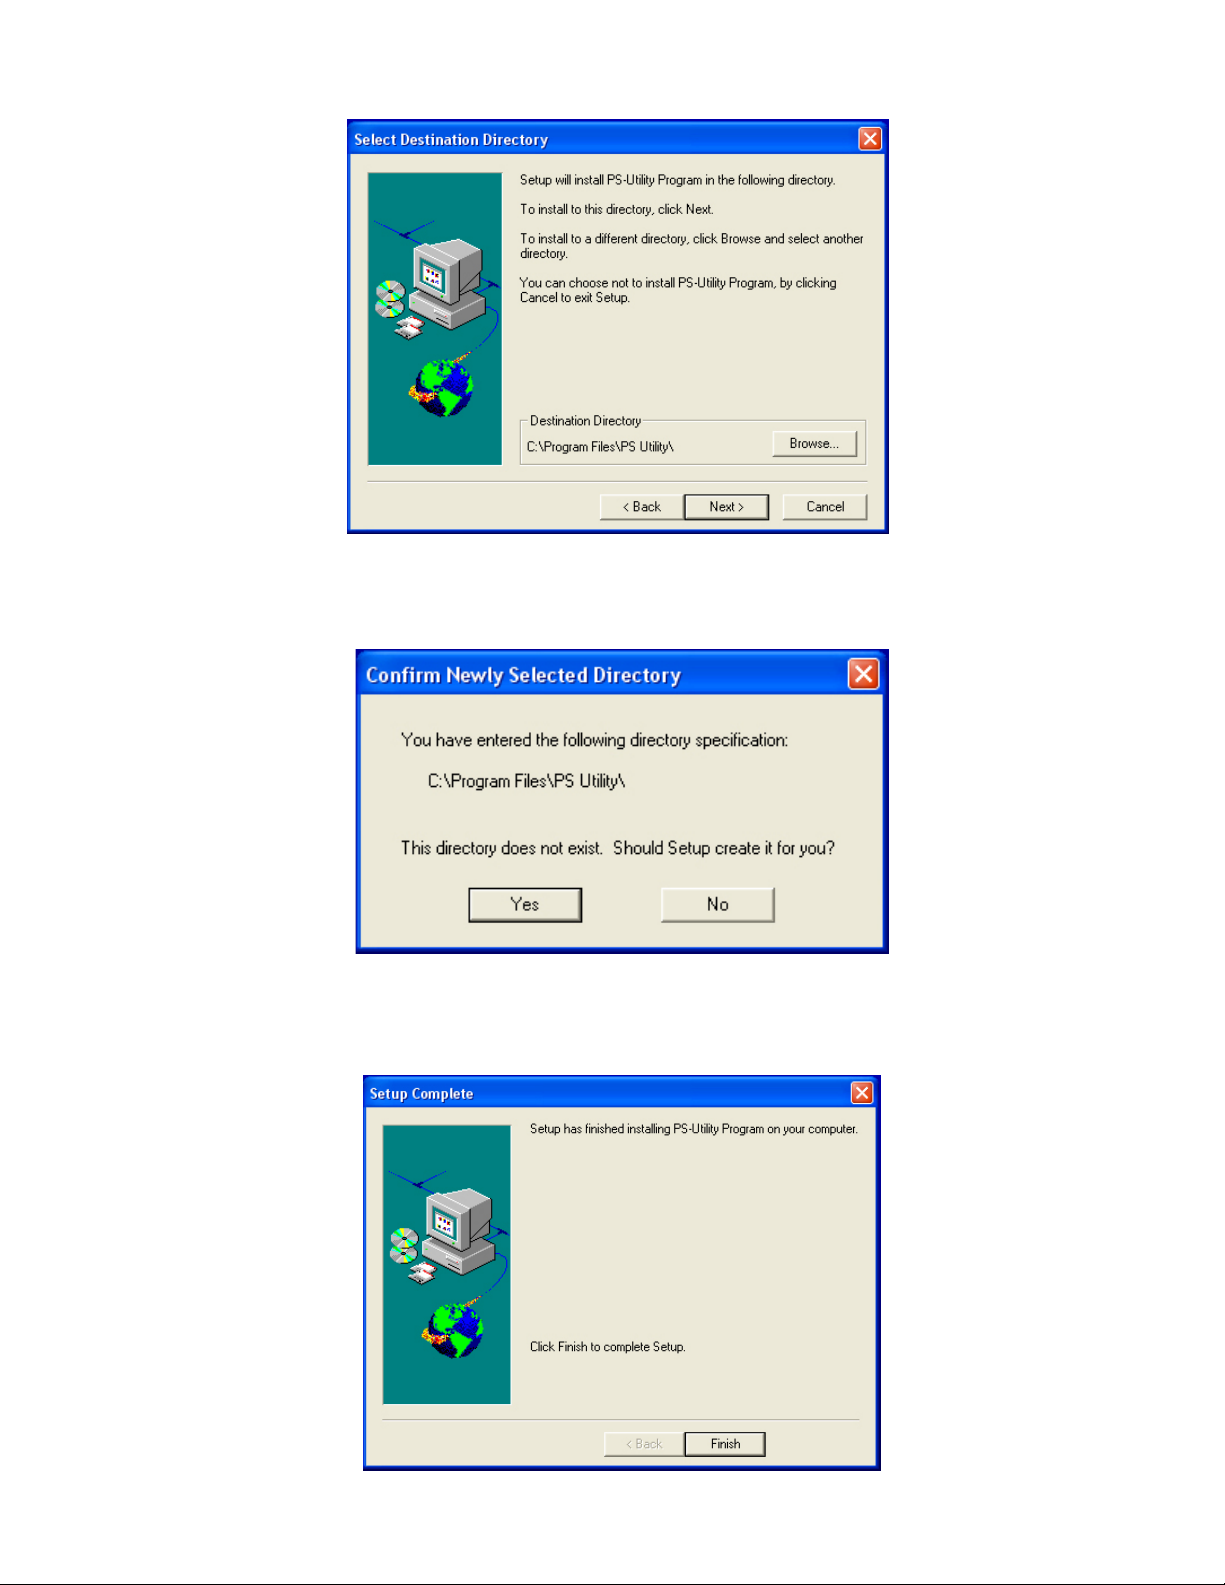
Step 4 Click Next.
Step 5 Click Yes.
Step 6 Click Finish.
Page 5
Section 3
Configuring Network Setting
Before configuring the Print Server’s network setting, please take note of your computer’s
TCP/IP setting.
Step 1
XP) and click OK.
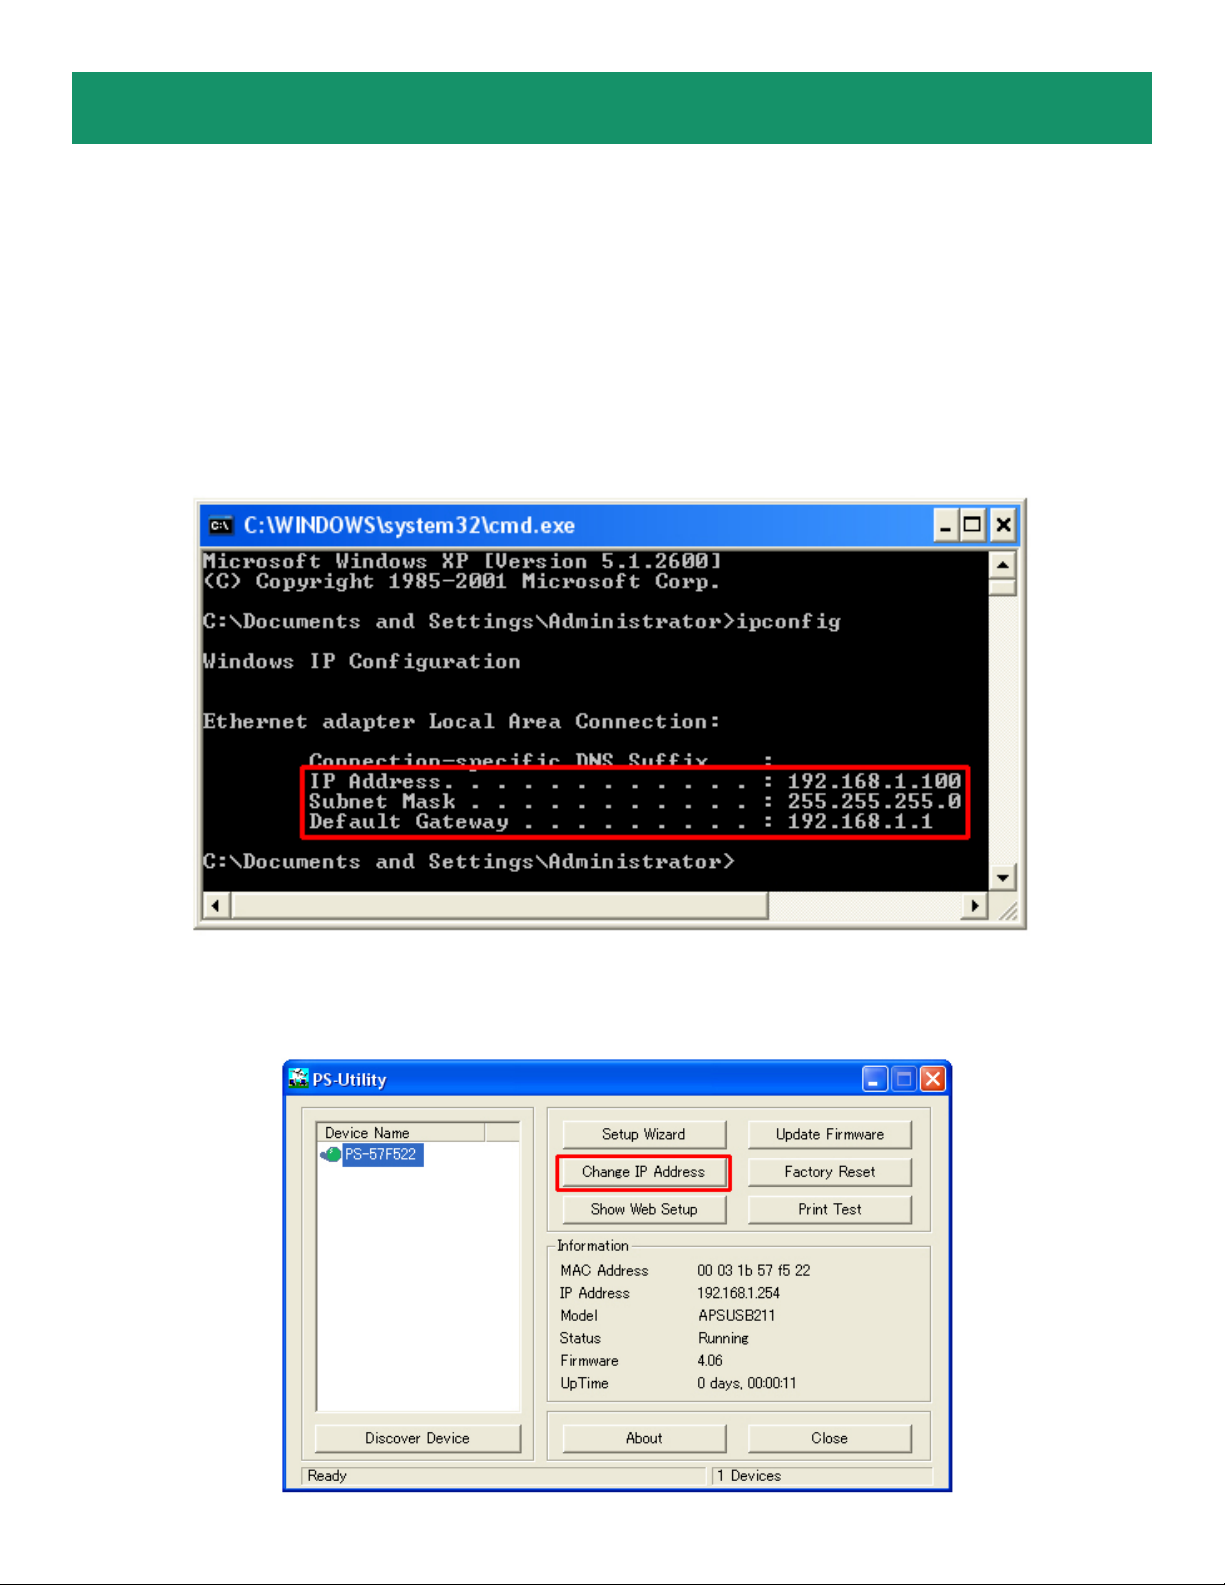
Step 2 At the command prompt, type ipconfig and press Enter.
Step 3 Write down the information for the IP Address, Subnet Mask, and Default Gateway. Y ou will
need these information later .
Click on Start, Run, and type command (for Windows 95/98/ME) or cmd (for Windows 2000/
Step 4 Run the PS Utility by going to Start, (All) Programs, PS-Utility, PS-Utility v3.00.
Step 5 Make sure the Print Server is listed under the Device Name and click on Change IP Address.
Page 6
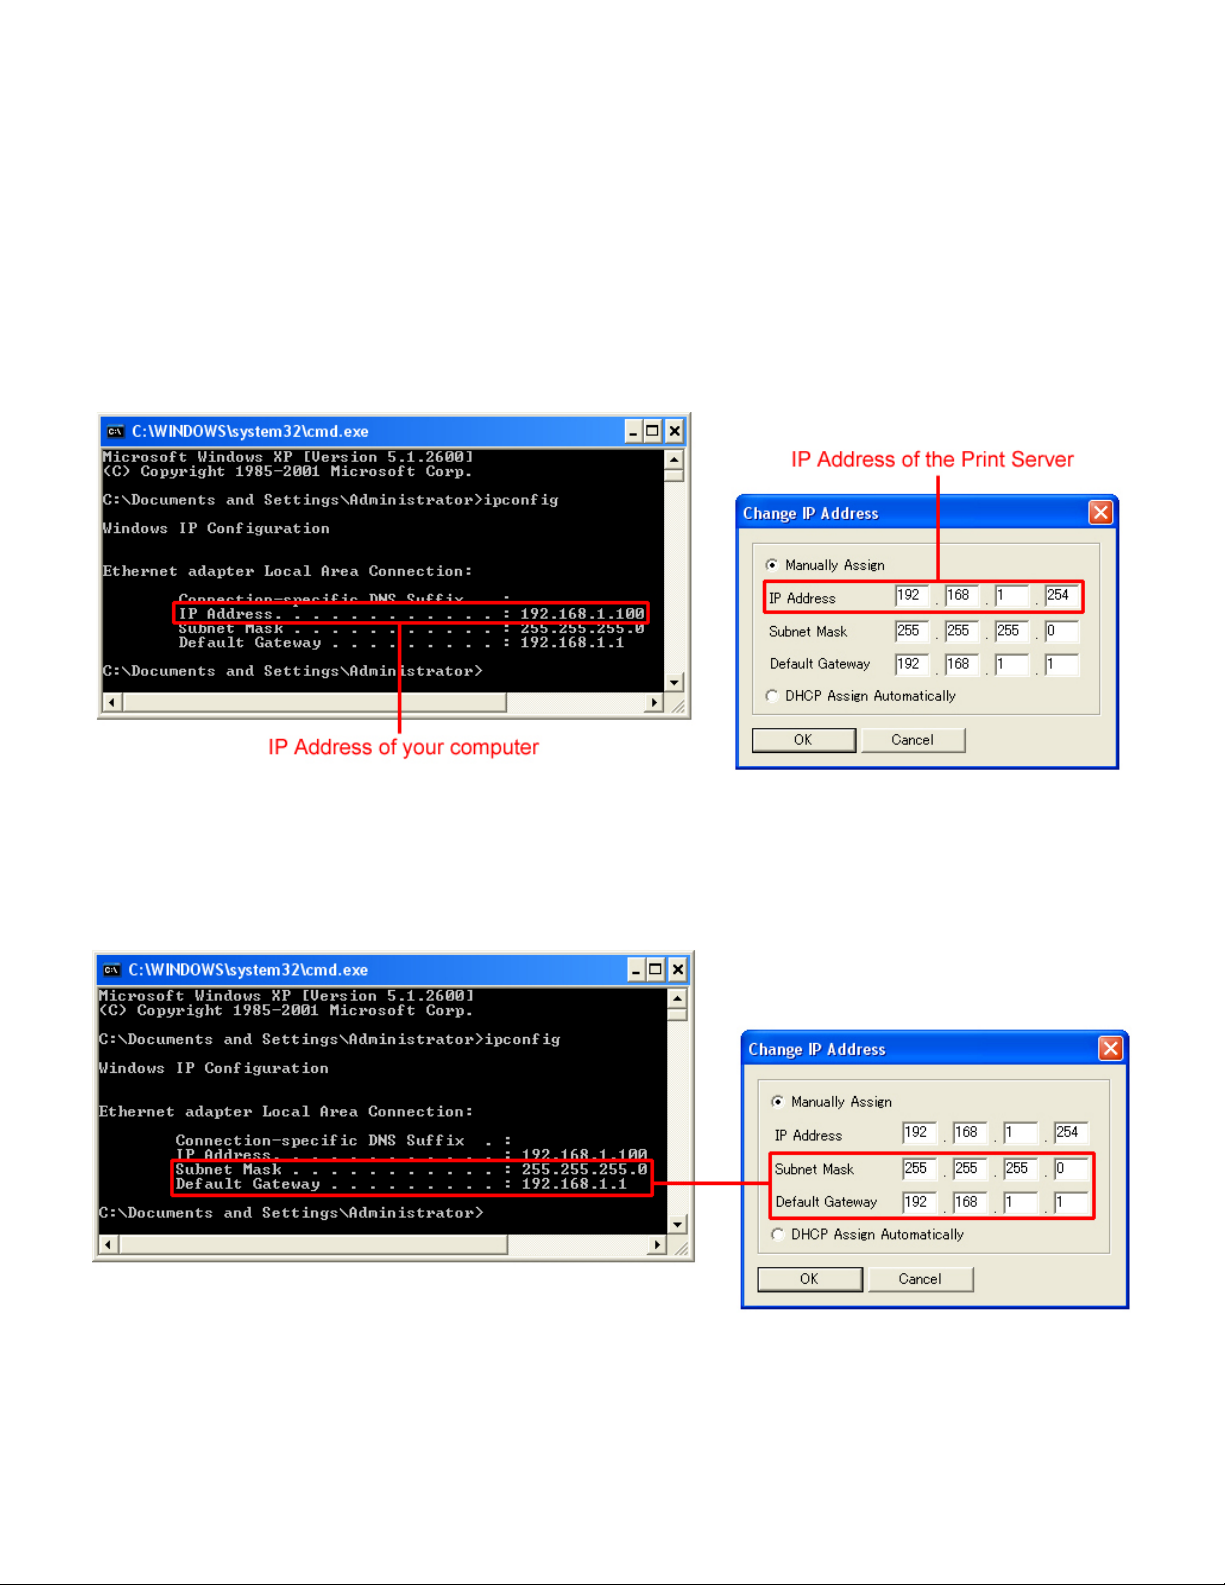
Step 6 In the IP Address field, enter a valid IP address, subnet mask, and default gateway that matches
your local area network.
For example: If your computer’s IP Address is 192.168.1.100, enter the same three numbers:
192.168.1 in the corresponding fields.
Note: Y ou can leave the last IP Address number 254 as is unless another network device
(i.e. the Default Gateway) is already using that number. If another network device is already using 254,
then change it to another number that is currently not in use (preferably 200 - 253).
Step 7 For the Subnet Mask and Default Gateway fields, enter the same number as the TCP/IP setting
of your computer.
Step 8 Click OK.
Step 9 Close the PS Utility program.
Page 7
Section 4
V erifying Network Connection
Step 1 Run the PS Utility by going to Start, (All) Programs, PS-Utility, PS-Utility v3.00.
Step 2 Make sure the Print Server is detected under the Device Name.
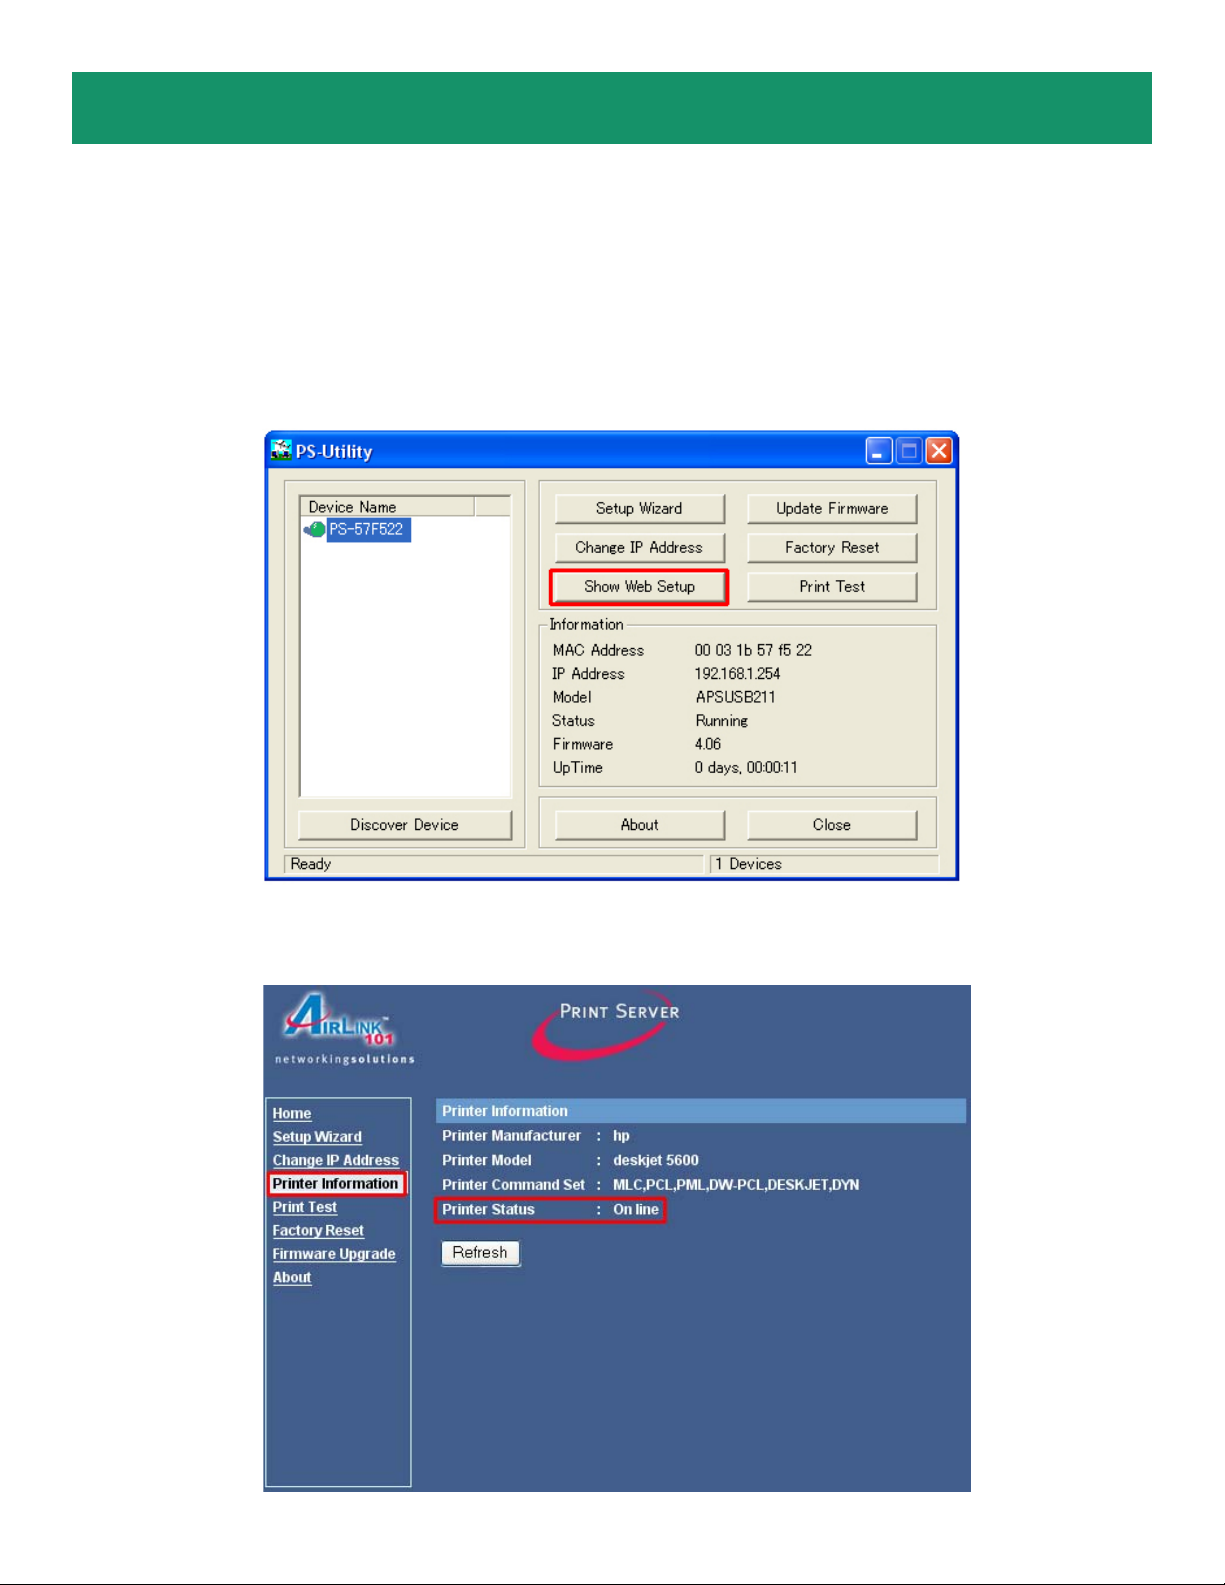
Step 3 Click on Show Web Setup to display the Print Server’s Web Configuration Utility.
Step 4 Click on the Printer Information link and make sure the Printer Status displays On line.
Page 8
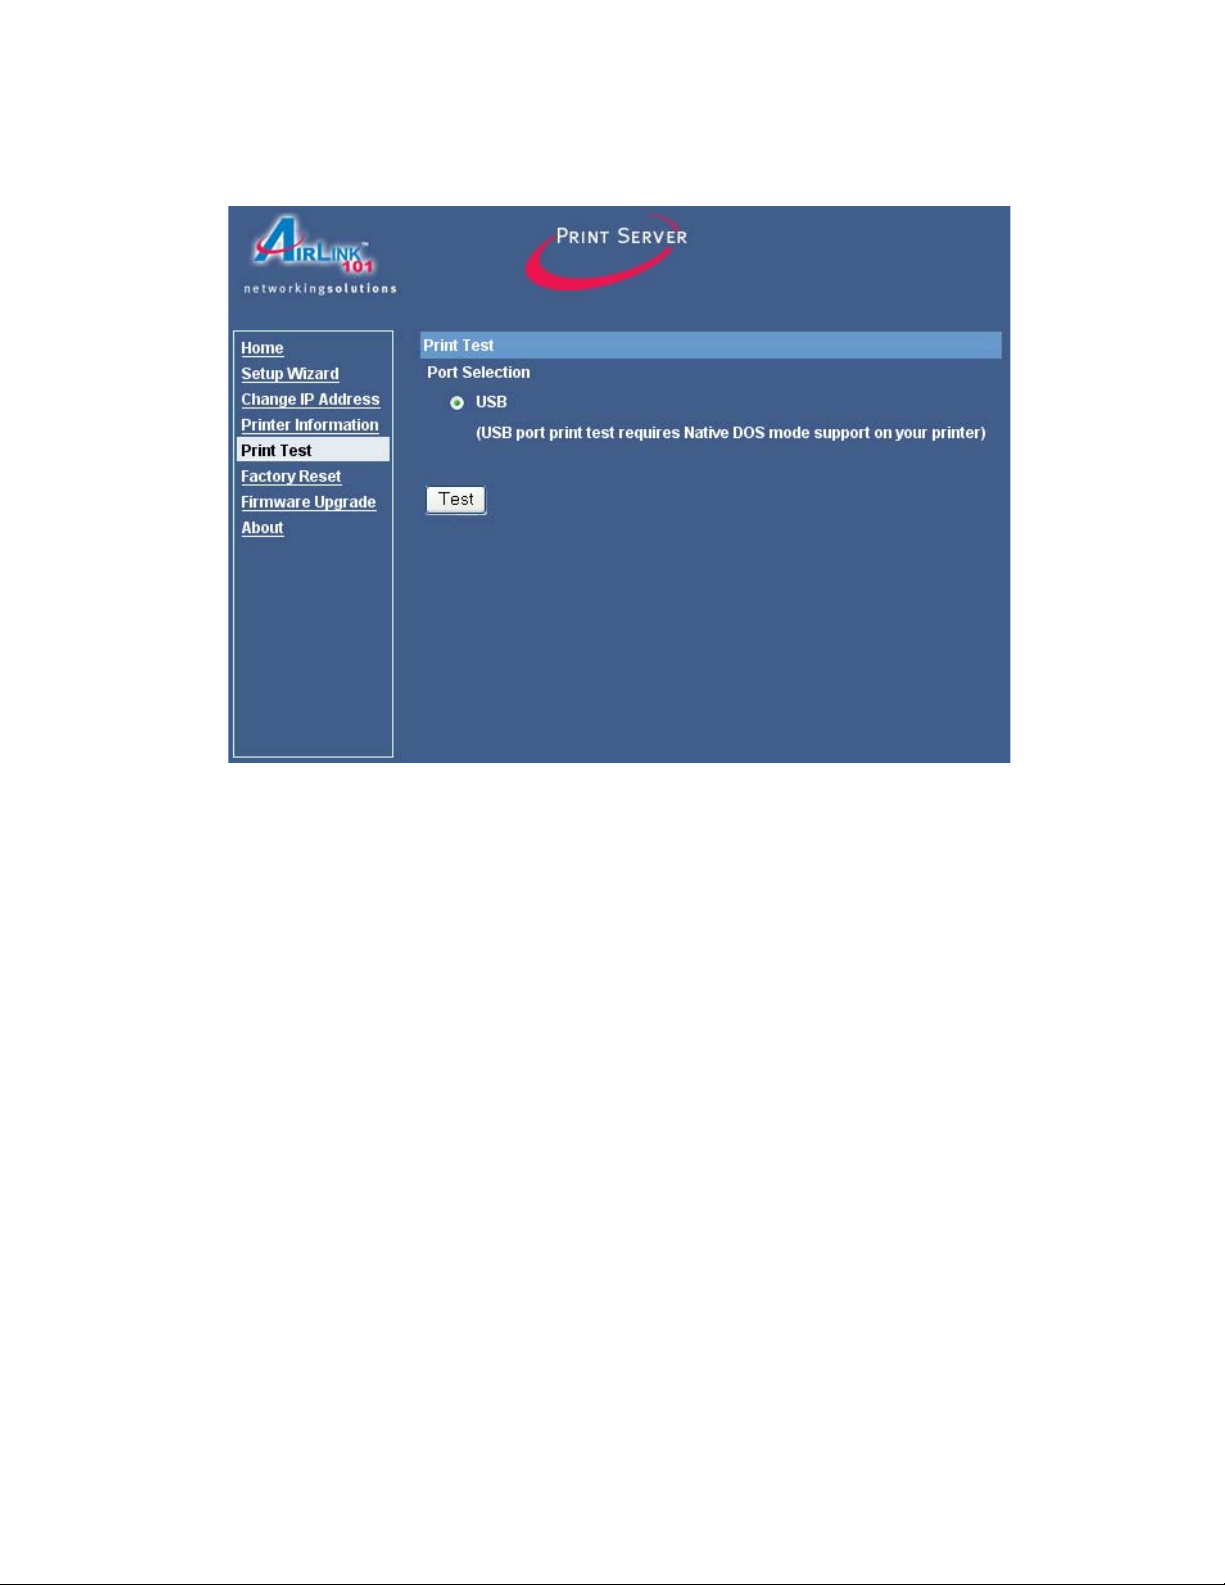
Step 5 Click on the Print T est link and click the Test button. The Print Server will perform a low-level
print test, bypassing the operating system layer .
Note: Y our printer should print out a test page. If not, verify that the printer is powered on and all cables
are securely connected and try again. If the printer still fails to print a test page, please check the printer
compatibility list on our web site at www.airlink101.com for a list of compatible printers. If your printer is
not on the list, it may not be compatible with the Print Server.
Step 6 Once the printer successfully prints out a test page, you may close the web browser and proceed
to the next section.
Page 9
Section 5
Running PS Wizard
Warning: Make sure you have installed the printer driver locally on every computer that will use the
Print Server in your network before running the PS Wizard. Otherwise, the PS Wizard will not run properly .
Be sure to run the PS Wizard on all the computers that will use the Print Server in your network.
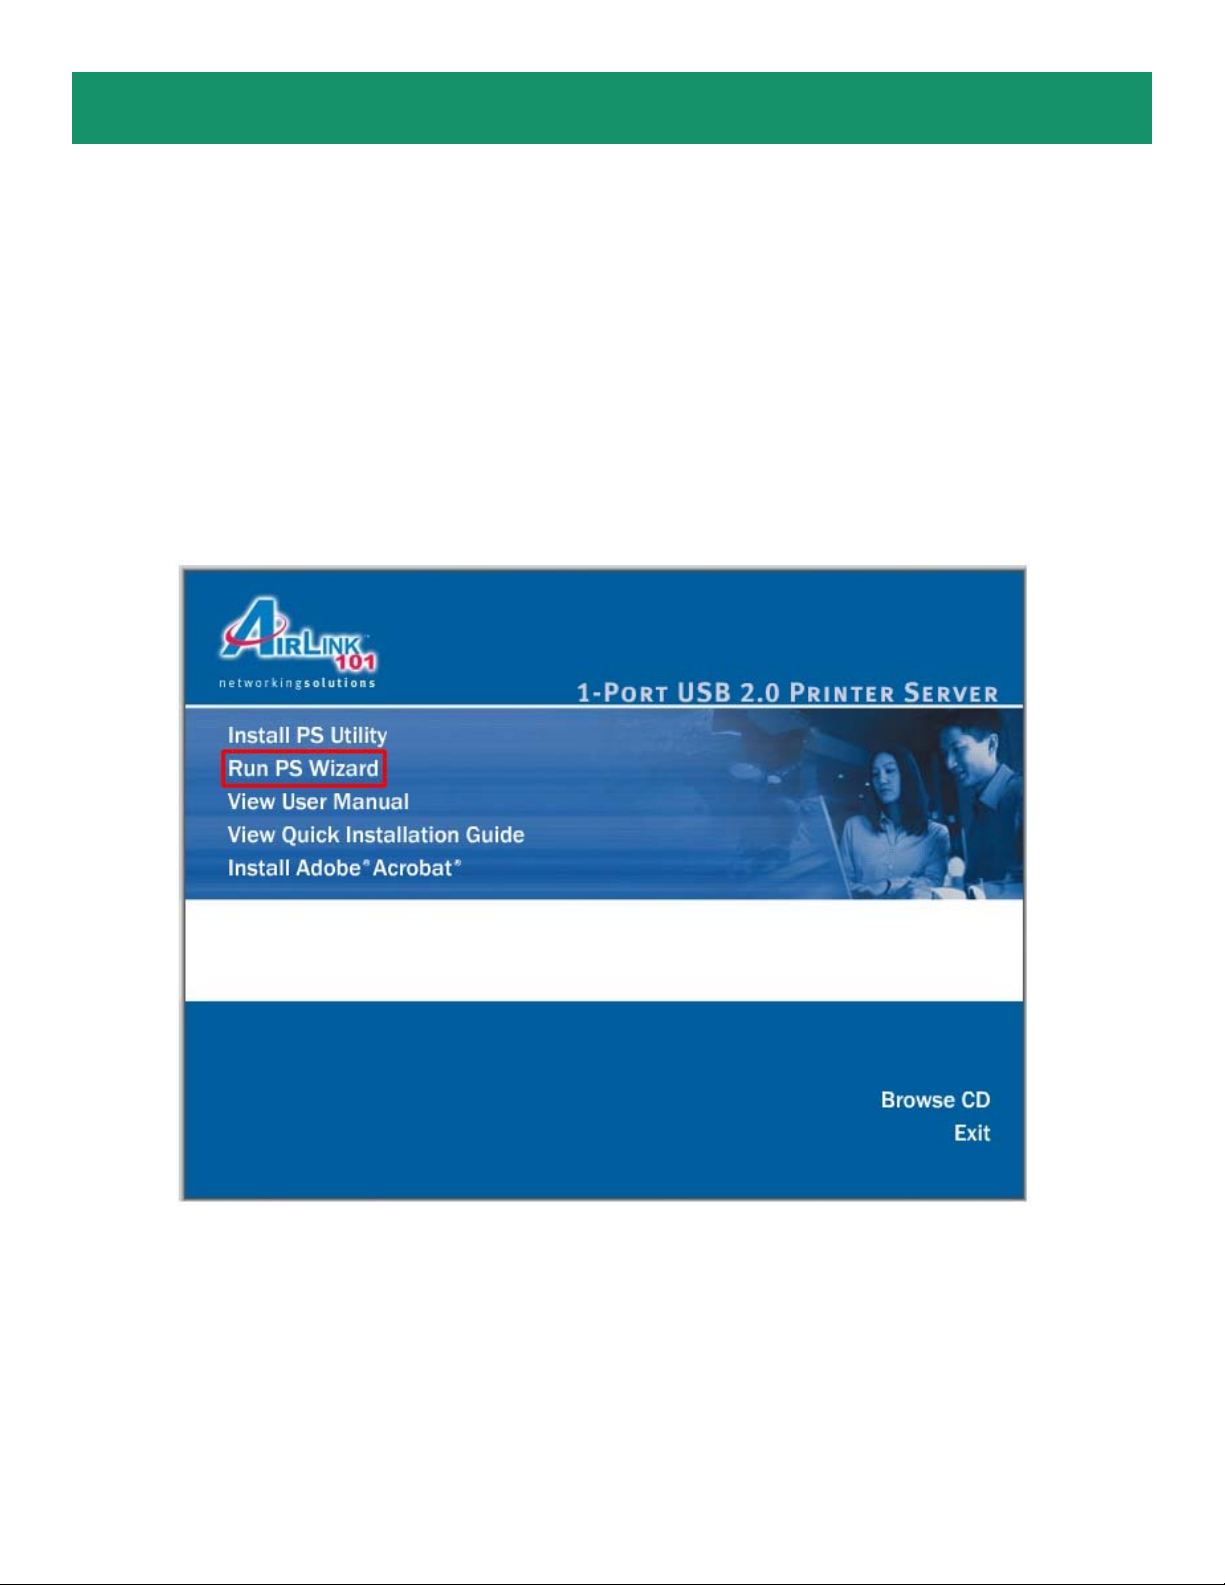
Step 1 Insert the provided CD and wait for the autorun screen to appear .
Step 2 Click on Run PS Wizard.
Note: If the autorun screen does not appear automatically , go to Start, Run, type D:\autorun.exe
(where D is the letter of your CD drive) and click OK.
Page 10
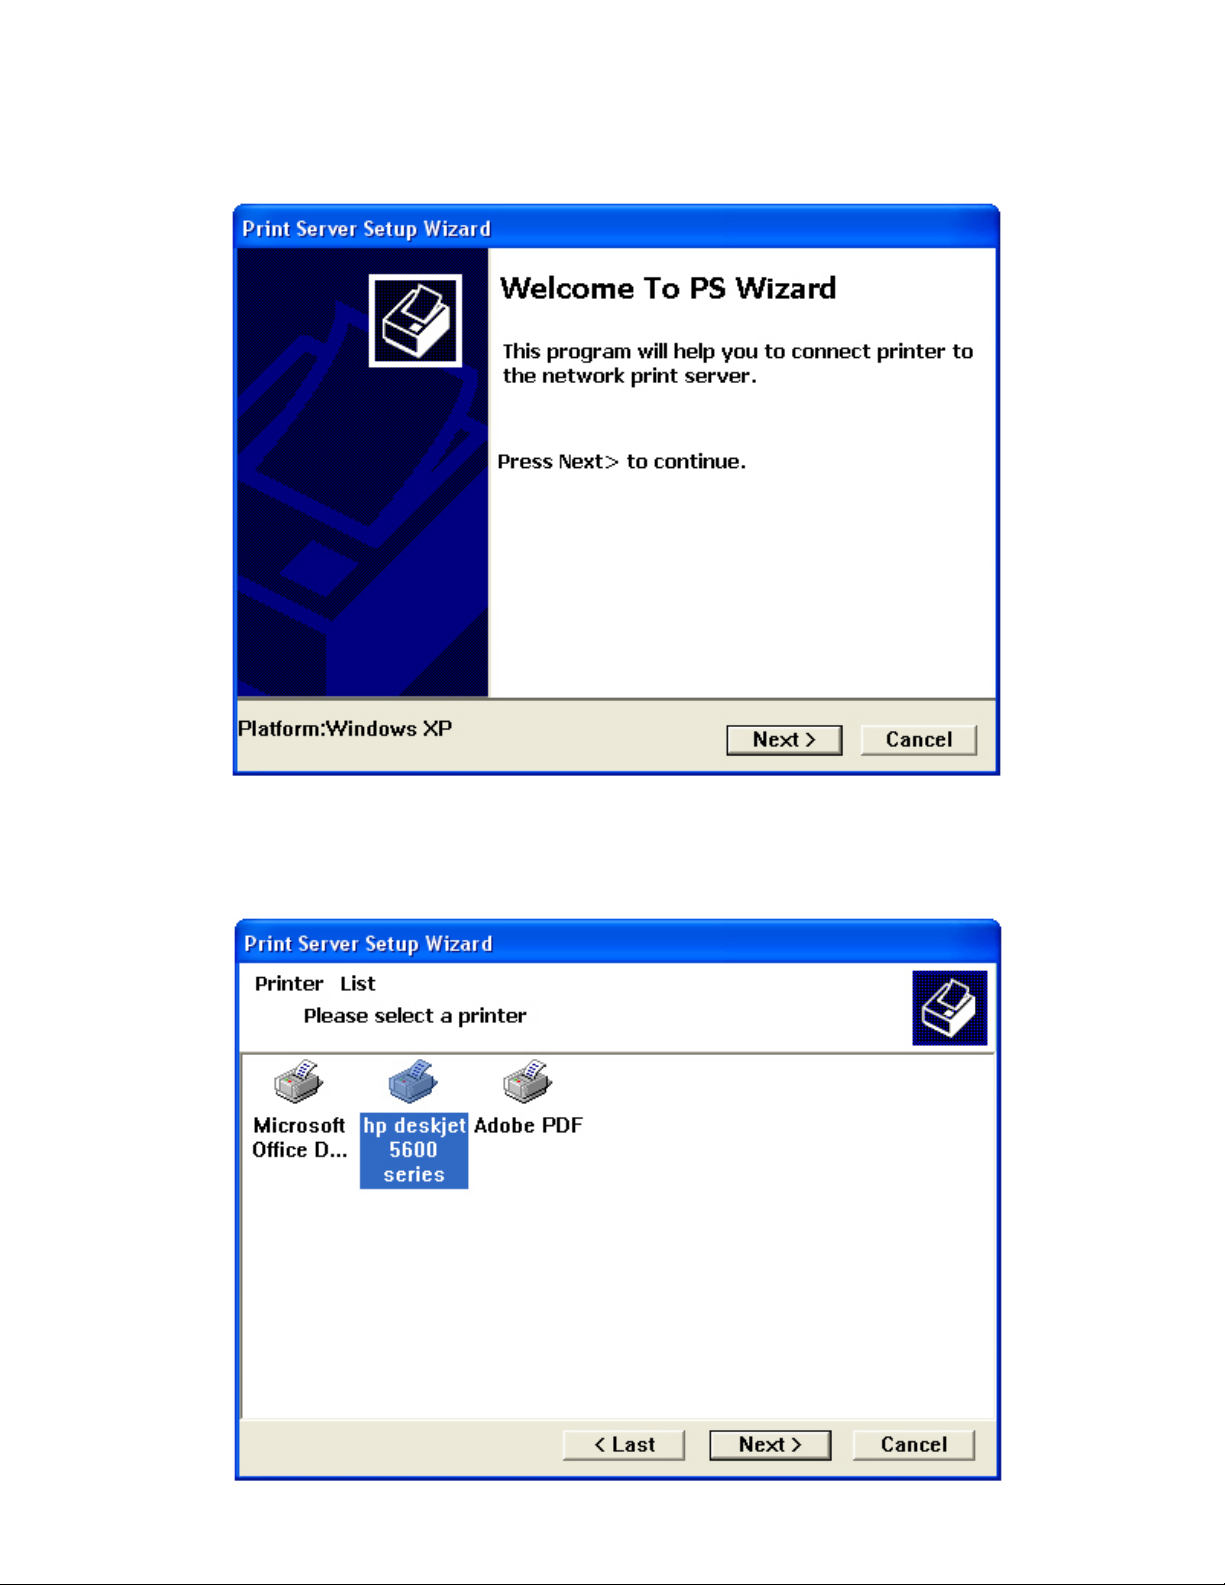
Step 3 Click Next.
Section 4
Step 4 Select the printer that is connected to the print server and click Next.
Page 11
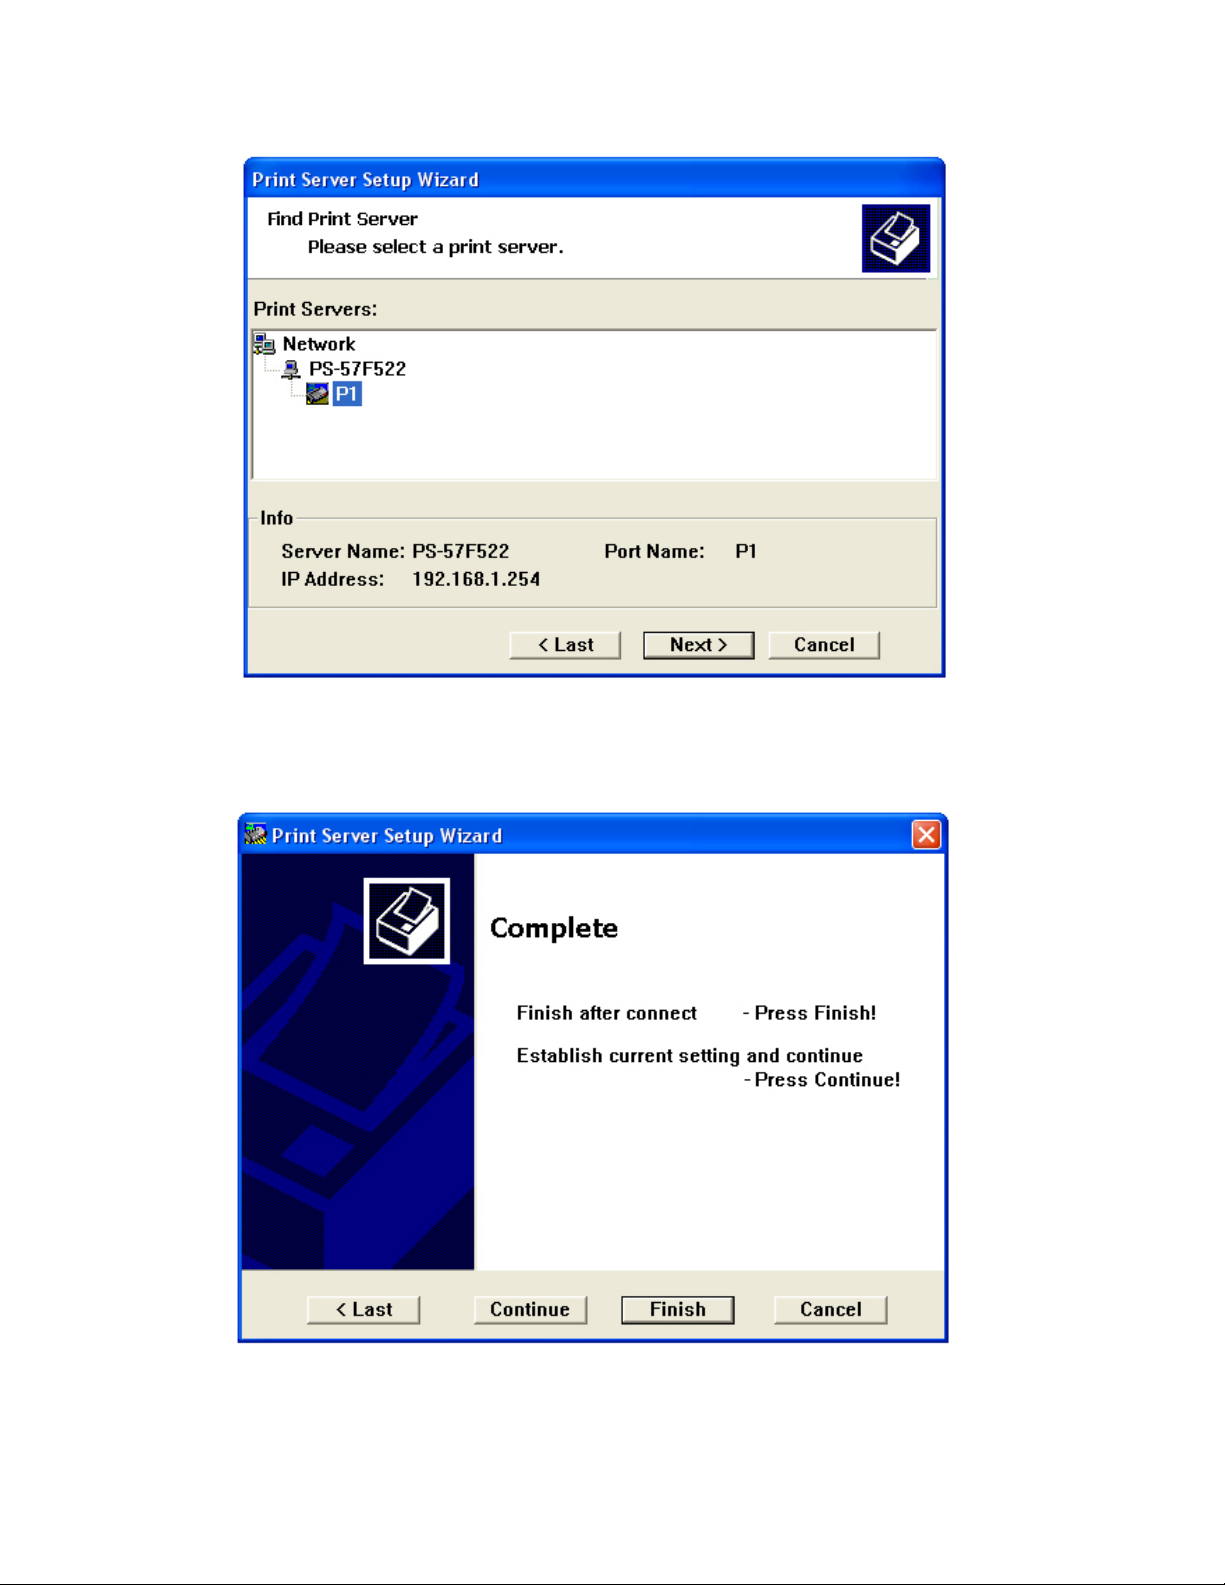
Step 5 Double-click on the Print Server Name, select the Printer Port Name, and click Next.
Step 6 Click Finish and OK. (For Windows 95/98/ME, you’ll need to reboot the computer).
Step 7 Run the PS Wizard on all the computers in your network that will use the print server .
Page 12
Section 6
Performing Operating System Print Test
The final step in setting up the Print Server is to perform an operating system print
test. Please note that the instructions below are for Windows XP, but the steps are
similar for all the other Windows operating systems.
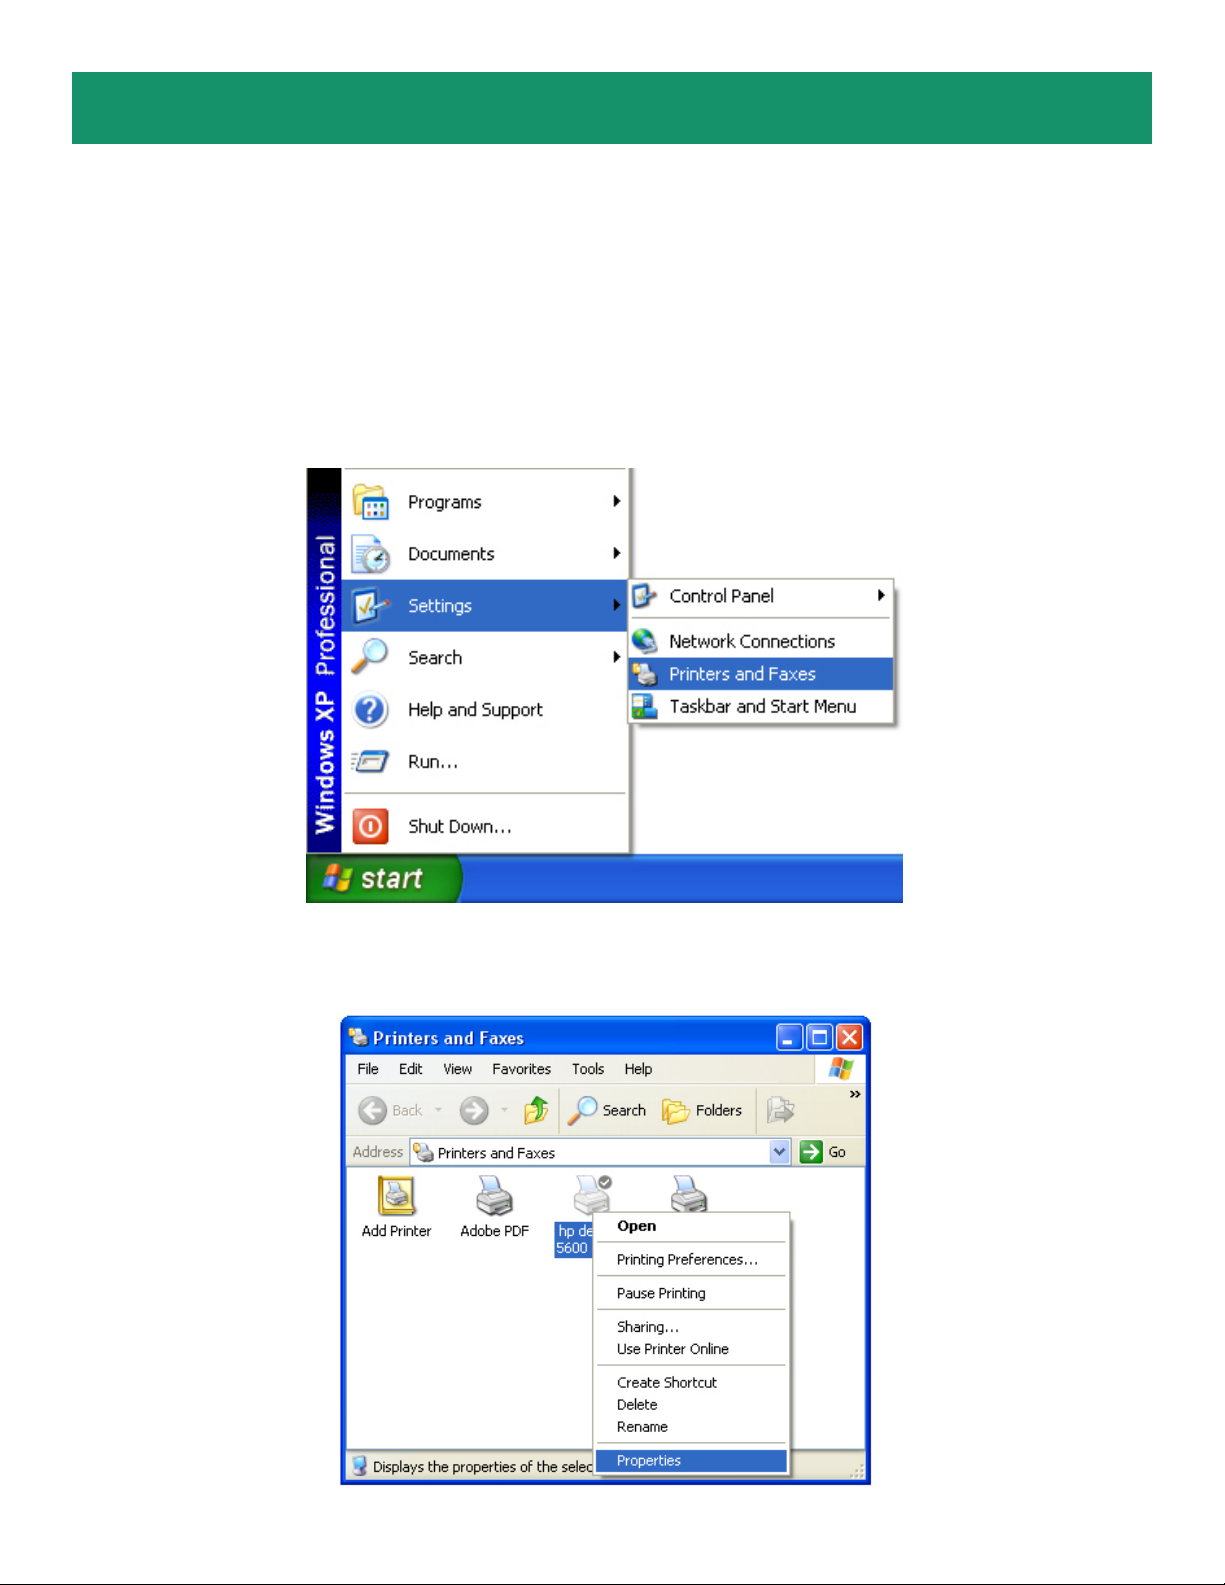
Step 1 Click on Start, Settings, Printers and Faxes.
Step 2 Right-click on the printer that is connected to the Print Server and select Properties.
Page 13
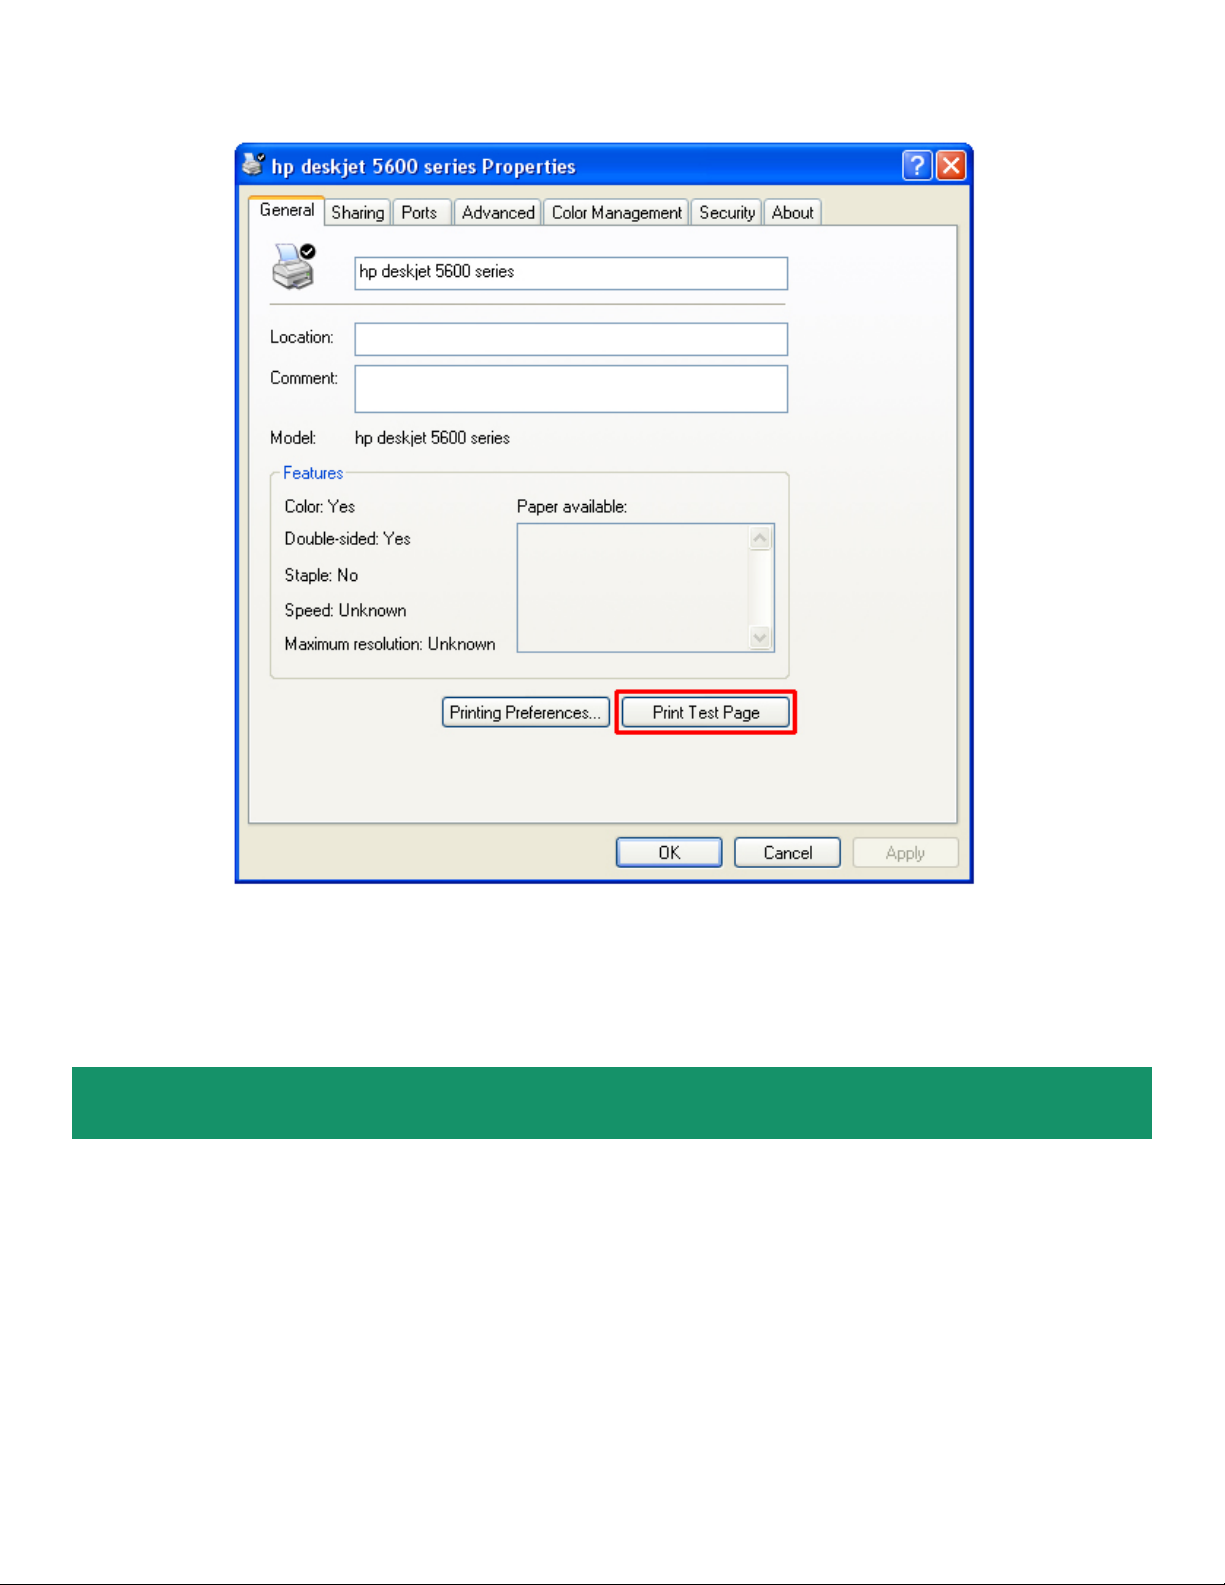
Step 3 Click on the Print Test Page button. Windows should print out a test page.
You have successfully configured the Print Server for printing.
For more information on how to use the Web Configuration Utility or setup for
Mac OS, please refer to the User’s Manual in the provided CD.
Section 7
Technical Support
E-mail: [email protected]
T oll Free: 1-888-746-3238
Web Site: www .airlink101.com
Page 14

Copyright © 2005 AirLink101. All rights reserved. AirLink101, the stylized AirLink101 logo, specific product designations, and all other words and
logos that are identified as trademarks and/or service marks are, unless noted otherwise, the trademarks and service marks of AirLink101. All other
product or service names are the property of their respective holders. AirLink101 products are protected under numerous U.S. and foreign patents
and pending applications, mask work rights, and copyrights.
 Loading...