

Page 1
Quick Installation Guide
ConnectSky™ 600W
Wireless N MPEG4 Network Camera
Model # AIC600W
Ver. 1A
Page 2
Package Contents
• Wireless N MPEG4 Network Camera
• Power Adapter
• Camera Stand Accessory Kit
• Cat. 5 Ethernet Cable
• Quick Installation Guide
• Installation CD
Section 1
This Quick Installation Guide only provides basic instructions. For detailed
information on using this product, please refer to the User’s Manual on the
supplied CD.
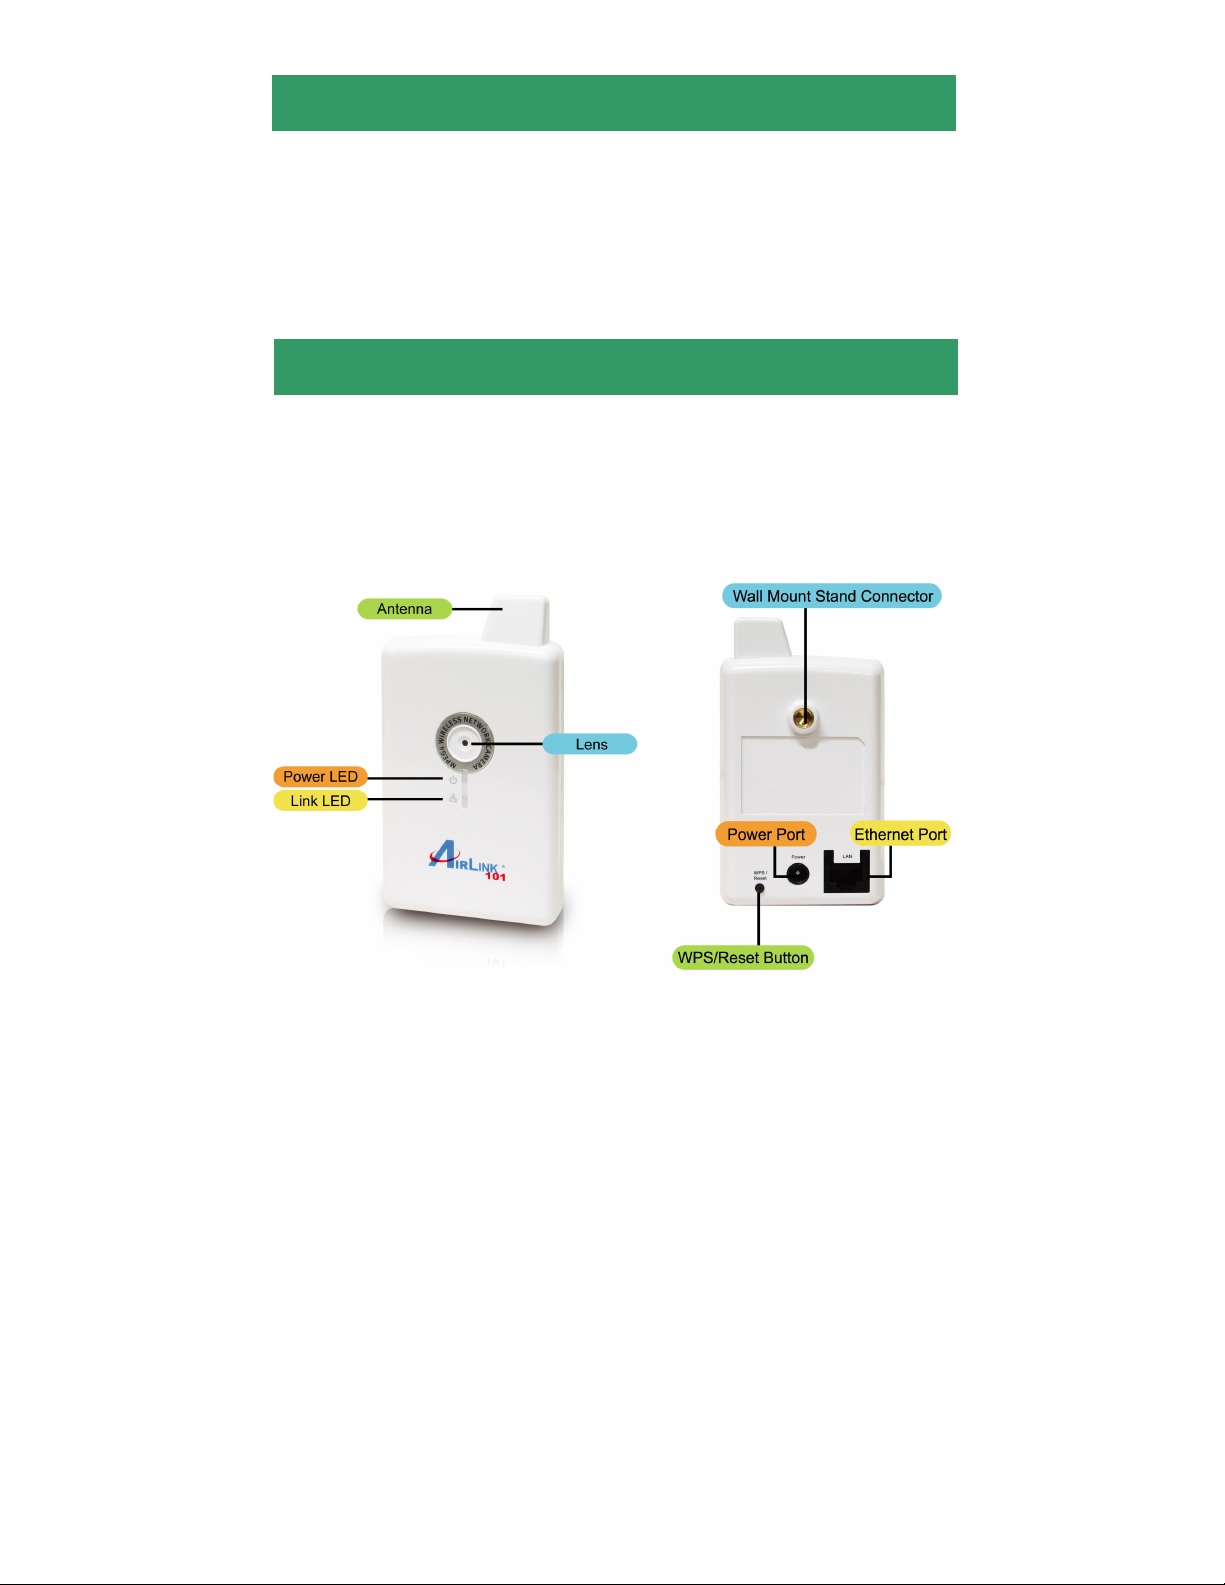
Hardware Introduction
Page 3
Section 2
Connecting the Camera
Step 1 Connect the power adapter to the Internet Camera and plug the
power adapter to power outlet. When the camera is ready, the Power LED
will be lit.
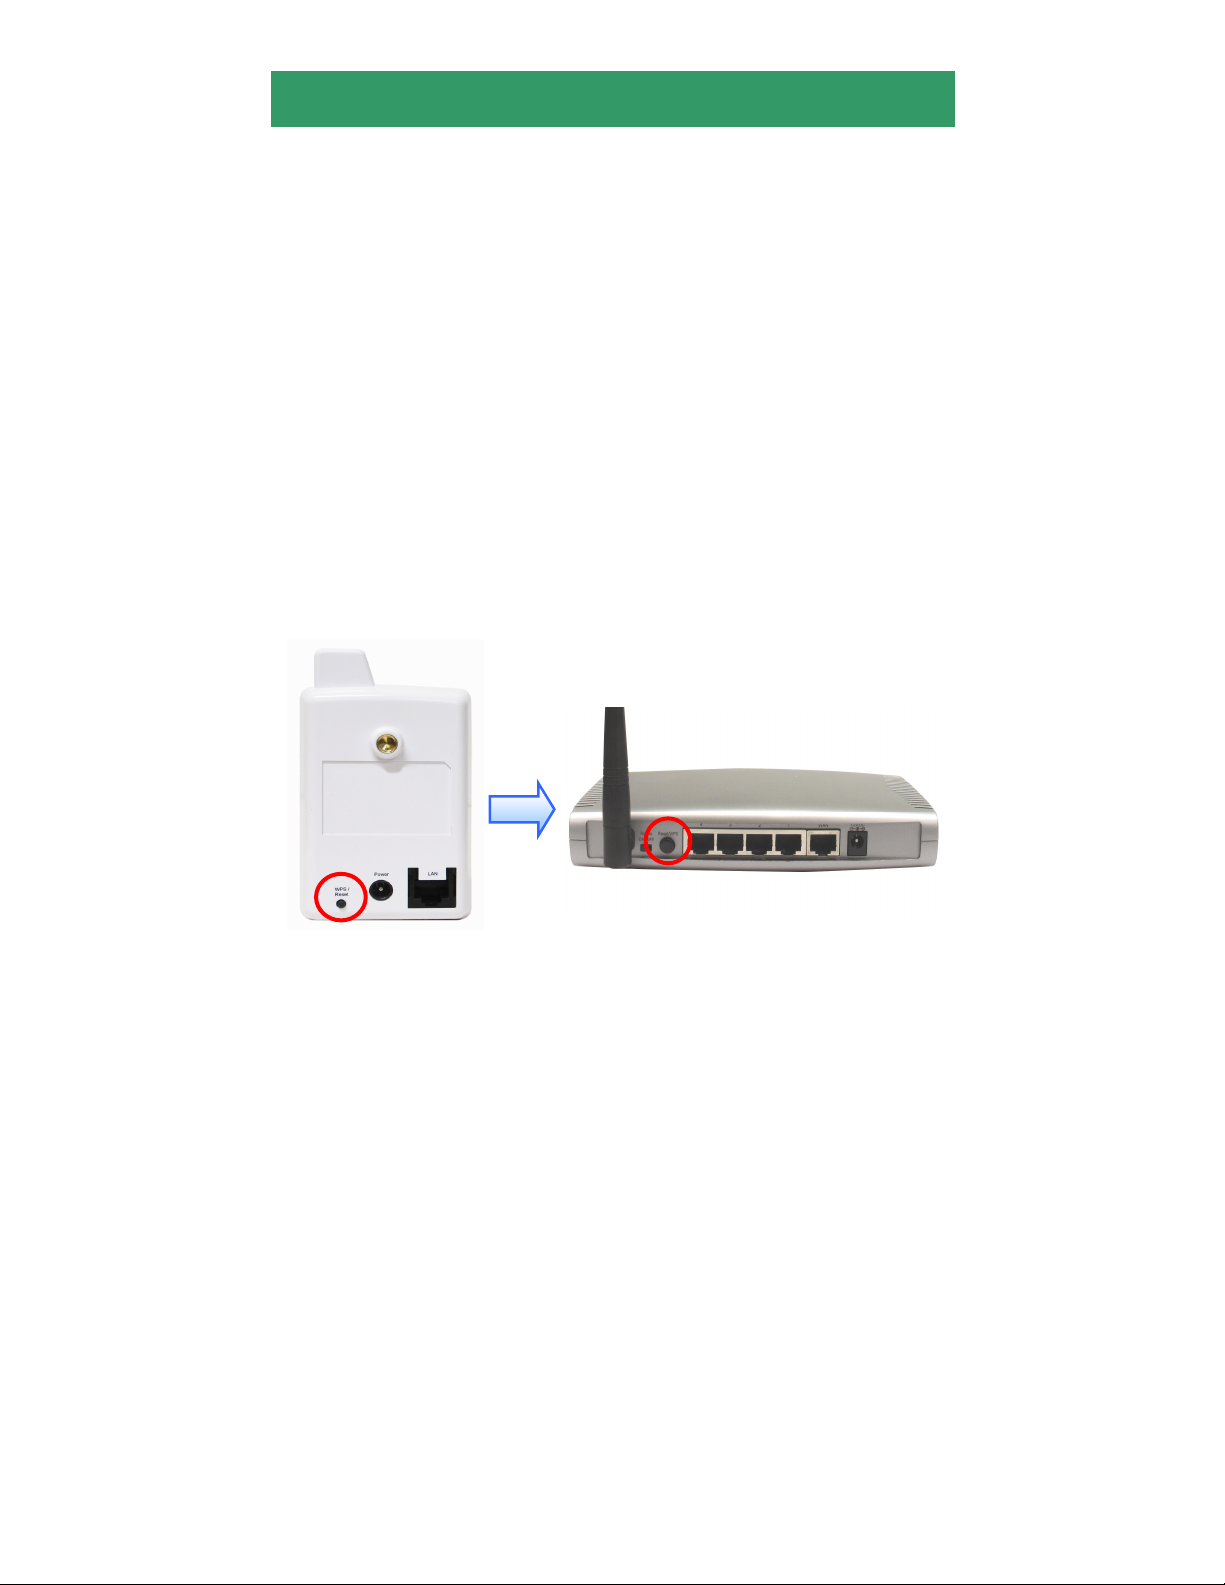
Step 2A If your router has a built in Easy Setup Button (WPS button), you
can easily build the wireless connection between your router and the
camera. If your router doesn’t have a built-in WPS button, please go to Step
2B.
1) Push the WPS button on the back of the camera and hold for 1 second.
2) Push the WPS button on the router.
3) The wireless connection between the camera and your router will be built
within 1 minute.
4) Continue to Step 3.
Page 4

Step 2B Connect the Internet Camera to your network by attached the
network cable from the switch/router to the LAN port of the Internet Camera.
Step 3 Insert the provided CD into your computer’s CD ROM drive. The
“autorun.exe” program should be executed automatically. If not, run
“autorun.exe” manually in the CD.
Step 4 Click Install ConnectSky™ Setup Wizard.
Page 5

Step 5 Follow the on screen instructions to install the Setup Wizard.
Step 6 After the installation finished, the ConnectSky Setup Wizard will
launch up. If not, double click on the icon on your desktop:
Page 6

Step 7 Click on Search Camera to show the camera(s) connected to your
network. If you do not see any camera in the list, try Step 2 again.
Step 8 Select the camera you wish to view/configure and click Browse
Camera via Web.
Page 7

Note: By default, AIC600W uses dynamic IP address. If there is no DHCP
server in your network or you prefer to use static IP address, you may click
Configure Camera to change the IP settings.
Step 9 Enter ‘admin’ for both user name and password.
Step 10 Click on Install to install the plug-in for the camera.
Page 8

Step 11 Click on the white box to install ActiveX control in order to view the
camera image.
Step 12 You should now be able to view the image.
If you did Step 2A, your camera has connected to you wireless network
already, and you do not need any further configuration to start using your
camera.
If you did Step 2B, please continue the following steps to configure the
wireless settings.
Page 9

Step 13 Click on WLAN on the top menu bar to enter the Wireless LAN
1
2
3
page.
Step 14 Follow the steps below:
1) Select the wireless network you wish to connect to
2) enter the wireless Key below if your wireless network is encrypted
3) click Apply.
Page 10

Congratulations! The configuration is now complete. You can disconnect
the Ethernet cable from the camera and move it to the desired location.
You can monitor up to 16 cameras with the bundled software
“ConnectSky™ Viewer” installed on your computer. Please refer to the
User’s Manual for detailed instructions.
Section 3
Technical Support
E-mail: support@airlink101.com
Toll Free: 1-888-746-3238
*Theoretical maximum wireless signal rate derived from IEEE standard 802.11n specifications. Actual data
throughput will vary. Network conditions and environmental factors, including volume of network traffic,
building materials and construction, mix of wireless products used, radio frequency interference (e.g.,
cordless telephones and microwaves) as well as network overhead lower actual data throughput rate.
Compatibility with 802.11n devices from other manufactures is not guaranteed. Specifications are subject to
change without notice. Photo of product may not reflect actual content. All products and trademarks are the
property of their respective owners. Copyright ©2010 Airlink101®
Website: www.airlink101.com
 Loading...