

Page 1
USER’S GUIDE
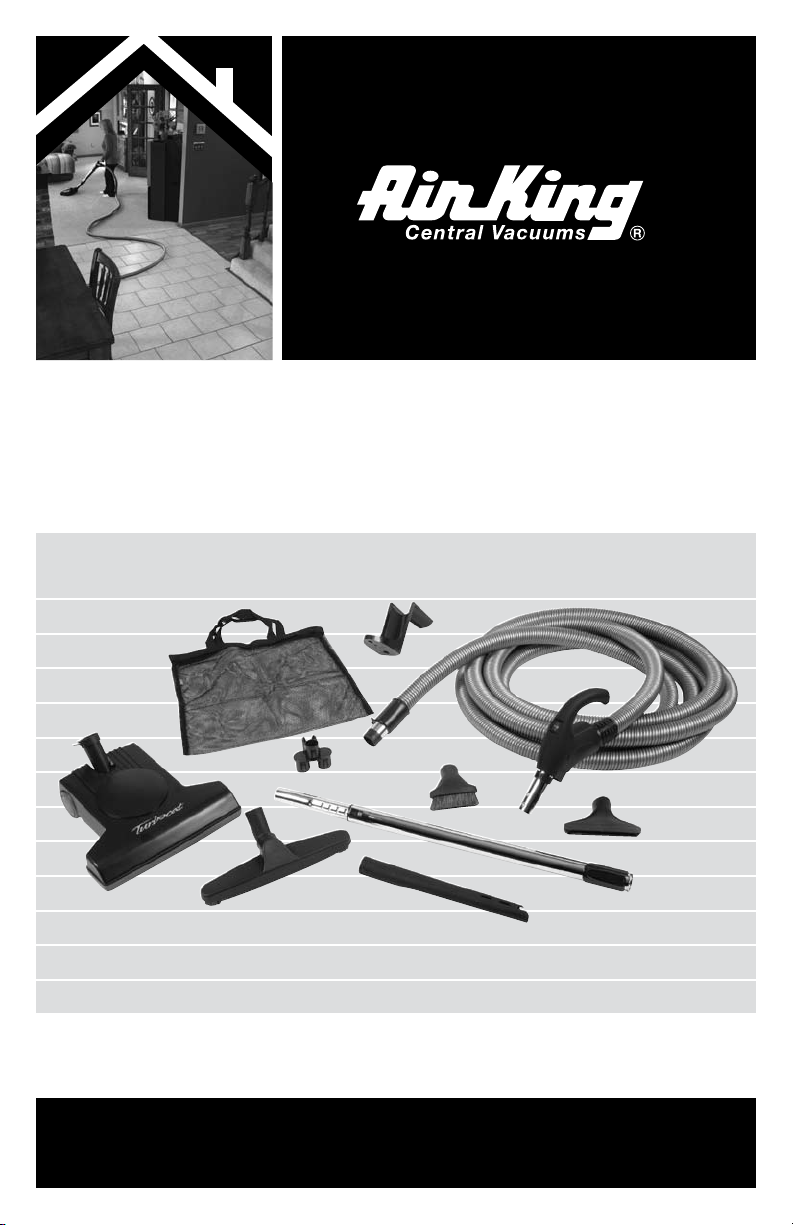
CVS-12T Deluxe Home Turbine Package
Page 2

IMPORTANT SAFETY INSTRUCTIONS
* READ ALL INSTRUCTIONS before using the turbine nozzle.
When using this appliance, basic precautions should always be followed, including
the following:
RNING: Electric shock could occur if used outdoors or on wet surfaces.
WA
1. Unplug and disconnect power before servicing.
2. Always turn off this appliance before connecting or disconnectin
hose or turbine nozzle.
3. Do not vacuum up anything that is burning or smoking, such as c
or hot ashes.
4. Do not pick up flammable or combustible liquids such as gasolin
where they may be present.
Use only as described in this manual. Use only manufactures
5.
recommended attachments.
6. Do not handle system or appliances with wet hands.
urn off all controls before unplugging hose from wall inlet.
7. T
Do not allow to be used as a toy. Pay close attention when used by or
8.
near small children.
The hose contains electrical wires. Do not use if damaged, cut, or punctured. Avoid
9.
picking up sharp objects.
10. Do not put any object into openings.
11. Do not use with any opening blocked; keep free of dust, lint, hair, and anything that
may reduce air flow.
12. Keep hair
moving parts.
13. Unplug from wall outlet when not in use and before servicing.
14. If appliance is not working as it should, has been dropped, damaged, left outdoors, or
dropped in water, return it to your distributor
15. Use extra care when cleaning on stairs.
, loose clothing, fingers, and all parts of the body away from openings and
g either
igarettes, matches,
e or use it in areas
SAVE THESE INSTRUCTIONS — INTENDED FOR HOUSEHOLD USE ONLY
2
Page 3
SAVE THESE INSTRUCTIONS
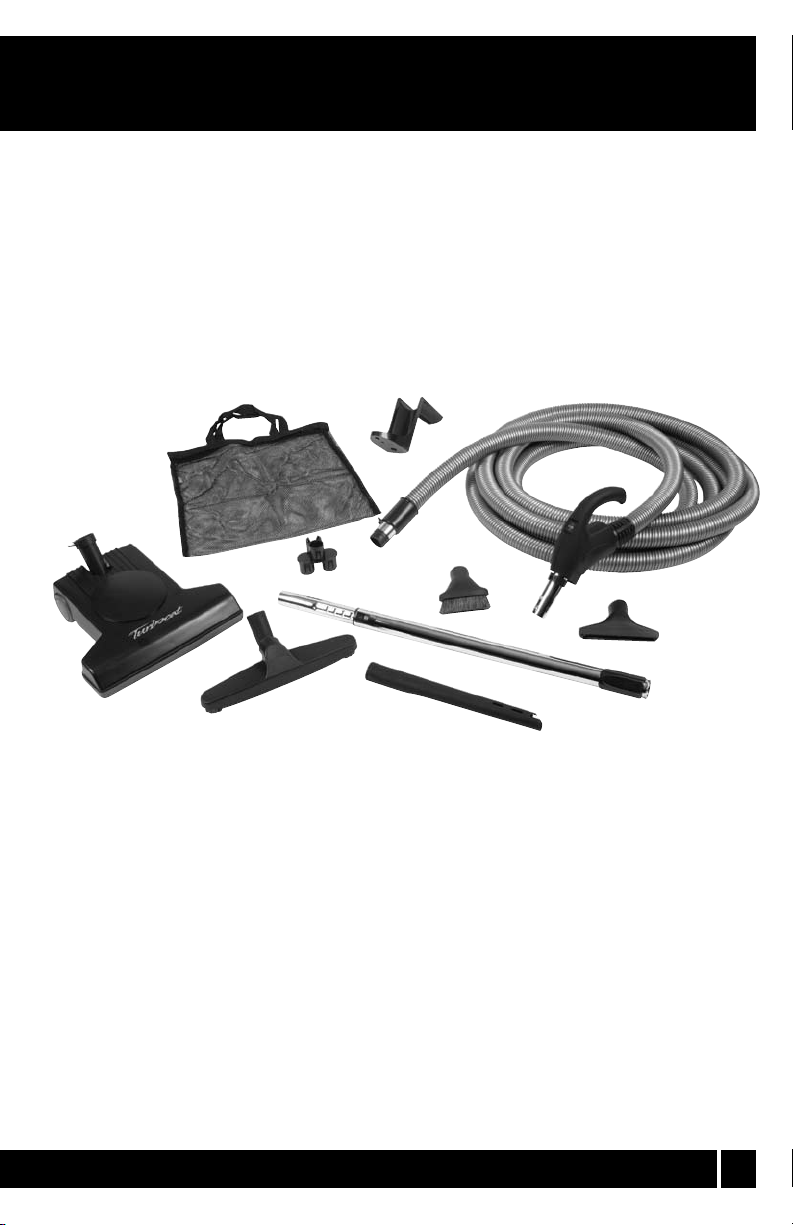
CVS-12T Complete Home Package
Individual tools may vary and
are subject to change at any time.
9.
10.
8.
1.
4.
ACKAGE INCLUDES:
P
1.
35279 — Floo r Turbine
2. 994 8 4 — 3
3. 345 3 1 — ButtonDo w n
4. 349 0 5— 12” Natur a l Bristle Har d Floor Brush.
5. 348 3 9 — Deluxe D u s ting Brush
6. 348 1 7 — Deluxe C r e vice Tool
7. 353 0 1 — Deluxe U p h olstery Tool
8. 347 5 1 — Wand Tool Cadd y
9. 352 0 2
10. 352 2 4
0 Ft. 3200 S e r ies Low Voltage Hose w /Soft Grip H a n dle
— Plastic Ho s e Hanger
— Mesh Caddy B ag
™
Chrome Ratc h e t Wand
5.
6.
2.
7.
3.
3
Page 4
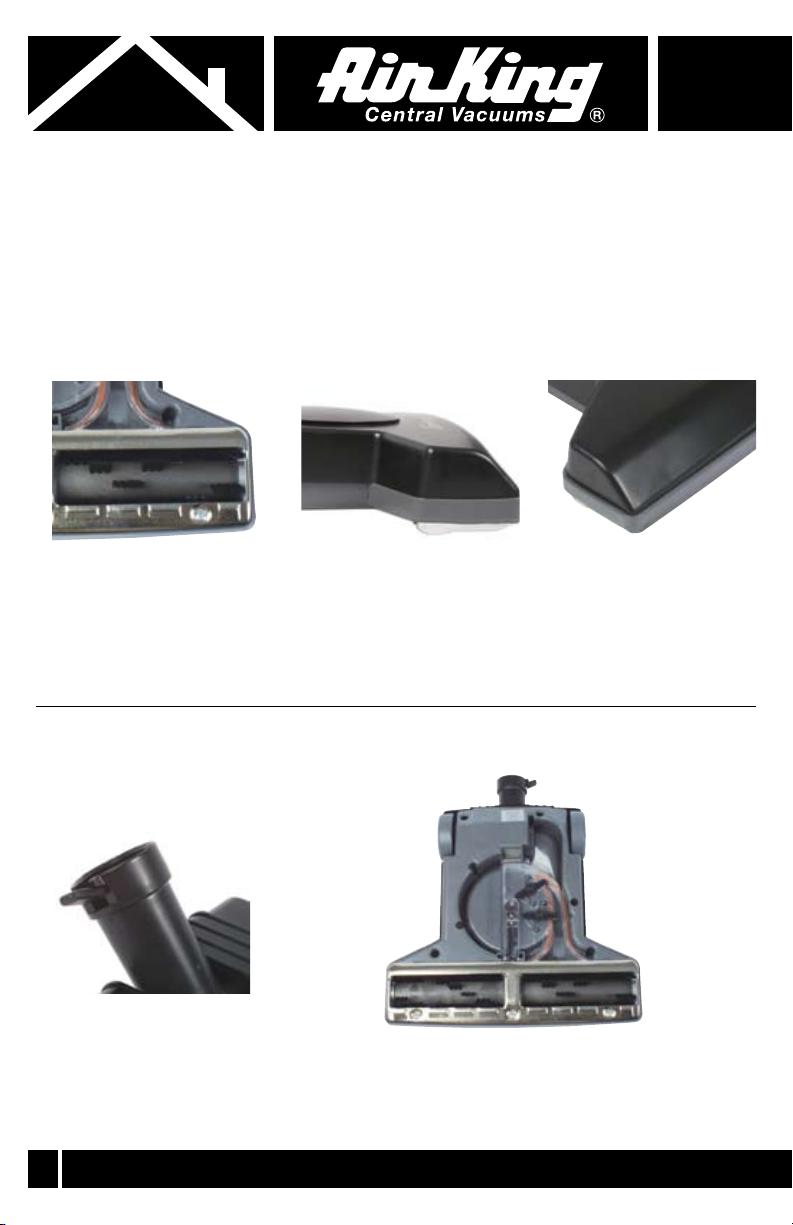
35279 TURBINE
This turbine is ideal for homes with high quality area rugs laid directly over hard floors
where electric brushes can be too aggressive. This turbine must be used with the
ratchet wand.
URES INCLUDE:
FEAT
This turbine features a full size
brush roll for consistent cleaning
resluts on all carpet conditions.
Unique locking neck design
accepts standard 32mm wands
with a step on release feature.
The unique turbine design g
ives a low profile for traveling
under furnishings.
Clean-out is easy with the winged access screws and clear cover plate.
Soft wrap around bumper
protects baseboards and
fine furnishings.
4
Page 5
SAVE THESE INSTRUCTIONS
REMEMBER: As with all electric appliances, risk of shock is possible. Do not remove
brush, pull wands out, or attempt maintenance while power is on.
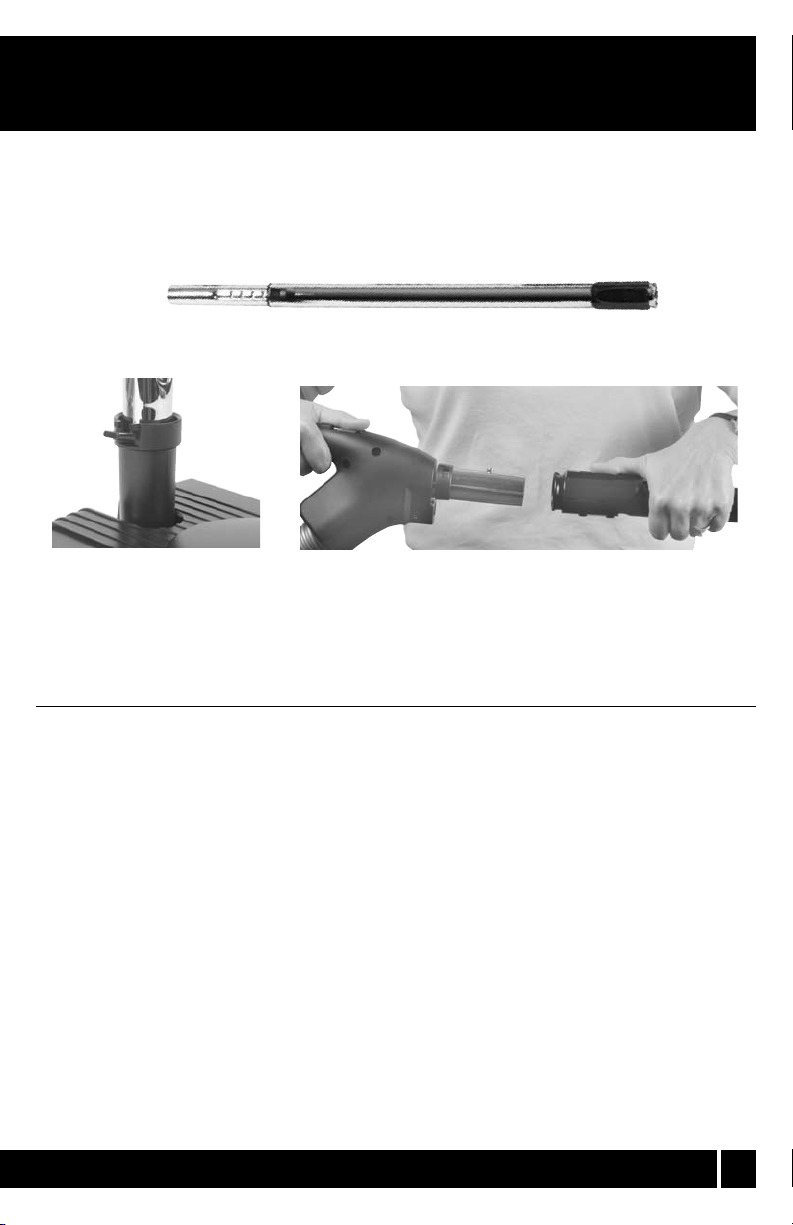
WANDS
Wand fits easily into the neck
of the turbine for an easy lock
and release.
OPERATION: Your turbine powerhead has no on/off switch. Whenever it is attached
to an operating vacuum system, it will be running. No adjustments to the tool are necessary for different types of carpeting.
To insure maximum efficiency of the turbine powerhead, make sure that
any filters, bags and cleaning hoses in your vacuum system are clean and
free of blockage.
Nylon collar on the friction wand provides a positive fit to the hose
handle and a clean finish, eliminating sharp edges.
5
Page 6

35279 TURBINE INSTRUCTIONS
INSTALLATION:
1. Read important safety instructions before installing the turbine
2. Ensure your central vacuum is not running before installing the t
3. Connect the telescopic wand to the turbine nozzle.
ORAGE:
ST
1. Ensure vacuum cleaner is disconnected before unplugging turbine
2. Disconnect wand from hose.
3. Remove turbine nozzle from the telescopic wand store turbine in a
CHANGING BELT:
1. Insure power has been switched off at the central vacuum unit.
2. Remove turbine nozzle from the telescopic wand.
3. Remove screws from bottom of turbine.
4. Remove base plate from turbine.
5. Replace brush roll.
6. Replace old belt with new belt.
7. Insert brush roll back into correct spot.
8. Replace base plate and put screw back in.
HANGING BRUSH ROLL:
C
1. Insure power has been switched off at the central vacuum unit.
2. Remove turbine nozzle from the telescopic wand.
3. Remove screws from bottom of turbine nozzle.
4. Remove base plate from turbine nozzle.
5. Replace old brush roll with new brush roll.
6. Insert brush roll back into correct spot.
7. Replace base plate and put screw back in.
nozzle.
urbine nozzle.
nozzle.
safe place.
RATCHET WAND INSTRUCTIONS
The wand length is adjustable and requires no assembly.
To adjust, simply push down on the wand and adjust
button and slide to the desired height.
6
Page 7
SAVE THESE INSTRUCTIONS
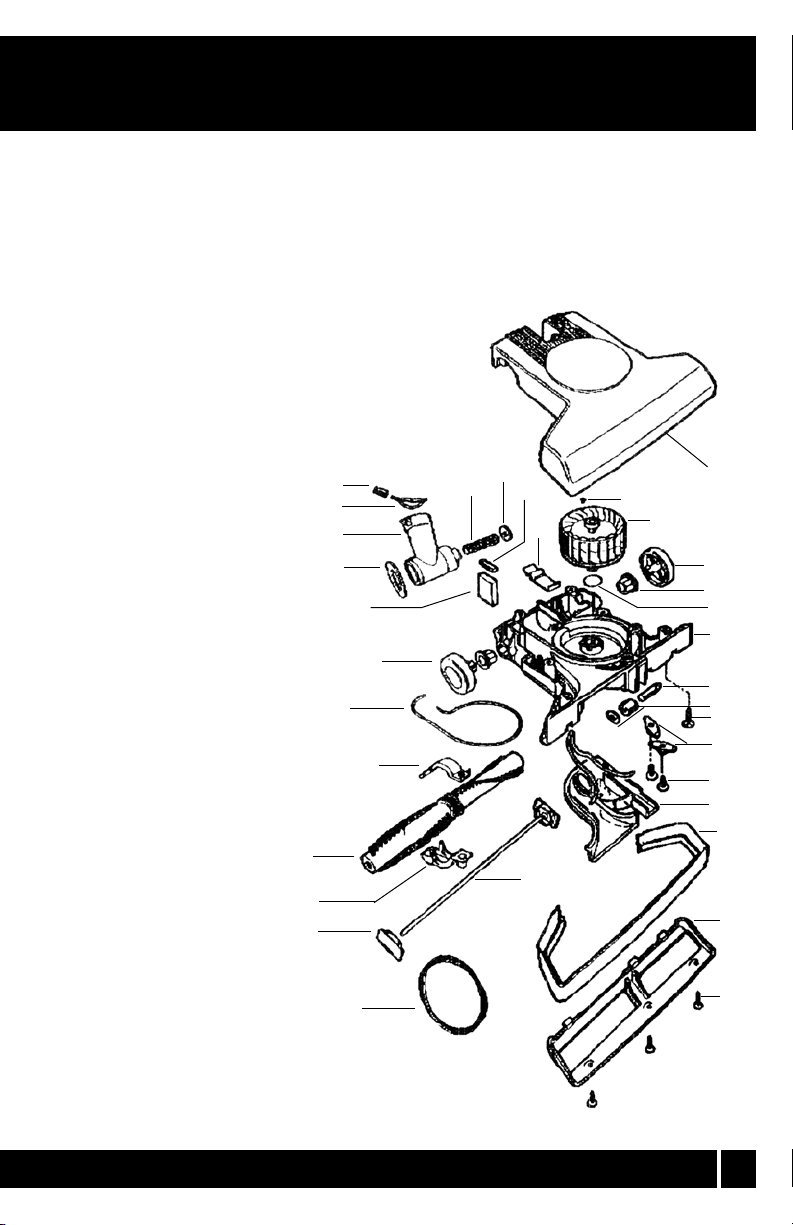
35279 EXPLOSION
1 49645 LOWER HOUSING
2 49667 WHEEL
3 49678 SA TURBINE
4 49689 BELT COVER
5 49700 BASE
6 49711 COMPRESSION SPRING
7 49722 WASHER
8 49733 WASHER, ELBOW SEAL
9 49744 ELBOW
10 49755 SPRING WAND
11 49766 RETAINER CAP
12 49777 SPRING LATCH
13 49788 SA TOPHOUSING
14 49854 BUMPER
15 49865 SEAL (LARGE)
16 49876 SEAL (SMALL)
17 39316 SA BRUSH II
18 49898 T LATCH (2)
19 49909 BELT
20 49920 SCREW BASE (3)
21 49931 O-RING
22 47819 SCREW
23 49942 SCREW, T LATCH (2)
24 49953 D-WASHER
25 49964 BEARING NEEDLE
26 49975 IDLER SHAFT
27 49986 SLEEVE, FLANGE (2)
28 49997 SA SHAFT SUPPORT
29 50008 RT SHAFT SUPPORT
30 50019 RUBBER PLUG
31 50030 BALLAST WT (2)
32 50041 FOAM PAD (2)
34 50063 BELT SHROUD, UPPER
35 50074 BELT SHROUD, LOWER
11
10
17
35
29
7
6
32
9
8
31
2
16
34
12
28
30
13
3
2
27
21
1
26
24/25
22
18
23
4
14
6
19
20
7
Page 8
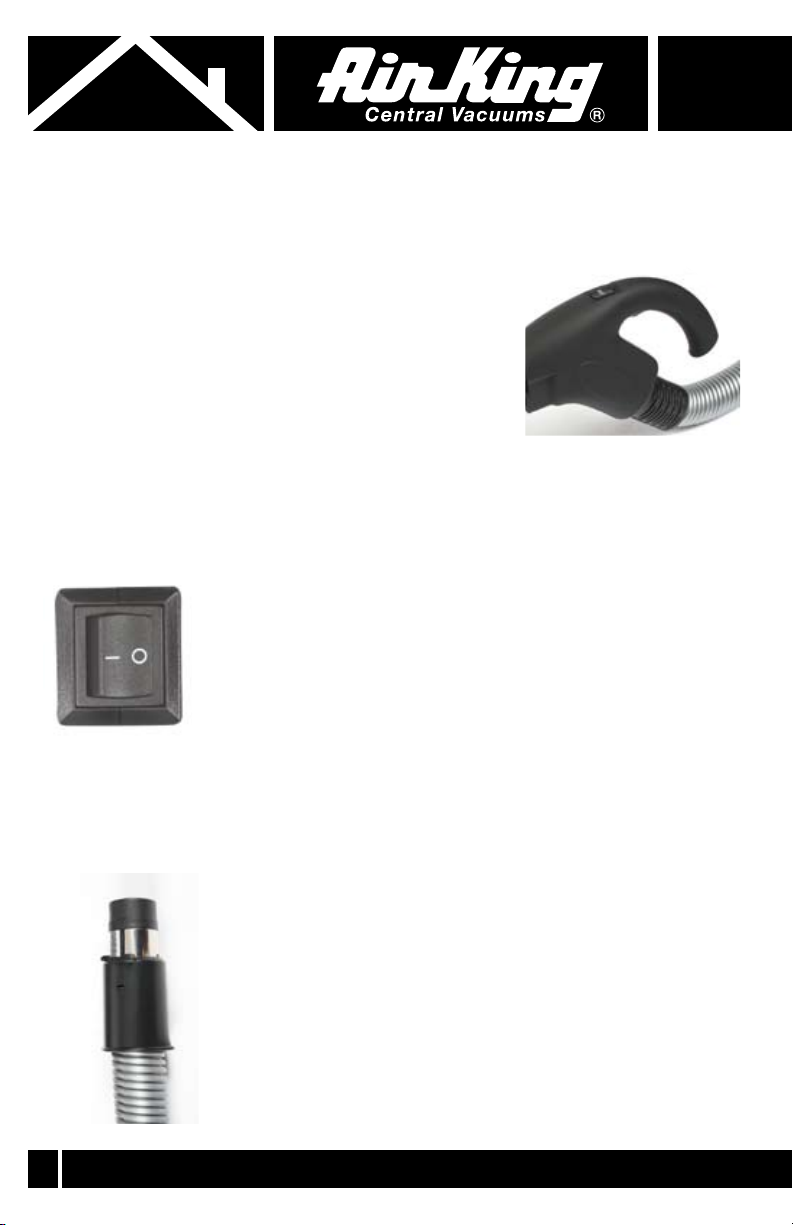
LOW VOLTAGE CRUSH-PROOF HOSE
The “slimfit” style handle has 360° rotation to minimize kinks, effort, and in-hand weight.
For use with the turbine nozzle.
OSE HANDLING:
H
Hold the hose and handle in any way you find to be the
most comfortable. With this new style handle, numerous
hand positions are offered and reduce strain and
increase ease of use.
Also, for added ease while vacuuming, try keeping the hose behind you rather than out
in front of you. Use one hand to hold the handle and the other hand to hold and guide the
hose. Again, do what feels comfortable to you.
TWO POSITION SWITCH:
Allows vacuum to be controlled from the handle
• Vacuum off
• Vacuum on
PORTANT:
IM
Make sure power is turned O
Arcing or damage to the electrical contacts can occur if the wand is removed while brush
power is on.
Hose
This universal style wall end is designed for compatibility with
all North American valves and inlests and fits the majority of
European inlets as well. The positive locator system prevents
rotationn of the wall end in the valve defeating the total control
switch in the handle.
8
FF before removing the hose and handle from the wand.
End:
Page 9
SAVE THESE INSTRUCTIONS
CLEANING ATTACHMENTS AND TOOLS
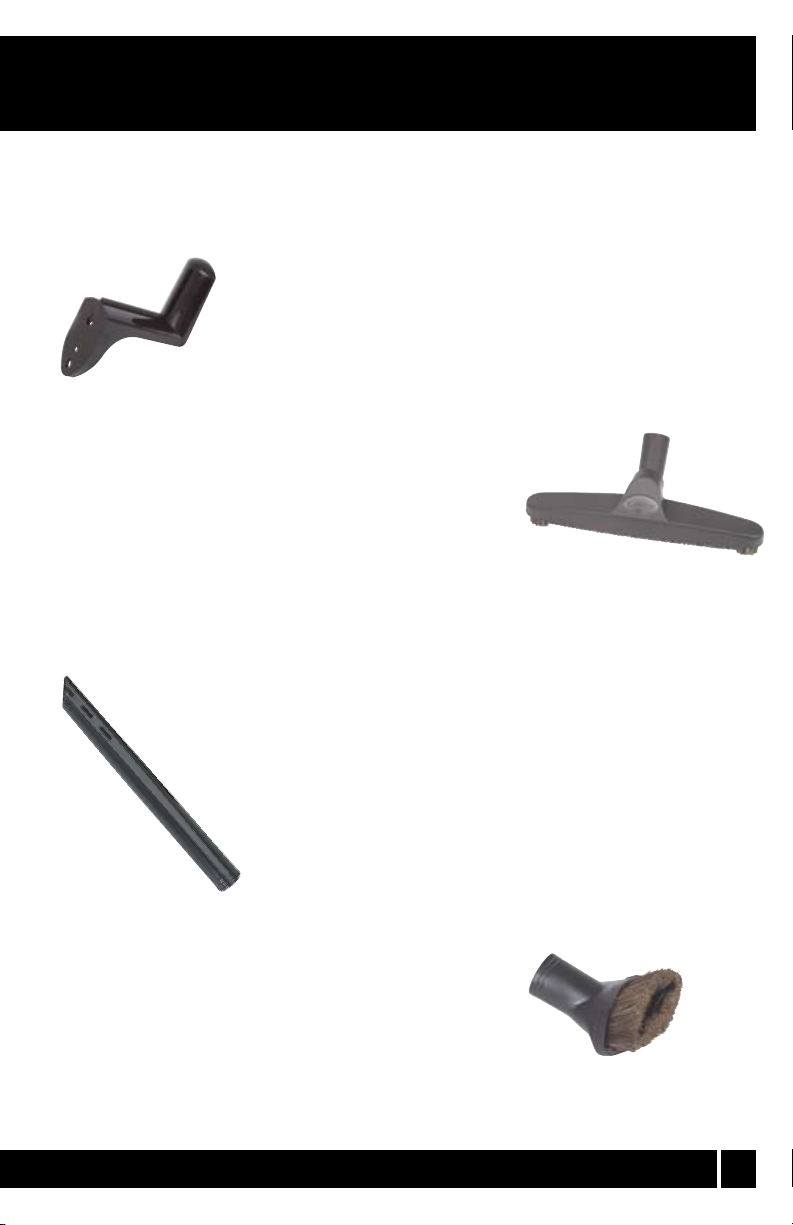
PLASTIC HOSE HANGER:
• Use of hanger can increase the life of your hose and save
space while storing.
• Coil your hose around this hanger to store when not in use.
• Mount on a wall in a closet, garage, or any other convenient
location for hose storage, and place it high enough so you can
loop your hose only four times and still clear the floor.
• Mounts using only one stud and two screws.
12” FLOOR BRUSH:
• Works well to clean bare floors, wood flooring, tile, etc.
•
Shorter bristles in front, longer in back, allows larger
dirt particles to be picked up with forward movement.
For best results, do not force the front of the brush down when moving forward. allow
the brush to gently glide across the floor. The front of the brush should allow particles to
enter through the raised bristles.
CREVICE TOOL:
• Tool reaches into cracks and crevices such as tracks of slid-
ing glass doors, corners, along baseboards, and even in the
cracks of couches and other furniture.
• Notched end helps maintain air flow and proper suction.
• This tool has flat sides which makes it great for reaching un-
der refrigerators, around air conditioner coils, and other hard
to reach places that collect a lot of dust and dirt.
STING BRUSH:
DU
• Use for dusting furnishings such as bookcases,
tables, desks, and mantles.
•
Also great for dusting picture frames, collectibles,
tops of televisions, window sills, and even the
backs of computer monitors.
Full, natural bristles for gentle cleaning.
•
9
Page 10
CLEANING ATTACHMENTS AND TOOLS
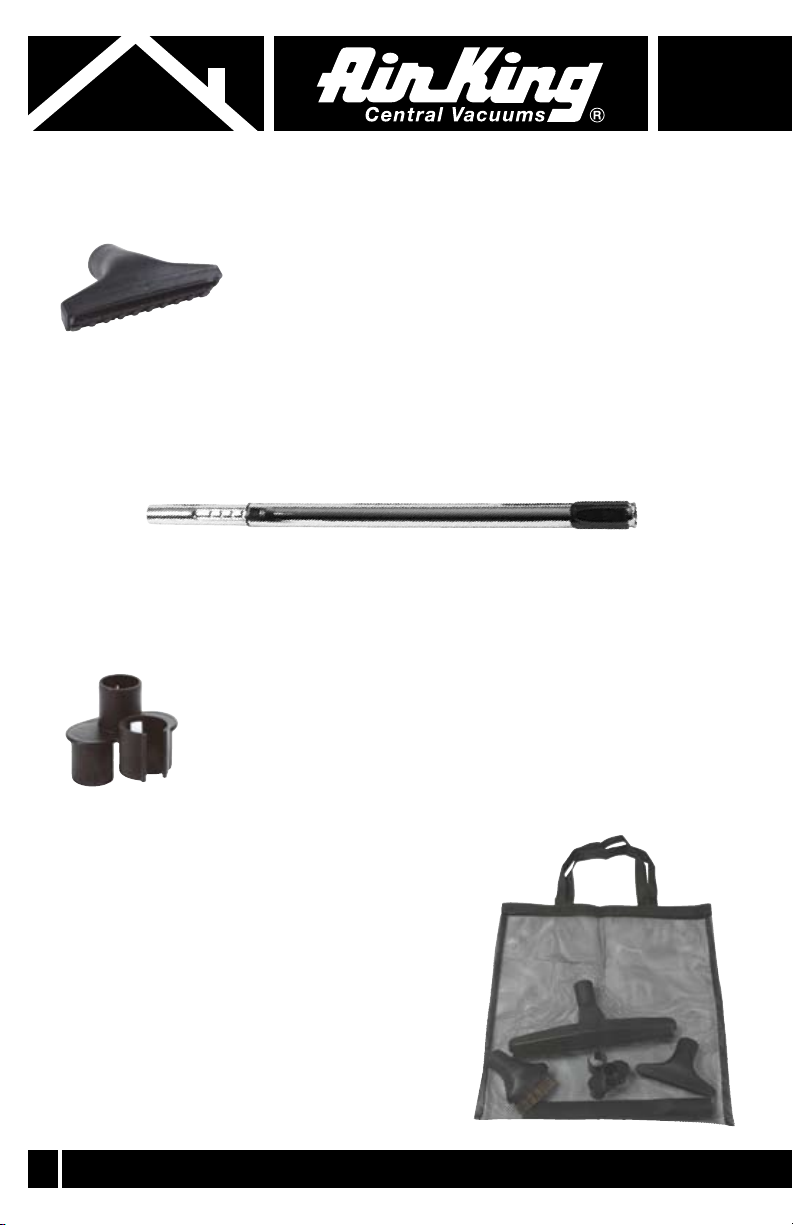
UPHOLSTERY TOOL:
• Cleans upholstered furniture, drapes, mattresses,
and even works well on vehicle upholstery and carpets.
• Won’t seal to the floor or furniture, keeping the air flow necessary for effective cleaning.
ELESCOPIC WAND:
T
• Attach any of your standard suction tools such as the upholstery tool or dusting brush
for whatever cleaning needs you may have.
TOOL CADDY:
• Adds portable convenience by allowing multiple tools to be
carried on the wand for quicker and easier access.
• To attach: Snap caddy onto wand at an angle (beveled side
first), then slip attachments and tools onto caddy pegs. when
clipping it onto wand, attach it so that the two-peg side faces
up, while the single-peg side faces down the wand. This will
keep your tools on better.
SH TOOL CADDY BAG:
ME
• Holds accessories and tools making
them more manageable.
•
For storing and transporting tools & accessories.
Accessories shown may not be to scale.
10
Page 11

SAVE THESE INSTRUCTIONS
For more details on these or any other AirKing products, contact your local Airking dealer or visit our websites at www.airkinglimited.com
Caring for your carpet.
“Proper maintenance will extend the time you can enjoy your carpet and help keep its fresh appearance.
Vacuum regularly, remove spills promptly, and extraction clean periodically. Use a strong, well functioning vacuum cleaner with a powerful airflow, adjustable brushes, and an enclosed, high efficiency filtration
bag. It is best to purchase a vacuum cleaner that bears the CR
label, assuring that the cleaner will remove soil well, contain the dust within the machine, and protect the
carpet’s appearance.”
—The Carpet & Rug Institute (CRI)
For more information on caring for your carpet, please visit the CRI website at www.carpet-rug.com
AIR KING AMERICA LIMITED WARRANTY:
WHAT THIS WARRANTY COVERS: This product is warranted against defects in workmanship and/or materials.
HOW LONG THIS WARRANTY LASTS: This warranty extends only to the original purchaser of the product and lasts for
one (1) year from the date of original purchase or until the original purchaser of the product sells or transfers the product,
whichever first occurs.
WHAT AIR KING WILL DO: During the warranty period, Air King will, at its sole option, repair or replace any part or parts
that prove to be defective or replace the whole product with the same or comparable model.
WHAT THIS WARRANTY DOES NOT COVER: This warranty does not apply if the product was damaged or failed
because of accident, improper handling or operation, shipping damage, abuse, misuse, unauthorized repairs made or
attempted. This warranty does not cover shipping costs for the return of products to Air King for repair or replacement. Air
King will pay return shipping charges from Air King following warranty repairs or replacement ANY AND ALL WARRAN-
TIES, EXPRESSED OR IMPLIED (INCLUDING, WITHOUT LIMITATION, ANY IMPLIED WARRANTY OF MERCHANTABILITY), LAST ONE YEAR FROM THE DATE OF ORIGINAL PURCHASE OR UNTIL THE ORIGINAL PURCHASER OF
THE PRODUCT SELLS OR TRANSFERS THE PRODUCT, WHICHEVER FIRST OCCURS AND IN NO EVENT SHALL
AIR KING’S LIABILITY UNDER ANY EXPRESS OR IMPLIED WARRANTY INCLUDE (I) INCIDENTAL OR CONSEQUENTIAL DAMAGES FROM ANY CAUSE WHATSOEVER, OR (II) REPLACMENT OR REPAIR OF ANY HOUSE
FUSES, CIRCUIT BREAKERS OR RECEPTACLES. NOTWITHSTANDING ANYTHING TO THE CONTRARY, IN NO
EVENT SHALL AIR KING’S LIABILITY UNDER ANY EXPRESS OR IMPLIED WARRANTY EXCEED THE PURCHASE
PRICE OF THE PRODUCT AND ANY SUCH LIABILITY SHALL TERMINATE UPON THE EXPIRATION OF THE WARRANTY PERIOD.
Some states and provinces do not allow limitations on how long an implied warranty lasts, or the exclusion or limitation of
incidental or consequential damages, so these exclusions or limitations may not apply to you. This warranty gives you specific legal rights. You may also have other rights which vary from state to state and province to province. Proof of purchase
is required before a warranty claim will be accepted.
I indoor Air Quality Testing Program
CUSTOMER SERVICE:
Our Customer Service team is available to assist you with product questions, service center locations, and replacement
parts. They can be reached Monday through Friday, 8am-4pm Eastern. Please have your model number available, as well
as the type and style (located on the label inside of your product). Please do not return product to place of purchase.
PARTS FOR DISCONTINUED, OBSOLETE AND CERTAIN OTHER PRODUCTS
MAY NOT BE AVAILABLE. DUE TO SAFETY REASONS, MANY ELECTRONIC COMPONENTS AND MOST HEATER
COMPONENTS ARE NOT AVAILABLE TO CONSUMERS FOR
Toll-Free (800) 465-7300
www.airkinglimited.com
INSTALLATION OR REPLACEMENT.
11
Page 12
CONTACT
Location Information
Corporate Headquarters for
United States division:
820 Lincoln Avenue
West Chester, PA 19380
Ph. 800.465.7300
#F51065
 Loading...