

Page 1
CONFIGURATION – B
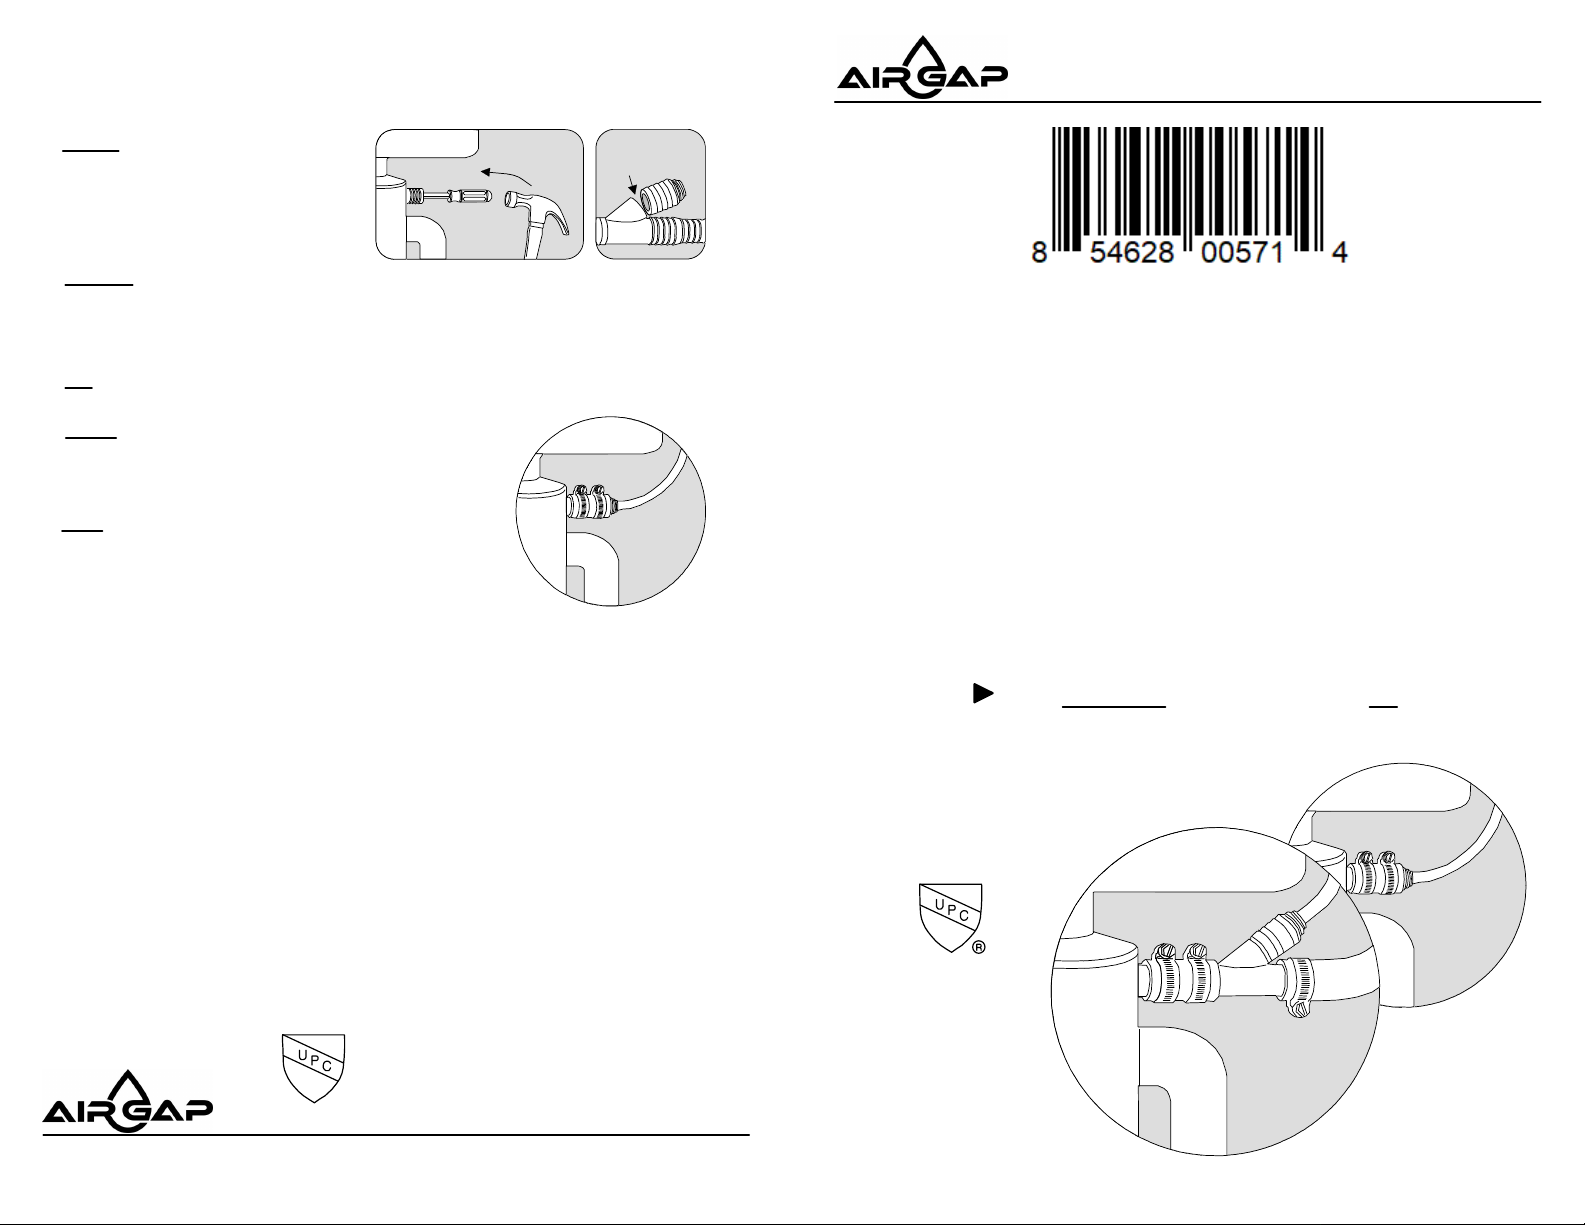
1. Knock out the plug inside the
disposal nipple by using a
hammer and flat screwdriver. Tap
away all edges of the “knock out”
plug until only a round hole
remains. (See Fig.5)
2. Remove all pieces of plug left inside the disposal after ensuring that the
power has been disconnected. Run fingers carefully around the bottom
circumference of the chamber to search for any hidden fragments.
(See Caution below)
3. Cut off the “wye branch” of the ET116-003 with a hacksaw. Use the grooved
“cut line” provided, then smooth away any burrs. (See Fig.6)
4. Follow instructions 5, 6, & 10 of Configuration – A
to complete the installation. (Only the “cut branch” will be
used in instruction 6, discarding the leftover section of
adapter. (See Fig. 7)
5. After reconnecting the power supply, the test to
see that disposal is clear. Quickly turn the switch on, then
off, and listen for the sound of any fragments. If an
obstruction is heard, disconnect power and repeat
instruction two above until disposal is clear.
CAUTION:
The installer is urged to exercise extreme caution whenever reaching inside
the disposal. After confirming that power has absolutely been turned off (and
will stay off until the job is done), use extra care that fingers are not cut on any
sharp surfaces. Also, caution should be taken to avoid “over-tightening”
screw-type hose clamps.
AVOID SIPHONING RO reject water into dishwasher.
(See important details below)
IMPORTANT:
The ET116-003 is designed to be used downstream of an approved airgap
faucet and dishwasher air gap (when installed in conjunction with a dishwasher).
Most dishwashers have a built-in check valve, but these often fail. Some states
require the installation of a manufactured dishwasher air gap, while other states
permit the drain hose to loop up from the dishwasher to the underside of the
sink before descending to the disposal (See Fig. 3). Do not install an ET116-003
(with dishwasher) in the absence of one of these types of airgaps – use an
ET109-003 or ET112-003.
Serving the
Reverse Osmosis
Water Treatment Industry
MADE IN USA
Copyright @ AIRGAP INTERNATIONAL a Division of Altinex Inc.
Installation (without Dishwasher)
FIG. 5 FIG. 6
NOTE:
To connect reverse osmosis reject water
drain line to the plumbing of a single or
double compartment sink without
disposal, please request a ET112-003.
Cut here
FIG. 7
Model:
ET116-003
REVERSE OSMOSIS
DRAIN LINE ADAPTER
Pat. No. 5,635,058
MADE IN USA
For Disposal Connection with or
without Dishwasher
Old Part Number:
D-50QC
DLA-D
TM
Placentia, California
500 S Jefferson Street, Placentia CA 92870 USA • 949-955-3928 • Email: [email protected]
Doc. # 400-0727-002
Page 2
ET116-003
Installation Procedures
For Disposal Connection with or without Dishwasher
LIST OF PARTS ENCLOSED
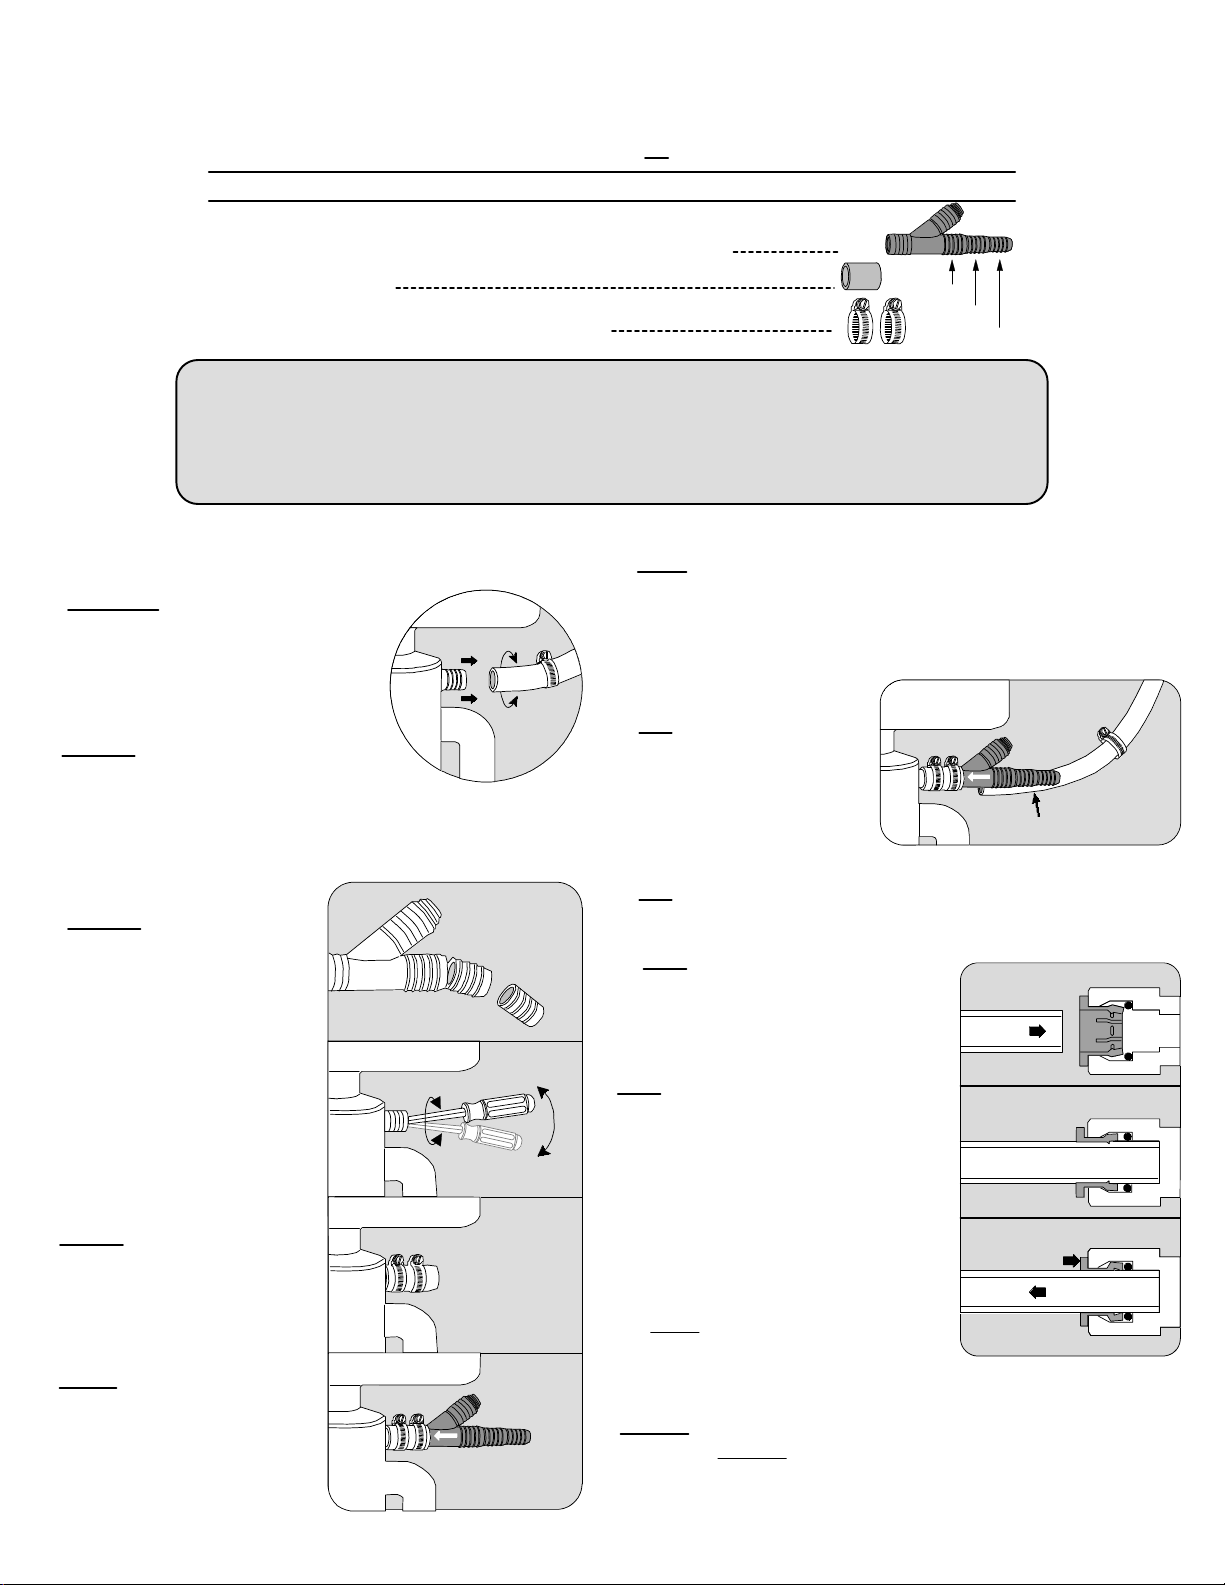
1 – Drain Line Adapter with Push-In Connector ET116-003
1 – Hose Coupler
2 – Marine Stainless Steel Hose Clamps
•The ET116-003 provides an IAPMO / UPC listed alternative to the use of the
drain saddle, which is a prohibited fitting in the United States.
• To install the ET116-003 reverse osmosis reject water Drain Line Adapter,
follow these instructions.
CONFIGURATION – A
1. Disconnect the power supply to the
disposal by unplugging the cord under
the sink, or shutting off the circuit
breaker before starting work.
(Do this for configuration A & B)
2. Remove dishwasher drain hose from
disposal by unscrewing hose clamp, or
expanding spring clamp with pliers. Move
clamp away from disposal nipple, then
twist hose back and forth while pulling away
from disposal to separate. (See Fig. 1)
Installation (with Dishwasher)
FIG. 1
7/8
3/4
1/2-5/8
6. Point arrows of ET116-003 toward disposal and slide barbs into
the remaining one inch of the hose coupler until firmly seated against
the disposal nipple. Orient the “wye branch” in a vertical position to
receive the RO drain tube. Tighten both hose clamps securely over
hose coupler so that the ET116-003 is secure on disposal.
(See Fig. 2d)
(Example only)
7. Lift the tail of the adapter
slightly higher than horizontal,
and position semi-taut hose
behind it. Measure the hose
against the selected barb.
(See Fig. 3)
Cut hose here
FIG. 3
3. Universal barbs on the
ET116-003 will accommodate the
various ( IDs) inside diameters
dishwasher hoses. Determine
which size is required by sliding
open end of the hose over the
stepped barbs until one fits
snugly. If the hose fits snugly
over the middle or largest barb,
you must cut away the smaller
barb(s) with a hacksaw. Use the
grooved “cut lines” provided, then
smooth away any burrs. (See Fig.
2a)
4. Scrape the inside of the
exposed disposal nipple with a
screwdriver to remove any
build-up caused by a dishwasher.
(See Fig. 2b)
5. Mount hose coupler (provided)
one inch over disposal nipple.
Then slip both new stainless steel
hose clamps (provided) loosely
over hose coupler. (See Fig. 2c)
FIG. 2a
FIG. 2b
FIG. 2c
FIG. 2d
8. Cut off excess hose squarely with a sharp knife. Reuse original
spring or hose type clamp by sliding loosely over the hose. (See
Fig. 3)
9. Twist hose over the selected barb,
then slide hose clamp down and tighten
securely.
FIG. 4
Quick Connect / Push-in Connector
Push tube straight past O-ring
to bottom.
(See Large Cover Illustration)
Note: Use tautness of dishwasher hose
to keep the tail of the adapter slightly
FIG. 4a
Tube is secured in position.
above the horizontal plane; this is
important for proper drainage and a
clog-free installation. If dishwasher hose
material cannot be easily shortened or it
is undesirable to do so, attach the uncut
end of the hose to the adapter, then tie
FIG. 4b
Push in collet to release tube
up the remaining slack with suitable
material.
10. Insert RO 1/2-inch drain tube into
Push in the connector to complete
FIG. 4c
the installation (See Fig. 4), then
reconnect the power supply to disposal.
In some instances, the disposal may be oriented away from the air
gap faucet. Solution: redirect the ET116-003 using a 3/4-inch
copper 45° or 90° elbow between the disposal and ET116-003 as
desired (requires an extra hose coupler and two hose clamps).
-OVER-
 Loading...