

Page 1
ZEUS
QUICK-START GUIDE
A
Getting started
1
4
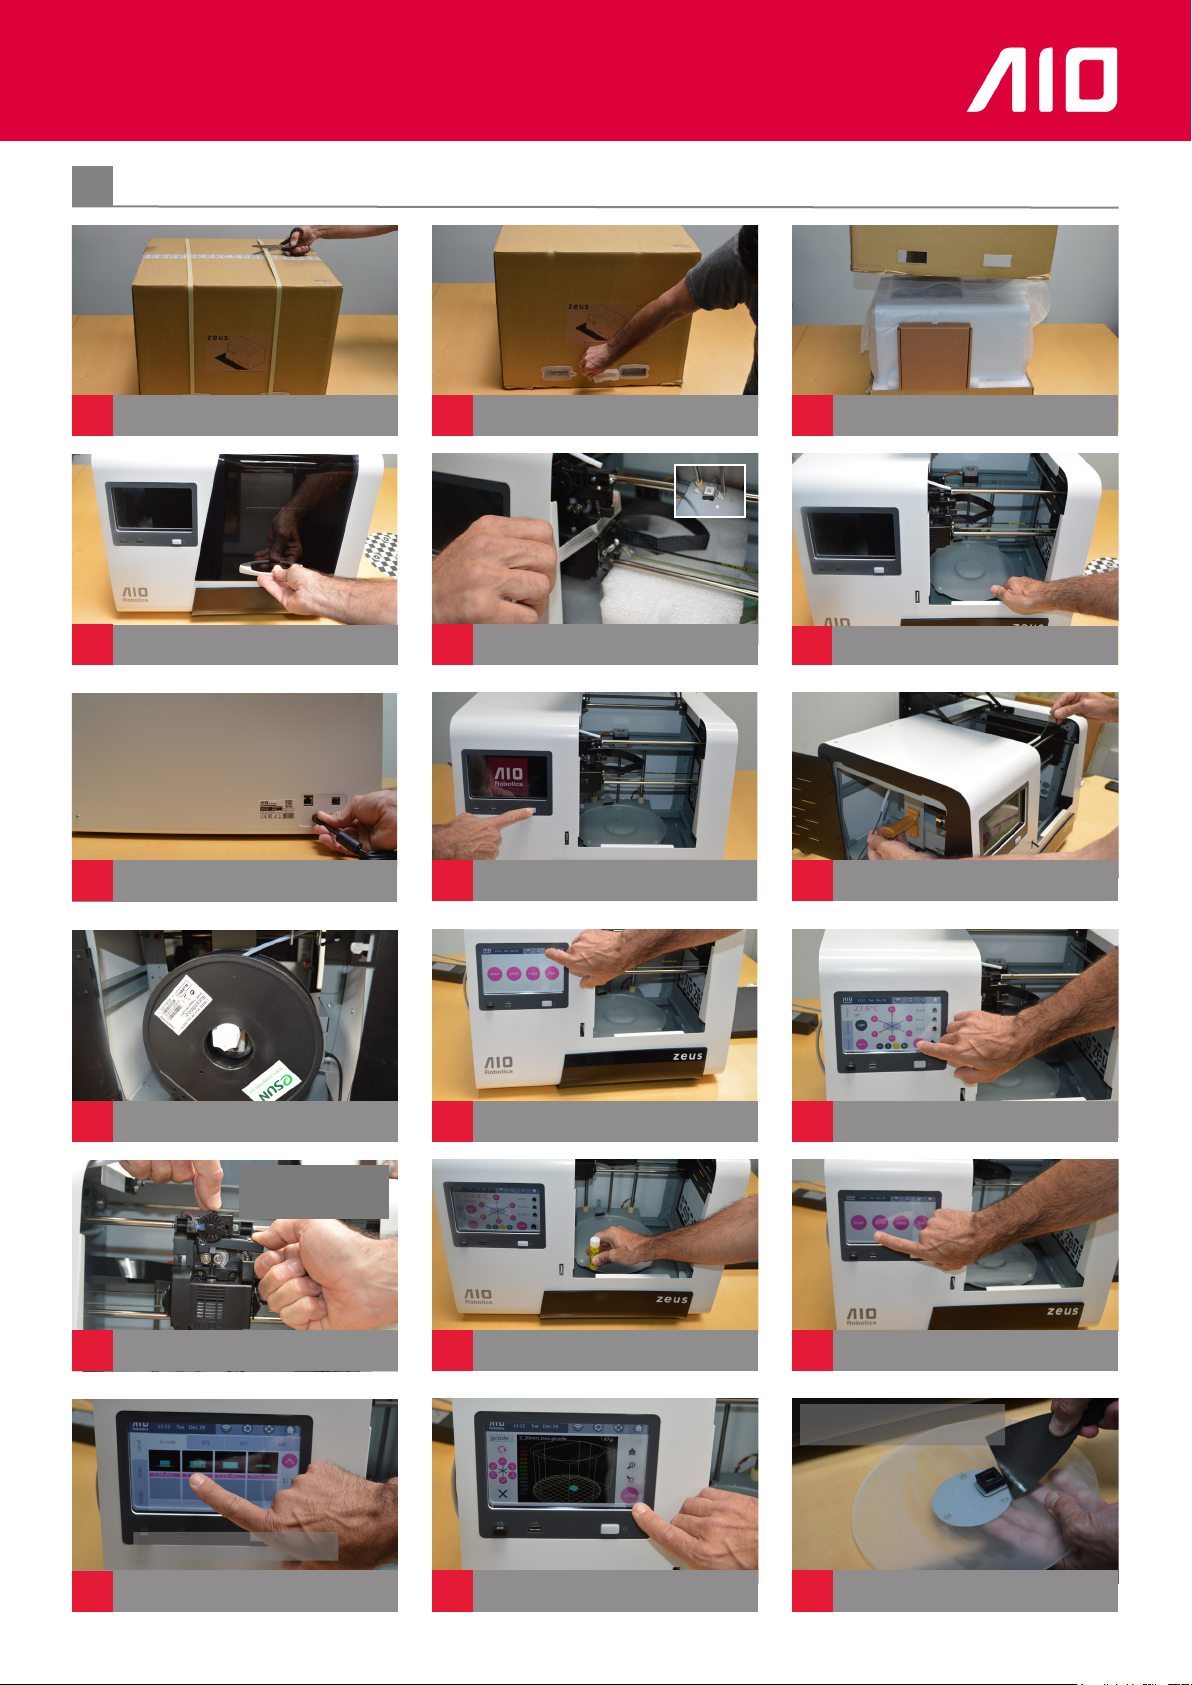
Open door by lifting up and back
4
Insert power cable in back, switch on
7
Cut straps
2
5
8
Remove all four plastic tabs
Remove
test printout
Remove interior packaging
Press front on button for 1 second
3
6
9
Lift box + remove packaging
Place turnable 3 pins facing down
Unwrap lament and feed through tube
10
13
16
Wind excess back onto spool
Feed lament all the way down
Recommended: start with a test
Select a le
Squeeze tabs with
thumb and index
11
14
17
Press control button
Prep plate with thin layer of glue
Select print
12
15
NB: “Box” test le print time:
> 8 mins
18
Press park button
Press print to access les
Lift glass plate then remove printout
Page 2
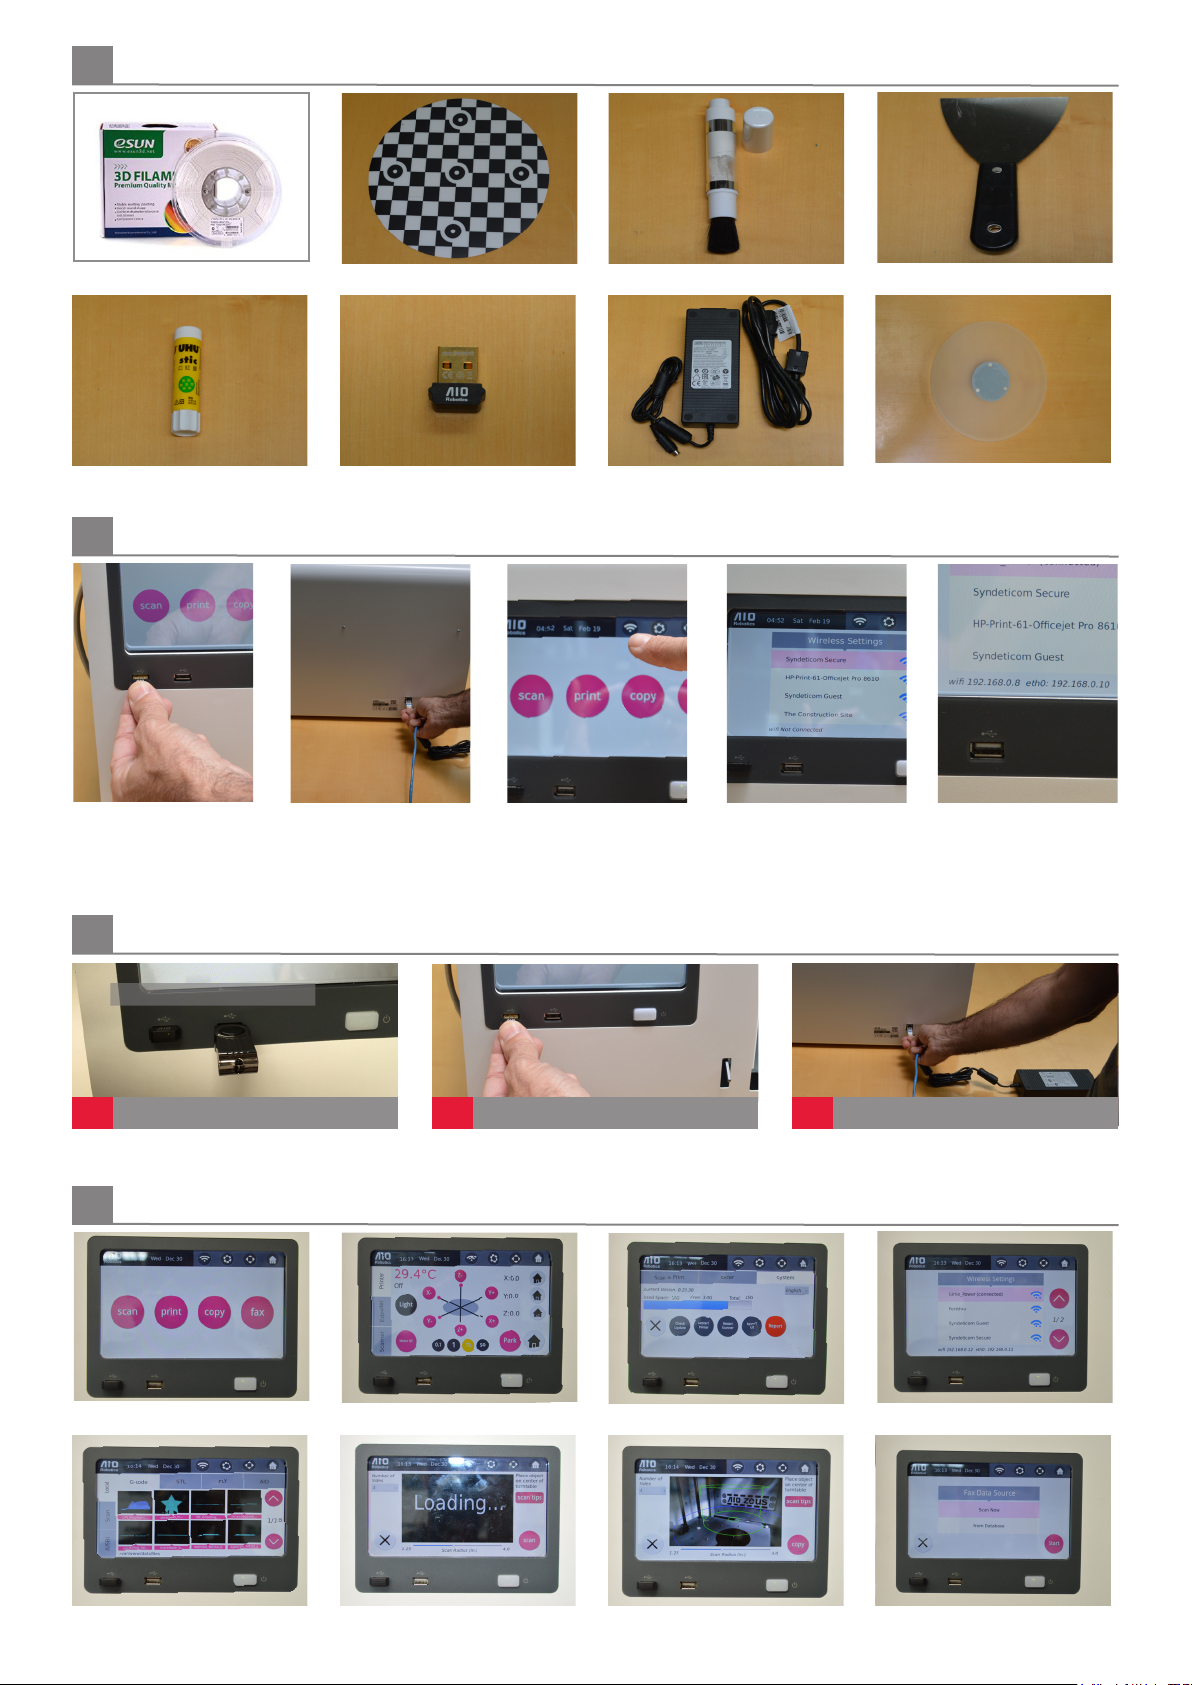
Included Accessories
B
Filament
Glue Stick
Connecting ZEUS to the web
C
Insert wi dongle
File Transfer Options (refer to manual for details) D
Optional:ethernet
Scanner Calibration Pattern
Wi dongle Power supply Turn table
Select WIFI icon
Scan powder + applicator
Select your local
wireless network.
Enter password.
Spatula (printout remover)
A. Wi is connected
B. Ethernet is
connected (defaults
to ethernet if
connected)
A
B
When ZEUS is off line
1
For le transfer via wi or ethernet, enter IP address (A or B) in computer browser to access Pydio. Login: aio Password: aiorobotics
ZEUS UI - the basicsE
Home
USB
Control
2
Wi
System menu
NB: “Box” test le print time:
> 8 mins
3
Online settings
Ethernet
Print
Scan Copy Fax
 Loading...