

Page 1
Step1
Customizing Your Tablet
(For Wireless/Wired)
USB Tablet provides a testing function for you to find out the best
settings for your pen.
3 For wireless tablet - Make sure that you have completed
all the previous steps in Chapter 1 and Chapter 2.
For wired tablet - Make sure that you have connected your tablet
To PC via a USB cable and have installed the battery of the pen.
1
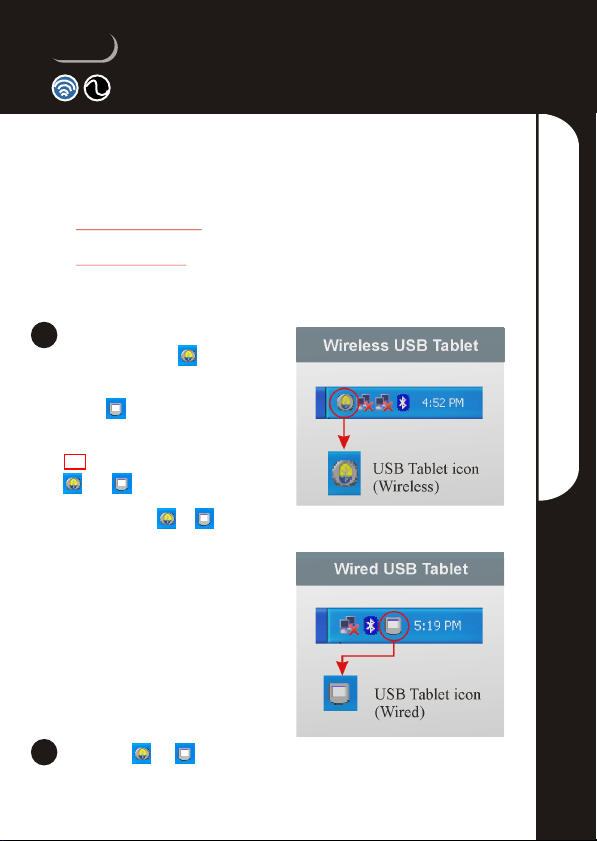
If your tablet is enabled as a
Bluetooth Tablet, will appear
in Windows System tray. While
your tablet is enabled as a wired
tablet, will appear in
Windows System tray.
!!
Note: If you cannot find
and , click Start menu and
then click Run and enter atwtusb.
Click OK and or will
show up.
Wireless USB Tablet
USB Tablet icon
(Wireless)
Wired USB Tablet
USB Tablet icon
(Wired)
Customizing Your Tablet
Left-click or icon and
2
the USB Tablet Window will
pop up.
20
Page 2
1
1
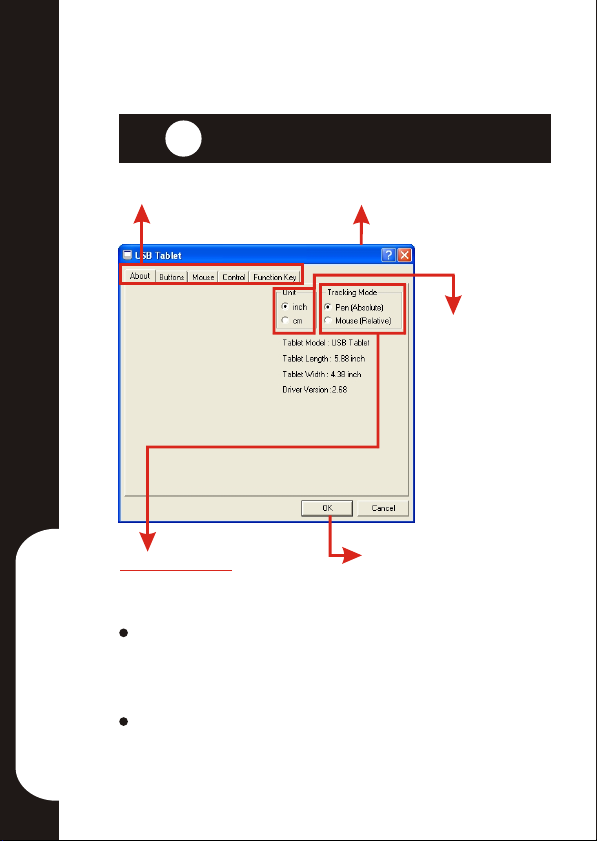
About
Click category tabs
Tracking Mode
Pen [Absolute mode] - the area of the tablet corresponds to the
whole area of the screen. For example, if place your wireless
pen in the top right hand corner, the mouse pointer will always
be at the top right of the screen.
Mouse [Relative mode] - acts like a mouse, moves in relation
3. Configuration
to where the mouse pointer currently is. For example, place your
wireless pen anywhere on the tablet. If you move up, the mouse
pointer will follow, regardless of where you start on the tablet.
USB Tablet Window
Change the length
unit of tablet size in
inch/cm.
Click OK to save changes.
21
Page 3
2
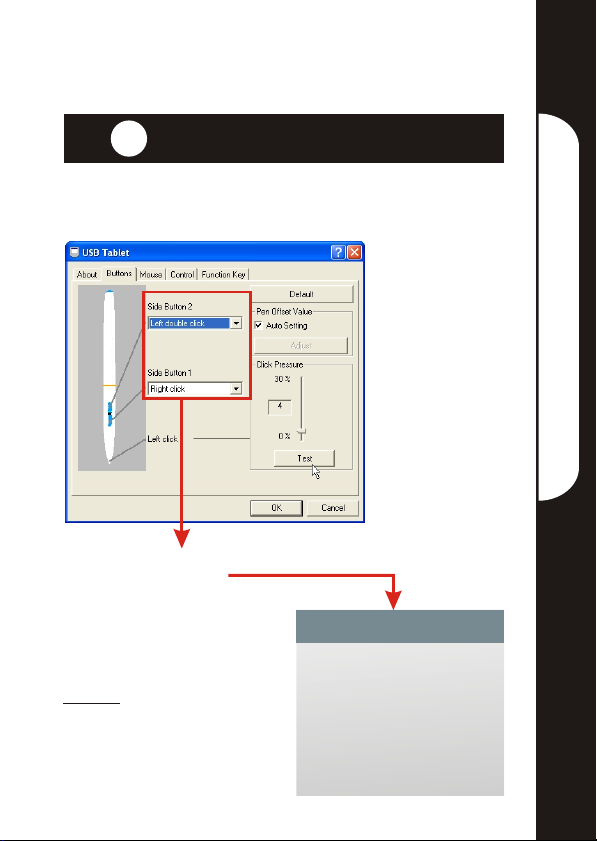
There are two buttons on the wireless pen. Both of them can
correspond to mouse click.
Pull-down menu of Side
Buttons of your wireless pen
Buttons
Customizing Your Tablet
Click the Side Buttons menu and
choose one function for each Side
Button.
Default
Side Button 1= Right click
Side Button 2= Left double click
Pull-down menu
None
Left click
Left double click
Right click
Right double click
Middle click
Middle double click
ScrollBar Move Up/Down
ScrollBar Move
22
Page 4
3
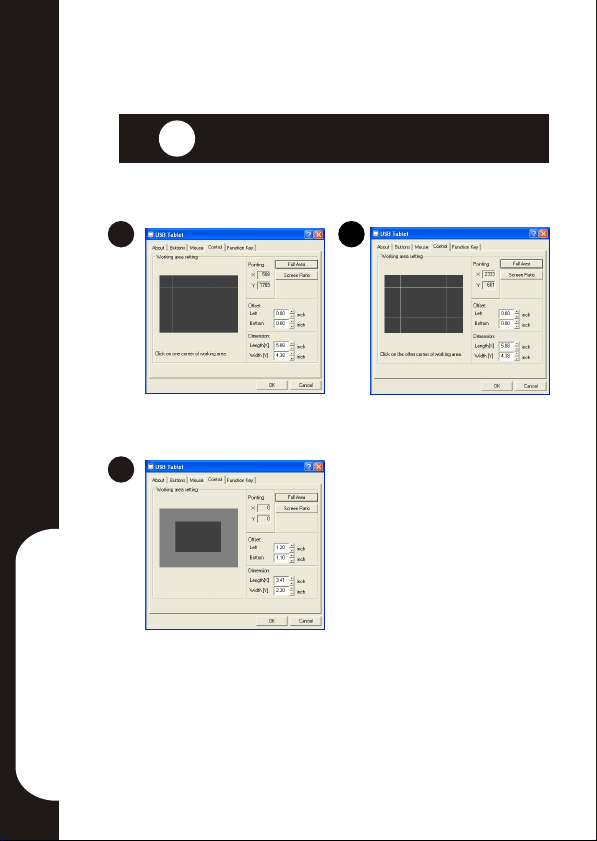
The control tab allows configuration of the active working area of
the tablet to a smaller area.
Control
1
1. The Full Area button allows the
entire area of the tablet to be
used. (Default setting)
3
3. When selected you will see the active area in black, and inactive in grey.
The black area in the Working Area Setting corresponds to the same area
on your tablet.
The active area can now be adjusted in two ways.
3. Configuration
The Offset moves the selected active area.
The Dimensions allows you to adjust the size of the selected active area
more precisely.
2
2. To select a smaller active area,
use the wireless pen and on the
tablet click on the upper left
corner of the area you wish to
select, then move your wireless
pen to the lower right of the area
you wish to select and click.
23
Page 5
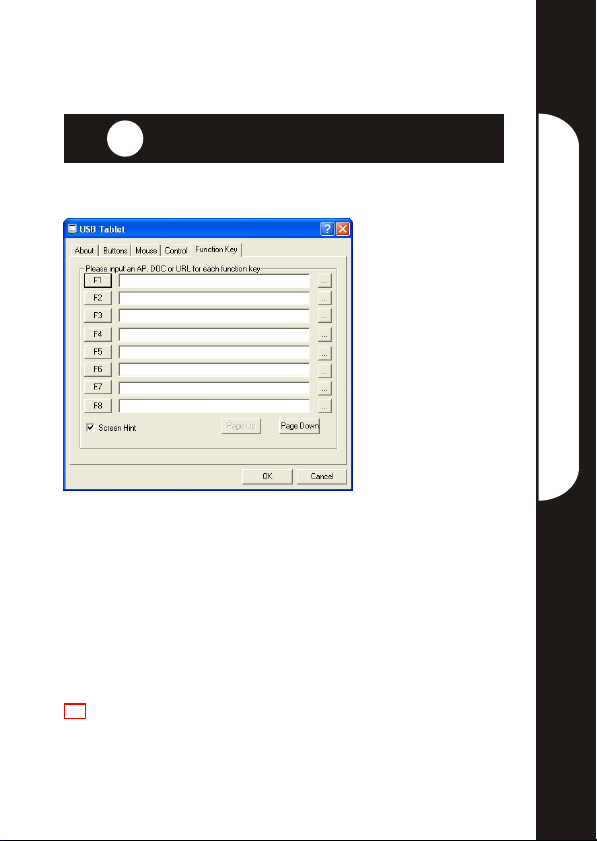
4
The function key tab allows you to view or change existing shortcuts.
To change a shortcut click on .. And search for the file you wish to link the
function key to. You may also type the location.
Once a function key is linked, the next time you want to access that file or
location, just click on the respective function key.
There are F1 - F12 to view or change F9 onwards, click Page Down.
!!
Note:To use a short cut, you move your pointer, use the wireless
pen and point to the top of the active area.
Function Key
Customizing Your Tablet
And F1 to F12 will appear along the top of the screen.
24
Page 6
Step2
Adjusting Your Wireless
Pen Sensitivity
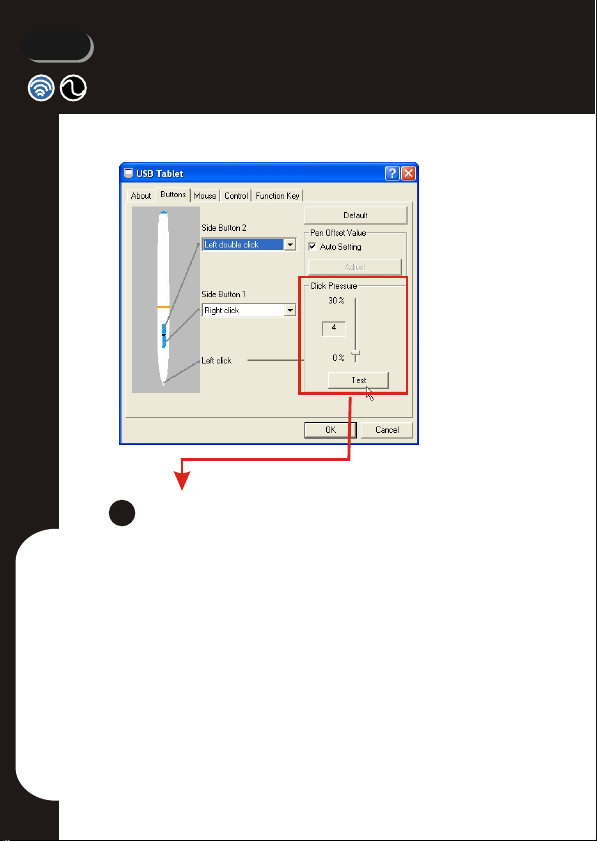
Click Test to pop up the Click
1
Pressure Test Window.
The Click Pressure slider allows you to adjust the sensitivity of
your pen as a percentage of the entire sensitivity.
The figure in the box ranges from 0-30, with 0 as the most
sensitive and 30 as the least possible setting.
(For Wireless/Wired)
25
In practice, when you push your wireless pen gently on the tablet,
the tablet detects a pressure starting from 0 (if you set 0). If you
push harder the value increases (to 511).
3. Configuration
If you adjust to a larger value, the tablet will not detect the pen
being pushed down on, until the pressure reaches that figure.
Page 7
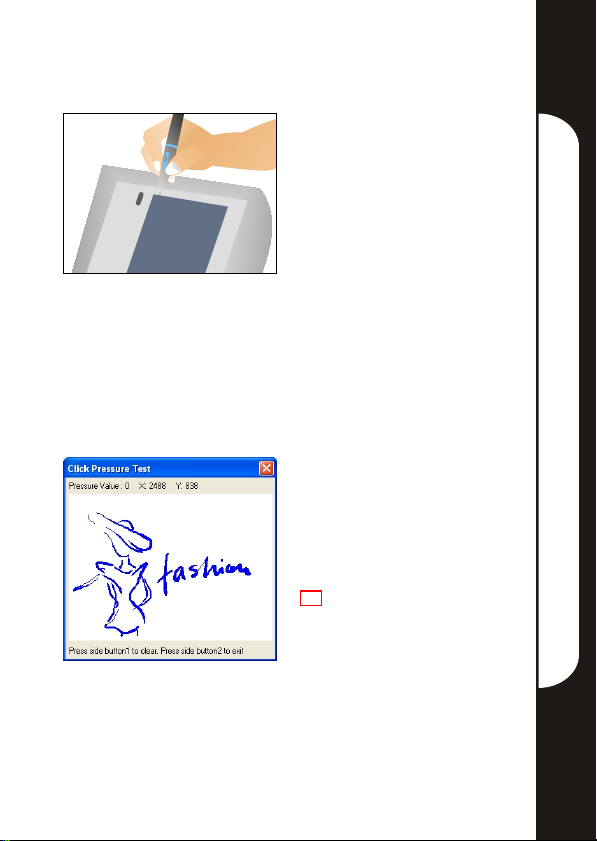
Write or draw anything on your
tablet.
Click Pressure Test Window
The Window will display your
writing or drawing. Feel the
sensitivity of your pen and
adjust Click Pressure Slider
for your preference.
!!
Note: Your writing and
Adjusting Your Wireless Pen Sensitivity
drawing on Click Pressure
Test Window cannot be
saved.
26
Page 8

4
Disconnection
27
Option1
Option2
Option3
4. Disconnection
Disconnection
(For Wireless)
Disconnection
(For Wireless)
Disconnection
(For Wired)
 Loading...