

AIGO E898 User Manual

MP5 Player E898
User Manual
(Version 1.0)

aigo E898
Important Notice
Congratulations on purchasing your aigo MP5 Player E898. Please
read this user manual carefully before using your aigo product.
Warranty Registration
Register your aigo product online to enjoy warranty, member's perks
and more, please visit
Need Help Fast?
Read your User Manual first for quick tips. After you have read the
instructions and still need assistance, you may access our online help
at
www.aigo.com.sg or call +65 6333 6388 with your product’s model
and serial number.
Obtaining Warranty Service
Please review the User’s Manual troubleshooting resources and online
help resources before seeking warranty service. If the product is still
not functioning properly after making use of these resources, access
the online website:
warranty service.
www.aigo.com.sg
www.aigo.com.sg for instructions on how to obtain
| 1 |

aigo E898
Copyrights/ Trademarks Information
• aigo logo is registered trademark of Beijing Huaqi Information &
Digital Technology Co., Ltd.
• Microsoft, MS-DOS, Windows and the Windows logo are
registered trademarks of Microsoft Corporation.
• Intel and Pentium are registered trademarks of Intel Corporation.
• SRS WOW is the registered trademark of SRS Labs, Inc.
• All other products are trademarks or registered trad emarks of their
respective owners and are hereby recognized as such.
• The information on this manual is prepared with the current player
specifications. aigo reserves the right to make design and
specification changes for product improv ement w ithout pri or noti ce.
Actual contents may differ slightly from those pictured.
• Unauthorized duplication of any recordings downloaded from the
internet or made from audio CDs is a violation of copyright laws
and international treaties.
©
• Copyright
Ltd. All rights reserved.
2006 by Huaqi Information Technology (Singapore) Pte
| 2 |

aigo E898
Always Keep a Copy of Your Original Data
Before you deliver your product for warranty services p lea se backup all
data, including all software programs. You will be responsible for
reinstalling all data. Data recovery is not included in the warranty
service and aigo is not responsible for data that may be lost or
damaged during transit or a repair.
Safety Instructions
• Do not expose to extreme temperatures.
• Do not allow any liquid form into the device.
• Do not apply or subject the player to excessive pressure.
• Do not expose to direct sunlight or heat sources.
• Do not try to disassemble and repair the device yourself.
• Do not expose device to chemicals such as benzene or thinner.
• Do not store device in dusty or damp area.
• aigo will claim no responsibility for any damage on data loss due
to breakdown, repair or other causes.
| 3 |

aigo E898
Contents
Important Notice................................................................................ 1
Before Using the Player.................................................................... 5
Get Started....................................................................................... 13
USB connection to PC................................................................. 13
Disconnecting the USB Disk from the computer ..........................14
Power ON.................................................................................... 16
Power OFF.................................................................................. 16
My Music.....................................................................................17
My Movie..................................................................................... 23
My MTV....................................................................................... 28
My Radio .....................................................................................30
My Recorder................................................................................ 31
My E-book ...................................................................................33
My Picture.................................................................................... 36
My Disc........................................................................................ 38
Removing the Expansion MicroSD card.......................................42
Theme Settings............................................................................ 43
Config Settings ............................................................................44
Reading Disk or MicroSD Card on Computer...............................47
Technical Specifications............................................................... 49
| 4 |

aigo E898
Before Using the Player
Product Features
• Sleek and lightweight design with built-in speaker.
• 3.0'' LTPS LCD screen 960x240 (16.7 million colors).
• Expandable memory Micro SD Card.
• Video playback - RM/RMVB, DAT, AVI (DivX, Xvid), MPG, MPEG
and FLV format.
• Audio playback - MP3, WMA, APE and FLAC format.
• Supports photo browsing in JPEG, BMP and GIF format.
• Built-in MIC for high quality digital voice recording in MP3 format.
• Text viewer in TXT format.
• Synchronous lyrics display in LRC format.
• Mini USB 2.0 (USB 1.1 compatible).
• Built-in rechargeable li-polymer battery.
- Audio Playback (Maximum up 24 hours*).
- Video Playback (Maximum up 5 hours**).
• Supports Windows 2000 (SP3) and Windows XP.
*Audio - Based on a 4 minutes MP3 song encoded at 128kbps; using bundled
earphone; volume set to 25; standard built-in EQ mode selected; LCD backlight
turned OFF.
**Video - Based on a RMVB video data rate encoded at 500kbps; using bundled
earphone; volume set to 25; resolution settings 640x480;
Note: Actual battery life will vary with use.
| 5 |
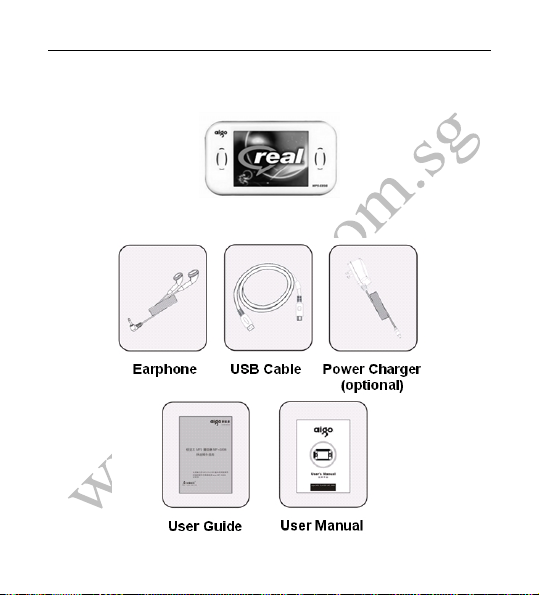
Package Contents
MP5 Player E898
| 6 |
aigo E898
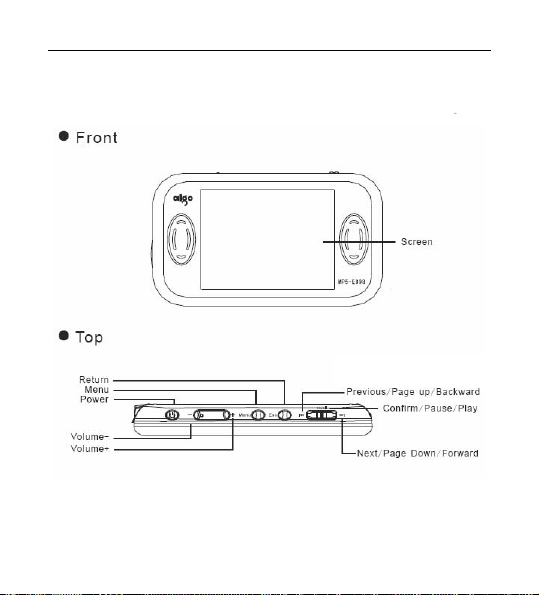
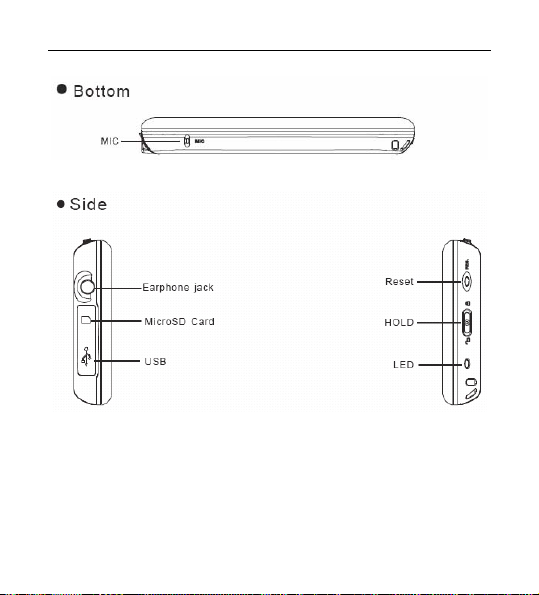
Components Overview
| 7 |
aigo E898
3-way navigation buttons:
aigo E898
Note: As for the button operation mentioned in the User's Manual, “Press &
hold” refers to press & hold the button for 3 seconds and release. “Press
refers to press the button and release it immediately.
| 8 |

aigo E898
Charging the battery
• Always charge up battery fully before initial use. (Approximately 8
hours).
• If the battery level is low, please charge it immediately. Otherwise
the player will shut down automatically or unable to power ON.
• The battery life varies depending on the music volume level
settings and backlight display etc.
• In order to protect the battery condition, we recommend that you
charge it every 4 months if you are not using it fo r a v ery long time.
• Y ou may charge the player via AC Power Adaptor (Optional) or via
USB cable connection with the computer.
| 9 |
aigo E898
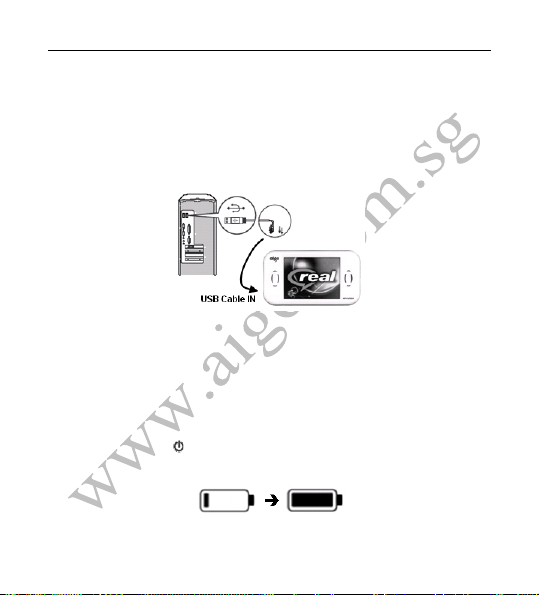
Charging the Battery Using Computer
• Connect one end of the supplied mini USB cable to the player.
• Connect the other end of the mini USB cable to the computer.
• Charging process begins automatically.
• The battery indicator on the player will start flashing in green color.
• When it is fully charged, the battery indicator stops flashing and
turns green color (still). The charging process stops automatically.
• Fully charge time: Approximately up to 4 hours.
Note: When the player is connected to the computer via USB cable,
disconnect the player from the computer using “Safely Remove Hardware”
procedure (Please refer to “Disconnecting the USB Disk from the computer”).
Next, press & hold “ ” key to power off the player. The following battery
charging process (blue color charging icon) will be displayed.
| 10 |
aigo E898
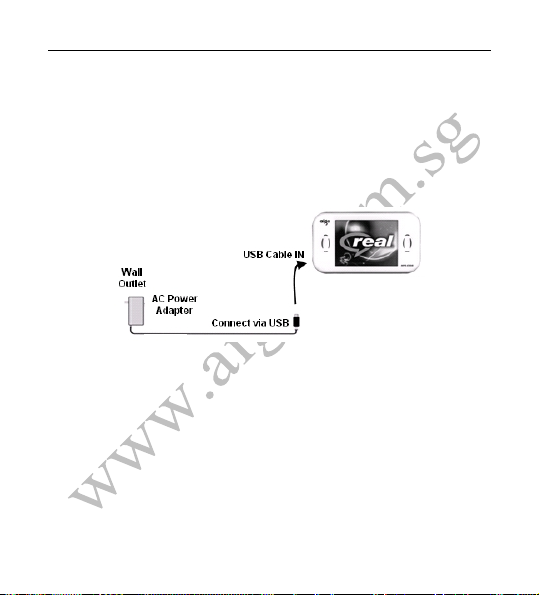
Charging the Battery Using AC Power Adaptor (Optional)
• Connect one end of the AC Power Adaptor (mini USB) to the
player via the supplied USB cable.
• Connect the other end of the AC Power Adaptor to the wall outlet
and turn on the power to begin charging.
• Charging process begins automatically.
• The battery indicator on the player will start flashing during
charging process.
• When it is fully charged, the battery indicator turn s green color and
charging stops automatically.
• Fully charge time: Approximately up to 4 hours.
Note:
Please use ONLY the original AC Power Adaptor (optional) or USB cable
supplied. DO NOT use any third-party AC Power Adaptor as it might cause
severe damage to the player.
| 11 |

aigo E898
Minimum System Requirements
• Intel Pentium processor and above.
• Windows 2000 (Service Pack 3) and Windows XP.
• 32MB of RAM (128MB recommended).
• Up to 100MB of available hard-disk space.
• Standard USB Port.
Note:
1. Log in the computer as Administrator account to perform any software
installation or firmware upgrade (if any). Otherwise the installation process
might not be completed successful.
| 12 |
aigo E898
Get Started
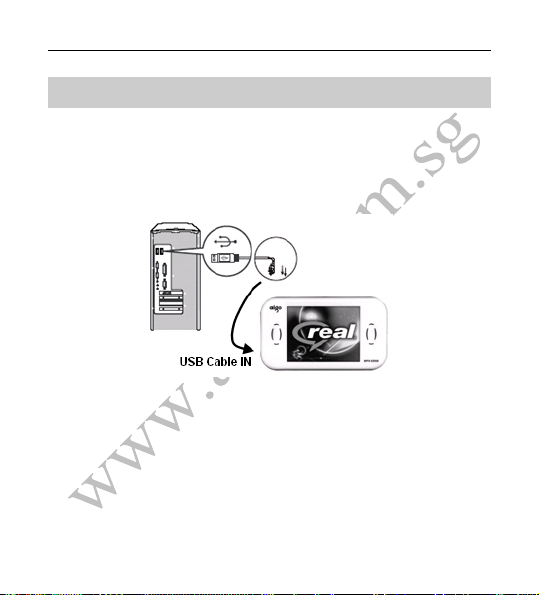
USB connection to PC
• Connect one end of the supplied mini USB cable to the player.
• Connect the other end of the mini USB cable to the computer.
• When the connection is successful, the player will display the
connection icon. You may now transfer any audio and video files
into the player via the computer. To transfer the files, simply copy
and paste the files on the computer to the player directory.
| 13 |
aigo E898
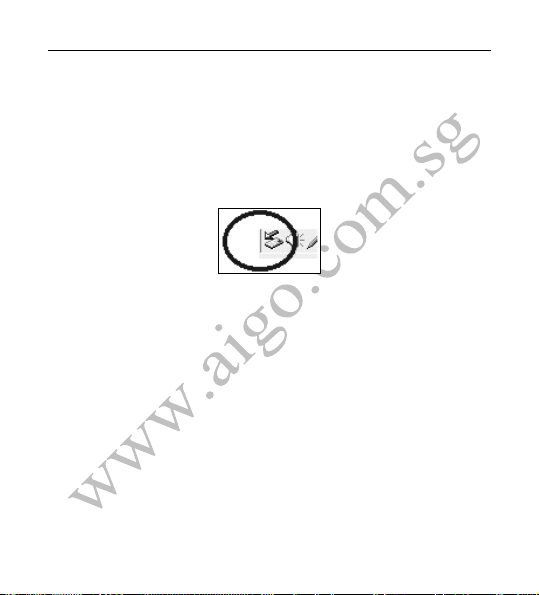
Disconnecting the USB Disk from the computer
For Windows 2000 or Windows XP, please follow the “Safely Remove
Hardware” proced ure on the computer. A “Safely Remove Hardware”
icon will be displayed in the computer’s system tray as shown in
diagram below.
- Move the mouse over the icon, the “Safely Remove Hardware”
prompt appears.
- Double click on “Safely Remove Hardware” icon and the “Safely
Remove Hardware” windows will be displayed. Select the device to be
disconnected and click on “Stop” button to end the connection between
the computer and the device.
| 14 |

aigo E898
- Next, “The USB Mass Storage Device can now be safely removed
from the system” will be displayed.
- Finally, di sconnect and safely unplug the device from the USB port on
your computer.
| 15 |
 Loading...