

Page 1
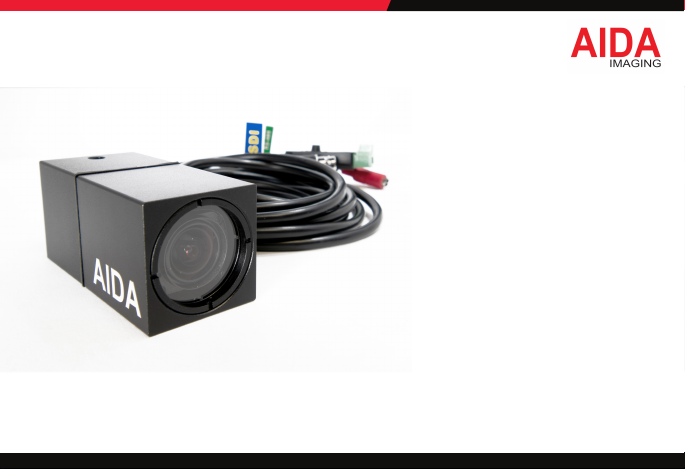
FHD Weatherproof POV Camera
HD-X3L-IP67
OPERATION GUIDE
Reproduction of this manual, in whole or in part, by any means, is prohibited.
Version 1.0 / April 2021
Page 2
CAUTION:
RISK OF ELEC TRIC SHOCK.
DO NOT OPEN.
TO REDUCE THE RISK OF ELEC TRIC SHOCK, DO NOT REMOVE COVER (O R BACK)
NO USER SERVICE ABLE PARTS INSIDE. REFER SER VICING TO QUALIFIED SERV ICE PERSONNEL.
WARN ING
This sy mbol indica tes that dange rous
voltag e consistin g a risk of elect ric shock
is pres ent within thi s unit.
CAUTION:
PRECAU TION
This exc lamation poin t symbol is inte nded to aler t
the use r to the presenc e of importan t operating a nd
maintenance (servicing) instructions in the literature
accompanying the appliance.
WARNING
To prevent damage which may result in fire or electric shock hazard, do not modify or open the housing of the camera.
1. Be sure to u se only the stan dard adapter t hat is specied i n the specic ation sheet. Us ing any other ada pter could caus e re,
elect rical shock , or damage to the pr oduct.
2. Incorrec tly connec ting the power su pply or replaci ng battery m ay cause explos ion,cause exce ssive heat or re
3. Securely p lug the power cor d into the power re ceptacle. Ins ecure connec tion may cause r e.
4. Do not place co nductive obj ects (e.g. scre w drivers, coin s, metal items, e tc.) or containe rs lled with wat er on top of the cam era.
Doing so m ay cause perso nal injury due t o re, electric s hock, or falli ng objects.
Continu e on Next Page
2
Page 3

Warning co ntinues
5. If any unusual smells or smoke come from the unit, stop using the product. Immediately disconnect the power source
and contact the service center. Continued use in such a condition may cause fire or electric shock.
6. If this product fails to operate normally, contact the nearest service center. Never disassemble or modify this product in any way.
7. When cleaning, do not spray water directly onto parts of the product. Doing so may cause fire or electric shock.
PRECAUTION
Pleas e read thi s Operation Gu ide before ins talling and u sing the c amera & retai n this copy for your r efere nce.
1
. Always follow the instructions in the operations guide when applying power. Fire and equipment damage can occur if power is
applied incorrectly. For the correct power supply,refer to the specifications page.
2. Do not use camera if fumes, smoke or a strange odor is emitted from the camera, or if it seems not functional correctly.
Disconnect the power source immediately and consult with your supplier.
3. Do not use the camera in extreme environments where high temperatures or high humidity exists. Use the camera under
conditions where temperatures are between 32°F ~ 104°F.
4. If installed close to a TV, radio transmitter, magnet, electric motor transformer or audio speakers the magnetic field generated
may interfere with or distort the image.
5. Try to avoid fluorescent light reflections, unstable light conditions, direct pointing toward the sun. Use caution when operating the camera in
the vicinity of spotlights or other bright lights and light reflecting objects.
6. To prevent damage, do not drop the camera or subject it to strong shock or vibration.
3
Page 4
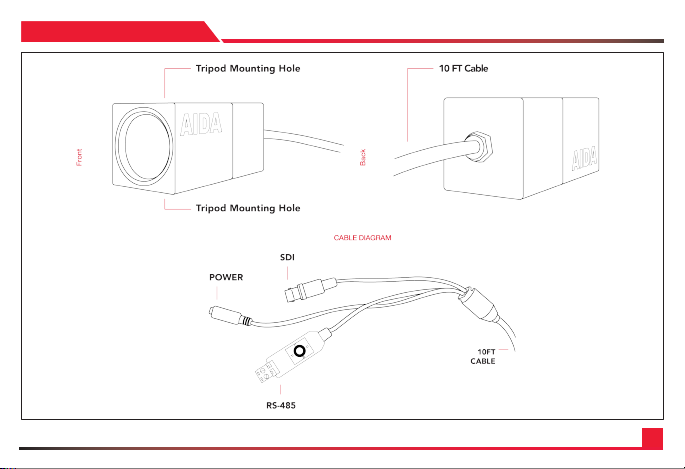
HD-X3L-IP67
4
Page 5
FEATURES
• Full-HD 1/3" Progressive Scan CMOS sensor captures sharp and vivid Full-HD video even under low light conditions.
• X3 optical zoom features 78˜ ~ 25˜ wide angle of view.
• Built-in zoom lens offers zoom, focus and iris control.
• Advanced digital imaging processor provides vivid and detailed images by utilizing Dynamic Range, Auto White Balance, and
Noise Reduction.
• 10 ft weatherproof OSD breakout cable with power input, 3G-SDI out, and RS485 communications for remote control.
• Perfectly suited for outdoor events, outdoor research, OB vehicles and security.
• Versatile, compact, and IP67 rated protection covering dust, moisture, and water submersion up to 1m for 30 minutes.
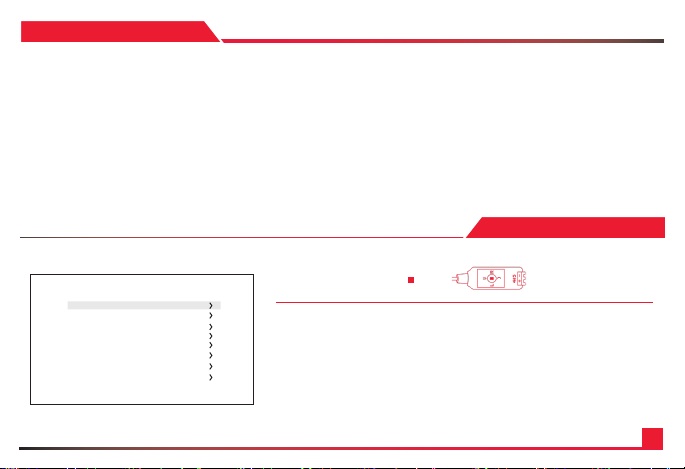
OSD MENU
MAIN ME NU
*FOCUS C ONTR OL
WB CONTROL
AE CONTROL
COLOR/ B/W
IMAGE CO NTROL
SPECIAL
SETUP
RESET
EXIT
L- Left | R- Right | U- Up | D- Down | - Select
1. Move t he Cursor Up/Dow n to Choose Menu
To move from ite m to item in the menu , move the joystic k to the Up/Down.
2. Chan ge the Value
To change the v alue of the selec ted item, move th e joystick to the L eft/Righ t.
3. Shif t to the Sub Menu o f the Chosen Menu
To go into sub me nu, press SEL key. The me nu items with > alw ays have its sub me nu.
5
Page 6
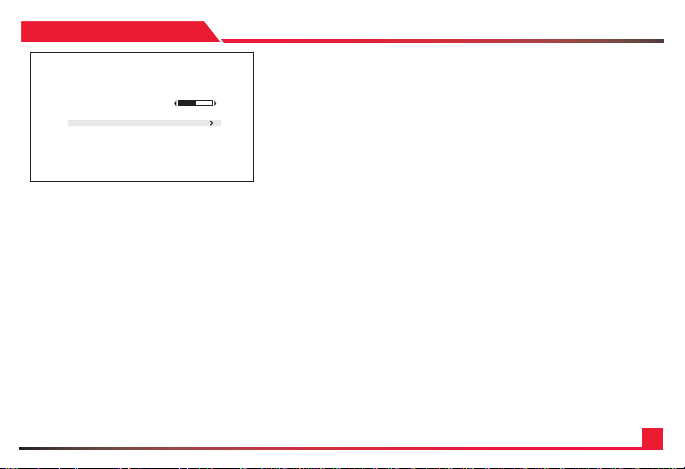
FOCUS CONTROL
FOCUS CONT ROL
FOCUS MODE AUTO
PUSH
ZOOM SPEED 5
FOCUS LIMIT 50CM
*AF AREA/SIZE
RETURN
AUTO
Auto mode will have the focus be done automatically.
MANUAL
Focus control is done manually and will remain the same.
• PUSH : Pres s SEL key to focus auto matically fro m the current v iew.
ZOOM SPEED
0 ~ 7 ( Adjust the speed at which the camera zooms.)
FOCUS LIMIT
10cm, 50cm, 1m, 2m, 3m, 5m, 10m ( Adjust the Autofocus algorithm by distance ).
A
F AREA/SIZE
Allows for setting focus parameters. The camera will try to focus based off the users
box settings.
User Mode : ON, OFF
WIDTH - 0 ~ 20 ( Auto mode will adjust the exposure level automatically ).
HEIGHT - 0 ~ 20 ( Auto mode will adjust the exposure level automatically ).
MOVE HOR - 0 ~ 20 ( Auto mode will adjust the exposure level automatically ).
MOVE VER - 0 ~ 20 ( Auto mode will adjust the exposure level automatically ).
6
Page 7
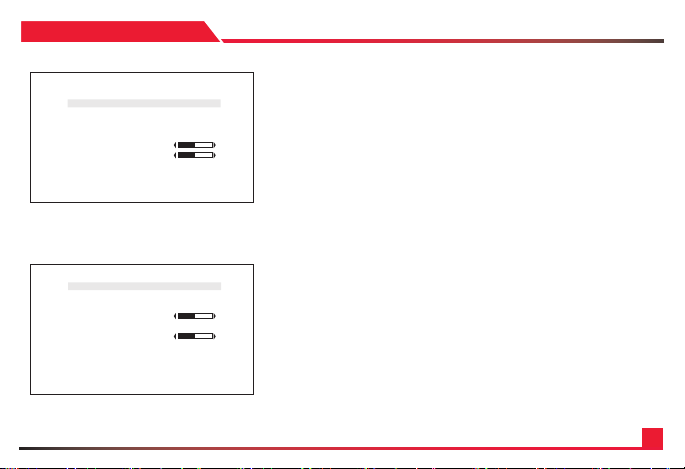
WB CONTROL
WHITE BALAN CE
*MODE ATW
PUSH
BLUE
RED
BLUE OFFSET
RED OFFSET
RETURN
EXPOSURE
*AE MODE AUTO
SHUTTER
AGC
AGC MAX 13
SENS UP OFF
AE BRIGHT 6
FL
RETURN
K CONTRO L
OFF
AWB - Auto white balance mode will adjust white balance within
3,000˜K ~ 8,000˜K temperature.
ATW - Auto trace white mode will adjust white balance within
1,900˜K ~ 11,000˜K temperature.
ONE PUSH - One push mode is used if AWB or ATW cannot produce the proper white
balance. Place a white paper in front of the camera when using the one push mode to
self adapt.
INDOOR - Indoor mode will adjust white balance to indoor lighting conditions.
OUTDOOR - Outdoor mode will adjust white balance to outdoor lighting conditions.
MANUAL - Manual mode will adjust white balance manually.
BLUE - 0 ~ 100 ( Select Manual blue gain within the range of 0 to 100 )
RED - 0 ~ 100 ( Select Manual red gain within the range of 0 to 100 )
BLUE OFFSET - 0 ~ 100 ( Select AWB blue offset within the range of 0 to 100)
RED OFFSET - 0 ~ 100 ( Select AWB red offset within the range of 0 to 100)
AUTO
Auto mode will adjust the exposure level automatically.
Detailed fine tuning options are available under this menu
• AGC MAX : Set the maximum gain value to control video noise caused by AGC
• SENS UP : OFF, x2 ~ x15
“SENS UP” mode controls the digital slow shutter to allow extra light into the
camera and adjust the picture quality.
• AE BRIGHT : 0~20
Auto Exposure brightness level can be adjusted.
7
Page 8
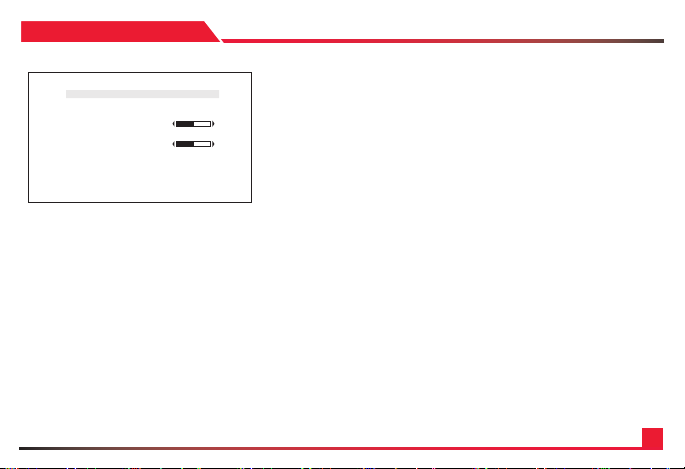
AE CONTROL
EXPOSURE
*AE MODE AUTO
SHUTTER
AGC
AGC MA
X 13
SENS UP OFF
AE BRIGHT 6
K CONTRO L
FL
RETURN
OFF
SHUT FIX
SHUT FIX mo de provides mor e detailed shu tter speed op tion.
All other c ontrols are tune d for the selecte d shutter spe ed.
• SHUTTER : AUTO, 1/30 ~ 1/10,000 ( Shutter speed can be set )
• AGC MAX : sets the maximum gain value to control the video noise caused by
Auto Gain Control.
• SENS UP : 0~15
“SENS UP” mode controls the digital slow shutter to allow extra light into the
camera and adjust the picture quality.
• AE BRIGHT : 0~24
Auto Exposure brightness level can be adjusted.
8
Page 9
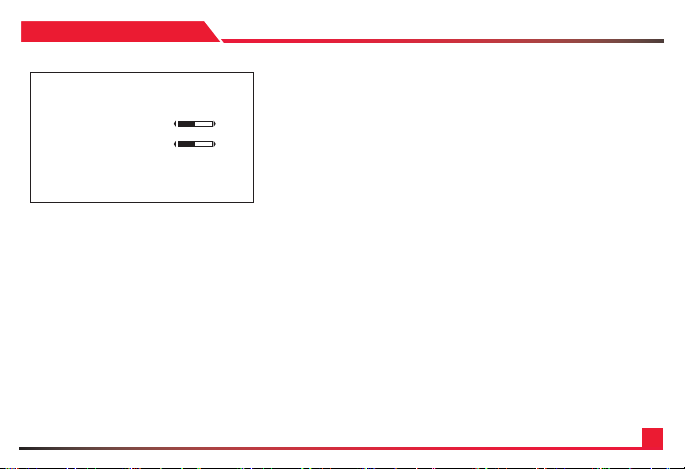
AE CONTROL
AE CONTROL
EXPOSURE
*AE MODE AUTO
SHUTTER
AGC
AGC MAX 13
SENS UP OFF
AE BRIGHT 6
FL
RETURN
K CONTRO L
OFF
AGC FIX
AGC FIX mode provides more detailed gain options.
All other controls are tuned for the selected gain value.
• AGC : 0dB ~ 27dB,
Gain level can be set. ( lower values=less adjusted lighting in image)
• AE BRIGHT : 0~10
Auto Exposure brightness level can be adjusted.
• FLK CONTROL : AUTO, ON, OFF
“FLK CONTROL” mode provides a proper image sensor frequency to match the
power frequency in order to minimize video f icker.
9
Page 10
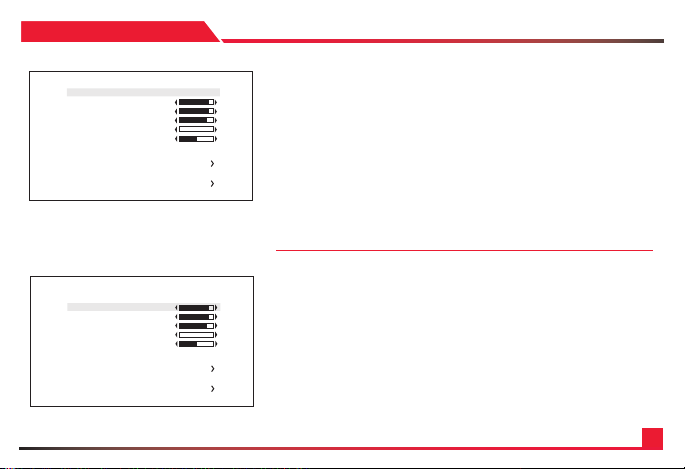
IMAGE CONTROL
IMAGE CO NTRO L
*LENS SHADING
OFF
CONTR AST 11
BRIGH TNESS 11
SATUR ATION 10
HUE 0
EDGE ENHANCE 5
AUTO S ATUR ATE MID DLE
AUTO EDGE ON
BLACK WHITE LV
GAMMA COR RECT DEFAULT
DNR
RETURN
IMAGE CO NTRO L
LENS SHADING OFF
*CONTR AST 11
BRIGH TNESS 11
SATUR ATION 10
HUE 0
EDGE ENHANCE 5
AUTO S ATUR ATE MID DLE
AUTO EDGE ON
BLACK WHITE LV
GAMMA COR RECT DEFAULT
DNR
RETURN
Camera i mage control can b e adjusted fro m EFFECT menu.
• LENS SHADING: ON, OFF
Optical vignetting issue can be correct from this menu.
• CONTRAST : 0 ~ 20 ( Contrast level can be adjusted )
• BRIGHTNESS : 0 ~ 20 ( Brightness level can be adjusted )
• SATURATION : 0 ~ 20 ( Saturation level can be adjusted )
• HUE : 0 ~ 20 ( Hue level can be adjusted )
• EDGE ENHANCE : 0 ~ 20 ( Image sharpness level can be adjusted )
• AUTO SATURATE : OFF, LOW, MIDDLE, HIGH
Decrease saturation automatically when noisy scene is detected.
EDGE : ON, OFF
• AUTO
Allows automatic sharpening of image depending on focus.
• BLACK LEVEL : -64 ~ 64 ( Gamma level can be adjusted )
• GAMMA CORRECT : DEFAULT, 0.4 ~ 1.0 ( Gamma level can be adjusted )
• DNR : Camera noise level can be adjusted from this menu.
• DNR MODE : OFF, 2D, 3D, 2D+3D
Digital noise reduction can be applied from this menu.
• DNR LEVEL : AUTO, LOW, MIDDLE, HIGH
Noise reduction level can be adjusted from this menu.
10
Page 11

SPECIAL
SPECIAL
*DZOOM OFF
ZOOM MAG
DEFOG OFF
BACK LIGHT OFF
BINNING OFF
DEFECT PIXEL ON
DISP. FUNCTION
WDR
PRIVACY
RETURN
D-ZOOM
*ZOOM CONTROL X 1.0
RETURN
OFF
Camera s pecial func tions can be adju sted from SPECIAL m enu.
D ZOOM : ON, OFF ( Digital Zoom can be enabled from this menu )
• DZOOM LIMIT: 1x ~ 12x ( Allows ability to digitally zoom this far)
To use this function, keep zooming in after standard 3x optical zoom, you will then slowly
enter the digitally zoomed imaging.
ZOOM MAG : ON, OFF ( Displays the zoom level at the top right of image) .
11
Page 12
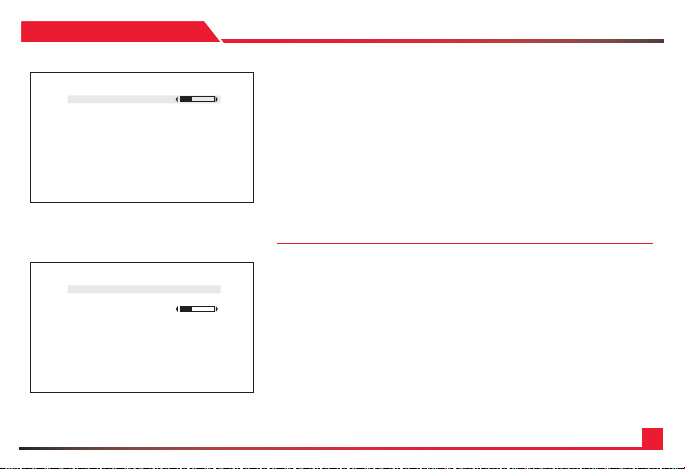
SPECIAL
DEFOG SE TUP
*STRENGTH 4
THRESHOLD
AUTO LE VEL
RETURN
BACKLIGHT - BLC
*BLC ON
SIZE/PO SITION
LEVEL 128
DISPLAY O N
DEF AU LT
RETURN
DEFOG : ON, OFF, AUTO ( “DEFOG” me nu improves fog gy image)
• STRENGTH : 0 ~ 16
Change d efog strengt h.
• THRESHOLD : 0 ~ 3
Thresh old value sets m inimum sensit ivity value fo r automatic def og control.
Higher va lue makes defog -on control re luctant.
• AUTO LEVE L : LOW, MID, HIGH
Auto leve l value sets max imum strengt h value for autom atic defog cont rol.
Higher va lue makes defog ef fect to be st ronger.
BACK-LI GHT : OFF, BLC, HLM
Camera b ack-light comp ensation ca n be adjusted.
BLC : OFF, ON
BLC enabl es back light com pensation.
• SIZE/POSITION : SIZE, POS ITION, RETURN
Adjust B LC area window size .
• LEVEL : Back-l ight level compe nsation level c an be adjusted f rom this menu.
Higher le vel will compens ate more from th e selected ar ea
• DI SPLAY : OFF, ON ( BLC area display c an be turned ON or O FF )
• DEFAULT : Set BLC menu to defa ult value.
12
Page 13
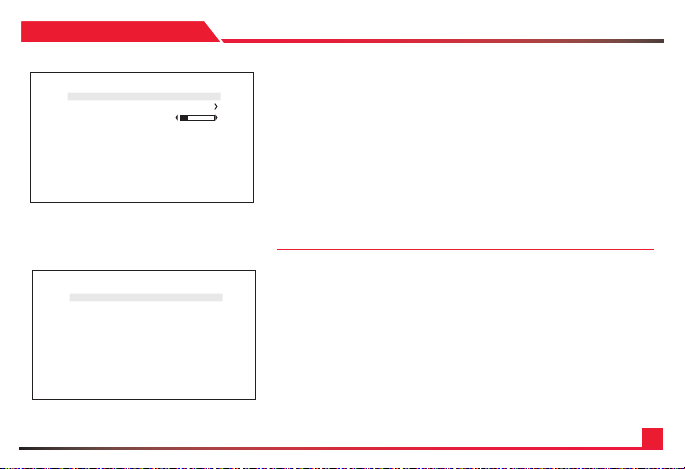
SPECIAL
BACKLIGHT - HLM
*AREA DISPLAY ON
SIZE/PO SITION
LEVEL 3
BLACK MASK ON
DEF AU LT
RETURN
DEFECT PIX EL
*STATIC PROGRESS PRESS OK
RETURN
HLM : OFF, ON
HLM can be adj usted.
• AREA D ISPLAY : ON, OFF
HLM ARE A DISPLAY can be tur ned ON or OFF.
• SIZE/POSITION : SIZE, POSIT ION, RETURN
Adjust B LC area window size .
• LEVEL : 0 ~ 20
Amount o f masking area c an be adjusted.
• BLACK M ASK : OFF, ON
Maskin g area highlight c an be turned ON or O FF.
• DEFAULT : Set HLM menu to def ault value.
BINNING : OFF, ON
Binning can be turned ON or OFF. (Sacrifice pixel quality to raise image contrast)
DEFECT PIXEL : OFF, ON,
To fix dead or stuck pixels accumulated on the sensor, please enter this following
menu.
• STATIC PROCESS : PRESS OK.
To use this progress, please cover the lens of the camera until the image is
completely black. Press OK, and then it will adjust. Once complete, your
dead or stuck pixels will now be mirrored by a neighboring pixel.
13
Page 14
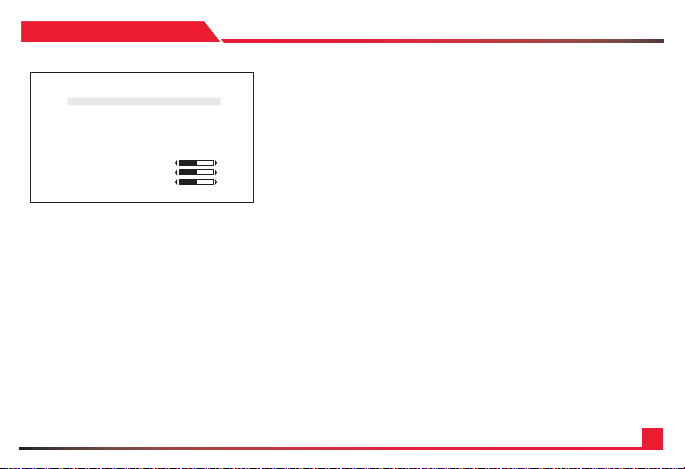
SPECIAL
DISPLAY FUNCITON
*FREEZE OFF
MIRROR OFF
FLIP
IMAGE EFFEC T NEG ATIVE
ROTATIO N ROT
PICTURE STYLE VIVID
PIC CONTRAST 3
PIC SATURATION 3
PIC EDGE 3
RETURN
OFF
DISPLAY FUNCTION : OFF, ON
Adjust i mage display fe atures from thi s menu.
• FREEZE : OFF, ON
Image freeze can be turned ON or OFF.
• MIRROR : OFF, MIRROR, Image mirror can be operated.
• FLIP : OFF, V-FLIP, Image flip can be operated.
• IMAGE EFFECT : OFF, NEGATIVE, GREY MODE, REDDISH-1 ~ 4,
BLUISH-1 ~ 4, GREENISH-1 ~ 4.ROTATION : OFF, ROT_L 1:1
Several color effects can be applied.
• ROTATION : OFF, ROT_L FULL, ROT_L 1:1, ROT_R Full, ROT_R 1:1
Image can be rotated either left or right side. (*Will not work on 60 frames resolution)
• PICTURE STYLE : OFF, STANDARD, VIVID, CLEAR, VIVID CLEAR, NEUTRAL
Different types of picture style can be applied. Overrides Image control for fine
tuning
• PIC CONTRAST : 0 ~ 6 (Applies contrast to image)
• PIC SATURATION : 0 ~ 6 (Applies saturation to image)
• PIC EDGE : 0 ~ 6 (Applies sharpness to image)
FLICKER D ETECT : OFF, ON
“FLICKER D ETECT” mode prov ides a proper im age sensor fre quency
to match t he power freque ncy in order to mi nimize video ic ker.
WDR : Wide Dynamic range can be turned on or off.
14
Page 15
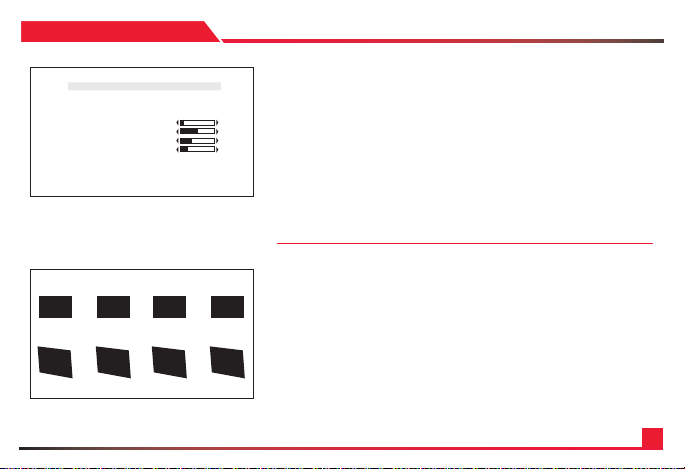
PRIVA CY
PRIVAC Y MASK
*MODE ON
MASK NO. MASK 1
DISPLAY ON
COLOR BLACK
POSITION-X 2
POSITION-Y 5
SIZE-X 20
SIZE -Y 11
DEFA ULT
RETURN
Privacy zone can be setup from this menu.
MO
DE : ON, OFF
Enable “PRIVACY ZONE” ON or OFF.
MASK NO : MASK1 ~ MASK8
Select privacy zone mask number.
DISPLAY : ON, OFF
Turn ON or OFF the selected privacy mask zone.
COLOR : WHITE, GREEN, BLUE, RED, CYAN, MAGENTA, YELLOW, GRAY-1 ~ 6,
MOSAIC, BLACK. ( Select privacy zone mask color )
POSITION-X & POSITION-Y
Change the size of the selected corner from
“POLY SELECT” menu.
SIZE-X & SIZE-Y
Change the size of the privacy square.
DEFAULT
Set priv acy zone to defa ult value.
15
Page 16
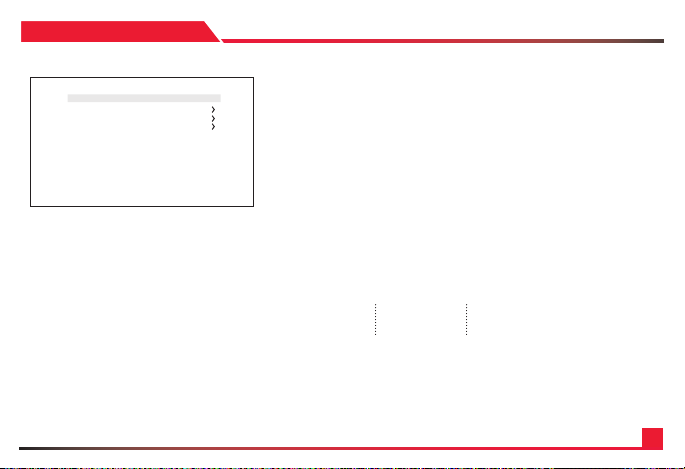
SETUP
SETUP
*CAM TITLE OFF
COMMUNICATION
SYSTEM INFO
OUTPUT FORMAT 1080P60
RETURN
Camera s etup can be adj usted from thi s menu.
CAM TITLE : O FF, ON
Camera title can be turned ON or OFF.
COMMUNICATION : ON, OFF,
VISCA communication control can be adjusted.
• CAM ID : 0 ~ 7
Camer a ID can be setup.
• ID DIS PLAY : OFF, ON
Camer a ID can be setup.
• BAU DRATE : 2400, 4800, 960 0, 19200, 38400
Camer a baudrate can b e set.
SYSTEM INFO :
Camera S/W version can be found under this menu.
OUTPUT FORMAT : ON, OFF
Camera resolution and frame rate can be set. Select
to set.
Supported formats are:
* 1080p by de fault
1080P - 60 / 59.94
50 / 30 / 29.97 / 25 / 24
1080I - 60 / 59.94 / 50
720P - 60 / 59.94 / 50
16
Page 17
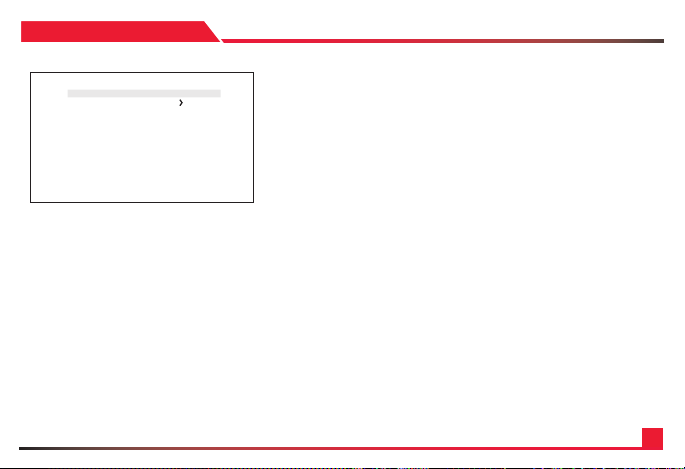
R
ESET
RESET
*MODE FACTORY
RESET
SAVE AS USER
RETURN
MODE : FACTORY, USER
Camera will reset to factory default or user saved value.
RESET : NO, YES
Reset the camera to the selected mode.
SAVE AS USER :
Save the user desired setting from the menu. Mode must be set to User.
All settings will be saved, from focus and zoom to image settings.
17
Page 18

SPECIFICATION
VIDEO
Image Sensor 1/3” inch Progressive CMOS
Sensor Size Diagonal 7.20mm
Effective Pixels Horizontal: 1920, Vertical: 1080
Pixel Size
Resolution
Resolution Rate
Output
Color Space
µm x 2.75 µm
2.75
1080p: 1920 x 1080
1080i : 1920 x 1080
720p : 1280 x 720
1080p : 60 / 59.94 / 50 / 30 / 29.97 / 25 / 24
1 1080i : 60 / 59.94 / 50
720p : 60 / 59.94 / 50
3G-SDI
4:2:2 (YCbCr) 10bit
FUNCTION
White B alance AWB / AE / AF
Full Auto, Bright , Shutter Prio rity, Iris Prio rity, Manual
Exposure
Other WDR, DIS (D igital Image St abilization), 2D/ 3D
Noise Reduct ion, Digital Slo w Shutter,
Black Lev el Compensat ion, Flicker Dete ction.
LENS
Lens 3X Optic al Zoom Lens,
3.85mm/ 78° (Wide) ~ 13.4mm /25° (Tele))
STANDARD
SMPTE SMPTE 292M, SMPTE 424M
PHYSICAL
Weatherproof Rating IP67
Cable Length 10FT
Camera C
ontrol RS-485, OSD Button
Operation Temp 32° F - 104° F
Dimension
Weight
Power
83.09mm x 48mm x 48mm (excl. 3M attached cable)
3.25" x 1.95" x 1.95" (excl.10ft attached cable) (LxWxH)
140g / 0.30lbs
12VDC (+9 - +15VDC)
*Specica tion are subjec t to change witho ut notice.
18
Page 19

QUESTIONS
Visit us:
www.aidaimaging.com/support
E-mail us:
Give us a Ca ll:
Toll Free: 844.631.8367 | Tel: 90 9.333.7421
Operating Hours: Mon-Fr i | 8:00am – 5:00p m PST
19
Page 20

Disposal of Old Appliances
1. When this crossed-out wheel bin symbol is attached to a product it means the product is covered by the European Directive 2002/96/EC.
2. All electrical and electronic products should be disposed of separately form the municipal waste stream in accordance to laws designated by the government or the local authorities.
3. The correct disposal of your old appliance will help prevent potential negative consequences for the environment and human health.
4. For more detailed information about disposal of your old appliance, please contact your city ofce, waste disposal service or the shop where you purchased the product.
This equipm ent has been tes ted and found to co mply with the li mits for a Class A di gital device, pu rsuant to par t 15 of the FCC Rules. The se limits are de signed to provi de reasonable p rotection ag ainst
harmful int erference w hen the equipm ent is operate d in a commercial en vironment. Th is equipment ge nerates, use s, and can radia te radio frequ ency energy an d, if not install ed and used in acc ordance with
the instru ction manual, m ay cause harmf ul interfere nce to radio com munications . Operation of t his equipment i n a residential a rea is likely to cau se harmful inte r reference in w hich case the us er will be requir ed
to correc t the interfer ence at his own exp ense.
20
 Loading...