

Page 1
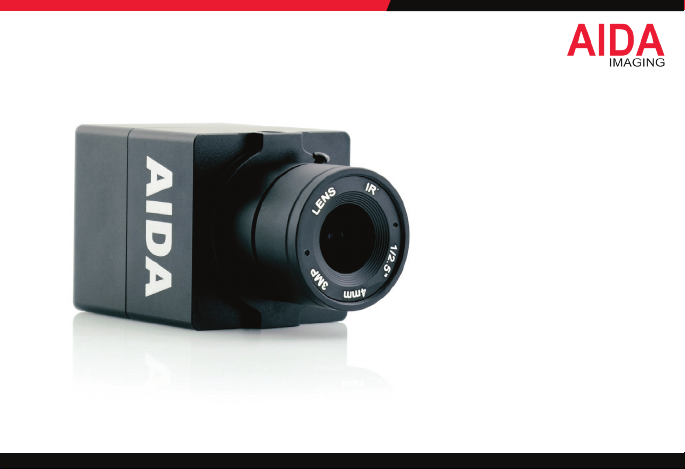
FULL HD HDMI Camera
HD-100A
OPERATION GUIDE
Reproduction of this manual, in whole or in part, by any means, is prohibited.
Version 1.0 / Apr il 2020
Page 2
CAUTION:
RISK OF ELEC TRIC SHOCK.
DO NOT OPEN.
TO REDUCE THE RISK OF ELEC TRIC SHOCK, DO NOT REMOVE COVER (O R BACK)
NO USER SERVICE ABLE PARTS INSIDE. REFER SER VICING TO QUALIFIED SERV ICE PERSONNEL.
WARN ING
This sy mbol indica tes that dange rous
voltag e consistin g a risk of elect ric shock
is pres ent within thi s unit.
CAUTION:
PRECAU TION
This exc lamation poin t symbol is inte nded to aler t
the use r to the presenc e of importan t operating a nd
maintenance (servicing) instructions in the literature
accompanying the appliance.
WARNING
To prevent d amage w hich may r esult i n fire or ele ctric shock h azard, do not ex pose thi s applia nce to rain or moi sture.
1. Be sure to u se only the stan dard adapter t hat is specied i n the specic ation sheet. Us ing any other ada pter could caus e re,
elect rical shock , or damage to the pr oduct.
2. I ncorrectl y connectin g the power suppl y or replacing ba ttery may ca use explosio n,cause excess ive heat or re
3. S ecurely plug t he power cord into t he power recep tacle. Insecu re connectio n may cause re.
4. D o not place condu ctive objec ts (e.g. screw dri vers, coins, me tal items, etc.) o r containers l led with water on t op of the camer a.
Doing so m ay cause perso nal injury due t o re, electric s hock, or falli ng objects.
Continu e on Next Page
2
Page 3

Warning co ntinues
5. Do not ins tall the unit in hu mid, dusty, or so oty location s. Doing so may cau se re or elect ric shock
6. If any unu sual smells or sm oke come from the u nit, stop using t he product. I mmediately di sconnect th e power source
and cont act the ser vice center. Conti nued use in such a c ondition may ca use re or elect ric shock.
7. If this produ ct fails to operate no rmally, cont act the nearest se rvice ce nter. Never disa ssemble or modif y this prod uct in any way.
8. When cl eaning, do not spr ay water direc tly onto part s of the produc t. Doing so may ca use re or elect ric shock.
PRECAUTION
Pleas e read thi s Opera tion Guide befo re installi ng and us ing the ca mera & retain th is copy for your re ferenc e.
1. Always f ollow the instr uctions in th e operations g uide when appl ying power. Fire and e quipment dam age can occur if p ower is
applie d incorrect ly. For the correc t power supply,r efer to the spec ications pag e.
2. D o not use camer a if fumes, smoke o r a strange odo r is emitted fro m the camera, or i f it seems not fun ctional corr ectly.
Discon nect the power s ource immedi ately and consul t with your supp lier.
3. D o not use the came ra in extreme e nvironments w here high tempe ratures or hig h humidity exi sts. Use the ca mera under
condit ions where temp eratures are b etween 32°F ~ 10 4°F, and humid ity is below 90 %.
4. I f installed cl ose to a TV, radio tr ansmitter, magn et, electri c motor transf ormer or audio s peakers the mag netic eld gene rated
may inter fere with or di stort the ima ge.
5. Tr y to avoid uoresc ent light reec tions, unst able light condi tions, direc t pointing towa rd the sun. Use ca ution when ope rating the cam era
in the vic inity of spotl ights or other b right lights an d light reect ing objects .
6. To pr event damage, do not d rop the camer a or subject it to s trong shock o r vibration.
3
Page 4
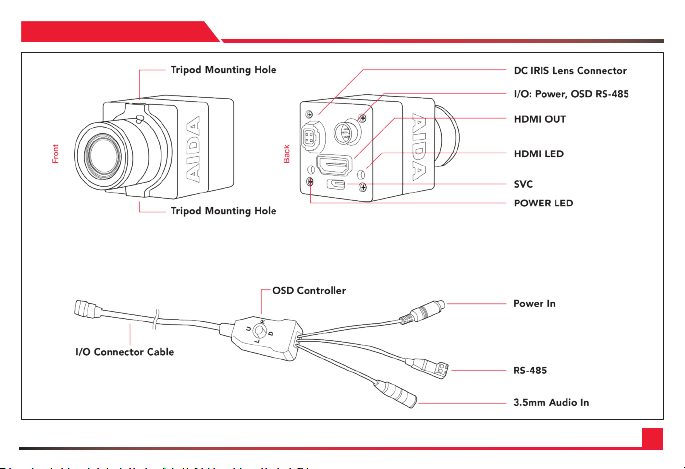
HD -10 0A
4
Page 5
FEATURES
• 4K UHD 1/3” Progr essive S can CMOS senso r capab le of 4K (4096 x 2160 ) captur es sharp
and vivi d images even und er very low ligh t condit ions.
• Powered by a ba ck-illu minated p ixel technolo gy.
• Advance d digita l imaging p rocessor pr ovides v ivid and d etailed image s by utilizing
Dynam ic Range, Auto W hite Balan ce, and Noise Re ducti on.
• Superb mo tion- compensate d temporal noi se reduc tion lter for m otion video wit hout blurri ng.
• OSD control b reakout cable w ith two audio i nputs a nd RS-485 for r emote communi cation .
• Flawless ly relays multi -chan nel embe dded audio via H DMI 1.3a.
• Perfec tly suited for br oadcast, pr o audio/v ideo, and secur ity.
• Versatile, c ompac t, and rugged d esign.
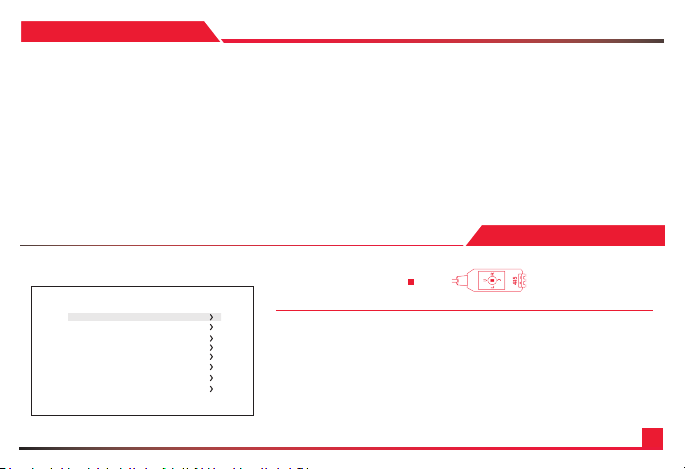
OSD MENU
MAIN ME NU
*WB CONTRO L
AE CONTROL
DAY /NIG HT
AUDIO
IMAGE CO NTROL
SPECIAL
SETUP
RESET
EXIT
L- Left | R- Right | U- Up | D- Down | - Select
1. Move t he Cursor Up/Do wn to Choose Menu
To move from ite m to item in the menu , move the joystic k to the Up/Down.
2. Cha nge the Value
To change the v alue of the selec ted item, move th e joystick to the L eft/Righ t.
3. Shi ft to the Sub Men u of the Chosen Me nu
To go into sub me nu, press SEL key. The me nu items with > alw ays have its sub me nu.
5
Page 6
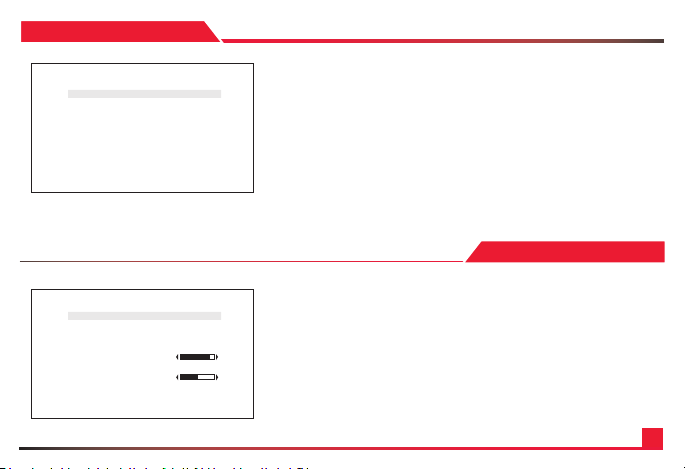
WB CONTROL
WHITE BALAN CE
*MODE AT W
PUSH
BLUE
RED
RETURN
AWB - Auto w hite balance mo de will adjust wh ite balance wit hin
3,000 ˜K ~ 8,000 ˜K temper ature.
ATW - A uto trace white m ode will adjus t white balance wi thin
1,900˜ K ~ 11,000˜ K temperatu re.
ONE PUSH - On e push mode is use d if AWB or ATW cannot p roduce the pro per
white bal ance. Place a white p aper in front of t he camera whe n using the one pus h
mode to se lf adapt.
INDOOR - Indoor mo de will adjust w hite balance to in door lighting co nditions.
OUTDOOR - Outdoor m ode will adjust w hite balance to o utdoor lightin g conditions.
MANUAL - Manual mode w ill adjust whit e balance manual ly.
BLUE - 0 ~ 100 ( Sele ct blue gain wit hin the range of 0 t o 100 )
RED - 0 ~ 100 ( Selec t Red gain within t he range of 0 to 100 )
AE CONTROL
AE CONTROL
*AE MODE AUTO
SHUTTER
IRIS
AGC
AGC MAX 13
SENS UP OFF
AE BRIGHT 6
FLK CONT ROL OFF
LENS MODE MANUAL
RETURN
AUTO
Auto mod e will adjust the e xposure level a utomaticall y.
Detail ed ne tuning opt ions are availab le under this men u.
• AGC MA X : OFF, LOW, MIDDLE, HIG H, DMIN, DMID, DMAX
“AGC MAX” set s the maximum ga in value to contro l the video nois e caused by
Auto Gain C ontrol.
• SENS UP : OFF, x2 ~ x10
“SENS UP” mod e contro ls the digital slow shu tter to allow extr a light into the
camer a and adjust the p icture quali ty.
• AE BRI GHT : 0~20 - ( Auto Expos ure brightne ss level can be adj usted )
6
Page 7
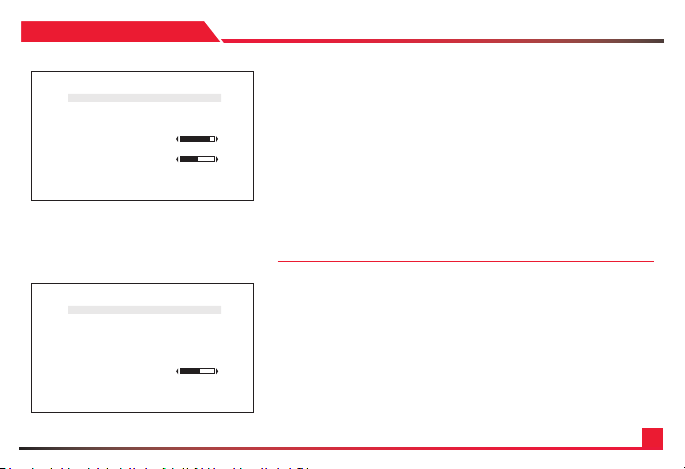
AE CONTROL
AE CONTROL
*AE MODE SHUTTER
SHUT TER 1/30
IRIS
AGC
AGC MAX 13
SENS UP OFF
AE BRIGHT 6
FLK CONT ROL OFF
LENS MODE
RETURN
AE CONTROL
*AE MODE AGC FIX
SHUTTER
IRIS
AGC 9dB
AGC MA X
SENS UP
AE BRIGHT 6
FLK CONT ROL OFF
LENS MODE MANUAL
RETURN
SHUT FIX
SHUT FIX mo de provides mor e detailed shu tter speed op tion.
All other c ontrols are tune d for the selecte d shutter spe ed.
• SHUTTER : AUTO, 1/30 ~ 1/10,0 00 ( Shutter s peed can be set )
• AGC MA X : OFF, LOW, MIDDLE, HIGH, D MIN, DMID, DMAX
“AGC MAX” set s the maximum ga in value to contro l the video nois e caused by
Auto Gain C ontrol.
• SENS UP : 0~20
“SENS UP” mod e contro ls the digital slow shu tter to allow extr a light into the
camer a and adjust the p icture quali ty.
• AE BRI GHT : 0~10
Auto Ex posure brigh tness level ca n be adjusted.
AGC FIX
AGC FIX mode p rovides more d etailed gain op tion.
All other c ontrols are tune d for the selecte d gain value.
• AGC : AUTO, 0d B ~ 27dB, d2X ~ d9X ( Ga in level can be set )
• AGC MA X : OFF, LOW, MIDDLE, HIG H, DMIN, DMID, DMAX
“AGC MAX” set s the maximum ga in value to contro l the video nois e caused
by Auto Gai n Control.
• AE BRI GHT : 0~10
Auto Ex posure brigh tness level ca n be adjusted.
7
Page 8
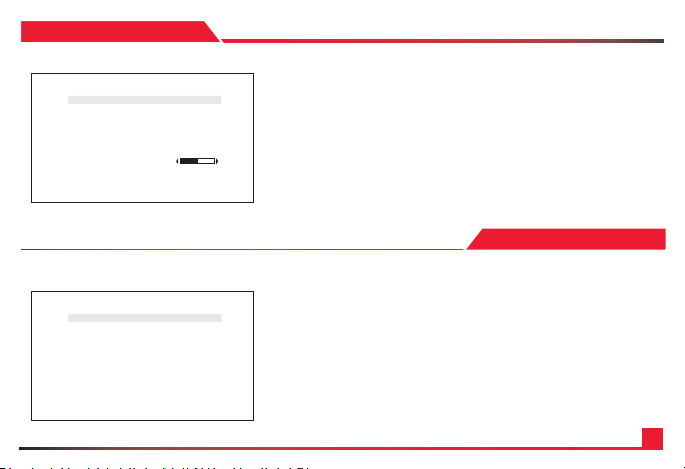
AE CONTROL
AE CONTROL
*AE MODE AUTO
SHUTTER
IRIS
AGC
AGC MA X
SENS UP OFF
AE BRIGHT 6
FLK CONT ROL OFF
LENS MODE MANUAL
RETURN
DAY & NIGHT
*MODE DAY (COLOR)
NIGHT COLOR OFF
COLOR BURST OFF
RETURN
• IRIS SPEED : 0 ~ 5
Elect ronic Iris spee d can be control led. ( DC Iris lens o nly )
• LENS MODE : INDOOR, OUTDOOR, MANUAL
Lens set ting will be opt imized for the se lected envir onment. ( DC Iris l ens only )
• FLK CONTROL : AUTO, ON, OFF
“FLK CONTR OL” mode prov ides a proper ima ge sensor freq uency to match t he
power fr equency in ord er to minimize vid eo icker.
DAY & NIGHT
Adjust c olor or B&W settin g from this menu.
• MODE : DAY(COLOR), NIG HT(B&W) Set cam era to either col or mode or B&W mode.
• NIGHT COLOR : ON, OFF
When “NI GHT COLOR” is turn ed ON, camera s tays on color mod e even
“NIGHT( B&W)” is selec ted from the MOD E.
• COLOR BU RST : ON, OFF
Color bu rst signal ON or O FF can be set for CV BS signal. ( Not ap plicable )
8
Page 9

AUDIO
AUDIO
*MODE LINE
AUDIO LEVEL 0 dB
MIC ATTE NUATO R OFF
AGC LIMIT
SAMPLE BITS 24BITS
RETURN
MODE : OFF, LINE, MIC
Selec t the proper aud io mode from this m enu.
AUDIO LEVEL : -12dB ~ 48 dB
Audio lev el can be manuall y adjusted fro m this menu.
MIC ATTENUATOR : ON , OFF
Audio in put attenuat ion can be contr olled from this m enu to minimize the
audio noi se level.
AGC LIMIT: -0dB ~ 58 dB
Audio gai n level can be adju sted from thi s menu when MIC at tenuation is ena bled.
SAMPLE BIT S : 16, 20, 24, 32 ( Audio s ample bit rate c an be adjusted f rom this menu )
9
Page 10
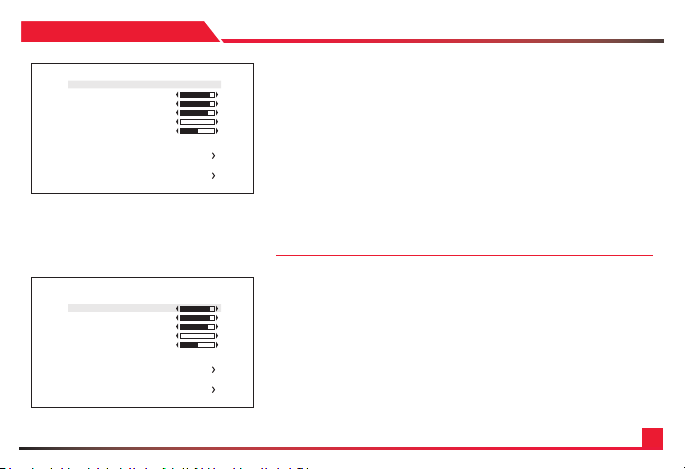
IMAGE CONTROL
IMAGE CO NTRO L
*LENS SHADING SHUTTER
CONTR AST 11
BRIGH TNESS 11
SATUR ATION 1 0
HUE 0
EDGE ENHANCE 5
AUTO S ATUR ATE MIDD LE
AUTO EDGE ON
BLACK WHITE LV
GAMMA COR RECT DEFAULT
DNR
RETURN
IMAGE CO NTRO L
LENS SHADING OFF
*CONTR AST 11
BRIGH TNESS 11
SATUR ATION 1 0
HUE 0
EDGE ENHANCE 5
AUTO S ATUR ATE MIDD LE
AUTO EDGE ON
BLACK WHITE LV
GAMMA COR RECT DEFAULT
DNR
RETURN
Camera i mage control can b e adjusted fro m EFFECT menu.
• LENS SHADING : ON, OFF
Optica l vignettin g issue can be cor rected from t his menu.
• BLACK LEVEL : -64 ~ 64 ( G amma level can be a djusted )
• GAMMA CORRECT : DEFAULT, 0.4 ~ 1.0 ( Gamma leve l can be adjust ed )
• DNR : Camer a noise level ca n be adjusted fr om this menu.
• DNR MODE : OFF, 2D, 3D, 2D+3D
Digita l noise reduc tion can be appl ied from this men u.
• DNR LEVEL : AUTO, LOW, MIDD LE, HIGH
Noise re duction leve l can be adjuste d from this menu .
• DNR APERTURE : 0 ~ 4 ( Motion a rtifact s tightness c an be adjusted )
* 0= Most G host Arti fact | 4= Mos t Ghost Arti fact
• CONTRAST : 0 ~ 20 ( Co ntrast level c an be adjusted )
• BRIGHTNESS : 0 ~ 20 ( Br ightness lev el can be adjus ted )
• SAT URATIO N : 0 ~ 20 ( Saturat ion level can be ad justed )
• HUE : 0 ~ 20 ( Hue le vel can be adjus ted )
• EDGE ENHANCE : 0 ~ 20 ( Imag e sharpness l evel can be adjus ted )
• AUT O SATUR ATE : OFF, LOW, MIDDLE, HIGH
Decrease saturation automatically when noisy scene is detected.
• AUTO E DGE : ON, OFF
Decrease edge enhancement (sharpness) automatically when noisy scene is detected.
• DEFAULT : See Effects menu t o default valu e.
10
Page 11
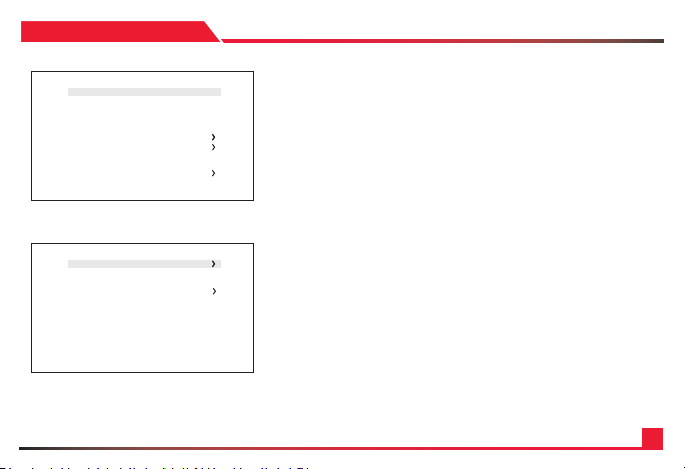
SPECIAL
SPECIAL
*DZOOM OFF
DEFOG OFF
DIS OFF
BACK LIGHT OFF
BINNING OFF
DEFECT PIXEL ON
DISP. FUNCTION
WDR OFF
FLICKER DETECT OFF
PRIVACY
HDMI MODE RGB44 4.709
RETURN
D-ZOOM
*ZOOM CONTROL
PIP OFF
PIP SIZE 1/16
PIP POSITION
DZOOM SAVE
DEFA ULT
RETURN
Camera s pecial func tions can be adju sted from SPECIAL m enu.
D ZOOM : ON, OFF
Digita l Zoom and PIP func tion can be ena bled from this m enu.
• ZOOM CONTR OL : RATIO, POSITION, R ETURN
Adjust t he digital zoo m ratio and posit ion.
Use LEF T / RIGHT button t o adjust the rat io, then press se lect.
USE LEFT / R IGHT/ UP / DOWN butt on to adjust the i mage positio n, then press sel ect.
Press se lect to exit.
• PIP : ON, OFF
Turn ON or OFF th e PIP window.
• PIP SIZE : 1/16, 1/2 5
Change t he size of PIP windo w.
• PIP POSITION : POSITI ON, RETURN
Adjust t he PIP window loc ation.
USE LEFT / R IGHT/ UP / DOWN butt on to adjust the i mage positio n,then press sel ect.
Press se lect to exit.
• DEFAULT : Set privacy zone to default value.
11
Page 12
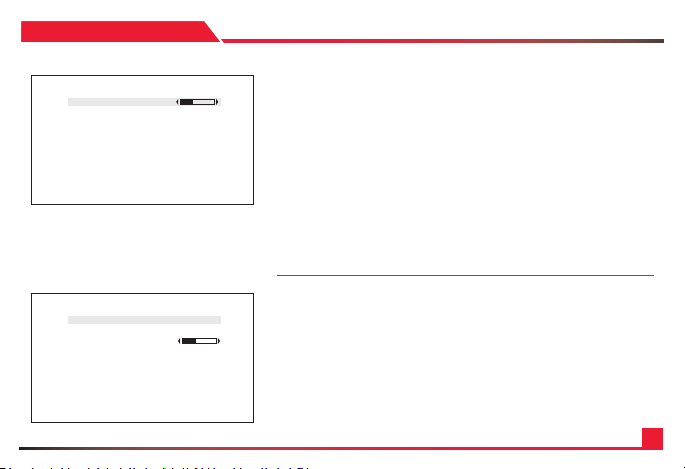
SPECIAL
DEFOG SE TUP
*STRENGTH 4
THRESHOLD
AUTO LE VEL
RETURN
BACKLIGHT - BLC
*BLC ON
SIZE/PO SITION
LEVEL 128
DISPLAY ON
DEF AULT
RETURN
DEFOG : ON, OFF, AUTO
“DEFOG” me nu improves fogg y image.
• STRENGTH : 0 ~ 16
Change d efog strengt h.
• THRESHOLD : 0 ~ 3
Thresh old value sets m inimum sensit ivity value fo r automatic def og control.
Higher va lue makes defog -on control re luctant.
• AUTO LEVE L : LOW, MID, HIGH
Auto leve l value sets max imum strengt h value for autom atic defog cont rol.
Higher va lue makes defog ef fect to be st ronger.
DWDR : ON, OFF
Wide Dy namic range ca n be adjusted fr om the sub menu.
MOTION DETECT : ON, OFF
Camer a can detect a mot ion within the s elected area s.
BACK-LI GHT : OFF, BLC, HLM ( Came ra back-light co mpensation c an be adjuste d )
BLC : OFF, ON ( BLC ena bles back ligh t compensatio n)
• SIZE/POSITION : SIZE, POS ITION, RETURN
Adjust B LC area window size .
• LEVEL : Back-l ight level compe nsation level c an be adjusted f rom this menu.
Higher le vel will compens ate more from th e selected ar ea.
• DI SPLAY : OFF, ON
BLC area dis play can be tur ned ON or OFF.
• DEFAULT : Set BLC menu to defa ult value.
12
Page 13
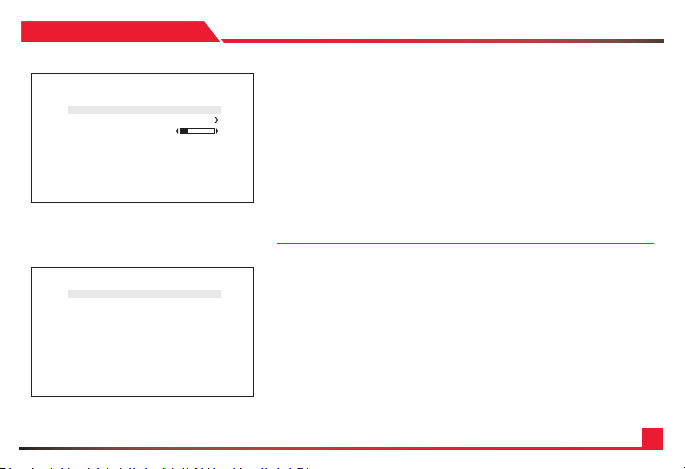
SPECIAL
BACKLIGHT - HLM
AREA O N
*AREA DISPLAY ON
SIZE/PO SITION
LEVEL 3
BLACK MASK ON
DEF AULT
RETURN
DEFECT PIX EL
*STATIC PROGRESS PRESS OK
SDPC UPDATE PRESS O K
SDPC CLEAR PR ESS OK
RETURN
HLM : OFF, ON
HLM can be adj usted.
• AREA D ISPLAY : ON, OFF
HLM ARE A DISPLAY can be tur ned ON or OFF.
• SIZE/POSITION : SIZE, POSI TION, RETURN
• Adju st BLC area window s ize.
• LEVEL : 0 ~ 20
Amount o f masking area c an be adjusted.
• BLACK MA SK : OFF, ON
Maskin g area highlight c an be turned ON or O FF.
• DEFAULT : Set HLM menu to def ault value.
BINNING : OFF, ON
Binning c an be turned ON o r OFF
DEFECT PIXEL : OFF, ON, ON (FIXED), STATIC
Defective Pixel Correction featur e can be operate d. It is turned ON b y default and
will run b oth dynamic and s tatic DPC func tion.
13
Page 14

SPECIAL
DISPLAY FUNCITON
*FREEZE OFF
MIRROR O FF
IMAGE EFFEC T OFF
ROTATIO N OFF
PICTURE STYLE OFF
PIC CONTRAST ON
PIC SATU RATION
PIC EDGE
RETURN
DISPLAY FUNCTION : OFF, ON
Adjust i mage display fe atures from thi s menu.
• FREEZE : OFF, ON
Image fr eeze can be turn ed ON or OFF.
• MIRR OR : OFF, MIRROR, V- FLIP, BOTH(H/V)
Image mir ror or ip can be op erated.
• IMAGE EF FECT : OFF, NEGATIVE, GREY MODE, REDD ISH-1 ~ 4,
BLUISH-1 ~ 4, GRE ENISH-1 ~ 4.ROTATION : OFF, ROT_L 1:1
Several c olor effec ts can be appli ed.
• RO TATION : O FF, ROT_L FULL, ROT_ L 1:1, ROT_R Full, ROT_R 1:1
Image ca n be rotated eit her left or rig ht side.
• PICT URE STYLE : OFF, STANDARD, VIVID, CLE AR, VIVID CLEA R, NEUTRA L
Diffe rent types of p icture sty le can be applie d.
FLICKER D ETECT : OFF, ON
“FLICKER D ETECT” mode prov ides a proper im age sensor fre quency
to match t he power freque ncy in order to mi nimize video ic ker.
14
Page 15
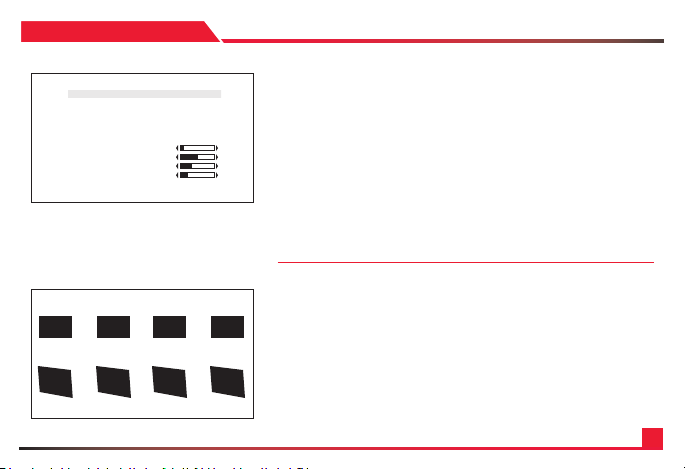
PRIVA CY
PRIVAC Y MASK
*MODE ON
TYPE SQUARE
MASK NO. MASK 1
DISPLAY ON
COLOR BLAC K
POLY PIX EL
POSITION-X 2
POSITION-Y 5
SIZE-X 20
SIZE -Y 11
DEFA ULT
RETURN
Privac y zone can be setup f rom this menu.
MODE : ON, OFF
Enable “PR IVACY ZONE” ON or OFF.
TYPE : SQUA RE, POLYGON
Selec t privacy zone s hape.
MASK NO : MA SK1 ~ MASK8
Selec t privacy zone m ask number.
DI SPLAY : ON, OFF
Turn ON or OFF th e selected pr ivacy mask zon e.
COLOR : WHITE , GREEN, BLUE, RED, CYAN, MAGENTA, YELLO W,
GRAY-1 ~ 6, MOSAIC, BL ACK.
Selec t privacy zone m ask color.
POLY SELECT : L- TOPP, L- BOTTOM, R- TOP, R-BOTTOM
Change t he shape of the po lygon by selec ting the corner o f the polygon.
POSITION-X & POSITION-Y
Change t he size of the sele cted corner f rom “POLY SELE CT” menu.
SIZE-X & SIZE-Y
Change t he size of the priv acy square.
DEFAULT
Set priv acy zone to defa ult value.
15
Page 16
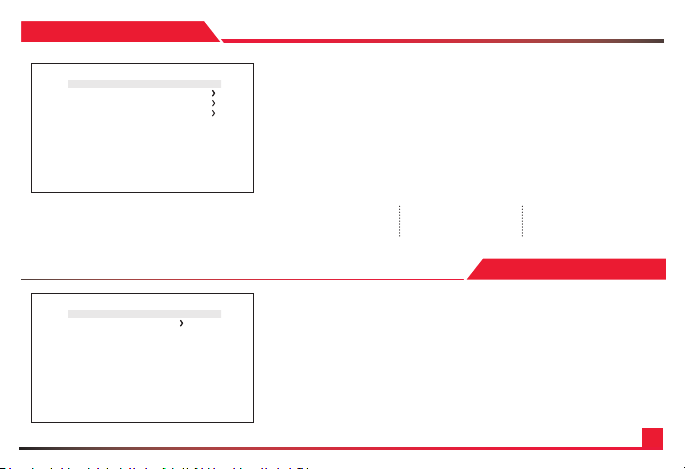
SETUP
SETUP
*CAM TITLE OFF
COMMNUCATION
SYSTEM INFO
OUTPUT FORMAT 1080P30
RETURN
RESET
*MODE FACTORY
RESET
SYSTEM INFO
SAVE AS USER
RETURN
Camera s etup can be adj usted from thi s menu.
CAM TITLE : O FF, ON
Camer a title can be tur ned ON or OFF.
COMMUNICATION : ON, OFF, AUTO ( VISCA co mmunication co ntrol can be adju sted )
• CAM ID : 0 ~ 7 ( C amera ID can be s etup )
• ID DIS PLAY : OFF, ON ( Camer a ID can be setup )
• BAU DRATE : 2400, 4800, 960 0, 19200, 38400 ( C amera baudra te can be set )
SYSTEM IN FO : ON, OFF, AUTO ( Camer a information c an be found under th is menu )
OUTPUT FORMAT : ON, OFF, AUTO ( Camera resolu tion and frame ra te can be set )
Supported formats are:
* 1080p by de fault
1080P - 60 / 59.94/50 / 30
29.97 / 25 / 24
1080I - 60 / 59.94 / 50
720P - 60 / 59.94 / 50
RESET
MODE : FACTORY, USER
Camer a will reset to fac tory defau lt or user saved va lue.
RESET :
Reset th e camera to the se lected mode.
SAVE AS USER :
Save the us er desired set ting from the m enu. Mode must b e set to User.
16
Page 17

SPECIFICATION
VIDEO
Image Sensor 1/3 inch Pro gressive CMOS
Sensor Size Diagona l 7.2mm
Effective Pixels Horizon tal: 1920, Vertical: 10 80
Pixel Size 2.75 µm x 2.75 µm
Resolution 1080p & 108 0i: 1920 x 1080, 720p & 720i: 1280 x 720
Resolution/Rate 1080 60p/59.94p/50p/30p/29.97p/25p/24p
1080 60i /59.94i/50i
720 60p/59.94p/50 p
Output HDMI 1.3a
Color Space 4:2:2 (YCb Cr) 10bit
Min. Illumination 0.2Lux (D ay), 0.1Lux (Night), 0. 005Lux
(Slow Shutte r ON)
White Balance Auto & Manual ( 9,000 K - 11,000 K )
LENS
Lens C/CS Mou nt (Default 4mm H D Lens)
AUDIO INPUT
Input 3.5mm TRS St ereo
Mic-in & L ine in over I/O Cabl e
Sample Rate 16/24 /32 Bi ts
PHYSICAL
Camera Control RS-485 VIS CA, OSD Butto n
Operation Temp 32° F - 104° F
Dimension 39mm x 39m m x 50.50mm / 1.53” x 1.53” x 1.99”
(Wit h default 4mm Le ns)
Weight 180g / 0.39l bs (With def ault 4mm Lens)
Power 6W at 12VDC (+9 - +15VDC)
*Specica tion are subjec t to change witho ut notice.
17
Page 18

QUESTIONS
Visit us:
www.aidaimaging.com/support
E-mail us:
Give us a Ca ll:
Toll Free: 844.631.8367 | Tel: 90 9.333.7421
Operating Hours: Mon-Fr i | 8:00am – 5:00p m PST
18
Page 19

Disposal of Old Appliances
1. When this crossed-out wheel bin symbol is attached to a product it means the product is covered by the European Directive 2002/96/EC.
2. All electrical and electronic products should be disposed of separately form the municipal waste stream in accordance to laws designated by the government or the local authorities.
3. The correct disposal of your old appliance will help prevent potential negative consequences for the environment and human health.
4. For more detailed information about disposal of your old appliance, please contact your city ofce, waste disposal service or the shop where you purchased the product.
This equipm ent has been tes ted and found to co mply with the li mits for a Class A di gital device, pu rsuant to par t 15 of the FCC Rules. The se limits are de signed to provi de reasonable p rotection ag ainst
harmful int erference w hen the equipm ent is operate d in a commercial en vironment. Th is equipment ge nerates, use s, and can radia te radio frequ ency energy an d, if not install ed and used in acc ordance with
the instru ction manual, m ay cause harmf ul interfere nce to radio com munications . Operation of t his equipment i n a residential a rea is likely to cau se harmful inte r reference in w hich case the us er will be requir ed
to correc t the interfer ence at his own exp ense.
19
 Loading...