

Page 1
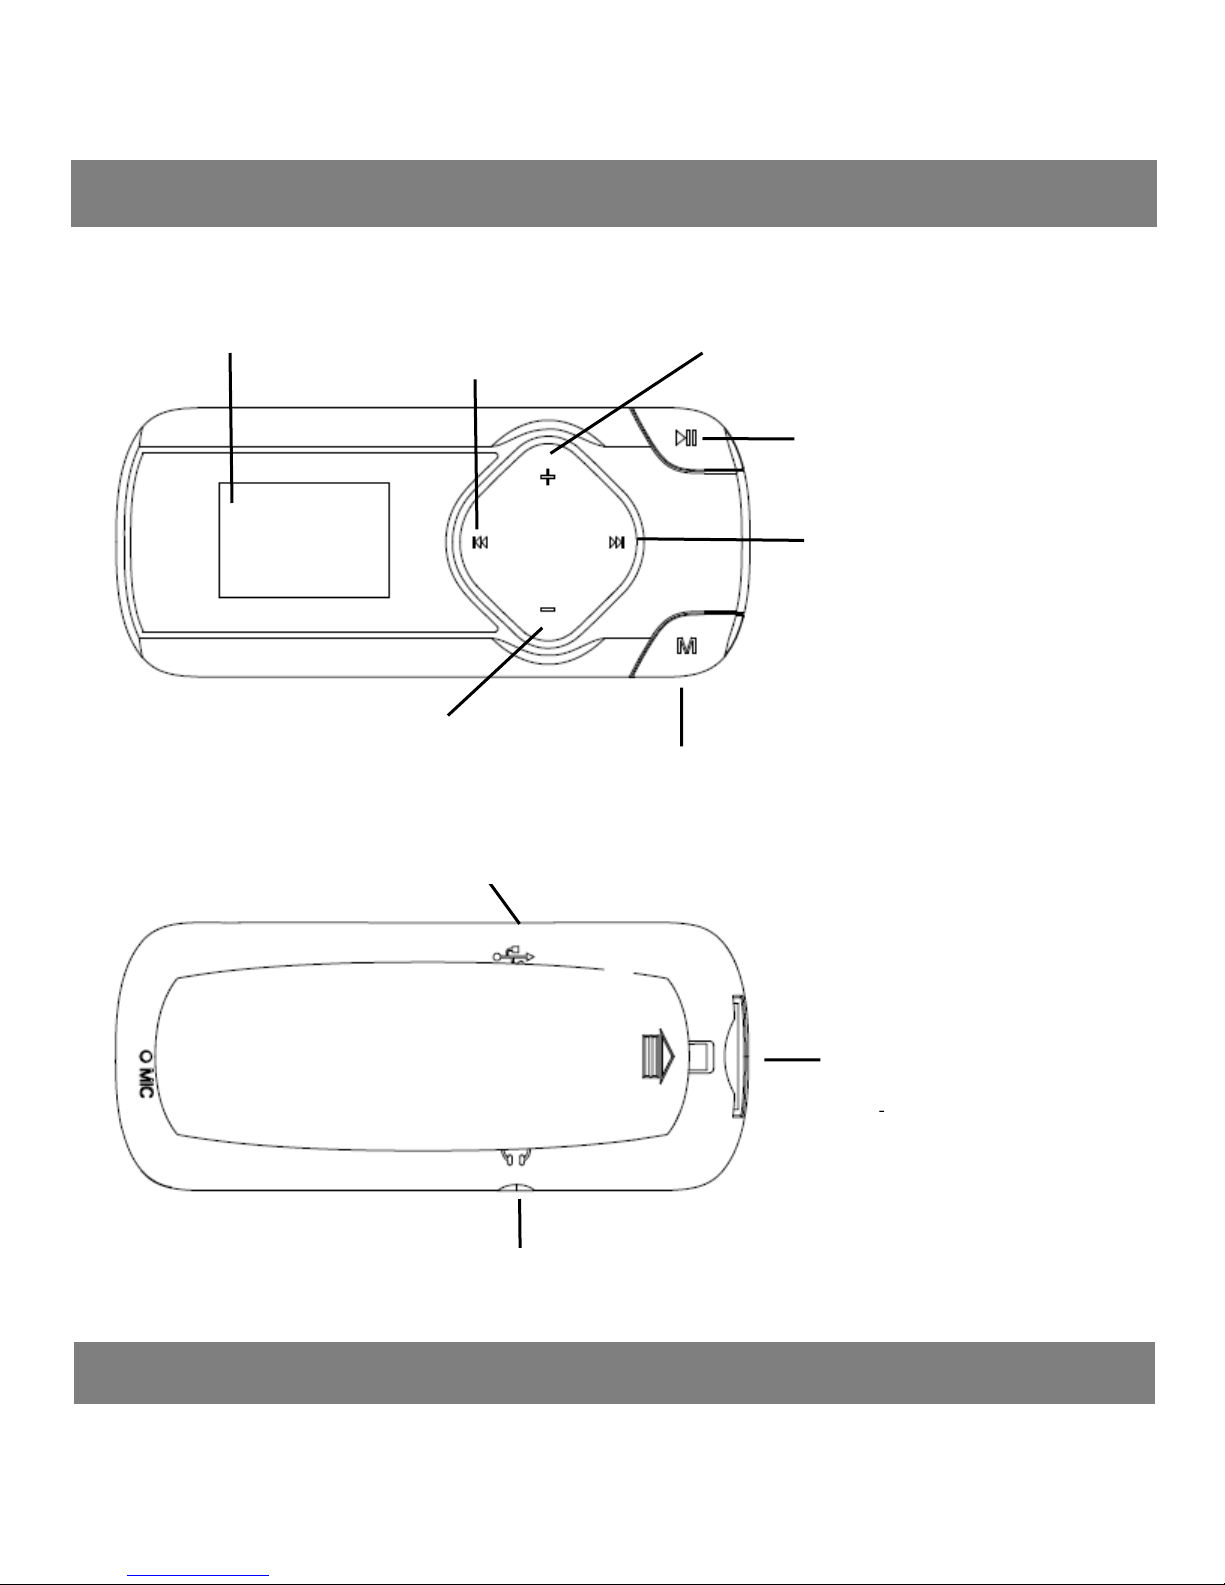
Menu button, exit to superior
VOL-
Micro SD card
Earphone Jack
Play/Pause/Power
On-off/Enter
VOL+
LCD
Previous,moving up and
fast forward playing
Unit overview
Technical Specification
R2 USER MANUAL
Next,moving down
and fast backward
playing
Micro-USB
Packaging contents:
.The player
Page 2
Basic Operation
.Earphone
Screen
0.8 inch 128*64 LCD display
Flash memory
8GB
Audio format
MP3/WMA/OGG/APE/FLAC/WAV/AAC-LC/A
CELP
Recording format
FM/MIC record and WAV
Battery
Li-polymer rechargeable 140mAh
FM frequency
87.0-108MHZ
Micro-SD card
Extend to 64GB
Micro-USB transfer
High speed USB 2.0
.USB cable
.User manual
Specification
Powering on the player
Press button and hold(about 3 seconds) to turn it on.
Turning off the player
Press button and hold(about 3 seconds) to turn it off.
Lock keys
Press both M and buttons at the same time till appear lock icon.
And key pad is locked and not working.
Unlock keys
Press both M and buttons at the same time till appear unlock
icon.And key pad work normally
Battery Charging
When the battery indicator on the screen, you must charge the device.
The device has two charge options:
a)You can charge the device via the USB connector.
b)You can also charge the device via a USB wall adapter(not supplied)
Note:The charging time should not exceed 4 hours.It is recommended
to turn off the device before charging.
Page 3
Main Menu
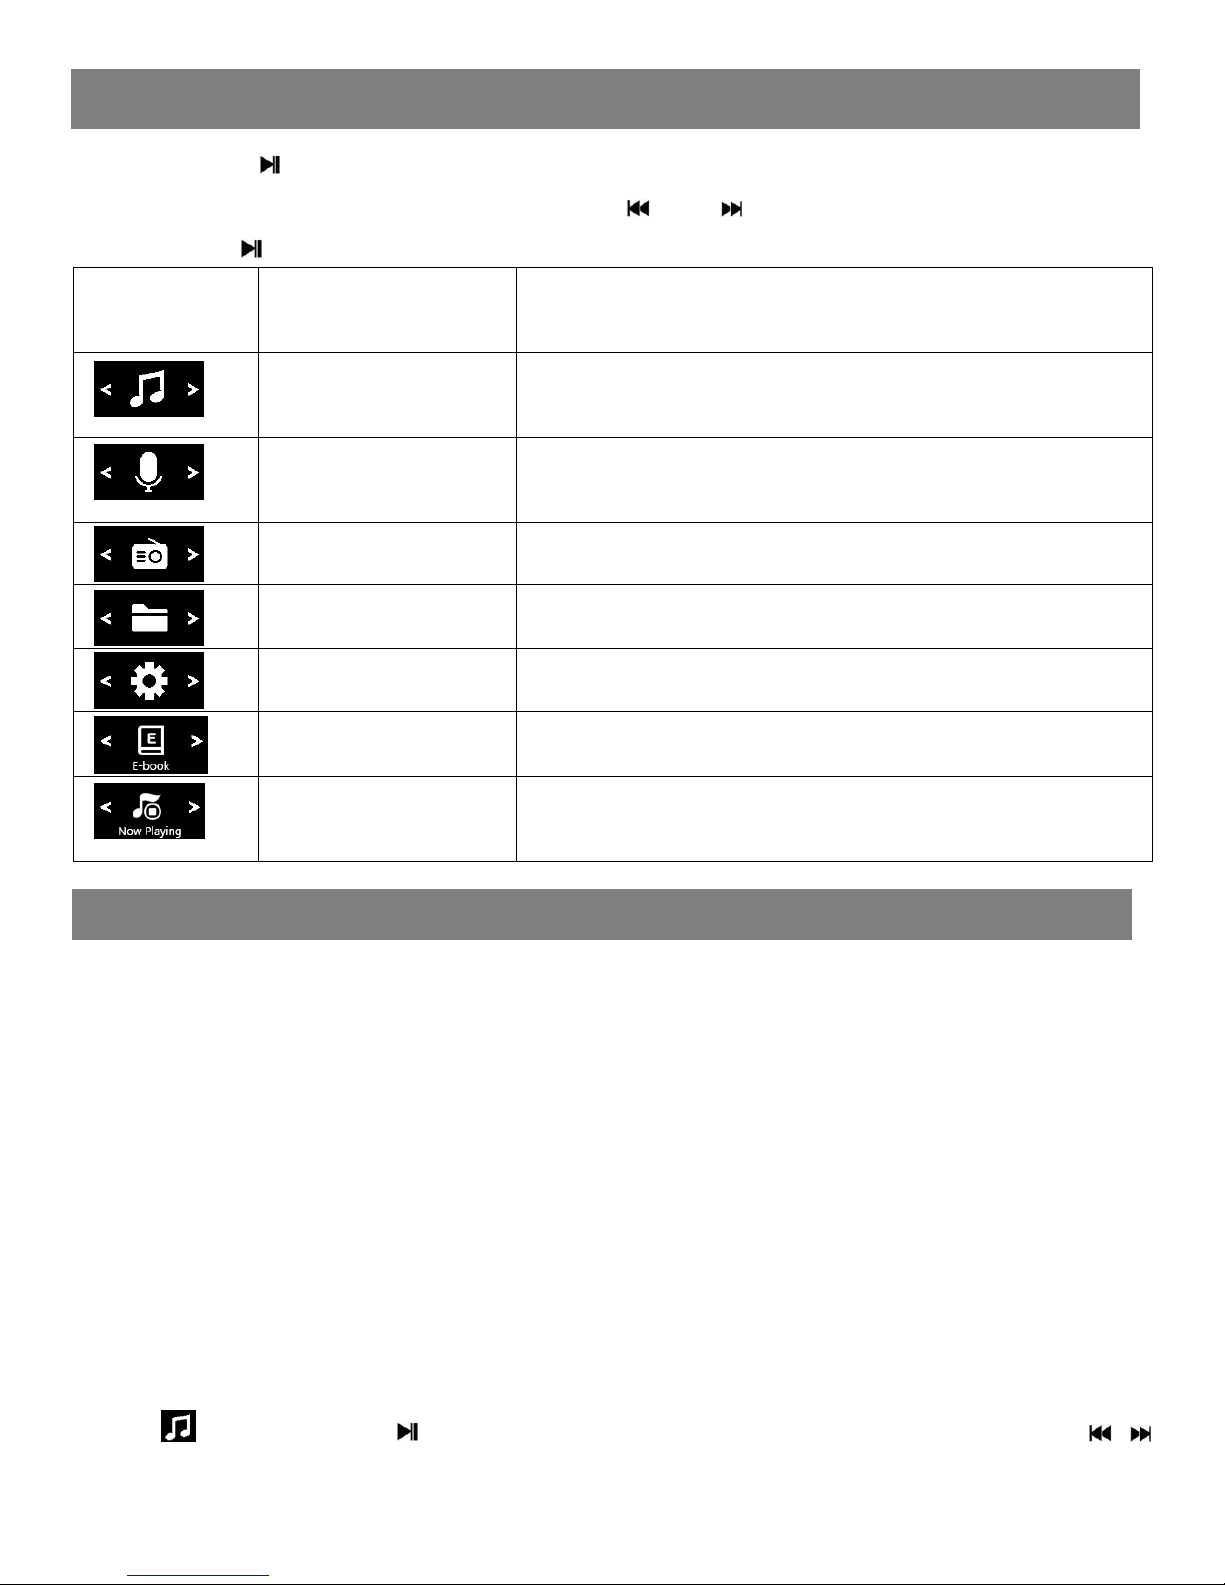
MUSIC
ICON
Main menu
name
Access to function
MUSIC
Listen to songs saved in the player or
from SD card
RECORD
Record voice by the internal
microphone and playing recording files
FM RADIO
Listen to FM radio broadcast
FOLDER
Navigation by folders
SETTING
Change the system configuration
EBOOK
Read Ebook(only for TXT format)
Now Playing
Playing music or FM radio when it is
working on backstage.
Long press to turn on the player, and long press M button to appear
5 main menus on the screen, press or to view below menu icon,
and press to confirm your choice.
Loading music
1. Connect the digital audio player to a computer using the Micro-USB
Port and a USB cable.
2. Once connected, the unit will show up on the connected computer
as if it were a connected USB thumb drive, external hard drive, or
memory card.
3. Drag and drop the desired audio files into the unit’s drive location on
the connected computer.
4. After the files are loaded onto the unit, right-click on the drive and
eject it from the computer, then disconnect the USB cable.
Play your music
Find icon, press to enter music interface ,and by pressing /
view the lists: “All songs”, “Artists”, “Albums”, “Genres”, “Playlists” and
Page 4

“Update the card data”. Press to confirm your option and start to
play your music
When the device is playing songs, long press M button to enter below
sub-menus, and press to enter the option you want.
Home
Select this option and return to main menu
Repeat
Here appears 4 options,Repeat off, Repeat 1,and Repeat All and view
playing
Shuffle
Choose On or off mode as you want
Bookmarks
It is marked by the stopping time as “hh:mm:ss”.So you can set the
stopping time before you add it for continues playing next time
conveniently.
Maximum number of bookmarks supported by each audio file is 10.
You can also cover the previous bookmark with new bookmark, and
then the old one will be replaced by the new.
You can find the bookmarks you saved with the option “Go to
bookmark” under item “Bookmarks”, and you can delete them with
the option “Delete bookmark”.
Speed
You can adjust the playback speed.
Language learning
Here appears 3 options,Repeat mode, Relay times and Relay
Interval.Press to enter the option you want
Sleep timer
When playing time is reach sleep timer you set, the player will power
off automatically
Equalizer
Here are 7 equalizers for your option, Rock, Funk, Hip Hop, Jazz,
Classical,Techno and custom.
Delete
It will show” ...(song name)” delete? Press to choose yes to delete
this song.
Page 5

FM RADIO
RECORD
Add to playlist
There are 3 options prepared for you, including “Playlist on the go [1]”,
“Playlist on the go [2]” and “Playlist on the go [3]”, you can add the
song which is playing to any one of these three as you like.
Remove from playlist
You can remove the song which is playing to any one of these three
Playlist as you like.
To create playlists by yourself
There is a free program called Media Go. It's the easiest program to use
for transferring playlists to the AGPTek. . Just create your playlists in
Media Go and then right-click its name and select 'Add playlist to X :(
Which is your MP3 player's disk) '. (You can download it at
http://mediago.sony.com/chs/download).
Note: whenever at any interface, short press M to exit and back to
superior menu.
Find the icon and press to enter voice recording. The following
list will show: Start Voice Recording, Recordings library, Storage,
Recording Format and Record Settings.
• Select a format from MP3, WAV or ACT
• Scroll to “Start Voice Recording” to start your recording
• To pause or stop recording, tap the central icon at the bottom
• To play, go to “Recordings Library” and play as music
Find the icon and press to enter radio mode. then a related list
will show including “Station list”, “Manual tune”, “Auto tune” and “FM
recording”.
Station list
The frequency points of radio station are displayed with 30 frequency
points reserved at most.
Manual tune
Press to enter manual search mode, you can search programs
Page 6

FOLDER
SETTING
EBook
manually through pressing / button.
Auto tune
Press to enter Auto tune mode, it will show “Do you want to autotune ”, press to confirm Yes or No. If choose Yes, it will be
searching automatically and automatically save searched station in
“
Station list”.
FM recording
When listening to the broadcast station program, long press M button
to appear sub-menu, including Home,Start FM radio recording,Clear
preset,Auto tune and Tuner Region.
Note: the player is defaulted with command band, if you are in Japan,
you need to change to Japan Band.
Find the icon and press to enter folder menu. Here you can
check files you have stored on the device.
When you play music under “Folder”, it will shuffle songs by folder if
you turn shuffle on.
Find the icon and press to enter. Here you can find all of the
ebooks you have stored on the device. Select and press to read the
ebook.
Find the icon and press to access the following settings:
“Backlight timer”, “Key tone”, “Sleep timer”,“Date and time”, “Language”,
“Information”“Format device”, “Factory settings”.
When playing time is reach sleep timer you set, the player will
power off automatically
Choose the language according to your need
See information about your player under “Information”
Set the backlight time of your player
Format the device or restore to factory setting
If you have any question on this player, please contact with
Page 7

support@agptek.com.
 Loading...