

Page 1
Agilent Technologies
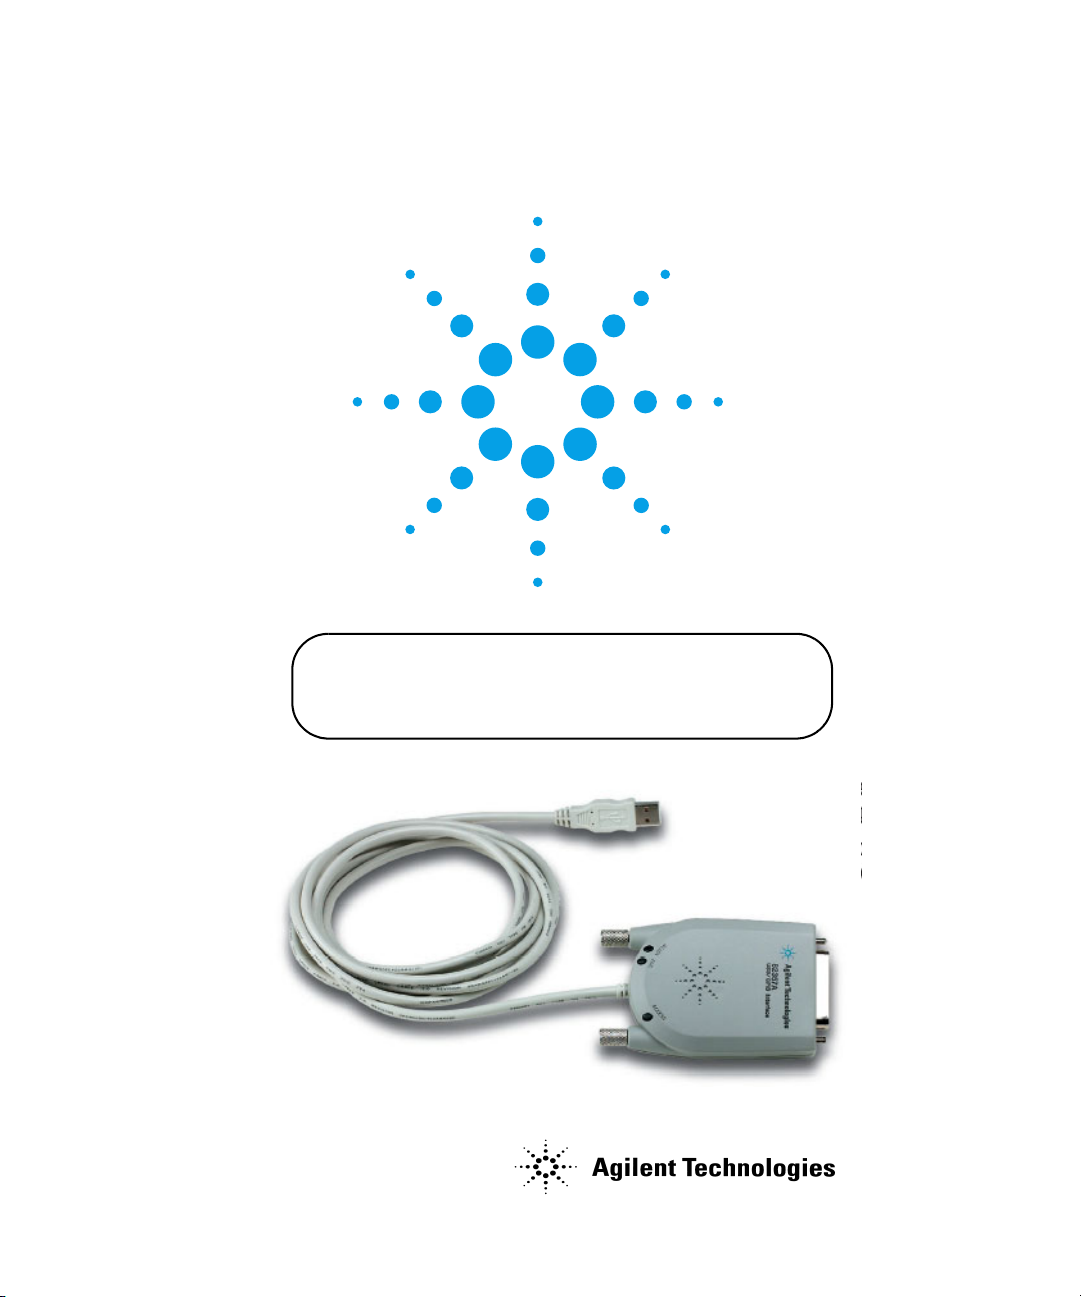
82357A USB/GPIB Interface for Windows
IMPORTANT
Install Agilent IO Libraries Suite Software
Before Connecting 82357A Interface to PC
Getting Started
Page 2

82357A General Information
82357A Related Documentation. See the following documents for
information related to the 82357A. All documents are available in
electronic format by clicking the circled IO icon on the Windows taskbar
and selecting D
- Agilent 82357A USB/GPIB Interface Converter User's Guide describes
the 82357A and provides installation and troubleshooting information.
- Agilent IO Libraries Suite Getting Started Guide provides a description
of the Agilent IO Libraries and utilities, and detailed installation
information.
- Agilent IO Libraries Suite Online Help provides detailed usage
information on the Agilent IO Libraries Suite utilities, including
Connection Expert.
- Agilent VISA User's Guide describes the Agilent Virtual Instrument
Software Architecture (VISA) library.
- Agilent SICL User's Guide for Windows describes the Agilent Standard
Instrument Control Library (SICL) for Windows.
ocumentation.
-Go to http://www.agilent.com/find/82357A for additional information
on the 82357A.
Contacting Agilent
Americas Call Center: 1-800-829-4444
World-Wide Web with Country-Specific Telephone Numbers:
http://www.agilent.com/find/assist
Copyright © 2003-2005, Agilent Technologies, Inc.
*82357-90104*
Part Number 82357-90104
Printed in Malaysia E0105
Page 3

1 Before You Install the 82357A
Check Your Shipment Items. Verify that you received the following items
in your shipment of the 82357A USB/GPIB Interface Converter:
• Agilent 82357A USB/GPIB Interface Converter
• Automation-Ready CD with Agilent IO Libraries Suite
• 82357A USB/GPIB Interface User's Guide
• Software License Agreement
If items are missing or damaged, contact Agilent Technologies.
See “General Information” on this poster for telephone and Web contact
information.
Check Your PC Operating System. To install the 82357A USB/GPIB
Converter, your PC operating system must be one of the following:
Windows XP Professional, Windows 2000, Windows Me, or Windows 98
(SE).
WAIT to connect the 82357A to your PC.
(You will make the connection in Step 3.)
Page 4

2 Install Agilent IO Libraries Suite
Insert the CD. Turn on your PC and insert the Automation-Ready CD with
Agilent IO Libraries Suite into the CD-ROM drive. If the installer is not
automatically activated, click Start > Run and type
<drive>:autorun\auto.exe
Agilent Automation-
Ready CD
Install the Libraries. When the Agilent IO Libraries Suite window appears,
follow the on-screen instructions to install the libraries. Check the box to
run Agilent Connection Expert when the installation is complete.
Look for Circled IO Icon. After the libraries are installed, a circled IO icon
is displayed on the Windows taskbar in the bottom-right corner of the
screen. You can click the icon to manually run I/O configuration utilities
and to display online documentation. It is not necessary to use the icon at
this time.
Page 5

3 Connect 82357A Interface
Plug the 82357A into a USB Port. Plug the 82357A USB cable into an
available USB port on your PC or on a supported USB hub. To connect to
USB hubs, see the 82357A USB/GPIB Interface Converter User's Guide. It
is not necessary to connect the 82357A to GPIB instruments at this time.
READY LED
Connect to USB Port
FAIL LED
USB Cable
ACCESS LED
82357A
Observe the 82357A LEDs. Observe the three LEDs on the 82357A. Initially,
only the red FAIL LED should be ON. After 10 seconds, or after you have
completed the Plug and Play dialogs (see below), all three LEDs should be
ON to show that the 82357A has been installed, but is not yet configured
for use with the Agilent IO Libraries. The 82357A will be configured in Step
4.
If any LED is OFF after 10 seconds and after all Plug and Play dialogs are
complete, STOP. See the 82357A USB/GPIB Interface Converter User's
Guide for information.
Observe Windows Plug and Play Manager Displays. After the 82357A is
plugged into a USB port, Windows Plug and Play Manager dialog boxes may
appear. Observe the dialog boxes and take actions as required. See the
82357A USB/GPIB Interface Converter User's Guide for information. Then,
go to Step 4 - Configure 82357A Interface.
Page 6

4 Configure 82357A Interface
Observe the Agilent Connection Expert. At this time, the Agilent
Connection Expert window should refresh. If it does not refresh
automatically, click the Refresh All button. The 82357A will appear in the
Connection Expert explorer as a USB/GPIB interface.
Configure the 82357A. Once you see the 82357A displayed in Connection
Expert, it has been configured and can be used for programming. At this
time, only the green READY LED should remain ON.
To edit the configuration settings, click Change Properties... in the
detail pane on the right side of the window.
Page 7

5 Connect GPIB Instruments
Connect the 82357A to GPIB Instruments. Connect one or more GPIB
instruments (14 instruments maximum) to the GPIB connector on the
82357A as shown.
Single Instrument Connections
USB Cable
ct to USB Port
Multiple Instrument Connections
USB Cable
USB Port
82357A
GPIB Cables
82357A
GPIB Instrument 1
GPIB Instrument
GPIB Instrumen
GPIB Instrument
GPIB Instrument 2
GPIB Instrument 3
Page 8

6 Program Instruments via 82357A
Use Interactive IO to Communicate with Instruments. After the 82357A
has been configured and connected to GPIB instruments, you can use
Interactive IO to establish communication between your PC and GPIB
instruments. To run Interactive IO for an IEEE-488.2 compliant instrument:
1. Click the instrument's icon in the Connection Expert window.
2. Click Send Commands To This Instrument to display Interactive IO.
3. With the default command, *IDN?, displayed in the text box, click the
Send & Read button.
4. The instrument identification string should appear.
5. Repeat Steps 1 - 4 for the next instrument.
Program GPIB Instruments (Optional). After communication has been
established, you can program your GPIB instruments using VISA, VISA
COM, or SICL. See 82357A General Information on this poster for
applicable documentation.
Page 9

Agilent Technologies
82357A USB/GPIB Interface for Windows
はじめにお読み
ください
重要
Agilent IO Libraries Suiteソフトウェアをインストール
してから82357A インタフェースをPC に接続してください
Page 10

82357A の概要
82357Aの関連マニュアル。 82357Aについては、以下のマニュアルを参照してください。
Windowsタスクバーにある丸で囲んだ[IO]のアイコンをクリックして[D
を選択すると、すべてのマニュアルを電子フォーマットで見ることができます。
- 『Agilent 82357A USB/GPIB Interface Converter User's Guide』では、82357Aについて説明
し、インストールおよびトラブルシューティングに関する情報を提供しています。
- 『Agilent IO Libraries Suite Getting Started Guide』では、Agilent IO Librariesとユーティ
リティについての説明と、詳細なインストール情報を提供しています。
- 『Agilent IO Libraries Suite Online Help』では、Connection ExpertなどのAgilent IO
Libraries Suiteユーティリティの詳細な使い方を説明しています。
- 『Agilent VISA User's Guide』では、Agilent Virtual Instrument Software Architecture
(VISA)ライブラリについて説明しています。
- 『Agilent SICL User's Guide for Windows』では、Agilent Standard Instrument Control
Library(SICL)for Windowsについて説明しています。
- 82357Aに関するその他の情報は、http://www.agilent.com/find/82357Aで入手するこ
とができます。
ocumentation]
計測お客様窓口 0120-421-345
(0426-56-7832)
各国の電話番号を記載したWebサイト:
http://www.agilent.com/find/assist
Copyright © 2003-2005, Agilent Technologies, Inc.
*82357-90104*
カタログ番号82357-90104
Printed in Malaysia E0105
Page 11

1 82357A をインストールする前に
箱の内容物を確認してください。 82357A USB/GPIB Interface Converterの箱には以下が同
梱されています。
• Agilent 82357A USB/GPIB Interface Converter
• Automation-Ready CD with Agilent IO Libraries Suite
•
『
82357A USB/GPIB Interface User's Guide
•
ソフトウェア使用許諾書
足りないものや破損が見つかった場合、Agilent Technologiesにご連絡ください。
連絡先については、本書の「82357Aの概要」をご覧ください。
』
PCのオペレーティング・システムをチェックしてください。 82357A USB/GPIB Converter
をインストールするには、PCのオペレーティング・システムがWindows XP Professional、
Windows 2000、Windows Me、Windows 98(SE)のいずれかでなければなりません。
82357AはまだPCに接続しないでください
(接続は手順3で行います)。
Page 12

2 Agilent IO Libraries Suite をインストールする
CDを挿入します。 PCの電源を投入して、Automation-Ready CD with Agilent IO Libraries Suite
をCD-ROMドライブに挿入します。インストーラが自動的に起動しない場合は、[スター
ト] > [ファイル名を指定して実行]をクリックして<ドライブ>:autorun\auto.exeと入力
します。
Agilent Automation-
Ready CD
ライブラリをインストールします。 Agilent IO Libraries Suiteのウィンドウが表示された
ら、画面上の指示に従ってライブラリをインストールします。インストールが終了し
たら、ボックスをチェックしてAgilent Connection Expertを実行します。
丸で囲んだ[IO]のアイコンを探します。 ライブラリをインストールすると、画面右下
コーナにあるWindowsタスクバーに丸で囲んだ[IO]のアイコンが表示されます。このア
イコンをクリックすると、I/O設定ユーティリティを手動で起動したり、オンライン・
マニュアルを表示したりすることができます。ここではこのアイコンを使用する必要
はありません。
Page 13

3 82357A インタフェースを接続する
82357AをUSBポートに差し込みます。 82357AのUSBケーブルを、PCまたはサポートされ
ているUSBハブの利用可能なUSBポートに差し込みます。USBハブとの接続について
は、『82357A USB/GPIB Interface Converter User's Guide』を参照してください。ここでは
82357AをGPIB機器に接続する必要はありません。
READY LED
Connect to USB Port
FAIL LED
USBࠤࡉ࡞
ACCESS LED
82357A
82357AのLEDに注目します。 82357Aにある3 つのLEDに注目します。最初は赤色のFAIL
LEDのみが点灯しています。10秒経過するか、プラグアンドプレイダイアログ(下記
参照)を終了すると、3つのLEDがすべて点灯します。これは、82357Aがインストール
されているが、まだAgilent IO Librariesで使用できるように設定されていないことを示
します。82357Aの設定は、手順4で行います。
10秒経過し、プラグ・アンド・プレイ・ダイアログをすべて終了しても点灯
しないLEDがある場合は、作業を中止してください。詳細については、
『82357A USB/GPIB Interface Converter User's Guide』を参照してください。
Windowsプラグ・アンド・プレイ・マネージャの画面に注目します。 82357A を USB
ポートに差し込むと、Windowsプラグ・アンド・プレイ・マネージャのダイアログ・
ボックスが表示されることがあります。ダイアログ・ボックスをよく見て、必要に応
じた操作を行ってください。詳細については、『82357A USB/GPIB Interface Converter
User's Guide』を参照してください。その後、「手順4 - 82357Aインタフェースを設定す
る」に進みます。
Page 14

4 82357A インタフェースを設定する
Agilent Connection Expertを見てください。 この時点で、Agilent Connection Expertウィン
ドウが更新されるはずです。自動的に更新されない場合は、[Refresh All]ボタンをク
リックします。Connection Expertエクスプローラに82357AがUSB/GPIBインタフェースと
して表示されます。
82357Aを設定します。 Connection Expertに82357Aが表示されたら、設定が終了し、プロ
グラミングに使用できる状態になっています。この時点では、緑色のREADY LEDだけ
が点灯しているはずです。
設定を編集するには、ウィンドウの右側にある詳細枠で[Change Properties...]をクリッ
クします。
Page 15

5 GPIB 機器を接続する
82357AをGPIB機器に接続します。 図のように、1個または複数個のGPIB機器(最大14個)
を82357AのGPIBコネクタに接続します。
単一機器の接続
USBࠤࡉ࡞
複数機器の接続
USBࠤࡉ࡞
82357A
GPIBࠤࡉ࡞
82357A
GPIBᯏེ
GPIB Instrument
GPIBᯏེ1
GPIBᯏེ2
GPIBᯏེ3
Page 16

6 82357A経由で GPIB 機器をプログラミングする
インタラクティブI/Oを使用してGPIB機器と通信します。 82357Aを設定してGPIB機器
に接続すると、インタラクティブI/Oを使用してPCとGPIB機器の間の通信を確立する
ことができます。IEEE-488.2準拠の機器に対してインタラクティブI/Oを動作させるに
は、以下の手順に従ってください。
1. Connection Expertウィンドウで機器のアイコンをクリックします。
2. [Send Commands To This Instrument]をクリックしてインタラクティブI/Oを表示します。
3. テキスト・ボックスに表示されているデフォルトのコマンド*IDN?を使って、[Send & Read]
をボタンをクリックします。
4. 機器の識別文字列が表示されます。
5. 次の機器に対して手順1~4を繰り返します。
GPIB機器をプログラミングします(任意)。 通信が確立すると、VISA、VISA COM、SICL
を使用してGPIB機器をプログラミングすることができます。該当するマニュアルにつ
いては、本書の「82357Aの概要」を参照してください。
 Loading...