

Page 1
VisiTrigger Quick Reference
This covers:
• Using Trigger Functions
• Editing Trigger Sequence Levels
• Storage Qualification
• Intermodule Triggering
s1
Agilent Technologies
Printed in the USA
Manual Part Number
16715-92004, May 2000
*16715-92004*
*16715-92004*
© Copyright Agilent Technologies 1999-2000
All Rights Reserved
Page 2
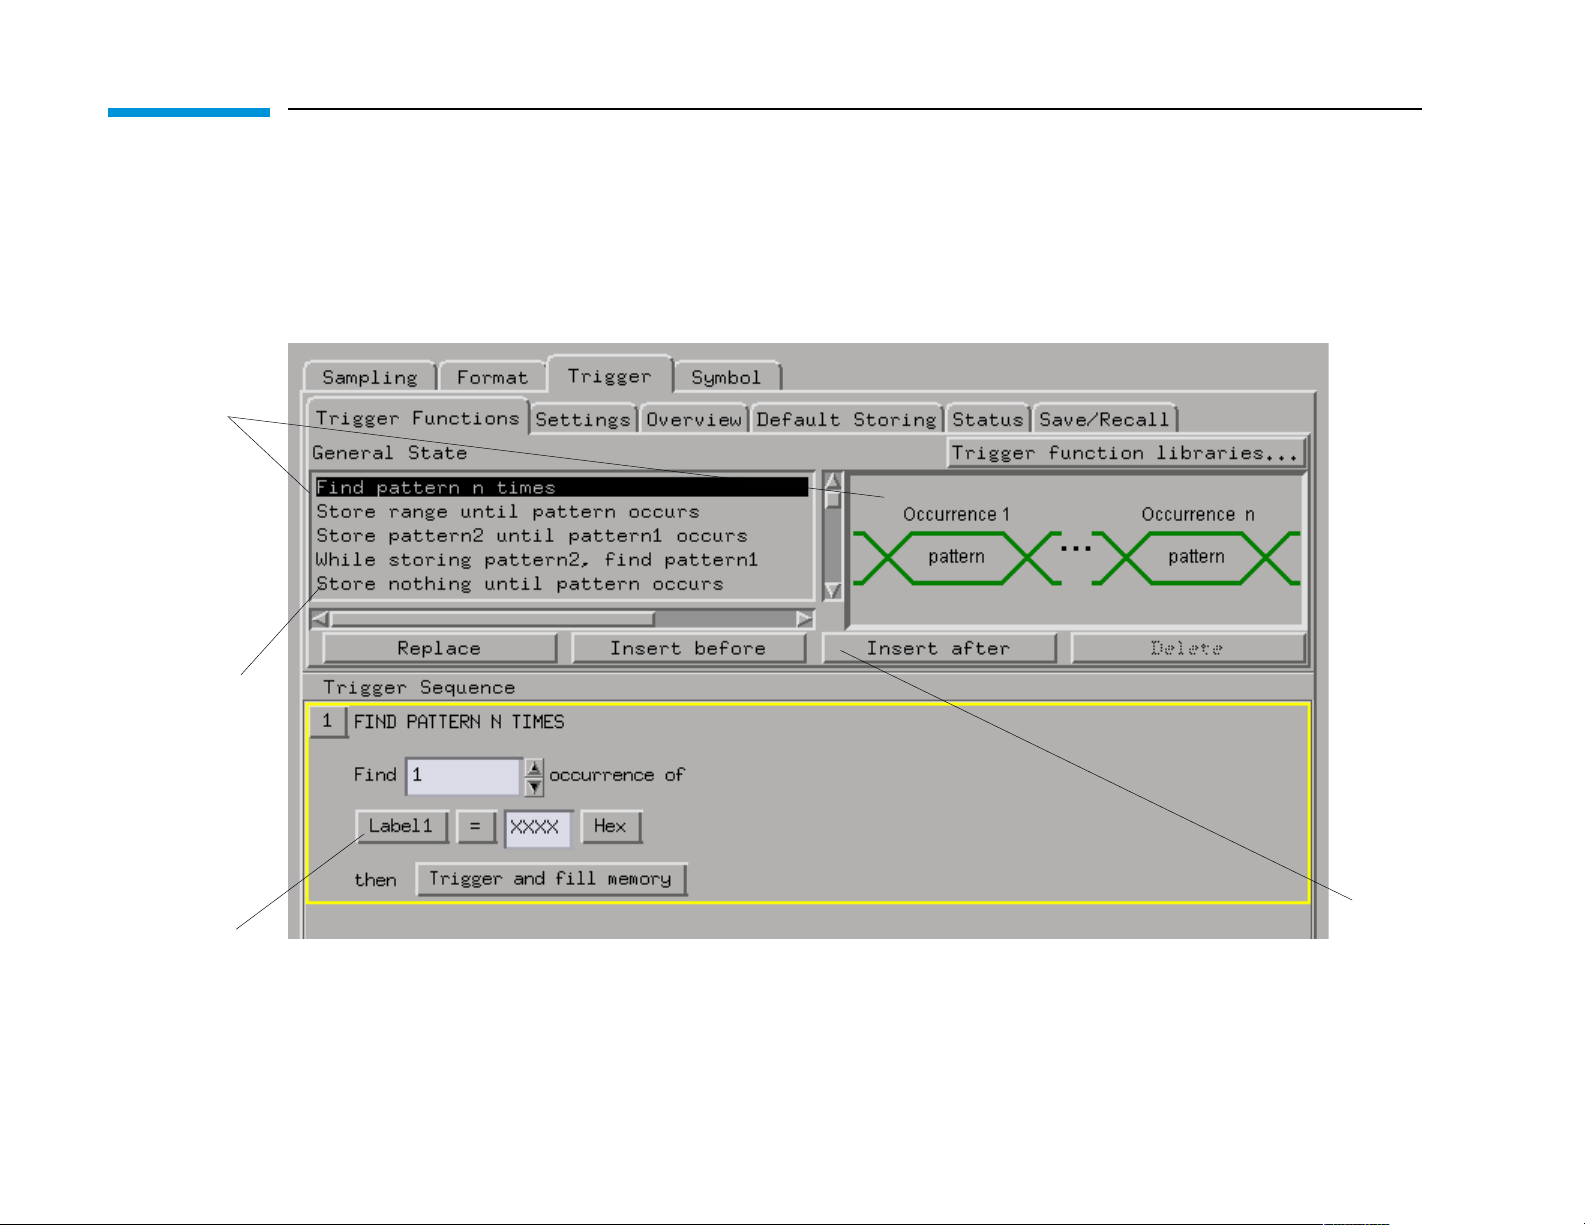
To see the
matching graphic,
single-click a
function.
To replace the
selected sequence
level, double-click a
function.
The advanced
functions are at the
bottom of the list.
Use them for multiway branching,
timers and
counters.
Using Trigger Functions
Click here and
select Replace
label.. to change
the label. Select
Insert label to
create an AND.
These buttons
use the
currently
selected
function.
2
Page 3
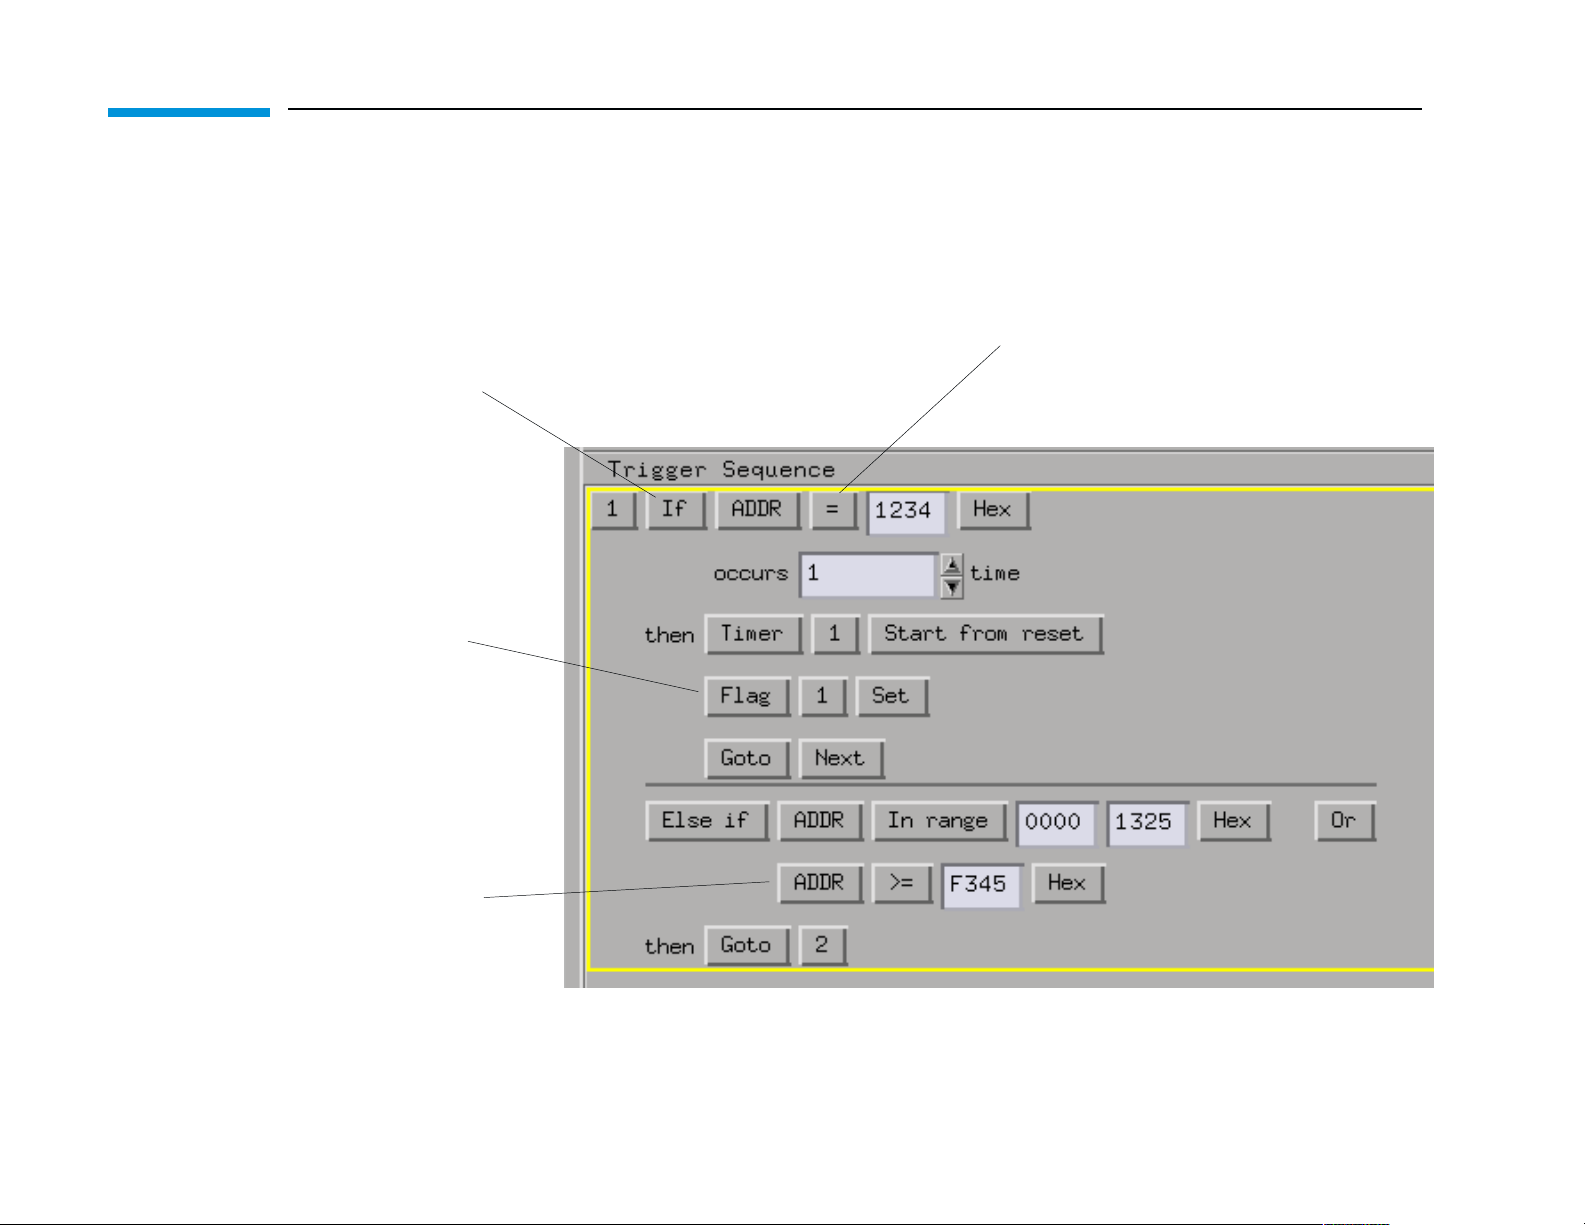
Editing Trigger Sequence Levels
General rule: Click on a button to get a list of options.
Click here and select
Insert Branch to add
another branch.
Multiple actions are
allowed in each
branch. Click here and
select Insert action
to add another action.
Click here to change the operator
to equals, edge, range, >, etc.
To create an AND/OR,
click here and select
Insert event. This
replaces the Combo
dialog.
Multiple branches, timers, counters
and flags are only available in
advanced functions.
3
Page 4
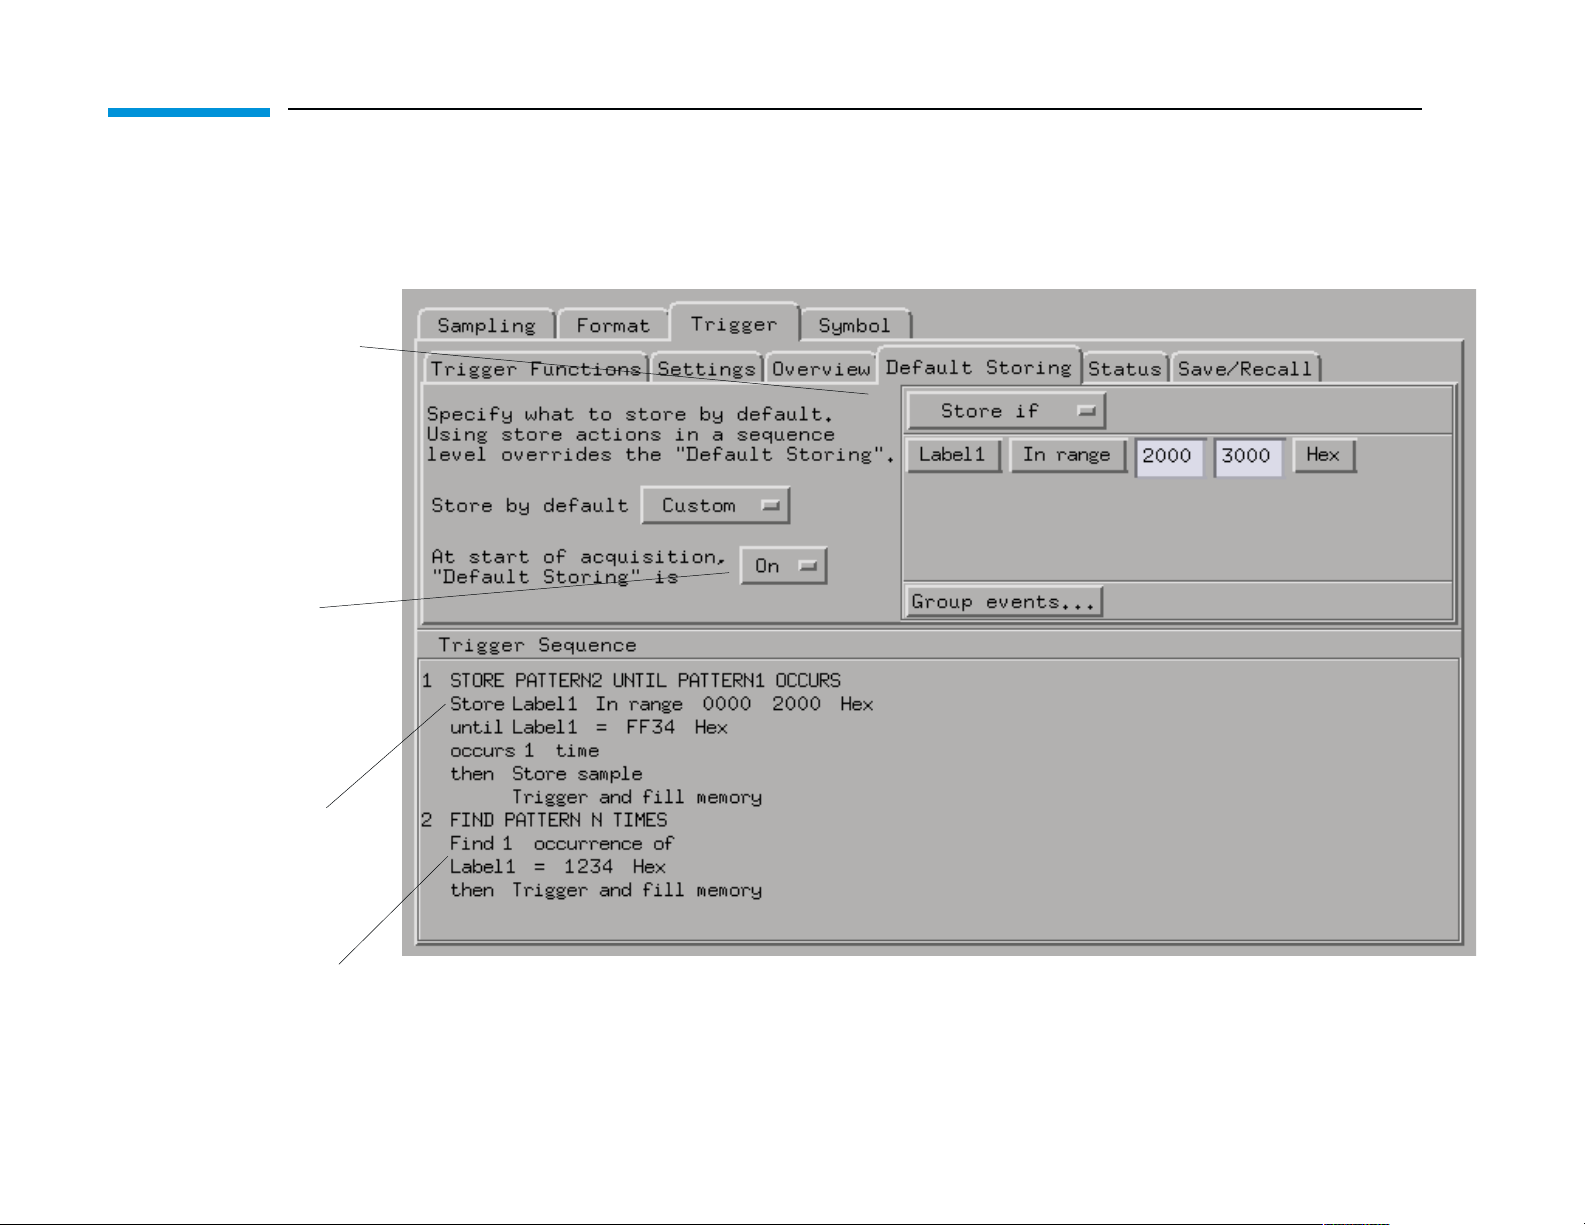
Storage Qualification
Default Storing means unless
a sequence level says
otherwise, this is what to
store. This eliminates the need
to specify storage for each
sequence level.
There are actions to turn
default storing On and Off.
This overrides the default
storing. This function is the
same as the While Storing
macro in previous versions.
This sequence level doesnt
specify what is stored, so the
Default Storing applies.
4
Page 5
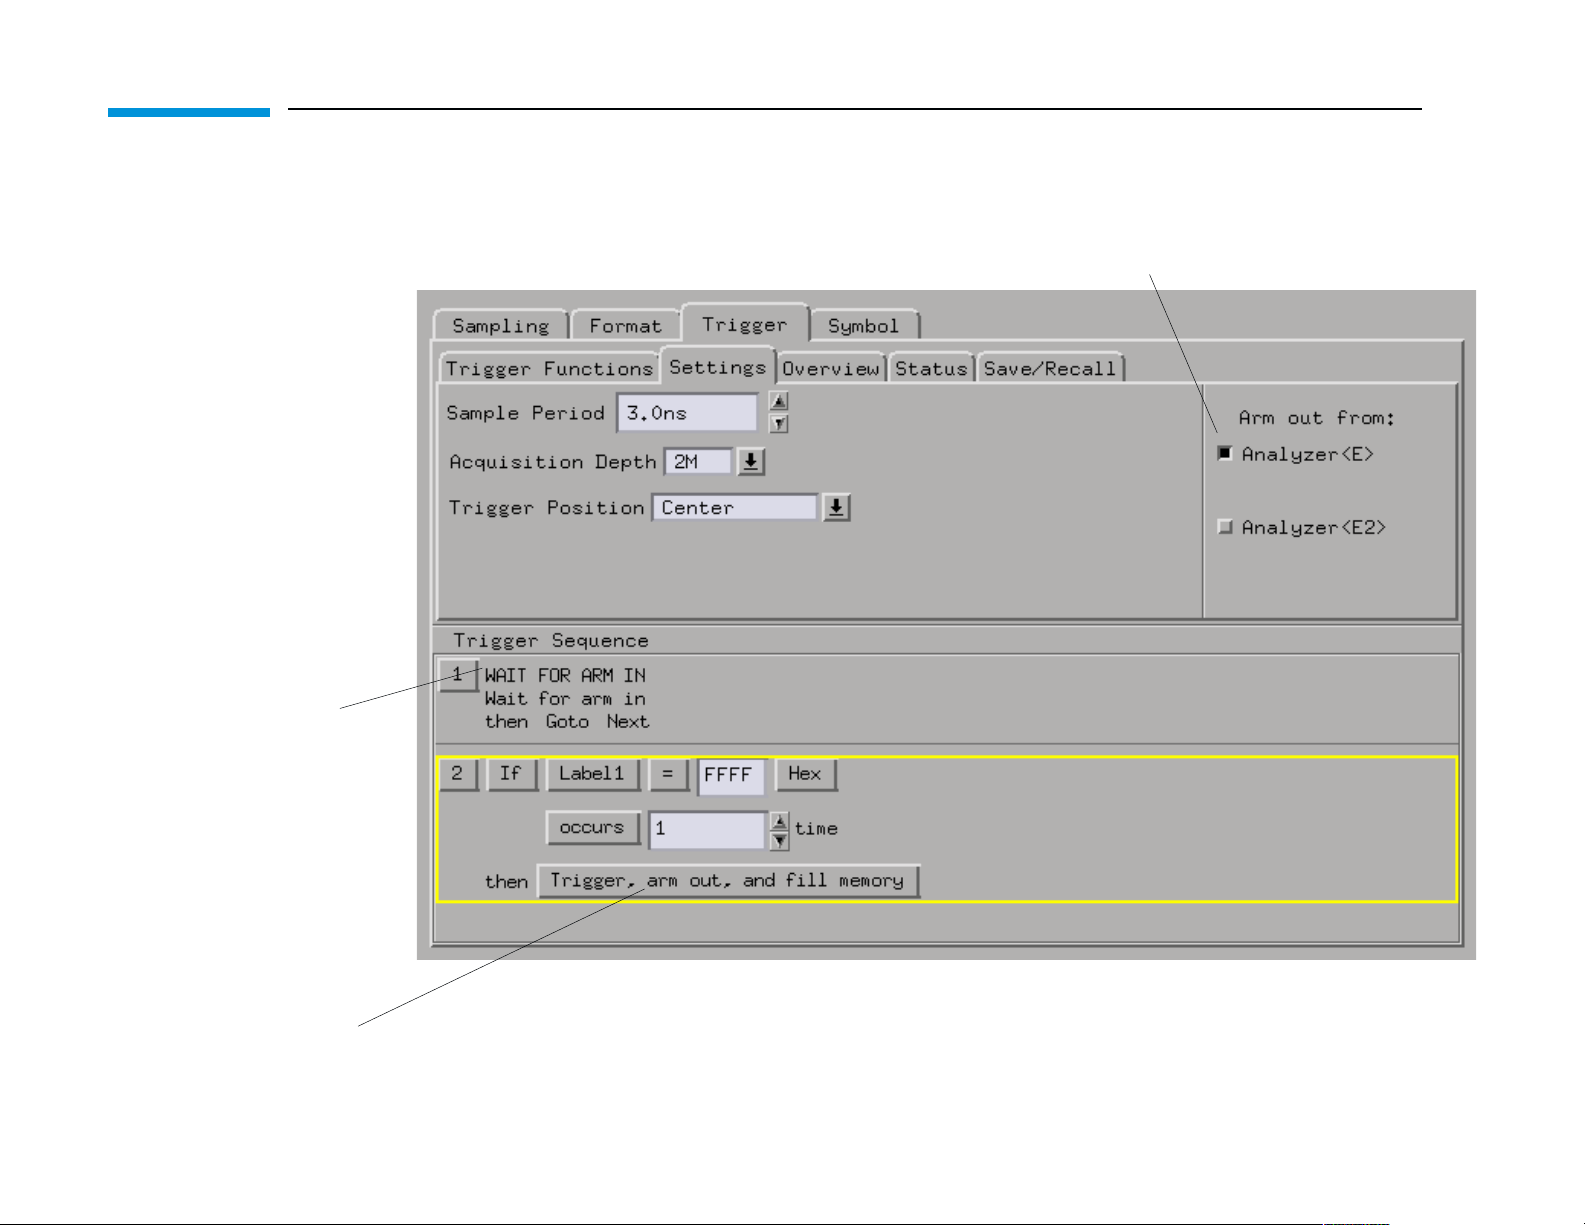
Intermodule Triggering
The Intermodule dialog still
controls the arming order. It is
easier if the arming order is set
up before specifying the triggers
for each module.
Theres a Wait for Arm In
trigger function. Use it to
specify which sequence level
is to wait for the arm in
signal.
Specify which analyzer is to send the arm out signal. This
only appears if both analyzers in a module are active.
Arm out signals are sent when
this module triggers. This is
set up in the Intermodule
dialog.
5
Page 6

Summary
• Trigger functions are the simplest way to set up a trigger.
• Click on a trigger function in the list; then, click on the “Replace”, “Insert Before”, or “Insert
After” buttons. Double-clicking a function is a short cut for “Replace”.
• To create an “AND”, click on the label button and select “Insert”. This replaces the combo
dialog.
• “While storing” becomes “Store pattern until pattern occurs”.
• Within each branch, multiple actions are allowed, one of which must be a Go To or Trigger
action.
• Advanced functions are located at the bottom of the list. Use them for multiple branches,
timers, flags, and global counters.
• The Arming Control dialog has been replaced by the trigger functions “Wait for Arm in” and
“Wait for other analyzer to trigger”.
6
 Loading...