


User Interface Changes
for HP 16600A/16700A-series logic analysis
systems - Version A.01.40.00 and higher
This covers:
• Sampling Tab
• Setting Up State Mode Clocks
• Format Tab
• Trigger Tab
Hewlett-Packard Company
Printed in the USA
Manual Part Number
B3760-92002, December 1999
*B3760-92002*
*B3760-92002*
© Copyright Hewlett-Packard Company 1999
All Rights Reserved
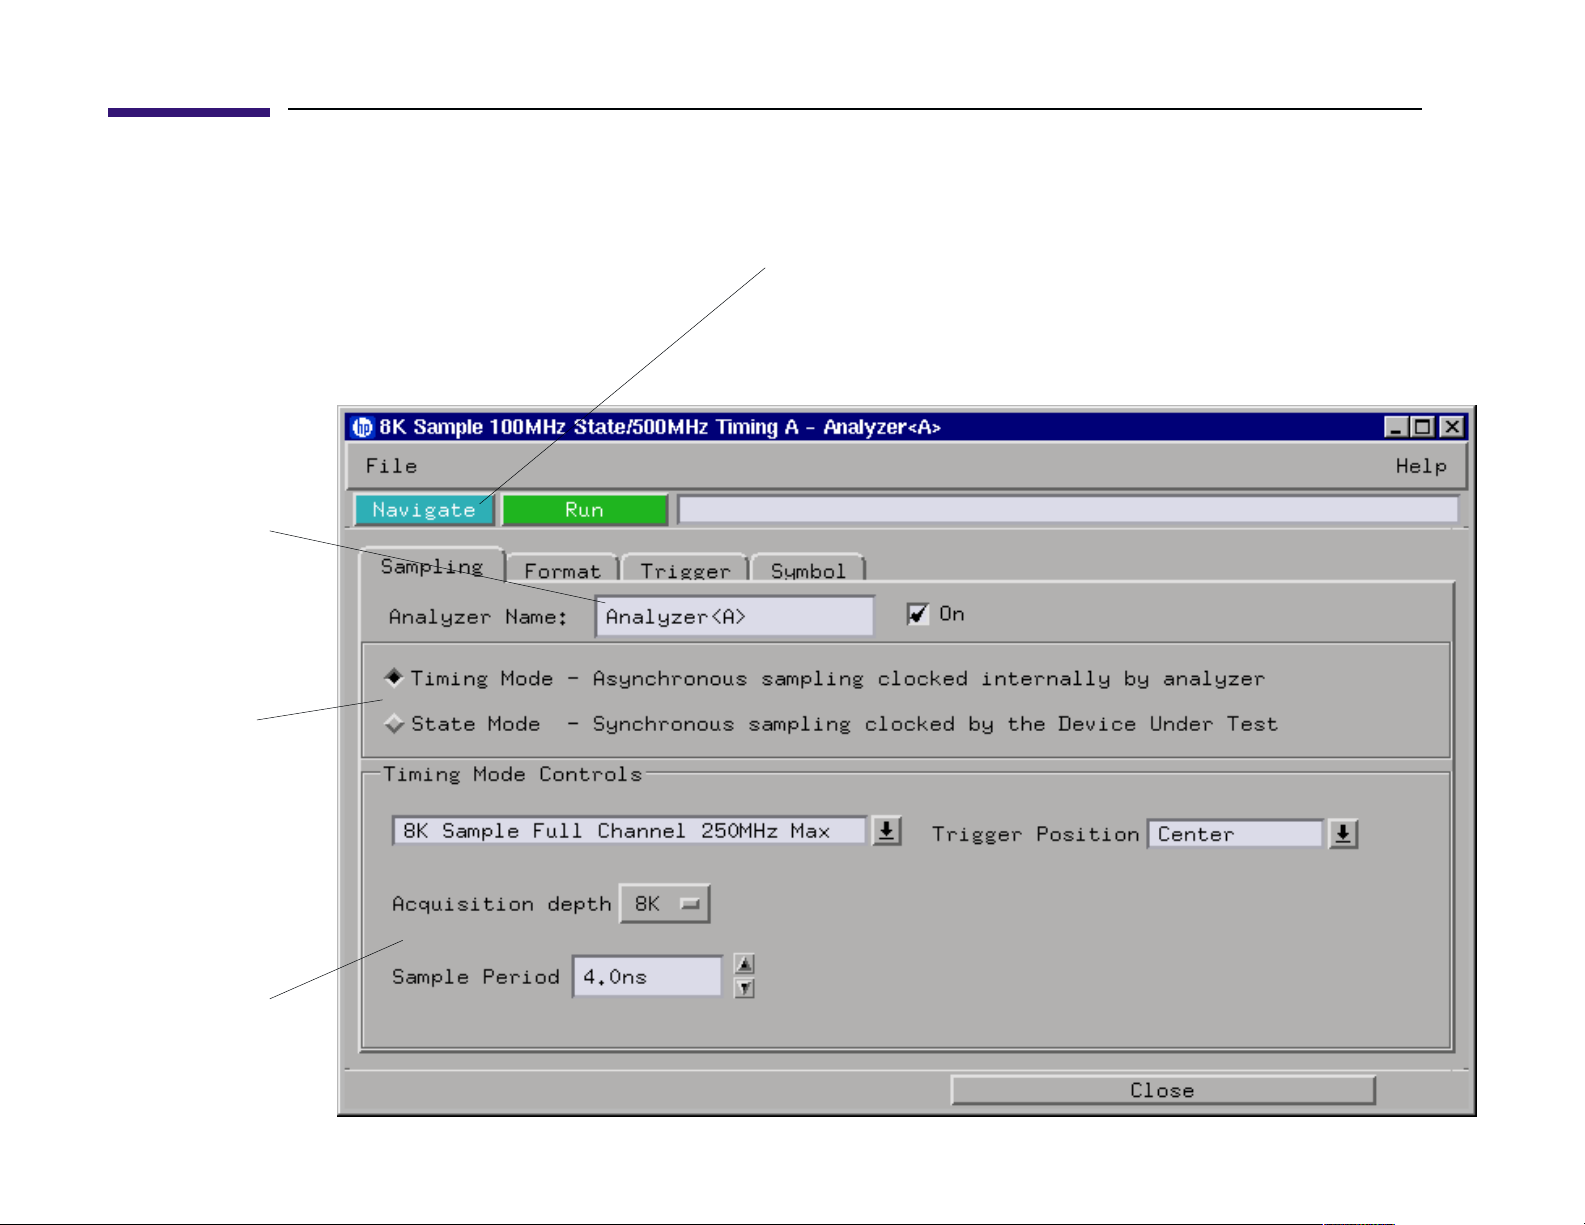
Enter the Analyzer
name here.
Analyzers are the
new name for
Machines.
Choose timing or
state mode.
Sampling Tab
To use the other Analyzer, click on the Navigate button and
select Activate Modules. You will see another analyzer in the
same slot as the current one (Analyzer <A2>). This will
open another Setup dialog for the new Analyzer.
In this area, enter
all of the
information for the
selected mode.
2

Setting Up State Mode Clocks
Check here to use the Advanced
Clocking dialog, which is the same
as the Clocking dialogs in previous
versions. Use the Advanced
Clocking dialog to use ORed
qualifiers.
This table simplifies setting up
State Clocks. If using Master/
Slave or Demultiplex modes, you
still need to specify which pods
use the slave clock or are
demultiplexed in the Format tab.
The clock equations reflect the selected clocks.
3

Format Tab
Click here for the Pod Assignment dialog which is the
same as the Config Tab in previous versions.
Select Master, Slave or Demultiplex here. Its not
enough to specify the state clocks in the Sampling Tab.
4

To see the
matching graphic,
single-click a
function.
To replace the
selected sequence
level, double-click a
function.
The user level
function is at the
bottom of the list.
Trigger Tab
Functions are same as Macros in previous versions.
The yellow box
indicates which
sequence level is
selected.
These buttons
use the
currently
selected
function.
5

Summary
•“Machines” have become “Analyzers”. The default names of the analyzers are “Analyzer
<Slot>” and “Analyzer <Slot2>”. For example, if a module is in Slot A, then the analyzers
are “Analyzer <A>” and “Analyzer <A2>”.
• To activate a second analyzer, click on the navigate button, and choose “Activate”.
• The new Sampling tab contains all information related to when the logic analyzer will take a
sample, including the selection of Timing or State Modes.
• The Config Tab has become the Pod Assignment dialog. It is accessed via a button in the
Format tab.
• Trigger “macros” have become trigger “functions”.
• Click on a trigger function in the list; then, click on the “Replace”, “Insert Before”, or “Insert
After” buttons. Double-clicking on a function is a short cut for “Replace”.
• The “User Level” function is at the bottom of the list.
6
 Loading...