

Page 1

Press the button during photo playback:
1
2
B D
S
U
AF 5088/5108 PS Quick Start Guide
Phot o Preview Mod e( 16 thumbna ils per pag e)
Packing Contents
1
1.1 Digital Photo Frame
1.2 Power Supply
1.3 Quick Guide
1.1
m
e
mo
f
la
ry
sh
c
a
r
d
ce
i
v
U
e
S
B
d
ri
ve
1.2
2.1
1.3
2.3
2.2
1.4 War ra nt y Ca rd (n ot s ho wn i n th e di ag ram)
Getting Started
2
2.1 Insert a memory card (SD, MMC,MS or xD) into the card slot.
Insert the USB device into the USB port.
The card will only fit in one direction; do not
force it. The card should fit snugl y wh en
properly inserted.
2. 2 Plug AC adaptor into the Digital Photo Frame, and plug
it into a wall outlet.
2.3 Press the POWER button on the rear of the device to
power on.
1. Use o r button to sel ect a folder/ album on the le ft ,then pres s button.
2. Use b utton to sele ct an image and p ress OK to star t the slide sh ow.
3. Ski p to the previo us or next imag e,use the or bu tton.To pause o r start the s li de show,pr ess OK
4. Pre ss or button to a djust LCD bac klight.
Photo Copy Menu
1. Use o r button to sel ect a source;
2. Sel ect an image an d press OK.
Press OK again to cancel the sel ection.Select all images lo ng press OK.
3. Use o r button to sel ect a folder/ album and pre ss OK to start co pying.
4. If se lect new albu m and press OK, y ou can rename t he album. U se b utton to sele ct a letter /d igit and pr ess OK.
Afte r input all the l etters/di gits, selec t the Enter and p ress OK to co nf irm.
Photo Delete Menu
3
3.2
3.1
A B C
Basic Operations
3
3.1 Press the button
to exchange between slideshow mode and preview mode
Press the button to enter the setting menu:
A: Copy Menu
B: Delete Menu
C: Setting Mode
3. 2 Use the direction key to select different item.
1. Dir ection Key
2. Skips to previous or next image/video/music file.
1. Direction Key
2. Adjust the LCD backlight brightness
Start/Pause the playback.
1. Use o r button to sel ect a source
2. Sel ect an image an d press OK.Pr ess OK agai n to cancel the s election. Select all im ages long p ress OK
3. Pre ss button and t hen press OK bu tton.
4. Use o r button to sel ect P to del ete,selec t x to cancel.
Page 2
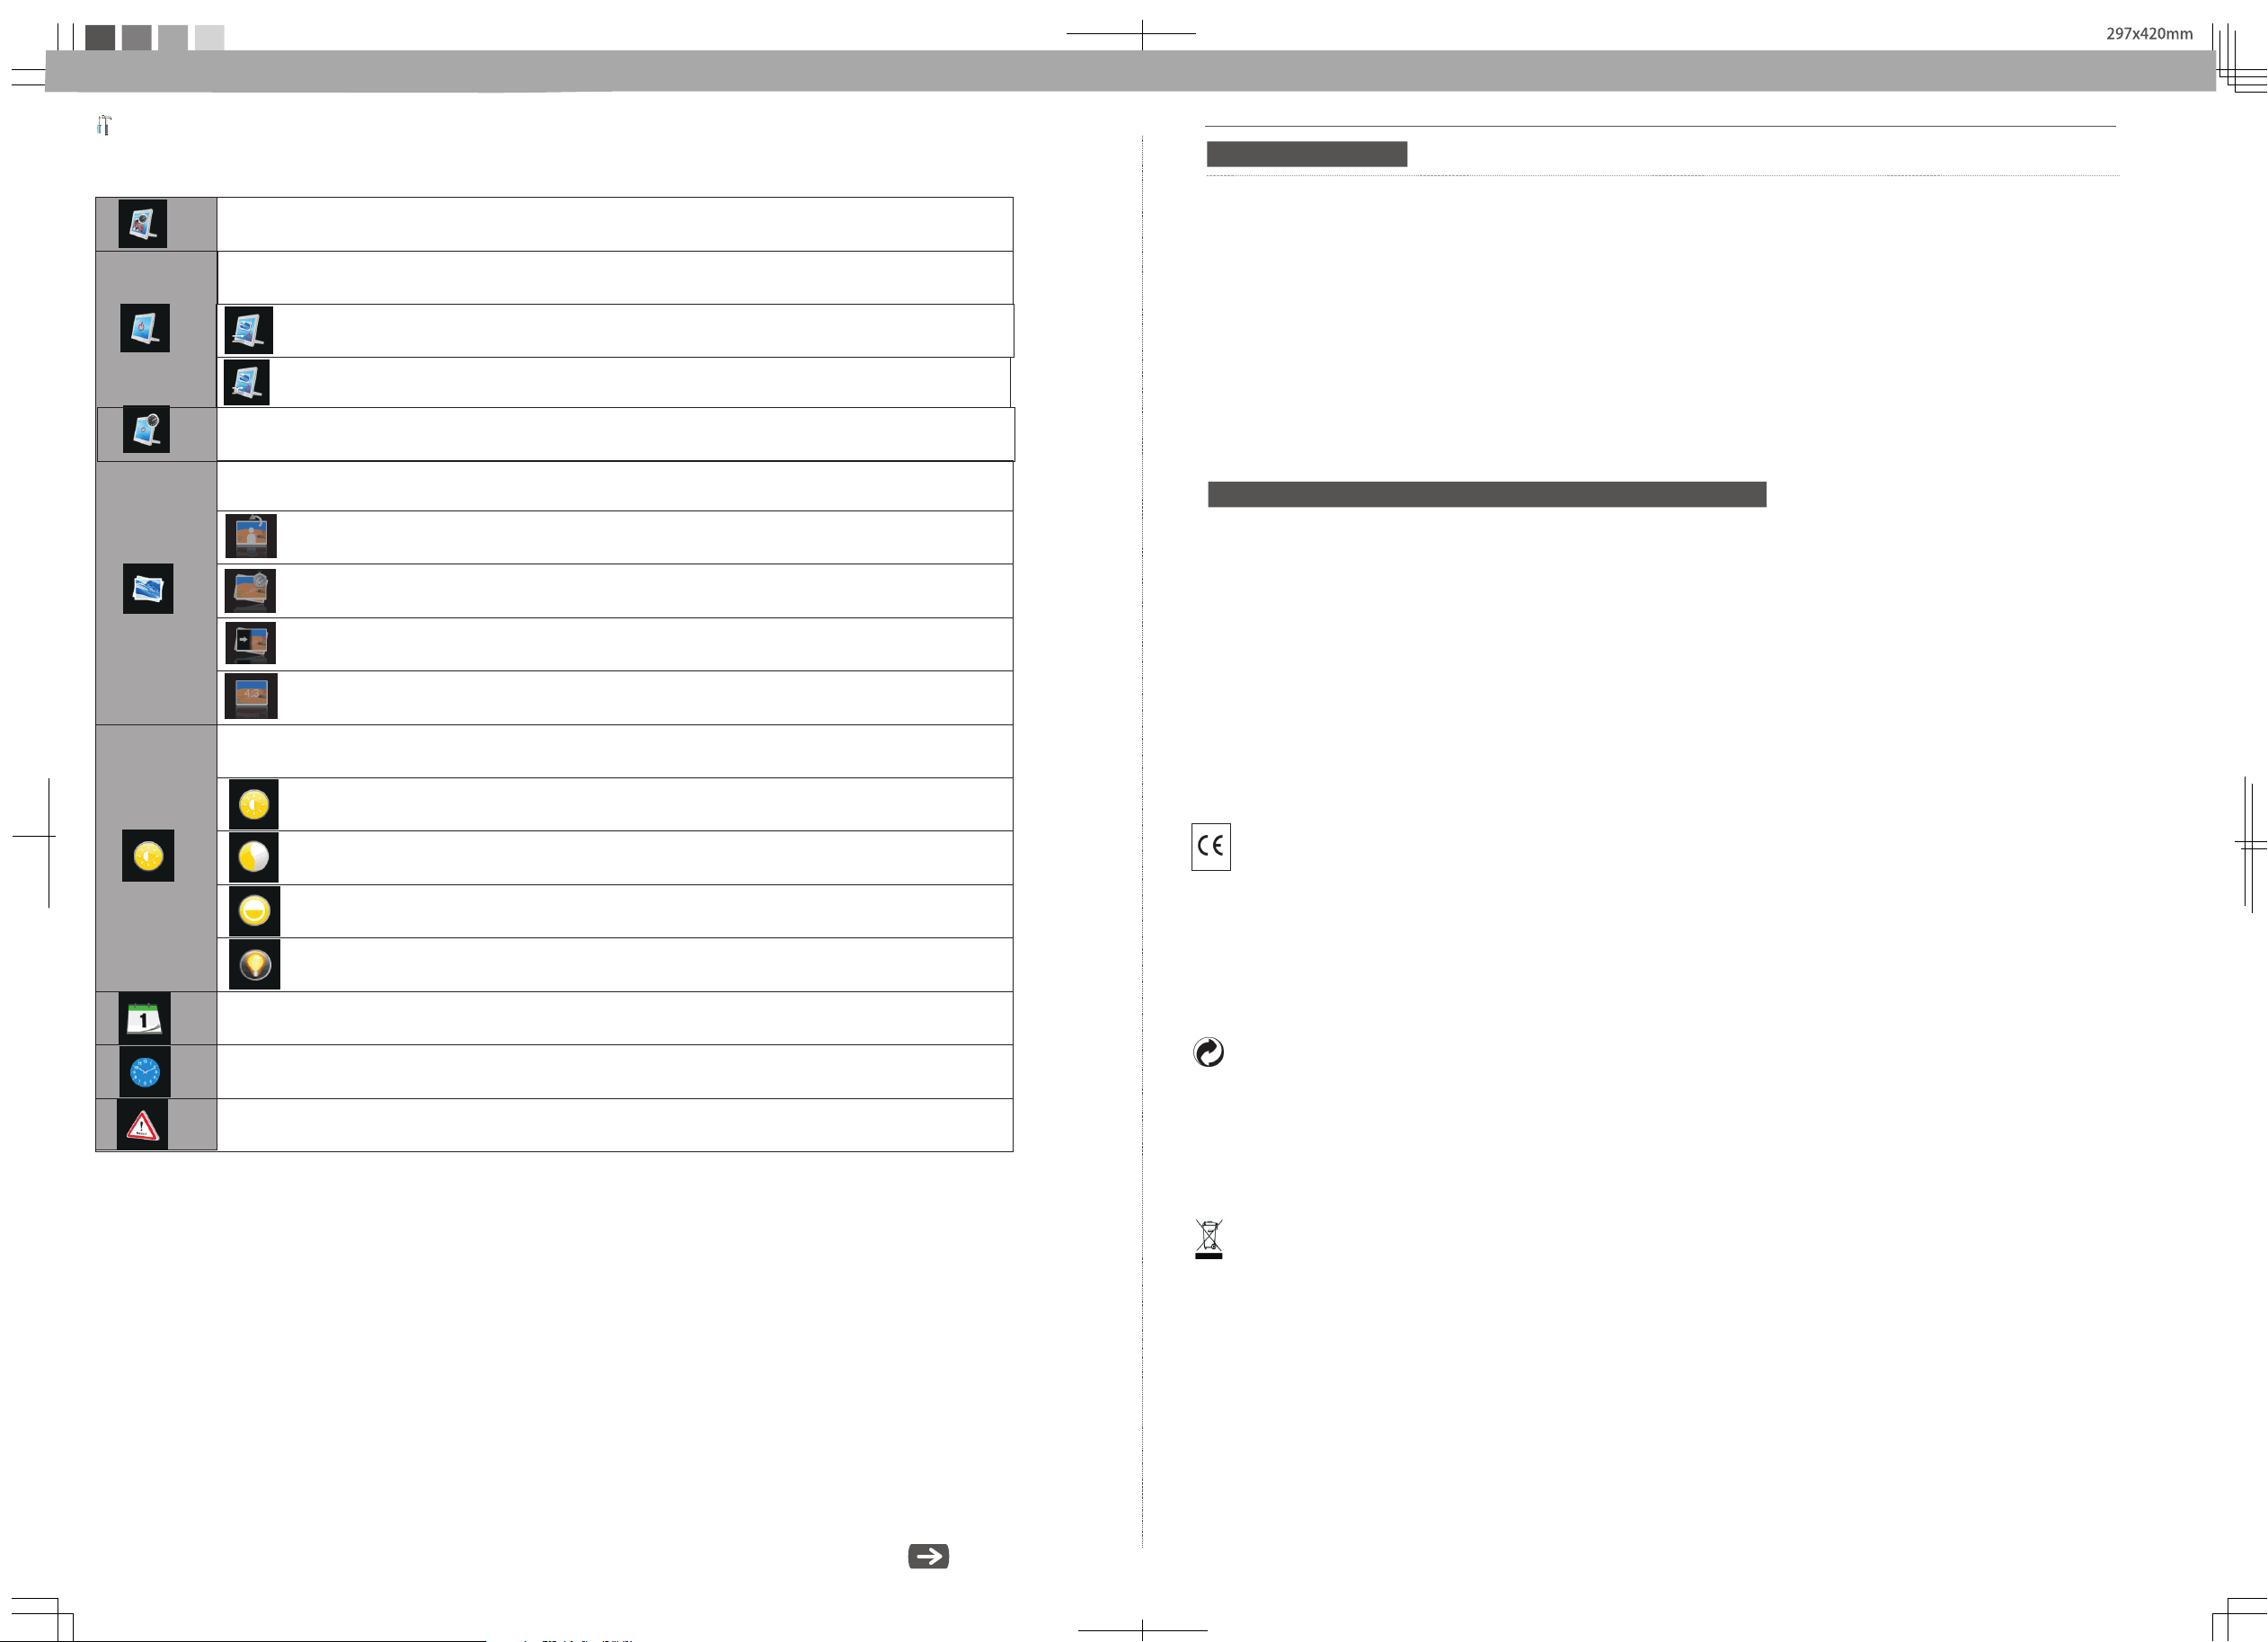
Setting Mode
420x297 m m
Icon s in the settin g mode:
To set s pecific fun f rame
To cho ose the speci fic power sta rt mode
Star t up with photo s lideshow or derly
Star t up with photo s lideshow ra ndomly
Eco Se tting(Set t he automati cally power o n/off time).
Phot o Setting(f rom the left to t he right)
Rota tion
To chang e the interva l time for slid e show.
To choos e diff erent trans ition effect fo r slide show.
To set differe nt LCD screen d isplay ra ti o.
Adju st LCD Settin g( from left to r ight )
Technical Data
Dime nsions.. .. .... .. .. .. .. .. .... .. .. .. .. .. ...... .. .. .. .. .. .... .. .. .. .. .. .... .. .. .. .. .. .... .. .. .. .. .. ...... .. .. .. .. .. .... .. .. .. .. .. .... ..
.... .. .... .. .... .. .... .. .... .. .... .. .. .. .. .. .. .. .. .. .. .. .. .. .. .. .. .. .. .. .. .. .. .. .. .. .. .. .. .. .. .. .. .. .. .. .... .. .... .. .... .. .... .. 255×202×88.3mm ( AF5108PS)
Screen size .. .. .... .. .... .. .... .. .... .. .... .. .... .. .... .. .... .. .... .. .... .. .... .. .... .. .. .. .. .. .. .. .. .. .. .. .. .. .. .. .. .. .. .. .. .. .. .. .. .. 20cm/ 8'' (AF5088P S)
.... .. .... .. .... .. .... .. .... .. .... .. .. .. .. .. .. .. .. .. .. .. .. .. .. .. .. .. .. .. .. .. .. .. .. .. .. .. .. .. .. .. .. .. .. .. .. .. .. .... .. .... .. .... .. .... .. ...2 6cm/1 0 .4 (AF5108PS)''
Aspect ra ti o .. .. .... .. .... .. .... .. .... .. .... .. .... .. .... .. .... .. .... .. .... .. .... .. .... .. .. .. .. .. .. .. .. .. .. .. .. .. .. .. .. .. .. .. .. .. .. .. .. .. .. .. .. .. .. .. .. .. .. .. .... .. 4:3
Resolution .. .. .... .. .... .. .... .. .... .. .... .. .... .. .... .. .... .. .... .. .... .. .... .. .... .. .... .. .. .. .. .. .. .. .. .. .. .. .. .. .. .. .. .. .. .. .. .. .. .. .. .. .. .. .8 00 x 600 pixel
Inte rn al memory.. .... .. .... .. .... .. .... .. .... .. .... .. .... .. .... .. .... .. .... .. .... .. .. .. .. .. .. .. .. .. .. .. .. .. .. .. .. .. .. .. .. .. .. .. .. .. .. .. .. .. .. .. .. .. .. .. .. .1 28MB
USB port. .... .... .. .... .. .... .. .... .. .... .. .. .. .. .. .. .. .. .. .. .. .. .. .. .. .. .. .. .. .. .. .. .. .. .. .. .. .. .. .. .. .. .. .. .. .. .. .. .... .. .... .. .... .. .... .. .... .. .... .. USB-Host
Compati ble m emory card .. .. .. .. .. .. .. .. .. .. .. .. .. .. .. .. .. .. .. .. .. .. .. .... .. .... .. .... .. .... .. .... .. .... .. .... .. .... .. .... .. .... .. .... .. ...SD/MMC /MS/XD
Photo fo rmat... .. .. .. .. .. .. .. .. .. .. .. .. .. .. .. .. .. .. .. .. .. .. .. .. .. .. .... .. .... .. .... .. .... .. .... .. .... .. .... .. .... .. .... .. .... .. .... .. .... .. .. .. .. .. .. .. .. .. .. .. JP EG
File form at... .. .... .. .... .. .... .. .... .. .... .. .... .. .... .. .... .. .... .. .... .. .... .. .. .. .. .. .. .. .. .. .. .. .. .. .. .. .. .. .. .. .. .. .. .. .. .. .. .. .. .. .. .. .. .. .. .. .... .. .... .. *.jpg
203×162.5×8 8.1mm (AF5088PS)
Safety instructions and recommendations
- Keep th e scre en clean (ple ase use a dry soft cloth fo r cle aning). Mak e sure the po wer is off before cle aning th e uni t. Then
- In ord er to prevent d amage to the ca rd or th e unit, p lease tu rn off th e power befo re re moving or i nserti ng th e card .
- Use en closed DC 5V/2 A power a dapter, the un it is fo r indoo r use only.
- Alway s handle the un it with care . Avoi d to uching th e LCD scre en.
- Neve r place heavy o r sharp objec ts on th e LCD pan el, fra me, or powe r cord .
gentl y wipe w ith a dry soft cl oth.
- Do not p lace the unit n ear any other h eat sources .
- Do not s plash or fill th e unit w ith liquids .
- Do not p lace the unit to ra in, wate r, m oisture or hi gh humidi ty.
- Tempera tu re and humid ity:
Opera ting te mpera ture : 0C- + 45C, Humidi ty : 20%-80%
- This equip ment comp li es with th e v olta ge type s pecifi ed on th e unit.
Brig htness
Cont rast
Colo r Saturatio n
LCD Ba cklight
Date S etting
Tim e Setting
Rese t
The CE marki ng certifie s that the pr oduct meets t he main requi rements of th e European Pa rliament an d Council
dire ctive 1999/ 5/CE on telec ommunicat ions term inal equipm ent,regar ding safety a nd health of us ers,and
rega rding elect romagneti c interfe re nce.
The declar ation of co mp liance ca n be consulte d on the site www. agfaphoto .com
Pres ervation of t he environm ent as part of a su stainab le d evelopm ent logic is an e ssential co ncern of AgfaP hoto.
The de sire of AgfaPh oto is to opera te systems ob serving t he environm ent and conse quently it ha s decided to
inte grate envir onmental pe rforman ce s .
In the l ife cycle of th is products ,from manuf acturing to c ommissi oning use and e liminatio n.
Packagin g:
The presence of the logo(green d ot ) means that a contribution is paid t o an a pp roved national organisa tion to
improve pa ck age recovery and recyclin g in frastructures to facili ta te.please respect the sorting r ul es set up locally
for this kind of was te.
Pro d uct:
The cro ssed -o ut waste bi n stuck on the pro duct m eans that th e p ro duct belo ngs to the fami ly of electri cal a nd e lectro n ic
equi pment. In th i s re spect, th e Euro pean re gulati o ns ask you to dis pose of it sele ctively;
At sal es points in th e event of the pu rc hase of sim ilar equi pm ent.
At th e c ollection p oints made av ailable to yo u local-l y(drop-o ff centre , sel ecti ve coll ecti on, etc .).
In th i s way you can parti cip ate in the re-u se and upgra d ing of Elec tri ca l an d Electro nic Equ ipment Waste , whic h can have an
eff e ct on th e enviro nmen t and human hea lth.
AgfaPhoto Holding Gmbh:AGFAPHOTO is used under license of Agfa-Gevaert NV & Co.KG.Agfa-Gevaert NV & Co.KG does not
manufacture these products or provide any product warranty or support.Contact:www.agfaphoto.com
For service,support and warranty information,contact the distributor or manufacturer.
 Loading...