

Page 1
BARN DOOR HARDWARE INSTALLATION:
BARN DOOR FLUSH PULL/GRIP
FLUSH PULL ONLY
1. Determine where you want the pull to be on the door horizontally. If there is a vertical stile (board that
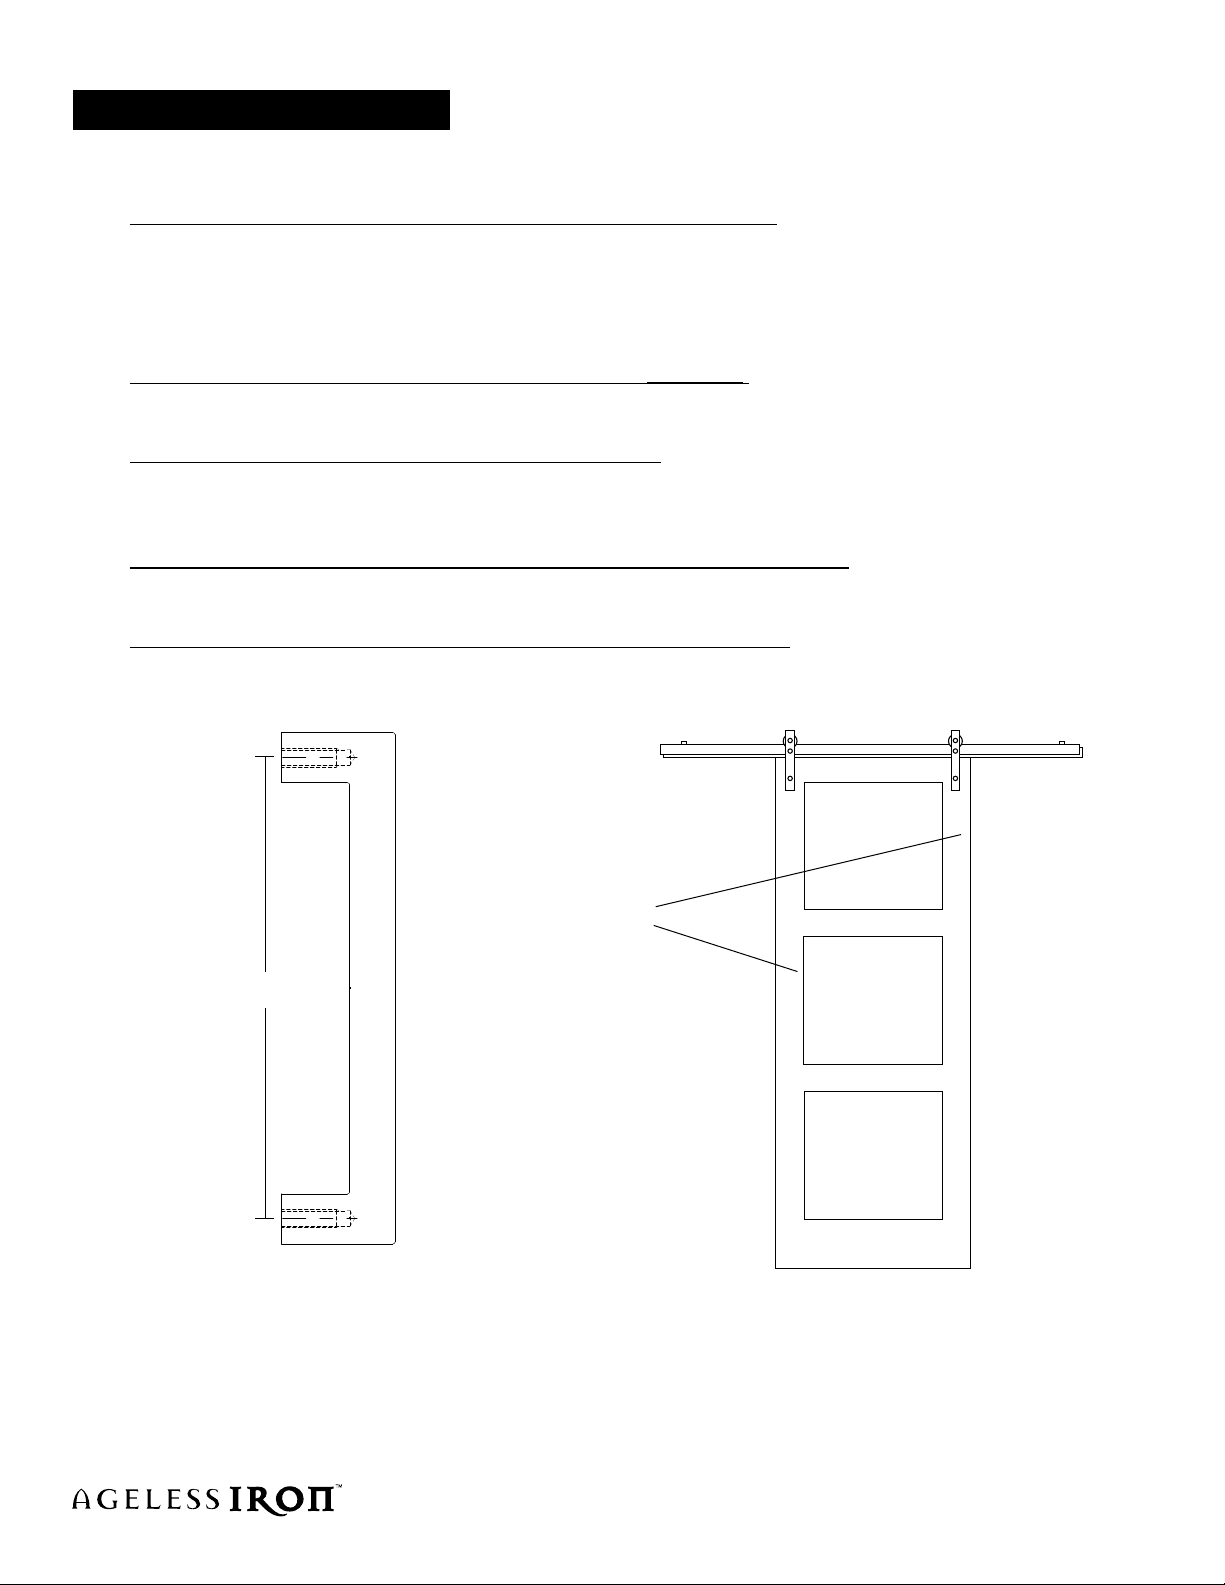
goes from the top of the door to the bottom, on the door edge [see drawing at the bottom of page 2]),
normal placement is in the middle of this board. For example: If the style is 4.5” wide, the center of the
grip would be located in the middle, or 2.25” from the edge. If the door has no visible stiles, locate the
grip 2.5” from the door edge. Mark this distance lightly with a pencil.
2. Determine where you want the pull to be on the door vertically. Normal placement is 33” from the
bottom of the door to the bottom mounting hole, or whatever is appropriate for the door.
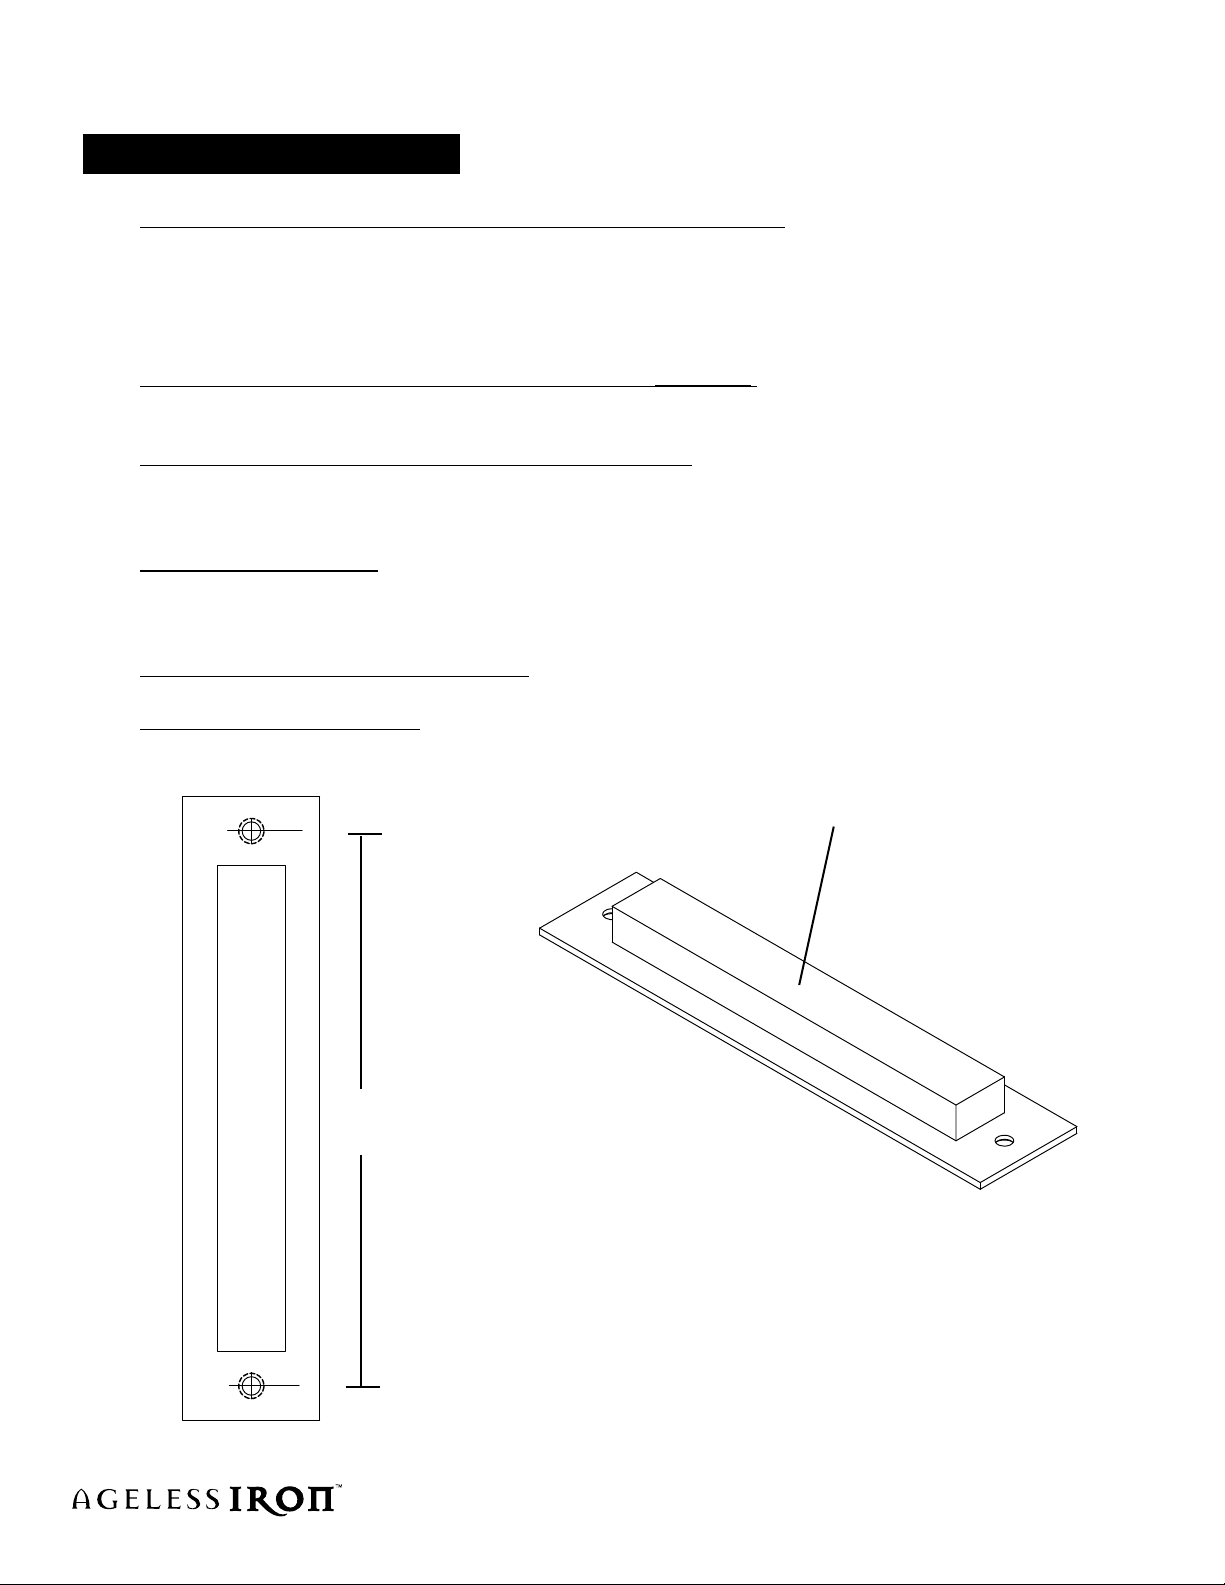
3. Use the attached template and mark the mounting holes. Double check that these holes are the exact
same distance from the edge of the door. Drill into the door 1” with a 1/8” diameter bit at the marked
locations.
4. Hold the pull on the door, with the holes aligned, and trace around the recessed area of the pull
(part that will t into the door). Then, using a router, remove this area 1/2” deep to make room for the
recessed area of the pull. If a router is not available, a chisel can be used.
5. Check that the pull sits ush on the door, and does not “rock” when opposite corners are pushed.
6. Install provided wood screws and tighten securely.
RECESSED AREA OF PULL
ON BACK SIDE
8”
For assistance, call 1-800-522-7336 Mon–Fri 7:00 AM – 5:00 PM MT
or visit www.AgelessIronHardware.com/support
PK315BD
1
Page 2
BARN DOOR GRIP ONLY
1. Determine where you want the grip to be on the door horizontally. If there is a vertical stile (board that
goes from the top of the door to the bottom, on the door edge), normal placement is in the middle of
this board. For example: If the style is 4.5” wide, the center of the grip would be located in the middle,
or 2.25” from the edge. If the door has no visible stiles, locate the grip 2.5” from the door edge. Mark
this distance lightly with a pencil.
2. Determine where you want the grip to be on the door vertically. Normal placement is 33” from the
bottom of the door to the bottom mounting hole, or whatever is appropriate for the door.
3. Use the included template to mark the mounting holes. Double check that these holes are the exact
same distance from the edge of the door. Drill through the door with a 5/16” diameter bit at the marked
locations.
4. Countersink the holes on the inside of the door 1/8” deep with a 9/16” drill. This will allow the screws to
sit ush on the door.
5. Push the provided screws though the door, and thread onto the grip. Tighten securely.
DOOR STILE
8”
GRIP
For assistance, call 1-800-522-7336 Mon–Fri 7:00 AM – 5:00 PM MT
or visit www.AgelessIronHardware.com/support
PK315BD
2
Page 3
FLUSH PULL & GRIP COMBINATION
1. Determine where you want the grip to be on the door horizontally. If there is a vertical stile (board that
goes from the top of the door to the bottom, on the door edge [see image at the bottom of page 2]),
normal placement is in the middle of this board. For example: If the style is 4.5” wide, the center of the
grip would be located in the middle, or 2.25” from the edge. If the door has no visible stiles, locate the
grip 2.5” from the door edge. Mark this distance lightly with a pencil.
2. Determine where you want the grip to be on the door vertically. Normal placement is 33” from the
bottom of the door to the bottom mounting hole, or whatever is appropriate for the door.
3. Use the included template to mark the mounting holes. Double check that these holes are the exact
same distance from the edge of the door. Drill through the door with a 5/16” diameter bit at the marked
locations.
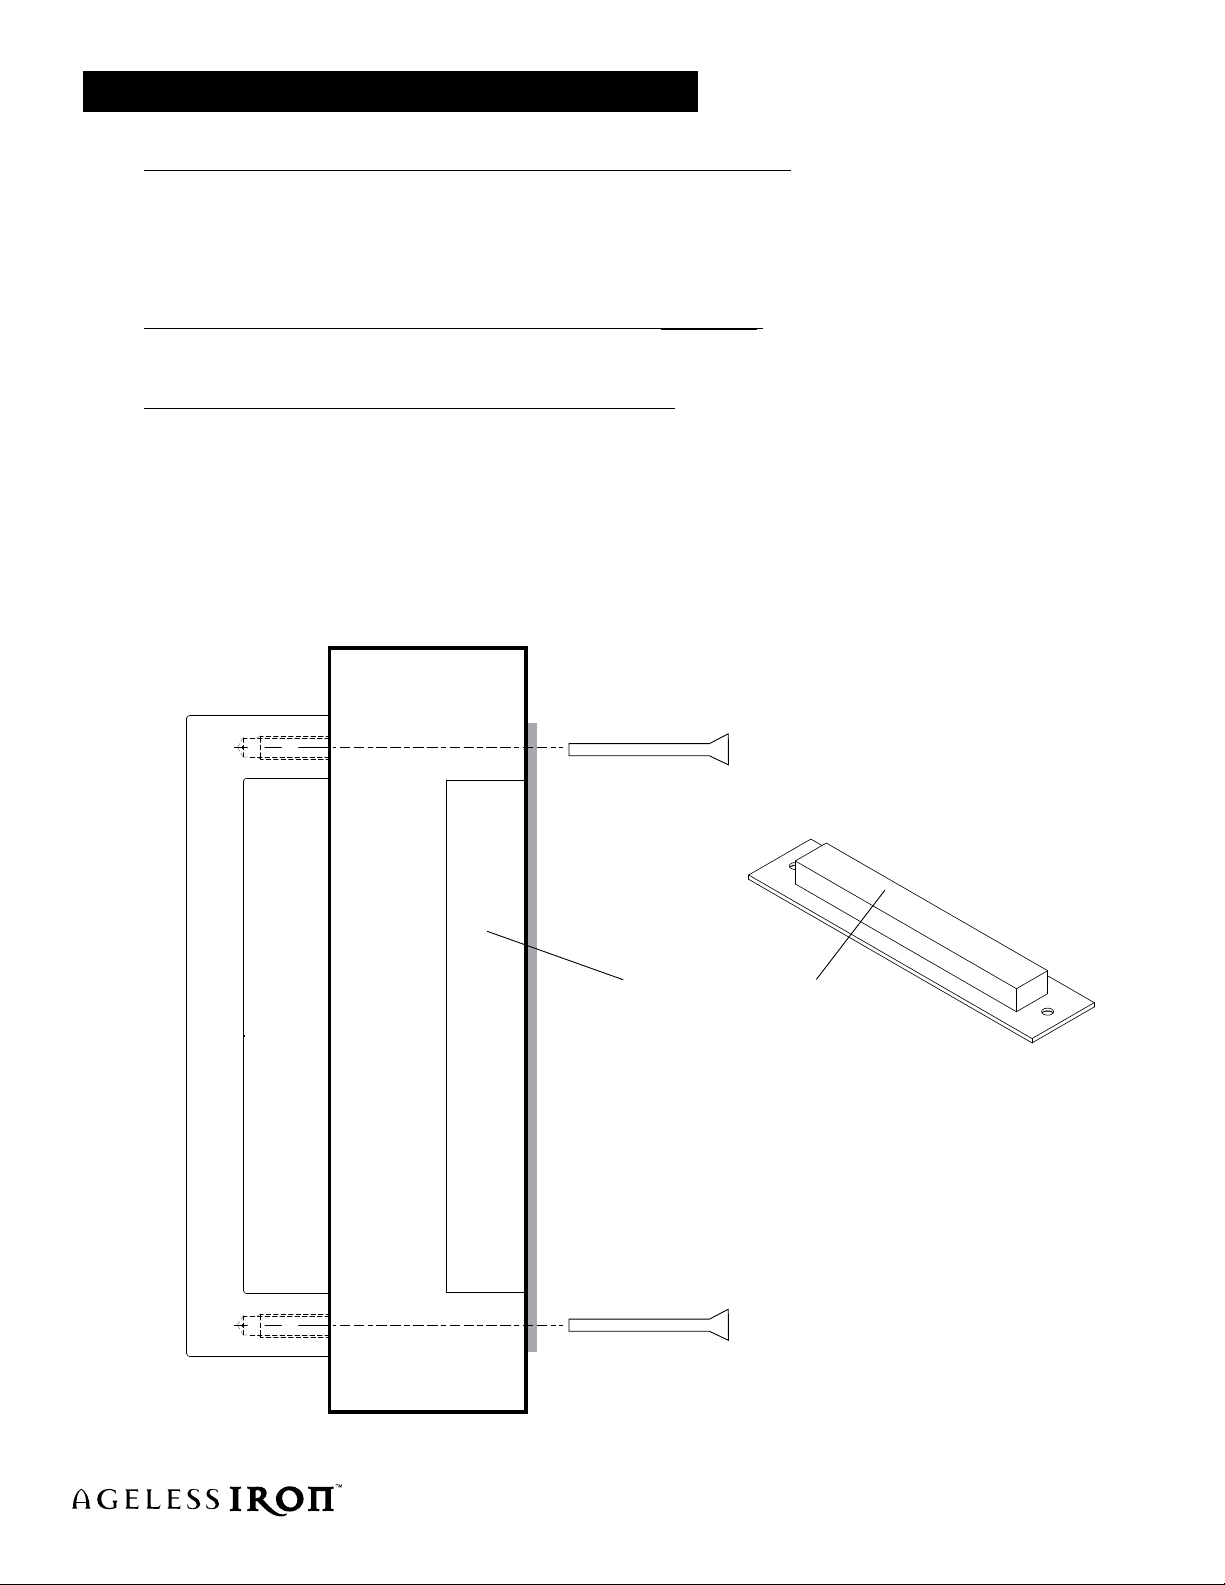
4. Follow steps 4 and 5 on page 1.
5. Push the provided screws though the ush pull and door, and thread into the grip. Tighten securely.
DOOR
RECESSED AREA
OF PULL ON
BACK SIDE
DOOR
For assistance, call 1-800-522-7336 Mon–Fri 7:00 AM – 5:00 PM MT
or visit www.AgelessIronHardware.com/support
PK315BD
3
 Loading...