

Page 1
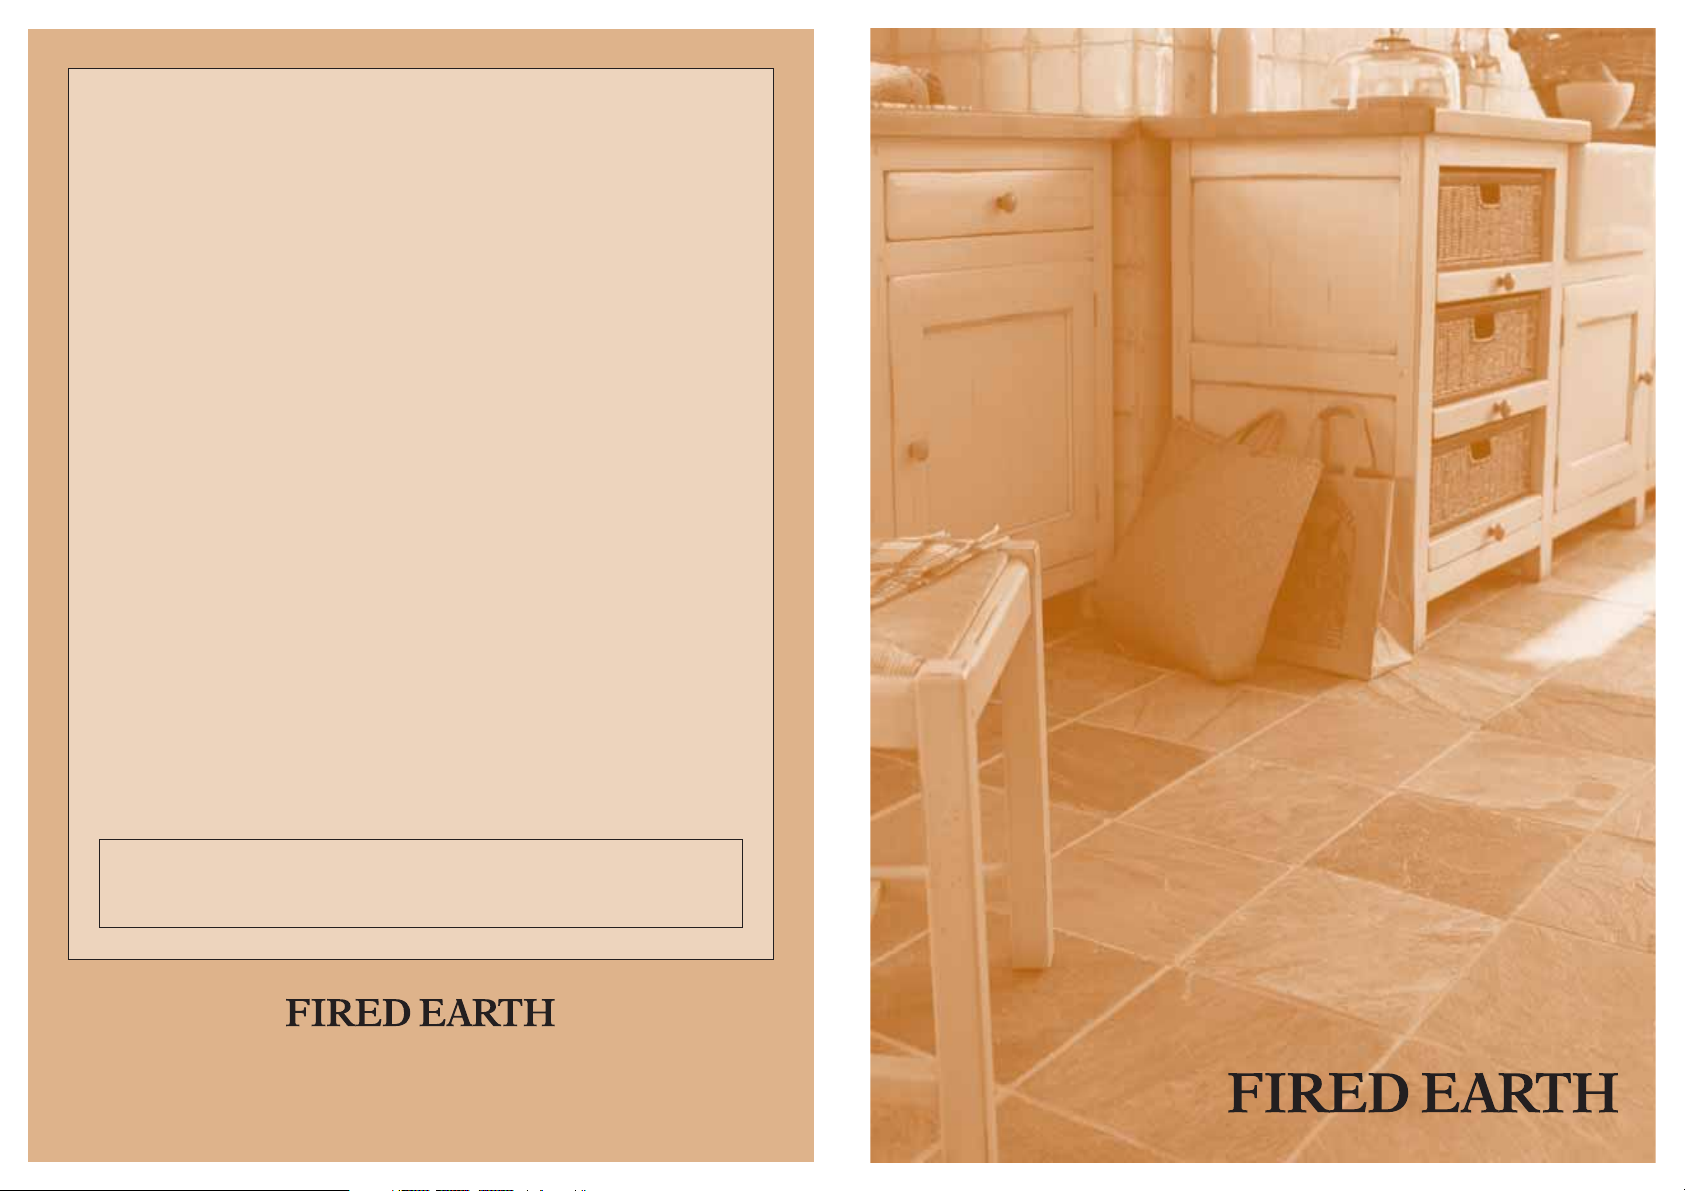
Floor Tiling
Installation Guide
Ancillary Products
A full range of high quality fixing and sealing products, researched and developed to
meet Fired Earth standards, are available for both professional and DIY use.
Read the instructions on the packaging of Adhesives, Grouts and Sealants very carefully.
Website- www.firedearth.com
All our installation guides are available to download from our website: Wall Tiling,
Underfloor Heating, Wood Flooring and Waterproofing Showers and Bathrooms.
Useful Numbers
UK Sales 0845 366 0400
Export Sales +44 (0)1295 814316
Installations 01295 814310
Technical 01295 814271
Home Deliveries 01295 814313
Customer Care 01295 814396
Disclaimer
The specifications and technical information given in this publication are intended for guidance and
although they are to the best of our knowledge correct, they are given without warranty.
We cannot accept any responsibility for reliance placed upon the advice contained herein since practical
expertise and site conditions are outside of our control. Neither do we accept liability for the performance
of the product arising from such use. This does not affect your statutory rights.
Fired Earth is a trading name of Aga Consumer Products Limited. Registered in England
and Wales under Registered Number 3872754. Registered Office Address - 4 Arleston Way,
Shirley, Solihull B90 4LH.
Fired Earth, Twyford Mill, Oxford Road, Adderbury, OX17 3SX
Tel: 01295 812088 Fax: 01295 810832 www.firedearth.com
© Aga Consumer Products Limited trading as Fired Earth. August 2008
Page 2
Floor Tiling
Installation Guide
Contents
Substrates 4
Planning 6
Fixing 7
Cutting 8
Sealing 9
Grouting 10
Terracotta Tiles 11
Presealed Terracotta, Geometric,
Roman Mosaic and Encaustic Tiles 13
Slate and Lubelska Bricks 14
Natural Stone Tiles and Mosaics 15
Porcelain and Glass Tiles 16
External Floor Tiling 16
Glossary 16
Product Selector 1 18
(Adhesives, Grouts and Additives)
Product Selector 2 22
(Sealing, Finishing and Maintenance)
The purpose of this booklet is to outline the basic
principles of installing Fired Earth floor tiles. For more
detailed technical information, refer to British Standard
BS 5385 Wall and Floor Tiling.
Important Notes:
Prior to installation please ensure the tiles purchased
are suitable for the application. All tiles must be
thoroughly inspected prior to installation. Ensure your
tiler is aware of the expected finish of the tiles and there
are sufficient tiles for the area. The tiles must be well
shuffled by drawing tiles from all the boxes. Dry lay an
area in suitable light as a final check before installation.
No complaints regarding the appearance of the product
will be accepted by the company once the tiles have
been installed.
For further information or if any doubt exists, please
telephone our Technical Department for advice prior to
commencing any tiling.
Fired Earth have tested our range of adhesives, grouts and
sealants to ensure compatibility with all our tiles (see our
Product Selector on page 18-23). Read the instructions on
the packaging of Adhesives, Grouts and Sealants very
carefully. Keep everything meticulously clean and orderly
as work progresses.
Page 3
5
Substrates
If your tiling is to last, it is essential that
the surface onto which the tiles are to be
laid is sound. Careful consideration must be
given to the floor surface to confirm that
the surface is level, clean, dry, free of dust,
grease and any loose material.
Your tiler must confirm the suitability of
the subfloor before tiling.
Sand and cement screeds
When tiling onto a new screed, a minimum
period of one week for each 25mm of new
screed should elapse to allow the screed to
be suitably dry. Further time may be
necessary, depending on weather and site
conditions. We do not recommend tiling
onto anhydrite or fast setting screeds
without careful consideration - please
contact our Technical Department for
further advice.
A new screed may shrink as it dries, and
this may result in cracks across the screed.
If cracking does occur it is likely to appear
across any tiles that are fixed to the screed.
Ensure that the screed is suitably dry and
stable before any tiling is started.
Any movement or day joints in the screed
must be carried through into the tiled
surface. Day joints or construction joints
must not be tiled over without the
inclusion of an expansion joint.
Bumps and hollows
in screeded floors
Minor irregularities can be overcome with
up to 5mm of Fired Earth Universal
Levelling Compound* or Fired Earth Thick
Bed Adhesive*. If the floor is very uneven,
with undulations of more than 5mm, Fired
Earth Universal Levelling Compound*
should be used in conjunction with clean
granite chippings.
Suspended timber floors/
Floating insulated floors
Suspended timber floors/floating insulated
floors (polystyrene with water resistant
chip board over) should be rigid, nonflexing and stable enough to bear the
additional load. In order to minimise the
damaging effect of lateral movement in the
floor surface, it is recommended that the
floor is prepared using Fired Earth
Fleximat*. Our Sales Team will be happy to
provide our separate information sheet.
If the suspended timber floor is subject to
vertical movement, the floor must be
stiffened. Remove flexing by fixing a
minimum 18mm, WBP plywood over the
existing timber, screwed down at 150mm
centres. If the floating insulted floor is
subject to vertical movement the floor
must be braced by screwing and gluing
WPB plywood to its surface, or removing
4
some of the boards so 'bearers' can be
fitted below to provide further support.
Seal all the surfaces of the plywood boards
with Fired Earth Universal Bonding Agent*
Other types of floors
Fired Earth would recommend that all
existing floor covering and residue adhesive
are removed before tiling. However it is
possible to tile over existing tiles provided
the surface is completely sound, secure and
thoroughly cleaned to remove all
contaminants such as oil, wax and grease,
using an appropriate cleaner.
Cork and woodblock floors must be
removed and any bitumen left on the
subfloor should be scraped away and all
loose material removed.
Vinyl tiles must be primed with Fired Earth
Universal Bonding Agent*.
Damp
Prior to fixing tiles, damp of any nature
should be rectified. Consult a specialist if
any doubt exists.
Finished floor level
The finished level of an existing floor will
be raised by the maximum thickness of the
tile plus approximately 3–4mm adhesive
bed. Any resultant discrepancy with the
levels of adjoining rooms can be minimised
with the use of threshold/reducer strips.
Underfloor heating
Fired Earth floor tiles can be used over most
underfloor heating systems. The heating
should be correctly commissioned prior to
tiling and switched off during tiling. There
must be no cracks in the screed otherwise
any floor tiles fitted on top will crack.
Fired Earth Fleximat* can be used as an
anti-fracture membrane over Fired Earth
Underfloor Heating. Our Sales Team will
be happy to provide our separate
information sheet.
Always use flexible adhesive and grout and
provide an expansion gap around all
perimeters and abutments. As a general
guide, do not tile continuously over areas
with a length of over 6 metres, fit an
expansion gap to prevent stress building up
in the floor. Always fit expansion joints in
doorways of adjoining tiled rooms.
DO NOT switch the heating on for at least
two weeks after tiling, then, starting from
ambient temperature, do not increase the
temperature by more than 5°C in a 24
hour period until the normal working
temperature is reached.
'Wet' floors
Please refer to our Waterproofing Showers
and Bathrooms Installation Guide for
further advice.
Walls
When tiling onto walls with floor tiles,
consideration must be given to the weight
of the tile and suitability of the substrate.
Our Sales Team will be happy to confirm the
weight of any of our tiles.
Page 4

Step 4. When tiling commences you should
start at point ‘X’, so check that the lines you
have marked make a perfect right angle and
the side line runs parallel to the centre line.
Grout joints
The width of grout joints will vary between
3–12mm. Large joints will be necessary on
rustic tiles such as terracotta and slate.
Please refer to the Fired Earth price list for
recommended grout joints.
Roman Mosaic tiles should be butt jointed
(no allowance made for a grout joint)
except when used in a shower where a
narrow but impervious grout joint will
be necessary.
When fitting random sized tiles an area
should be 'dry laid' first to establish the
optimum joint width. Joint sizes may vary
from 2mm-10mm across the floor
depending on the mixture of tile sizes
used and the pattern.
Mosaic tiles - Ensure that the sheets of
mosaic tiles are spaced so that once
grouted, no individual sheets can be
distinguished.
Particular care is required when blending
individual sheets of mosaics, to ensure a
subtle blend of colour is achieved.
Damp Tiles
Damp tiles should be stored on end in a
well ventilated area to dry thoroughly
before fixing. This may particularly apply
to Natural Stone, Lubelska Brick and
Reclaimed Terracotta and Encaustic tiles.
In general, the following weights apply to
the list of substrates, provided they are fixed
correctly and sound and stable;
Plaster - 20 kg/m2: Plasterboard - 32 kg/m
2
Brick/block/render - 40 kg/m2+
Tile Backer board/wbp plywood - 40 kg/m2 +
76
Planning
Take the time to study the room and plan
your work. Tiling usually commences in the
corner furthest from the door. If there is
more than one door, it will be necessary to
decide which is the primary entrance.
Consider how cuts will look against fixed
furniture etc. and through doorways.
Adjustments may be required to achieve
the best results.
Please note: Where tiles have variable depths
e.g. Reclaimed Terracotta the thickest tile
including the adhesive should be taken as the
approximate floor height increase.
Step 1. Mark the centre line of the room
from the wall of the primary entrance to the
far end. You will need to measure and mark
the midpoints of walls A to B and C to D.
Join these two points with a taught chalk
line and mark.
Step 2. Mark the midpoint of the room by
measuring the centre of the line. From this
point, lay down tiles (without fixing them)
alongside the centre line, allowing for joints,
to see where the last whole tile will end.
Mark (with string or chalk) a line 1 to 2 at a
right angle alongside this last whole tile.
Step 3. Locate starting point ‘X’ by laying
down tiles along the new line 1 to 2 in the
same way as before, to see where the last
whole tile will end. Now mark your side line
3 to 4 at a right angle alongside this last
whole tile.
Fixing
Before commencing tiling please ensure
you are familiar with the important notes
on page 3.
It is important to establish which way the
tiles are to be laid before any tiling is
started. Make sure the person fitting the
tiles knows what the tiles should look like.
‘Shuffle’ the batch to ensure that any
colour and tonal variations are well mixed.
Minor chips and blemishes should be
expected and are best used for cuts or well
mixed into the floor.
Some of our tiles vary considerably in depth.
Where this is applicable, it is important to
grade the tiles before installation.
Some of our tiles require careful sealing
prior to installation. (See page 9 onwards)
Be certain that the tiles are suitable for the
application.
midpoint
centre line
A
B
C
D
4
3
X
first tile position
1
2
Page 5

9
8
Cutting
Due to the thickness and make-up of the
majority of Fired Earth floor tiles, it is
recommended that either a diamond cutter
or an angle grinder is used to cut the tiles.
Water cooled diamond cutters are available
from tool hire shops.
Please wear suitable protective eyewear and
protective clothing when cutting tiles.
Porcelain tiles require high quality diamond
blades for cutting.
Drilling holes can be a difficult task without
the correct equipment. Fired Earth
Terracotta, Lubelska Bricks and Slate floor
tiles can be irregular or bowed and may
require a greater depth of adhesive in order
to ‘iron out’ potential irregularities in the
finished surface. Fired Earth Thickbed
Adhesive* is perfect for this purpose as it
can be used up to 25mm in depth.
Using a suitable notched trowel, spread an
area 1 square metre to a depth of
approximately 4mm. ‘Butter’ the back of
the tile with a further 2mm of adhesive and
place the tile in the starting position as
described in the Planning Steps 1 to 4.
When using Fired Earth Thickbed Adhesive*,
use a ‘large format’ trowel to apply the
correct bed of adhesive to the subfloor.
When laying thin, machine made glazed,
porcelain or quarry tiles to an even surface
it may be possible to fix the tiles directly
onto a thin bed of adhesive, without having
to ‘butter’ the back of the tile.
Stone or glass tiles are normally fixed with
white adhesive to prevent the colour of the
adhesive 'bleeding' through. Push the tile
home firmly with a slight twisting
movement. Place the next tile adjacent to
the first, allowing for the grout joint, and
so on over the prepared area.
All the tiles should be soundly bedded in
the adhesive without any space for air
underneath. Be careful not to allow any
adhesive onto the surface of the tiles. Any
surplus should be wiped away with a clean
damp sponge. Once a square metre area
has been tiled, another similar area should
be prepared and so on until you have
completed the floor with whole tiles. The
remaining perimeter area should now be
prepared and cut tiles laid. If you prefer
cuts can be fitted as the work progresses.
Check the floor level as work progresses
with a spirit level and a straight edge. Fixing
tiles into sand and cement should be
avoided because of the time required for the
tiles to dry out and the associated problem
of efflorescence.
recommend the use of the ARMEG® range
of porcelain drill bits and core drills.
When cutting or drilling the tile, the
surface may become wet and dirty. Wipe
the tile clean immediately after cutting.
Using a water cooled diamond cutter will
achieve the most accurate cut.
When using an angle grinder, mark the tile
where you wish to cut it, run the cutting
disc along the marked surface cutting the
tile to at least two thirds of its depth, then
the tile can be snapped. Rough edges and
chips should be smoothed and finished
with a sanding block or in severe cases, by
rubbing the tile edge with a broken piece of
another tile.
Roman Mosaic - Metal reinforcing bars are
used in the manufacture of border designs
and may cause excessive wear on cutting
equipment. Care should be taken to ensure
that the pattern is correctly matched,
particularly in the case of the basketweave
design. Small pieces of mosaic can become
detached during cutting and should be
glued back into place using an epoxy or
similar glue.
Sealing
Many Fired Earth tiles require sealing to
prevent stains from penetrating the body of
the tile. Please refer to our Product Selector
on pages 18 -23 for more details.
Before sealing commences it is imperative
that the tiles are completely clean and dry,
otherwise you may actually seal in dirt,
cement dust and moisture which can impair
the final appearance.
The process of sealing should be kept
meticulously clean and all materials
including brushes and cloths etc., should
be new and unused.
It is equally important that the sealer soaks
into the surface of the tile, disappears and
is not allowed to ‘spoil’ (i.e. the hardening of
excess sealer on the tile surface).
Terracotta and Encaustic tiles must be
individually sealed prior to fixing.
With other tiles requiring sealing the
process is performed in two stages. The
first seal is applied once the tiles are fixed
but before they are grouted. The second
seal is applied over the whole floor, once
the tiles have been grouted and have
completely dried.
All sealers take a few days to oxidise and
will not be fully effective during this time.
Therefore keep traffic across the floor to a
minimum for the first week.
Page 6

Grouting
Grouting refers to the process of filling the
spaces between the individual tiles and
thus completing the floor surface. Before
grouting can commence, the adhesive used
must have cured, which usually takes
between 12–24 hours for Fired Earth Floor
Adhesive* and 3 hours for Fired Earth
Fastset Adhesive*. The depth of adhesive,
ambient temperature, porosity of the tile
and subfloor will all affect the curing time.
The joints to be grouted should be clean,
dry and free of loose debris and excess
adhesive. The addition of Fired Earth
Flexibond* will increase durability and
impart flexibility to the grout. Fired Earth
Flexibond* should be added to the grout
when tiling onto timber floors prepared
with WBP plywood, floating floors, tiles
over underfloor heating and 'wet floors'.
It is advisable to grout and clean a small
‘test’ area prior to grouting the whole floor.
This will give you the opportunity to check
that all grout can be removed without
staining the tiles and that you are happy
with your chosen colour.
Pointing and Slurry Grouting
Pointing is the careful application of grout
between the tiles avoiding contaminating
the surface of the tile by using a damp
sponge to wipe off any excess.
Slurry grouting is the method of grouting
involving a wet mix, or slurry of grout
being spread over the whole of the tile
surface, as well as into the grout joints. The
slurry is then pressed with a ‘grout float’ or
squeegee into the grout lines and into any
pits in the surface of the tile. Any surplus
should be wiped off the tiles particularly
before it starts to dry with a clean damp
sponge, continuously washing the sponge
using clean warm water.
The addition of Fired Earth Flexibond* into
the grout makes removal of surplus grout
more difficult, so it is important to clean as
you grout.
Grout should be pushed well down into the
joints so that no air pockets exist and the
joints are fully filled. The more the grout is
compacted the harder it will set. A timber
dowel of the appropriate diameter may be
used to assist in compacting the grout.
Smooth off the joints and remember that
the main purpose of grouting is to
strengthen the overall floor and, in order to
achieve this, the grout must fully support
the edges of all the tiles.
Fired Earth offers grouts for floors in
three colours, Sandstone, Grey and
Limestone*. We do not recommend the use
of strong pigmented grouts which are
more likely to stain the tile. As soon as
the floor is finished and the grout has
completely dried, the tiles should be
thoroughly cleaned to remove any stains
or fine dust particles.
Terracotta Tiles (except Presealed Terracotta)
Sealing
Fired Earth recommend Terracotta tiles are
sealed with Fired Earth Linseed Sealer*
prior to fixing. We would advise that a
number of sample tiles are tested for
porosity, from which an indication of the
amount of sealer that the tiles will absorb
can be gauged.
Using a clean, short haired paint roller or
brush, work the sealer into the surface so
that the tile appears matt again within 10
minutes. If the tile regains its matt
appearance too quickly, use the sealer a
little more liberally.
The tiles will readily absorb the first coat of
sealer and, as a rough guide, you should
expect to use up to 75% of the sealer on
the first coat. Within 20 minutes of applying
the sealer, check that there is no surplus
remaining on the surface of the tiles.
Wipe away any surplus sealer with a clean,
dry cloth. If oil is allowed to remain on the
surface for 20 minutes or more, it is likely
that the oil will begin to turn tacky or hard,
which will necessitate remedial work. The
final seal can only be carried out once the
grouting has completely dried.
Take particular care during the application
of the second coat of sealer as the tile is
now partially sealed and will absorb less
sealer than the first coat. Apply a second
coat to a small test area to gauge how
much sealer the tiles are likely to absorb.
Remember the oil should soak in within 20
minutes of application and the tiles should
be matt in appearance.
Finishing
Option A - Wax Polish
Once sealed, Fired Earth’s traditional
method of finishing terracotta is for Fired
Earth Wax Paste* to be applied. This
enhances the natural colours within the
clay and provides protection against
staining. Apply the first coat as soon as
possible after the sealer has dried. The wax
should be applied sparingly, allowed to
harden then buffed to form a hard,
protective finish. For a newly installed floor,
Fired Earth Wax Paste* should be applied
once a week for the first 4–6 weeks, in
order to build up a hard wearing surface.
Option B - Cotto Rapid*
As an alternative finish, providing less
protection but requiring less maintenance,
Cotto Rapid* can be applied once the tiles
have been sealed for the second time.
Ensure the sealant is completely dry before
application of this product. Two to three
coats should be applied sparingly with a
clean cloth, allowing sufficient drying time
between coats.
Cotto Rapid* should be re-applied once or
twice per year. Cotto Rapid* is not
recommended for use on Fired Earth Antique
1110
Page 7

Pammets because salt pits cannot be
'blended in' without the use of wax polish.
Maintenance
Terracotta floors should be swept or
vacuumed regularly to remove all loose dirt.
It is important to use the correct Fired Earth
products when maintaining your floor, as
these have been formulated to both clean
the floor and be gentle on the sealants.
Spillage and cooking stains should never be
allowed to remain on an unglazed floor and
should be wiped off immediately with a
clean, damp cloth. More stubborn marks
can usually be removed using white spirit.
Terracotta finished with wax polish
Between waxing, the floor should be
washed with Fired Earth Super Floor*
diluted in clean, warm water. Avoid harsh
or abrasive floor cleaners.
For most domestic floors it is advisable to
apply further wax coats from time to time.
The frequency will be dictated by the wear
and washing the floor receives. If a build
up of wax becomes visible, reduce the
frequency of waxing. Likewise, if the tiles
are marking or look dull and dry, increase
the frequency.
Terracotta finished with
Cotto Rapid*
Floors should be wiped clean using Fired
Earth Stone Clean* - diluted with water.
Reapply Cotto Rapid* when the floor
appears dull.
General characteristics
Efflorescence - Terracotta contains various
soluble minerals and salts which can be
activated by damp and moisture. This may
appear as a white stain or ‘bloom’ on the
surface and should be wiped away with a
clean damp cloth. Stubborn efflorescence
may be removed with a cement stain
remover, such as HG Extra Cement/Grout
Remover*. Do not soak terracotta tiles
during fixing as this may activate
efflorescence.
Streaking - This occurs when terracotta is
sealed with a dirty brush, dirty oil or uneven
application. As soon as streaking is noticed,
stop sealing and eliminate the cause.
Sweating - Terracotta tiles can sweat and
on occasion may actually exude recently
applied sealer. This might happen when cool,
damp tiles are sealed in a hot environment
or if a new floor is sealed in an unoccupied
property in mid-winter. Avoid sealing
terracotta tiles under these conditions.
Salt pits - Salt occurs naturally in
terracotta. In certain situations the salt is
drawn to the surface and creates craters or
blistering. Should this occur, fill the craters
with grout, reseal and finish.
Mildew - If terracotta tiles are sealed while
damp, or the subfloor is damp, there is a risk
of mildew forming in the tiles. This will
appear as black or white marks and spots.
For further information contact the Fired
Earth Technical Department.
13
12
Presealed Terracotta
These tiles require no sealing.
Finishing
Apply one coat of Cotto Rapid*. The use of
this product on Pale Presealed Terracotta
may darken the appearance. Reapply
Cotto Rapid* when the floor appears dull.
Maintenance
Presealed terracotta floors should be swept
or vacuumed regularly to remove loose dirt.
It is important to use the recommended
Fired Earth products when maintaining
your floor as these have been formulated
to both clean the floor and be gentle on
the sealants. Floors should be wiped clean
using Fired Earth Stone Clean* diluted
with water.
Geometric and Roman Mosaic Tiles
Sealing
Geometric tiles should be sealed with two
sparing coats of MN Stain Stop*. They
require no further sealant or finishing. Fired
Earth Roman Mosaic tiles do not require
sealing prior to grouting. Apply 2 coats of
MN Stain Stop* after grouting.
Maintenance
Tiled floors should be swept or vacuumed
regularly to remove all loose dirt. It is
important to use the correct Fired Earth
products when maintaining your floor, as
these have been formulated to both clean
the floor and be gentle on the sealants.
Spillage and cooking stains should never be
allowed to remain on an unglazed floor and
should be wiped off immediately with a
clean, damp cloth. More stubborn marks
can usually be removed using white spirit.
Floors should be wiped clean with MN Easy
Care* diluted with water.
Encaustic Tiles
Due to the very porous and delicate nature
of this tile, extreme care must be taken
with handling and installing.
Fired Earth recommend the use of our
installation service for this tile. Please
discuss further details with a member of
our Sales Team.
Detailed fitting instructions must be
followed. These can be obtained through
our sales teams in store or via our Technical
Department (see page 24 for contact
numbers).
Page 8

15
14
Slate and Lubelska Bricks
Sealing
Before grouting apply one or two coats
of Fired Earth Stone Shield* using a clean,
fluff-free cloth. Allow approximately 2
hours between applications and do not
apply more sealer than can be fully
absorbed by the tiles within 20 minutes.
Surplus sealer should be removed with
white spirit.
Lubelska Bricks can vary enormously in
porosity. In some cases a litre of sealant
may be required per 3m2of tiles. Apply
the sealer liberally to ensure thorough
sealing. Surplus sealer should be removed
in 20 minutes.
Finishing
In wet areas e.g showers, no finishing
product should be used.
Slate - After grouting apply a first coat of
Fired Earth Stone Finish* evenly and
sparingly over both the tiles and grout with
a soft, fluff-free cloth. The second coat
should be applied at right angles to the first
coat after 20 minutes. Further coats should
be applied at least once a year or more
frequently as required.
Lubelska Bricks - After grouting, the tiles
are finished with Cotto Rapid*. Two to three
coats should be applied sparingly with a
clean cloth, allowing sufficient drying time
between coats. The third coat is more likely
to provide a semi-gloss finish.
Maintenance
Tiled floors should be swept or vacuumed
regularly to remove all loose dirt. It is
important to use the correct Fired Earth
products when maintaining your floor, as
these have been formulated to both clean
the floor and be gentle on the sealants.
Spillage and cooking stains should never
be allowed to remain on floor and should
be wiped off immediately with a clean,
damp cloth.
Fired Earth Super Floor* - Tiles finished
with Fired Earth Stone Finish* should be
wiped over with Fired Earth Super Floor*
diluted in clean, warm water.
Tiles finished with Cotto Rapid* should be
wiped clean with Fired Earth Stone Clean*
diluted with water. Reapply Cotto Rapid*
when the floor appears dull.
Product notes
Slate - A certain amount of delamination
should be expected from slate tiles during
and following installation. During
installation any loose flakes should be
broken off. Where delamination occurs
after installation, the affected area should
be resealed. Slate tiles should not be
installed in areas subject to direct and
intense heat, as this may cause extensive
delamination.
Uncalibrated Slate - Because of the great
variation in the depth of individual
Natural Stone Tiles and Mosaics
Sealing
MN Stain Stop* will maintain the natural
appearance of the tile. Fired Earth Stone
Shield* will enhance the colours and deepen
the appearance of the natural stone.
Before grouting apply one to two coats of
appropriate sealant. Once the grouting has
completely dried and the tiles are clean and
dry, apply one further coat with a fluff-free
cloth. Any excess sealant should be wiped
off before it dries with a clean, dry cloth.
Ensure the grout is fully sealed.
Finishing
If using Fired Earth Stone Shield* finish
with Fired Earth Stone Finish*; spread
evenly and sparingly over both tiles and
grout with a soft, fluff-free cloth, unless in
a wet area where no finishing product
should be used.
If using MN Stain Stop* no finishing
product is required.
Maintenance
Tiled floors should be swept or vacuumed
regularly to remove all loose dirt. It is
important to use the correct Fired Earth
products when maintaining your floor, as
these have been formulated to both clean
the floor and be gentle on the sealants.
Spillage and cooking stains should never be
allowed to remain on an unglazed floor and
should be wiped off immediately with a
clean, damp cloth. Tiles will require resealing
from time to time, dependant on use.
MN Stain-Stop* - Tiles sealed with
MN Stain Stop* should be cleaned with
MN Easy Care*.
Fired Earth Stone Shield* - Tiles sealed
with this product should be cleaned using
Fired Earth Super Floor* diluted with clean
water. It is unadvisable to use Fired Earth
Super Floor* in wet areas.
Product notes
Honed and Filled Stone - Occasionally the
filler in the stone may require repair by
simply infilling with Limestone grout* or a 2
part resin based filler which is available for
purchase from Fired Earth via our Technical
Department.
uncalibrated slate tiles, it is recommended
that the tiles are graded before installation
Pale Classic and Chipped Edge Slate -
Following the application of Fired Earth
Stone Finish*, these products must always
be finished and maintained using Fired
Earth Wax Paste*.
Lubelska Bricks - Lubelska Bricks are
irregular in size, and depth and this needs
to be taken into account when planning
and tiling. Being a reclaimed product, the
tiles will vary in colour, texture and size.
Page 9

17
Porcelain and Glass Tiles
These tiles do not require any sealing or
finishing products. After grouting, the tiles
should be polished with a soft, clean cloth
to remove any remaining grout film. The
grout can be sealed with MN Stain Stop* to
prevent staining.
Maintenance
Clean your floor with an MN Easy Care*
when required.
Colour change - As the colour of each
batch of stone will vary, it is advisable to
confirm your choice of sealant by treating a
small number of test tiles prior to treating
the whole floor.
External Floor Tiling
Many of our tiles are suitable for external
use. As we sell our tiles all over the world,
atmospheric/climate conditions must be
taken into consideration.
For more information on specific tiles
please speak to our Sales Team or our
Technical Department.
Glossary
Adhesion – The ability to stick
Angle Grinder – Electrical tile cutting tool
Anhydrite Screeds – Calcium based
screed, seek advice
Appliances – Fridge, dishwasher etc.
Asphalt – Black, bituminous base
Bedding – Depth of material to seat tiles
Bitumen – Black in colour, often used
as a glue to stick vinyl tiles
Bowed – Convex or concave shaped tiles
Buffed – Abrasion of a waxed surface
Butter – Applying a thin bed of adhesive
to the back of the tile.
Butt Jointed – Fixing tiles together tightly
with no allowance for a grout joint
Chalk Line – Tool used to provide straight
line for setting out tiles
Chipboard – A composition of
fibrous timber
Coatings – Material applied to a surface
Compacting – Pressing material firmly
into position
Cotto Rapid – Surface sealer and finish
Curing – Improvement in strength, hardness,
durability and other properties of a material
Damp Proof Membrane (DPM) –
A layer of impervious material installed
to prevent rising damp
Day Joints - A ‘joint’ in the screed as a
result of a break in pouring the screed
Delamination – Loss of some or all of a
naturally occurring layer of slate
Diamond Cutter – Electrical cutting tool
Expansion Joints – A space allowed in a
floor to allow for movement
Fired Earth Flexible Fastset Adhesive –
Flexible tile adhesive with improved
bond strength
Fired Earth Flexibond – A liquid used as an
additive in adhesive or grout to increase
flexibility and bond strength
Fired Earth Fleximat – An orange plastic
sheet used to prepare timber floors for tiling
Floating or Insulated Floor – A thermally
efficient floor which is not physically
attached to its base
Filled Stone – Where any naturally
occurring holes have been filled with
resin based filler
Finishing – Process of applying final
coat of sealer
Grout Float – Tool used to apply grout
Grout Joints – Channel formed between
tiles to be filled with grout material
Honed Stone – Mechanical process used
to smooth the surface of natural stone
Linseed Sealer – Impregnating sealer
MN Stain Stop – Impregnating sealer
Movement Joint - An area which allows
for movement caused by change in
temperature/humidity etc.
Notched Trowel – Tool designed to
apply a specified depth of adhesive
Oxidise – Hardening reaction following
exposure to the air
Presealed – Pre-treated with sealer
at the factory
Pointing – Careful application of grout
between tiles using a tool to finish off
the joint
Sand and Cement Screed – A mixture
laid to form an accurate flat base
Sealing – Process of applying liquids to
reduce porosity
Slurry – A thick creamy liquid
Spoil – Excessive or surplus sealer
Squeegee – Rubber edged tool to aid
removal of excess grout
Stone Clean 1 – Cleaning agent
Fired Earth Stone Finish – A surface sealer,
protector and finish
Fired Earth Stone Shield – An
impregnating sealer
Straight Edge - Tool used to ensure tiles
are ‘straight’ and ‘flat’.
Subfloor – The surface on to which the
tiles are to be laid
Fired Earth Super Floor – Cleaning agent
Thermal Movement – Movement induced
by temperature change
Fired Earth Universal Bonding Agent -
Primer for surfaces prior to applying tile
adhesive.
Fired Earth Universal Levelling Compound –
Material used to remove unacceptable
variations of level in a subfloor, or bed
underfloor heating
Uncalibrated – Tiles will vary in depth
Wax Polish – Protective material originated
from bees wax
WBP Plywood - Minimum 18mm deep,
suitable grade for floor tiling
16
Page 10

Substrate
Sand and
Cement Screed
Concrete/Brickwork
Timber
Floorboards
(sound and secure)
Timber Floorboards
overlaid with WBP
Plywood (min depth 18mm)
Timber Floating
Floors
Quarry, Clay,
Glazed Tiles
Vinyl Tiles, Flooring
Grade Asphalt
(internal use only)
Underfloor
Heating
Watch Points
New concrete should be
allowed to dry for at least 6
weeks, cement sand screeds
3 weeks and cement sand
rendering 2 weeks
Must be screwed down to
joists and noggings and be
free from deflection
Countersink screws
to 150mm centres
If deflection exists in
floor, overlay with
plywood prior to using
Fleximat* or install
‘bearers’ between joists
Existing tiles must be
well fixed; any hollow
spots should be made
good and filled
Hollow or loosely fixed vinyl
tiles should be removed
along with their adhesive
residue, prime vinyl with
Universal Bonding Agent*
Fit in accordance with
manufacturers instructions.
Specification may vary
according to substrate
Preparation
If dusty or porous seal
with Fired Earth Universal
Bonding Agent*
Seal with Fired Earth
Universal Bonding Agent,
overlay with Fleximat
(see instructions)*
Seal with Fired Earth
Universal Bonding Agent*
Seal with Fired Earth
Universal Bonding Agent,
overlay with Fleximat
(see instructions)*
All surfaces must be
degreased and thoroughly
cleaned to remove old
polish residues etc
All surfaces must be
degreased and thoroughly
cleaned to remove old
polish residues etc.
Fit in accordance with
manufacturers instructions.
Specification may vary
according to substrate
PRESEALED AND RECLAIMED TERRACOTTA TILES AND LUBELSKA BRICKS Tiles need to be dry before installation
Adhesive
Fired Earth Fastset Floor Adhesive or Fired Earth Thickbed Adhesive
with Lubelska Brick and Reclaimed Terracotta tiles*
Grout
Sandstone*
Additive
Not required Fired Earth Flexibond* in both adhesive and grout Not required
Fired Earth Flexibond* in
both adhesive and grout
ENCAUSTIC - Tiles need to be dry before installation
Adhesive
Fired Earth White Floor Adhesive*
Grout
All Fired Earth grouts are suitable*
Additive
Not required Fired Earth Flexibond* in both adhesive and grout Not required
Fired Earth Flexibond* in
both adhesive and grout
SLATE TILES - Tiles need to be dry before installation (Use Thickbed Adhesive with all 40 x 60cm and 60 x 60cm Tiles)
Adhesive
Fired Earth
Fastset Floor Adhesive*
Fired Earth Flexible Fastset Floor Adhesive*
Fired Earth
Flexible Fastset Adhesive*
Fired Earth
Flexible Fastset Adhesive*
Fired Earth
Flexible Fastset Adhesive*
Grout
All Fired Earth grouts are suitable*
Additive
Not required Fired Earth Flexibond* Not required Fired Earth Flexibond
Product Selector 1 - Adhesives, Grouts and Additives Quick reference guide
1918
* Read the instructions on the packaging of Adhesives, Grouts and Sealants very carefully.
Notes:
Use this table in conjunction with Fired Earth Installation guides.
Page 11

Substrate
Sand and Cement
Screed
Concrete/Brickwork
Timber
Floorboards
(sound and secure)
Timber Floorboards
overlaid with WBP
Plywood (min depth 18mm)
Timber Floating Floors
Quarry, Clay,
Glazed Tiles
Vinyl Tiles, Flooring
Grade Asphalt
(internal use only)
Underfloor Heating
Watch Points
New concrete should be
allowed to dry for at least 6
weeks, cement sand screeds
3 weeks and cement sand
rendering 2 weeks
Must be screwed down to
joists and noggings and be
free from deflection
Countersink screws
to 150mm centres
If deflection exists in
floor, overlay with plywood
prior to using Fired Earth
Fleximat or install ‘bearers’
between joists*
Existing tiles must be well
fixed; any hollow spots
should be made good and
filled
Hollow or loosely fixed vinyl
tiles should be removed
along with their adhesive
residue, prime vinyl with
Fired Earth Universal
Bonding Agent*
Fit in accordance with
manufacturers instructions.
Specification may vary
according to substrate
Preparation
If dusty or porous seal
with Fired Earth Universal
Bonding Agent*
Seal with Fired Earth
Universal Bonding Agent,
overlay with Fired Earth
Fleximat (see instructions)*
Seal with Fired Earth
Universal Bonding Agent*
Seal with Universal
Bonding Agent, overlay
with Fleximat (see
instructions)*
All surfaces must be
degreased and thoroughly
cleaned to remove old
polish residues etc
All surfaces must be
degreased and thoroughly
cleaned to remove old
polish residues etc
Fit in accordance with
manufacturers instructions.
Specification may vary
according to substrate
NATURAL STONE TILES AND MOSAICS - Tiles need to be dry before installation
Adhesive
Fired Earth White
Fastset Floor Adhesive*
Fired Earth White Fastset Floor Adhesive
with Fired Earth Flexibond added*
Fired Earth White
Fastset Floor Adhesive*
Fired Earth White Fastset
Floor Adhesive with Fired
Earth Flexibond added*
Grout
All Fired Earth grouts are suitable*
Additive
Not required Fired Earth Flexibond in grout* Not required
Fired Earth Flexibond
in grout*
GLAZED, PORCELAIN AND GEOMETRIC TILES (Thickbed Adhesive can be used for all tiles 40 x 60cm and 60 x 60cm and above)
Adhesive
Fired Earth Flexible Fastset Adhesive*
Grout
Grey/Sandstone/Limestone*
Additive
Not required
Fired Earth Flexibond*
(grout only)
Not required
Fired Earth Flexibond
(grout only)*
GLASS TILES (Use Thickbed Adhesive with all 40 x 60cm and 60 x 60cm Tiles)
Adhesive
Fired Earth White Fastset Floor Adhesive with Flexibond added*
Grout
White/Grey/Limestone*
Additive
Fired Earth Flexibond in grout*
Product Selector 1 (cont’d) - Adhesives, Grout and Additives Quick reference guide
2120
* Read the instructions on the packaging of Adhesives, Grouts and Sealants very carefully.
Notes:
Use this table in conjunction with Fired Earth Installation guides.
Page 12

Product
Sealant Finish Cleaner Maintenance
Terracotta
(inc. Reclaimed terracotta)
Fired Earth Linseed Sealer*
Wax paste (high
protection/high
maintenance/
colour enhancer)
Cotto Rapid
(low maintenance,
less protective)*
For waxed floors, use Fired Earth
Super Floor; for Cotto Rapid
floors, use Clean Stone 1*
For waxed floors it is advisable to apply further
wax coats from time to time; For Cotto Rapid floors,
reapply when floor appears dull*
Pre-sealed terracotta
Not required Cotto Rapid* Clean Stone 1* Reapply Cotto Rapid when floor appears dull*
Lubelska bricks
Fired Earth Stone Shield* Cotto Rapid* Clean Stone 1* Reapply Cotto Rapid when floor appears dull*
Encaustic
(follow specific instructions)
Fired Earth Stone Shield* Fired Earth Stone Finish* Fired Earth Super Floor* Reapply Fired Earth Stone Finish when floor appears dull*
Geometrics
MN Stain Stop* Not required MN Easy Care* Not required
Slate
Stone Shield
in dry areas*
MN Stain Stop
in wet areas*
Fired Earth Stone Finish if using
Fired Earth Stone Shield only*
If finishing with Fired Earth
Stone Finish, use Fired Earth
Super Floor; if sealing with MN
Stain Stop* use MN Easy Care*
For wet areas re-apply MN Stain Stop* when tiles appears porous; For dry
areas, re-apply Fired Earth Stone Finish when tiles appear dull. Wax paste
will be required for Pale Classic and chipped edge tile (use only in dry areas)
Natural Stone
(inc. Stone Mosaics)
MN Stain Stop to
retain natural
appearance*
Stone Shield to
enhance natural
colours*
If sealing(dry areas only) with
Fired Earth Stone Shield, use Fired
Earth Stone Finish; if sealing with
MN Stain Stop no finish is required*
If finishing with Fired Earth
Stone Finish, use Fired Earth
Super Floor; if sealing with MN
Stain Stop use MN Easy Care*
For MN Stain floors, it is advisable to re-apply the MN Stain Stop if
tiles become porous. For Fired Earth Stone Finish floors, reapply when
floor appears dull*
Roman Mosaics
MN Stain Stop* Not required MN Easy Care*
It is advisable to reapply the MN Stain Stop*
if tiles becomes porous
Porcelain
Tiles do not require sealing; seal
grout joints with MN Stain Stop*
Not required MN Easy Care* Not required
Glass
Tiles do not require sealing; seal
grout joints with MN Stain Stop*
Not required MN Easy Care* Not required
Product Selector 2 - Sealing, Finishing and Maintenance Quick reference guide
2322
* Read the instructions on the packaging of Adhesives, Grouts and Sealants very carefully.
Notes:
Use this table in conjunction with Fired Earth Installation guides.
 Loading...