

Page 1
REMEMBER: when replacing a part on this appliance, use only spare parts that you can be assured
conform to the safety and performance specification that we require. Do not use reconditioned or copy
parts that have not been clearly authorized by AGA.
Owners Manual
comprising
Users and Installation Guide
AGA TC5 and DC5
(Hotcupboard with Induction Cooktop)
IMPORTANT : SAVE INSTRUCTIONS FOR FUTURE REFERENCE
IMPORTANT : CONSERVER CES INSTRUCTIONS POUR REFERENCE FUTURE
THESE INSTRUCTIONS MUST BE READ IN CONJUNCTION WITH THE TOTAL CONTROL OR
DUAL CONTROL RANGE INSTALLATION AND USERS GUIDE
12/15 EINS 517244
For use in USA/Canada
Page 2

2
SECTION PAGE
Product Safety 3
General Notes 3
Users Section 4
Introduction 4
Safety 4
Fire 4
Pans 5
How to use your Induction Cooktop 5
Induction Cooktop 5
Control Panel 5
Switching the Induction Cooktop ON 5
Setting the Power Level 5
Switching the Induction Cooktop OFF 6
Pan Detection 6
Residual Heat Indicator 6
Pause 6
Warming Function 6
Auto Cook 6
Minute Timer 7
Control Locking 7
Overheat Protection 7
Hutcupboard 8
Cleaning 9
Installation Guide 10
General Installation Requirements 10
Using Left Hand Side Flue Vent Option - 10
AGA Dual Control 5 Oven Gas Power Flue only
Electrical Connection 10
Warranty Service 11
Wiring Diagram 11
AGA TC5/DC5 (Electric) - Appliance Dimensions 12
AGA DC5 Gas Power Flue - Appliance Dimensions 13
CONTENTS
Page 3
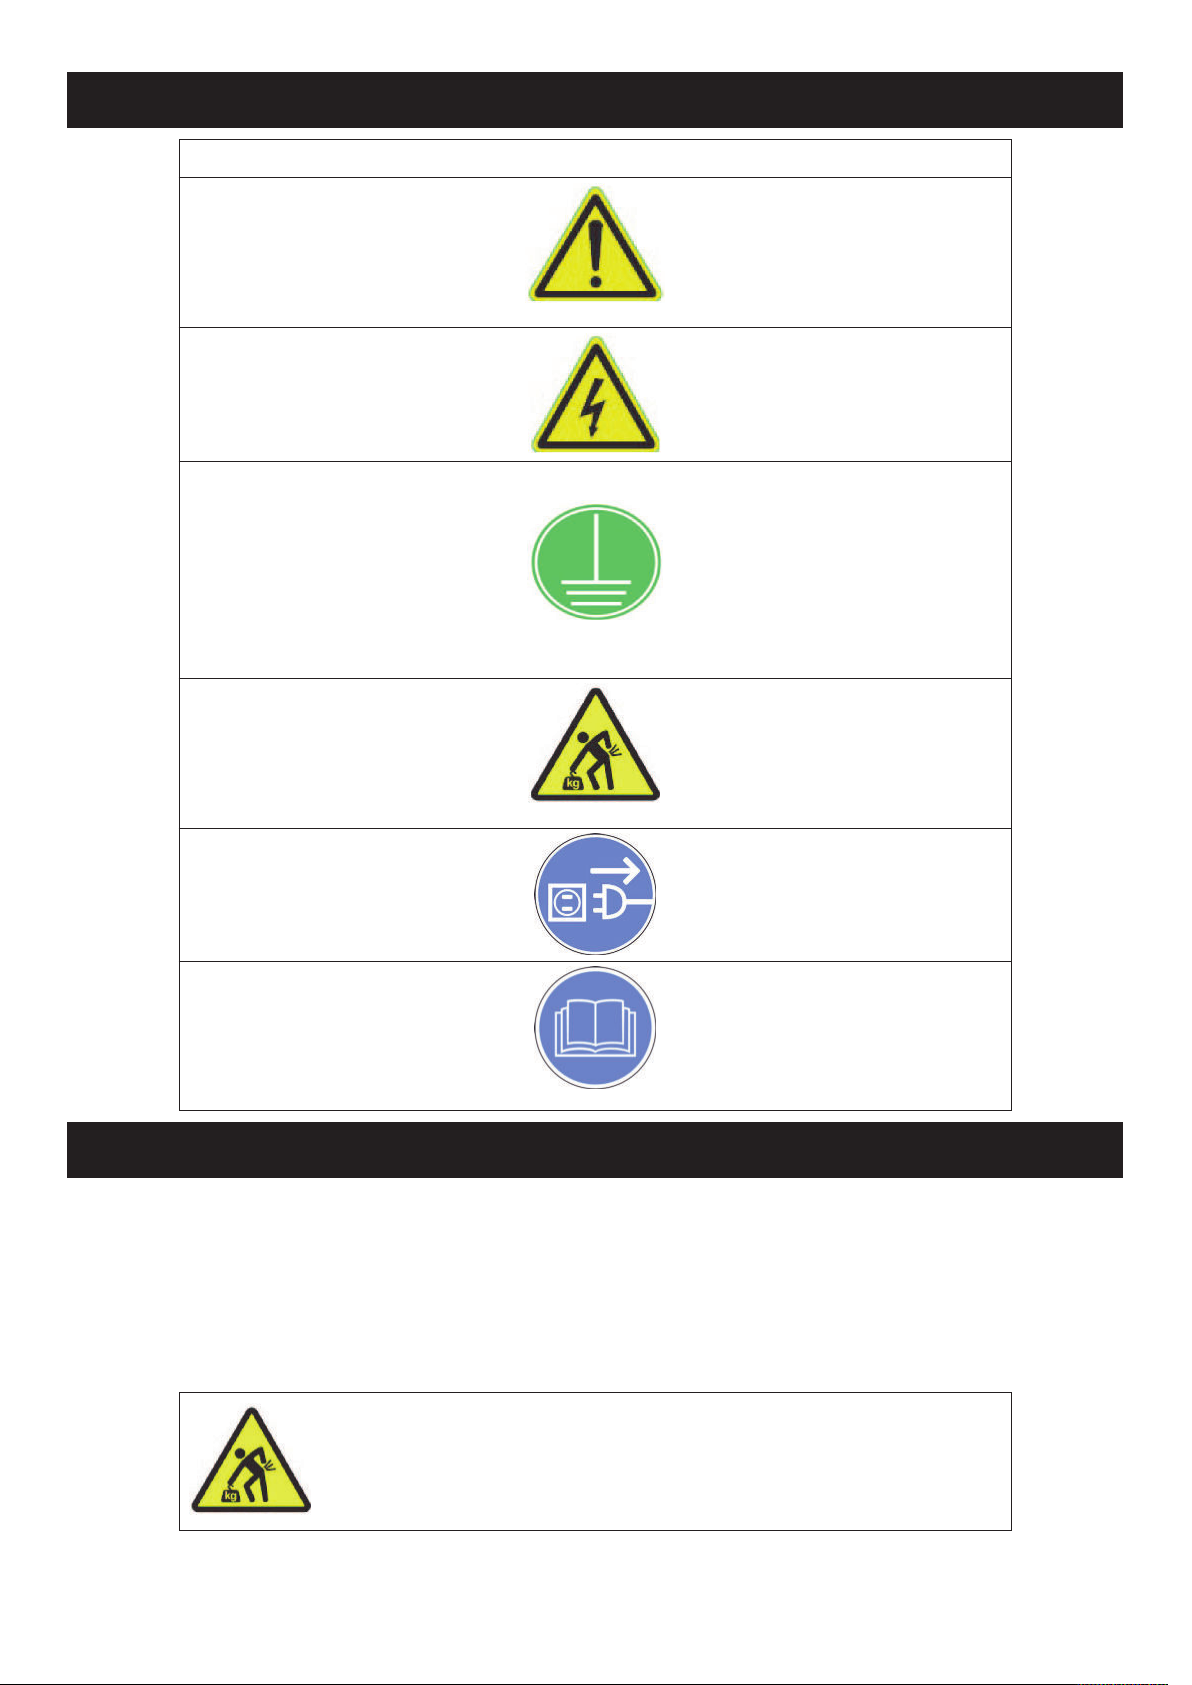
PRODUCT SAFETY
MEANING/DESCRIPTION SIGNIFICATION/DESCRIPTIONSYMBOL
WARNING/CAUTION
An appropriate safety instruction
should be followed or caution to a
potential hazard exists.
AVERTISSEMENT
Une consigne de sécurité
appropriée doivent être suivies
ou garde d’un danger potentiel
exists.
DANGEROUS VOLTAGE
To indicate hazards arising from
dangerous voltages.
TENSION DANGEREUSE
Pour indiquer les dangers
résultant des tensions
dangereuses.
PROTECTIVE EARTH (GROUND)
To identify any terminal which is
intended for connection to an
external conductor for protection
against electric shock in case of
a fault, or the terminal of a
protective earth (ground)
electrode.
TERRE DE PROTECTION
Pour marquer bornes destin
ées à
être raccordées à un conducteur
de protection extérieur contre les
chocs éclectiques en cas de
défaut d’isolement, ou pour
marquer la borne de la terre de
protection.
HEAVY
This product is heavy and
reference should be made to the
safety instructions for provisions
of lifting and moving.
LOURD
Ce produit est lourd et doit
être
fait référence auc consignes de
sécurité relatives aux dispositions
de soulever et déplacer.
DISCONNECT MAINS SUPPLY
Disconnect incoming supply
before inspection or
maintenance.
APPAREIL À LASER DE
CLASSE 2
Alimentation d’entr
ée Débrancher
avant inspection ou d’entretien.
REFER TO MANUAL
Refer to relevant instructions
detailed within the product
manual.
ATTENTION, SURFACE TRÉS
CHAUDE
Reportez-vous aux instructions
applicables, indiquées dans le
manuel du produit.
GENERAL NOTES
Consumer Protection
As responsible manufacturers we take care to make sure that our products are designed and constructed to meet the
required safety standard when properly installed and used.
PLEASE READ THE ACCOMPANYING WARRANTY
Any alterations that is not approved by AGA could invalidate the approval of the appliance, operation of the warranty
and could also affect your statutory rights
CAUTION:
THIS UNIT IS HEAVY, PROPER EQUIPMENT AND ADEQUATE
MANPOWER MUST BE USED IN MOVING THE RANGE TO
AVOID DAMAGE TO THE UNIT OR THE FLOOR
3
Page 4

Introduction
Thank you for choosing the AGA Hotcupboard with
induction cooktop. The induction cooktop is an efficient
way of cooking and will give you more control during the
cooking process. The hotcupboard provides gentle heat,
in the form of a slow cooking oven and warming oven.
Please read these instructions to ensure a full
understanding of the controls and the precautions
required prior to their use.
4
Please read the following points carefully.
• Important information for pacemakers and insulin
pump users.
The functions of this induction cooktop complies with
applicable standards for electromagnetic interference.
If you are fitted with such a device and have concerns
please consult your doctor for medical advice.
• This appliance is not intended for use by persons
(including children under 8) with reduced physical,
sensory and mental capabilities, or lack of experience
and knowledge, unless they have had or been given
supervision or instruction concerning its use by a
person responsible for their safety and understand the
hazards involved.
• Children shall not play with the appliance. Cleaning
and user maintenance shall not be made by children
without supervision.
• Do not use a cracked or broken cooktop. Should a
crack appear and to avoid electric shock, disconnect
the appliance from the electrical supply and arrange
for its repair.
• Surfaces on and around the appliance may get hotter
than expected and remain hot during and for a while
after use, children should be kept away during this
time.
• When the cooktop is in use keep items that use a
magnetic storage medium, such as credit cards away.
• Metallic objects such as cutlery, should not be placed
or stored on the induction cooktop as they may get
hot. Cutlery, utensils and unused pans should be
stored elsewhere.
• Do not allow saucepan handles to overhang the
cooktop.
• Do not slide cooking pans over the cooktop.
• After use, turn the induction cooktop off, do not rely on
the pan sensor.
• Do not use the cooktop as a cutting board.
• Do not use the appliance to dry clothes and other
combustible materials.
• Do not obstruct appliance vents by placing towels,
clothes etc. on the hand rail.
• Do not use steam cleaners on your appliance.
Users Guide Safety
Fire!
• To avoid fire. Never leave a pan containing oil
unattended. Always heat oil slowly and watch as it
heats. To prevent spillage do not fill a pan more than a
third of its capacity, this will prevent spill over when
adding food.
• DO NOT use water on a fat/oil fire. NEVER move the
pan. Turn off the appliance at the wall switch and
carefully smother the flame with a lid, fire blanket or
use an approved dry extinguisher.
Page 5

DEFINED
PAN AREA
9” (230mm)
MAXIMUM
5
Pans
It is important to use pans that are specifically
recommended for induction cooking. Generally stainless
steel, special pans with stainless steel bases, enamelled
steel, or cast iron pans with flat enamelled bases are
suitable. It should be noted that some grades of
stainless steel pans may not function or may be slow to
heat.
All copper and all aluminium constructed pans or
ceramic pans, will not work on an induction cooktop. If
you are unsure of a pan, try a quick test using a magnet
on the pan base (See Fig. 1). A strong attraction
between magnet and pan, will normally indicate a
suitable pan. Weak or no attraction usually indicates a
pan that is not suitable. Do not forget to remove the
magnet before using the pan on the cooktop.
Fig. 1
Ideally pans should have near flat bottoms to maximise
induction efficiency.
Most types of pans will generate a faint audible sound
during the cooking process and this is perfectly normal.
The level of sound will vary depending on the type and
style of pan used.
AGA accessories can be viewed at your local AGA
dealer or onlinr at www.aga-ranges.com
Use pans that are the same size or slightly larger than
the marked area. Smaller pans will take longer to heat.
Using a pan with a lid will help pan contents boil more
quickly.
Fig. 2
How to operate your Induction
Cooktop
Place an appropriate pan containing food to be heated,
onto the induction cooktop.
Touch the power on pad , touch the induction on
pad .
Set power level by sliding your finger along the power
level pads to the required setting.
To simmer, slide your finger down the power level pads
for a lower setting.
Turn the cooktop off after pan contents are heated, by
touching the power off pad .
Remove the pan from the cooktop carefully, as it will be
hot.
Induction Cooktop
The induction cooktop works independent of the AGA
hotcupboard. It is not necessary for the hotcupboard
control switch to be on when the induction cooktop is in
use.
All of the induction cooktop functions are accessed via
the touch pads located on the ceramic surface.
Display Indicators
Auto Cook
Pan detection
Residual heat
Lock set
Boost
Warming settings
Timer set
Pause set
Power levels
Prolonged pad
contact
Control Panel - See Fig. 3
Always use positive finger contact on the touch pads to
ensure a good control response (by gently touching and
not pressing the pad).
Touch pads may not respond if the induction cooktop
control area is wet. Touch pad area should be dried prior
to use.
Page 6

Switching the Induction
Cooktop ON
Using the induction cooktop requires three steps.
1. Touch the power on - off pad
2. Touch the induction on - off pad and
3. Set the required power level
If power level is not set within 20 seconds the unit will
automatically switch off.
Setting the Power Level
This induction cooktop offers 10 levels of power the first
9 power levels can be selected by touching an individual
power level pad or by sliding your finger along the
pads. A visual indicator will illuminate as both a
numerical as a level display with a
representing high.
The 10th power level is achieved using the boost
function. To set the boost function, touch boost pad
the display will indicate . The boost function will run
for 10 minutes maximum before reverting back to
setting .
6
Fig. 3
Display
Cooktop Timer Set
Warming
Levels
Power
Level
Display
Induction
On-Off
Warm
Setting
Low
Power Level
Lock
Power
On-Off
Pause
Minute
Timer
Set
Timer Display
High
Boost
When the power is on and a power level is selected, the
pan detection will be automatic whenever the pan is
placed within or removed from the cooking zone on the
cooktop. (See Fig. 2 for defined pan area and Fig. 4 for
pan location).
If there is no pan placed on the cooking surface the
display will flash .
Always switch off by touching the power pad when
the cooktop is not in use.
Switching the Induction
Cooktop OFF
After use the cooktop should be turned off by touching
the power touch pad .
Pan Detection
Fig. 4
Residual Heat Indicator
The cooktop surface will get hot when in use, this is due
to heat being conducted from the cooking pan. The
cooktop surface will also remain hot for a while after
use.
After the cooking period the cooktop hot indicator will
be displayed and for a short period of time after power
off.
Pause
To interrupt the cooking period, touch the pause touch
pad , cooking will stop and will be displayed.
To recommence cooking, touch pause pad and then
slide your finger the full length of the power level pads,
through to the original power level will be
automatically set.
Pause remains active for 10 minutes only, after 10
minutes the cooktop will switch off.
Page 7

There are two control locking features:
1. Temporary Lock, this feature will lock the controls
for the duration of a cooking process to prevent
accidental adjustment of the controls.
Touch power button followed by induction on pad .
Set to required power level . Touch lock key .
Power levels only, are locked to prevent adjustment
during a cooking period.
To unlock, touch the lock pad to enable power level
adjustment, or power pad to turn the cooktop off.
To remove the feature, after use touch power on pad
and then lock pad .
2. Fixed Lock, will lock the controls, even when the
cooktop is powered off, this feature is to prevent
accidental and unsupervised cooktop use and will
require manual intervention before use, or
deactivation of the feature.
Power off pads and will always function.
Touch pads can be locked to prevent unsupervised
control function, even after the cooktop has been
powered off. Manual intervention or a deactivation
sequence will be required to return the cooktop to
normal operation.
To activate the fixed lock. Touch power pad , followed
by induction on pad .
The induction cooktop has two individual timers:
Kitchen Timer, for general kitchen timing requirements,
for example, timing food cooked in an oven.
Touch power pad and then pads together,
will be displayed.
A time can now be set using or touch pads. The
count down will commence after a few seconds. If an
instant countdown is required touch the power pad .
After the set time has elapsed the audible alarm can be
cancelled by touching the power off pad .
To modify or cancel a previously set time, touch
power pad (on) and then pads together.
Release and then touch either the or pad to
adjust the time setting, or set to zero time.
Warming Function
The warming function will keep cooked food warm for a
set period of time.
Touch the power on - off pad . Touch the induction
on - off pad and touch the first power level pad to
select warming level one, the warming indicator and
will be displayed.
To select the second and higher warming level, touch
and hold the first power level pad . The warming
indicator and will be displayed.
Auto Cook
The Auto Cook feature allows the pan contents to be
brought up to a high temperature rapidly, before
reverting back to the set power level.
To set Auto Cook
Touch power on pad and then touch induction on
pad .
Touch required power level pad for 5 seconds. The
symbol along with the set level, will flash in the
display.
Turn off the cooktop by touching the off pad after
cooking is complete.
6
Minute Timer
Minute Minder, for timing the duration of the induction
cooking process.
The timer functions do not start or stop a cooking
process.
Touch power pad followed by induction on pad ,
set the required power level .
Touch pads together will be displayed,
use and pads to set time. The count down will
commence after a few seconds.
After set time has elapsed the audible alarm can be
cancelled by touching the power off pad .
To modify a previously set time, touch
pads together and adjust using and pads.
The timer with the shortest time period remaining will
show in the display.
Control Locking
Page 8

7
Touch lock and pause pads together , release
and then touch lock pad . will be displayed.
Manual intervention will be required to release the
control functions for use. This is done by touching lock
and pause pads together followed by induction
on pad.
The induction cooktop control function will now be
normal.
When the cooktop is switched off the Fixed Lock will still
be active.
To deactivate the Fixed Lock. Touch power pad ,
touch lock and pause pads together , release
and then immediately touch the pause pad.
If deactivation fails wait 20 seconds before retrying or
unplug the appliance.
Overheat Protection
Power levels will be automatically reduced if excessive
high temperatures are monitored below the cooking
zone. If high temperatures are detected it will not be
possible to adjust the power level to a higher level than
shown in the visual displays.
Should a pan be allowed to boil dry the overheat
protection system will turn the induction cooktop off.
Hotcupboard
Simmering Oven plus Warming Oven
These ovens are not cast iron on the interior. They are
heated by a single element at the rear of the oven
cavity. It is operated by a single push ON-OFF button
located on the left hand side of the hotcupboard top
plate and can be turned ON and OFF when required.
(See Fig. 5).
ON/OFF
BUTTON
Fig. 5
Simmering Oven
This oven delivers a gentler convected heat making it
better suited for longer cooking times, especially for
overnight cooking, for example rich fruit cakes and
celebration cakes. The cooking of meringues may also
be better suited for this oven.
NOTE: These ovens vent into the room, mechanical
venting to the outside is not available.
Points to remember when using the Simmering Oven:
• Pre-heat the oven for 30 minutes before starting to
cook.
• Bring casseroles, soups etc to the boil on the
hotplate and start meat in the roasting oven, before
placing in the slow cook oven.
• Make sure that casseroles have sufficient liquid,
particularly when cooking over a long period.
• Use lids on casseroles or foil to cover food whilst it
is cooking to retain moisture.
• Make sure all dishes will fit into the oven before
preparing food.
• Make sure that meat and poultry is piping hot before
eating and reaches 75°C internal temperature.
• Always thaw frozen food completely before
cooking.
You can also produce crisp white meringues in the slow
cooking oven.
Timings for simmering oven will depend upon the
temperature, quantity and type of dish you are cooking,
as a guide for casseroles, a minimum of 2 hours cooking
time is recommended.
Keep an eye on the food until you are familiar with the
oven.
Page 9

Cleaning
Induction Cooktop
Make sure all the surfaces have cooled prior to cleaning
the cooktop and front plate.
The easiest way to clean the AGA induction cooktop and
front plate is to mop up spills as soon as they happen. It
maybe useful to keep a damp cloth handy to do this.
The ceramic surface should then be cleaned with a
proprietary cleaner.
If milk or fruit juice or anything containing acid, is spilt on
the cooker, wipe it up immediately.
Also, clean off any condensation streaks on the front
plate around the oven doors or the vitreous enamel
maybe permanently discoloured.
All that is usually needed to keep the vitreous enamel
surfaces of the cooker bright and clean is a daily rub
over with a damp soapy cloth followed immediately with
a clean, dry cloth to avoid streaks.
Ensure the lower vent is cleaned on a regular basis, and
free from obstruction, to maintain sufficient air flow
through the appliance. (The louvered plinth facia can be
easily removed for cleaning).
Hotcupboard Ovens
Oven Door Linings
The best way to keep the linings clean is to wipe them
over after cooking (be careful with a hot cooker), so that
splashes do not get baked on.
Clean the linings when they are cool and the cooker is
off. The linings can be cleaned with hot soapy water
and /or a cream cleanser. To deep clean the linings,
place a towel on the work surface and carefully lift off
the oven door (doors are heavy). Place it enamel side
down on the towel padding. Clean with a soapy
impregnated pad to remove stubborn marks. Do not
immerse the doors in water as they are packed with
insulating material which will be damaged by excessive
moisture. Dry off before carefully replacing on their
hinges.
Do not put oven doors in a dishwasher.
9
Page 10

10
Installation Guide
Please refer to the Total Control or Dual Control
installation guide for product dimensions following
the Hotcupboard instructions.
Electrical Connection
Electrical grounding is required on this
appliance.
DO NOT connect to the electrical supply
until the appliance is permanently
grounded.
This appliance must be connected to a
ground metallic permanent supply or wire
lead on the appliance.
Failure to follow these instructions could
result in death or serious injury.
Using Left Hand Side Flue Vent
Option - AGA Dual Control 5
Oven Gas Power Flue
When installing a
AGA Dual Control 5 Oven Gas
Power Flue where the cooker flue vent pipe exits to the
left, it will be necessary to use the off set flue pipe
adaptor (supplied with the installation kit). The adaptor
must be positioned at the cooker left hand flue exit to
allow the flue tube to pass behind the hotcupboard. (See
Figs. 6 and 7).
Always fit the offset elbow in a position that will not
create a water/grease trap.
Off set flue pipe adaptor
Pressure drop is equal to a 90° bend
Fig. 6
Fig. 7
General Installation
Requirements
The installation of the range must be in accordance with
the relevant requirements of the local Wiring and
Building Regulations. It shuld be in accordance also with
any relevant requirements of the local or state codes.
In your own interest and that of safety to comply with the
law, all appliances should be installed by an authorized
AGA distributor in accordance with the relevant
regulations.
Use these instructions when making the
electrical connection.
This appliance must be supplied with a 240V 60Hz
power supply and connected to a properly grounded
branch circuit protected by an appropriate circuit
breaker.
At 240 Volts the appliance has a maximum load of
12.5 amps.
The rating plate can be found on a pull out plate located
at the lower front of the appliance. Electrical hook-up
must be done by a licensed electrician. This appliance
must be installed according to regional codes, or in the
absence of regional codes, the National Electrical Code.
The power cord on the appliance is fitted with a
standard 3 conductor NEMA type 6 -20 P plug, and
should be plugged directly into a matching receptacle
(matching receptacle 6-20R) Do not cut or remove the
grounding prong from this plug.
An electrical socket (receptacle) must be provided within
5 feet of the left hand side of the appliance and easily
accessible for the user to disconnect. Do not position
the socket over the appliance. Do not use an extension
cord with this appliance.
Fig. 8
Page 11

Service
Please refer to main guide for service detail.
Fig. 9
Do not fuse the grounding circuit as this could result in
an electric shock.
Failure to follow these instructions could result in death
or serious injury.
Fig. 10
Wiring Diagram
11
Page 12

12
DESN 516561
A B C D E F G H J K L
mm 1478 951 913 680 1388 760 1145 698 116 10 634
ins 58
1
/4
37
1
/2
36 26
3
/4
54
5
/8
29
7
/
8
45
1
/8
27
1
/2
4
9
/16
3
/8
25
AGA TC5/DC5 - RANGE DIMENSIONS
Fig. 11
Page 13

Fig. 12 DESN 516848 A
OVERHEAD
CUPBOARD
AGA DC5 GAS POWER FLUE - RANGE DIMENSIONS
A B C D E F G H J K L M N P Q R S T U
mm 1478 951 913 680 1388 760 1145 698 116 10 565 689 43 118 55 634 75 760 330
inch
58 1/4 37 1/2 36 26 3/4 54 5/8 29 7/8 45 1/8 27 1/2 4 9/163/8 22 1/4 27 1/8 1 3/4 4 5/8 2 1/8
25
3
30 13
131415
Page 14

Page 15

Page 16

16
www.agamarvel.com
Supplied by
AGA Marvel
1260 E. Van Deinse St.
Greenville, MI 48838
Business (616) 754-5601
Fax (616) 754-9690
Toll Free Telephone 800-223-3900
With AGA Marvel’s policy of continuous product
improvement, the Company reserves the right to
change specifications and make modifications to
the appliance described and illustrated at any time.
For further advice or information contact
your local AGA Specialist
 Loading...