

Page 1
LLAASSEERR SSHHOOWW SSYYSSTTEEMM
RRGGBB
EEFFFFEETT LLAASSEERR RRVVBB
RRGGBB LLAASSEERREEFFFFEEKKTT
EEFFEECCTT LLAASSEERR
RReeff..:: LLAASS11000000RRGGBB--55IINN11 ((1155--11116688))
UUSSEERR’’SS MMAANNUUAALL
MMAANNUUEELL DD’’UUTTIIL
L
IISSAATTIIOONN
BBEEDDIIEENNUUNNGGSSAANNLLEEIITTUUNNGG
HHAANNDDLLEEIIDDIINNGG
NNAAVVOODDIILLAA ZZAA UUPPOORRAABBO
MMAANNUUAALL D
©Copyright Lotronic 2014 LAS1000RGB-5IN1 1
DEE UUTTIILLIIZZAARREE
O
Page 2
GB - This LASER effect is built for PROFESSIONAL use only. It must be used and controlled by a professional in sufficiently large premises because of its high
output power. Always set up and install al l laser effects so that al l laser light is at least 3 meters (9.8 feet ) above the floor. Never create a fixed point.
F - Cet effet LASER est un appareil conçu uniquement pour un usage PROFESSIONNEL. Il doit utilisé et installé par un professionnel à une hauteur minimale de 3m dans
des salles suffisamment grandes en raison de sa puissance importante. Toujours installer et configurer le laser de sorte que tous les effets du laser sont au moins à 3 mètres
au-dessus du sol. Ne jamais créer de point fixe.
D – Dieser LAS E R Effekt ist nur für GEWERBLICHEN Ge brauch. Aufgrund seiner hohen Ausgangsleistung darf das Gerät nur von einem Fachmann in ausrei chend großen
Räumen inst alliert und bet rieben werd en. Es muss in mindesten 3m B odenhöhe an gebracht wer den. Der Strahl darf auf keinen Fall auf einen festen P unkt gerichtet sein.
NL - Dit LASER effect is alleen voor professioneel gebruik. Door zijn hoge vermogen mag het apparaat alleen van een specialist in voldoende grote ruimten worden
geïnstalle erd en bediend. Het moet worden aangebracht in tenmins te 3m vloerh oogte. In gee n geval de beam op een vast punt richten.
PT - Este efeito LASER foi desenha do apenas para uso PROFISSIONAL. Deve ser usado e controlado por um profissional em locais grandes devido à sua elevada potência
de saída. Co nfigurar sempre e instalar todos os efeitos laser de modo a que a luz d o laser esteja a pelo menos 3 metros (9,8 pés) do chão. Nunca crie um ponto fixo.
RO - Acest efect LASER este construit nu m ai pentru uz P ROFESIONAL. Acesta trebuie utilizat si controlat de catre un profesionist i n spatii sufic ient de mari, din cauza put erii
sale mari de iesire. Intotdeauna setat i si instalati toate efectele laser , astfel incat toate luminile laser sa f ie la cel putin 3 metri deasupr a podelei. N u creati un punct fix.
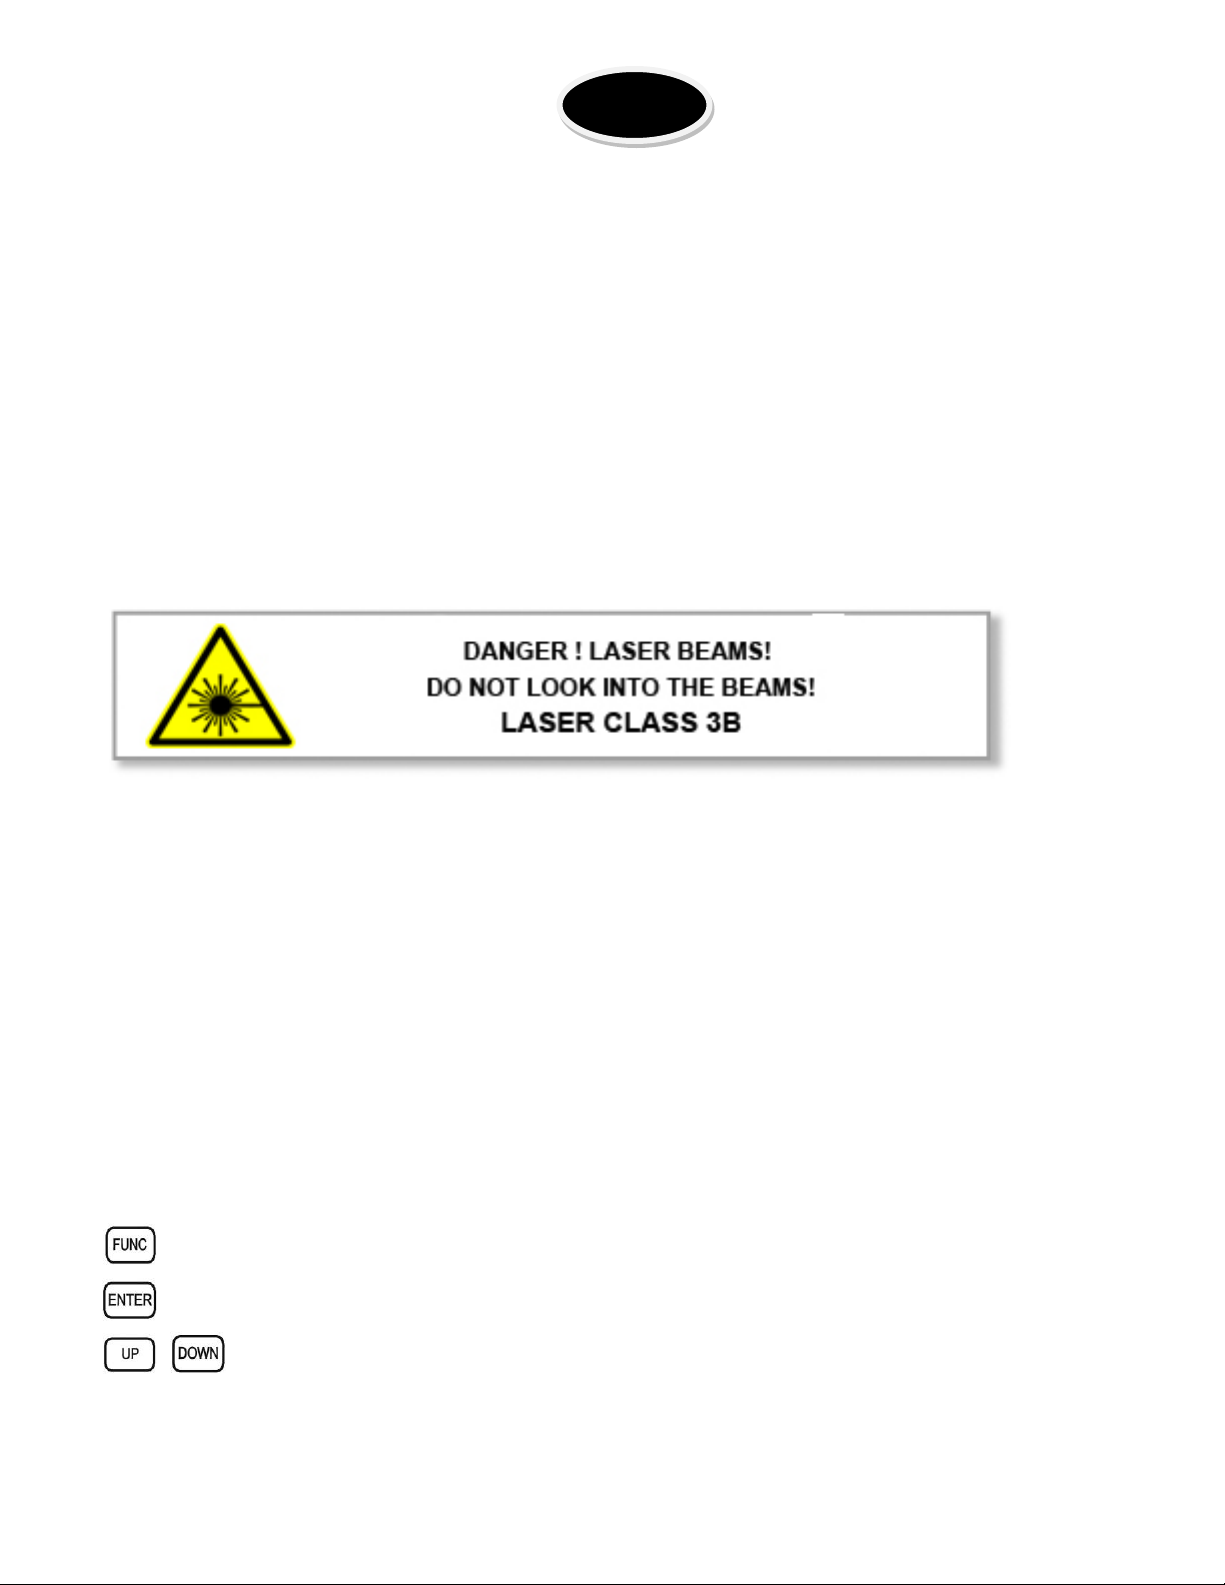
GB-LASER RADIATION !
DANGERO US EXPOSURE TO LASER RADIATION
CLASS 3B LASER
F-RAYONNEMENT LASER !
EXPOSITIO N AU FAISCEAU DANGER EUSE
APPAREIL À LA SER DE CLASSE 3B
D-LASERSTRAHLEN !
GEFÄHRLI CHE A USSET ZUNG A N LASERST RA HLEN
LASERKLASSE 3B
NL-LASERSTRALEN!
GEV A A RLIJKE BLOO TSTELLI NG A A N LASERLICHT
LASER CLASSE 3B
PT-RADIAÇÃO LASER!
EXPOSIÇÃO PERIGOSA A RADIAÇÃO LASER
LASER DE CLASSE 3B
RO-RADIATII LASER!
EXPUNERE P ERICULOASA LA RADIATII LASER
LASER CLA SA 3B
©Copyright Lotronic 2014 LAS1000RGB-5IN1 2
Page 3
GB
Thank you for purchasin g this prod uct. Please r ead us er guide for safety and ope rations inf orm ation before using
the product. Keep this m anual for future reference. This product can create perfect las er programs and effects
since it has passed a series of strictly tests bef ore delivery. Please c hec k the attachments listed on t h e pag e af ter
opening the carton. In the event of car ton dam age or attachm ent m issing in tr ans it, please c ontact your dealer or
our after sales service department.
Technical specifications
1. Voltage: AC100-240V, 50Hz/60Hz, Fuse: 2A/250V
2. Rated Power: 100W
3. Laser diode: DPSS, green 532nm 100mW, red 650nm 300mW, blue 450nm 800mW
4. Laser power: 1000mW
5. Scanner: 20K high speed scanner
6. Control mode: sound control/auto/DMX/ ILDA
7. DMX channel: 19 channels
8. Dimensions: 340mm x 250mm x 150mm
9. Net weight: 4.5kg
10. Gross weight: 5.5kg
Warning
Do not expose the human eye direct to laser beam.
Do not turn on and off the unit frequently.
Before using this unit make sure the power supply is grounded.
This unit is intended for indoor use only and should be prevented from water, moisture and shakes. The
working temperature of this unit is 18-30°C, do not use this continuously over 4 hours, otherwise it shortens the
lifetime of the unit.
Use cleaning tissue to remove the dust absorbed on the external lenses periodically to optimize light output.
Do not remove or break the warranty label, otherwise it void the warranty.
Always replace wit h the exact same t ype fuse, replacement with anything other than th e specified fuse can
cause fire or electric shock and damage your unit, and will void your manufactures warranty.
Function setting
When laser is po wered on, LCD monitor on rear panel shows the c urrent operating stand-alone mode or DMX
address of DMX mode. It is very easy to set and change the operating mode of the laser via the LCD control panel.
After every reset and saving, the new mode information will be shown on LCD monitor at next power on.
Mode Option, to choose the operating mode of laser
Confirmation, to store the current menu of confirm the current function
UP/DOWN, to change operating mode, parameter or DMX address
©Copyright Lotronic 2014 LAS1000RGB-5IN1 3
Page 4

OPERATION
MODE
STAND ALONE MODE
MODE:AUTO
Mixed 5 effect
LCD DISPLAY DESCRIPTION
Auto Show with Mixed 5 effect
PREPROGRAMMED
EFFECT
MODE:AUTO
Laser 3D
MODE:AUTO
Scanned Beam
MODE:AUTO
Laser Lumia
MODE:AUTO
Burst Grating
MODE:AUTO
Laser Universal
MODE:SOUND
Mixed 5 effect
MODE:SOUND
Laser 3D
MODE:SOUND
Scanned Beam
MODE:SOUND
Laser Lumia
Laser 3D Effect Auto Show
Scanned Beam Effect Auto Show
Laser Lumia Effect Auto Show
Burst Grating Effect Auto Show
Laser Universal Effect Auto Show
Sound Show wi t h Mixed 5 effect
Laser 3D Effect Sound Show
Scanned Beam Effect Sound Show
Laser Lumia Effect Sound Show
SOUND
DMX
SLAVE
MIRROR
Attention In preprogrammed standalone SOUND SHOW mode, the laser beam will be blank-out in 10 seconds
MODE:SOUND
Burst Grating
MODE:SOUND
Laser Universal
MODE:SENSITIVITY
▐▐▐▐▐▐▐▐▐▐
MODE: signal
001
MODE: signal
SLAVE
MODE:MIRROR
SY:Y SX:Y
without AUDIO/MIC activated signal.
Burst Grating Effect Sound Show
Laser Universal Effect Sound Show
Set microphone sensitivity
The laser is working in DMX MODE.
The laser is working in SLAVE MODE
The laser scanned world
©Copyright Lotronic 2014 LAS1000RGB-5IN1 4
Page 5
SOUND ACTIVATED MODE: Sensitivity Setting
Press FUNC until S 6 is displayed
Press UP/DOWN to set the microphone sensitivity. S 0 is no sound activation, from S 1 to S 9, the sensitivity level is
getting more sensitive.
Press ENTER to confirm and save the setting.
DMX Control
Press FUNC to enter MODE selection
Press until the LCD panel shows 001
Press ENTER to confirm setting
The laser is working in DMX MODE. Set the DMX address via the UP and DOWN buttons
Slave Operation
Press FUNC to enter MODE selection
Press until the LCD panel shows SLAVE
Press ENTER to confirm setting
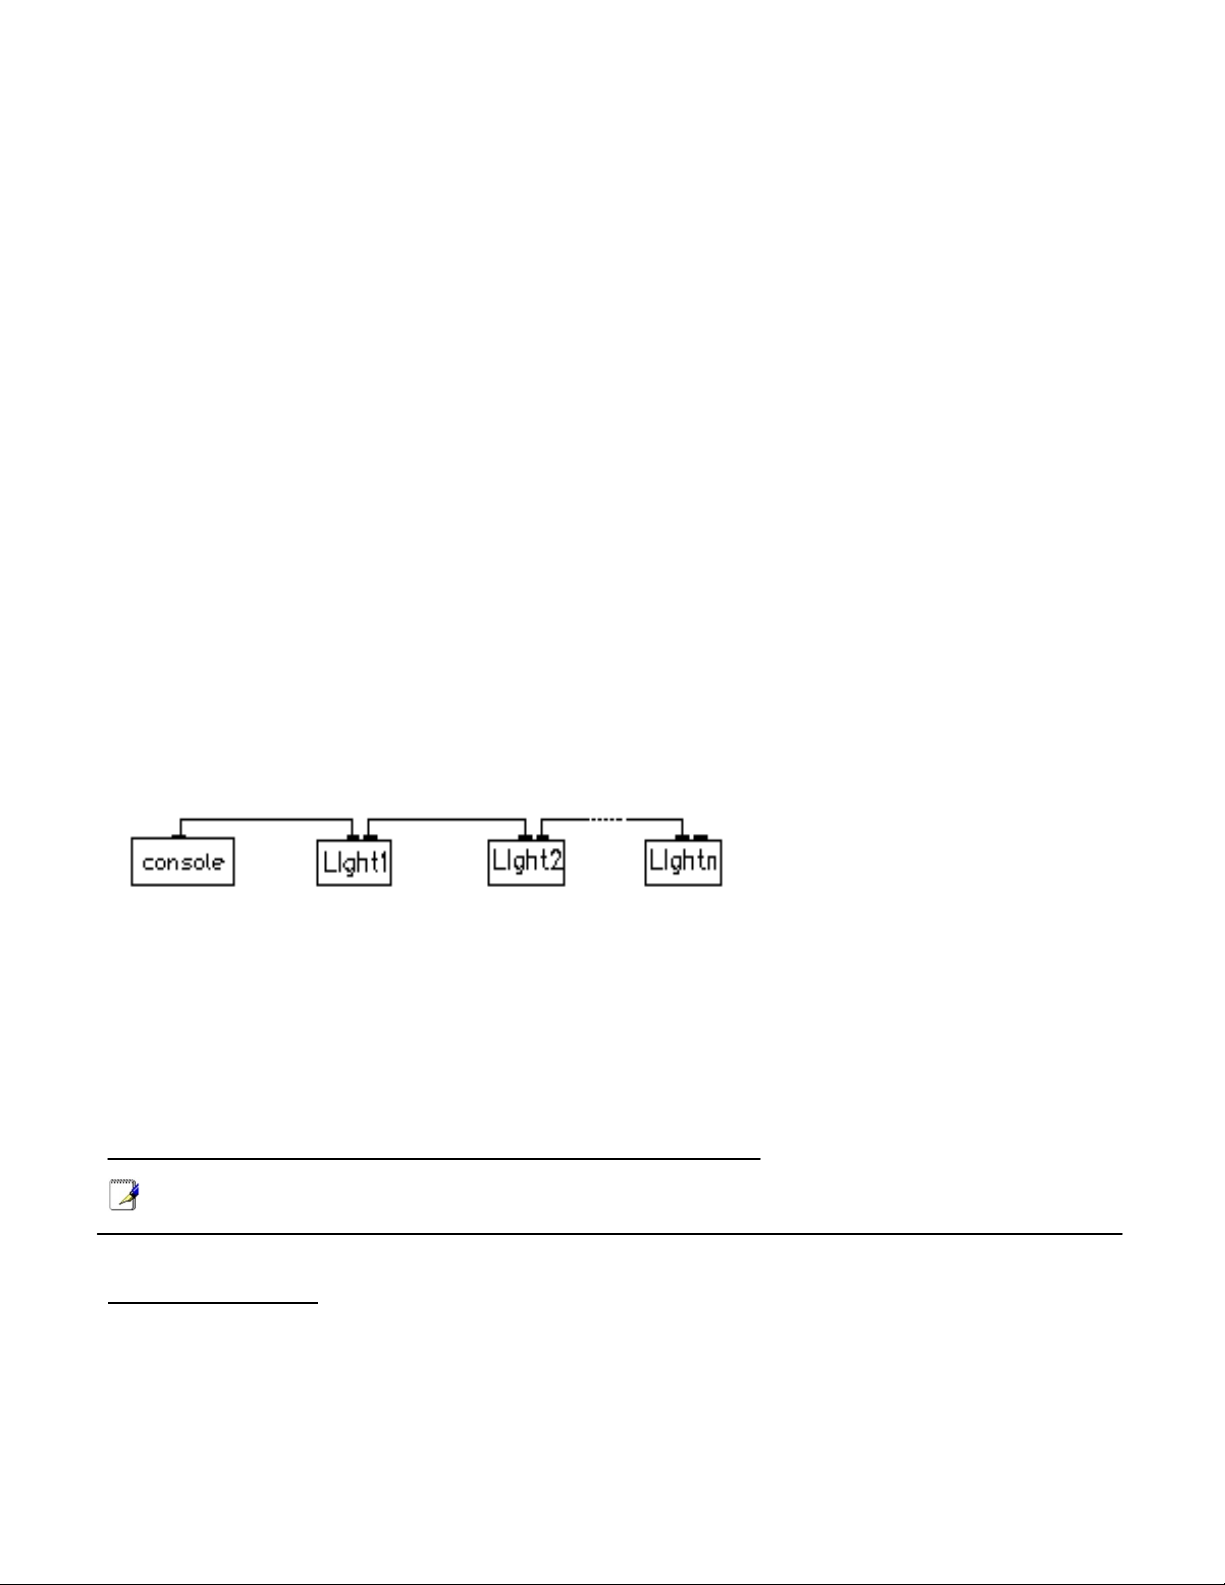
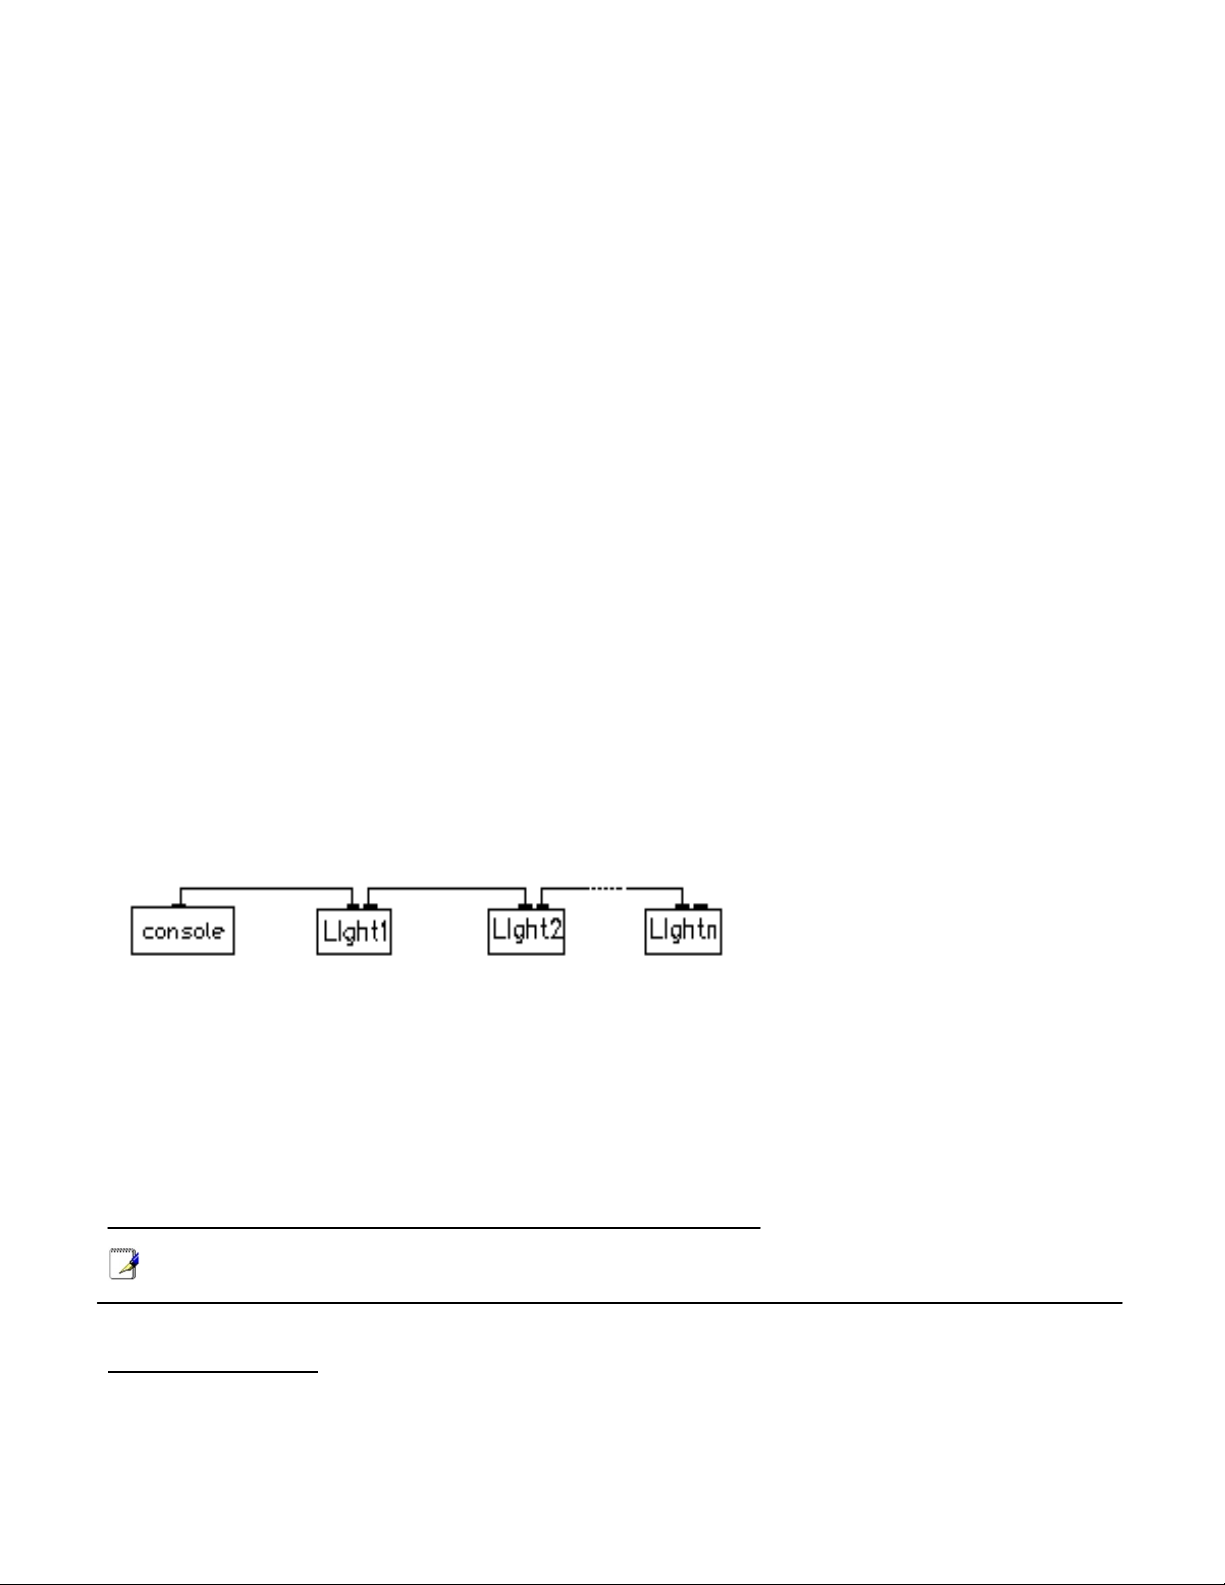
The laser is working in SLAVE MODE. Connect MASTER laser to several SLAVE lasers via a DMX c able, SLAVE
lasers are doing exactly the same laser show as MASTER laser. Please check below for DMX cable connection for
reference.
DMX512
1. Install the units in a suitable position (laying or appending).
2. Use standard XLR mic rophone cable chain your units together via the XLR connector on the rear of the units.
For longer cable runs we suggest a terminator at the last fixture.
3. Assign a DMX addr ess t o eac h the unit using dipswitc hes; s ee t he "DMX Addres s Quick Ref erenc e Char ». (A ll
units set to #1 and #10 on will be OK)
4. Turn on all units' power, the units begins reset, then the unit begins working.
5. Use DMX console to control your units.
PATTERN MIRROR REVERSE SETTING
Press FUNC to enter MODE selection
Till to below LCD display is shown in LCD panel and the laser will show pattern right side.
Press ENTER to confirm the setting.
With help of UP button, the laser scanned world in x direction could be reversed, as the graphic as below.
With help of DOWN button, the laser scanned world in y direction could be reversed, as the graphic as below.
Please note: Besides the LCD programmed mirror reverse setting, the laser scanned world could be
set by ILDA control panel.
ILDA Control Mode
This unit has an I LD A DB25 port that allo ws th e u nit to be PC-controlled. When a 25-pin lea d is c o nnec te d, the
laser will be PC controlled. When the lead is disconnected, the laser will return to the last operating mode.
©Copyright Lotronic 2014 LAS1000RGB-5IN1 5
Page 6
DMX Channels Chart
DMX Channels Chart Whe n ILDA is connected
CHANNEL VALUE DESCRIPTION
000-004 No grating rotating
CH1
Grating Rotation
005-127 Clockwise grating rotating
128-133 No grating rotating
134-255 Anticlockwise grating rotating
000-031 Laser 3D Effect
032-063 Scanned Beam Effect (Pattern Effect)
064-095 Laser Lumia Effect
CH2
096-127 Scanned Beam Effect (Pattern Effect)
Grating Effect
128-159 Burst Grating Effect
160-191 Scanned Beam Effect (Pattern Effect)
192-223 Laser Universal Effect
224-255 Scanned Beam Effect (Pattern Effect)
DMX Channels Chart When ILDA is NOT connected
CHANNEL VALUE FUNCTION
000-018
Laser OFF
CH 1
MODE
019-036 AUT Auto Show with Mixed 5 effect
037-054 A3D Laser 3D Effect Auto Show
055-072 AUB Scanned Beam Effect Auto Show
073-090 AUL Laser Lumia Effect Auto Show
091-108 AUN Burst Grating Effect Auto Show
109-126 AUO Laser Universal Effect Auto Show
127-144 SOU Sound Show with Mixed 5 Effect
145-162 S3D Sound show with LASER 3D
163-180 SOB Sound show with Scanned Beam
181-198 SOL Sound show with LASER LUMIA
199-216 SON Sound show with Burst Grating
217-234 SOO Sound show with Laser Universal
235-255 DMX MODE
©Copyright Lotronic 2014 LAS1000RGB-5IN1 6
Page 7
000-051
000-007
Original
000
Full pattern without clipping
1 Group Patterns.
CH 2
GROUP
CH 3 PATTERN
CH 4
COLOR
052-103
104-155
156-207
208-255
000-255 Every 16 for 1 Group, total 16 patterns.
008-015 Red
016-023 Green
024-031 Yellow
032-039 Blue
040-047 Purple
048-055 Light Blue
056-063 White
064-111 Color Rolling
112-159 Color Jumping
160-127 Color Moving
208-255 Strobing
2 Group Patterns
3 Group Patterns
4 Group Patterns
5 Group Patterns
CH 5
CLIPING
CH 6
ZOOMING
CH 7
ZOOM SPEED
CH 8
Y AXIS ROLLING
CH 9
ROLL SPEED
CH 10
X AXIS ROLLING
001-127 0%~99% fixed pattern clipped
128-255 Clipping Speed
000-127 100%-5% fixed pattern zoomed
128-169 Zooming IN
170-209 Zooming OUT
210-255 Alternately Zooming
000-255
000-127 0 -359 degree fixed Y axis rolled
128-191 Clockwise rolling
192-255 Anticlockwise rolling
0-255 Fast to Slow
000-127 0 -359 degree fixed X axis rolled
128-191 Clockwise rolling
192-255 Anticlockwise rolling
Fast to Slow
©Copyright Lotronic 2014 LAS1000RGB-5IN1 7
Page 8
CH 11
ROLL SPEED
0-255 Fast to Slow
CH 12
Z AXIS ROLLING
CH 12
Z AXIS ROLLING
CH 13
ROLL SPEED
CH 14
Y AXIS MOVING
CH 15
MOVE SPEED
CH 16
X AXIS MOVING
CH 17
MOVE SPEED
000-127 0 -359 degree fixed Z axis rolled
128-191 Clockwise rolling
000-127 0 -359 degree fixed Z axis rolled
128-191 Clockwise rolling
192-255 Anticlockwise rolling
0-255 Fast to Slow
000-127 128 different fixed position on X axis
128-191 Clockwise moving
192-255 Anticlockwise moving
0-255 Fast to Slow
000-127 128 different fixed position on Y axis
128-191 Clockwise moving
192-255 Anticlockwise moving
0-255 Fast to Slow
Grating Rotation
Different effect
CH18
CH19
000-004 No grating rotating
005-127 Clockwise grating rotating
128-133 No grating rotating
134-255 Anticlockwise grating rotating
000-031 Laser 3D Effect
032-063 Scanned Beam Effect (Pattern Effect)
064-095 Laser Lumia Effect
096-127 Scanned Beam Effect (Pattern Effect)
128-159 Burst Grating Effect
160-191 Scanned Beam Effect (Pattern Effect)
192-223 Laser Universal Effect
224-255 Scanned Beam Effect (Pattern Effect)
©Copyright Lotronic 2014 LAS1000RGB-5IN1 8
Page 9
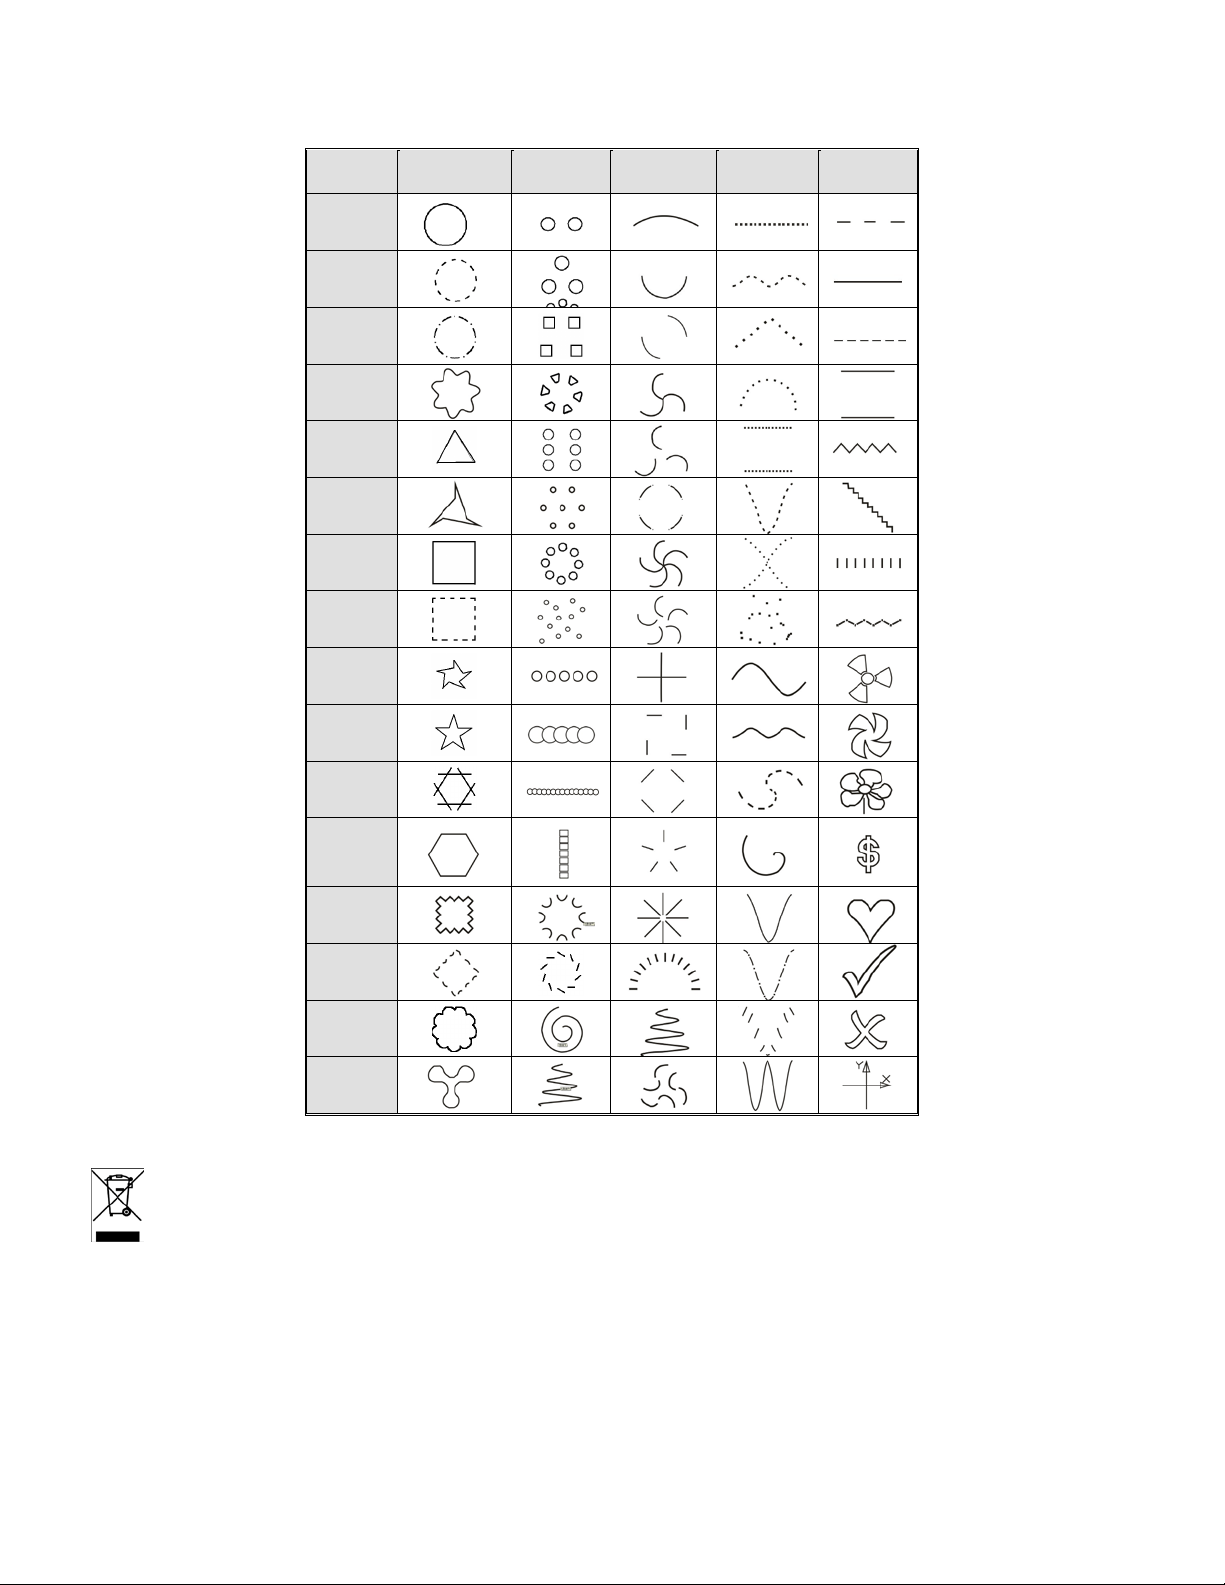
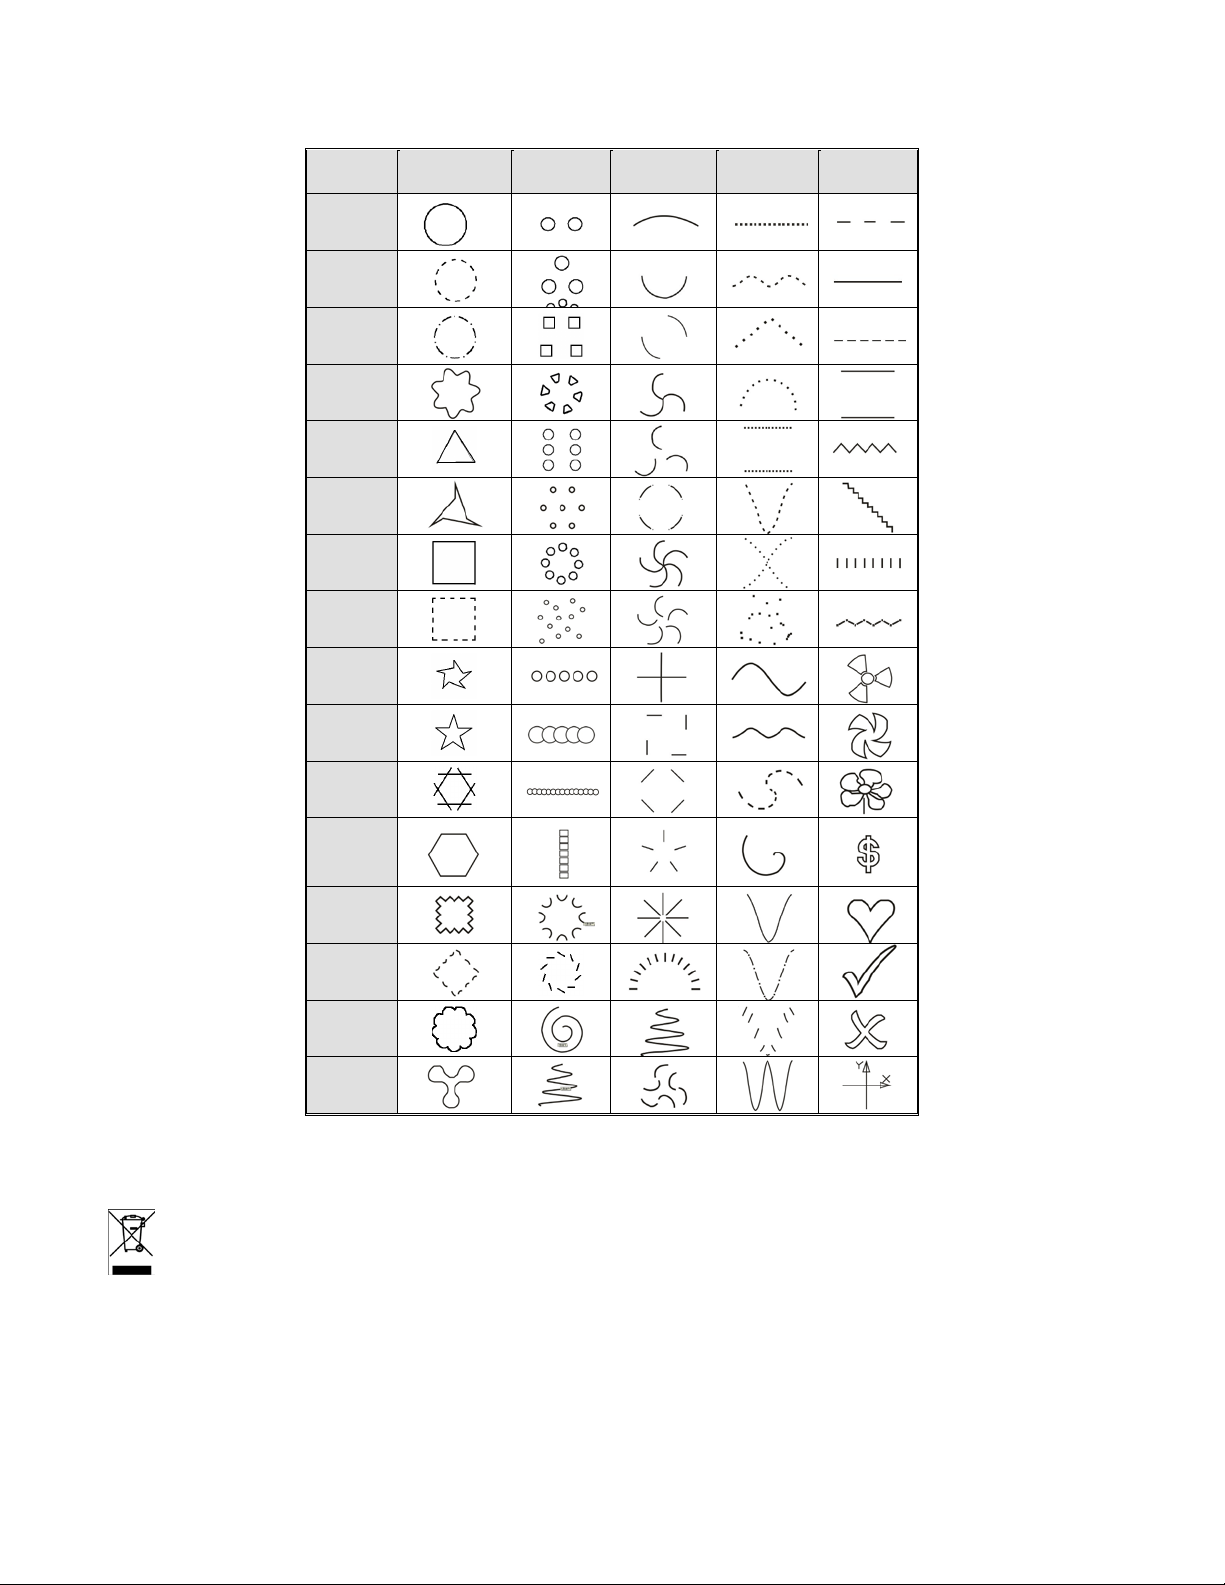
P ATTERN LIST
DMX
000-015
016-031
032-047
048-063
064-079
080-095
096-111
112-127
128-143
144-159
1 2 3 4 5
160-175
176-191
192-207
208-223
224-239
240-255
Electric products must not be put into household waste. Please bring them to a recycling centre. Ask your local
authorities or your dealer about the way to proceed.
©Copyright Lotronic 2014 LAS1000RGB-5IN1 9
Page 10
F
MANUEL D’UTILISATION
Lire attentivement le manuel avant la première mise en service et le conserver pour référence ultérieur. Cet
appareil a quitté l’usine en parfait état après avoir passé une série de contrôles de qualité très stricts.
Vérifiez le contenu à l’ouverture de l’emballage
CARACTERISTIQUES TECHNIQUES
1. Alimentation: 110/220V, 50/60Hz, Fusible : 2A/250V
2. Consommation : 100W
3. Diode laser: DPSS, vert 532nm 100mW, rouge 650nm 300mW, bleu 450nm 800mW
4. Puissance du laser : 1000mW
5. Moteur : Scanner haute vitesse 20 kpps
6. Modes de fonctionnement: Activation audio, automatique, DMX, ILDA
7. Canaux DMX : 19
8. Dimensions : 340 x250 x 150mm
9. Poids net : 4,5kg
10. Poids brut : 5,5kg
AVERTISSEMENTS
o Ne pas exposer l’œil humain au rayon laser.
o Ne mettre fréquemment l’appareil sous et hors tension.
o Cet appareil doit être relié à la masse.
o Uniquement pour u tilisation à l’intérie ur. Tenir à l’abri de l’eau, de l’hum idité e t de sec ousses . La température
de fonctionnement est de 18-30°C. Ne pas utiliser l’appareil plus de 4 jour en continue sous peine de diminuer
sa durée de vie.
o Nettoyez régulièrement la lentille extérieure avec un chiffon propre pour retirer la poussière accumulée et
optimiser la puissance lumineuse.
o Ne pas retirer l’étiquette de garantie sous peine d’invalider la garantie.
o Remplacez le fusible uniquement par un neuf en tous points identique au fusible d’or igine. Un autre fusible
peut provoquer un incendie ou un choc électrique et endommager l’appareil.
Réglage des fonctions
When laser is po wered on, LCD monitor on rear panel shows the c urrent operating stand-alone mode or DMX
address of DMX mode. It is very easy to set and change the operating mode of the laser via the LCD control panel.
After every reset and saving, the new mode information will be shown on LCD monitor at next power on.
Mode Option, to choose the operating mode of laser
Confirmation, to store the current menu of confirm the current function
UP/DOWN, to change operating mode, parameter or DMX address
©Copyright Lotronic 2014 LAS1000RGB-5IN1 10
Page 11

MODE
STAND ALONE MODE
MODE:AUTO
Mixed 5 effect
OPERATION
LCD DISPLAY DESCRIPTION
Auto Show with Mixed 5 effect
PREPROGRAMMED
EFFECT
MODE:AUTO
Laser 3D
MODE:AUTO
Scanned Beam
MODE:AUTO
Laser Lumia
MODE:AUTO
Burst Grating
MODE:AUTO
Laser Universal
MODE:SOUND
Mixed 5 effect
MODE:SOUND
Laser 3D
MODE:SOUND
Scanned Beam
MODE:SOUND
Laser Lumia
Laser 3D Effect Auto Show
Scanned Beam Effect Auto Show
Laser Lumia Effect Auto Show
Burst Grating Effect Auto Show
Laser Universal Effect Auto Show
Sound Show with Mixed 5 effect
Laser 3D Effect Sound Show
Scanned Beam Effect Sound Show
Laser Lumia Effect Sound Show
SOUND
DMX
SLAVE
MIRROR
Attention In preprogrammed standalone SOUND SHOW mode, the laser beam will be blank-out in 10 seconds
MODE:SOUND
Burst Grating
MODE:SOUND
Laser Universal
MODE:SENSITIVITY
▐▐▐▐▐▐▐▐▐▐
MODE: signal
001
MODE: signal
SLAVE
MODE:MIRROR
SY:Y SX:Y
without AUDIO/MIC activated signal.
Burst Grating Effect Sound Show
Laser Universal Effect Sound Show
Set microphone sensitivity
The laser is working in DMX MODE.
The laser is working in SLAVE MODE
The laser scanned world
©Copyright Lotronic 2014 LAS1000RGB-5IN1 11
Page 12
SOUND ACTIVATED MODE: Sensitivity Setting
Press FUNC until S 6 is displayed
Press UP/DOWN to set the microphone sensitivity. S 0 is no sound activation, from S 1 to S 9, the sensitivity level is
getting more sensitive.
Press ENTER to confirm and save the setting.
DMX Control
Press FUNC to enter MODE selection
Press until the LCD panel shows 001
Press ENTER to confirm setting
The laser is working in DMX MODE. Set the DMX address via the UP and DOWN buttons
Slave Operation
Press FUNC to enter MODE selection
Press until the LCD panel shows SLAVE
Press ENTER to confirm setting
The laser is working in SLAVE MODE. Connect MASTER laser to several SLAVE lasers via a DMX c able, SL AVE
lasers are doing exactly the same laser show as MASTER laser. Please check below for DMX cable connection for
reference.
Fonctionnement DMX
Ce mode vous permet de commander l’effet par le biais d’une console DMX512.
1. Installez les appareils dans une position appropriée (couché ou suspendu).
2. Reliez les appareils ensemble au moyen d’un cordon microphone XLR standard à l’arrière des appareils.
Lorsque plusieurs appareils sont c onn ectés e n sér ie, nous r ecom m andons de poser une r ésistanc e de f in d e
ligne sur la sortie du dernier appareil.
3. Affectez une adresse DMX à chaque appareil au moyen des commutateurs DIP. Voir charte des adresses DMX.
Réglez les commutateurs DIP n° 1 et n° 10 sur ON.
4. Mette z tous les appar eils s ous tensi on. Ils commencent à exécuter une rem ise à zéro e t com m encent ens uite
à fonctionner.
5. Commandez les appareils à l’aide d’une console DMX.
PATTERN MIRROR REVERSE SETTING
Press FUNC to enter MODE selection
Till to below LCD display is shown in LCD panel and the laser will show pattern right side.
Press ENTER to confirm the setting.
With help of UP button, the laser scanned world in x direction could be reversed, as the graphic as below.
With help of DOWN button, the laser scanned world in y direction could be reversed, as the graphic as below.
Please note: Besides the LCD programmed mirror reverse setting, the laser scanned world could be
set by ILDA contr o l panel.
ILDA Control Mode
This unit has an I LD A DB25 port that allo ws th e u nit to be PC-controlled. When a 25-pin lea d is c o nnec te d, the
laser will be PC controlled. When the lead is disconnected, the laser will return to the last operating mode.
©Copyright Lotronic 2014 LAS1000RGB-5IN1 12
Page 13
DMX Channels Chart
DMX Channels Chart Whe n ILDA is connected
CHANNEL VALUE DESCRIPTION
000-004 No grating rotating
CH1
Grating Rotation
005-127 Clockwise grating rotating
128-133 No grating rotating
134-255 Anticlockwise grating rotating
000-031 Laser 3D Effect
032-063 Scanned Beam Effect (Pattern Effect)
064-095 Laser Lumia Effect
CH2
096-127 Scanned Beam Effect (Pattern Effect)
Grating Effect
128-159 Burst Grating Effect
160-191 Scanned Beam Effect (Pattern Effect)
192-223 Laser Universal Effect
224-255 Scanned Beam Effect (Pattern Effect)
DMX Channels Chart When ILDA is NOT connected
CHANNEL VALUE FUNCTION
000-018
Laser OFF
019-036 AUT Auto Show with Mixed 5 effect
037-054 A3D Laser 3D Effect Aut o Show
055-072 AUB Scanned Beam Effect Auto Show
073-090 AUL Laser Lumia Effect Auto Show
CH 1
MODE
©Copyright Lotronic 2014 LAS1000RGB-5IN1 13
091-108 AUN Burst Grating Effect Auto Show
109-126 AUO Laser Universal Effect Auto Show
127-144 SOU Sound Show with Mixed 5 Effect
145-162 S3D Sound show with LASER 3D
163-180 SOB Sound show with Scanned Beam
181-198 SOL Sound show with LASER LUMIA
199-216 SON Sound show with Burst Grating
Page 14
217-234 SOO Sound show with Laser Universal
000-127
0 -359 degree fixed Y axis rolled
235-255 DMX MODE
CH 2
GROUP
CH 3 PATTERN
CH 4
COLOR
000-051
052-103
104-155
156-207
208-255
000-255 Every 16 for 1 Group, total 16 patterns.
000-007 Original
008-015 Red
016-023 Green
024-031 Yellow
032-039 Blue
040-047 Purple
048-055 Light Blue
056-063 White
064-111 Color Rolling
112-159 Color Jumping
1 Group Patterns.
2 Group Patterns
3 Group Patterns
4 Group Patterns
5 Group Patterns
CH 5
CLIPING
CH 6
ZOOMING
CH 7
ZOOM SPEED
CH 8
Y AXIS ROLLING
CH 9
ROLL SPEED
CH 10
X AXIS ROLLING
160-127 Color Moving
208-255 Strobing
000 Full pattern without clipping
001-127 0%~99% fixed pattern cli pped
128-255 Clipping Speed
000-127 100%-5% fixed pattern zoomed
128-169 Zooming IN
170-209 Zooming OUT
210-255 Alternately Zooming
000-255
128-191 Clockwise rolling
192-255 Anticlockwise rolling
0-255 Fast to Slow
000-127 0 -359 degree fixed X axis rolled
128-191 Clockwise rolling
Fast to Slow
©Copyright Lotronic 2014 LAS1000RGB-5IN1 14
Page 15
192-255 Anticlockwise rolling
000-127
0 -359 degree fixed Z axis rolled
CH 11
ROLL SPEED
CH 12
Z AXIS ROLLING
CH 12
Z AXIS ROLLING
CH 13
ROLL SPEED
CH 14
Y AXIS MOVING
CH 15
MOVE SPEED
CH 16
X AXIS MOVING
0-255 Fast to Slow
000-127 0 -359 degree fixed Z axis rolled
128-191 Clockwise rolling
128-191 Clockwise rolling
192-255 Anticlockwise rolling
0-255 Fast to Slow
000-127 128 different fixed position on X axis
128-191 Clockwise moving
192-255 Anticlockwise moving
0-255 Fast to Slow
000-127 128 different fixed position on Y axis
128-191 Clockwise moving
192-255 Anticlockwise moving
MOVE SPEED
Grating Rotation
Different effect
CH 17
CH18
CH19
0-255 Fast to Slow
000-004 No grating rotating
005-127 Clockwise grating rotating
128-133 No grating rotating
134-255 Anticlockwise grating rotating
000-031 Laser 3D Effect
032-063 Scanned Beam Effect (Pattern Effect)
064-095 Laser Lumia Effect
096-127 Scanned Beam Effect (Pattern Effect)
128-159 Burst Grating Effect
160-191 Scanned Beam Effect (Pattern Effect)
192-223 Laser Universal Effect
224-255 Scanned Beam Effect (Pattern Effect)
©Copyright Lotronic 2014 LAS1000RGB-5IN1 15
Page 16
P ATTERN LIST
DMX
000-015
016-031
032-047
048-063
064-079
080-095
096-111
112-127
128-143
144-159
1 2 3 4 5
160-175
176-191
192-207
208-223
224-239
240-255
NOTE IMPORTANTE : Les produits électriques ne doivent pas être mis au rebut avec les ordures ménagères. Veuillez les
faire recycler là où il existe des centres pour cela. Consultez les autorités locales ou votre revendeur sur la façon de les
recycler.
©Copyright Lotronic 2014 LAS1000RGB-5IN1 16
Page 17

D
ANLEITUNG
Vor der ersten Inbetriebnahme die Anleitung durchlesen, um das Gerät sicher und richtig zu bedienen. Alle
Anweisungen und Hinweise müssen genau befolgt werden. Das Gerät wurde zahlreichen strengen
Qualitätskontrollen unterworfen und hat unser Werk in einwandfreiem Betriebszustand verlassen.
Packen Sie das Gerät aus und untersuchen Sie es auf eventuelle Transportschäden. Die Verpackung muss
folgende T eile enthalten:
Warnhinweise
1. Nicht in den Laserstrahl blicken.
2. Das Gerät nicht kurz hintereinander ein- und ausschalten.
3. Das Gerät muss geerdet sein.
4. Nur für Innengebrauch. Vor Wasser, Feuchtigkeit und Erschütterungen schützen. Die Betriebstemperatur
beträgt 18-30°C. Nicht länger als 4 Stunden ununterbrochen benutzen, da sich sonst die Lebensdauer
erheblich verkürzt.
5. Die Linse regelmäßig mit einem sauberen Tuch abwisc hen, um den angesamm elten Staub zu entfernen und
die Leuchtkraft zu erhalten.
6. Nicht das Garantieschild entfernen, da sonst der Garantieanspruch erlischt.
7. Die Sicherung nur durch eine identische erset zen, da sons t Brand- und Stromschlaggefahr besteht.
Technische Daten
1. Versorgung: AC110/220V, 50/60Hz
2. Ver br auc h: 100W
3. Laserdiode: DPSS, grün 532nm 100mW, rot 650nm 300mW, blau 450nm 8000mW
4. Laserleistung: 1000mW
5. Motor: 20Kpps Hochgeschwindigkeitsscanner
6. Betriebsart: Audio/Automatik/DMX/ILDA
7. 19 DMX Kanäle
8. Abmessungen: 340 x250 x 150mm
9. Nettogewicht: 4,5kg
10. Bruttogewicht: 5.5kg
Einstellung der Funktionen
Beim Einschalten des Ger äts erscheinen auf dem LCD auf der Rückseite die aktuelle Betriebs art oder die DMX
Adresse, wenn sich der La ser im DMX Betrieb befand. Die Betriebsarten und Ei nstellungen können schnell und
einfach über das Bedienfeld vorgenommen werden. Die neuen Informationen erscheinen beim nächsten
Einschalten auf dem Display.
Einstellung der Betriebsarten.
Bestätigung und Speicherung der Einstellungen
UP/DOWN: Wahl der Werte, Parameter bzw. Einstellung der DMX Adresse
©Copyright Lotronic 2014 LAS1000RGB-5IN1 17
Page 18

BETRIEBSART
MODE:AUTO
Mixed 5 effect
BEDIENUNG
LCD DISPLAY BESCHREIBUNG
Auto Show with Mixed 5 effect
AUTOMATISCHER
BETRIEB,
VORPROGRAMMIERTE
EFFEKTE
MODE:AUTO
Laser 3D
MODE:AUTO
Scanned Beam
MODE:AUTO
Laser Lumia
MODE:AUTO
Burst Grating
MODE:AUTO
Laser Universal
MODE:SOUND
Mixed 5 effect
MODE:SOUND
Laser 3D
MODE:SOUND
Scanned Beam
MODE:SOUND
Laser Lumia
Laser 3D Effect Auto Show
Scanned Beam Effect Auto Show
Laser Lumia Effect Auto Show
Burst Grating Effect Auto Show
Laser Universal Effect Auto Show
Sound Show with Mixed 5 effect
Laser 3D Effect Sound Show
Scanned Beam Effect Sound Show
Laser Lumia Effect Sound Show
KLANGAKTIVIERT
DMX
SLAVE
SPIEGEL
Hinweis: Im vorprogrammierten, automatischen SOUND Betrieb schaltet sich der Laser nach 10 Sekunden aus,
MODE:SOUND
Burst Grating
MODE:SOUND
Laser Universal
MODE:EMPFINDLICHKEIT
▐▐▐▐▐▐▐▐▐▐
MODE: Signal
001
MODE: Signal
SLAVE
MODE:MIRROR
SY:Y SX:Y
wenn kein AUDIO/ MIKROFON Signal anliegt.
Burst Grating Effect Sound Show
Laser Universal Effect Sound Show
Einstellung der Mikrofonempfindlichkeit
Der Laser arbeitet im DMX Betrieb.
Der Laser arbeitet im SLAVE Betrieb
LASER SCANNED WORLD
©Copyright Lotronic 2014 LAS1000RGB-5IN1 18
Page 19

MUSIKAKTVIERTER BETRIEB: Einstellung der Empfindlichkeit
FUNC Taste drücken, bis S 6 erscheint
Mit den UP/DOWN Tasten die Mikrofonempfindlichkeit einstellen.. S 0 bedeutet keine Klangaktivierung. Von S 1 bis S 9
erhöht sich die Empfindlichke it .
Mit ENTER die Einstellung bestätigen und speichern.
DMX Steuerung
Auf FUNC drücken, um die Betriebsart (MODE) zu wählen
Drücken bis 001 auf dem Display erscheint
Mit ENTER die Einstellung bestätigen
Der Laser arbeitet nun im DMX Betrieb. Mit den UP und DOWN Tasten die DMX Adresse einstellen.
Slave Betrieb
Auf FUNC drücken, um die Betriebsart (MODE) zu wählen
Drücken bis SLAVE auf dem Display erscheint
Mit ENTER die Einstellung bestätigen
Der Laser arbeitet nun im Slave-Betrieb. Den MAST ER Laser an m ehrere SLAVE Laser über ein DMX Kabel
anschließen. Die SLAVE Laser folgen dem Master und tun genau dasselbe. S; nachstehend wie die Geräte
angeschlossen werden müssen.
Universaler DMX Betrieb
In dieser Betriebsart wird das Gerät von einer DMX512 Konsole gesteuert.
1. Installieren Sie das Gerät in einer geeigneten Stellung (liegend oder hängend).
2. Mit einem Standard XLR Mikrofonkabel die Geräte über die XLR Buchse auf der Rückseite miteinander
verbinden. Wenn mehrere Geräte benutzt werden, muss ein Endwiderstand an die XLR Ausgangsbuchse des
letzten Geräts angebracht werden.
3. Geben Sie jedem Gerät m ittels der DIP Schalter eine DMX Adresse (s. DMX Tabelle). Stellen Sie alle DIP
Schalter Nr. 1 und Nr. 10 auf ON.
4. Schalten Sie alle Geräte ein. Nach dem Reset sind sie einsatzbereit.
5. Mit der DMX Konsole die Geräte steuern.
SPIEGELVERKEHRTE MUSTER
Auf FUNC drücken, um die Betriebsart (MODE) zu wählen
Drücken bis die nachstehende Zeichnung auf dem Display erscheint. Der Laser zeigt die rechte Seite des
Musters.
Mit ENTER die Einstellung bes tät ige n.
Mit der UP Taste das Muster um die X-Achse drehen.
Mit der DOWN Taste das Muster um die Y-Achse drehen.
Hinweis: Außer der über das Display programmierten Spiegelung kann die Laser Scanned World
auch über ILDA eingestellt werden.
ILDA Steuerung
Das Gerät besitzt einen ILDA Sub-D25 Verbinder, über den der Laser PC-gesteuert werden kann. Wenn ein
25-pol. Verbinder angeschlossen is t, wird der Laser über den PC gesteuert. Wenn kein Sub-D25 Verbinder
angeschlossen ist, arb eitet der Laser in der zulet zt ein ges tel lten Betr i ebsar t.
©Copyright Lotronic 2014 LAS1000RGB-5IN1 19
Page 20

DMX Kanaltabelle
DMX Kanaltabelle, wenn der ILDA Verbinder angeschlossen ist:
KANAL WERT BESCHREIBUNG
000-004 No grating rotating
CH1
Grating Rotation
005-127 Clockwise grating rotating
128-133 No grating rotating
134-255 Anticlockwise grating rotating
000-031 Laser 3D Effect
032-063 Scanned Beam Effect (Pattern Effect)
064-095 Laser Lumia Effect
CH2
096-127 Scanned Beam Effect (Pattern Effect)
Grating Effect
128-159 Burst Grating Effect
160-191 Scanned Beam Effect (Pattern Effect)
192-223 Laser Universal Effect
224-255 Scanned Beam Effect (Pattern Effect)
DMX Kanaltabelle, wenn kein Sub-D25 Verbinder angeschlossen ist:
KANAL WERT BESCHREIBUNG
000-018
Laser OFF
CH 1
MODE
019-036 AUT Auto Show with Mixed 5 effect
037-054 A3D Laser 3D Effect Auto Show
055-072 AUB Scanned Beam Effect Auto Show
073-090 AUL Laser Lumia Effect Auto Show
091-108 AUN Burst Grating Effect Auto Show
109-126 AUO Laser Universal Effect Auto Show
127-144 SOU Sound Show with Mixed 5 Effect
145-162 S3D Sound show with LASER 3D
163-180 SOB Sound show with Scanned Beam
181-198 SOL Sound show with LASER LUMIA
199-216 SON Sound show with Burst Grating
217-234 SOO Sound show with Laser Universal
235-255 DMX MODE
©Copyright Lotronic 2014 LAS1000RGB-5IN1 20
Page 21

000-051
000-007
Original
000
Full pattern without clipping
1 Group Patterns.
CH 2
GROUP
CH 3 PATTERN
CH 4
COLOR
052-103
104-155
156-207
208-255
000-255 Every 16 for 1 Group, total 16 patterns.
008-015 Red
016-023 Green
024-031 Yellow
032-039 Blue
040-047 Purple
048-055 Light Blue
056-063 White
064-111 Color Rolling
112-159 Color Jumping
160-127 Color Moving
208-255 Strobing
2 Group Patterns
3 Group Patterns
4 Group Patterns
5 Group Patterns
CH 5
CLIPING
CH 6
ZOOMING
CH 7
ZOOM SPEED
CH 8
Y AXIS ROLLING
CH 9
ROLL SPEED
CH 10
X AXIS ROLLING
001-127 0%~99% fixed pattern clipped
128-255 Clipping Speed
000-127 100%-5% fixed pattern zoomed
128-169 Zooming IN
170-209 Zooming OUT
210-255 Alternately Zooming
000-255
000-127 0 -359 degree fixed Y axis rolled
128-191 Clockwise rolling
192-255 Anticlockwise rolling
0-255 Fast to Slow
000-127 0 -359 degree fixed X axis rolled
128-191 Clockwise rolling
192-255 Anticlockwise rolling
Fast to Slow
©Copyright Lotronic 2014 LAS1000RGB-5IN1 21
Page 22

CH 11
ROLL SPEED
0-255 Fast to Slow
CH 12
Z AXIS ROLLING
CH 12
Z AXIS ROLLING
CH 13
ROLL SPEED
CH 14
Y AXIS MOVING
CH 15
MOVE SPEED
CH 16
X AXIS MOVING
CH 17
MOVE SPEED
000-127 0 -359 degree fixed Z axis rolled
128-191 Clockwise rolling
000-127 0 -359 degree fixed Z axis rolled
128-191 Clockwise rolling
192-255 Anticlockwise rolling
0-255 Fast to Slow
000-127 128 different fixed position on X axis
128-191 Clockwise moving
192-255 Anticlockwise moving
0-255 Fast to Slow
000-127 128 different fixed position on Y axis
128-191 Clockwise moving
192-255 Anticlockwise moving
0-255 Fast to Slow
Grating Rotation
Different effect
CH18
CH19
000-004 No grating rotating
005-127 Clockwise grating rotating
128-133 No grating rotating
134-255 Anticlockwise grating rotating
000-031 Laser 3D Effect
032-063 Scanned Beam Effect (Pattern Effect)
064-095 Laser Lumia Effect
096-127 Scanned Beam Effect (Pattern Effect)
128-159 Burst Grating Effect
160-191 Scanned Beam Effect (Pattern Effect)
192-223 Laser Universal Effect
224-255 Scanned Beam Effect (Pattern Effect)
©Copyright Lotronic 2014 LAS1000RGB-5IN1 22
Page 23

P ATTERN LIST
DMX
000-015
016-031
032-047
048-063
064-079
080-095
096-111
112-127
128-143
144-159
1 2 3 4 5
160-175
176-191
192-207
208-223
224-239
240-255
WICHTIGER HINWEIS: Elektrogeräte gehören nicht in den Hausmüll. Sie müssen in speziellen Betrieben
recycelt werden. Bringen Sie sie zu einer speziellen Entsorgungsstelle für Elektrokleingeräte (Wertstoffhof)!
©Copyright Lotronic 2014 LAS1000RGB-5IN1 23
Page 24

NL
HANDLEIDING
Bedankt voor de aankoop van onze product. Lees deze handleiding aandachtig door alvorens U het product
gebruikt. Bewaar d e handleiding op. Dit pro duct creëert perfecte laser programm a’s en effecten en heeft een r ij
van strikte tests doorgelopen..
Specificaties
1. Voeding: AC100-240V, 50Hz/60Hz, Zekering: 2A/250V
2. Opgenomen vermogen: 100W
3. Laser diode: DPSS, groen 532nm 100mW, rood 650nm 300mW, blauw 450nm 800mW
4. Laser vermogen: 1000mW
5. Scanner: 20K high speed scanner
6. Werkingsmodi: muziek bestuurd/auto/DMX/ ILDA
7. DMX kanalen: 19 kanalen
8. Afmetingen: 340mm x 250mm x 150mm
9. Nettogewicht: 4.5kg
10. Brutogewicht: 5.5kg
Waarschuwingen
1. Nooit in de laserstraal kijken.
2. Nooit het toestel kort achtereenvolgens aan en uit schakelen.
3. Alleen op een stopcontact met randaarde aansluiten.
4. Alleen voor binnen gebruik . Tegen water, vochtigheid en trillingen beschermen. De werkingstemperatuur is
18-30°C. Na 10 minuten gebruik 30 minuten pauze maken.
5. Reinig de lens regelmatig d.m.v . een zuivere doek om vuil te verwijderen en het lichtvermogen te bewaren.
6. De zekering alleen door een identieke vervangen om vuur en elektrische schokken te vermijden.
7. Voor reparaties en onderhoudswerken het toestel van het lichtnet ontkoppelen. Alle reparaties alleen door een
vakman doorvoeren laten. Nooit het toestel zelfs repareren. Het toestel omvat geen van de gebruiker
vervangbare onderdele n.
8. Nooit het toestel gebruiken wann eer het net k abel beschadigd is. Een beschadi gde stroomk abel onmidde llijk
van een vakman vervangen laten.
Functie instelling
Wanneer de laser wordt ingeschakeld, toont de LCD op de achterzijde de huidige operationele stand-alone modus
of DMX-adres in DMX modus. Het is heel eenvoudig de m odus van de laser via het LCD-bedieningspaneel in te
stellen of te veranderen. Na elke reset en opslaan, wordt de nieuwe modus informatie op het LCD weergegeven.
Drukken om de werkingsmodi van de laser te kiezen
Bevestiging van de instellingen
UP/DOWN: Verandering van de werkingsmodi, instelling of DMX adres
©Copyright Lotronic 2014 LAS1000RGB-5IN1 24
Page 25

WERKING
MODUS
MODE:AUTO
Mixed 5 effect
LCD DISPLAY OMSCHRIJVING
Auto Show with Mixed 5 effect
AUTOMATISCHE
WERKING MET VOORGEPROGRAMMEERDE
EFFECTEN
MODE:AUTO
Laser 3D
MODE:AUTO
Scanned Beam
MODE:AUTO
Laser Lumia
MODE:AUTO
Burst Grating
MODE:AUTO
Laser Universal
MODE:SOUND
Mixed 5 effect
MODE:SOUND
Laser 3D
MODE:SOUND
Scanned Beam
MODE:SOUND
Laser Lumia
Laser 3D Effect Auto Show
Scanned Beam Effect Auto Show
Laser Lumia Effect Auto Show
Burst Grating Effect Auto Show
Laser Universal Effect Auto Show
Sound Show with Mixed 5 effect
Laser 3D Effect Sound Show
Scanned Beam Effect Sound Show
Laser Lumia Effect Sound Show
MUZIEKBESTURING
DMX
SLAVE
SPIEGEL
Let op: In voorgeprogrammeerde standalone SOU ND modus schakel t de la ser na 10 se conden ui t indi en gee n
MODE:SOUND
Burst Grating
MODE:SOUND
Laser Universal
MODE:SENSITIVITY
▐▐▐▐▐▐▐▐▐▐
MODE: signal
001
MODE: signal
SLAVE
MODE:MIRROR
SY:Y SX:Y
geluid/microfoonsign aal aan wez ig is.
Burst Grating Effect Sound Show
Laser Universal Effect Sound Show
Instelling van de microfoon gevoeligheid
De laser werkt in DMX MO DE.
De laser werkt in SLAVE MODE
LASER SCANNED WORLD
©Copyright Lotronic 2014 LAS1000RGB-5IN1 25
Page 26

GELUIDGEACTIVEERDE MODUS: Instelling van de gevoeligheid
Druk op FUNC totdat S 6 verschijnt
Stel de microfoong evoelighe id d.m.v. de UP/DOWN toetsen in. S 0 bedoelt g een geluid activ ering, van S 1 tot S 9, wordt de
microfoon gevoeliger.
Instellingen met ENTER bevestigen en opslaan.
DMX Controle
Druk op FUNC om de MODE te kiezen
Druk totdat 001 op de display verschijnt.
Druk ENTER om de instelling te bevestigen
De laser werkt nu in DMX modus. Stel de DMX adres d.m.v. de UP en DOWN toetsen in.
Slave modus
DMX Controle
Druk op FUNC om de MODE te kiezen
Druk totdat SLAVE op de display verschijnt.
Druk ENTER om de instelling te bevestigen
De laser werkt nu in SLAVE modus. Sluit een MASTER laser op meerder e SLAVE lasers d.m.v. een DMX kabel
aan. De slaves doen hetzelfde als de master. Zie kabelaansluiting beneden.
DMX modus
1. Installeer het toestel in een geschikte positie.
2. Ver bind de t oeste llen d.m .v. een standard XLR microf oon kabel via de XLR contr a op de ac hterk ant. Ind ien U
meerdere toestellen aan elkaar aansluit, installeer een aardweerstand op de laatste XLR uitgang.
3. Geef elk toestel een DMX adres (zie tabel).
4. Schakel alle toestellen aan. Na de reset zijn ze klaar voor gebruik.
5. Bestuur de toestellen via de DMX controller.
INSTELLING VAN DE PATROONSPI EG ELING
Druk op FUNC om de MODE te kiezen
Druk totdat de rechterkant van een patroon op de display verschijnt.
Druk ENTER om de instelling te bevestigen
Druk op UP om de LASER SCANNED WORLD om de x-as te draaien.
Druk up DOWN om de LASER SCANNED WORLD om de y-as te draaien.
Let op: De spiegeling van de LASER SCANNED WORLD kan ook via ILDA gedaan worden.
ILDA Besturing
Dit apparaat heft een D25 port zodat het via een PC gestuurd worden kan. Als een 25-pin kabel aangesloten is,
wordt de laser via PC bestuurd. Als geenkabel aangesloten is, werkt het in de laatste opgeslagen modus.
©Copyright Lotronic 2014 LAS1000RGB-5IN1 26
Page 27

DMX Kanaaltabel
DMX kanaaltabel met ILDA
KANAAL WAARDE OMSCHRIJVING
000-004 No grating rotating
CH1
Grating Rotation
005-127 Clockwise grating rotating
128-133 No grating rotating
134-255 Anticlockwise grating rotating
000-031 Laser 3D Effect
032-063 Scanned Beam Effect (Pattern Effect)
064-095 Laser Lumia Effect
CH2
096-127 Scanned Beam Effect (Pattern Effect)
Grating Effect
128-159 Burst Grating Effect
160-191 Scanned Beam Effect (Pattern Effect)
192-223 Laser Universal Effect
224-255 Scanned Beam Effect (Pattern Effect)
DMX kanaaltabel zonder ILDA
KANAAL WAARDE FUNCTIE
CH 1
MODE
000-018
019-036 AUT Auto Show with Mixed 5 effect
037-054 A3D Laser 3D Effect Aut o Show
055-072 AUB Scanned Beam Effect Auto Show
073-090 AUL Laser Lumia Effect Auto Show
091-108 AUN Burst Grating Effect Auto Show
109-126 AUO Laser Universal Effect Auto Show
127-144 SOU Sound Show with Mixed 5 Effect
145-162 S3D Sound show with LASER 3D
163-180 SOB Sound show with Scanned Beam
181-198 SOL Sound show with LASER LUMIA
199-216 SON Sound show with Burst Grating
217-234 SOO Sound show with Laser Universal
235-255 DMX MODE
Laser UIT
©Copyright Lotronic 2014 LAS1000RGB-5IN1 27
Page 28

000-051
000-007
Original
000
Full pattern without clipping
1 Group Patterns.
CH 2
GROUP
CH 3 PATTERN
CH 4
COLOR
052-103
104-155
156-207
208-255
000-255 Every 16 for 1 Group, total 16 patterns.
008-015 Red
016-023 Green
024-031 Yellow
032-039 Blue
040-047 Purple
048-055 Light Blue
056-063 White
064-111 Color Rolling
112-159 Color Jumping
160-127 Color Moving
208-255 Strobing
2 Group Patterns
3 Group Patterns
4 Group Patterns
5 Group Patterns
CH 5
CLIPING
CH 6
ZOOMING
CH 7
ZOOM SPEED
CH 8
Y AXIS ROLLING
CH 9
ROLL SPEED
CH 10
X AXIS ROLLING
001-127 0%~99% fixed pattern clipped
128-255 Clipping Speed
000-127 100%-5% fixed pattern zoomed
128-169 Zooming IN
170-209 Zooming OUT
210-255 Alternately Zooming
000-255
000-127 0 -359 degree fixed Y axis rolled
128-191 Clockwise rolling
192-255 Anticlockwise rolling
0-255 Snel naar langzaam
000-127 0 -359 degree fixed X axis rolled
128-191 Clockwise rolling
192-255 Anticlockwise rolling
Snel naar langzaam
©Copyright Lotronic 2014 LAS1000RGB-5IN1 28
Page 29

CH 11
ROLL SPEED
0-255 Snel naar langzaam
CH 12
Z AXIS ROLLING
CH 12
Z AXIS ROLLING
CH 13
ROLL SPEED
CH 14
Y AXIS MOVING
CH 15
MOVE SPEED
CH 16
X AXIS MOVING
CH 17
MOVE SPEED
000-127 0 -359 degree fixed Z axis rolled
128-191 Clockwise rolling
000-127 0 -359 degree fixed Z axis rolled
128-191 Clockwise rolling
192-255 Anticlockwise rolling
0-255 Snel naar langzaam
000-127 128 different fixed position on X axis
128-191 Clockwise moving
192-255 Anticlockwise moving
0-255 Snel naar langzaam
000-127 128 different fixed position on Y axis
128-191 Clockwise moving
192-255 Anticlockwise moving
0-255 Snel naar langzaam
Grating Rotation
Different effect
CH18
CH19
000-004 No grating rotating
005-127 Clockwise grating rotating
128-133 No grating rotating
134-255 Anticlockwise grating rotating
000-031 Laser 3D Effect
032-063 Scanned Beam Effect (Pattern Effect)
064-095 Laser Lumia Effect
096-127 Scanned Beam Effect (Pattern Effect)
128-159 Burst Grating Effect
160-191 Scanned Beam Effect (Pattern Effect)
192-223 Laser Universal Effect
224-255 Scanned Beam Effect (Pattern Effect)
©Copyright Lotronic 2014 LAS1000RGB-5IN1 29
Page 30

PATRONENLIJST
DMX
000-015
016-031
032-047
048-063
064-079
080-095
096-111
112-127
128-143
144-159
1 2 3 4 5
160-175
176-191
192-207
208-223
224-239
240-255
BELANGRIJK: De elektrische producten mogen niet bij het huisvuil gegooid worden. Gelieve deze te laten
recycleren daar waar er centra’s hiervoor voorzien is. Raadpleeg de plaatselijke autoriteiten of uw verkoper
ivm de manier van recycleren
©Copyright Lotronic 2014 LAS1000RGB-5IN1 30
Page 31

P
MANUAL DE INSTRUÇÕES
De modo a poder operar e usar o equipamento correctamente e com segurança, leia este manual antes de o usar.
Guarde este manual para referência futura.
Especificações:
1. Voltagem: AC100-240V, 50Hz/60Hz, Fusível: 2A/250V
2. Potência: 100W
3. Laser: DPSS, DPSS, verde 532nm 100mW, vermelho 600nm 500mW, azul 455nm 800mW
4. Potência de Laser: 1000mW
5. Motor: scanners de alta velocidade 20Kpps
6. Modo de controlo: Controlo de som auto/DMX/ILDA
7. Canais DMX: 19 canais
8. Dimensões: 340 x250 x 150mm
9. Peso Liquido: 4,5kg
10. Peso Bruto: 5.5Kg
Aviso
Não exponha os seus olhos à luz directa do Laser
Não desligue e ligue a unidade com frequência
Esta unidade é para ser usada em espaços fechados. A temperatura de funcionamento é de 18-30ºC. Não
a utilize por mais de 4 horas ou poderá encurtar a vida do equipamento.
Limpe a lente externa do equipamento com um pano limpo para remover o pó e ter o máximo
desempenho.
Não remova o selo de garantia.
Substitua pelo fusível com amperagem correcta.
Ao usar este aparelho o ef eito irá mudar conforme a música. Se m udar o som e ritmo a máquina vai
mudar a direcção e velocidade.
Configuração de Funções
When laser is po wered on, LCD monitor on rear panel shows the c urrent operating stand-alone mode or DMX
address of DMX mode. It is very easy to set and change the operating mode of the laser via the LCD control panel.
After every reset and saving, the new mode information will be shown on LCD monitor at next power on.
Mode Option, to choose the operating mode of laser
Confirmation, to store the current menu of confirm the current function
UP/DOWN, to change operating mode, parameter or DMX address
©Copyright Lotronic 2014 LAS1000RGB-5IN1 31
Page 32

OPERATION
MODE
STAND ALONE MODE
MODE:AUTO
Mixed 5 effect
LCD DISPLAY DESCRIPTION
Auto Show with Mixed 5 effect
PREPROGRAMMED
EFFECT
MODE:AUTO
Laser 3D
MODE:AUTO
Scanned Beam
MODE:AUTO
Laser Lumia
MODE:AUTO
Burst Grating
MODE:AUTO
Laser Universal
MODE:SOUND
Mixed 5 effect
MODE:SOUND
Laser 3D
MODE:SOUND
Scanned Beam
MODE:SOUND
Laser Lumia
Laser 3D Effect Auto Show
Scanned Beam Effect Auto Show
Laser Lumia Effect Auto Show
Burst Grating Effect Auto Show
Laser Universal Effect Auto Show
Sound Show with Mixed 5 effect
Laser 3D Effect Sound Show
Scanned Beam Effect Sound Show
Laser Lumia Effect Sound Show
SOUND
DMX
SLAVE
MIRROR
Attention In preprogrammed standalone SOUND SHOW mode, the laser beam will be blank-out in 10 seconds
MODE:SOUND
Burst Grating
MODE:SOUND
Laser Universal
MODE:SENSITIVITY
▐▐▐▐▐▐▐▐▐▐
MODE: signal
001
MODE: signal
SLAVE
MODE:MIRROR
SY:Y SX:Y
without AUDIO/MIC activated signal.
Burst Grating Effect Sound Show
Laser Universal Effect Sound Show
Set microphone sensitivity
The laser is working in DMX MODE.
The laser is working in SLAVE MODE
The laser scanned world
©Copyright Lotronic 2014 LAS1000RGB-5IN1 32
Page 33

SOUND ACTIVATED MODE: Sensitivity Setting
Press FUNC until S 6 is displayed
Press UP/DOWN to set the microphone sensitivity. S 0 is no sound activation, from S 1 to S 9, the sensitivity level is
getting more sensitive.
Press ENTER to confirm and save the setting.
DMX Control
Press FUNC to enter MODE selection
Press until the LCD panel shows 001
Press ENTER to confirm setting
The laser is working in DMX MODE. Set the DMX address via the UP and DOWN buttons
Slave Operation
Press FUNC to enter MODE selection
Press until the LCD panel shows SLAVE
Press ENTER to confirm setting
The laser is working in SLAVE MODE. Connect MASTER laser to several SLAVE lasers via a DMX cable, SLAVE
lasers are doing exactly the same laser show as MASTER laser. Please check below for DMX cable connection for
reference.
DMX512
1. Instale as unidades numa posição adequada (fixa ou anexar).
2. Use cabos d e m icrof one XLR em rede c om as unidades em conjunto através da tom ada X LR na parte traseira
das unidades. Para mais cabo sugerimos um terminal na última ligação.
3. Atribua um endereço D MX para cada unidade usando di pswitches; Consulte a secção "DMX Address Quick
Reference Char». (Todas as unidades definidas para # 1 e # 10 vão ficar OK)
4. Ligue a alimentaç ão de todas as un idades, as unidades começam a r econfigurar, e em seguida, a unidade
começa a trabalhar.
5. Use a consola DMX para controlar as unidades.
PATTERN MIRROR REVERSE SETTING
Press FUNC to enter MODE selection
Till to below LCD display is shown in LCD panel and the laser will show pattern right side.
Press ENTER to confirm the setting.
With help of UP button, the laser scanned world in x direction could be reversed, as the graphic as below.
With help of DOWN button, the laser scanned world in y direction could be reversed, as the graphic as below.
Please note: Besides the LCD programmed mirror reverse setting, the laser scanned world could be
set by ILDA control panel.
ILDA Control Mode
This unit has an I LD A DB25 port that allo ws th e u nit to be PC-controlled. When a 25-pin lea d is c o nnec te d, the
laser will be PC controlled. When the lead is disconnected, the laser will return to the last operating mode.
©Copyright Lotronic 2014 LAS1000RGB-5IN1 33
Page 34

DMX Channels Chart
DMX Channels Chart Whe n ILDA is connected
CHANNEL VALUE DESCRIPTION
000-004 No grating rotating
CH1
Grating Rotation
005-127 Clockwise grating rotating
128-133 No grating rotating
134-255 Anticlockwise grating rotating
000-031 Laser 3D Effect
032-063 Scanned Beam Effect (Pattern Effect)
064-095 Laser Lumia Effect
CH2
096-127 Scanned Beam Effect (Pattern Effect)
Grating Effect
128-159 Burst Grating Effect
160-191 Scanned Beam Effect (Pattern Effect)
192-223 Laser Universal Effect
224-255 Scanned Beam Effect (Pattern Effect)
DMX Channels Chart When ILDA is NOT connected
CHANNEL VALUE FUNCTION
000-018
Laser OFF
CH 1
MODE
019-036 AUT Auto Show with Mixed 5 effect
037-054 A3D Laser 3D Effect Auto Show
055-072 AUB Scanned Beam Effect Auto Show
073-090 AUL Laser Lumia Effect Auto Show
091-108 AUN Burst Grating Effect Auto Show
109-126 AUO Laser Universal Effect Auto Show
127-144 SOU Sound Show with Mixed 5 Effect
145-162 S3D Sound show with LASER 3D
163-180 SOB Sound show with Scanned Beam
181-198 SOL Sound show with LASER LUMIA
199-216 SON Sound show with Burst Grating
217-234 SOO Sound show with Laser Universal
235-255 DMX MODE
©Copyright Lotronic 2014 LAS1000RGB-5IN1 34
Page 35

000-051
000-007
Original
000
Full pattern without clipping
1 Group Patterns.
CH 2
GROUP
CH 3 PATTERN
CH 4
COLOR
052-103
104-155
156-207
208-255
000-255 Every 16 for 1 Group, total 16 patterns.
008-015 Red
016-023 Green
024-031 Yellow
032-039 Blue
040-047 Purple
048-055 Light Blue
056-063 White
064-111 Color Rolling
112-159 Color Jumping
160-127 Color Moving
208-255 Strobing
2 Group Patterns
3 Group Patterns
4 Group Patterns
5 Group Patterns
CH 5
CLIPING
CH 6
ZOOMING
CH 7
ZOOM SPEED
CH 8
Y AXIS ROLLING
CH 9
ROLL SPEED
CH 10
X AXIS ROLLING
001-127 0%~99% fixed pattern clipped
128-255 Clipping Speed
000-127 100%-5% fixed pattern zoomed
128-169 Zooming IN
170-209 Zooming OUT
210-255 Alternately Zooming
000-255
000-127 0 -359 degree fixed Y axis rolled
128-191 Clockwise rolling
192-255 Anticlockwise rolling
0-255 Fast to Slow
000-127 0 -359 degree fixed X axis rolled
128-191 Clockwise rolling
192-255 Anticlockwise rolling
Fast to Slow
©Copyright Lotronic 2014 LAS1000RGB-5IN1 35
Page 36

CH 11
ROLL SPEED
0-255 Fast to Slow
CH 12
Z AXIS ROLLING
CH 12
Z AXIS ROLLING
CH 13
ROLL SPEED
CH 14
Y AXIS MOVING
CH 15
MOVE SPEED
CH 16
X AXIS MOVING
CH 17
MOVE SPEED
000-127 0 -359 degree fixed Z axis rolled
128-191 Clockwise rolling
000-127 0 -359 degree fixed Z axis rolled
128-191 Clockwise rolling
192-255 Anticlockwise rolling
0-255 Fast to Slow
000-127 128 different fixed position on X axis
128-191 Clockwise moving
192-255 Anticlockwise moving
0-255 Fast to Slow
000-127 128 different fixed position on Y axis
128-191 Clockwise moving
192-255 Anticlockwise moving
0-255 Fast to Slow
Grating Rotation
Different effect
CH18
CH19
000-004 No grating rotating
005-127 Clockwise grating rotating
128-133 No grating rotating
134-255 Anticlockwise grating rotating
000-031 Laser 3D Effect
032-063 Scanned Beam Effect (Pattern Effect)
064-095 Laser Lumia Effect
096-127 Scanned Beam Effect (Pattern Effect)
128-159 Burst Grating Effect
160-191 Scanned Beam Effect (Pattern Effect)
192-223 Laser Universal Effect
224-255 Scanned Beam Effect (Pattern Effect)
©Copyright Lotronic 2014 LAS1000RGB-5IN1 36
Page 37

P ATTERN LIST
DMX
000-015
016-031
032-047
048-063
064-079
080-095
096-111
112-127
128-143
144-159
1 2 3 4 5
160-175
176-191
192-207
208-223
224-239
240-255
Produtos eléctricos não deverão ser postos em contentores de lixo caseiros. Por favor, deposite-os em contentores
para reciclagem. Questione as autoridades locais ou onde adquiriu o produto sobre como deverá proceder.
©Copyright Lotronic 2014 LAS1000RGB-5IN1 37
Page 38

SLO
Zahvaljujemo se vam za nakup tega izdelka. Prosimo, preberite navodilo za varnost in del informacij pred uporabo
izdelka. Shranite ta priročnik za poznejšo uporabo. S tem laserjem lahko ustvarite popolne laserske programe in
efekte, saj je opravil vrsto strogih testov strogo pred dostavo. Prosimo, preverite priloge, navedene na strani, ko se
odprete škatlo. V primeru poškodb na škatli ali če so priloge izgubljene pri tarnsportu, se obrnite na prodajalca ali
na naš poprodajno servisni oddelek.
Tehnični podatki
1. Napajanje: AC100-240V, 50Hz/60Hz, Varovalka: 2A/250V
2. Nazivna moč: 100W
3. Laserske diode: DPSS, zelena 532nm 100mW, rdeča 650nm 300mW, modra 450nm 800mW
4. Moč laserja: 1000mW
5. Motor: 20K visoko precizni motor
6. Načini kontrole: Zvočna aktivacija/Samodejno/DMX/ ILDA
7. DMX kanali: 19 kanalov
8. Dimenzije: 340 x 250 x 150 mm
9. Neto teža: 4.5 kg
10. Bruto teža: 5.5 kg
Opozorilo
Ne izpostavljajte človeško oko direktno laserskim žarkom.
Ne vklapajte in izklapajte naprave pogosto.
Pred uporabo te naprave se prepričajte če je napajalnik ozemljen.
Ta enota je nam enjena le za u porabo v za prtih pr ost orih in jo n e i zpostavljajte, vla gi, vodi , tres ljaj em . Delovn a
temperatura v napravi je 18-30 ° C, ne uporablajte jo neprekinjeno več kot 4 ure, sicer boste skrajšali
življenjsko dobo naprave.
Odstranite prah z leč z krpo za optimalno svetilnost.
Ne odstranjujte garancijsko nalepko, sicer boste izničili garancijo.
Varovalko vedno zamenjajte s točno enakim tipom varovalke, zamenjavo s čimerkoli, razen določene
varovalke lahko povzroči požar ali električni udar in poškoduje enoto in izniči garancijo proizvajalca.
Nastavitev funkcij
Ko je laser vklopljen, LCD monitor na zadnji plošči prikazuje trenutno delovanje v samostojnem načinu ali DMX
adreso v DMX načinu. To je zelo enostavno za vzpostavitev in spremembo načina delovanja laserja preko LCD
nadzorne plošče. Po vsakem resetiranju in shranjevanju, se bodo novi podatki prikazali na LCD zaslonu pri LCD
pri naslednjem vklopu.
Opcije načinov, da izbere način delovanja laserja
Potrditev, za shranjevanje trenutnega menija potrdite trenutno funkcijo
UP/DOWN, za spremembo načina delovanja, parametrov ali DMX adrese
©Copyright Lotronic 2014 LAS1000RGB-5IN1 38
Page 39

DELOVANJE
NAČIN
NAČIN:SAMODEJNO
Mix 5 efektov
LCD ZASLON OPIS
Samodejni Show z Mixom 5 efektov
SAMOSTOJNI NAČIN
PREDPROGRAMIRANI
EFEKTI
NAČIN: SAMODEJNO
Laser 3D
NAČIN: SAMODEJNO
Scanned Beam
NAČIN: SAMODEJNO
Laser Lumia
NAČIN: SAMODEJNO
Burst Grating
NAČIN: SAMODEJNO
Laser Universal
NAČIN:ZVOK
Mix 5 efektov
NAČIN: ZVOK
Laser 3D
NAČIN: ZVOK
Scanned Beam
NAČIN: ZVOK
Laser Lumia
Laser 3D Efekt Samodejni Show
Scanned Beam Efekt Samodejni Show
Laser Lumia Efekt Samodejni Show
Burst Grating Efekt Samodejni Show
Laser Universal Efekt Samodejni Show
Zvočni Show z Mixom 5 efektov
Laser 3D Efekt Zvočni Show
Scanned Beam Efekt Zvočni Show
Laser Lumia Efekt Zvočni Show
ZVOK
DMX
SLAVE
OGLEDALA
Pozor: V predprogramiranem samostojnem načinu ZVOČNI SHOW, bo laserski žarek black-out v 10 sekundah
NAČIN: ZVOK
Burst Grating
NAČIN: ZVOK
Laser Universal
NAČIN:OBČUTLJIVOST
▐▐▐▐▐▐▐▐▐▐
NAČIN: signal
001
NAČIN: signal
SLAVE
NAČIN:OGLEDALA
SY:Y SX:Y
brez AUDIO/MIC aktivacijskega signala.
Burst Grating Efekt Zvočni Show
Laser Universal Efekt Zvočni Show
Nastavitev občutljivosti mikrofona
Laser dela v DMX NAČINU.
Laser dela v SLAVE NAČINU
Laser scanned world
©Copyright Lotronic 2014 LAS1000RGB-5IN1 39
Page 40

ZVOČNA AKTIVACIJA: Nastavitev občutljivosti
Pritisnite FUNC dokler se ne prikaže S 6
Pritisnite UP/DOWN za nastavitev občutljivosti mikrofona. S 0 je brez zvočne aktivacije, za S 1 do S 9, nivo občutljivosti je
vse bolj občutljiv.
Pritisnite ENTER da potrdite in shranite nastavitve.
DMX Kontrola
Pritisnite FUNC za vstop v MODE izbor
Pritisnite dokler se na LCD ne prikaže 001
Pritisnite ENTER za potrditev nastavitve
Laser deluje v DMX NAČINU. Nastavite DMX adreso preko gumbov UP in DOWN
Slave Delovanje
Pritisnite FUNC za vstop v MODE izbor
Pritisnite dokler se na LCD ne prikaže SLAVE
Pritisnite ENTER za potrditev nastavitve
Laser deluje v SLAVE NAČINU. Povežite MASTER laser za več SLAVE laserjev prek kabla DMX, SLAVE laserji
delajo točno isti laser show kot MASTER laser. Prosimo, preverite spodaj DMX kabla za sklicevanje.
DMX512
1. Enote namestite v primernim položaju.
2. Upora bljajte standardne XLR mikrofonske kable d a povežete svoje enote v verigo preko XLR konektorja na
zadnji strani enote. Za daljše kabelske linije priporočamo da priključite DMX terminator v zadnjo enoto.
3. Določite DMX adreso za vsako enoto preko DIP stikal: glejte "DMX adrese hitri referenčni graf". (Vse enote
nastavite na #1 in #10 na ON in bo OK)
4. Vklopite vse enote, enote se ponastavijo, potem začnejo delovati.
5. Uporabite DMX krmilnik za kontrolo enot.
NASTAVITEV OBRNJENIH LIKOV
Pritisnite FUNC za vstop MODE izbiro
Dokler se na LCD zaslonu ne prikaže pravi lik.
Pritisnite ENTER, da potrdite nastavitev.
S pomočjo gumba UP, lahko laserski motor kroži, v smeri x se obrne, kot grafika spodaj.
S pomočjo gumba DOWN, lahko laserski motor kroži v y smeri se obrne, kot grafika spodaj.
Prosimo, upoštevajte: Poleg LCD programiranja ogledal obratno, lahko laserski motor kroži, kako
določi ILDA nadzorna plošča.
ILDA Način Kontrole
Ta enota ima vhod za ILDA DB25, ki omogoča, da se enota računalniško kontrolira. Ko je 25-pin kabel povezan,
bo laser računalniško kontroliran. Če se kabel odklopi, se laser vrne na zadnji način delovanja.
©Copyright Lotronic 2014 LAS1000RGB-5IN1 40
Page 41

DMX Kanali
DMX Kanali ko je ILDA priključena
KANAL VREDNOST OPIS
000-004 No grating rotating
CH1
Grating Rotation
005-127 Clockwise grating rotating
128-133 No grating rotating
134-255 Anticlockwise grating rotating
000-031 Laser 3D Effect
032-063 Scanned Beam Effect (Pattern Effect)
064-095 Laser Lumia Effect
CH2
096-127 Scanned Beam Effect (Pattern Effect)
Grating Effect
128-159 Burst Grating Effect
160-191 Scanned Beam Effect (Pattern Effect)
192-223 Laser Universal Effect
224-255 Scanned Beam Effect (Pattern Effect)
DMX Kanali ko ILDA ni priključena
KANAL VREDNOST FUNKCIJA
000-018
Laser OFF
CH 1
MODE
019-036 AUT Auto Show with Mixed 5 effect
037-054 A3D Laser 3D Effec t Auto Show
055-072 AUB Scanned Beam Effect Auto Show
073-090 AUL Laser Lumia Effect Auto Show
091-108 AUN Burst Grating Effect Auto Show
109-126 AUO Laser Universal Effect Auto Show
127-144 SOU Sound Show with Mixed 5 Effect
145-162 S3D Sound show with LASER 3D
163-180 SOB Sound show with Scanned Beam
181-198 SOL Sound show with LASER LUMIA
199-216 SON Sound show with Burst Grating
217-234 SOO Sound show with Laser Universal
235-255 DMX MODE
©Copyright Lotronic 2014 LAS1000RGB-5IN1 41
Page 42

000-051
000-007
Original
008-015
Red
024-031
Yellow
032-039
Blue
048-055
Light Blue
056-063
White
112-159
Color Jumping
160-127
Color Moving
000
Full pattern without clipping
001-127
0%~99% fixed pattern clipped
Clipping Speed
1 Group Patterns.
CH 2
GROUP
CH 3 PATTERN
CH 4
COLOR
052-103
104-155
156-207
208-255
000-255 Every 16 for 1 Group, total 16 patterns.
016-023 Green
040-047 Purple
064-111 Color Rolling
2 Group Patterns
3 Group Patterns
4 Group Patterns
5 Group Patterns
CH 5
CLIPING
CH 6
ZOOMING
CH 7
ZOOM SPEED
CH 8
Y AXIS ROLLING
CH 9
ROLL SPEED
CH 10
X AXIS ROLLING
208-255 Strobing
128-255
000-127 100%-5% fixed pattern zoomed
128-169 Zooming IN
170-209 Zooming OUT
210-255 Alternately Zooming
000-255
000-127 0 -359 degree fixed Y axis rolled
128-191 Clockwise rolling
192-255 Anticlockwise rolling
0-255
000-127 0 -359 degree fixed X axis rolled
128-191 Clockwise rolling
192-255 Anticlockwise rolling
Fast to Slow
Fast to Slow
©Copyright Lotronic 2014 LAS1000RGB-5IN1 42
Page 43

CH 11
ROLL SPEED
0-255
Fast to Slow
CH 12
Z AXIS ROLLING
CH 12
Z AXIS ROLLING
CH 13
ROLL SPEED
CH 14
Y AXIS MOVING
CH 15
MOVE SPEED
CH 16
X AXIS MOVING
CH 17
MOVE SPEED
000-127 0 -359 degree fixed Z axis rolled
128-191 Clockwise rolling
000-127 0 -359 degree fixed Z axis rolled
128-191 Clockwise rolling
192-255 Anticlockwise rolling
0-255
000-127 128 different fixed position on X axis
128-191 Clockwise moving
192-255 Anticlockwise moving
0-255
000-127 128 different fixed position on Y axis
128-191 Clockwise moving
192-255 Anticlockwise moving
0-255 Fast to Slow
Fast to Slow
Fast to Slow
Grating Rotation
Different effect
CH18
CH19
000-004 No grating rotating
005-127 Clockwise grating rotating
128-133 No grating rotating
134-255 Anticlockwise grating rotating
000-031 Laser 3D Effect
032-063 Scanned Beam Effect (Pattern Effect)
064-095 Laser Lumia Effect
096-127 Scanned Beam Effect (Pattern Effect)
128-159 Burst Grating Effect
160-191 Scanned Beam Effect (Pattern Effect)
192-223 Laser Universal Effect
224-255 Scanned Beam Effect (Pattern Effect)
©Copyright Lotronic 2014 LAS1000RGB-5IN1 43
Page 44

SEZNAM LIKOV
DMX
000-015
016-031
032-047
048-063
064-079
080-095
096-111
112-127
128-143
144-159
1 2 3 4 5
160-175
176-191
192-207
208-223
224-239
240-255
Električni izdelki ne smejo biti dana v gospodinjske odpadke. Prosimo, da jih pripeljete do reciklažnega centra.
Vprašajte svoje lokalne oblasti ali svojega prodajalca o nadaljevanju.
©Copyright Lotronic 2014 LAS1000RGB-5IN1 44
Page 45

RO
PERICOL! FASCICOL LASER!
Va multumim pentru ac hizitionarea acestui produs. Va rugam sa cititi m anualul de utilizare inainte de utili zarea
produsului. Pastrati acest manual pentru referinte viitoare. Acest produs poate crea programe si efecte laser
deosebite si a trecut o ser ie de teste stricte inainte de li vrare. Va r ugam sa verificati accesoriile la des chiderea
cutiei. In cazul in c are cutia este deteriorata sau constatati lipsa accesoriilor in urma transportului, va ruga m sa
contactati distribuitorul.
Specificatii tehnice
1. Tensiune de alimentare: 100-240 VAC, 50Hz/60Hz, siguranta: 2A/250V
2. Putere nominala: 100 W
3. Dioda laser: DPSS, verde 532nm 100mW, rosie 650nm 300mW, albastra 450nm 800mW
4. Putere laser: 1000mW
5. Scaner: 20K scanner de mare viteza
6. Moduri de functionare: activat de sunet/automat/DMX/ ILDA
7. Canale DMX: 19 canale
8. Dimensiuni (mm): 340 x 250 x 150
9. Greutate neta: 4.5 kg
10. Greutate bruta: 5.5 kg
NU PRIVITI DIRECT CATRE RAZA LASER!
LASER CLASA 3B
Avertisment
Feriti-va privirea de fasciculul laser.
Nu porniti sau opriti aparatul in mod frecvent.
Inainte de utilizarea aparatului asigurati-va ca sursa de alimentare are pamantare.
Acest aparat este destinat numai utilizarii in interior trebuie sa f ie ferit de apa si umiditate. Temperatura de
functionare a acest ei unitati es te de 18-30°C, nu utilizati in mod con tinuu m ai m ult de 4 or e, in ca z contrar se
reduce durata de functionare a aparatului.
Utilizati un servetel de hartie pentru a indepărta periodic praful depus pe lentilele externe pentru a optimiza
fluxul de lumina.
Nu indepartati sau rupeti eticheta de garantie, in caz contrar acest lucru duce la pierderea garantiei.
Inlocuiti intotdeauna cu acelasi tip de siguranta. Inlocuirea cu orice alt tip diferit de siguranta decat cea
specificata poate provoca incendii sau socuri electrice, deteriorarea unitatii si va anula garantia acordata
produsului.
Setare functii
Cand laserul este porn it, monitorul LCD de p e panoul din spate va afis a modul autonom de oper are sau adresa
DMX a modului DMX. Este foarte usor de configurat si de schimbat modul de functionare a laserului, prin
intermediul panoului de control LCD. Dupa fiecare resetare si salvare,modul informatiilor noi va fi afisat pe
monitorul LCD la urmatoarea pornire.
Optiune Mod, pentru alegerea modului de functionare a laserului
Confirmare, pentru memorarea meniului curent
SUS/JOS, pentru schimbarea modului de functionare, al parametrilor sau al adresei DMX
©Copyright Lotronic 2014 LAS1000RGB-5IN1 45
Page 46

MOD:AUTO
5 efecte combinate
Dispozitivul laser functioneaza pe MODUL
Dispozitivul laser functioneaza pe MODUL
FUNCTIONARE
MOD AFISAJ LCD DESCRIERE
Auto Show cu 5 efecte combinate
MOD AUTONOM EFECT
PRE-PROGRAMAT
MOD:AUTO
Laser 3D
MOD:AUTO
Fascicul de lumina
MODE:AUTO
Laser Lumia
MOD:AUTO
Burst Grating
MOD:AUTO
Laser Universal
MOD:SUNET
Mixed 5 effect
MOD:SUNET
Laser 3D
MOD:SUNET
Fascicul de lumina scanat
MOD:SUNET
Laser Lumia
Laser 3D Effect Auto Show
Efect fascicul de lumina Auto Show
Efect Laser Lumia Auto Show
Efect Burst Grating Auto Show
Efect Laser Universal Auto Show
Spectacol de sunet cu 5 efecte combinate
Spectacol de sunet Efect Laser 3D
Spectacol de sunet efect fascicul de lumina
scanat
Spectacol de sunet efect Laser Lumia
MOD:SUNET
Burst Grating
MOD:SUNET
Laser Universal
SUNET
DMX
SLAVE
MIRROR
Atentie Pe modul autonom preprogramat SOUND SHOW (SPECTACOL DE SUNET), fasciculul luminos se va
intrerupe dupa 10 secunde daca nu exista semnal AUDIO/MIC.
MOD:SENSIBILITATE
▐▐▐▐▐▐▐▐▐▐
MOD: semnal
001
MOD: semnal
SLAVE
MOD:MIRROR
SY:Y SX:Y
Spectacol de sunet efect Burst Grating
Spectacol de sunet efect Laser Universal
Setare sensibilitate microfon
DMX.
SLAVE
The laser scanned world
©Copyright Lotronic 2014 LAS1000RGB-5IN1 46
Page 47

MOD SUNET ACTIVAT: Setare Sensibilitate
Apasati tasta FUNC pana cand S 6 va fi afisat
Apasati tasta U P/DOWN pentru a seta s ensibilit a te micro fonului. S 0 indi ca faptu l ca sun etul nu est e act iv. De la S 1 la S 9,
nivelul de sensibilitate creste.
Apasati tasta ENTER pentru a confirma si salva setarea.
Control DMX
Apasati tasta FUNC pentru a accesa selectarea MODULUI.
Apasati pana cand pe panoul LCD apare 001
Apasati tasta ENTER pentru a confirma setarea
Dispozitivul laser functioneaza pe MODUL DMX . Setati adresa DMX cu ajutorul butoanelor UP si DOWN.
Functionare Slave
Apasati tasta FUNC pentru a accesa selectarea MODULUI.
Apasati pana cand pe panoul LCD apare SLAVE
Apasati tasta ENTER pentru a confirma setarea
Laserul functioneaza pe MO DUL SLAVE. Conectati laserul M ASTER la m ai multe lasere SLAVE prin intermediul
unui cablu DMX. Laserele SLAVE vor oferi exact acelasi spectacol de lumini ca si laserul MASTER. Va rugam sa
verificati mai jos pentru conexiunea prin cablu DMX.
DMX512
1. Instalati aparatul intr-o pozitie convenabila.
2. Utilizati cablur i de m icrofon XLR standar d pentru a conecta aparatel e intre ele. Pentru u ltimul cablu utilizati un
terminator de linie.
3. Atribuiti o adresa DMX fiecarei unitati cu ajutorul comutatoarelor dip; vezi “Tabelul cu adrese DMX” (Toate
unitatile setate pe #1 si #10 vor fi OK) .
4. Porniti toate aparatele.
5. Utilizati consola DMX pentru controlul instalatiei.
SETARE MODEL MIRROR REVERSE
• Apasati tasta FUNC pentru a accesa MODUL de selectare.
• Apasati tasta ENTER pentru a confirma setarea.
• Cu ajutorul butonului UP, laserul pe directia x ar putea fi inversat, ca si graficul de mai jos.
• Cu ajutorul butonului DOWN, laserul pe directia y ar putea fi inversat, ca si graficul de mai jos.
Imaginile vor fi setate de catre panoul de control ILDA.
Mod de control ILDA
Acest aparat are un por t ILDA DB25 care perm ite unitatii sa fie con trolate de catr e calculator. Atunci cand u n
cablu cu 25-pini este cone ctat la portul unitatii, laseru l va fi controla t de calculator. In cazul in care cablul es te
deconectat, laserul va reveni la ultimul mod de operare.
©Copyright Lotronic 2014 LAS1000RGB-5IN1 47
Page 48

Tabel canale DMX
Tabel Canale DMX cand dispozitivul ILDA este conectat
CANAL VALOARE DESCRIERE
CH1
Rotatie Grilaj
000-004 Fara rotire grilaj
005-127 Rotatie grilaj in sensul acelor de ceasornic
128-133 Fara rotire grilaj
134-255 Rotatie grilaj in sens invers acelor de ceasornic
000-031 Laser efect 3D
032-063 Efect fascicul luminos scanat (efect tipar/model)
064-095 Efect Laser Lumia
CH2
096-127 Efect fascicul luminos scanat (efect tipar/model)
Efect Grilaj
128-159 Efect Burst Grating
160-191 Efect fascicul luminos scanat (efect tipar/model)
192-223 Efect laser universal
224-255 Efect fascicul luminos scanat (efect tipar/model)
Tabel Canale DMX cand dispozitivul ILDA NU este conectat
CANAL VALOARE FUNCTII
MOD CH 1
000-018
019-036
037-054 A3D Laser efect 3D Auto Show
055-072 AUB Efect Fascicul luminos scanat Auto Show
073-090 AUL Efect Laser Lumia Auto Show
091-108 AUN Efect Burst Grating Auto Show
109-126 AUO Efect Laser Universal Auto Show
127-144
145-162
163-180
181-198
199-216
217-234
235-255 MOD DMX
Laser OPRT
AUT Auto Show
SOU Spectacol de sunet cu 5 efecte combinate
Spectacol de sunet cu LASER 3D
S3D
SOB Spectacol de sunet cu fascicul luminos scanat
Spectacol de sunet cu LASER LUMIA
SOL
Spectacol de sunet cu Burst Grating
SON
Spectacol de sunet cu laser universal
SOO
cu 5 efecte combinate
©Copyright Lotronic 2014 LAS1000RGB-5IN1 48
Page 49

000-051
128-191
Rotire in sensul acelor de ceasornic
Tipare
Grupa 1
GRUP CH 2
TIPAR CH 3
CULOARE CH 4
052-103
104-155
156-207
208-255
000-255 Fiecare 16 pentru Grupa 1, total 16 tipare.
000-007
008-015 Rosu
016-023 Verde
024-031 Galben
032-039 Albastru
040-047 Mov
048-055 Abastru deschis
056-063 Alb
064-111 Rulare culoare
112-159 Omitere culoare
160-127 Miscare culoare
208-255 Strobing
Tipare Grupa 2
Tipare G r upa 3
Grupa 4
Tipare
Tipare G r upa 5
Original
CH 5
CLIPING
CH 6
TRANSFOCARE
CH 7
VITEZA ZOOM
CH 8
ROTIRE AXA Y
CH 9
VITEZA ROTIRE
CH 10
ROTIRE AXA X
000 Tipar complet fara perforare
001-127 0%~99% tipar fix perforat
128-255 Viteza perforare
000-127 100%-5% tipar fix transfocat
128-169 Marire
170-209 Micsorare
210-255 Zoom alternativ
000-255 De la rapid la lent
000-127
192-255 Rotire in sens invers acelor de ceasornic
0-255 De la rapid la lent
000-127 Rotire axa fixa X la 0 -359°
128-191 Rotire in sensul acelor de ceasornic
192-255 Rotire in sens invers acelor de ceasornic
Rotire axa fixa Y la 0 -359°
©Copyright Lotronic 2014 LAS1000RGB-5IN1 49
Page 50

CH 11
VITEZA ROTIRE
0-255 De la rapid la lent
CH 12
ROTIRE AXA Z
CH 12
ROTIRE AXA Z
CH 13
VITEZA ROTIRE
CH 14
MISCARE AXA Y
CH 15
VITEZA MISCARE
CH 16
MISCARE AXA X
CH 17
VITEZA MISCARE
000-127
128-191 Rotire in sensul acelor de ceasornic
000-127
128-191 Rotire in sensul acelor de ceasornic
192-255 Rotire in sens invers acelor de ceasornic
0-255 De la rapid la lent
000-127 128 pozitii fixe diferite pe axa X
128-191 Miscare in sensul acelor de ceasornic
192-255 Miscare in sens invers acelor de ceasornic
0-255 De la rapid la lent
000-127 128 pozitii fixe diferite pe axa Y
128-191 Miscare in sensul acelor de ceasornic
192-255 Miscare in sens invers acelor de ceasornic
0-255 De la rapid la lent
Rotire axa fixa Z la 0 -359°
Rotire axa fixa Z la 0 -359°
CH18
Rotire grilaj
CH19
Efect diferit
000-004 Fara rotire grilaj
005-127 Rotire grilaj in sensul acelor de ceasornic
128-133 Fara rotire grilaj
134-255 Rotire grilaj in sens invers acelor de ceasornic
000-031 Efect Laser 3D
032-063
064-095 Efect Laser Lumia
096-127
128-159 Efect Burst Grating
160-191
192-223 Efect Laser Universal
224-255
Efect fascicul luminos scanat (Efect tipar/model)
Efect fascicul luminos scanat (Efect tipar/model)
Efect fascicul luminos scanat (Efect tipar/model)
Efect fascicul luminos scanat (Efect tipar/model)
©Copyright Lotronic 2014 LAS1000RGB-5IN1 50
Page 51

LISTA TIPARE
DMX
1 2 3 4 5
000-015
016-031
032-047
048-063
064-079
080-095
096-111
112-127
128-143
144-159
160-175
176-191
192-207
208-223
224-239
240-255
Deseurile electrice si electronice nu trebuie anmestecate cu gunoiul menajer. Pentru dezafectarea acestora,
prezentati-le la centrele de colectare special amenajate in acest scop. Inte resati-va la a utoritatile locale cu privire la
informatii despre procedura de dezafectare selectiva a deseurilor provenind din aparatura electrica si electronica.
Imported from China by:
LOTRONIC SA
Avenue Zénobe Gramme 11
B - 1480 SAINTES
©Copyright Lotronic 2014 LAS1000RGB-5IN1 51
 Loading...