

Page 1

MODEL MT-C1
Machine Code: B064/B065
MODEL MT-C2
Machine Code:
B140/B141/B163/B142/B143/B228
MODEL MT-C3/C3.5
Machine Code:
B246/B248/B249/B250/B252/B253/
D052/D053/D054
SERVICE MANUAL
February 2008
Subject to Change
Page 2

IMPORTANT SAFETY NOTICES
PREVENTION OF PHYSICAL INJURY
1. Before disassembling or assembling parts of the copier and peripherals,
make sure that the copier power cord is unplugged.
2. The wall outlet should be near the copier and easily accessible.
3. Note that some components of the copier and the paper tray unit are
supplied with electrical voltage even if the main power switch is turned off.
4. If any adjustment or operation check has to be made with exterior covers off
or open while the main switch is turned on, keep hands away from electrified
or mechanically driven components.
5. If the Start key is pressed before the copier completes the warm-up period
(the Start key starts blinking red and green alternatively), keep hands away
from the mechanical and the electrical components as the copier starts
making copies as soon as the warm-up period is completed.
6. The inside and the metal parts of the fusing unit become extremely hot while
the copier is operating. Be careful to avoid touching those components with
your bare hands.
HEALTH SAFETY CONDITIONS
1. Never operate the copier without the ozone filters installed.
2. Always replace the ozone filters with the specified ones at the specified
intervals.
3. Toner and developer are non-toxic, but if you get either of them in your eyes
by accident, it may cause temporary eye discomfort. Try to remove with eye
drops or flush with water as first aid. If unsuccessful, get medical attention.
OBSERVANCE OF ELECTRICAL SAFETY STANDARDS
1. The copier and its peripherals must be installed and maintained by a
customer service representative who has completed the training course on
those models.
2. The NVRAM on the system control board has a lithium battery which can
explode if replaced incorrectly. Replace the NVRAM only with an identical
one. The manufacturer recommends replacing the entire NVRAM. Do not
recharge or burn this battery. Used NVRAM must be handled in accordance
with local regulations.
Page 3

SAFETY AND ECOLOGICAL NOTES FOR DISPOSAL
1. Do not incinerate toner bottles or used toner. Toner dust may ignite suddenly
when exposed to an open flame.
2. Dispose of used toner, developer, and organic photoconductors in
accordance with local regulations. (These are non-toxic supplies.)
3. Dispose of replaced parts in accordance with local regulations.
4. When keeping used lithium batteries in order to dispose of them later, do not
put more than 100 batteries per sealed box. Storing larger numbers or not
sealing them apart may lead to chemical reactions and heat build-up.
LASER SAFETY
The Center for Devices and Radiological Health (CDRH) prohibits the repair of
laser-based optical units in the field. The optical housing unit can only be repaired
in a factory or at a location with the requisite equipment. The laser subsystem is
replaceable in the field by a qualified Customer Engineer. The laser chassis is not
repairable in the field. Customer engineers are therefore directed to return all
chassis and laser subsystems to the factory or service depot when replacement of
the optical subsystem is required.
WARNING
Use of controls, or adjustment, or performance of procedures other than
those specified in this manual may result in hazardous radiation exposure.
WARNING
WARNING: Turn off the main switch before attempting any of the
procedures in the Laser Unit section. Laser beams can
seriously damage your eyes.
CAUTION MARKING:
Page 4

What This Manual Contains
This preliminary manual describes the installation procedures for the
B064/B140/B246 Series Copiers and their peripheral devices:
Conventions in this Manual
This manual describes more than one machine.
The following short notations are used in text to refer to the following machines.
Short Notations What They Mean
B064 Series
B140 Series
B246 Series
B064/B065
B140/B141/B142/B143/B163/B228
B246/B248/B249/B250/B252/B253
This manual uses several symbols.
Symbol What it means
=
Refer to section number
See Core Tech Manual for
details
Screw
Connector
E-ring
Clip ring
Clamp
Long Edge Feed (LEF)Short Edge Feed (SEF)
Page 5

TABLE OF CONTENTS
1. INSTALLATION .......................................................................................................................... 1-1
1.1 INSTALLATION REQUIREMENTS ..................................................................................... 1-1
1.1.1 OPERATING ENVIRONMENT .................................................................................. 1-1
1.1.2 MACHINE LEVEL ...................................................................................................... 1-2
1.1.3 MINIMUM SPACE REQUIREMENTS ....................................................................... 1-3
1.1.4 DIMENSIONS ............................................................................................................ 1-4
B064 Series................................................................................................................... 1-4
B140 Series................................................................................................................... 1-5
B246 Series................................................................................................................... 1-6
1.1.5 PERIPHERAL/OPTION SUMMARY TABLE ............................................................. 1-7
1.1.6 POWER REQUIREMENTS ....................................................................................... 1-9
1.2 MAIN MACHINE (B064 SERIES/B140 SERIES/B246 SERIES)....................................... 1-10
1.2.1 ACCESSORY CHECK............................................................................................. 1-10
1.2.2 INSTALLATION PROCEDURE ............................................................................... 1-11
Removing Tapes and Retainers ................................................................................. 1-11
Connecting the ADF.................................................................................................... 1-14
Removing and Filling the Development Unit............................................................... 1-14
Re-installing the Development Unit ............................................................................ 1-17
Initializing the Drum Settings (B064 Series) ............................................................... 1-18
Initializing the Drum Settings (B140/B246 Series)...................................................... 1-19
Tandem Tray............................................................................................................... 1-20
Machine Level............................................................................................................. 1-22
Date/Time Setting ....................................................................................................... 1-22
SP Codes .................................................................................................................... 1-22
1.3 A3/DLT FEEDER KIT (B475)............................................................................................. 1-23
1.3.1 ACCESSORY CHECK............................................................................................. 1-23
1.3.2 INSTALLATION PROCEDURE ............................................................................... 1-24
1.4 LCT (B473)......................................................................................................................... 1-26
1.4.1 ACCESSORY CHECK............................................................................................. 1-26
1.4.2 INSTALLATION PROCEDURE ............................................................................... 1-27
Removing Tape........................................................................................................... 1-27
Preparing the Main Machine ....................................................................................... 1-28
Installing the LCT ........................................................................................................ 1-28
1.5 LG/B4 FEEDER KIT (B474)............................................................................................... 1-31
1.5.1 ACCESSORY CHECK............................................................................................. 1-31
1.5.2 INSTALLATION PROCEDURE ............................................................................... 1-32
1.6 3000-SHEET FINISHERS (B468/B469/B674)................................................................... 1-35
1.6.1 ACCESSORY CHECK............................................................................................. 1-35
1.6.2 INSTALLATION PROCEDURE ............................................................................... 1-36
Removing Tapes and Retainers ................................................................................. 1-36
Installation................................................................................................................... 1-38
Selecting the Staple Supply Name ............................................................................. 1-41
Enabling Booklet Binding ............................................................................................ 1-41
1.7 PUNCH UNIT (B377) ......................................................................................................... 1-42
1.7.1 ACCESSORY CHECK............................................................................................. 1-42
1.7.2 INSTALLATION PROCEDURE ............................................................................... 1-43
i
Page 6

1.8 COVER INTERPOSER TRAY (B470) ............................................................................... 1-45
1.8.1 ACCESSORY CHECK............................................................................................. 1-45
1.8.2 INSTALLATION PROCEDURE ............................................................................... 1-46
Removing Tapes and Retainers ................................................................................. 1-46
Attaching the Extensions ............................................................................................ 1-48
Attaching the Interposer Tray...................................................................................... 1-49
Attaching the Corner Plates for the B478/B706.......................................................... 1-50
Right Rear Corner Plate (B478/B706 only)................................................................. 1-50
Right Front Corner Plate (B478/B706 only) ................................................................ 1-51
Attaching the Finisher to the Machine ........................................................................ 1-52
1.9 9-BIN MAILBOX (B471) ..................................................................................................... 1-54
1.9.1 ACCESSORY CHECK............................................................................................. 1-54
1.9.2 INSTALLATION PROCEDURE ............................................................................... 1-55
Removing Tapes and Retainers ................................................................................. 1-55
Installation................................................................................................................... 1-56
1.10 3000 SHEET FINISHER (B478/B706)............................................................................. 1-58
1.10.1 ACCESSORY CHECK........................................................................................... 1-58
1.10.2 INSTALLATION ..................................................................................................... 1-59
1.11 PUNCH UNIT (B531/B812).............................................................................................. 1-63
1.11.1 ACCESSORY CHECK........................................................................................... 1-63
1.11.2 INSTALLATION ..................................................................................................... 1-64
1.12 JOGGER UNIT (B513)..................................................................................................... 1-68
1.12.1 ACCESSORY CHECK........................................................................................... 1-68
1.12.2 INSTALLATION PROCEDURE ............................................................................. 1-69
1.13 Z-FOLDING UNIT (B660)................................................................................................. 1-70
1.13.1 ACCESSORY CHECK........................................................................................... 1-70
1.13.2 INSTALLATION PROCEDURE ............................................................................. 1-71
Before You Begin........................................................................................................ 1-71
Unpacking ................................................................................................................... 1-72
Docking to the Finisher ............................................................................................... 1-73
Docking to the Main Frame......................................................................................... 1-76
1.14 2000/3000 SHEET FINISHERS (B700/B701) ................................................................. 1-78
1.14.1 ACCESSORIES ..................................................................................................... 1-78
1.14.2 INSTALLATION PROCEDURE ............................................................................. 1-79
Removing Tapes and Retainers ................................................................................. 1-79
Docking the Finisher ................................................................................................... 1-82
Attaching the Trays ..................................................................................................... 1-85
Leveling the Finisher................................................................................................... 1-86
Selecting the Staple Supply Name ............................................................................. 1-87
Enabling Booklet Binding (B700 Only)........................................................................ 1-87
Auxiliary Trays............................................................................................................. 1-88
1.15 PUNCH UNIT (B702) ....................................................................................................... 1-90
1.15.1 ACCESSORIES ..................................................................................................... 1-90
1.15.2 INSTALLATION PROCEDURE ............................................................................. 1-91
1.16 COVER INTERPOSER TRAY (B704) ............................................................................. 1-94
1.16.1 ACCESSORIES ..................................................................................................... 1-94
1.16.2 INSTALLATION PROCEDURE ............................................................................. 1-95
Removing Tapes and Retainers ................................................................................. 1-95
Preparing the Finisher (B700/B701/B706).................................................................. 1-96
Attaching the Extensions for the B706........................................................................ 1-97
Prepare the Cover Interposer for the B706................................................................. 1-98
Attach the Extensions to the B706.............................................................................. 1-99
Attaching the Extensions for the B700/B701 ............................................................ 1-100
Attaching the Interposer Tray (B700/B701/ B706).................................................... 1-101
Attaching the Corner Plates for the B706 ................................................................. 1-102
Docking the Finisher and Interposer to the Machine (B700/B701/B706) ................. 1-104
ii
Page 7

1.17 OUTPUT JOGGER UNIT (B703)................................................................................... 1-106
1.17.1 ACCESSORIES ................................................................................................... 1-106
1.17.2 INSTALLATION PROCEDURE ........................................................................... 1-107
1.18 MAIL BOX (B762) .......................................................................................................... 1-109
1.18.1 ACCESSORY CHECK......................................................................................... 1-109
1.18.2 INSTALLATION PROCEDURE ........................................................................... 1-110
1.19 COPY TRAY (B756)....................................................................................................... 1-113
1.19.1 ACCESSORIES ................................................................................................... 1-113
1.19.2 INSTALLATION ................................................................................................... 1-114
1.20 KEY CARD BRACKET (B498), KEY COUNTER BRACKET (B452)............................. 1-117
1.20.1 KEY CARD BRACKET B498 ACCESSORIES.................................................... 1-117
1.20.2 KEY COUNTER BRACKET B452 ACCESSORIES ............................................ 1-118
1.20.3 INSTALLATION ................................................................................................... 1-119
Assemble the Key Counter Bracket.......................................................................... 1-119
Install the Key Card Bracket and Assembled Key Counter ...................................... 1-120
1.21 COPY CONNECTOR KITS............................................................................................ 1-122
1.21.1 COPY CONNECTOR KIT (B525-10, -12) FOR B064 SERIES ........................... 1-122
ACCESSORY CHECK.............................................................................................. 1-123
Installation................................................................................................................. 1-124
Installing the Hardware ............................................................................................. 1-125
1.21.2 COPY CONNECTOR KIT (B328-03) FOR B140 SERIES .................................. 1-129
ACCESSORY CHECK.............................................................................................. 1-129
Preparation................................................................................................................ 1-130
Installation................................................................................................................. 1-131
1.21.3 COPY CONNECTOR (B842) FOR B246 SERIES .............................................. 1-134
Accessories............................................................................................................... 1-134
Preparation................................................................................................................ 1-135
Installation................................................................................................................. 1-136
1.22 MFP OPTIONS: B064 SERIES...................................................................................... 1-139
1.22.1 PRINTER/SCANNER KIT (G338), PRINTER KIT (G339)................................... 1-139
ACCESSORY CHECK.............................................................................................. 1-139
1.22.2 INSTALLATION PROCEDURE ........................................................................... 1-140
Inserting DIMMs........................................................................................................ 1-140
Installation Procedure ............................................................................................... 1-141
1.22.3 PS3 (B525-08) ..................................................................................................... 1-143
1.22.4 USB 2.0 (B525-01)............................................................................................... 1-144
ACCESSORY CHECK.............................................................................................. 1-144
Installation Procedure ............................................................................................... 1-144
USB SP Settings....................................................................................................... 1-145
1.22.5 IEEE1394 (G561) FIREWIRE INTERFACE ........................................................ 1-146
ACCESSORY CHECK.............................................................................................. 1-146
Installation Procedure ............................................................................................... 1-147
UP Mode Settings for IEEE 1394 ............................................................................. 1-148
SP Mode Settings for IEEE 1394.............................................................................. 1-149
1.22.6 IEEE802.11B WIRELESS LAN (G628) ............................................................... 1-150
ACCESSORY CHECK.............................................................................................. 1-150
Installation Procedure ............................................................................................... 1-151
UP Mode Settings for Wireless LAN......................................................................... 1-152
SP MODE SETTINGS FOR 802.11B WIRELESS LAN.......................................................... 1-154
1.22.7 FILE FORMAT CONVERTER (MLB) (B519)....................................................... 1-155
Accessory Check ......................................................................................................1-156
Installation Procedure ............................................................................................... 1-156
Installing the Firmware.............................................................................................. 1-156
Installing the Hardware ............................................................................................. 1-157
iii
Page 8

1.23 MFP OPTIONS: B140 SERIES...................................................................................... 1-158
1.23.1 MERGING APPLICATIONS ON ONE SD CARD................................................ 1-158
Overview ................................................................................................................... 1-158
Merging Applications................................................................................................. 1-159
Undo Exec................................................................................................................. 1-160
1.23.2 OVERVIEW.......................................................................................................... 1-161
1.23.3 PRINTER/SCANNER KIT (B659) ........................................................................ 1-162
ACCESSORY CHECK.............................................................................................. 1-162
Installation................................................................................................................. 1-163
1.23.4 PS3 (B525-15) ..................................................................................................... 1-166
ACCESSORY CHECK.............................................................................................. 1-166
Installation................................................................................................................. 1-166
1.23.5 USB 2.0 INTERFACE BOARD (B596-01) ........................................................... 1-167
ACCESSORY CHECK.............................................................................................. 1-167
Installation................................................................................................................. 1-167
1.23.6 IEEE 1394 INTERFACE BOARD (B581-01) ....................................................... 1-168
ACCESSORY CHECK.............................................................................................. 1-168
Installation................................................................................................................. 1-168
1.23.7 IEEE 802.11B INTERFACE BOARD (B582-01, -02)........................................... 1-169
ACCESSORY CHECK.............................................................................................. 1-169
Installation................................................................................................................. 1-169
1.23.8 BLUETOOTH INTERFACE UNIT (G377)............................................................ 1-171
ACCESSORY CHECK.............................................................................................. 1-171
Installation................................................................................................................. 1-171
1.23.9 FILE FORMAT CONVERTER (B609).................................................................. 1-172
ACCESSORY CHECK.............................................................................................. 1-172
Installation................................................................................................................. 1-172
1.23.10 DATA OVERWRITE SECURITY UNIT (B735).................................................. 1-173
ACCESSORY CHECK.............................................................................................. 1-173
Before You Begin… .................................................................................................. 1-173
Seal Check And Removal ......................................................................................... 1-174
Installation Procedure ............................................................................................... 1-175
1.24 MFP OPTIONS: B246 SERIES...................................................................................... 1-178
1.24.1 OVERVIEW.......................................................................................................... 1-178
1.24.2 COMMON PROCEDURES.................................................................................. 1-179
Inserting SD Cards.................................................................................................... 1-179
Storing Copied SD Cards.......................................................................................... 1-179
1.24.3 PRINTER SCANNER KIT (B841) ........................................................................ 1-180
ACCESSORY CHECK.............................................................................................. 1-180
Installation................................................................................................................. 1-181
1.24.4 POSTSCRIPT3 (B525) ........................................................................................ 1-184
Accessories............................................................................................................... 1-184
Installation................................................................................................................. 1-184
1.24.5 IEEE1394 INTERFACE BOARD (B581).............................................................. 1-185
Accessories............................................................................................................... 1-185
Installation................................................................................................................. 1-185
1.24.6 WIRELESS LAN G813 (802.11B)........................................................................ 1-186
Accessories............................................................................................................... 1-186
Installation................................................................................................................. 1-186
1.24.7 BLUETOOTH INTERFACE UNIT TYPE C B826 ................................................ 1-187
Accessories............................................................................................................... 1-187
Installation................................................................................................................. 1-187
1.24.8 FILE FORMAT CONVERTER TYPE C B609...................................................... 1-188
ACCESSORY CHECK.............................................................................................. 1-188
Installation................................................................................................................. 1-188
iv
Page 9

1.24.9 DATA OVERWRITE SECURITY UNIT TYPE C B735 ........................................ 1-189
ACCESSORY CHECK.............................................................................................. 1-189
Before You Begin… .................................................................................................. 1-189
Seal Check And Removal ......................................................................................... 1-190
Installation Procedure ............................................................................................... 1-191
1.24.10 REMOTE COMMUNICATION GATE TYPE CM1 (B818) ................................. 1-194
Accessories............................................................................................................... 1-194
Installation................................................................................................................. 1-194
1.24.11 USB HOST INTERFACE UNIT TYPE A (B825)................................................ 1-197
Accessory Check ......................................................................................................1-197
Installation................................................................................................................. 1-197
1.24.12 BROWSER UNIT TYPE B (B828) ..................................................................... 1-198
Accessories............................................................................................................... 1-198
Installation................................................................................................................. 1-198
1.24.13 COPY DATA SECURITY UNIT TYPE C (B829) ............................................... 1-199
Accessories............................................................................................................... 1-199
Installation................................................................................................................. 1-199
B246 Series: IPU ...................................................................................................... 1-199
1.24.14 VM CARD (B861)............................................................................................... 1-201
Accessories............................................................................................................... 1-201
Installation................................................................................................................. 1-201
1.24.15 IEEE1284 B679 ................................................................................................. 1-202
Accessories............................................................................................................... 1-202
Installation................................................................................................................. 1-202
1.24.16 GIGABIT ETHERNET G381 .............................................................................. 1-203
Accessories............................................................................................................... 1-203
Installation................................................................................................................. 1-203
2. PREVENTIVE MAINTENANCE .................................................................................................. 2-1
2.1 PM TABLES ......................................................................................................................... 2-1
2.1.1 MAIN MACHINE ........................................................................................................ 2-1
2.1.2 ADF............................................................................................................................ 2-5
2.1.3 OPTIONAL PERIPHERAL DEVICES ........................................................................ 2-5
LCT (Large Capacity Tray) B473.................................................................................. 2-5
Cover Interposer Tray B470.......................................................................................... 2-5
3000-Sheet Finisher with 50-sheet stapler and Saddle-Stitching B468/B469/B674 .... 2-6
3000-Sheet Finisher B478/B706................................................................................... 2-6
Z-Folding Unit Type 2105 (B660) ................................................................................. 2-6
2000/3000-Sheet Booklet Finisher B700/B701............................................................. 2-7
Punch B702................................................................................................................... 2-7
2.2 RELATED SP CODES......................................................................................................... 2-7
v
Page 10

3. REPLACEMENT AND ADJUSTMENT....................................................................................... 3-1
3.1 GENERAL CAUTIONS ........................................................................................................ 3-1
3.1.1 DRUM ........................................................................................................................ 3-1
3.1.2 DRUM UNIT............................................................................................................... 3-1
3.1.3 TRANSFER BELT UNIT ............................................................................................ 3-2
3.1.4 SCANNER UNIT ........................................................................................................ 3-2
3.1.5 LASER UNIT.............................................................................................................. 3-2
3.1.6 CHARGE CORONA................................................................................................... 3-3
3.1.7 DEVELOPMENT........................................................................................................ 3-3
3.1.8 CLEANING.................................................................................................................3-4
3.1.9 FUSING UNIT ............................................................................................................ 3-4
3.1.10 PAPER FEED .......................................................................................................... 3-4
3.1.11 USED TONER ......................................................................................................... 3-4
3.2 SPECIAL TOOLS AND LUBRICANTS......................................................................... 3-5
3.2.1 SPECIAL TOOLS....................................................................................................... 3-5
3.2.2 LUBRICANTS ............................................................................................................ 3-5
3.3 OPERATION PANEL AND EXTERNAL COVERS .............................................................. 3-6
3.3.1 OPERATION PANEL................................................................................................. 3-6
3.3.2 FRONT DOOR........................................................................................................... 3-6
3.3.3 RIGHT COVERS........................................................................................................ 3-7
3.3.4 LEFT COVERS .......................................................................................................... 3-8
3.3.5 REAR COVERS......................................................................................................... 3-9
3.4 SCANNER.......................................................................................................................... 3-10
3.4.1 ADF AND TOP COVERS ........................................................................................ 3-10
ADF .............................................................................................................................3-10
Top Covers.................................................................................................................. 3-11
3.4.2 EXPOSURE GLASS................................................................................................ 3-12
3.4.3 SCANNER ORIGINAL SIZE SENSORS ................................................................. 3-13
3.4.4 LENS BLOCK .......................................................................................................... 3-14
3.4.5 EXPOSURE LAMP .................................................................................................. 3-15
3.4.6 LAMP REGULATOR................................................................................................ 3-16
3.4.7 SCANNER MOTOR DRIVE BOARD (SDRB).......................................................... 3-17
3.4.8 SCANNER MOTOR ................................................................................................. 3-18
3.4.9 SCANNER HP SENSOR ......................................................................................... 3-19
3.4.10 SCANNER WIRE REPLACEMENT....................................................................... 3-20
Preparation for Removal ............................................................................................. 3-20
Wire Removal: Back ................................................................................................... 3-21
Wire Removal: Front ................................................................................................... 3-22
Attaching the New Wire .............................................................................................. 3-23
3.4.11 SCANNER HEATER.............................................................................................. 3-25
3.5 LASER UNIT ...................................................................................................................... 3-26
3.5.1 CAUTION DECALS .................................................................................................3-26
3.5.2 LD UNIT AND POLYGON MOTOR ......................................................................... 3-27
3.5.3 LASER SYNCHRONIZATION DETECTOR REPLACEMENT ................................ 3-29
3.5.4 LASER UNIT ALIGNMENT...................................................................................... 3-30
3.6 DRUM UNIT ....................................................................................................................... 3-32
3.6.1 DEVELOPMENT UNIT REMOVAL.......................................................................... 3-32
Removal ...................................................................................................................... 3-32
Re-installation ............................................................................................................. 3-33
Replacement with a used Development Unit.............................................................. 3-33
3.6.2 CHARGE CORONA UNIT ....................................................................................... 3-34
3.6.3 CHARGE CORONA WIRE AND GRID.................................................................... 3-35
3.6.4 CHARGE CORONA WIRE CLEANING PADS........................................................ 3-36
3.6.5 OPC DRUM REMOVAL........................................................................................... 3-37
Dusting the Drum Surface........................................................................................... 3-38
3.6.6 PTL (B140 AND B246 SERIES ONLY) ................................................................... 3-39
3.6.7 QUENCHING LAMP ................................................................................................ 3-40
vi
Page 11

3.6.8 DRUM POTENTIAL SENSOR................................................................................. 3-40
3.6.9 CLEANING FILTER ................................................................................................. 3-41
3.6.10 CLEANING BLADE................................................................................................ 3-41
3.6.11 CLEANING BRUSH............................................................................................... 3-42
3.6.12 PICK-OFF PAWLS................................................................................................. 3-43
3.6.13 ID SENSOR ........................................................................................................... 3-43
3.6.14 DRUM MOTOR...................................................................................................... 3-44
3.6.15 TONER COLLECTION BOTTLE ........................................................................... 3-45
3.6.16 TONER SEPARATION UNIT................................................................................. 3-45
3.6.17 OZONE FILTERS .................................................................................................. 3-46
3.6.18 OPTICS DUST FILTER ......................................................................................... 3-46
3.6.19 INTERNAL DUST FILTER..................................................................................... 3-46
3.7 DEVELOPMENT UNIT....................................................................................................... 3-47
3.7.1 DEVELOPER REPLACEMENT............................................................................... 3-47
3.7.2 DEVELOPMENT FILTER ........................................................................................ 3-49
3.7.3 ENTRANCE SEAL AND SIDE SEALS .................................................................... 3-50
3.7.4 TD SENSOR ............................................................................................................ 3-51
3.7.5 TONER END SENSOR............................................................................................ 3-51
3.7.6 TONER SUPPLY MOTOR....................................................................................... 3-52
3.7.7 DEVELOPMENT MOTOR ....................................................................................... 3-53
3.8 TRANSFER BELT UNIT .................................................................................................... 3-54
3.8.1 TRANSFER BELT UNIT .......................................................................................... 3-54
3.8.2 TRANSFER BELT.................................................................................................... 3-55
3.8.3 TRANSFER ROLLER CLEANING BLADE.............................................................. 3-57
3.8.4 DISCHARGE PLATE ............................................................................................... 3-58
3.8.5 TRANSFER POWER PACK .................................................................................... 3-59
3.9 FUSING UNIT .................................................................................................................... 3-60
3.9.1 FUSING UNIT .......................................................................................................... 3-60
3.9.2 FUSING PRESSURE RELEASE MOTOR (B140/B246 SERIES)........................... 3-62
3.9.3 FUSING PRESSURE RELEASE HP SENSOR (B140/B246 SERIES)................... 3-63
3.9.4 FUSING UNIT THERMISTORS AND THERMOSTATS.......................................... 3-64
B064 Series................................................................................................................. 3-65
B140 Series................................................................................................................. 3-65
B246 Series................................................................................................................. 3-65
3.9.5 WEB CLEANING ROLLER...................................................................................... 3-67
Web Unit Disassembly................................................................................................ 3-67
Web Unit Assembly..................................................................................................... 3-68
3.9.6 WEB MOTOR AND WEB END SENSOR................................................................ 3-69
3.9.7 PRESSURE ROLLER CLEANING UNIT................................................................. 3-70
B064 Series................................................................................................................. 3-70
B140/B246 Series ....................................................................................................... 3-71
3.9.8 FUSING LAMPS, HOT ROLLER, AND PRESSURE ROLLER............................... 3-72
B064 Series: Fusing Lamps........................................................................................ 3-72
B140/B246 Series: Fusing Lamps .............................................................................. 3-73
Important Notes about Fusing Unit Assembly (B064 Series) ..................................... 3-78
3.9.9 PRESSURE ROLLER.............................................................................................. 3-79
3.9.10 STRIPPER PAWLS ............................................................................................... 3-80
B064 Series................................................................................................................. 3-80
B140/B246 Series ....................................................................................................... 3-81
3.9.11 NIP BAND WIDTH ADJUSTMENT........................................................................ 3-82
3.9.12 FUSING UNIT EXIT SENSOR............................................................................... 3-83
3.9.13 FUSING/EXIT MOTOR.......................................................................................... 3-84
3.9.14 FUSING EXIT AND EXIT UNIT ENTRANCE SENSORS...................................... 3-85
vii
Page 12

3.10 DUPLEX UNIT ................................................................................................................. 3-86
3.10.1 DUPLEX UNIT REMOVAL .................................................................................... 3-86
3.10.2 DUPLEX UNIT SIDE-TO-SIDE ADJUSTMENT .................................................... 3-87
3.10.3 JOGGER FENCE ADJUSTMENT ......................................................................... 3-87
3.10.4 DUPLEX MOTORS................................................................................................ 3-88
Duplex Inverter Motor ................................................................................................. 3-88
Duplex Jogger and Transport Motors ......................................................................... 3-89
3.10.5 DUPLEX TRANSPORT CLUTCH/JOGGER HP SENSOR................................... 3-90
3.10.6 DUPLEX ENTRANCE SENSOR ........................................................................... 3-91
3.10.7 DUPLEX TRANSPORT SENSOR 3...................................................................... 3-92
3.10.8 INVERTER EXIT SENSOR, TRANSPORT SENSORS 1 & 2............................... 3-93
3.10.9 DUPLEX JOGGER BELT ADJUSTMENT............................................................. 3-94
3.11 PAPER FEED .................................................................................................................. 3-95
3.11.1 PAPER TRAY REMOVAL ..................................................................................... 3-95
3.11.2 REAR FENCE RETURN SENSOR REPLACEMENT ........................................... 3-97
3.11.3 REAR FENCE HP SENSOR REPLACEMENT ..................................................... 3-98
3.11.4 TANDEM RIGHT TRAY PAPER SENSOR REPLACEMENT ............................... 3-99
3.11.5 BOTTOM PLATE LIFT WIRE REPLACEMENT .................................................. 3-100
3.11.6 TANDEM TRAY PAPER SIZE CHANGE ............................................................ 3-102
3.11.7 PICK-UP, FEED, SEPARATION ROLLER REPLACEMENT.............................. 3-105
3.11.8 FEED UNIT .......................................................................................................... 3-106
3.11.9 SEPARATION ROLLER PRESSURE ADJUSTMENT ........................................ 3-108
3.11.10 RELAY SENSOR ............................................................................................... 3-109
3.11.11 BY-PASS PAPER SIZE DETECTION BOARD ................................................. 3-110
3.11.12 BY-PASS TRAY ROLLERS............................................................................... 3-111
3.11.13 BY-PASS SEPARATION ROLLER PRESSURE ADJUSTMENT .................. 3-112
3.11.14 REGISTRATION SENSOR................................................................................ 3-113
3.11.15 REGISTRATION AND BY-PASS UNIT REMOVAL .......................................... 3-114
3.12 PCBS AND HDD ............................................................................................................ 3-116
3.12.1 BCU BOARD (BASE ENGINE CONTROL UNIT) ............................................... 3-116
BCU: B064, B140 Series .......................................................................................... 3-116
BCU, IOB: B246 Series............................................................................................. 3-117
3.12.2 CONTROLLER BOARD....................................................................................... 3-118
B064 Series: Controller Board .................................................................................. 3-118
B140 Series: Controller Board .................................................................................. 3-119
B246 Series: Controller Board .................................................................................. 3-120
3.12.3 IPU BOARD ......................................................................................................... 3-121
B064 Series: IPU Board............................................................................................ 3-121
B140 Series: IPU, Mother Board............................................................................... 3-122
B246 Series: IPU ...................................................................................................... 3-125
B246 Series Motherboard......................................................................................... 3-126
3.12.4 DEVELOPMENT POWER PACK ........................................................................ 3-128
3.12.5 PSU, PFC BOARDS ............................................................................................ 3-129
B064 Series............................................................................................................... 3-129
B140 Series PSU ...................................................................................................... 3-129
B246 Series PSU ...................................................................................................... 3-130
3.12.6 HDD ..................................................................................................................... 3-131
B064 Series HDD...................................................................................................... 3-131
B140 Series HDD...................................................................................................... 3-132
B246 Series HDD...................................................................................................... 3-133
Disposal of HDD Units .............................................................................................. 3-134
Reinstallation............................................................................................................. 3-134
3.12.7 NVRAM ................................................................................................................ 3-135
NVRAM: B064 Series, B140 Series.......................................................................... 3-135
NVRAM: B246 Series ............................................................................................... 3-137
3.12.8 DIMMS ................................................................................................................. 3-139
viii
Page 13

3.13 ADF ................................................................................................................................ 3-140
3.13.1 ADF COVERS...................................................................................................... 3-140
3.13.2 FEED UNIT .......................................................................................................... 3-141
3.13.3 FEED BELT AND PICK-UP ROLLER.................................................................. 3-142
3.13.4 SEPARATION ROLLER ...................................................................................... 3-143
3.13.5 REGISTRATION SENSOR.................................................................................. 3-144
3.13.6 ADF CONTROL BOARD ..................................................................................... 3-145
3.13.7 ORIGINAL WIDTH, INTERVAL, AND SKEW CORRECTION SENSORS........ 3-146
3.13.8 ORIGINAL LENGTH SENSORS ......................................................................... 3-147
3.13.9 DF POSITION AND APS SENSOR..................................................................... 3-148
3.13.10 OTHER ADF SENSORS ................................................................................... 3-149
3.13.11 BOTTOM PLATE LIFT MOTOR ........................................................................ 3-150
3.13.12 FEED MOTOR ................................................................................................... 3-150
3.13.13 EXIT MOTOR AND TRANSPORT MOTOR ...................................................... 3-151
3.13.14 PICK-UP ROLLER MOTOR AND HP SENSOR ............................................... 3-152
3.13.15 CIS POWER SUPPLY BOARD AND CIS UNIT ................................................ 3-153
3.13.16 ADF EXIT SENSOR........................................................................................... 3-154
3.14 COPY IMAGE ADJUSTMENTS: PRINTING/SCANNING ............................................. 3-155
3.14.1 PRINTING............................................................................................................ 3-155
Registration - Leading Edge/Side-to-Side ................................................................ 3-155
Blank Margin ............................................................................................................. 3-156
Registration Buckle Adjustment ................................................................................ 3-156
3.14.2 SCANNING .......................................................................................................... 3-157
Registration: Platen Mode......................................................................................... 3-157
Magnification............................................................................................................. 3-157
3.14.3 ADF SCANNING ADJUSTMENTS ...................................................................... 3-158
Vertical Black Lines................................................................................................... 3-158
DIP Switch Settings (ADF Main Board) .................................................................... 3-158
ADF Skew Correction ............................................................................................... 3-158
3.15 TOUCH SCREEN CALIBRATION ................................................................................. 3-160
4. TROUBLESHOOTING ................................................................................................................ 4-1
4.1 OVERVIEW.......................................................................................................................... 4-1
4.1.1 RECOVERY METHODS............................................................................................ 4-2
4.1.2 IMPORTANT SP CODES .......................................................................................... 4-2
4.1.3 DOWNLOAD ERROR CODES.................................................................................. 4-3
4.1.4 JAM DETECTION ...................................................................................................... 4-6
SENSOR LOCATIONS ................................................................................................. 4-6
4.1.5 TIMING CHARTS....................................................................................................... 4-7
Feed, Transport, Feed Out: Face-up ............................................................................ 4-7
Transport, Inverter, Feed Out: Face-down ................................................................... 4-8
Duplex Transport .......................................................................................................... 4-9
4.1.6 PROGRAM DOWNLOAD ........................................................................................ 4-10
4.2 B064 SERIES SERVICE MODE........................................................................................ 4-11
4.2.1 B064 SERIES SERVICE CALL CONDITIONS........................................................ 4-11
4.2.2 B064 SERIES SC CODE DESCRIPTIONS............................................................. 4-12
SC100: Scanning System ........................................................................................... 4-12
SC300: Image Development System (1) .................................................................... 4-15
SC400: Image Development System (2) .................................................................... 4-20
SC500: Feed, Transport, Duplexing, and Fusing Systems ........................................ 4-21
SC600: Data Communication ..................................................................................... 4-24
SC700: Peripherals..................................................................................................... 4-26
SC800: Overall System............................................................................................... 4-29
SC900: Miscellaneous ................................................................................................ 4-32
4.2.3 ADDITIONAL SC CODES PRINTED IN SMC REPORT......................................... 4-34
ix
Page 14

4.3 B140/B246 SERIES SERVICE MODE .............................................................................. 4-37
4.3.1 SERVICE MODE LOCK/UNLOCK .......................................................................... 4-37
4.3.2 B140/B246 SERIES SERVICE CALL CONDITIONS .............................................. 4-38
4.3.3 B140/B246 SERIES SC CODE DESCRIPTIONS ................................................... 4-39
SC100: Scanning System ........................................................................................... 4-40
SC200: Exposure........................................................................................................ 4-43
SC300: Image Development System (1) .................................................................... 4-44
SC400: Image Development System (2) .................................................................... 4-49
SC500: Feed, Transport, Duplexing, and Fusing Systems ........................................ 4-50
SC600: Data Communication ..................................................................................... 4-55
SC700: Peripherals..................................................................................................... 4-57
SC800: Overall System............................................................................................... 4-66
SC900: Miscellaneous ................................................................................................ 4-72
4.3.4 JAM CODES ............................................................................................................ 4-76
Main Unit: Paper Jam Errors....................................................................................... 4-76
Finisher B469 Jam Codes........................................................................................... 4-77
Finisher B468/B674 Jam Codes ................................................................................. 4-77
Finisher B478/B706 Jam Codes ................................................................................. 4-78
Mailbox B471 Jam Codes ........................................................................................... 4-78
Cover Interposer Tray B470 Jam Codes .................................................................... 4-78
Z-Folding Unit B660 Jam Codes................................................................................. 4-79
4.3.5 ADDITIONAL SC CODES PRINTED IN SMC REPORT......................................... 4-80
4.4 OTHER PROBLEMS (B064/B140/B246 SERIES) ............................................................ 4-83
4.4.1 BLOWN FUSE CONDITIONS ................................................................................. 4-83
4.4.2 COMMON PROBLEMS ........................................................................................... 4-83
4.4.3 FREQUENT PAPER JAMS ..................................................................................... 4-84
5. SERVICE TABLES ..................................................................................................................... 5-1
5.1 SERVICE PROGRAM MODE.............................................................................................. 5-1
5.1.1 SERVICE PROGRAM MODE OPERATION ............................................................. 5-1
Service Mode Lock/Unlock ........................................................................................... 5-1
To Enter and Exit the Service Mode ............................................................................. 5-2
To Enter and Exit the Super SP Mode.......................................................................... 5-2
To Switch to the Copy Window for Test Printing .......................................................... 5-2
Using the SP Mode ....................................................................................................... 5-3
SP Mode Button Summary ........................................................................................... 5-4
SP Mode Print (SMC Print) ........................................................................................... 5-5
5.2 RESETS............................................................................................................................... 5-6
5.2.1 MEMORY ALL CLEAR: SP5801 ............................................................................... 5-6
5.2.2 SOFTWARE AND SETTING RESET ...................................................................... 5-10
Software Reset ........................................................................................................... 5-10
Resetting the System.................................................................................................. 5-10
Resetting Copy/Document Server Features Only....................................................... 5-10
Resetting Scanner Features Only............................................................................... 5-10
5.3 TEST PATTERN PRINTING.............................................................................................. 5-11
5.3.1 PRINTING TEST PATTERN: SP2902-003.............................................................. 5-11
Test Pattern Table ...................................................................................................... 5-12
5.3.2 IPU FRONT/BACK TEST PATTERNS: SP2902-001,002 ....................................... 5-13
Test Pattern Table ...................................................................................................... 5-14
5.3.3 IPU PRINTING TEST PATTERN: SP2902-004 ...................................................... 5-15
x
Page 15

5.4 SOFTWARE UPDATE ....................................................................................................... 5-16
5.4.1 SOFTWARE UPDATE PROCEDURE: B140/B246 SERIES................................... 5-16
Updating the LCDC for the Operation Panel .............................................................. 5-21
Downloading Stamp Data ........................................................................................... 5-21
NVRAM Data Upload/Download ................................................................................. 5-22
5.4.2 SOFTWARE UPDATE PROCEDURE: B064 SERIES............................................ 5-23
GW Controller/BCU Update ........................................................................................ 5-24
Forced Update ............................................................................................................ 5-25
Stamp Data Update .................................................................................................... 5-25
Operation Panel Software Update .............................................................................. 5-26
Scanner Update .......................................................................................................... 5-27
NIB Update.................................................................................................................. 5-27
NetFile Firmware Update............................................................................................ 5-27
NVRAM Update .......................................................................................................... 5-28
Firmware Update Notes .............................................................................................. 5-28
5.5 SERVICE PROGRAM MODE TABLES ............................................................................. 5-29
5.5.1 SERVICE TABLE KEY............................................................................................. 5-29
5.5.2 COPIER SERVICE TABLE...................................................................................... 5-30
SP1xxx Feed............................................................................................................... 5-30
SP2xxx Drum .............................................................................................................. 5-36
SP3xxx Processing ..................................................................................................... 5-55
SP4xxx Scanner ......................................................................................................... 5-58
SP5xxx Mode.............................................................................................................. 5-68
SP6xxx Peripherals................................................................................................... 5-120
SP7xxx Data Logs .................................................................................................... 5-131
SP8xxx: Data Log2 ................................................................................................... 5-148
5.5.3 PRINTER SERVICE TABLE.................................................................................. 5-177
5.5.4 SCANNER SERVICE TABLE ................................................................................ 5-178
5.6 INPUT/OUTPUT CHECK................................................................................................. 5-190
5.6.1 COPIER INPUT CHECK: SP5803......................................................................... 5-190
5.6.2 COPIER OUTPUT CHECK: SP5804..................................................................... 5-196
5.6.3 ADF INPUT CHECK: SP6007 ............................................................................... 5-198
5.6.4 ADF OUTPUT CHECK: SP6008 ........................................................................... 5-199
5.6.5 FINISHER INPUT CHECK: SP6117 (B478/B704) ............................................... 5-200
5.6.6 FINISHER OUTPUT CHECK: SP6118.................................................................. 5-202
5.6.7 FINISHER 1 INPUT CHECK: 6121........................................................................ 5-203
5.6.8 FINISHER 1 OUTPUT CHECK: 6124.................................................................... 5-204
5.6.9 FINISHER 2 INPUT CHECK: 6122........................................................................ 5-205
5.6.10 FINISHER 2 OUTPUT CHECK: 6125.................................................................. 5-206
5.7 USING THE DEBUG LOG (B140/B246).......................................................................... 5-207
5.7.1 SWITCHING ON AND SETTING UP SAVE DEBUG LOG ................................... 5-207
5.7.2 RETRIEVING THE DEBUG LOG FROM THE HDD ............................................. 5-210
5.7.3 RECORDING ERRORS MANUALLY.................................................................... 5-211
5.7.4 NEW DEBUG LOG CODES .................................................................................. 5-212
SP5857-015 Copy SD Card-to-SD Card: Any Desired Key .................................... 5-212
SP5857-016 Create a File on HDD to Store a Log.................................................. 5-212
SP5857-017 Create a File on SD Card to Store a Log............................................ 5-212
5.8 USER TOOLS .................................................................................................................. 5-213
5.8.1 OVERVIEW............................................................................................................ 5-213
5.8.2 SYSTEM SETTINGS ............................................................................................. 5-214
B064 Series System Settings ................................................................................... 5-214
B140 Series System Settings ................................................................................... 5-216
5.8.3 COPIER/DOCUMENT SERVER FEATURES ....................................................... 5-219
5.8.4 INQUIRY ................................................................................................................ 5-223
5.8.5 COUNTER ............................................................................................................. 5-223
5.9 DIP SWITCH TABLES ..................................................................................................... 5-224
5.9.1 BCU (BASE ENGINE CONTROL UNIT) ............................................................... 5-224
5.9.2 CONTROLLER BOARD......................................................................................... 5-224
xi
Page 16

6. DETAILED DESCRIPTIONS ...................................................................................................... 6-1
6.1 OVERVIEW.......................................................................................................................... 6-1
6.1.1 PAPER PATH (WITH COVER INTERPOSER TRAY) .............................................. 6-3
6.1.2 PAPER PATH (WITH 9-BIN MAILBOX) .................................................................... 6-4
6.1.3 DRIVE LAYOUT......................................................................................................... 6-5
6.2 BOARD STRUCTURE ......................................................................................................... 6-6
6.2.1 BLOCK DIAGRAM ..................................................................................................... 6-6
6.2.2 COMPONENT DESCRIPTIONS ............................................................................... 6-7
BCU (Base Engine Control Unit)................................................................................... 6-7
Controller Board............................................................................................................ 6-7
MB (Mother Board) ....................................................................................................... 6-7
IPU (Image Processing Unit) ........................................................................................ 6-7
SBU (Sensor Board Unit).............................................................................................. 6-8
PFC (Paper Feed Control)............................................................................................ 6-8
SDRB (Scanner Driver Board)...................................................................................... 6-8
VIB (Video Interface Board) .......................................................................................... 6-8
DRB (Drive Board) ........................................................................................................ 6-8
CNB (Connection Board) .............................................................................................. 6-8
HDD (Hard Disk Drive).................................................................................................. 6-9
6.3 COPY PROCESS OVERVIEW.......................................................................................... 6-10
6.4 ADF .................................................................................................................................... 6-12
6.4.1 OVERVIEW.............................................................................................................. 6-12
6.4.2 ADF DRIVE LAYOUT .............................................................................................. 6-13
6.4.3 PICK-UP ROLLER LIFT .......................................................................................... 6-14
6.4.4 BOTTOM PLATE LIFT............................................................................................. 6-15
6.4.5 ORIGINAL SEPARATION ....................................................................................... 6-16
6.4.6 ORIGINAL TRANSPORT ........................................................................................ 6-17
6.4.7 ORIGINAL SKEW CORRECTION........................................................................... 6-18
6.4.8 ORIGINAL SIZE DETECTION................................................................................. 6-20
6.4.9 ADF SCANNING...................................................................................................... 6-23
6.4.10 JAM DETECTION .................................................................................................. 6-24
6.5 SCANNING ........................................................................................................................ 6-25
6.5.1 OVERVIEW.............................................................................................................. 6-25
6.5.2 SCANNER DRIVE ................................................................................................... 6-26
6.5.3 ORIGINAL SIZE DETECTION................................................................................. 6-27
Sensors ....................................................................................................................... 6-27
Detection Timing ......................................................................................................... 6-28
6.5.4 SCANNING MAGNIFICATION ................................................................................ 6-29
Book Mode.................................................................................................................. 6-29
6.5.5 AUTO IMAGE DENSITY (ADS)............................................................................... 6-30
Xenon Lamp → CCD ADS.......................................................................................... 6-30
CIS ADS...................................................................................................................... 6-30
6.6 IMAGE PROCESSING....................................................................................................... 6-31
6.6.1 OVERVIEW.............................................................................................................. 6-31
6.6.2 IMAGE PROCESSING FLOW................................................................................. 6-32
6.6.3 IMAGE PROCESSING MODES .............................................................................. 6-33
6.6.4 IMAGE QUALITY SP ADJUSTMENTS ................................................................... 6-34
Custom Settings for Each Mode: Image Quality......................................................... 6-34
Custom Settings for Each Mode: Line Width Correction ............................................ 6-36
Custom Setting: Duplex Scanning Mode Original Image Quality Settings ................. 6-38
Settings Adjustable for Each Original Mode ............................................................... 6-39
6.6.5 RELATION BETWEEN THE SP AND UP SETTINGS ............................................ 6-40
6.6.6 IMAGE PROCESSING TROUBLESHOOTING....................................................... 6-42
Removing Background from Coarse Paper ................................................................ 6-42
Improving the Appearance of a Copy of a Color Document ....................................... 6-42
Removing Vertical White Lines During Duplex Scanning........................................... 6-43
Equalizing Duplex Scanned Image Quality of Front/Back Sides ................................ 6-44
Equalizing Image Quality of Front Sides for Duplex and Simplex Modes .................. 6-44
xii
Page 17

6.7 LASER EXPOSURE .......................................................................................................... 6-45
6.7.1 OVERVIEW.............................................................................................................. 6-45
6.7.2 OPTICAL PATH ....................................................................................................... 6-46
6.7.3 FOUR-BEAM EXPOSURE ...................................................................................... 6-47
6.7.4 COOLING FAN ........................................................................................................ 6-48
6.7.5 LD SAFETY SWITCHES ......................................................................................... 6-49
B064 Series, B140 Series Safety Switches................................................................ 6-49
B246 Series Safety Switches...................................................................................... 6-50
6.8 DRUM UNIT ....................................................................................................................... 6-51
6.8.1 OVERVIEW.............................................................................................................. 6-51
6.8.2 OPC DRUM ............................................................................................................. 6-52
6.8.3 DRUM DRIVE .......................................................................................................... 6-52
6.8.4 DRUM CHARGE...................................................................................................... 6-53
6.8.5 CHARGE CORONA WIRE CLEANING................................................................... 6-54
6.8.6 DRUM PICK-OFF MECHANISM ............................................................................. 6-55
6.8.7 DRUM CLEANING................................................................................................... 6-56
6.8.8 DRUM VENTILATION AND OZONE FILTER.......................................................... 6-57
6.8.9 TONER RECYCLING .............................................................................................. 6-58
6.8.10 WASTE TONER COLLECTION ............................................................................ 6-59
Mechanism.................................................................................................................. 6-59
Error Detection............................................................................................................ 6-59
6.8.11 PROCESS CONTROL........................................................................................... 6-60
What Happens at Power On ....................................................................................... 6-60
Drum Potential Sensor Calibration.............................................................................. 6-61
Development Bias, Bias Grid, and LD Adjustment ..................................................... 6-62
ID Sensor Calibration (Vsg) ........................................................................................ 6-64
TD Sensor Calibration (Vref)....................................................................................... 6-64
6.9 DEVELOPMENT AND TONER SUPPLY .......................................................................... 6-65
6.9.1 OVERVIEW.............................................................................................................. 6-65
Development Unit ....................................................................................................... 6-65
Toner Supply............................................................................................................... 6-66
6.9.2 DEVELOPMENT UNIT ............................................................................................ 6-67
6.9.3 DEVELOPER/TONER MIXING (AGITATION) ........................................................ 6-68
6.9.4 DEVELOPMENT BIAS............................................................................................. 6-69
6.9.5 TONER SUPPLY ..................................................................................................... 6-70
6.9.6 DEVELOPMENT UNIT DRIVE AND VENTILATION............................................... 6-71
6.9.7 TONER END SENSOR............................................................................................ 6-72
6.9.8 SHUTTER MECHANISM......................................................................................... 6-72
6.9.9 TONER BOTTLE SUPPLY AND VENTILATION..................................................... 6-73
6.9.10 TONER SUPPLY CONTROL ................................................................................ 6-74
Sensor Control Mode .................................................................................................. 6-74
Pixel Count Toner Supply Mode ................................................................................. 6-75
TD Sensor Initialization ............................................................................................... 6-76
Determining Vref ......................................................................................................... 6-76
Toner Supply without ID Sensor and TD Sensors...................................................... 6-77
Abnormal TD Sensor Output....................................................................................... 6-77
Abnormal ID Sensor Output........................................................................................ 6-77
Toner End Detection ................................................................................................... 6-78
Toner End Recovery ................................................................................................... 6-78
xiii
Page 18

6.10 IMAGE TRANSFER AND PAPER SEPARATION........................................................... 6-79
6.10.1 OVERVIEW............................................................................................................ 6-79
6.10.2 TRANSFER BELT LIFT ......................................................................................... 6-80
Mechanism.................................................................................................................. 6-80
Timing ......................................................................................................................... 6-81
6.10.3 TRANSFER BELT CHARGE ................................................................................. 6-82
6.10.4 TRANSFER CURRENT SETTINGS...................................................................... 6-83
6.10.5 TRANSFER CURRENT CIRCUIT ......................................................................... 6-84
6.10.6 TRANSFER BELT DRIVE AND PAPER TRANSPORT ........................................ 6-85
6.10.7 TRANSFER BELT CLEANING .............................................................................. 6-86
6.10.8 ANTI-CONDENSATION HEATER......................................................................... 6-87
6.11 PAPER FEED .................................................................................................................. 6-88
6.11.1 OVERVIEW............................................................................................................ 6-88
Tray Capacities ........................................................................................................... 6-89
Built-in Feed Stations.................................................................................................. 6-89
By-pass Feed.............................................................................................................. 6-89
Paper Registration ...................................................................................................... 6-89
Jam Removal .............................................................................................................. 6-89
6.11.2 DRIVE .................................................................................................................... 6-90
6.11.3 TRAY AND PAPER LIFT MECHANISM – TRAY 2,3 ............................................ 6-91
Bottom Plate Lift.......................................................................................................... 6-91
Lift Sensor................................................................................................................... 6-92
6.11.4 PAPER FEED AND SEPARATION MECHANISM ................................................ 6-93
Paper Feed and Separation: No Paper Present......................................................... 6-93
Paper Feed and Separation........................................................................................ 6-94
Separation Roller Release Mechanism ...................................................................... 6-95
6.11.5 PAPER NEAR-END AND PAPER END – TRAYS 2 AND 3.................................. 6-96
6.11.6 PAPER SIZE DETECTION.................................................................................... 6-97
Tandem Tray (Tray 1) ................................................................................................. 6-97
Universal Cassettes (Tray 2, 3) .................................................................................. 6-97
6.11.7 ANTI-CONDENSATION HEATERS ...................................................................... 6-98
6.11.8 TANDEM TRAY – TRAY 1 .................................................................................... 6-99
Overview ..................................................................................................................... 6-99
Connecting the Left and Right Sides of the Tray...................................................... 6-100
Paper Lift/Remaining Paper Detection ..................................................................... 6-101
Fence Drive............................................................................................................... 6-103
Rear Fence Drive...................................................................................................... 6-104
Tray Side-to-side Positioning .................................................................................... 6-105
6.11.9 TRAY POSITIONING MECHANISM – TRAYS 1 TO 3 ....................................... 6-106
6.11.10 BY-PASS TRAY................................................................................................. 6-107
By-pass Feed and Separation .................................................................................. 6-107
By-pass Tray Paper End Detection .......................................................................... 6-108
By-pass Paper Size Detection .................................................................................. 6-109
6.11.11 PAPER REGISTRATION................................................................................... 6-110
Overview ................................................................................................................... 6-110
Paper Registration Drive........................................................................................... 6-111
Jam Removal at Paper Registration ......................................................................... 6-112
xiv
Page 19

6.12 IMAGE FUSING AND PAPER EXIT .............................................................................. 6-113
6.12.1 OVERVIEW.......................................................................................................... 6-113
B064 Series............................................................................................................... 6-113
B140/B246 Series ..................................................................................................... 6-114
All Series................................................................................................................... 6-114
6.12.2 FUSING MECHANISM ........................................................................................ 6-115
B064 Series............................................................................................................... 6-115
B140/B246 Series ..................................................................................................... 6-116
6.12.3 PRESSURE ROLLER.......................................................................................... 6-117
B064 Series............................................................................................................... 6-117
B140/B246 Series ..................................................................................................... 6-118
6.12.4 HOT ROLLER CLEANING .................................................................................. 6-119
Overview ................................................................................................................... 6-119
Web Drive ................................................................................................................. 6-120
Web Near-end........................................................................................................... 6-120
Web End ................................................................................................................... 6-120
6.12.5 FUSING UNIT ENTRANCE GUIDE..................................................................... 6-121
6.12.6 FUSING UNIT DRIVE.......................................................................................... 6-122
6.12.7 CPM DOWN MODE............................................................................................. 6-123
B140/B246 Series ..................................................................................................... 6-123
6.12.8 FUSING TEMPERATURE CONTROL ................................................................ 6-124
6.12.9 EXIT ..................................................................................................................... 6-126
6.12.10 EXIT JUNCTION GATE..................................................................................... 6-127
6.13 DUPLEX UNIT ............................................................................................................... 6-128
6.13.1 OVERVIEW.......................................................................................................... 6-128
6.13.2 DUPLEX DRIVE................................................................................................... 6-129
6.13.3 INVERTER OPERATION .................................................................................... 6-130
Inverter Feed-in and Jogging.................................................................................... 6-130
Inverter Feed-out ...................................................................................................... 6-131
6.13.4 DUPLEX TRAY FEED ......................................................................................... 6-132
6.13.5 DUPLEX INTERLEAVE FEED ............................................................................ 6-133
6.14 ENERGY SAVER MODES ............................................................................................ 6-135
6.14.1 OVERVIEW.......................................................................................................... 6-135
6.14.2 ENERGY SAVER MODE..................................................................................... 6-136
Entering the energy saver mode............................................................................... 6-136
What happens in energy saver mode ....................................................................... 6-136
Return to stand-by mode .......................................................................................... 6-136
6.14.3 LOW POWER MODE ..........................................................................................6-137
Entering the low power mode ................................................................................... 6-137
What happens in low power mode............................................................................ 6-137
Return to stand-by mode .......................................................................................... 6-137
6.14.4 AUTO OFF MODE............................................................................................... 6-138
Entering auto off mode.............................................................................................. 6-138
What happens in auto off mode................................................................................ 6-138
Returning to stand-by mode...................................................................................... 6-138
Disabling auto off mode ............................................................................................ 6-138
6.14.5 NIGHT MODE ...................................................................................................... 6-139
Entering night stand-by and night modes ................................................................. 6-139
What happens in night stand-by and night modes.................................................... 6-139
Returning to stand-by mode...................................................................................... 6-139
6.14.6 CHANGES FOR B140 AND B246....................................................................... 6-140
xv
Page 20

7. SPECIFICATIONS ................................................................................................................. 7-1
7.1 GENERAL SPECIFICATIONS...................................................................................... 7-1
7.1.1 COPIER ..................................................................................................................... 7-1
7.1.2 ADF............................................................................................................................ 7-2
7.1.3 POWER CONSUMPTION ......................................................................................... 7-3
7.2 MACHINE CONFIGURATION ............................................................................................. 7-6
7.3 OPTIONAL EQUIPMENT..................................................................................................... 7-7
7.3.1 A3/DLT KIT (B475) .................................................................................................... 7-7
7.3.2 LCT (LARGE CAPACITY TRAY) (B473)................................................................... 7-7
7.3.3 3000-SHEET FINISHER WITH SADDLE-STITCH
AND 50-SHEET STAPLER (B468)............................................................................ 7-8
7.3.4 3000-SHEET FINISHER WITH 50-SHEET STAPLER (B469)................................ 7-10
7.3.5 3000-SHEET FINISHER WITH SADDLE-STITCH
AND 50-SHEET STAPLER (B674).......................................................................... 7-11
7.3.6 PUNCH UNIT (B377) ............................................................................................... 7-14
7.3.7 COVER INTERPOSER TRAY (B470) ..................................................................... 7-15
7.3.8 3000 SHEET FINISHER (B478/B706)..................................................................... 7-16
7.3.9 PUNCH UNIT (B531) ............................................................................................... 7-17
7.3.10 PUNCH UNIT (A812)............................................................................................. 7-18
7.3.11 JOGGER UNIT (B513)........................................................................................... 7-19
7.3.12 9-BIN MAILBOX (B471)......................................................................................... 7-19
7.3.13 LG/B4 KIT (B474) .................................................................................................. 7-19
7.3.14 Z-FOLDING UNIT (B660) ...................................................................................... 7-19
7.3.15 3000-SHEET FINISHER B701 .............................................................................. 7-20
7.3.16 2000-SHEET FINISHER B700 .............................................................................. 7-22
7.3.17 PUNCH UNIT B702 ............................................................................................... 7-24
7.3.18 9-BIN MAILBOX B762 ............................................................................................ 7-24
xvi
Page 21
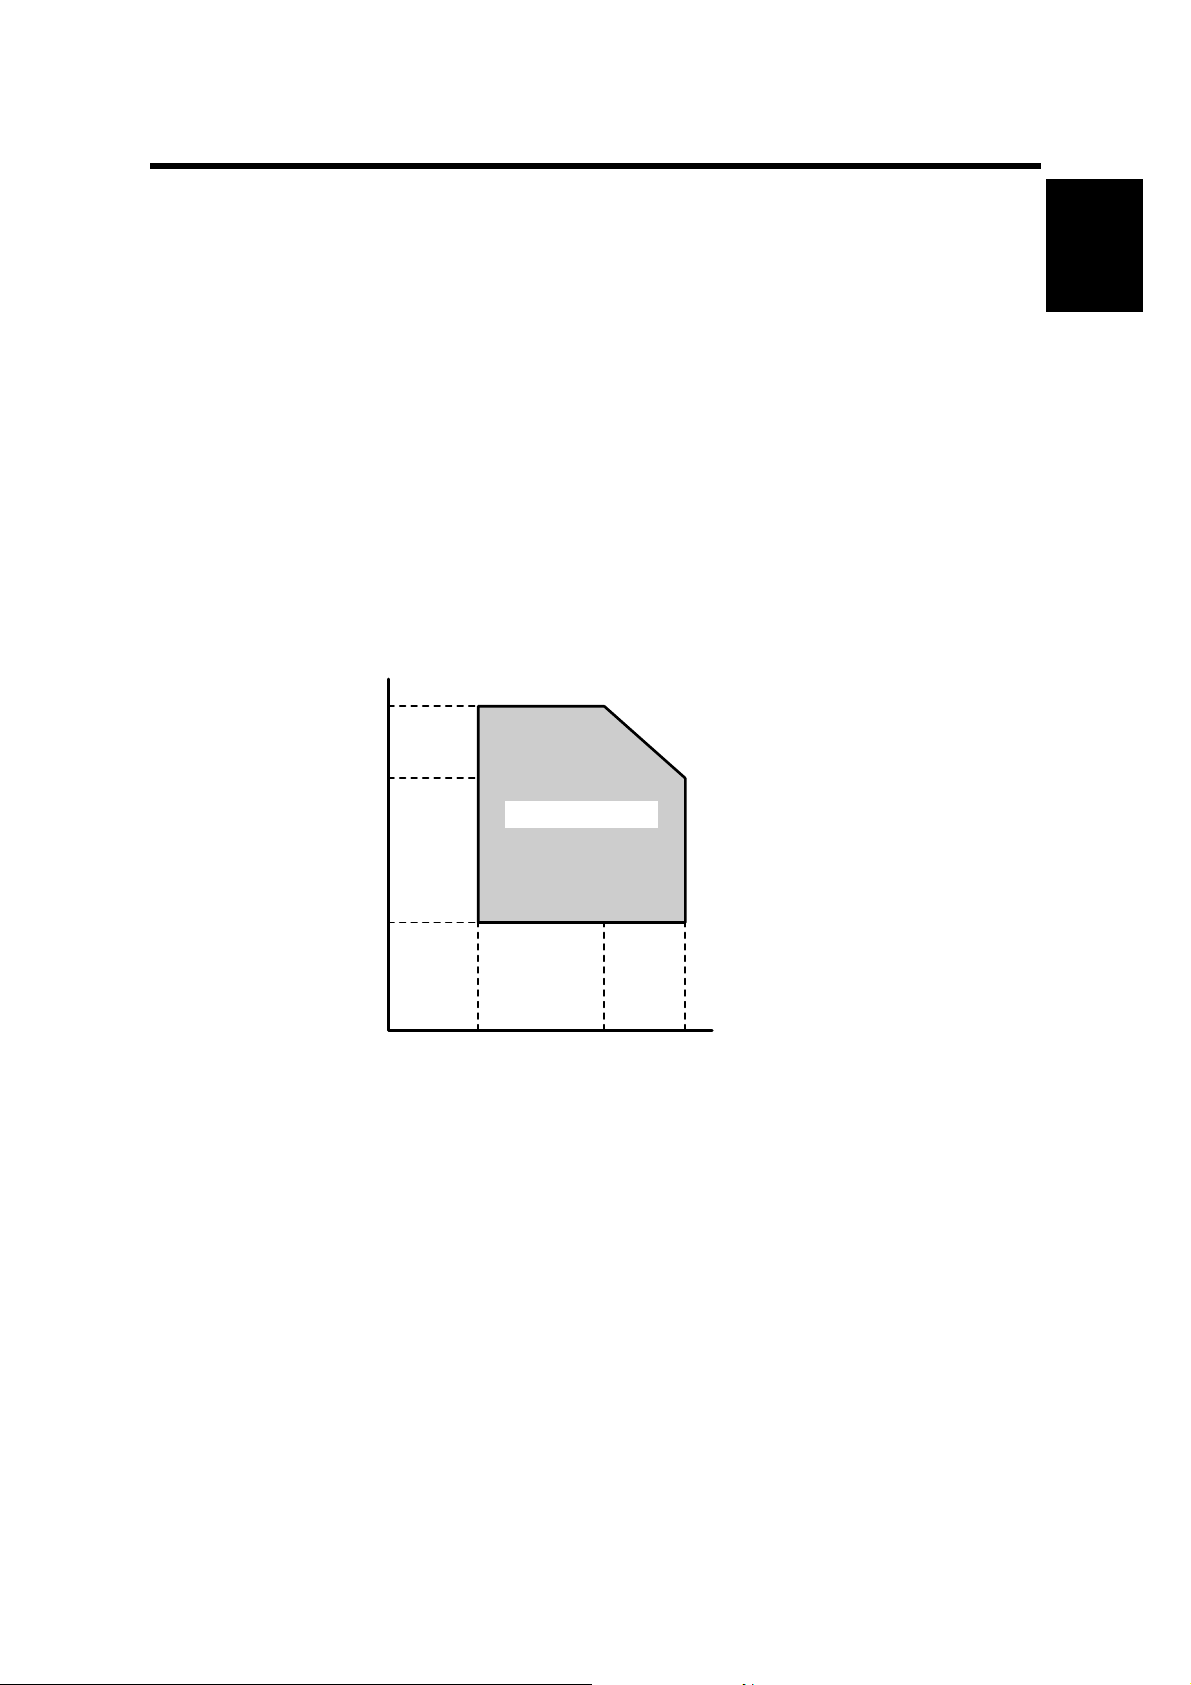
30 June 2006 INSTALLATION REQUIREMENTS
1. INSTALLATION
1.1 INSTALLATION REQUIREMENTS
1.1.1 OPERATING ENVIRONMENT
1. Temperature Range:
2. Humidity Range:
3. Ambient Illumination: Less than 1,500 lux (do not expose to direct sunlight or
4. Ventilation: Room air should turn over at least 3 times per hour
5. Ambient Dust: Less than 0.10 mg/m3
Humidity
80%
54%
Recommended: 15°C to 25°C (59°F to 77°F)
Possible: 10°C to 32°C (50°F to 90°F)
15% to 80% RH (27°C 80%, 32°C 54%)
strong light.)
Operation range
Installation
15%
10°C
(50°F)
27°C
(80.6°F)
32°C
(89.6°F)
Temperature
B064I502.WMF
6. If the place of installation is air-conditioned or heated, do not place the machine
where it will be:
1) Subjected to sudden temperature changes
2) Directly exposed to cool air from an air-conditioner
3) Directly exposed to heat from a heater
1-1
Page 22

INSTALLATION REQUIREMENTS 30 June 2006
7. Do not place the machine where it will be exposed to corrosive gases.
8. Do not install the machine at any location over 2,000 m (6,500 feet) above sea
level.
9. Place the copier on a strong and level base with the front and back of the
machine within ±5 mm (0.2") of level.
10. Do not place the machine where it may be subjected to strong vibrations.
11. Do not connect the machine to a power source shared with another electrical
appliance.
12. The machine can generate an electromagnetic field which could interfere with
radio or television reception.
1.1.2 MACHINE LEVEL
1. Front to back:
2. Right to left:
Within ±5 mm (0.2") of level
Within ±5 mm (0.2") of level
The machine legs may be screwed up or down in order to level the machine. Set a
carpenter’s level on the exposure glass.
1-2
Page 23

30 June 2006 INSTALLATION REQUIREMENTS
1.1.3 MINIMUM SPACE REQUIREMENTS
Place the copier near the power source, providing minimum clearance as shown
below. The same amount of clearance is necessary when optional peripheral
devices are installed.
50 mm (2") Back
100 mm (4") Left
700 mm (27.6") Front
B064I001.WMF
40 mm (1.6") Right
Installation
1-3
Page 24

INSTALLATION REQUIREMENTS 30 June 2006
1.1.4 DIMENSIONS
B064 Series
480 mm (18.9")
425 mm (16.7")
1,098 mm (43.2")
1,165 mm (45.9")
1,014 mm (39.9")
620 mm (24.4")
90 mm (3.5")
734 mm (28.9")
690 mm (27.2")
314 mm (12.4")
B064I003.WMF
750 mm (29.5")
458 mm (18")
B064I002.WMF
1-4
Page 25

30 June 2006 INSTALLATION REQUIREMENTS
B140 Series
480 mm (18.9")
425 mm (16.7")
Installation
1,098 mm (43.2")
1,014 mm (39.9")
620 mm (24.4")
90 mm (3.5")
734 mm (28.9")
177 mm (6.9")
690 mm (27.2")
1,165 mm (45.9")
314 mm (12.4")
B064I140.WMF
750 mm (29.5")
458 mm (18")
B064I002.WMF
1-5
Page 26

INSTALLATION REQUIREMENTS 30 June 2006
B246 Series
480 mm (18.9")
425 mm (16.7")
1103 mm (43.4")
978 mm (38.5")
90 mm (3.5")
657mm (25.9")
177 mm (6.9")
690 mm (27.2")
314 mm (12.4")
B132I112.WMF
1165 mm (45.9")
790 mm (31.1")
613 mm (24.1")
458 mm (18")
B064I002.WMF
1-6
Page 27

30 June 2006 INSTALLATION REQUIREMENTS
1.1.5 PERIPHERAL/OPTION SUMMARY TABLE
The table below summarizes all the peripheral devices and controller options that
can be installed with the B064, B140, and B246 Series machines. O: YES, X: NO
Bnnn Name
B328 Copy Connector Kit
Type 2105
B377 Punch Unit Type
1045
B452 Key Counter
Bracket Type 1027
B468 Booklet Finisher O X X 1 Punching, sorting, shifting,
B469 Booklet Finisher
SR850
B470 Cover Interposer
Tray
B471 9-Bin Mailbox O O X 2 Installed on the B468, B469,
B473 LCT RT43 O O O 1 Paper bank for LT/A4 paper
B474 81/2"x 14" Paper
Size Tray Type
1075
B475 A3/11"x17" Tray
Unit Type 1075
B476 Copy Tray Type
1075
B478 3000 Sheet Finisher O X X 1 Punching, sorting, shifting,
B498 Card Reader
Bracket
B499 Tab Sheet Holder
Type 3260
B513 Output Jogger Unit
Type 1075
B515 IEEE 801.11b O X X 3 Board
B519 File Format
Converter
B525-08 Postscript 3 Type
1075
B525-15 Postscript 3 Type
2075
B525-44 Postscript 3 Type
7500
B525-01 USB 2.0 O O O 3 Board
B531-27 Punch Unit Type
1075 EU 2/4
B531-17 Punch Unit Type
1075 NA 3/2
B581 IEEE 1394 Interface
Board Type B
B585 Memory Unit Type
D 2075 256MB
B594 Network Interface
Board Type 2105
B596-01 USB 2.0 Interface
Board Type B
B609-04 File Format
Converter Type C
B609-01 File Format
Converter Type B
B659 Printer/Scanner Kit
Type 2075
B064 B140 B246
Series
X O X 1 Links two mainframes.
O O X 2 Installed in B468, B469, B674
O O O 1 Common option.
O O X 1 Punching, sorting, shifting,
O O X 2 Installed on B468, B469,
O O O 1 Paper bank for LG paper
O O O 1 Installed in Tray 1 (Tandem
O X X 2 Small output tray for
O O O 1 Connected directly to the
O O O 2 Installed in Tray 1 (Tandem
X O O 2 Installed in B478 or B706
O X X 3 Board
O X X 3 DIMM
X O X 3 SD card
X X O 3 SD card
O O O 2 Installed in B478 or B706.
O O O 2 Installed in B478 or B706.
X X O 3 Board
X O X 3 Memory
X O X 3 Board
X O X 3 Board
X X O 3 Board
X O X 3 Board
X O X 3 SD card
Class*
1
corner/booklet stapling.
corner stapling only.
B674, or B478, B706
or B674.
Tray)
mainframe
corner stapling only.
mainframe.
Tray)
Comment
Installation
1-7
Page 28

INSTALLATION REQUIREMENTS 30 June 2006
Bnnn Name
B660 Z-folding Unit ZF
4000
B674 Booklet Finisher X O X 1 Punching, sorting, shifting,
B679 IEEE1284 Interface
Board Type A
B700 SR 4000 X X O 1 Punching, sorting, shifting,
B701 SR970 X X O 1 Punching, sorting, shifting,
B702-27 Punch Unit Type
3260 EU 2/4
B702-17 Punch Unit Type
3260 NA 2/3
B702-28 Punch Unit Type
3260 SC
B703 Output Jogger Unit
Type 3260
B704 Cover Interposer
Type 3260
B706 SR841 X O O 1 Punching, sorting, shifting,
B735 Data Overwrite
Security Unit C
B736 Bluetooth Interface
Unit Type 3245
B756 Copy Tray Type
2075
B762 Mail Box CS391 X X O 2 Installed on B700 or B701
B782 VM Card Type B X O X 3 SD card
B812 Punch Unit Type
850 SC
B818 Remote
Communication
Gate Type CM1
B825 USB Host Interface
Unit Type A
B826 Bluetooth Unit Type
3245
B828 Browser Unit Type
B
B829 Copy Data Security
Unit Type C
B841 Printer/Scanner Unit
Type 7500
B842 Copy Connector
Type MP 7500
B861 VM Card Type C X X O 3 SD card
G336 IEEE 1394 O X X 3 Board
G338 Printer/Scanner Kit O X X 3 DIMM
G377 Bluetooth Interface
Unit
G381 Gigabit Ethernet
Type 7300
G813 IEEE 802.11b
Interface Board
B064 B140 B246
Series
X O O 1 Installed with B674, B700, or
X X O 3 Board
X X O 2 Installed in B700 or B701
X X O 2 Installed in B700 or B701
X X O 2 Installed in B700 or B701
X X O 2 Installed on B700 or B701
X X O 2 Installed on the B700, B701,
X O O 3 SD card
X O X 3 Board
X O O 1 Small output tray for
O O O 2 Installed in B478/B706.
X X O 3 Board
X X O 3 Board
X X O 3 Board
X X O 3 SD card
X X O 3 IPU Board
X X O 3 SD Card
X O O 1 Links two mainframes
X O X 3 Board
X X O 3 Board
X O O 3 Board
Class*
1
B701.
corner/booklet stapling.
corner/booklet stapling.
corner stapling only.
B706.
corner stapling only.
mainframe
Comment
*1 Class 1: Peripheral units connected directly to the mainframe
Class 2: Components installed on or in peripheral units (punches, etc.)
Class 3: MFP controller options (SD cards, boards)
1-8
Page 29

30 June 2006 INSTALLATION REQUIREMENTS
1.1.6 POWER REQUIREMENTS
CAUTION
1. Make sure that the wall outlet is near the main machine and easily
accessible. Make sure the plug is firmly inserted in the outlet.
2. Avoid multi-wiring.
3. Be sure to ground the machine.
4. Never set anything on the power cord.
Input voltage level
Permissible voltage fluctuation
North America 120 V, 60 Hz: 20 A or more
Europe/Asia 220 V ~ 240 V, 50 Hz/60 Hz: 10 A or more
Taiwan 110V, 60 Hz, 20A or more
±10%
CAUTION
Never turn off the main power switch when the power LED is lit or flashing.
To avoid damaging the hard disk or memory, press the operation power
switch to switch the power off, wait for the power LED to go off, and then
switch the main power switch off.
The Main Power LED () lights or flashes at the following times:
Installation
• While the platen cover or ADF is open
• While the main machine is communicating with the network server
• While the machine is accessing the hard disk or memory when reading or
writing data.
There are two power switches on the machine:
• Main Power Switch.
Located on the front left corner of the machine and covered by a plastic cover.
This switch should always remain on unless the machine is being serviced.
• Operation Power Switch.
Located on the right side of the operation panel. This is the switch normally used
by the customer to power the machine on and off.
1-9
Page 30

MAIN MACHINE (B064 SERIES/B140 SERIES/B246 SERIES) 30 June 2006
1.2 MAIN MACHINE (B064 SERIES/B140 SERIES/B246
SERIES)
1.2.1 ACCESSORY CHECK
Check the accessories and their quantities against this list:
Description Q’ty
1. Model Name Decal (-29 Only) ............................................... 1
2. Operation Instructions (-17, -19, -29, -69 Only) ..................... 2
3. NECR with Envelope (-17 Only) ............................................ 1
4. Decal – Paper Size ................................................................ 1
5. Decal: Caution Chart: Paper Set: Direction ........................... 1
6. Stand Holder.......................................................................... 1
7. Operating Instructions Holder ................................................ 2
8. Decal – Original Table (Face Up) .......................................... 1
9. Decal – Cleaning - Multiple .................................................... 1
10. Cloth – DF Exposure Glass ................................................... 1
11. Cloth Holder........................................................................... 1
12. Decal – Toner Supply - Multiple ............................................ 1
13. Decal: Power Source: Off ...................................................... 1
14. Decal Exposure Glass: Multiple............................................. 1
15. Decal – D1/E1 Multiple .......................................................... 1
1-10
Page 31

30 June 2006 MAIN MACHINE (B064 SERIES/B140 SERIES/B246 SERIES)
1.2.2 INSTALLATION PROCEDURE
Removing Tapes and Retainers
CAUTION
To avoid serious injury, do not connect the power plug to the machine until
you are instructed to do so.
[C]
[A]
[B]
Installation
[D]
B140I403.WMF
B064I404.WMF
1. Unpack the machine and remove all the wrapping.
2. Remove all filament tape from the front [A] of the machine.
3. Open the lower tray [B] and remove the operating instructions holder and foot
risers.
4. Open the ADF feed cover and remove the tape and retainer [C].
5. Remove the tape from the back [D] of the machine.
NOTE: Save the filament tape and shipping retainers to prepare the machine
for shipping in the future.
1-11
Page 32

MAIN MACHINE (B064 SERIES/B140 SERIES/B246 SERIES) 30 June 2006
6. Raise the ADF and remove all the tape and
shipping retainers around the exposure
glass [A] and operation panel.
[B]
7. Remove the shipping retaining sheet [B]
under the white pad.
8. Open the front door, open the toner
bottle holder [C], then remove all tape
and shipping retainers.
9. Open the right door and remove the tapes
from the vertical transport plate.
B064I005.WMF
[C]
B064I007.WMF
[A]
1
2
B246I104A.WMF
1-12
Page 33

30 June 2006 MAIN MACHINE (B064 SERIES/B140 SERIES/B246 SERIES)
10. Remove the PCU inner cover [D]
( x 2) and disconnect the fan
motor [E] ( x 1).
[E]
Installation
11. Lower the transfer unit by turning
its knob [A].
12. Remove the bracket [B], and the red
tag from the transfer belt ( x 1).
13. Remove the pin [C], and the red tag
from the cleaning plate.
[D]
[A]
[D]
B064I008.WMF
[C]
[B]
B140I009.WMF
14. Open the tandem tray (top paper tray)
and remove the metal retainer bracket
[D] ( x 1) and wire, then the red tags
(x2) and all tape.
1-13
1
2
34
B246I104B.WMF
Page 34

MAIN MACHINE (B064 SERIES/B140 SERIES/B246 SERIES) 30 June 2006
Connecting the ADF
Connect the ADF plug [A] to the
connector on the back of the
machine.
[A]
B064I405.WMF
Removing and Filling the Development Unit
Important!
• Before you begin, remove the toner bottle if it is installed.
• The toner bottle holder can be damaged if it is in the machine when you do the
procedure below.
1. Open the front door.
[C]
2. Remove the shutter cover [A] ( x 1).
3. Remove the lock screw [B].
4. Remove any remaining shipping tape
[C].
5. Pull the toner bottle holder [D] and
swing it to the right.
[D]
[A]
B246I113A.WMF
[B]
1-14
Page 35

30 June 2006 MAIN MACHINE (B064 SERIES/B140 SERIES/B246 SERIES)
6. Remove the face plate [E] of the
development unit (knob x 1, x 2).
Installation
7. Disconnect the development unit [F]
( x 2).
NOTE: If the LCT is installed,
disconnect it. This lets the front door
open far enough for development unit
removal.
8. Close the supply pipe shutter [G].
9. While allowing the development unit
[H] to slip to the right, slowly pull it out
of the machine.
[H]
[F]
[G]
[E]
B064I302.WMF
B064I303.WMF
10. Remove the toner hopper [A] ( x
2).
11. Rotate the toner hopper [B] slightly
10° to 20° as you slide it up to
remove it.
1-15
[A]
[B]
B064I304.WMF
Page 36

MAIN MACHINE (B064 SERIES/B140 SERIES/B246 SERIES) 30 June 2006
12. While turning the knob [C] slowly,
pour in one pack of developer [D]
[D]
from one end of the development
unit to the other.
13. Make sure that the developer is
evenly distributed. Note the
developer lot number printed on the
[C]
top edge of the bag. You will need
the lot number when you execute
SP2963 (Installation Mode).
14. Assembly the developer unit then
re-install it in the machine.
B064I305.WMF
15. Follow the instructions printed on the inside of the front door to install the toner
bottle.
NOTE: If the door does not close, make sure that the pipe line shutter is
rotated down. (See Step 7 above.)
1-16
Page 37

30 June 2006 MAIN MACHINE (B064 SERIES/B140 SERIES/B246 SERIES)
Re-installing the Development Unit
[A]
2
3
1
[B]
1. Push the development unit to the right .
2. While continuing to hold the unit to the right, push it into the machine.
3. Confirm that the pin [A] goes into the left side of the oval hole [B] in the
development unit plate.
4. Push the development unit in completely until it stops, then push it to the left
.
B246I999.WMF
Installation
5. Make sure you can see the horizontal pin in front of the plate as shown below.
Correct!
Incorrect!
B246I999A.WMF
NOTE: If you cannot move the development unit plate behind the horizontal pin,
turn the front gear of the unit to the left and try again.
6. Make sure the pipeline shutter is rotated down to the open position.
7. Reattach all removed parts.
1-17
Page 38

MAIN MACHINE (B064 SERIES/B140 SERIES/B246 SERIES) 30 June 2006
Initializing the Drum Settings (B064 Series)
After switching on the machine, you must execute SP2963 (Installation Mode)
within 60 seconds to 1) Initialize the developer and force toner supply to the
development unit, and 2) Initialize the auto process control settings.
• SP2963 must be executed before sample copying or test printing.
• If you do not press “Execute” in Step 2 in the following procedure within 60
seconds after the machine is switched on, the auto process control features
(potential sensor calibration, Vsg, Vref, etc.) will not initialize correctly.
• If the machine starts the auto process control routine before you have a chance
to press Execute, switch the machine off and try again.
1. Connect the power cord.
2. Within one minute, before the auto process control settings initialize, execute
SP2963.
• Press Clear Modes J.
• On the operation panel keypad, press .
• Hold down Clear/Stop D for more than 3 seconds.
• Press “Copy SP” on the touch-panel.
• Press .
• Press Enter .
• Enter the Developer Lot No. with the key display, then press “Execute”.
About four minutes is required to initialize toner supply and the auto process
control settings.
3. Press “Exit” to leave the SP mode.
4. Attach the appropriate decals (provided) to the paper trays.
5. Check copy quality and machine operation.
NOTE: At installation, use SP2963 to enter the lot number, initialize the
developer, and to force toner supply to the toner hopper. After
replacing developer in a machine that has already been installed, do
not use SP2963; execute SP2801 (TD Sensor Initial Setting) instead to
enter the lot number and initialize the TD sensor. ( 3.7.1)
1-18
Page 39

30 June 2006 MAIN MACHINE (B064 SERIES/B140 SERIES/B246 SERIES)
Initializing the Drum Settings (B140/B246 Series)
You must do SP2963 (Installation Mode) to 1) Initialize the developer and do a
forced toner supply to the development unit, and 2) Initialize the auto process
control settings.
• You must open the front door before you switch the machine on. If you do this,
the machine does not do the short automatic process control procedure, which is
usually done after the machine power is turned on.
• SP2963 must be done before you do sample copying or test printing.
• If you do not press “Execute” in Step 6, the auto process control items (potential
sensor calibration, Vsg, Vref, etc.) will not initialize correctly.
1. Open the front door.
2. Connect the power cord.
3. Turn the main power switch on.
4. Go into the SP mode. (Push [Clear Modes], then enter "107", then press and
hold down [Clear/Stop] for at least 3 sec.)
Installation
5. Close the front door.
6. Do SP2963, enter the developer lot number with the key pad display, then push
[Execute].
Approximately four minutes is necessary to initialize toner supply and the auto
process control settings.
7. Press “Exit” to go out of the SP mode.
8. Attach the applicable decals (supplied with the machine) to the paper trays.
9. Check the copy quality and machine operation.
Important
• At installation, use SP2963 to enter the lot number, initialize the developer,
and to force toner supply to the toner hopper.
• After you replace developer in a machine that has been already installed, do
not use SP2963; use SP2801 (TD Sensor Initial Setting) instead to enter the
lot number and initialize the TD sensor. ( 3.7.1)
1-19
Page 40

MAIN MACHINE (B064 SERIES/B140 SERIES/B246 SERIES) 30 June 2006
Tandem Tray
Before shipping the machine, the tandem tray is set for A4 or LT LEF and must be
adjusted if the customer wants to use the tandem tray for another paper size.
Feed Station Allowed Size
Tandem Tray (Tray 1) A4 LEF, LT LEF
1. Open the front cover.
2. Completely pull out the tandem feed
[B]
tray [A] so that the right tandem tray
[B] separates from the left tandem
tray.
[A]
B064I564.WMF
3. Remove the right tandem inner cover
[C].
4. Re-position the side fences [D] ( x
2). The outer slot position is used
when loading A4 size paper.
5. Re-install the right tandem inner
cover [C].
[D]
[C]
B064I565.WMF
1-20
Page 41

30 June 2006 MAIN MACHINE (B064 SERIES/B140 SERIES/B246 SERIES)
6. Remove the tray cover [A] ( x 2).
7. Remove the motor cover [B] ( x 4).
8. Re-position the side fences [C] ( x 8).
The outer slot position is used when
loading A4 size paper.
9. Re-install the motor cover and the tray
cover.
[B]
[C]
[A]
B064I566.WMF
Installation
10. Remove the rear bottom plate [D]
( x 1).
11. Re-position the return position
sensor bracket [E] ( x 1). To use
the paper tray for A4 size, put the
screw in the left hole as shown. (For
LT size, the screw should be placed
on the right.)
12. Re-install the rear bottom plate.
13. Change the paper size using
SP5959-001 (Paper Size – Tray 1).
For details, see SP5959 in section
“5. Service Tables”.
B064I523.WMF
[D]
[E]
B064I024.WMF
1-21
Page 42

MAIN MACHINE (B064 SERIES/B140 SERIES/B246 SERIES) 30 June 2006
Machine Level
1. Set a stand [A] at each corner of the
machine.
2. Place a level on the exposure glass
and use a wrench to turn each nut [B]
and level the machine to ±5 mm of the
horizontal.
3. Check the machine operation. With
[B]
the customer, determine the best
place to attach the cleaning reminder
decal.
[A]
B064I010.WMF
Date/Time Setting
Use the User Tools menu to set the current date and time.
• On the operation panel, press the User Tools key.
• On the touch-panel, press “System Settings”.
• Press the “Timer Setting” tab.
• Press “Set Date” the enter the date.
• Press “Set Time” to enter the time.
SP Codes
SP5812-001
SP5841-001
SP5853 Stamp Data Download
SP7825 (B064 Series Only) Total Counter Reset
Service Telephone
Number Settings
Supply Name Setting –
Toner Name Setting:
Black
Enter the contact number of
the customer engineer. This is
the number displayed when a
service call is issued.
This name appears when the
user presses the Inquiry on the
User Tools screen.
Do SP 5853 to copy stamp
data to the hard disk, then turn
the power off/on.
Execute after installation and
after making all test copies to
reset the electronic counter
total.
1-22
Page 43

30 June 2006 A3/DLT FEEDER KIT (B475)
1.3 A3/DLT FEEDER KIT (B475)
1.3.1 ACCESSORY CHECK
Check the accessories and their quantities against this list:
Description Q’ty
1. A3/DLT Tray ...................................................................... 1
2. Short connector ................................................................. 1
3. Page size decals................................................................ 1
3
2
Installation
1
B475I001.WMF
1-23
Page 44

A3/DLT FEEDER KIT (B475) 30 June 2006
1.3.2 INSTALLATION PROCEDURE
CAUTION
Switch the machine off and unplug the machine before starting the
following procedure.
1. Draw out the tandem tray completely
to separate the left and right sides of
the tray, then remove the front cover
[A] ( x 2).
2. Push in the right tandem tray [B].
[B]
3. Remove the left tandem tray [C]
( x 5). Save these screws.
[A]
B475I707.WMF
[C]
B475I708.WMF
1-24
Page 45

30 June 2006 A3/DLT FEEDER KIT (B475)
4. Remove the right tandem tray [A] ( x
2). Save these screws.
5. Connect the short connector [B] to the
left tandem tray terminal [C].
[A]
B475I709.WMF
Installation
6. Remove the stay [D] ( x 2) and reinstall it.
7. Attach the A3/DLT tray [E], using the
screws removed earlier.
8. Re-install the front cover.
9. Switch the machine on, enter the SP
mode and select the paper size for
Tray 1 with SP5959-001 (Paper Size
– Tray 1) For details, see SP5959 in
section “5. Service Tables”.
10. Attach the appropriate decal for the
selected paper size.
[C]
[D]
[B]
B475I201.WMF
[E]
B475I202.WMF
1-25
Page 46

LCT (B473) 30 June 2006
1.4 LCT (B473)
1.4.1 ACCESSORY CHECK
Check the accessories and their quantities against this list:
Description Q’ty
1. Flat-head shoulder screw - M4 x 6..................................... 1
2. Upper docking pins (grooved)............................................ 2
3. Lower docking pin (not grooved)........................................ 1
4. Installation Instructions ...................................................... 1
5. Paper Set Decal................................................................. 1
1-26
Page 47

30 June 2006 LCT (B473)
1.4.2 INSTALLATION PROCEDURE
Removing Tape
[A]
Installation
[B]
[C]
B473I001.WMF
B473I002.WMF
1. Remove the filament tape from the body [A] and top cover [B] of the LCT.
2. Remove the tape under the lid [C] of the LCT.
1-27
Page 48

LCT (B473) 30 June 2006
Preparing the Main Machine
CAUTION
Switch the machine off and unplug the machine before starting the
following procedure.
1. Remove the LCT installation cover
[A] from the right side of the
machine. ( x 2).
2. Save the screw on the left [B]. You
will need it to install the LCT.
3. Remove the LCT connector cover
[C] (x 1) and the covers over the
holes for the docking pins [D]. (x 3)
[C]
Installing the LCT
1. Insert the two upper docking pins
(grooved) [A] into the upper slots
and the lower docking pin [B] into
the lower slot.
[D]
[A]
[A]
[B]
B473I003.WMF
1-28
[B]
B473I004.WMF
Page 49

30 June 2006 LCT (B473)
[D]
[C]
[B]
Installation
[A]
B473I005.WMF
2. Align the holes on the side of the LCT [A] with the docking pins on the side of
the machine [B], then slowly push the LCT onto the pins.
NOTE: The release button [C] is used to unlock the LCT so it can be
disconnected from the machine.
3. Connect the plug [D] of the LCT power cord to the side of the machine.
1-29
Page 50

LCT (B473) 30 June 2006
[E]
[F]
B473I006.WMF
4. Insert the flat-head shoulder screw [E] into the hole and fasten it to lock the
release lever in place.
For easier access to the hole for the screw [E], you can remove the right panel
[F] ( x 2).
5. Switch the machine on and execute SP5959 005 (Paper Size – Tray 4 (LCT))
to select the paper size. For details, see SP5959 in section “5. Service Tables.”
1-30
Page 51

30 June 2006 LG/B4 FEEDER KIT (B474)
1.5 LG/B4 FEEDER KIT (B474)
1.5.1 ACCESSORY CHECK
Check the accessories and their quantities against this list:
Description Q’ty
1. Cover ..................................................................................... 1
2. B4/LG frame........................................................................... 1
3. Bottom plate extension .......................................................... 1
4. Rear bracket .......................................................................... 1
5. Front bracket.......................................................................... 1
6. Harness clamp ....................................................................... 1
7. Tapping hex screws - M4 x 8 ................................................. 6
8. Tapping screws - M4 x 8........................................................ 4
1
2
Installation
3
8
7
6
5
4
B474I001A.WMF
1-31
Page 52

LG/B4 FEEDER KIT (B474) 30 June 2006
1.5.2 INSTALLATION PROCEDURE
If the LCT is connected to the machine
[A]
1. Open the cover and remove the paper.
2. Lower the LCT tray. Cover the near end
sensor [A], then press the tray down
button [B] to lower the tray bottom plate.
CAUTION
Switch the machine off and unplug the machine before starting the
following procedure.
3. Disconnect the LCT from the machine.
4. Remove the LCT upper cover [C].
[B]
B474I507.WMF
[C]
1-32
B474I504.WMF
Page 53

30 June 2006 LG/B4 FEEDER KIT (B474)
5. Remove the LCT cover [A] ( x 1).
6. Remove the right stay [B] at and
re-attach it below at ( x 2).
7. Remove the right cover [C] ( x 2).
8. Attach the front bracket [D] with the
beveled corner down ( x 2).
NOTE: If the brackets are difficult to
install, raise the bottom plate with your
hand.
9. Attach the rear bracket [E] with the
beveled corner down ( x 2).
[B]
[C]
[A]
B474I001.WMF
[E]
Installation
[F]
10. Attach the bottom plate extension [F]
with the hex nuts ( x 4).
11. Align the positioning pin [G].
12. Attach the B4/LG frame [H] with the
hex nuts ( x 2).
The kit is set for B4. If you need to
change the paper size to LG, do the
following steps.
[D]
B474I502.WMF
[G]
1-33
[H]
B474I553.WMF
Page 54

LG/B4 FEEDER KIT (B474) 30 June 2006
13. Move the front side fence [A] to the LG
position and fasten ( x 1).
[B]
14. Move the rear side fence [B] to the LG
position and fasten ( x 1).
[A]
15. Change the position of the lower limit sensor
[C] ( x 1).
16. Attach the harness (not shown) to the back
of the plate and secure the sensor
connector wire.
17. Attach the LCT cover [D] provided with the
kit ( x 1).
[C]
B474I555.WMF
B474I508.WMF
[D]
18. Re-attach the right cover [E] ( x 2).
19. Connect the LCT to the machine ( 1.4.2).
20. Switch the machine on, enter the SP mode,
then use SP5959 005 (Paper Size – Tray 4
(LCT) to select the new paper size. For
details, see SP5959 in section “5. Service
Tables”.
1-34
[E]
B474I506.WMF
Page 55

30 June 2006 3000-SHEET FINISHERS (B468/B469/B674)
1.6 3000-SHEET FINISHERS (B468/B469/B674)
1.6.1 ACCESSORY CHECK
Check the accessories and their quantities against this list:
Description Q’ty
1. Tapping screws - M3 x 6........................................................ 2
2. Tapping screws - M4 x 8........................................................ 4
3. Tapping screws - M4 x 14...................................................... 4
4. Ground (earth) plate............................................................... 1
5. Rear joint bracket................................................................... 1
6. Front joint bracket .................................................................. 1
7. Upper output tray ................................................................... 1
8. Installation Instructions .......................................................... 1
9. Lower output tray ................................................................... 1
10. Cushion (with double-sided tape)........................................... 1
1
2
3
4
5
6
Installation
7
8
10
9
B468I001A.WMF
1-35
Page 56

3000-SHEET FINISHERS (B468/B469/B674) 30 June 2006
1.6.2 INSTALLATION PROCEDURE
This section describes the common installation instructions for these finishers:
• B468 Booklet Finisher. Does punching, shifting, corner stapling, and booklet
(saddle-stitch) stapling. This booklet finisher can be installed and used only with
the B064 Series. This finisher cannot be used with a B140 Series or B246 Series
machine.
• B469 Finisher. Does punching, shifting, and corner stapling. Does not do
booklet (saddle-stitch) stapling. This finisher can be installed and used only with
the B064 Series or B140 Series. This finisher cannot be used with a B246 Series
machine.
• B674 Booklet Finisher. Does punching, shifting, stapling, and booklet (saddle-
stitch) stapling . The booklet finisher can be installed and used only with the
B140 Series. This finisher cannot be used with a B064 Series or B246 Series
machine.
Important! Differences in installation procedures are denoted “B468", “B469” or
“B674”.
Removing Tapes and Retainers
B468 (B064 Series)
B674 (B140 Series)
B468I001.WMF
B469 (B064 Series/B140 Series)
B469I001.WMF
1-36
Page 57

30 June 2006 3000-SHEET FINISHERS (B468/B469/B674)
[A]
Installation
B468I002.WMF
1. Unpack the machine and remove all the wrapping.
2. Remove all filament tape and shipping retainers from the front of the finisher.
3. Open the front door [A] and remove all the tape and shipping retainers from
inside the finisher.
1-37
Page 58

3000-SHEET FINISHERS (B468/B469/B674) 30 June 2006
Installation
CAUTION
Switch the machine off and unplug the machine before starting the
following procedure.
[B]
[A]
[C]
B468I003.WMF
1. Install the front [A] and rear [B] joint brackets ( x 2 each, M4x 14).
2. Install the ground plate [C] ( x 2, M3 x 6).
1-38
Page 59

30 June 2006 3000-SHEET FINISHERS (B468/B469/B674)
[B]
[D]
[C]
Installation
[A]
B468I004.WMF
3. Remove the screw of the lock lever [A] and pull the lever out. Keep the screw.
4. Peel the cover tape from the sponge cushion [B], then install it in the upper slot.
NOTE: If you will also install the cover interposer tray, do not attach the
cushion here. Attach it to the cover interposer tray. The cover
interposer tray must be installed on the finisher before you attach the
finisher and tray to the main machine.
5. Align the brackets [C] with the slots in the finisher.
6. To avoid bending the entrance guide plates of the finisher, slowly push the
finisher against the side of the machine until the brackets enter the slots.
7. Fasten the lock lever [A] ( x 1) with the screw removed in Step 3. This locks
the finisher against the side of the mainframe.
8. Connect the plug [D] of the finisher power cord to the connector on the machine.
CAUTION
Always move the finisher slowly to avoid bending the entrance guide
plates. Bent guide plates could interfere with paper transport from the
machine to the finisher.
1-39
Page 60

3000-SHEET FINISHERS (B468/B469/B674) 30 June 2006
[B]
[A]
[D]
B468/B674
[C]
[F]
B469
B468I005.WMF
[E]
B468 (B064 Series)
B674 (B140 Series)
1. Install the lower output tray [A] ( x 2).
NOTE: Only the lower output tray has a movable support tray [B].
2. Install the upper output tray [C] ( x 2).
3. Attach the staple position decal [D] to the ADF.
B469 (B064 Series/B140 Series)
1. Install the output tray [E] ( x 2).
2. Attach the staple position decal [F].
B469I005.WMF
1-40
Page 61

30 June 2006 3000-SHEET FINISHERS (B468/B469/B674)
Selecting the Staple Supply Name
Enter the SP mode and execute the following information.
5841*
Supply Name Setting
011 Staple Std
021 Staple Bind
These names appear when the user presses the Inquiry
button on the initial User Tools screen.
Enter the name of the staples in use for normal stapling
(not booklet stapling). This setting should be done for the
B468, B469, and B674.
Enter the name of the staples in use for booklet stapling
(saddle-stitching). This setting is required only for the
B468 and B674
Enabling Booklet Binding
To enable booklet binding, you must select the ‘center stapling’ position.
1. Press the User Tools key.
2. Touch “Copier/Document Server Features”.
3. Touch the “Input/Output” tab, then access “Select Stapling Position”.
Installation
4. Touch any “Stapling Position” button and touch the center stapling symbol.
5. Exit the User Tools mode. Specify the number of copies, touch the center
stapling symbol on the operation panel, then start the print job.
These SP adjustments are available but not required at installation.
SP6902
SP6120
Fold Position
Adjustment
Staple Jogger
Adjustment
Use this SP to fine adjust the fold and staple positions if they
are not aligned correctly. See “5. Service Tables”.
Allows fine adjustment of the staple unit jogger fences for
different paper sizes, if required. See “5. Service Tables”.
1-41
Page 62

PUNCH UNIT (B377) 30 June 2006
1.7 PUNCH UNIT (B377)
The Punch Unit B377 can be installed only in the 3000-Sheet Finishers
B468/B469/B674.
1.7.1 ACCESSORY CHECK
Check the accessories and their quantities against this list:
Description Q’ty
1. Punch unit .................................................................................. 1
2. Sensor arm ................................................................................ 1
3. Step screw ................................................................................. 1
4. Spring ........................................................................................ 1
5. Tapping screw - M3x 10............................................................. 2
6. Tapping screw - M3 x 8.............................................................. 1
7. Spacer (2 mm) ........................................................................... 1
8. Spacer (1 mm) ........................................................................... 1
9. Hopper ....................................................................................... 1
1
2
3
4
5
9
8
7
6
B377I001A.WMF
1-42
Page 63

30 June 2006 PUNCH UNIT (B377)
1.7.2 INSTALLATION PROCEDURE
CAUTION
Switch off the main machine and unplug its power cord.
1. If the finisher is connected to the machine,
disconnect it.
2. Unpack the punch unit and remove all
tapes and shipping retainers.
3. Open the front door and remove the rear
cover [A] ( x 4).
Installation
4. Remove the bracket [B] ( x 2) and
paper guide [C] ( x 1).
5. Remove the plastic knockout [D].
[C]
[B]
B377I201.WMF
B377I103.WMF
[A]
6. Install the sensor arm [E] ( x 1).
7. Install the spring [F].
1-43
[D]
[F]
[E]
B377I202.WMF
Page 64

PUNCH UNIT (B377) 30 June 2006
[A]
1. Remove the shipping bracket [A] ( x
2).
2. Position the 2 mm spacer [B] and
secure the punch unit ( x 2).
3. Secure the punch unit at the front with
the shoulder screw [C] ( x 1).
[C]
[B]
B377I203.WMF
4. Connect the harnesses [D] and clamp
them as shown.
NOTE: No special DIP switch settings
are required for this punch unit. The
punch unit sends an identification
signal to the machine, so it knows what
type of punch unit has been installed.
5. Slide the hopper [E] into the machine.
6. Fasten the two 1 mm spacers [F] to the
rear frame. These may be used during
future adjustments.
NOTE: The spacers are used to adjust
the horizontal positioning of the holes.
[D]
B377I105.WMF
[F]
7. Reassemble the finisher and check the
punch operation.
1-44
[E]
B377I106.WMF
Page 65

30 June 2006 COVER INTERPOSER TRAY (B470)
1.8 COVER INTERPOSER TRAY (B470)
1.8.1 ACCESSORY CHECK
Check the accessories and their quantities against this list:
Description Q’ty
1. Front door extension (Top) ................................................ 1
2. Rear cover extension (bottom)........................................... 1
3. Shoulder screws ................................................................ 3
4. Tapping screws – M4 x 8................................................... 7
5. Tapping screws – M3 x 6................................................... 2
6. Tapping screws – M3 x 6................................................... 5
7. Ground Plate...................................................................... 1
8. Plate extension (bottom).................................................... 1
9. Right rear cover plate (for B478/B706 only)....................... 2
10. Right front corner plate (for B478/B706 only)..................... 2
11. Spacer (B468/B469/B674 only) ......................................... 1
12. Front door extension (bottom)............................................ 1
1
2
3
4
5
6
Installation
7
8
12
9
10
11
B470I006.WMF
1-45
Page 66

COVER INTERPOSER TRAY (B470) 30 June 2006
1.8.2 INSTALLATION PROCEDURE
This procedure shows you how to install the Cover Interposer Tray B470 on the:
• 3000-sheet Finisher (Booklet Finisher) B468/B674
• 3000-sheet Finisher B469
• 3000-sheet Finisher B478/B706.
Important! The Cover Interposer Tray B470 can be installed and used only on the
B064 Series or B140 Series machines.
NOTE
• The B468/B469/B674 require installation of only the front spacer.
• The B478/B706 require installation of corner plates.
Removing Tapes and Retainers
[A]
B470I001.WMF
1. If the finisher is connected to the machine, disconnect it.
2. Remove all tape and retainers from the cover interposer tray [A].
[B]
1-46
Page 67

30 June 2006 COVER INTERPOSER TRAY (B470)
[E]
[C]
Installation
[D]
[F]
B470I007.WMF
3. Remove the tape and cardboard [B] from the ground connector.
4. Remove the cover [C] of the relay connector.
5. Loosen the screw of the bracket [D] ( x 1) then remove the bracket.
NOTE: If you will install the cover interposer tray with a finisher that was
installed on the machine before this time (B468/ B469/ B478/ B674/
B706), remove the sponge strip [E] from the finisher. Keep it until you
attach it again to the interposer tray.
6. Remove the guide plate [F].
1-47
Page 68

COVER INTERPOSER TRAY (B470) 30 June 2006
Attaching the Extensions
[E]
[A]
[F]
[D]
[B]
[C]
B470I003.WMF
CAUTION
Make sure that the finisher is disconnected from the main machine and that
the copier is turned off and disconnected from the power outlet before you
start the following procedure.
1. Attach the three shoulder screws [A] ,, ( x 3).
2. Remove the ground plate [B] from the finisher, and keep the screws
3. Attach the bottom plate [C] ( x 2, M3 x 6). Then attach the ground plate [B] to
the bottom plate ( x 2) with the screws that you removed in step 2.
4. Attach the bottom front door extension [D] ( x 2, M4 x 8).
5. Attach the top front cover extension [E] ( x 2, M4 x 8).
6. Attach the rear cover extension [F] ( x 2, M3 x 6).
1-48
Page 69

30 June 2006 COVER INTERPOSER TRAY (B470)
Attaching the Interposer Tray
[C]
[B]
[D]
Booklet Finisher
[A]
B468/B469/B674 only
B470I004.WMF
1. If you install the cover interposer tray on the B468/B469/B674 finisher, install
the spacer [A]. You will hear a click when it is installed correctly.
NOTE: If you install the cover interposer tray on the B478/B706, do not install
this spacer. This spacer is for the B468/B469/B674 installation only.
Installation
2. Lift the cover interposer tray, and align the keyholes [B] with the shoulder screws
[C]. Then move the cover interposer down onto the screws.
3. Attach the cover interposer with the screw [D] ( x 1, M3 x 6).
Important
• If you are installing the cover interposer tray on the B468/B469/B674, skip the
next section and go directly to “Attaching the Finisher to the Machine” on page 1-
52.
• If you are installing the cover interposer tray on the B478/B706, go to the next
section, install the corner plates on the B478/B706, then go to “Attaching the
Finisher to the Machine” on page 1-52.
1-49
Page 70

COVER INTERPOSER TRAY (B470) 30 June 2006
Attaching the Corner Plates for the B478/B706
The corner plates are installed on the B478/B706 only. Attach the cover interposer
tray to the finisher before you attach the corner plates.
Right Rear Corner Plate (B478/B706 only)
[C]
[E]
[D]
[A]
[B]
B470I009.WMF
1. Temporarily set the screws [A] (with approximately two turns) at the right end of
the finisher extension table [B] ( x 2, tapping M4 x 8)
NOTE: You cannot see the holes, because there is tape on them. Punch the
screws through the holes.
2. Align the notches [C] in the right rear corner plate [D] with the screws, and
attach the plate.
3. If there is a gap [E] between the plate and the tray extension attached to the
side of the finisher:
• Loosen the two screws below the table extension (not shown)
• Align the table extension with the corner of the finisher and the plate
• Tighten the tray extension screws.
4. With a long screw driver inserted through the notches in the right rear corner
plate [D], tighten the screws. This attaches the right rear corner plate to the
table extension [B].
1-50
Page 71

30 June 2006 COVER INTERPOSER TRAY (B470)
Right Front Corner Plate (B478/B706 only)
[C]
[B]
[A]
B470I008.WMF
1. Temporarily set the screw [A] (M4 x 8) (with approximately two turns) to attach
the panel at the right front corner.
NOTE: You cannot see the hole, because there is tape on it. Punch the screw
through the hole.
Installation
2. Align the notch in the right front corner plate [B] with the screw and install it.
You hear a click when it is put into its correct position.
3. Put a long screwdriver into the plate cutout [C]. Then, tighten the screw to
attach the right front corner plate.
1-51
Page 72

COVER INTERPOSER TRAY (B470) 30 June 2006
Attaching the Finisher to the Machine
[A]
[F]
[D]
[B]
[C]
B470I005.WMF
1. Attach the sponge strip [A] (this is supplied with the finisher).
NOTE: If you will install the cover interposer tray with a finisher that was
installed on the machine before this time, remove the strip from the
finisher and attach it to the cover interposer tray.
[E]
2. Attach the guide plate [B] (removed from the finisher) to the cover interposer
( x 2).
NOTE: Make sure to use the two small tapping screws supplied with the
machine, and not the machine screws that you removed from the
finisher with the guide plate.
3. Release the lock lever [C] ( x 1).
4. Lower the transport guide plate [D].
5. Slowly push the finisher against the side of the machine until the brackets [E]
go into the slots.
Important: Do the above step carefully. Do not bend the entrance guide
plates. Bent guide plates could cause a blockage for paper transport
between the finisher and copier.
6. Attach the lock lever [C] ( x 1).
7. Lift the transport guide plate [D] to close it.
8. Connect the connector [E] into the copier.
1-52
Page 73

30 June 2006 COVER INTERPOSER TRAY (B470)
9. Switch on the machine, and select the default paper size for the cover
interposer.
Important: Be sure to execute the correct SP code for the machine. Please
refer to the table below.
Machine Correct SP Code
B064 series SP5959-006
B140 series SP5158-001 to 008
Installation
1-53
Page 74

9-BIN MAILBOX (B471) 30 June 2006
1.9 9-BIN MAILBOX (B471)
1.9.1 ACCESSORY CHECK
Check the accessories and their quantities against this list:
Description Q’ty
1. Trays...................................................................................... 9
2. Guide plate............................................................................. 1
3. Installation Instructions .......................................................... 1
4. Tapping screws - M3 x 8........................................................ 6
5. Decals (bin display)................................................................ 1
1
2
3
5
4
B471I001A.WMF
1-54
Page 75

30 June 2006 9-BIN MAILBOX (B471)
1.9.2 INSTALLATION PROCEDURE
Important! The 9-Bin Mailbox B471 can be installed and used only with a B064
Series or B140 Series machine. The B471 cannot be installed on a B246 series
machine.
Removing Tapes and Retainers
[A]
[B]
Installation
B471I001.WMF
1. Remove the filament tape [A].
NOTE: Handle the mailbox carefully. The corner leaf [B] can be damaged
easily.
1-55
Page 76

9-BIN MAILBOX (B471) 30 June 2006
Installation
CAUTION
Switch the machine off and unplug the machine before starting the
following procedure.
If the Cover Interposer Tray B470 is installed on the Finisher B468/B469/B674,
remove it. The cover interposer tray and mailbox cannot be installed on the finisher
at the same time.
1. Remove the top cover [A] of the
finisher ( x 1).
2. Remove the bracket [B] ( x 1).
NOTE: Loosen the screw. Do not
remove it.
[B]
3. Attach the guide plate [A] to the top
of the finisher ( x 2, M3 x 8).
[A]
B471I002.WMF
[A]
B471I003.WMF
1-56
Page 77

30 June 2006 9-BIN MAILBOX (B471)
4. Attach the mailbox [B] to the top of
the finisher ( x 4, M3 x 8).
5. Attach the 9 trays [C] to the mailbox.
6. Give the decals [D] to the customer
for notation and pasting at the
correct location.
[C]
[B]
[D]
B471I004.WMF
Installation
1-57
Page 78

3000 SHEET FINISHER (B478/B706) 30 June 2006
1.10 3000 SHEET FINISHER (B478/B706)
1.10.1 ACCESSORY CHECK
Check the accessories and their quantities against this list:
Description Q’ty
1. Cushion.................................................................................. 1
2. Table Extension ..................................................................... 1
3. Leveling Shoes ...................................................................... 1
4. Rear Joint Bracket ................................................................. 1
5. Front Joint Bracket................................................................. 1
6. Entrance Guide Plate............................................................. 1
7. Grounding Plate ..................................................................... 1
8. Auxiliary Tray Holder.............................................................. 2
9. Auxiliary Tray - Proof ............................................................. 2
10. Auxiliary Tray - Shift............................................................... 2
11. Tapping Screws - M4 x 8 ....................................................... 2
12. Tapping Screws - M3 x 6 ....................................................... 4
13. Tapping Screws - M3 x 8 ....................................................... 4
14. Phillips Screws w/washer - M4 x 14....................................... 4
15. Shift Tray................................................................................ 4
2
3
1
4
15
5
14
13
6
12
11
10
9
8
B706I201A.WMF
7
1-58
Page 79

30 June 2006 3000 SHEET FINISHER (B478/B706)
1.10.2 INSTALLATION
Important!
• The 3000-Sheet Finisher B478 can be installed and used only on a B064 Series
machine..
• The 3000-Sheet Finisher B706 can be installed and used only on a B140 or
B246 Series machine.
CAUTION
Unplug the machine power cord before starting the following procedure.
Installation
B478I002.WMF
1. Unpack the finisher and remove all tapes and shipping retainers.
B478I003.WMF
1-59
Page 80

3000 SHEET FINISHER (B478/B706) 30 June 2006
2. Open the front door and remove the
shipping retainers. Remove
brackets [A], [B], and [C] ( x 2
each).
[A]
3. Install the front rear bracket [D] and
front joint bracket [E] ( x 2 each)
(M4 x 14) on the left side of the
copier.
4. Remove the connector cover [F].
[B]
[E]
[D]
[C]
B478I014.WMF
[F]
B478I019.WMF
1-60
Page 81

30 June 2006 3000 SHEET FINISHER (B478/B706)
5. Install the grounding plate [A] ( x 2)
(M3 x 6).
NOTE: Set the grounding plate so that
there is no gap between the grounding
plate and the bottom frame of the
finisher (as shown).
6. Install the table extension [B] as shown
( x 2) (M4 x 8).
NOTE: The edge of the table extension
should be aligned with the edge of the
finisher (as shown).
[A]
B478I004.WMF
Installation
7. Attach the cushion [C] to the right side
of the upper cover.
NOTE: If you are installing the cover
interposer tray, do not attach the
cushion here. Attach it to the cover
interposer tray. The cover interposer
tray must be installed before you dock
the finisher and tray with the main
machine. For details, see the Cover
Interposer Tray B470 installation
instructions.
8. Install the entrance guide plate [D] ( x
2) (M3 x 6).
[C]
[D]
[B]
B478I005.WMF
B478I107.WMF
1-61
Page 82

3000 SHEET FINISHER (B478/B706) 30 June 2006
[C]
[D]
[B]
[A]
B478I006A.WMF
9. Attach the shift tray [A] ( x 4) (M3 x 8).
10. Open the front door of the finisher, and remove the screw from the locking lever,
then pull out the locking lever [B].
11. Align the finisher on the joint brackets, and lock it in place by pushing in the
locking lever [B].
NOTE: Before securing the locking lever, make sure that the top edges of the
finisher and the copier are parallel from front to rear as shown [C].
12. Secure the locking lever [B] ( x 1) and close the front door.
13. Connect the finisher cable [D] to the copier.
14. Set the leveling shoes (x 4) under the feet and level the machine.
1-62
Page 83

30 June 2006 PUNCH UNIT (B531/B812)
1.11 PUNCH UNIT (B531/B812)
The Punch Unit B531/A812 can be installed only in the 3000-Sheet Finisher
B478/B706.
1.11.1 ACCESSORY CHECK
Check the accessories and their quantities against this list:
Description Q’ty
1. Punch unit.......................................................................... 1
2. Harness Connector Cable - PCB ....................................... 1
3. Harness Connector Cable - HP Sensor 2 .......................... 1
4. Harness Connector Cable - HP Sensor 1, Hopper Full...... 1
5. Sensor Arm and Sensor .................................................... 1
6. Spacer (2 mm) ................................................................... 1
7. Spacer (1 mm) ................................................................... 2
8. Spring ................................................................................ 1
9. Step Screw (large) (M4 x 11)............................................. 1
10. Tapping Screw (M4 x 10)................................................... 2
11. Step Screw (small) (M3 x 4)............................................... 1
12. Machine Screw, Washer (M4 x 6)...................................... 1
13. Knob .................................................................................. 1
14. Punch Waste Hopper......................................................... 1
1
2
3
Installation
4
5
14
6
13
12
11
10
9
8
7
B531I001.WMF
1-63
Page 84

PUNCH UNIT (B531/B812) 30 June 2006
1.11.2 INSTALLATION
[A]
[B]
[C]
B531I09.WMF
[D]
[F]
[E]
B531I002.WMF
CAUTION
Switch the machine off and unplug the machine before starting the
following procedure.
1. If the finisher is connected to the machine, disconnect it.
2. Open the front door and remove the rear cover ( x 2).
3. Unpack the punch unit and remove the motor protector plate [A] ( x 4) and the
cam lock plate [B] ( x 1).
4. Remove the inner cover [C] ( x 3).
5. Behind the inner cover at [D] and [E], press the lock tab to the right to release
the inner cover from the frame.
6. Remove the plastic knockouts [F].
1-64
Page 85

30 June 2006 PUNCH UNIT (B531/B812)
[A]
B531I003.WMF
7. Remove the paper guide [A] ( x 4).
Installation
[B]
[C]
B531I004.WMF
8. Install the sensor arm [B] ( x 1, small step screw (M3 x 4).
NOTE: Make sure that the sensor arm swings freely on the step screw.
9. Attach the spring [C].
1-65
Page 86

PUNCH UNIT (B531/B812) 30 June 2006
[B]
[A]
B531I005.WMF
[D]
[C]
B531I006.WMF
10. At the rear, position the 2 mm spacer [A] and attach the punch unit [B] ( x 2,
M4 x 10).
Important
• At the hole just above the lock lever, use one of the screws from the paper
guide removed above to fasten the remaining two spacers to the frame.
• These extra spacers are used to adjust the horizontal position of the punch
holes.
11. At the front, secure the punch unit [C] with the large step screw ( x 1, M4 x
10).
12. Attach the punch unit knob [D] ( x 1).
1-66
Page 87

30 June 2006 PUNCH UNIT (B531/B812)
[C]
[E]
[D]
Installation
[B]
B531I007.WMF
[A]
[F]
B531I008.WMF
13. Connect the PCB harness connector [A] to CN129 of the finisher PCB and to
CN600 of the punch unit PCB.
14. Connect the HP Sensor 2 harness connector [B] to CN130 of the finisher PCB
and to HP Sensor 2.
15. Connect the single end of the hopper full sensor connector cable [C] to the
hopper full sensor on the arm ( x 1, clamp x 1), then connect the other two
connectors to HP Sensor 1 [D] and CN620 [E] of the punch PCB.
NOTE: No special DIP switch settings are required for this punch unit. The
punch unit sends an identification signal to the machine, so it knows
what type of punch unit has been installed.
16. Slide the hopper [F] into the finisher.
17. Re-attach the inner cover and rear cover.
18. Close the front door and re-connect the finisher to the machine.
1-67
Page 88

JOGGER UNIT (B513) 30 June 2006
1.12 JOGGER UNIT (B513)
The Jogger Unit B531 can be installed only on the 3000-Sheet Finisher B478/B706.
1.12.1 ACCESSORY CHECK
Check the accessories and their quantities against this list:
Description Q’ty
1. Jogger Unit B513 ............................................................... 1
2. Tapping Screws - M3 x 6 ................................................... 2
3. Installation Procedure ........................................................ 1
1-68
Page 89

30 June 2006 JOGGER UNIT (B513)
1.12.2 INSTALLATION PROCEDURE
Installation
[A]
B513I001.WMF
[B]
[D]
B513I002.WMF
[E]
[C]
B513I003.WMF
1. Turn the main machine switch off and disconnect the finisher from the main
frame.
2. Use the flat head of a screwdriver to remove the left upper cover [A] from the
finisher and discard it.
3. Remove the cover plate [B] from the jogger unit ( x 2). Save the screws.
4. With the jogger unit connector on the left side, hook the frame of the jogger unit
[C] into the holes on the left and right side of the finisher frame.
5. On the left side, fasten the connector [D] to the socket ( x 1).
6. On the left and right side, attach the jogger unit frame to the side of the finisher
with the screws [E] provided ( x 2).
7. Re-attach the jogger unit cover to its frame with the screws removed in step 2
( x 2).
1-69
Page 90

Z-FOLDING UNIT (B660) 30 June 2006
1.13 Z-FOLDING UNIT (B660)
1.13.1 ACCESSORY CHECK
Check the accessories and their quantities against this list:
Description Q’ty
1. Lock Bracket – Rear (Cover Interposer Tray) .................... 1
2. Lock Bracket – Rear ......................................................... 1
3. Lock Bracket – Front (Cover Interposer Tray)*1 ................ 1
4. Lock Bracket – Front*1 ...................................................... 1
5. Ground Plate (Cover Interposer Tray) .............................. 1
6. Ground Plate (Z-folding unit) ............................................ 1
7. Ground Plate (Finisher or Cover Interposer Tray) ............ 1
8. Right Docking Bracket....................................................... 1
9. Left Docking Bracket ........................................................ 1
10. Front Spacer *2 ................................................................. 1
11. Rear Spacer *2 .................................................................. 1
12. Power Cord........................................................................ 1
13. Sponge Strip...................................................................... 1
14. Screws M3 x 6................................................................... 8
15. Screws M4 x 6................................................................... 8
*1 Items 3, 4, are not required for the B706 (SR841) with B070/B071.
2
*
Items 10, 11 are not required for the B674 (SR861)
9
1
8
2
7
3
6
4
5
11
15
10
12
14
13
B660I003.WMF
1-70
Page 91

30 June 2006 Z-FOLDING UNIT (B660)
1.13.2 INSTALLATION PROCEDURE
Important!
• The Z-Folding Unit B660-17, -26, -27 can be installed and used only on the B674
Finisher (B140 series).
• The Z-Folding Unit B660-57, -66, -67 can be installed and used only on the B700
or B701 Finisher (B246 series).
Before You Begin
• Do the installation procedure for the finisher but do not dock it to the machine.
The Z-folding unit must be installed between the finisher and the main machine.
• Do the installation for the cover interposer tray (if necessary).
• If the finisher is already installed, disconnect the finisher from the main machine.
(If the cover interposer tray is installed on the finisher, it is not necessary to
remove the cover interposer tray.)
Installation
1-71
Page 92

Z-FOLDING UNIT (B660) 30 June 2006
Unpacking
[A]
[C]
[E]
[D]
[G]
[B]
[F]
B660I001.WMF
[I]
[I]
[H]
B660I002.WMF
CAUTION
Always switch the machine off and unplug the machine before doing any of
the following procedures.
1. Detach the head of the I/F connector [A].
2. Remove all tape [B] from unit.
3. Open the front door [C].
4. Raise the horizontal transport plate [D] and remove the cushion [E].
5. Pull out the Z-folding mechanism [F] and remove the cushion [G].
6. Open the right vertical transport cover [H].
7. Remove four spacers [I] by pulling on the string.
1-72
Page 93

30 June 2006 Z-FOLDING UNIT (B660)
Docking to the Finisher
[A]
[E]
[B]
[C]
[D]
Installation
[G]
[F]
B660I004.WMF
1. Remove the back cover of the finisher ( x 2).
2. Attach the left docking bracket [A] to the Z-folding unit ( x 2) (Bracket
provided with the finisher).
3. Attach the right docking bracket [B] to the Z-folding unit ( x 2). (Bracket
provided with the finisher).
4. Attach the rear locking bracket ( x 2).
• Attach rear bracket [C] if the cover interposer tray is installed.
• Attach rear bracket [D] if cover interposer tray is not
installed.
5. Attach the front locking bracket ( x 2).
NOTE: This step is required only when the Z-folding unit is installed with the
B674 (SR861).
• Attach front bracket [E] if the cover sheet interposer is installed.
• Attach front bracket [F] if the cover sheet interposer is not
installed.
6. Attach the ground plate [G] to the Z-folding unit ( x 2).
1-73
Page 94

Z-FOLDING UNIT (B660) 30 June 2006
1. Remove the tape from the sponge [A] and
attach it to the Z-folding unit.
2. At the left bottom edge of
the Z-folding unit, remove
the bracket [B] ( x 1).
3. Push in the support [C].
4. Reattach the bracket [B] (
x 1).
[C]
[A]
[B]
[B]
5 mm
B660I005.WMF
B660I006.WMF
5. If the cover interposer tray is
attached to the finisher, attach the
ground plate [D] to the Z-folding
unit ( x 2)
CAUTION
With the support retracted,
the Z-folding unit tips easily!
[D]
B660I102.WMF
1-74
Page 95

30 June 2006 Z-FOLDING UNIT (B660)
[B]
Installation
[C]
[F]
[E]
B660I013.WMF
[A]
[D]
6. Attach the ground plate [A] ( x 2) to the finisher (or the cover interposer tray).
NOTE: This is the ground with the flat plate attached with 2 vertical screws.
7. Open the front door of the finisher.
8. Pull out the lock lever [B] of the finisher ( x 1).
-or-
If the cover interposer tray is installed, pull out the lock lever of the cover
interposer tray.
9. Dock the Z-folding unit to the finisher.
10. Fasten the screw [B] ( x 1).
11. Fasten screw [E] to front lock bracket [F].
NOTE:
• Screw [E] is not needed if the Z-folder will be installed with a B246 Series
machine and the SR4000 B700 or SR970 B701.
• However, both brackets are required. Do not remove bracket .
12. Fasten the rear lock bracket [D] ( x 1).
1-75
Page 96

Z-FOLDING UNIT (B660) 30 June 2006
Docking to the Main Frame
[G]
[C]
[H]
[A]
[D]
[I]
[B]
B660I007.WMF
[E] [F]
1. Fasten the two docking brackets [A] (provided with the Z-folding unit) to the
main machine ( x 2 each).
2. At the right bottom edge of the Z-folding unit, remove the screw and bracket,
push in the support [B], then reattach the screw and bracket
3. Pull the top cover [C] toward you then raise it.
4. Raise the horizontal transport plate [D] to the left.
5. Pull out the Z-folding mechanism [E].
6. Pull out the Z-folding unit lock lever [F] ( x 1).
7. At the right bottom edge of the Z-folding unit, confirm that the breaker switch is
ON.
NOTE: This switch should display “—”. If you see “O”, set the switch to “—”.
The machine will not recognize the Z-folding unit if this switch is off.
8. Dock the Z-folding unit [G] to the main machine.
9. Push in the lock lever [F] and fasten it ( x 1).
10. Push in the Z-folding mechanism [E], lower the horizontal transport plate [D],
then close the front door [C].
11. Attach the I/F cable [H] of the Z-folding unit to the main machine.
12. Connect the power cord [I] to the Z-folding unit.
1-76
Page 97

30 June 2006 Z-FOLDING UNIT (B660)
[A]
Installation
13. Reattach the finisher rear cover ( x 2).
14. Connect the I/F cable [A] of the finisher to the Z-folding unit.
15. Raise or lower the nuts ,,,to level the machine.
B660I009.WMF
1-77
Page 98

2000/3000 SHEET FINISHERS (B700/B701) 30 June 2006
1.14 2000/3000 SHEET FINISHERS (B700/B701)
1.14.1 ACCESSORIES
Check the accessories from the box against the following list.
Description Q’ty
1. Cushion (with double-sided tape) ...................................... 1
2. Ground (earth) plate .......................................................... 1
3. Tapping screws - M4 x14.................................................. 4
4. Tapping screws - M3 x 8................................................... 1
5. Leveling Shoes .................................................................. 3
6. Upper output tray ............................................................... 1
7. Lower output tray (B700 Only)........................................... 1
8. Auxiliary Tray..................................................................... 1
9. Gasket ............................................................................... 1
10. Front joint bracket .............................................................. 1
11. Rear joint bracket............................................................... 1
Auxiliary Tray for Shift Tray (B700 Only – Not Shown)...... 1
Auxiliary Tray for Proof Tray (B700 Only – Not Shown) .... 1
Auxiliary Tray Storage Pocket (B700 Only – Not Shown).. 1
*1 3 screws M3x6 are provided for the B700.
1
2
3
4
5
6
11
10
9
8
7
B700I201.WMF
1-78
Page 99

30 June 2006 2000/3000 SHEET FINISHERS (B700/B701)
1.14.2 INSTALLATION PROCEDURE
This section describes the common installation instructions for two peripheral
devices:
• B700 Booklet Finisher. Does punching, shifting, corner stapling, and booklet
(saddle-stitch) stapling.
• B701 Finisher. Does punching, shifting, and corner stapling but no booklet
(saddle-stitch) stapling unit.
Important!
• The 2000-Sheet Finisher B700 can be installed only on a B246 Series machine.
• The 2000-Sheet Finisher B701 can be installed only on a B246 Series machine.
NOTE: Differences in the installation procedures are noted as “B700” or “B701”.
Removing Tapes and Retainers
B700 B701
Installation
B700I102.WMF
B701I102.WMF
WARNING!
Always turn the machine off and unplug the machine before doing any of
the following procedures.
1. Unpack the machine and remove all the wrapping.
2. Remove all filament tape and shipping retainers from the finisher.
1-79
Page 100

2000/3000 SHEET FINISHERS (B700/B701) 30 June 2006
B700
B700I202.WMF
B701
B701I202.WMF
3. Open the front door.
4. Remove all tapes and shipping retainers inside the finisher.
1-80
 Loading...