

Page 1

Z-Pi 7
SKU: AEOEZWA025
Used in this guide.
Artículos utilizados en este manual / Utilisé dans ce guide / In dieser Gebrauchsanweisung
verwendete Bezeichnungen / Usato in questa guida / Gebruikt in deze handleiding / Används
i den här handboken.
Important safety information.
Please read this and the online guide(s) at support.aeotec.com/zp7 carefully. Failure to
follow the recommendations set forth by Aeotec Limited may be dangerous or cause a
violation of the law. The manufacturer, importer, distributor, and/or reseller will not be held
responsible for any loss or damage resulting from not following any instruction in this guide
or in other materials.
is intended for indoor use in dry locations only. Do not use in damp, moist, and / or wet
locations.
Quick start.
The following will step you through using Z-Pi 7 when it is attached to a host, such as a
PC,as your primary Z-WaveTM controller. Please ensure that your automation software
supports the Z-Wave Serial Bridge API.
Please make sure the host controller is pre-installed; this includes any
corresponding operating system may need. In most cases, the host controller automatically
installs the required driver. If not, the driver can be downloaded from www.silabs.com part
CP2102N.
This device and every other certified Z-Wave device can be used together with any other
certified Z-Wave device regardless of brand and origin as long as both are suited for the
s
ame frequency range. All mains operated nodes within the network will act as repeaters
regardless of vendor to increase reliability of the network.
drivers that the
Expanded quick start steps are available at support.aeotec.com/zp7.
1. Plug Z-Pi 7 onto a host controller (that can be any Raspberry Pi, Orange Pi etc. with
GPIO’s).
Page 2
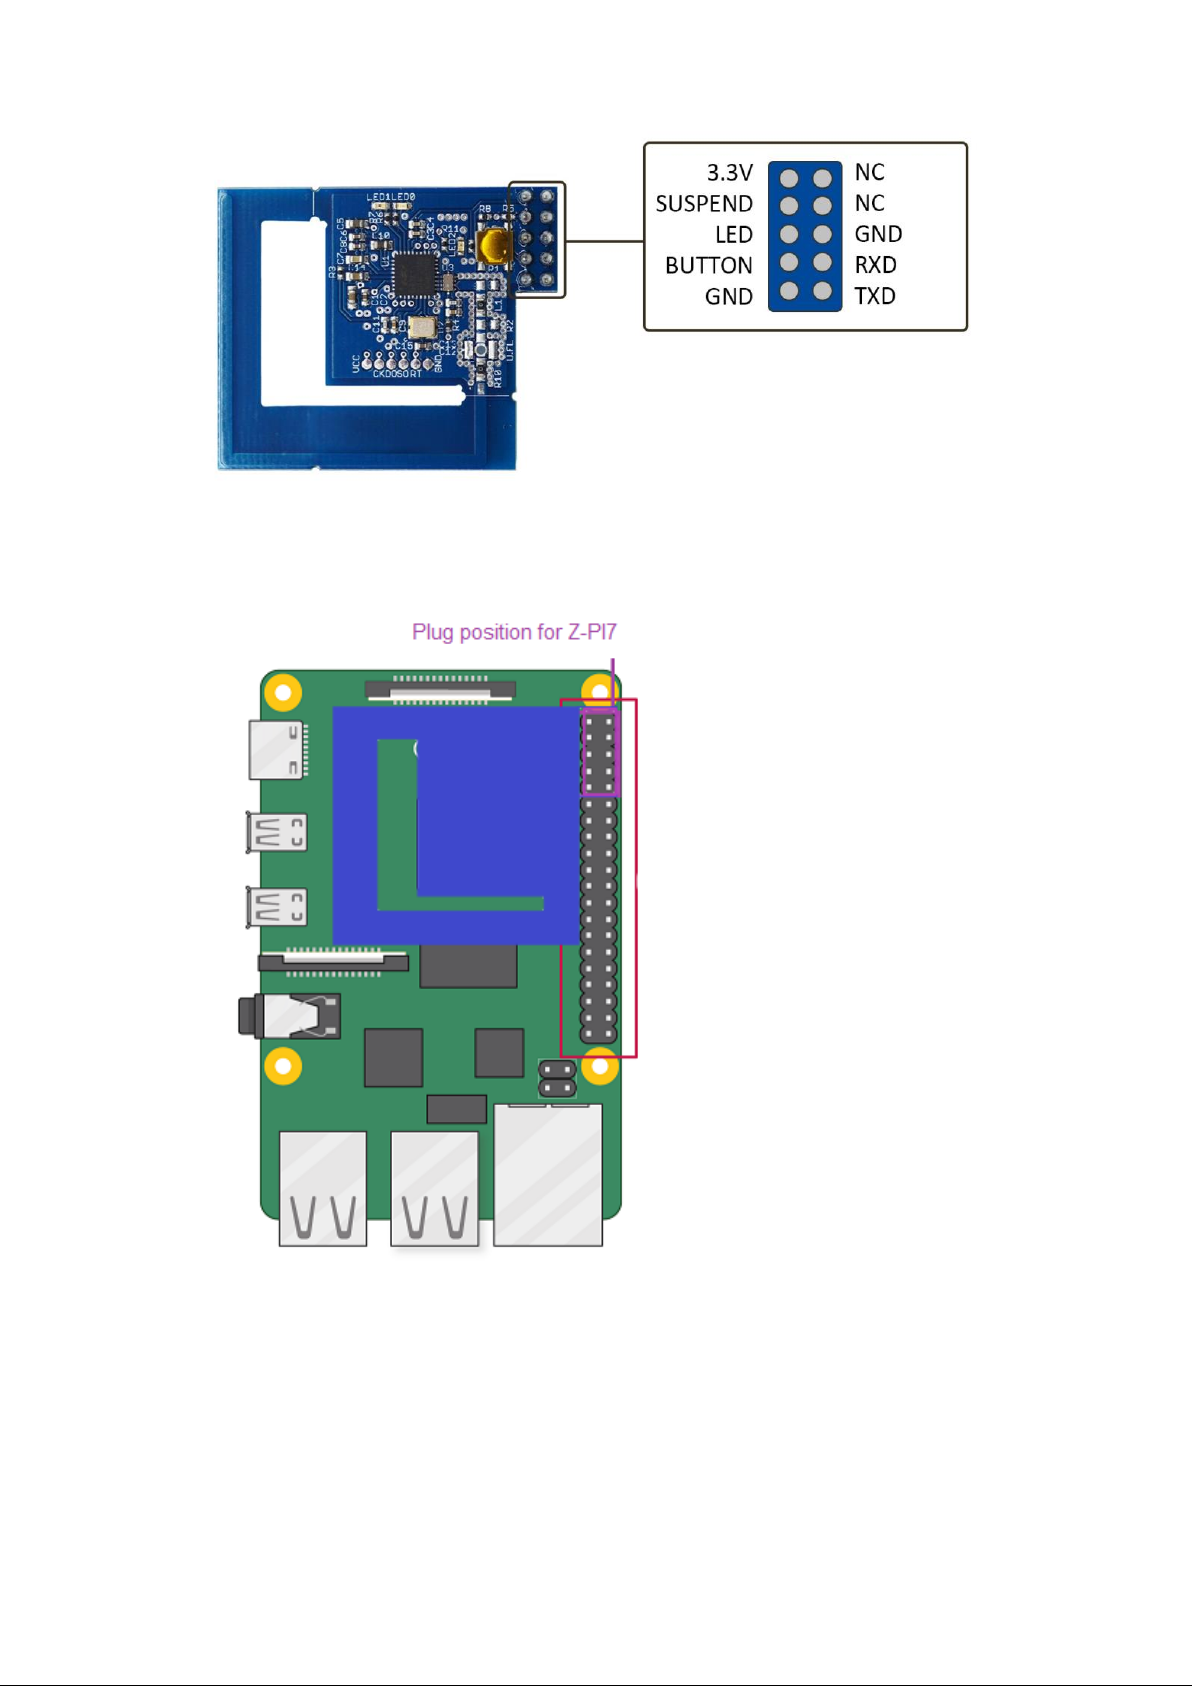
Raspberry Pi
Page 3

Orange Pi Zero
2. Determine the virtual port that your Z-Pi 7 is connected to. If using Linux
executing“dmesg | grep tty” through cmd prompt will give you a list of all tty devices
connected. Usually Z-Pi 7 shows as a /dev/ttyAMA0 device.
3. Open the selected third party software.
4. Follow that software’s instructions for connecting a Z-Wave adapter. Select the COM
or the virtual port Z-Pi 7 is associated with.
In most cases, any devices already paired with Z-Pi 7 network will automatically show up in
the software’s interface.
To include a new device into the system.
1. Set your automation software into its ‘add device’ mode in order to connect a Z-
Wave device. Refer to the software’s instructions if you are unsure of how to perform
this step.
2. On Aeotec devices, press the Action Button on the device which you want to add into
the Z-Wave network. For Z-Wave devices from other makers,, please refer to the
device’s manual for inclusion operation.
3. You will see the name of the device on the software’s interface when it is successfully
added.
4. Repeat the previous to include any further devices.
Reset your Z-Pi7.
Z-Pi 7 also can be reset to the factory defaults settings via the host software.
1. The host software must take control of the Z-Pi 7.
Find the Reset Z-Wave controller option/function in your chosen software.
2.
Note: Please use this procedure only when the network primary controller is missing or
otherwise inoperable.
Get help & learn
Should you encounter any problem with Z-Pi 7, visit support.aeotec.com/zp7 or contact our
support team via aeotec.com/contact. You can also learn more about Z-Pi 7 features,
configuration options, and technical specifications at the link.
more.
 Loading...