

Page 1

29-09-2020 16:16Aeotec Water Sensor 6 user guide : Aeotec Group
Pagina 1 van 9https://aeotec.freshdesk.com/support/solutions/articles/6000171886-water-sensor-6-user-guide-
Water Sensor 6 user guide.
Modified on: Wed, 20 Mar, 2019 at 11:02 PM
Aeotec Water Sensor 6.
Aeotec Water Sensor 6 (https://aeotec.com/z-wave-water-sensor) has been crafted as a safety sensor to help detect
and prevent floods and water leaks using Z-Wave Plus (http://aeotec.com/z-wave-plus). It is powered by Aeotec’s
Gen5 (http://aeotec.com/z-wave-gen5) technology.
To see whether Water Sensor 6 is known to be compatible with your Z-Wave system or not, please reference our Z-
Wave gateway comparison (http://aeotec.com/z-wave-gateways) listing. The technical specifications of Water
Sensor 6 (https://aeotec.freshdesk.com/solution/articles/6000176513-water-sensor-6-technical-specification-)can be
viewed at that link.
Familiarize yourself with your Water Sensor 6.
Water Sensor 6 has the following elements;
Page 2
29-09-2020 16:16Aeotec Water Sensor 6 user guide : Aeotec Group
Pagina 2 van 9https://aeotec.freshdesk.com/support/solutions/articles/6000171886-water-sensor-6-user-guide-
Important safety information.
Please read this and other device guides carefully. Failure to follow the recommendations set forth by Aeotec Limited
may be dangerous or cause a violation of the law. The manufacturer, importer, distributor, and /or reseller will not be
held responsible for any loss or damage resulting from not following any instructions in this guide or in other
materials.
Keep product and batteries away from open flames and extreme heat. Avoid direct sun light or heat exposure. Always
remove all batteries from products that are being stored and not used. Batteries may damage the appliance if they
leak. Do not use rechargeable batteries. Ensure correct polarity when inserting the batteries. Improper battery use
may damage the product.
To optimally detect water and leaks, Water Sensor 6 is intended for use in dry locations that then become wet.
Contains small parts; keep away from children.
Quick Start.
Power on Water Sensor 6.
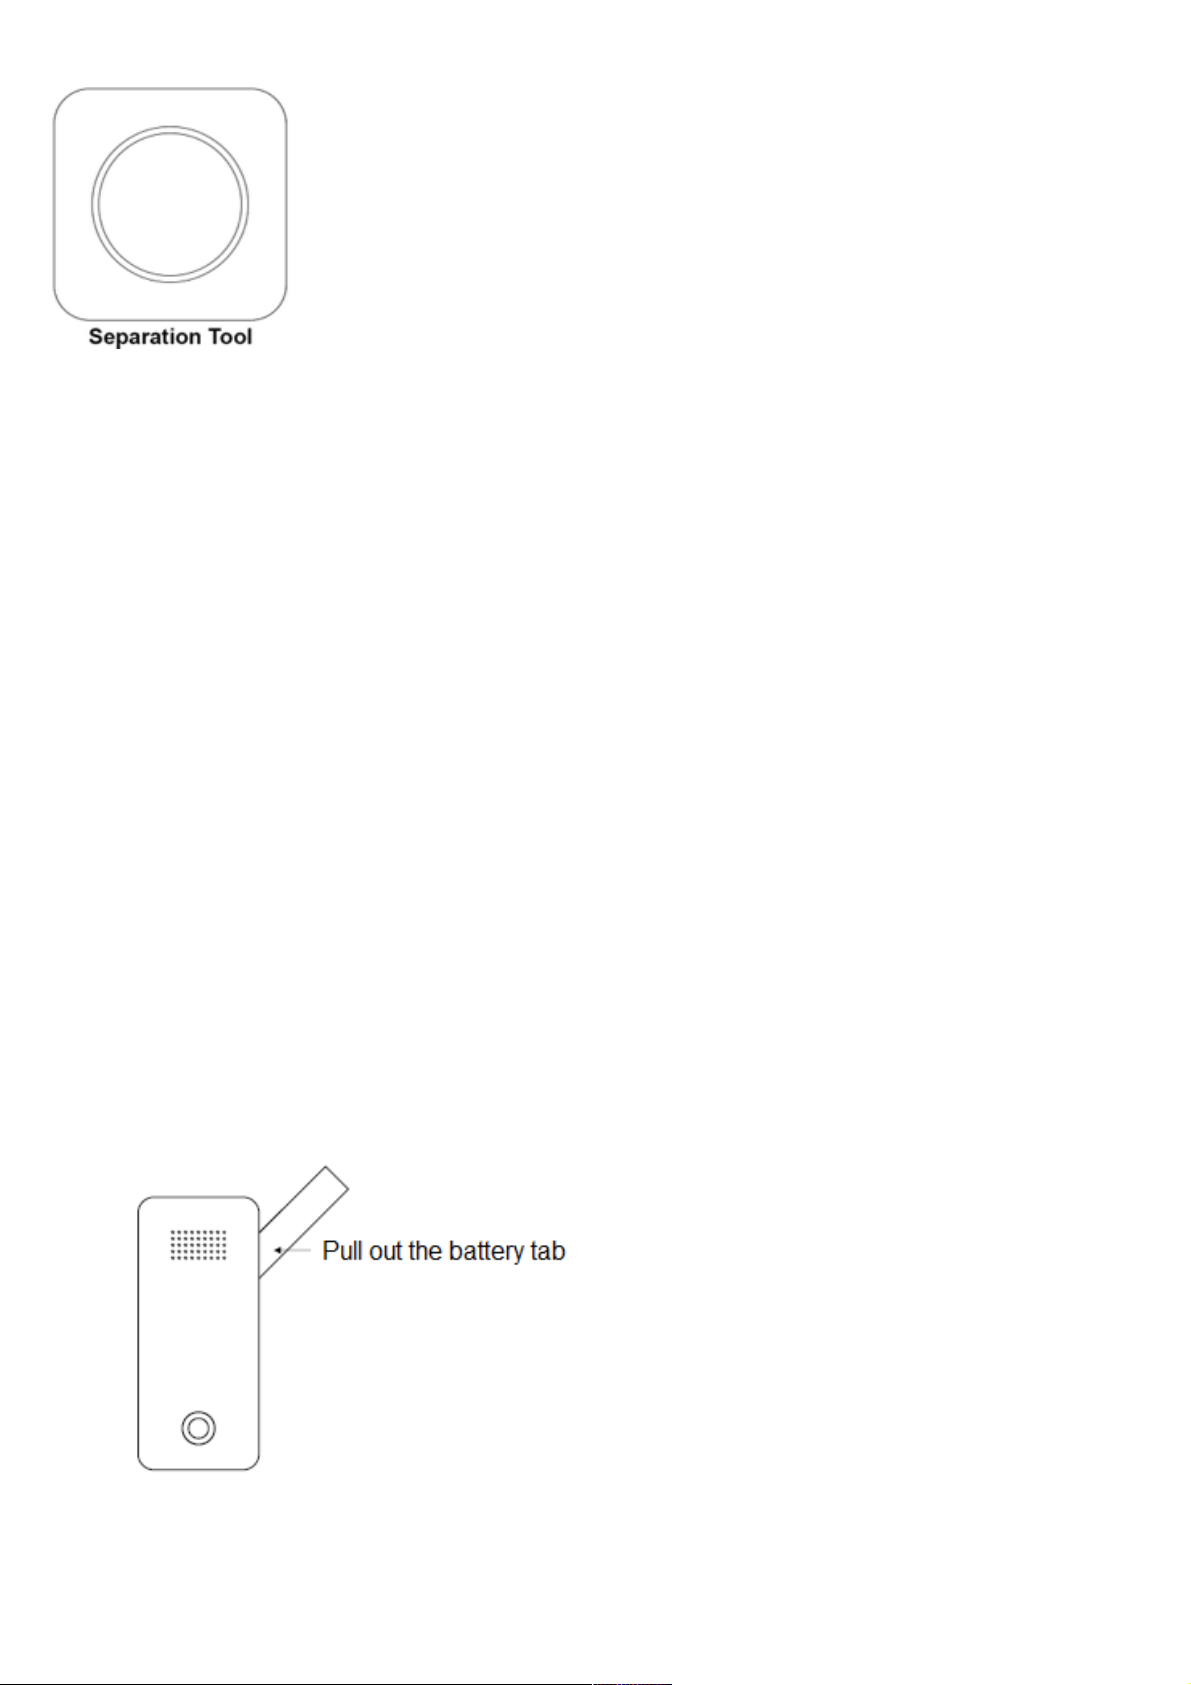
Water Sensor 6 ships with its battery pre-installed but disconnected. To connect the battery;
1. Remove the battery tab by pulling it away from water sensor.
2. Press the sensor's Action Button; its LED will blink to indicate that the sensor is powered.
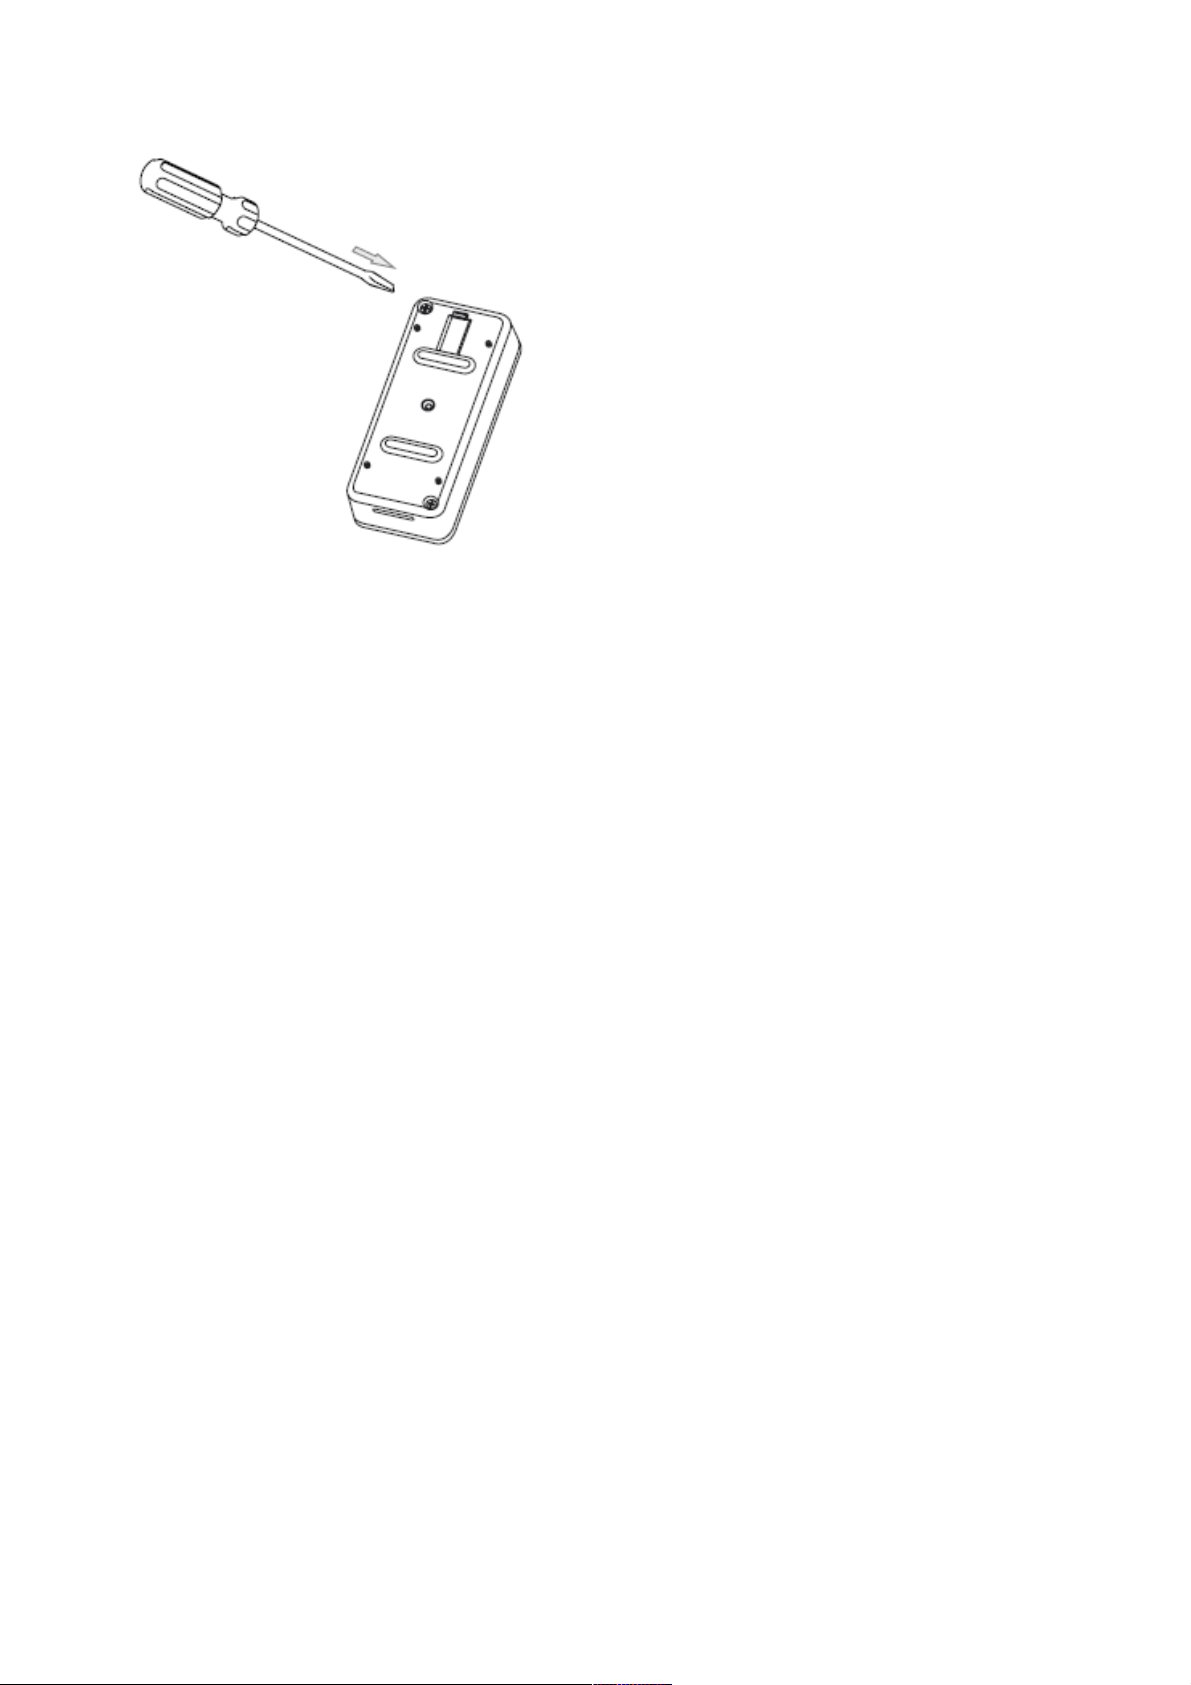
3. Secure Water Sensor 6's water proof cover using the screw provided in the package. On the rear of Water
Page 3
29-09-2020 16:16Aeotec Water Sensor 6 user guide : Aeotec Group
Pagina 3 van 9https://aeotec.freshdesk.com/support/solutions/articles/6000171886-water-sensor-6-user-guide-
Sensor 6 you'll find 2 screw holes in opposing corners; one screw hole will not contain a screw. Insert the
provided screw into the empty hole and tighten it with a screw driver.
After securing the sensor plate your Water Sensor unit will have the waterproof rating of IP65.
Adding your Sensor to your Z-Wave Network.
With your sensor powered on you'll need to add it to your Z-Wave network.
1. Put your Z-Wave controller / gateway into "add new product" mode. This is sometimes referred to as pairing
or inclusion mode within some software. If you are unsure of how to do this, please refer to your gateway's
user manual.
2. Water Sensor 6 can be connected to your Z-Wave network using standard or advanced security. Standard
security is recommended - advanced security will decrease battery life and response time and is also typically
not needed for devices that do not control access or the electronics in your home.
To connect Water Sensor 6 to your gateway using standard security: Press its Action Button once; its LED
flash will flash green which will indicate it has entered pairing mode.
To connect Water Sensor 6 to your gateway using advanced security: Tap its Action Button twice within 1
second; its LED will flash blue to indicate that it has entered pairing mode.
3. If your Water Sensor was added successfully, its RGB LED will change colour for 2 seconds: solid green with
basic security or solid blue for advanced security. After 2 seconds have passed, Water Sensor 6 will enter
Wakeup Mode during which its LED will flash orange to indicate that it is awake and ready to receive
commands and configurations from your Z-Wave gateway. You may tap its Action Button to put it back to
sleep.
Should Water Sensor 6 fail to connect to your gateway its LED will be red for 2 seconds after which it'll return to
displaying a gradient of colours. If pairing fails please follow the previous steps again ensuring that your Z-Wave
gateway is in the correct mode.
Page 4

29-09-2020 16:16Aeotec Water Sensor 6 user guide : Aeotec Group
Pagina 4 van 9https://aeotec.freshdesk.com/support/solutions/articles/6000171886-water-sensor-6-user-guide-
Your Water Sensor 6 will now work as part of your smart home; you can configure it, use it to control events and
triggers, or view its status from your Z-Wave software or smartphone application.
Optimally placing Water Sensor 6.
The final installation steps of Water Sensor 6 are very simple, all you need to do is choose the area that you want
Water Sensor 6 to monitor leaks or floods in.
Water Sensor 6 is optimally placed on a flat surface where floods, leaks and drips can occur; these can include your
washroom or kitchen. When placing it, ensure that its detection probes touch the surface being monitored; when
water touches any 2 of the 4 probes on Water Sensor 6 an alert will be sent to your Z-Wave network. Below are some
of the possible situations that can trigger Water Sensor 6.
1. Water is detected by sensing point 2 and 4.
2. Water is detected by sensing point 1 and 3.
3. Water is detected by sensing point 1 and 2.
4. Water is detected by sensing point 3 and 4.
5. Water is detected by sensing point 1, 2, 3 and 4.
Page 5

29-09-2020 16:16Aeotec Water Sensor 6 user guide : Aeotec Group
Pagina 5 van 9https://aeotec.freshdesk.com/support/solutions/articles/6000171886-water-sensor-6-user-guide-
These situations will cause Water Sensor 6 to send a water presence or trigger event to your gateway. Should water
clear from the area where Water Sensor 6 is installed, the sensor will also send a separate command to your Z-Wave
gateway informing it that there is no more water in the area.
Installing Dock for Water Sensor 6.
You can choose to install Water Sensor 6 on Dock for Water Sensor 6 for permanent power via USB and installation
of probes to extend the detection to different locations. You can follow the Dock for Water Sensor 6 user guide
(https://aeotec.freshdesk.com/solution/articles/6000176812-dock-for-water-sensor-6-user-guide-) to follow up with the
installation steps.
Additional information on other Gateways uses.
Smartthings Hub.
Smartthings hub has basic compatibility to the Water Sensor 6, it does not allow you to access its advanced
configuration functions readily. In order to make full use of your Water Sensor 6 to its fullest, you must install a
custom device handler in order to access other functions of the switch.
You can find the article for the custom device handler here:
https://aeotec.freshdesk.com/solution/articles/6000184942-water-sensor-6-smartthings-hub-device-handler-
(https://aeotec.freshdesk.com/solution/articles/6000184942-water-sensor-6-smartthings-hub-device-handler-)
Page 6

29-09-2020 16:16Aeotec Water Sensor 6 user guide : Aeotec Group
Pagina 6 van 9https://aeotec.freshdesk.com/support/solutions/articles/6000171886-water-sensor-6-user-guide-
The article contains the github code, and information used to create the article. If you need help installing the custom
device handler, please contact support about this.
Vera hub.
Water Sensor 6 isn't compatible without changing some settings through your Vera gateway. You can find steps to
allow Water Sensor 6 to work in your Vera hub here: https://aeotec.freshdesk.com/solution/articles/6000216341-
water-sensor-6-with-vera (https://aeotec.freshdesk.com/solution/articles/6000216341-water-sensor-6-with-vera)
Advanced functions.
Wake up Water Sensor 6.
You can manually wake up Water Sensor 6 for 10 minutes in order to send it new configurations or settings from your
Z-Wave gateway.
1. Press and hold the Action Button of Water Sensor 6 for 3 seconds.
2. When the LED becomes an orange/yellow LED color after 3 seconds, release the Action Button.
3. Your sensor will now blink rapidly (orange LED color) to indicate that it is awake. Your Water Sensor 6 will
continue to stay awake for 10 minutes before going back to sleep on its own.
4. Once you are done configuring your sensor, to conserve battery power, place your Water Sensor back to sleep
by tapping its Action Button once.
Alternatively, if your gateway queues configuration settings or other commands.
1. From your gateway, enter the configuration settings that you want.
2. Your gateway will wait for Water Sensor to wake up to send the command. Typically your gateway will confirm
that Water Sensor 6 will need to wake up.
3. Tap the Action Button once on Water Sensor, and your gateway will automatically send the configurations to
your Water Sensor 6.
Removing Water Sensor 6 from your Z-Wave Network.
This is the preferred method of removing your Water Sensor 6. Using this method will ensure that Water Sensor does
not leave a phantom/failed node in your network. Sometimes phantom/failed nodes become impossible or difficult to
remove.
This method can be used with any Primary Z-Wave Gateway (Water Sensor does not need to be paired for an
unsuccessful pair).
1. Set your Z-Wave gateway into unpair/removal mode.
2. Tap the Action Button 3x times on Water Sensor 6.
3. If it was successful, the RGB LED of your Water Sensor 6 will become a rainbow gradient, and your gateway
should confirm a successful removal.
4. Repeat steps 1-3 if you do not see the rainbow gradient LED.
Page 7

29-09-2020 16:16Aeotec Water Sensor 6 user guide : Aeotec Group
Pagina 7 van 9https://aeotec.freshdesk.com/support/solutions/articles/6000171886-water-sensor-6-user-guide-
Testing Health Connectivity.
Note - Health test does not test for routing communication health, only tests for direct communication with your
gateway to determine if it has a healthy direct connection.
You can determine the health of your Water Sensor 6s connectivity to your gateway using a manual button press,
hold, and release function which is indicated by the LED color.
1. Press and hold Water Sensor 6 Action button
2. Wait until the RGB LED turns into a Purple Color
3. Release Water Sensor 6 Action Button
The RGB LED will blink its Purple color while sending ping messages to your gateway, when it has finished, it will
blink 1 of 3 colors:
Red = Bad Health
Yellow = Moderate Health
Green = Great Health
Be sure to watch for the blink, as it will only blink once very quickly.
Manual factory reset Water Sensor 6.
We highly suggest using the gateway to remove your Water Sensor 6 from the network, but in the case that you no
longer have a controller on hand and you'd like to reset your Water Sensor 6 in preparation for a new controller, follow
the steps below:
1. Press and hold the Action Button of your Water Sensor 6 for 20 seconds.
2. Wait until the RGB LED turns into a green or rainbow gradient Color after 20 seconds of holding.
3. Release the Action Button.
4. If your Water Sensor 6 has been successfully factory reset, the RGB LED will be active with a colorful gradient
for 3 seconds before disappearing. When you tap the Action Button on Water Sensor, its green LED will blink
rapidly. If the factory reset was unsuccessful, the green LED will remain on solid for a few seconds when you
tap the Action Button.
Replacing your sensors battery.
Your Water Sensor 6 uses 1x CR123A battery that has a 2 year battery life maximum. Ultimately the battery life of the
sensor will highly depend on the uses and settings of Water Sensor. When battery power has depleted, below are the
steps you can take to replace the battery in your Water Sensor 6.
1. Unscrew the 2 screws from Water Sensor 6. On the rear of Water Sensor 6 you'll find 2 screws in opposing
corners.
Page 8

29-09-2020 16:16Aeotec Water Sensor 6 user guide : Aeotec Group
Pagina 8 van 9https://aeotec.freshdesk.com/support/solutions/articles/6000171886-water-sensor-6-user-guide-
2. Separate the battery cover from the Sensor unit. Use the separation tool to separate the battery cover by pushing
or moving the separation along the gap between the battery cover and the sensor unit.
Alternatively, you may use your fingers instead:
a. Pull open a small gap between the battery cover and Sensor unit.
Page 9

29-09-2020 16:16Aeotec Water Sensor 6 user guide : Aeotec Group
Pagina 9 van 9https://aeotec.freshdesk.com/support/solutions/articles/6000171886-water-sensor-6-user-guide-
b. Push or move your fingernail along the gap between the battery cover and Sensor unit.
3. Once the battery cover is separated from the Sensor Unit, you can pull out and change the battery located in the
center of the Water Sensor 6 hardware.
 Loading...