

Aeotec WallMote User Manual
29-09-2020 16:08Aeotec Wallmote user guide : Aeotec Group
Pagina 1 van 9https://aeotec.freshdesk.com/support/solutions/articles/6000176572-wallmote-user-guide-
WallMote user guide.
Modified on: Mon, 16 Mar, 2020 at 2:48 AM
Aeotec WallMote.
Aeotec Wallmote was developed to control devices and scenes with Z-Wave Plus (http://aeotec.com/z-wave-plus). It
is powered by Aeotec’s Gen5 (http://aeotec.com/z-wave-gen5) technology. You can find out more about Wallmote
(http://aeotec.com/z-wave-wireless-switch)by following that link.
To see whether Wallmote is known to be compatible with your Z-Wave system or not, please reference our Z-Wave
gateway comparison (http://aeotec.com/z-wave-gateways) listing. The technical specifications of Wallmote
(https://aeotec.freshdesk.com/solution/articles/6000176570-wallmote-technical-specification-) can be viewed at that
link.
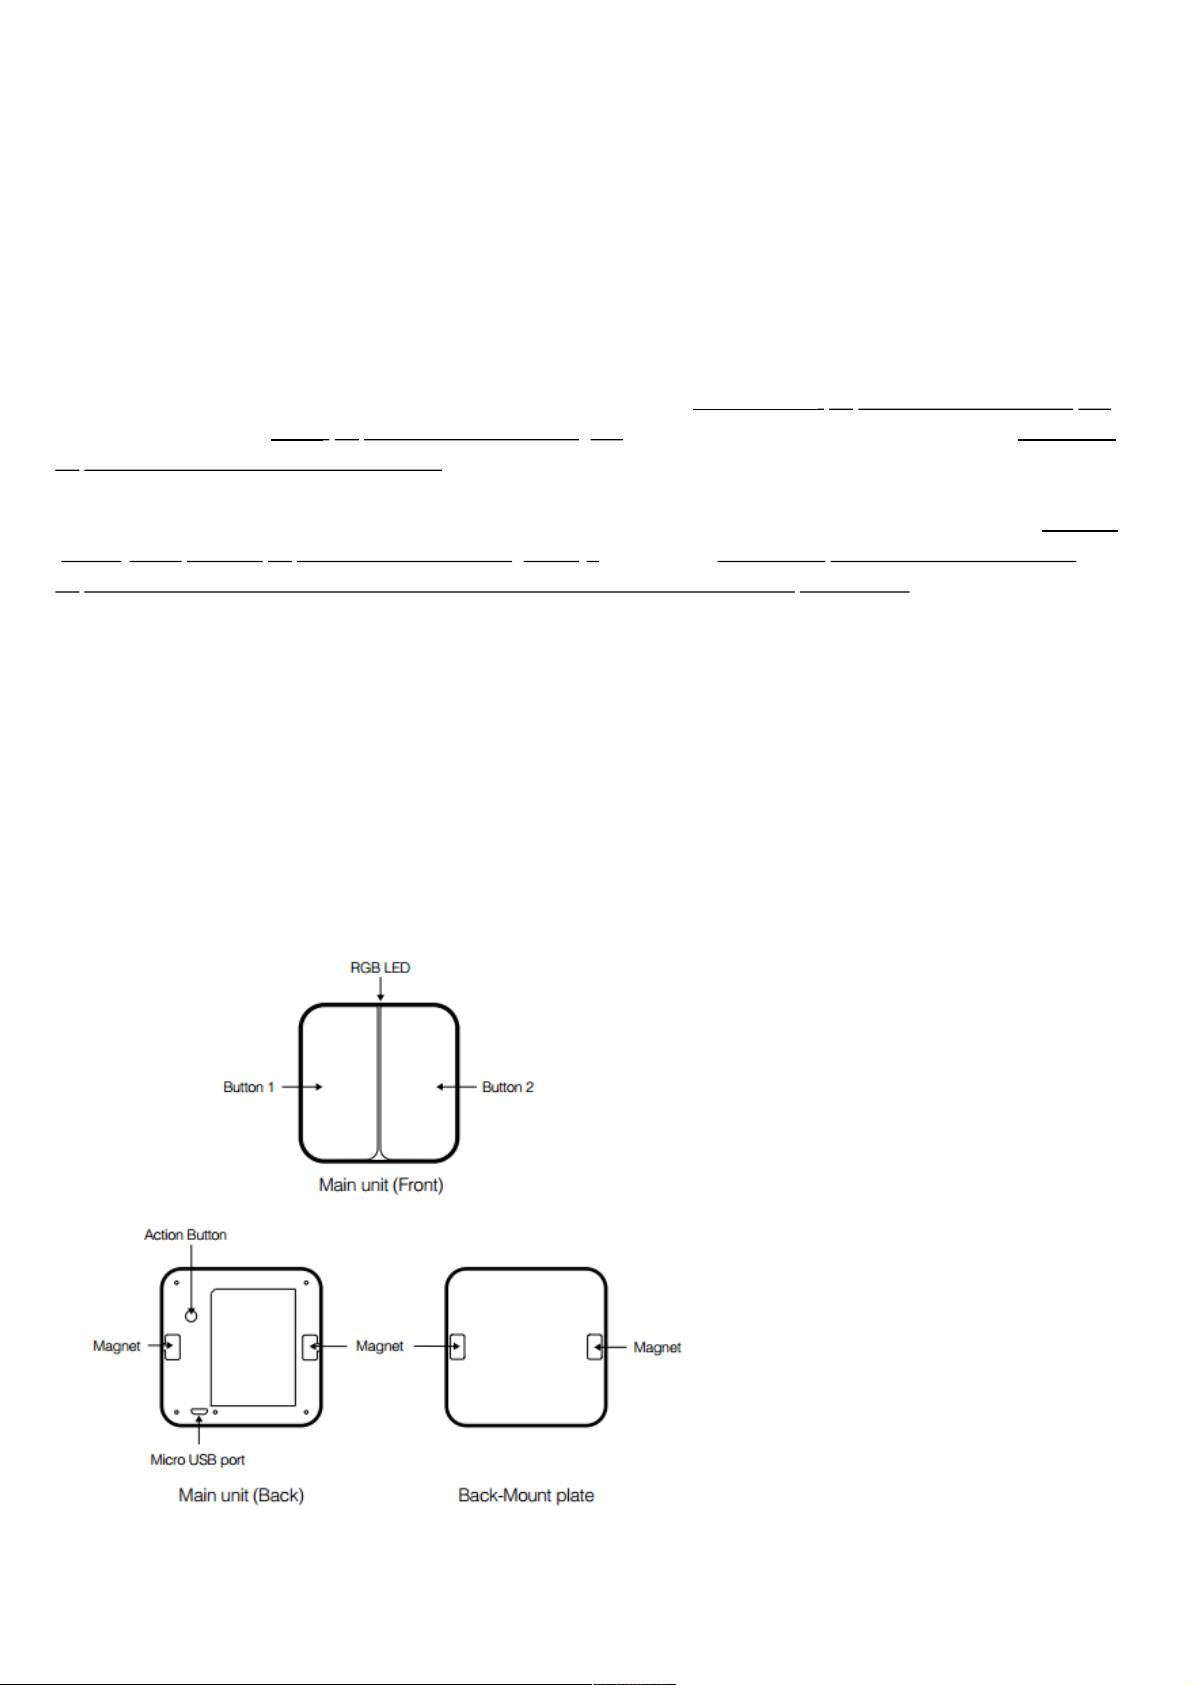
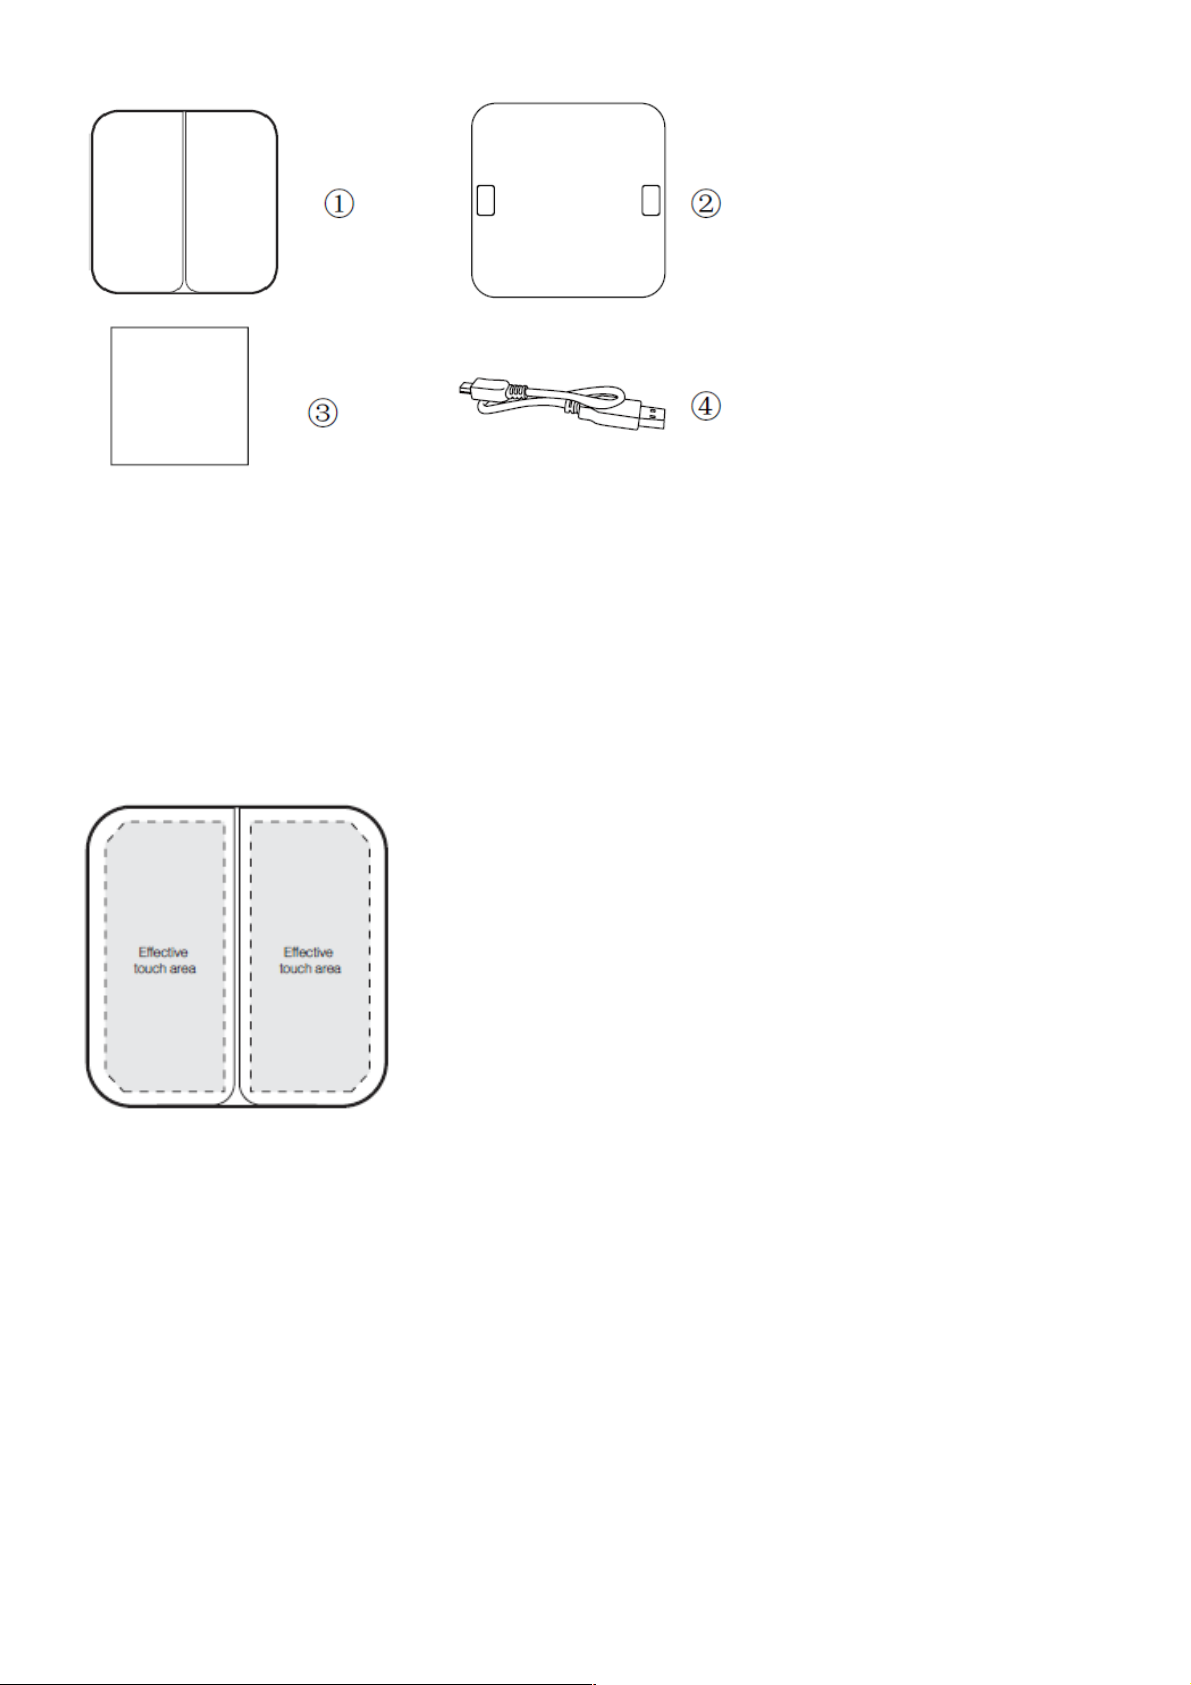
Familiarize yourself with your WallMote.
1. WallMote
2. Back-Mount plate
3. Double-sided tape
4. Micro USB cable
29-09-2020 16:08Aeotec Wallmote user guide : Aeotec Group
Pagina 2 van 9https://aeotec.freshdesk.com/support/solutions/articles/6000176572-wallmote-user-guide-
Note: When the WallMote is placed on somewhere, keep the glass button surface upward direction and no other
physical surface or desktop contact with the glass button surface to avoid false triggering and battery consumption.
Effective Touch area for WallMote.
To further understand WallMote, it has a effective touch area for each available button. Any touch outside of the
effective touch area will not trigger the WallMote button.
Important safety information.
Please read this and other device guides carefully. Failure to follow the recommendations set forth by Aeotec Limited
may be dangerous or cause a violation of the law. The manufacturer, importer, distributor, and / or reseller will not be
held responsible for any loss or damage resulting from not following any instructions in this guide or in other
materials.
Keep product and batteries away from open flames and extreme heat. Avoid direct sun light or heat exposure.
Improper battery use may damage the product.
29-09-2020 16:08Aeotec Wallmote user guide : Aeotec Group
Pagina 3 van 9https://aeotec.freshdesk.com/support/solutions/articles/6000176572-wallmote-user-guide-
WallMote and WallMote Quad are intended for indoor use in dry locations only. Do not use in damp, moist, and / or
wet locations. Do not power permanently. Do not charge for more than 3 hours at a time. Do note apply permanent
power.
Quick start.
Installing your WallMote.
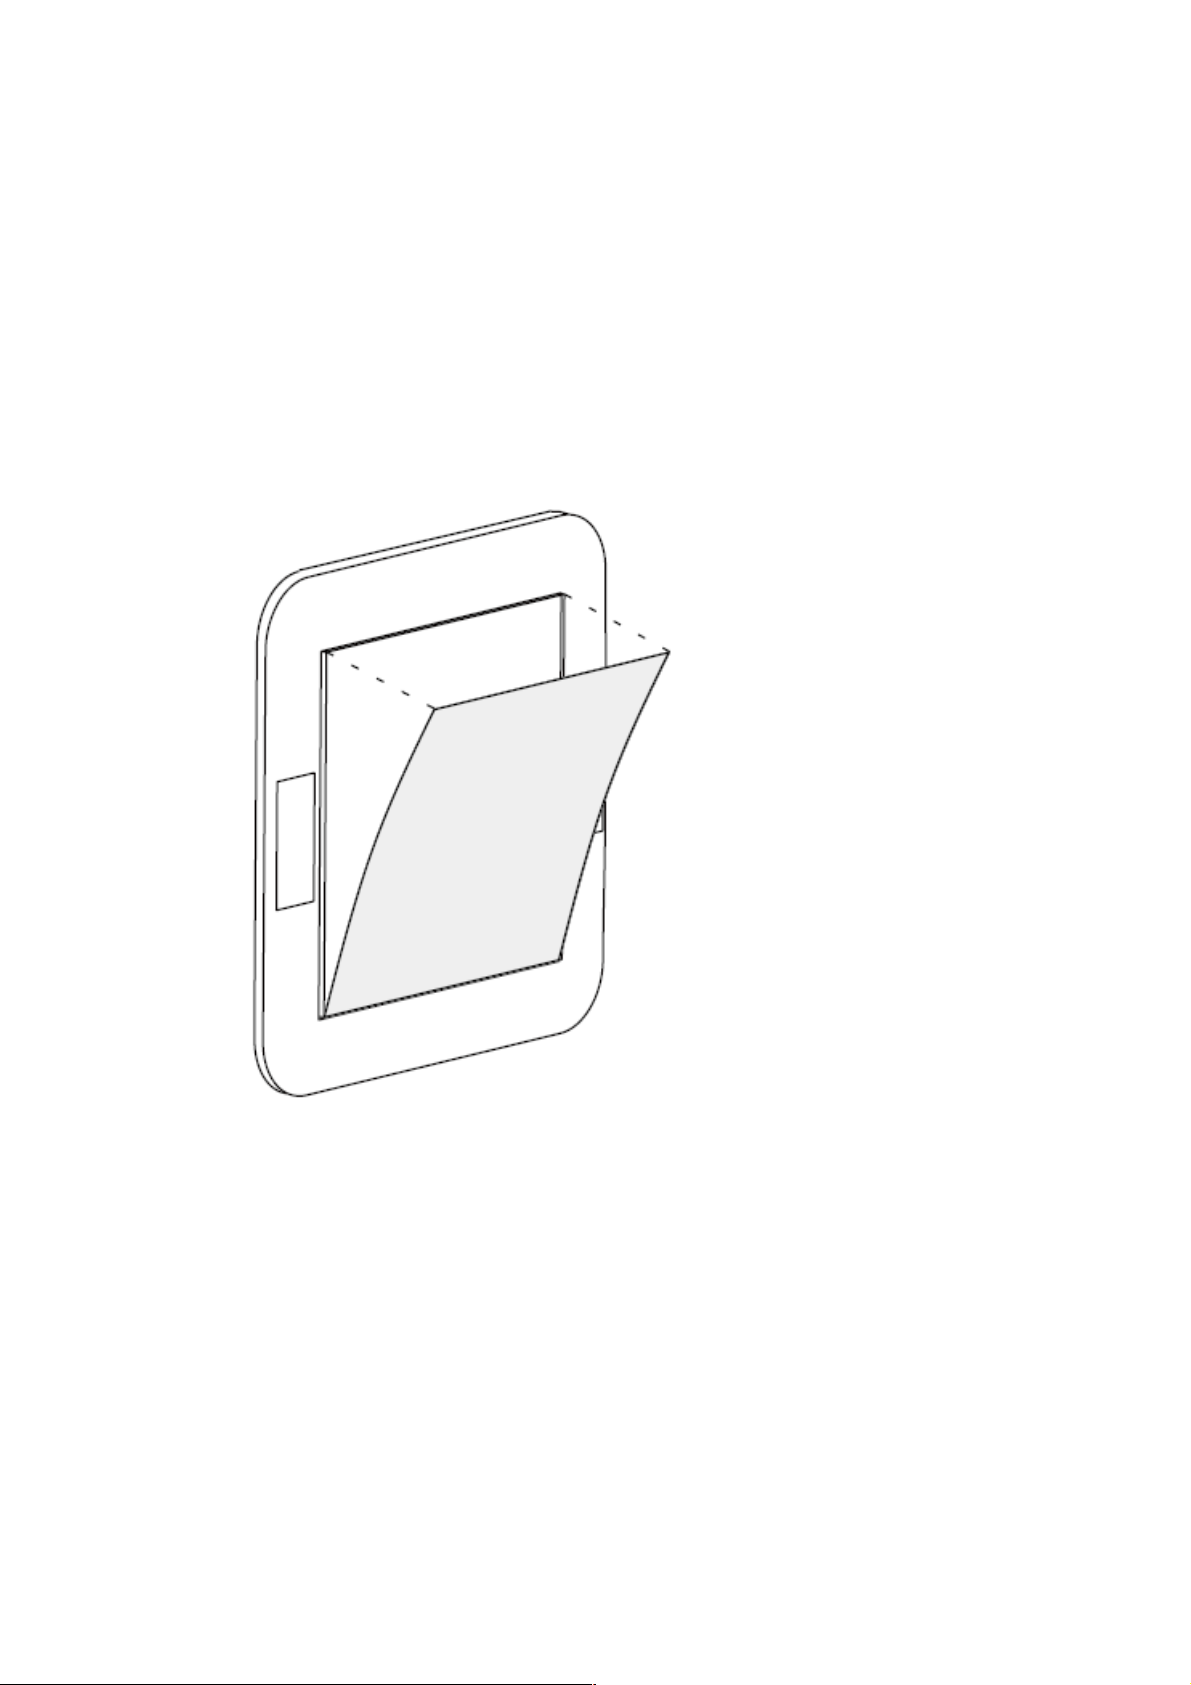
1. Selecting a place or wall in your home to affix your WallMote Back Mount plate.
2. Using the Double-sided tape, wipe the two surfaces clean of any oil or dust with a damp towel. When the surface
has completely dried, peel one side of the tape back and attach it to the corresponding section on the rear side of the
Back Mounting Plate.
Adding your WallMote to your Z-Wave network.
With your mounting plates prepared to hold each component of your WallMote, it’s time to add it to your Z-Wave
network.
1. Let your Z-Wave primary controller/gateway enter into pairing/
2. inclusion mode.
3. Take your WallMote near to your primary controller. Press the Action Button once on your WallMote, the LED will
blink with green color.
 Loading...