

Page 1
30-09-2020 13:28Recessed Door Sensor 7 user guide : Aeotec Group
Pagina 1 van 10https://aeotec.freshdesk.com/support/solutions/articles/6000226848-recessed-door-sensor-gen-7-user-guide-
Recessed Door Sensor 7 user guide.
Modified on: Thu, 2 Jul, 2020 at 11:16 PM
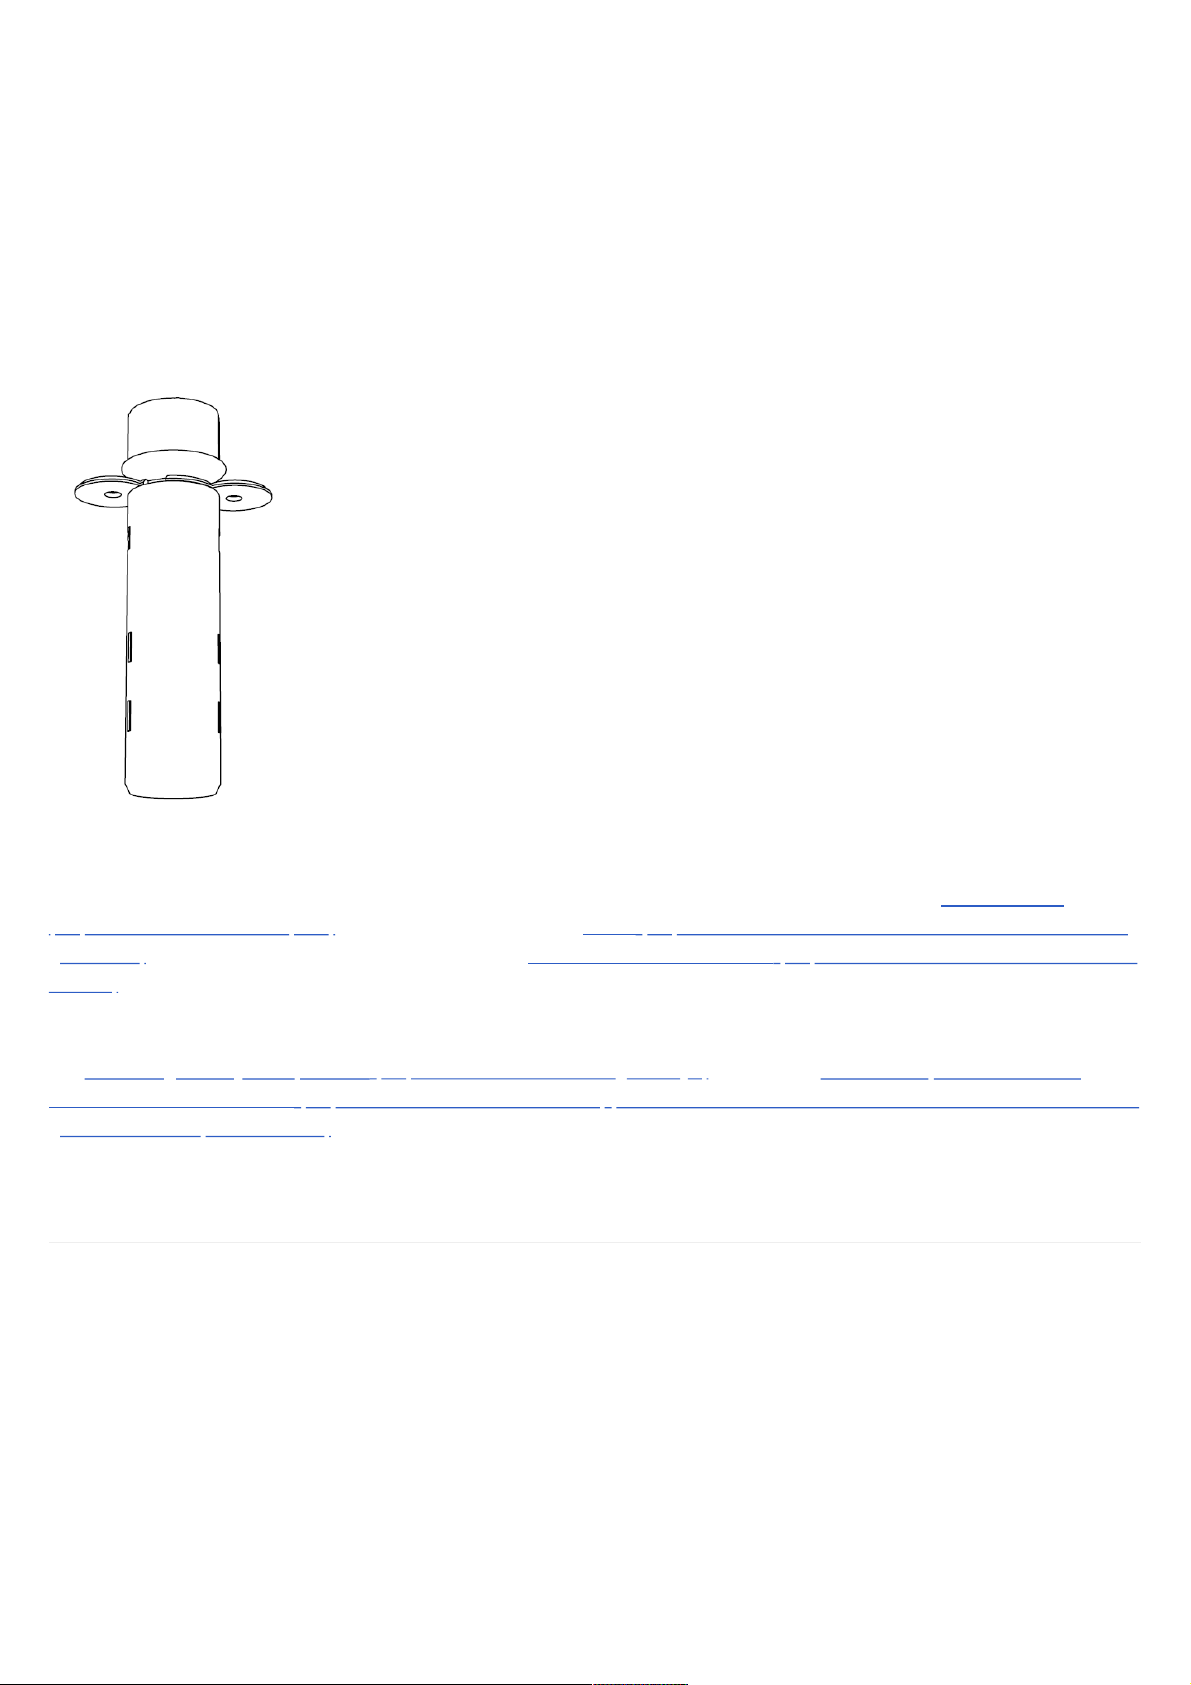
Aeotec Recessed Door Sensor 7.
Aeotec Recessed Door Sensor 7 was developed to detect the status of a door and transmit it via Z-Wave Plus
(http://aeotec.com/z-wave-plus). It is powered by Aeotec’s Gen7 (https://aeotec.com/z-wave-home-automation/z-wavegen7.html) technology. You can find out more about Recessed Door Sensor 7 (http://aeotec.com/hidden-z-wave-door-
sensor) by following that link.
To see whether Recessed Door Sensor 7 is known to be compatible with your Z-Wave system or not, please reference
our Z-Wave gateway comparison (http://aeotec.com/z-wave-gateways) listing. The technical specifications of
Recessed Door Sensor 7 (https://aeotec.freshdesk.com/support/solutions/articles/6000226851-recessed-door-sensor-
gen7-technical-specifications-) can be viewed at that link.
Page 2
30-09-2020 13:28Recessed Door Sensor 7 user guide : Aeotec Group
Pagina 2 van 10https://aeotec.freshdesk.com/support/solutions/articles/6000226848-recessed-door-sensor-gen-7-user-guide-
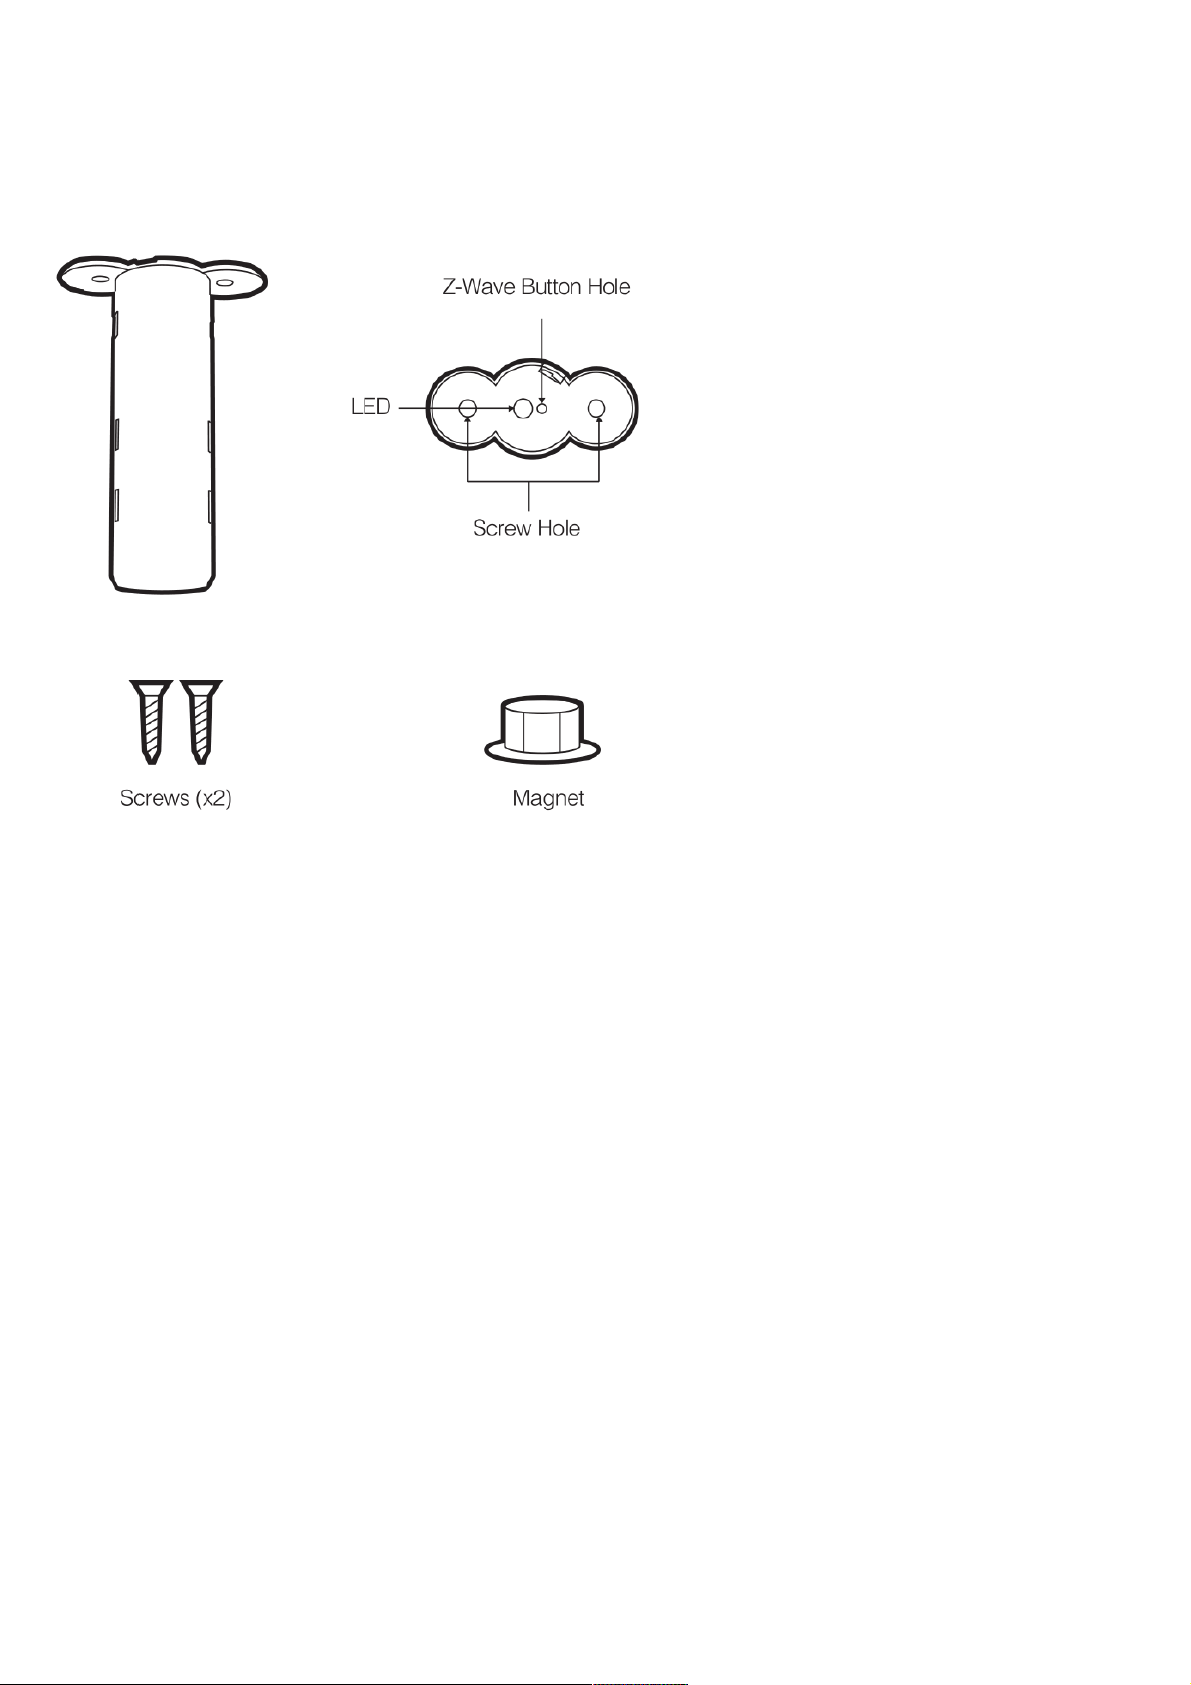
Get To Know Recessed Door Sensor 7
Your Recessed Door Sensor is comprised of two parts: the Main Sensor and the Magnetic Sensor.
Important safety information.
Please read this and other device guides carefully. Failure to follow the recommendations set forth by Aeotec Limited
may be dangerous or cause a violation of the law. The manufacturer, importer, distributor, and / or reseller will not be
held responsible for any loss or damage resulting from not following any instructions in this guide or in other materials.
Keep product and batteries away from open flames and extreme heat. Avoid direct sunlight or heat exposure. Always
remove all batteries from products that are being stored and not used. Batteries may damage the appliance if they
leak. Do not use rechargeable batteries. Ensure correct polarity when inserting the batteries. Improper battery use
may damage the product.
Recessed Door Sensor 7 is intended for indoor use in dry locations only. Do not use in damp, moist, and / or wet
locations.
Contains small parts; keep away from children.
Page 3
30-09-2020 13:28Recessed Door Sensor 7 user guide : Aeotec Group
Pagina 3 van 10https://aeotec.freshdesk.com/support/solutions/articles/6000226848-recessed-door-sensor-gen-7-user-guide-
Quick start.
The installation of your Recessed Door Sensor has two key steps:
1. Install both parts of your sensor.
2. Connect your sensor to your Z-Wave network
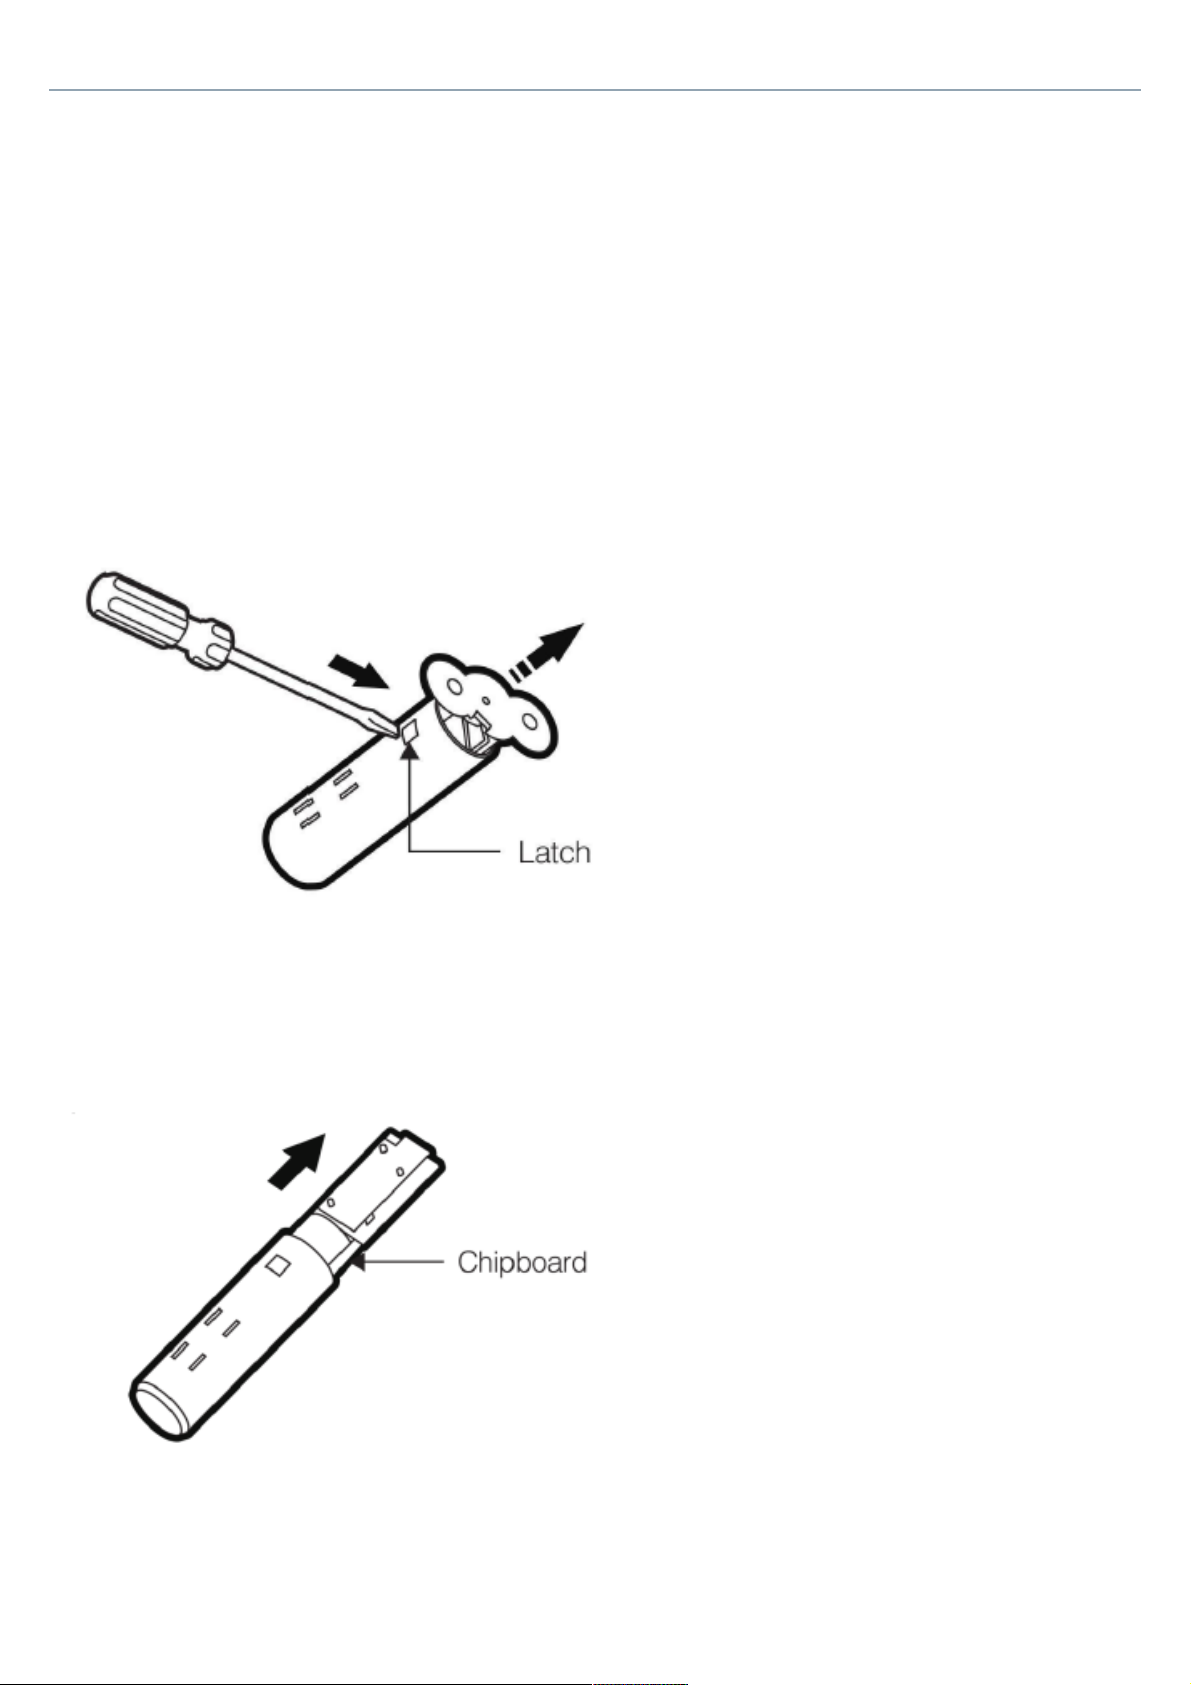
Prepare the Main Sensor.
1. Press the sensor latch with a slotting screwdriver to remove the lid of the sensor.
2. Squeeze the sides of the sensor casing to alleviate pressure on the chipboard; slide the chipboard out. (It is
recommended that when pulling out the hardware from the plastic casing, pinch 2 sides parallel to the hardware to
relieve pressure when pulling the hardware out, it should make it far easier to remove the hardware or place it back
in).
3. Remove the Pull Tab to engage the pre-installed battery. LED will become slow fade-in fade-out Red color for a few
Page 4

30-09-2020 13:28Recessed Door Sensor 7 user guide : Aeotec Group
Pagina 4 van 10https://aeotec.freshdesk.com/support/solutions/articles/6000226848-recessed-door-sensor-gen-7-user-guide-
seconds which will indicate that its power is on.
4. With the battery insulator removed, reinsert the internal components into Main Sensor's enclosure before
reattaching its lid. Ensure that Main Sensor's button aligns with the buttonhole of its lid. Main Sensor will now look as it
did prior to step 1.
Add Recessed Door Sensor to your Z-Wave network.
Getting your Recessed Door Sensor 7 up and running is as simple as powering it up, and adding it to your Z-Wave
network. There are 2 methods to pairing your sensor depending on the capabilities of your Z-Wave
gateway/controller/hub.
SmartStart Inclusion.
You can use this method of inclusion only if your Z-Wave gateway/controller/hub supports SmartStart.
1. Open up your Z-Wave gateway/controller/hub app over your Smartphone.
2. Select SmartStart inclusion.
3. Scan the QR code located on Recessed Door Sensor 7.
4. Once scanned, Recessed Door Sensor 7 will join your Z-Wave network automatically within 10 minutes from
Page 5

30-09-2020 13:28Recessed Door Sensor 7 user guide : Aeotec Group
Pagina 5 van 10https://aeotec.freshdesk.com/support/solutions/articles/6000226848-recessed-door-sensor-gen-7-user-guide-
when it is powered up.
Classic Inclusion.
1. Decide on where you want your Recessed Door Sensor 7 to be placed.
2. Set your Z-Wave Controller into pairing mode.
3. Press the Z-Wave Button on your Recessed Door Sensor 7 and quickly release the button (should only be a
quick tap action on the button).
Recessed Door Sensor 7 will quickly flash its red LED up to 30 seconds or until it is paired successfully. If
successfully paired, the red LED will become solid for 10 seconds.
If your Recessed Door Sensor failed to pair, the LED will return to slow breathing LED. If it is this case, please
return to step 2.
4. If you pairing with S2 encryption/security, enter the first 5 digits of the DSK into your controller/gateway/hub
interface when requested.
When Recessed Door Sensor 7 successfully joins your Z-Wave network its LED will turn solid red for 10 seconds. If
LED
becomes slow fade-in fade-out Red color before turning off, it means the device is still unable to join your Z-Wave
network; repeat the above steps and please contact us for further support if needed.
Install your Recessed Door Sensor.
With Main Sensor powered and activated, it is now time to inlay it within your selected door frame. Before beginning, it
is important to select a suitable position for your Recessed Door Sensor. For optimal performance, your sensor should
be:
1. Either installed at the top of a door or the side of a door.
2. Positioned away from metal that could interfere with its magnetic functionality or wireless functions. This includes
your door's plate, handle or lock mechanism.
3. Installed in a suitable location to ensure a clear (between 1mm and 5mm) separation when the door is closed.
4. Positioned exactly above or beside the position in which Magnetic Sensor will be inlaid.
Page 6

30-09-2020 13:28Recessed Door Sensor 7 user guide : Aeotec Group
Pagina 6 van 10https://aeotec.freshdesk.com/support/solutions/articles/6000226848-recessed-door-sensor-gen-7-user-guide-
The rectangular areas highlighted above are optimal installation positions.
Step 1 - Drill for Sensors main body.
Prepare the space for Main Sensor by drilling a hole into your doorframe using a 20mm/0,75 inch wide drill bit (you
can use a slightly larger drill bit if needed). The hole should be 65mm/2,56 inch deep.
Although 19mm/0,75 inch is stated for the drill bit size, it is advised that the drill bit should be larger to allow you to
easily remove Recessed Door Sensor 7 later.
Recommended drill bit size should be: 20 - 21mm in size.
Step 2 - Drill for Magnet piece.
Drill a corresponding hole in your door. The hole should be 15mm deep. As stated, the position of this hole should
align exactly with the hole you just created in the doorframe. Again, use a 19mm wide drill bit.
Unlike the main unit, 19mm drill bit should be used.
With your door and door frame prepared and the drill holes created, it's now time to mount both parts of your
Recessed Door Sensor.
Step 3
Insert Main Sensor into the hole you created in the door frame then secure it using two screws.
Page 7

30-09-2020 13:28Recessed Door Sensor 7 user guide : Aeotec Group
Pagina 7 van 10https://aeotec.freshdesk.com/support/solutions/articles/6000226848-recessed-door-sensor-gen-7-user-guide-
Step 4
Place a small amount of white glue (PVA) inside the hole you created for Magnetic Sensor. Then, place the sensor
over and into the hole. Next, insert it by tapping gently on it with a rubber hammer.
Step 5
The gap between the two parts of your sensor must be no less than 1mm and no more than 5mm. If your gap is
different, re-affix Main Sensor by altering its hole.
Page 8

30-09-2020 13:28Recessed Door Sensor 7 user guide : Aeotec Group
Pagina 8 van 10https://aeotec.freshdesk.com/support/solutions/articles/6000226848-recessed-door-sensor-gen-7-user-guide-
Advanced Functions.
Remove your sensor from your Z-Wave network (Software reset).
Your Recessed Door Sensor can be removed from your Z-Wave network at any time. You'll need to use your Z-Wave
network's main controller to do this.
1. Set your Z-Wave Controller into its ‘Remove Device‘ mode in order to remove the product from your Z-Wave
system Refer to the Controller's manual if you are unsure of how to perform this step.
2. Make sure the product is powered.
3. Click Action Button once; LED will become flash Red color for 5 seconds.
4. If Removing fails, it will extinguish, without slow fade-in fade-out Red color.
5. If Removing succeeds, it will become slow fade-in fade-out Red color for 10 seconds, and then extinguish. Now,
it is Roved from Z-Wave network successfully.
Manually Factory Reset your sensor.
If the primary controller is missing or inoperable, you may need to reset the device to factory settings. Make sure the
product is powered. To complete the reset process manually,
Press and hold the Action Button for at least 20 seconds.
@2 seconds, LED will shows a slow pulsing LED
@5 seconds, LED will pulse faster
@10 seconds, LED will flash even faster.
@20 seconds, LED will become solid for 2 seconds to indicate it factory reset.
You can release the action button here.
@22 seconds. LED will breathe slowly to indicate it is factory reset.
Release the Action Button when LED becomes slow fade-in fade-out red color.
Note:
1. This procedure should only be used when the primary controller is missing or inoperable.
2. Factory Reset will:
(a) Remove the product from Z-Wave network;
(b) Delete the Association setting;
(c) Restore the configuration settings to the default.
Wakeup your Recessed Door Sensor for configuration.
You can wakeup Recessed Door Sensor 7 to communicate with your Z-Wave gateway or push configuration settings
to your sensor.
To wake up your sensor, follow these steps:
Press and hold the Action Button for at least 2 seconds, but before 5 seconds.
Page 9

30-09-2020 13:28Recessed Door Sensor 7 user guide : Aeotec Group
Pagina 9 van 10https://aeotec.freshdesk.com/support/solutions/articles/6000226848-recessed-door-sensor-gen-7-user-guide-
@2 seconds, LED will shows a slow pulsing LED
Release action button here to toggle 10 minute wakeup.
If successful, LED will remain solid until sensor goes back to sleep.
Testing Health Connectivity.
NOTE - This health detection function is only good for determining the direct connection to the gateway (within
communication distance to your gateway without any other repeater nodes).
You can determine the health of your Recessed Door Sensor 7 connectivity to your gateway using its manual button
press, hold, and release function which is indicated by the LED.
Your gateway/controller/hub must support displaying Z-Wave device health in order for you to see the health of your
Recessed Door Sensor 7 to your Z-Wave gateway.
Follow these steps to test the health of your Recessed Door Sensor 7 to your Z-Wave gateway/controller/hub:
Press and hold the Z-Wave Button for 5-10 seconds to test the communication health your Recessed Door
Sensor 7.
@1 second, LED will turn off.
@2 seconds, LED will breath its LED
@5 seconds, LED will flash its LED
Release the Action Button to test the health.
If the LED sped up it's flashing, you have held it for too long.
Once the test is finished, the Recessed Door Sensor 7 will forward a Power Level Report command to your Z-Wave
gateway to display the communication quality. Some gateways do not support Power Level Command Class in its
interface and may not show.
Special setup for third party gateways.
This section will go over special steps to follow to get your Recessed Door Sensor 7 to work in the below Z-Wave
Controllers:
1. SmartThings hub: https://aeotec.freshdesk.com/support/solutions/articles/6000234485-setup-recessed-
door-sensor-7-with-smartthings (https://aeotec.freshdesk.com/support/solutions/articles/6000234485-setup-
recessed-door-sensor-7-with-smartthings)
2. Vera UI7: https://aeotec.freshdesk.com/support/solutions/articles/6000232857-setup-recessed-door-
sensor-7-on-vera (https://aeotec.freshdesk.com/support/solutions/articles/6000232857-setup-recessed-door-
sensor-7-on-vera)
More Advanced Configurations.
Page 10

30-09-2020 13:28Recessed Door Sensor 7 user guide : Aeotec Group
Pagina 10 van 10https://aeotec.freshdesk.com/support/solutions/articles/6000226848-recessed-door-sensor-gen-7-user-guide-
Recessed Door Sensor 7 has a longer list of device configurations that you can do with Recessed Door Sensor 7.
These are not exposed well in most gateways, but at the least, you can manually set configurations through most ZWave gateways available. These configuration options may not be available in a few gateways.
You can find the configuration sheet here: https://aeotec.freshdesk.com/helpdesk/attachments/6092013991
(https://aeotec.freshdesk.com/helpdesk/attachments/6092013991)
If you have any questions on how to set these, please contact support and let them know what gateway you are using.
 Loading...