

Page 1
THERMAL IMAGING
IR CAMERA
Model
1950
ENGLISH Quick Start Guide
Page 2

Page 3
ATTENTION
An infrared camera is a sensitive optical measuring
device; pay special attention to the following points:
1. Never aim the camera at the sun, a laser welding, or other source of powerful thermal radiation.
2. Avoid exposing to dust with the lens flap open.
3. Do not touch the lens with your fingers.
4. Avoid jolting or dropping the camera.
If parts of the camera are damaged or present
problems following failure to heed the warnings listed
above, neither the manufacturer nor the distributor
shall be held liable, and all costs incurred shall be
borne solely by the operator.
Meanings of the symbols used on the device:
The CE marking indicates compliance with the European
"Low Voltage" and "Electromagnetic Compatibility"
directives (2006/95/EC and 2004/108/EC).
In the European Union, this product is subject to selective
collection and recycling at end-of-life as waste electric and
electronic equipment under directive 2002/96/EC (WEEE):
this equipment must not be treated as an ordinary
household waste. The spent batteries must not be treated
as household wastes. Take them to the appropriate
collection point for recycling.
This product is designed to allow the recovery and
recycling of most of its constituents.
Page 4

ORDERING INFORMATION
Receiving Your Shipment
Upon receiving your shipment, make sure that the
contents are consistent with the packing list. Notify your
distributor of any missing items. If the equipment appears
to be damaged, file a claim immediately with the carrier
and notify your distributor at once, giving a detailed
description of any damage. Save the damaged packing
container to substantiate your claim.
Ordering Information
Thermal Imaging IR Camera Model 1950 .... Cat. #2121.40
Includes carrying case, external battery charger, USB
cable, four NiMh rechargeable batteries, SD card,
Bluetooth headphone, quick start guide, and a USB stick
containing the user manual, analysis software and
software manual.
Replacement Parts:
Case – Carrying Case with Foam Insert ...... Cat. #2121.60
Adapter – US External Battery Charger ....... Cat. #2121.64
Cable – USB (Type A to 5-pin Mini-B) ......... Cat. #2126.49
Page 5

1. QUICK START STEPS
1. Insert charged batteries in the camera.
2. Insert the micro SD memory card in its slot.
3. Open the flap protecting the lenses.
4. Press the ON/OFF key :
- If the corresponding window appears,
enter the date and time.
- If you just insert batteries, configure
battery manager (see instructions, user’s
manual §. 1.4.1.)
5. Aim at the target:
- either with the IR display,
- or with the visible image, the trigger, or the
keys.
6. Stop the acquisition, key.
7. Save the current image, key.
8. Transfer the image to the PC:
- either using the USB cable,
- or using a micro SD card reader.
NOTE: For more information, refer to the user
manual on the USB Stick.
Page 6

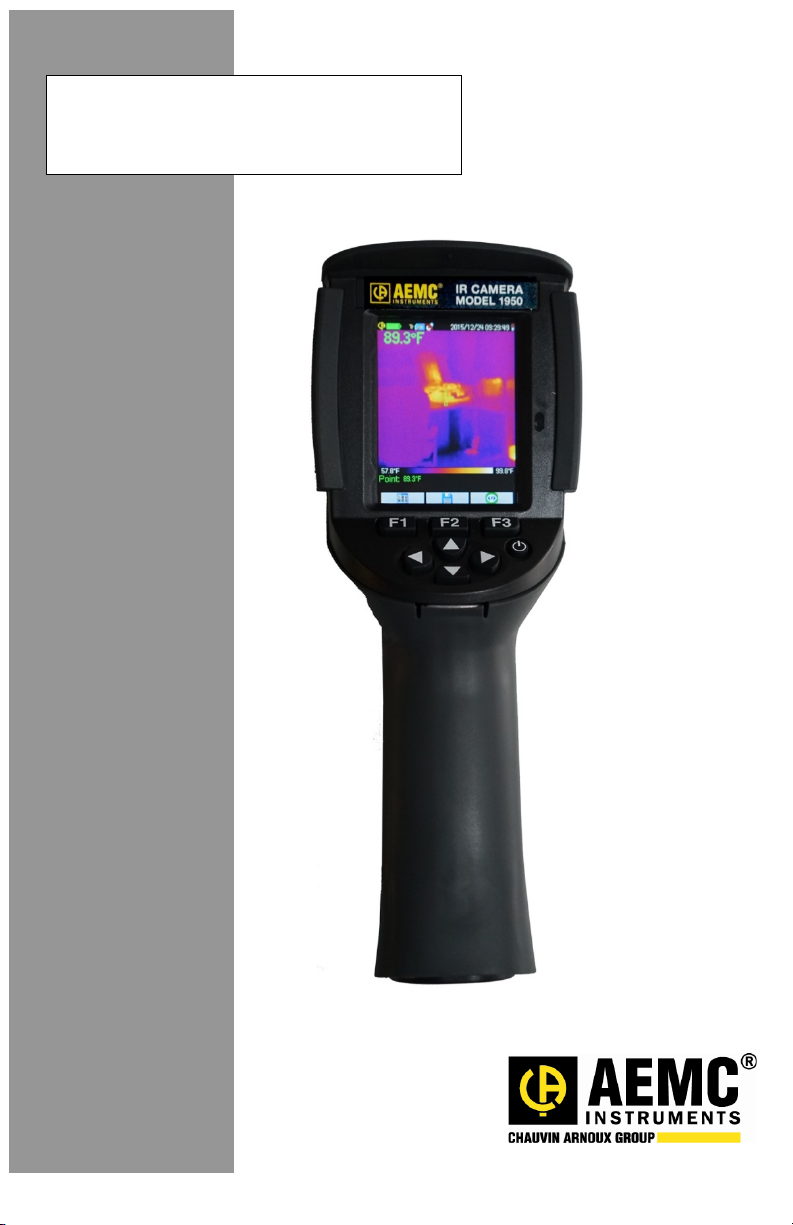
2. STRUCTURE OF THE FRONT PANEL
Lens protection flap
Lens of visible camera
Lens of infrared camera
Multiple-function trigger
Page 7

3. INTERFACE
Slot for SD card
Rubber flap
USB connector
Keypad
Multiple-function
trigger
Page 8

4. DESCRIPTION OF THE KEYS
Brightness
on the screen
Up/Down/Right/
Left Arrow Keys
sensor
Multiple-function keys
associated with the display
ON/OFF key
Page 9

5. STRUCTURE OF THE BATTERY
Tab locking the
quarter
Quarter
opening the cover
Insert for ¼" camera
tripod
COMPARTMENT COVER
-turn screw
-turn screw for
Page 10

6. DISPLAY
Page 11

7. STATUS BAR
Page 12

Chauvin Arnoux®, Inc. d.b.a AEMC® Instruments
15 Faraday Drive • Dover, NH 03820 USA
99-MAN 100433 v1 02/16
www.aemc.com
 Loading...