

AEI Communications MIP 300 User Manual
1
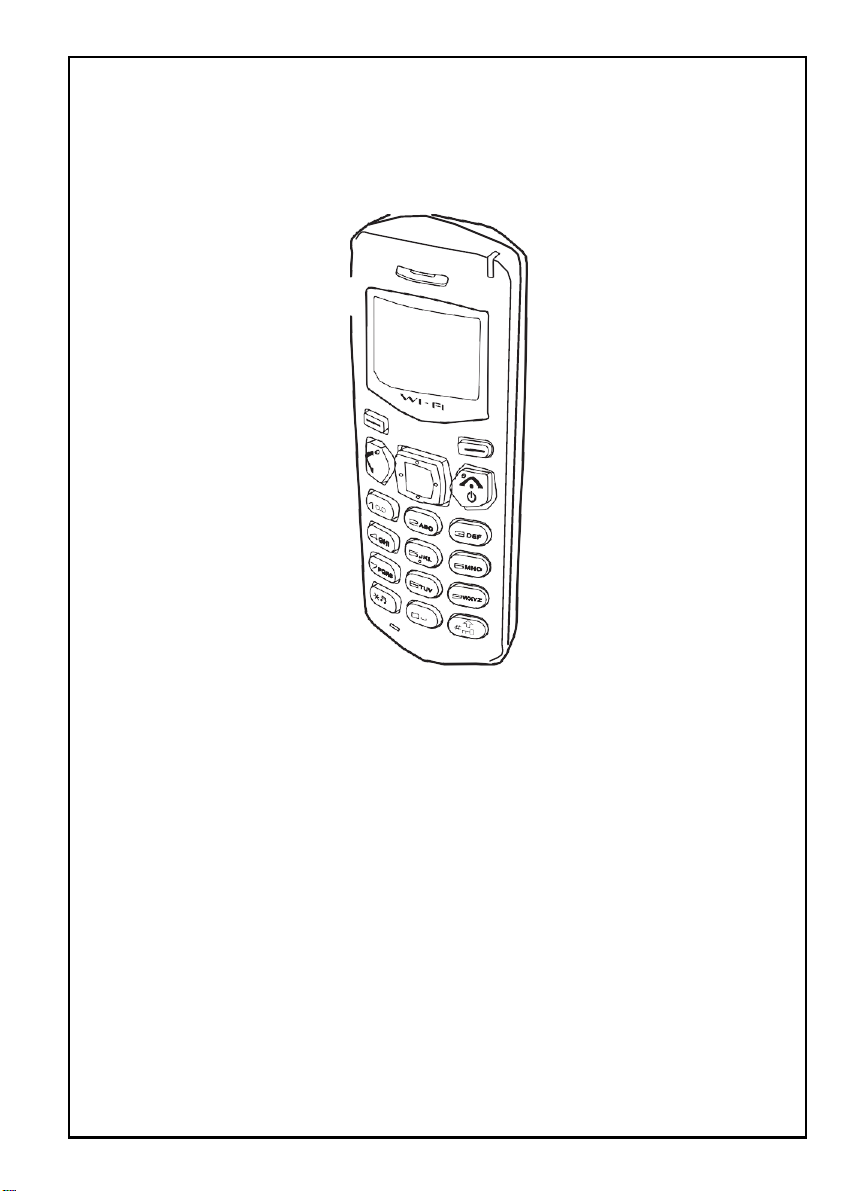
MIP-300
WiFi Phone
User’s Manual v1.00

Preface
Regulatory Information
FCC Regulation
This model phone complies with part 15 of the FCC Rules. Operation is subject
to the condition that this device does not cause harmful interference.
This device complies with Part 15 of the FCC Rules. Operation is subject to the
following two conditions: (1) this device may not cause harmful interference
and (2) this device must accept any interference received, including
interference that may cause undesired operation.
This equipment has been tested and found to comply with the limits for a Class
B digital device, pursuant to Part 15 of the FCC Rules. These limits are designed
to provide reasonable protection against harmful interference in a residential
installation.
This equipment generates, uses and can radiate radio frequency energy and,
if not installed and used in accordance with the instructions, may cause
harmful interference to radio communications.
However, there is no guarantee that interference will not occur in a particular
installation If this equipment does cause harmful interference to radio or
television reception, which can be determined by turning the equipment off
and on, the user is encouraged to try to correct the interference by one or
more of the following measures:
• Reorient or relocate the receiving antenna.
• Increase the separation between the equipment and the receiver.
• Connect the equipment to an outlet on a circuit different from that to which
the receiver is connected.
• Consult the dealer or an experienced radio/TV technician for help.
Changes or modifications not expressly approved by the party responsible for
compliance could void the user's authority to operate the equipment.
The antenna(s) used for this transmitter must not be co-located or operating in
conjunction with any other antenna or transmitter.
This EUT is in compliance with SAR for general population uncontrolled
exposure limits in ANSI/IEEE C95.1-1999 and has been tested in accordance
with the measurement methods and procedures specified in OET Bulletin 65
Supplement C.

RF exposure regulation (SAR)
This model phone meets the government's requirements for exposure to radio
waves. This phone is designed and manufactured not to exceed the emission
limits for exposure to radio frequency (RF) energy set by the Federal
Communications Commission of the U.S. Government.
The FCC has granted an Equipment Authorization for this model phone with all
reported SAR levels evaluated as in compliance with the FCC RF exposure
guidelines. SAR information on this model phone is on file with the FCC and
can be found under the Display Grant section of http://www.fcc.gov/oet/
fccid after searching on FCC ID: O4EMIP-300
For body worn operation, this phone has been tested and meets the FCC RF
exposure guidelines for use with an accessory that contains no metal and
positions the handset a minimum of 1 cm from the body. Use of other
enhancements may not ensure compliance with FCC RF exposure guidelines.
If you do not use a body- worn accessory and are not holding the phone at
the ear, position the handset a minimum of 1 cm from your body when the
phone is switched on.
Copyright © 2007 by G-TEK Electronic Group. All rights reserved.
Overview
This Wi-Fi phone enables you to make VoIP phone calls through IEEE 802.11 b/g/n
wireless network. Read this user manual carefully to learn how to operate this
product and take advantage of its features.
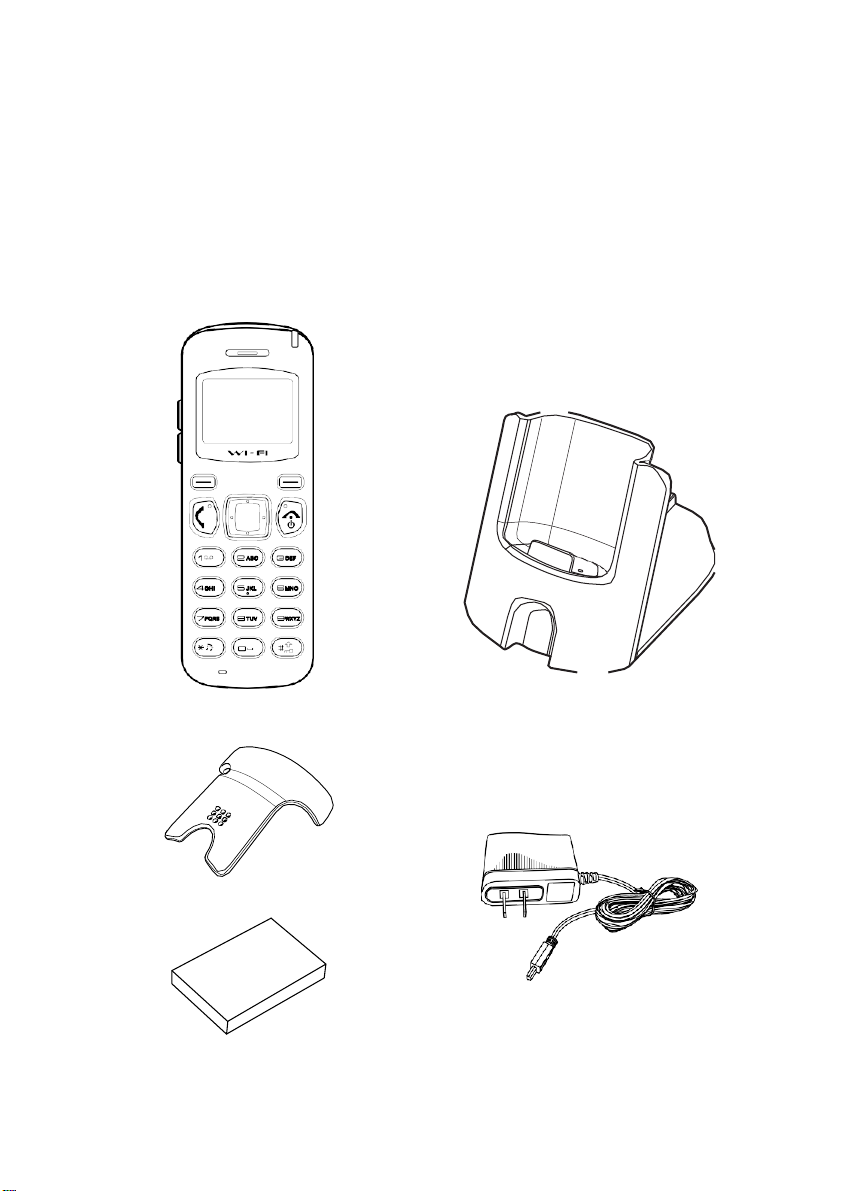
Package Contents
MIP-300 WiFi Phone
Belt Clip
Charging Cradle (Optional)
AC Adapter
Li-ion Battery
16
15
14
12
11
10
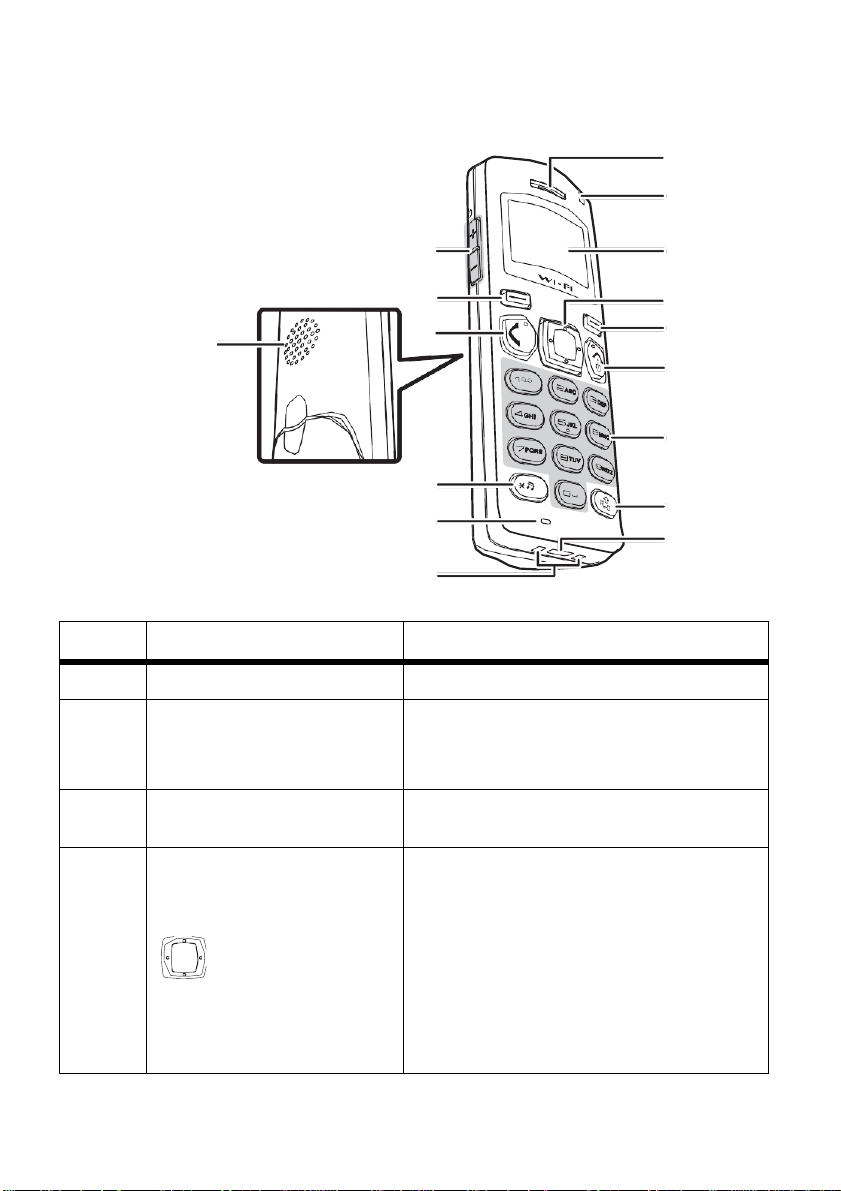
Product Description
No.
Item
Description
1.
Receiver
Transmits voice output
2. Charge Status
Indicates charge status:
• Off—charger off
• Red—charger on
3.
LED Display
112 x 64 pixel monochrome graphics
display with LED backlight
4.
Navigation Key
• Navigate through menus
• Left—select Profile; decreas volume
during a call
• Right—call log; increase volume
during a call
• Up—show dialled numbers; increase
volume during a call
• Down—Phone Book; decrease the
speaker volume during a call
13
1
2
3
4
5
6
7
8
9
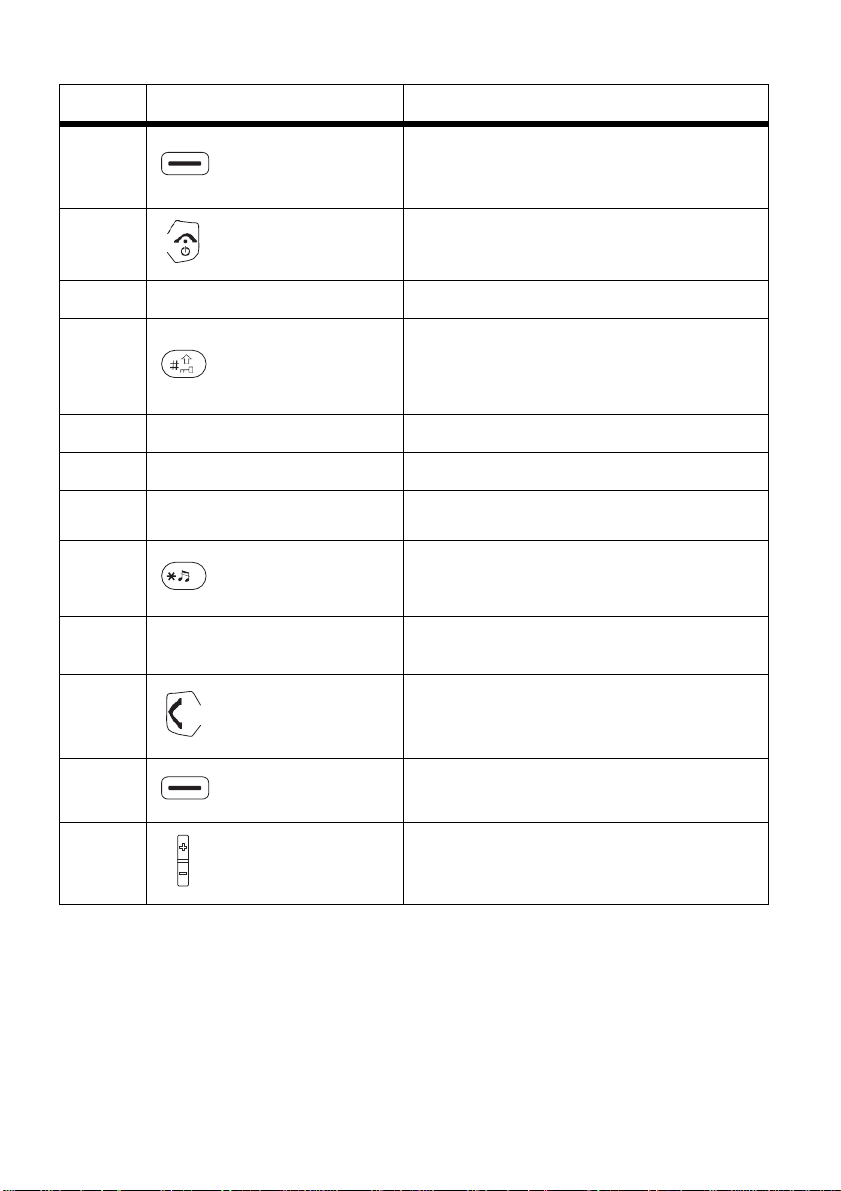
No.
Item
Description
5. Right Soft Key
• Display the Phone Book
• Clear inputs / cancel or Mute during a
call
6. Power/Red Key
• Power on or power off
• End conversation; exit (back)
7.
Numeric Key
Enter numbers and text
8. Pound Key
• Change text output in text mode. For
example: AB, ab, 12, Ab.
• Press and hold to enable key lock
9.
USB Jack
• Connect
mini USB / c
harger jack
10.
Charging Pad
• Contact to the charging cradle
11.
Microphone
• Receives voice inputs
12. Star Key
• Enter symbols in text mode
• Press and hold to mute
13.
Speaker
Transmits voice output (hand free
mode) or plays ring tone
14. Call
Key/Green
Key
• Dial manually entered or Phonebook
numbers
• Show call history
15.
Left Soft Key
• Select a menu or submenu
• Confirm menu option
16. Speaker Volume
• Increase or decrease volume during a
call
Getting Started
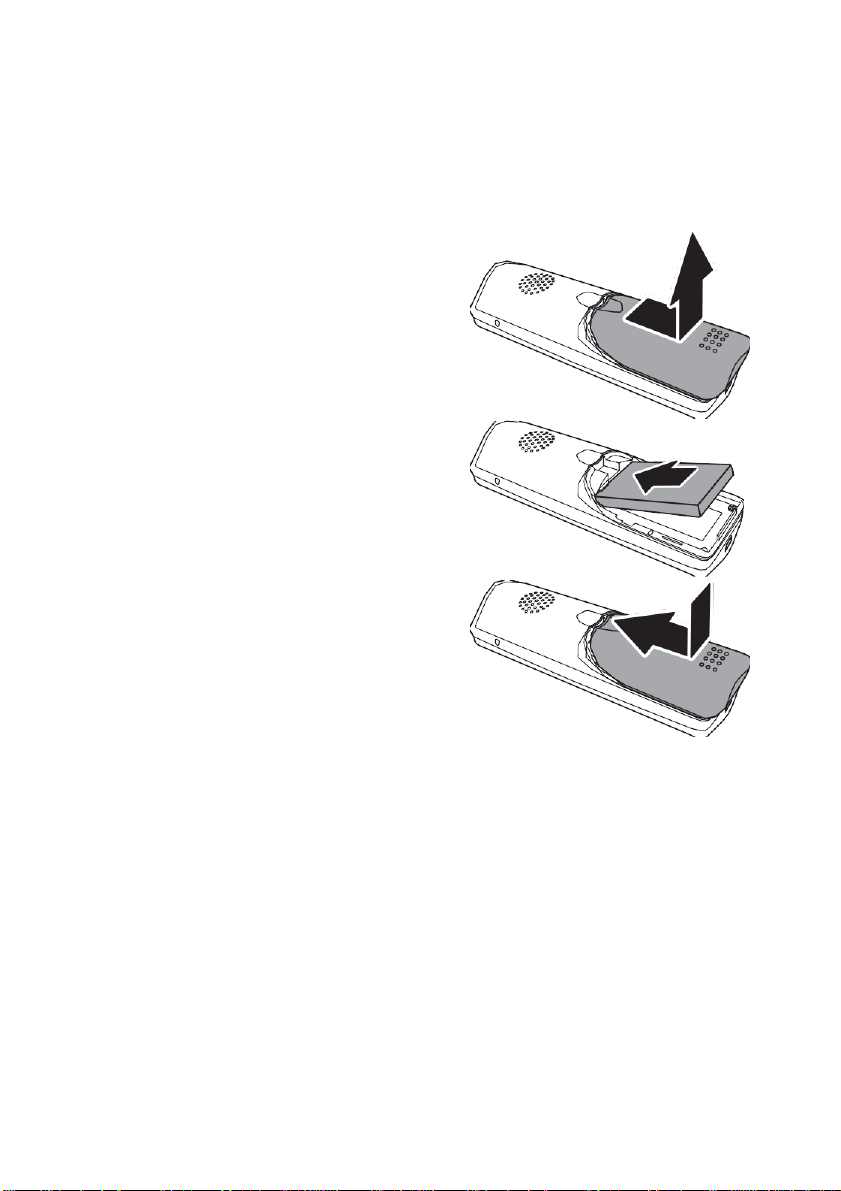
Inserting the Battery
To insert the battery into your phone, perform the following steps:
1. Slide off the battery compartment
cover.
2. Insert the battery as shown, making
sure the gold connectors are correctly
aligned.
3. Replace the battery compartment
cover until it clicks into place.
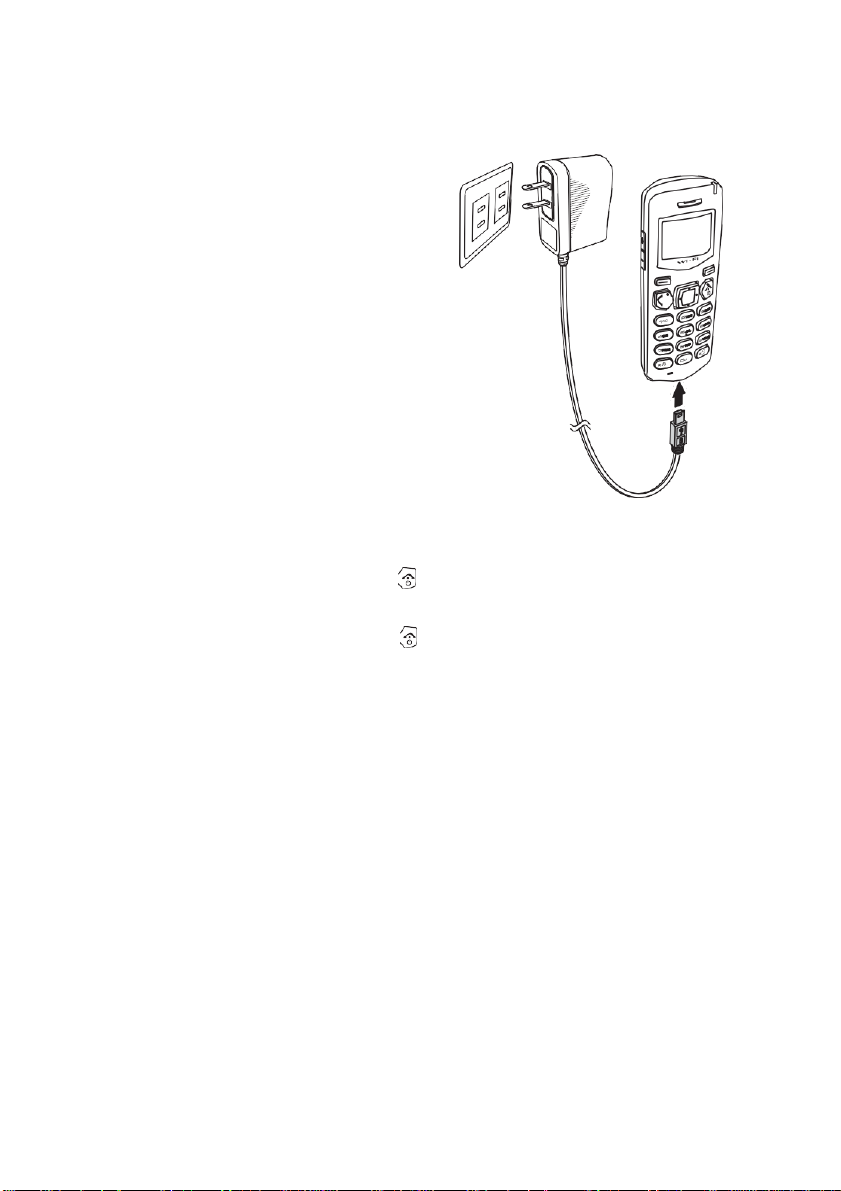
Charging Your Phone
Use AC power adapter to charge your phone.
1. Connect one end of the AC
power adapter cable to the port
at the rear of the cradle.
2. Plug the AC power adapter into
your mains socket.
3. Place your phone in the cradle
and charging begins.
We recommend that you charge the
battery for three hours before using
your phone for the first time.
Turning Your Phone On and Off
Press and hold the Power/end key ( ) for two seconds to turn it on. The LCD
lights and Welcome to UniVox displays followed by the main screen.
Press and hold the Power/end key ( ) for two seconds to turn the phone off.
Peer2Peer Ready
16:17
19-Nov-07
Menu Name
Navigating Phone Menus
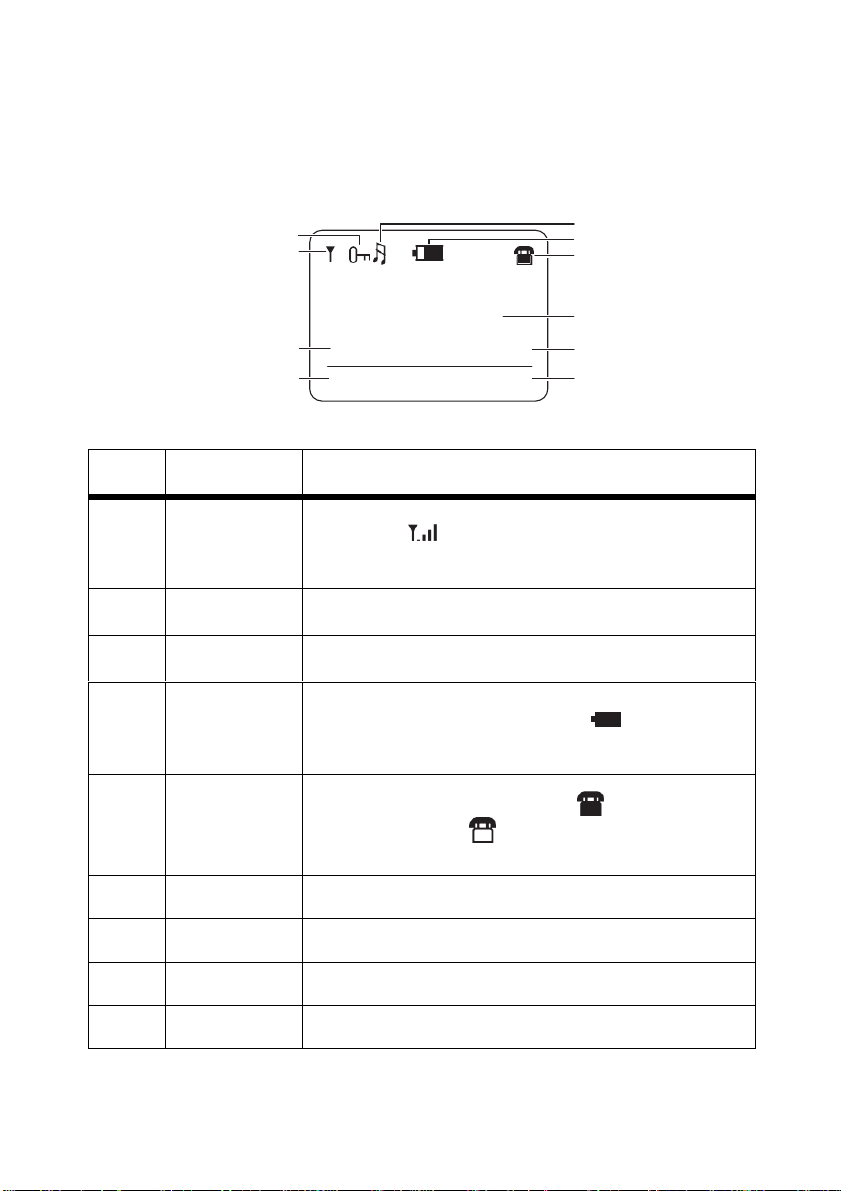
No.
Indicator
Description
1. WiFi signal
Displays the WiFi signal strength. The presence of
five bars ( ) indicates the strongest signal and
the presence of a single bar indicates the weak- est
signal.
2.
Key Lock
Mode
Displays the keypad locking status.
3.
Mute Mode
Displays the system volume in mute status.
4.
Battery
charging
level
The presence of all the five bars ( ) indicates
that the battery is fully charged or has 100%
charge. Charging is indicated by a moving charging
bar.
5.
Connection
status
Displays the connection status.
indicates
connection status;
indicates disconnection
status.
6.
Connection
Mode
Displays the current connection mode.
7.
Time and
Date
Displays the time and date.
8.
Right Soft Key
Press the Right soft key ( ) to execute the displayed command.
9.
Left Soft Key
Press the Left soft key ( ) to execute the displayed command.
The LCD Screen
See below for an overview of the layout of the LCD screen and its icons:
2
1
The LCD screen elements are described in the table below:
7
9
3
4
5
6
7
8
 Loading...