

AEI DG200 User manual
220808-1
MODEL: DG200
®
DigiSender X2
Wireless Video Sender System
PLEASE KEEP THIS INSTRUCTION MANUAL FOR FUTURE REFERANCE

DG200 - Wireless Video Sender System
TABLE OF CONTENTS
Introduction 03
Unpack your DigiSender® X2 04
Install the DigiSender® X2 Transmitter 05-06
Install the IR Systeme Technik™ 07
Install the DigiSender® X2 Receiver 08
Using the DigiSender® X2 09-10
Switching between inputs 10
Audio/Video Channels 10
Upgrades and Accessories 11
Troubleshooting 12-15
Picture Problems 12-13
Audio Problems 14
Problems Controlling Your Source Equipment 15
Back Panel Descriptions 16-17
DigiSender® X2 Transmitter 16
DigiSender® X2 Receiver 17
Technical Support 18
Document of Conformity 19
INTERFERENCE WARNING
This device is liable to receive interference signals generated by Spread
Spectrum LAN and stray microwave emissions from some Microwave Ovens.
Such interference will cease after the interfering equipment has been
switched off.
Please read this instruction manual carefully prior to installationPage 02
INTRODUCTION
DG200 - Wireless Video Sender System
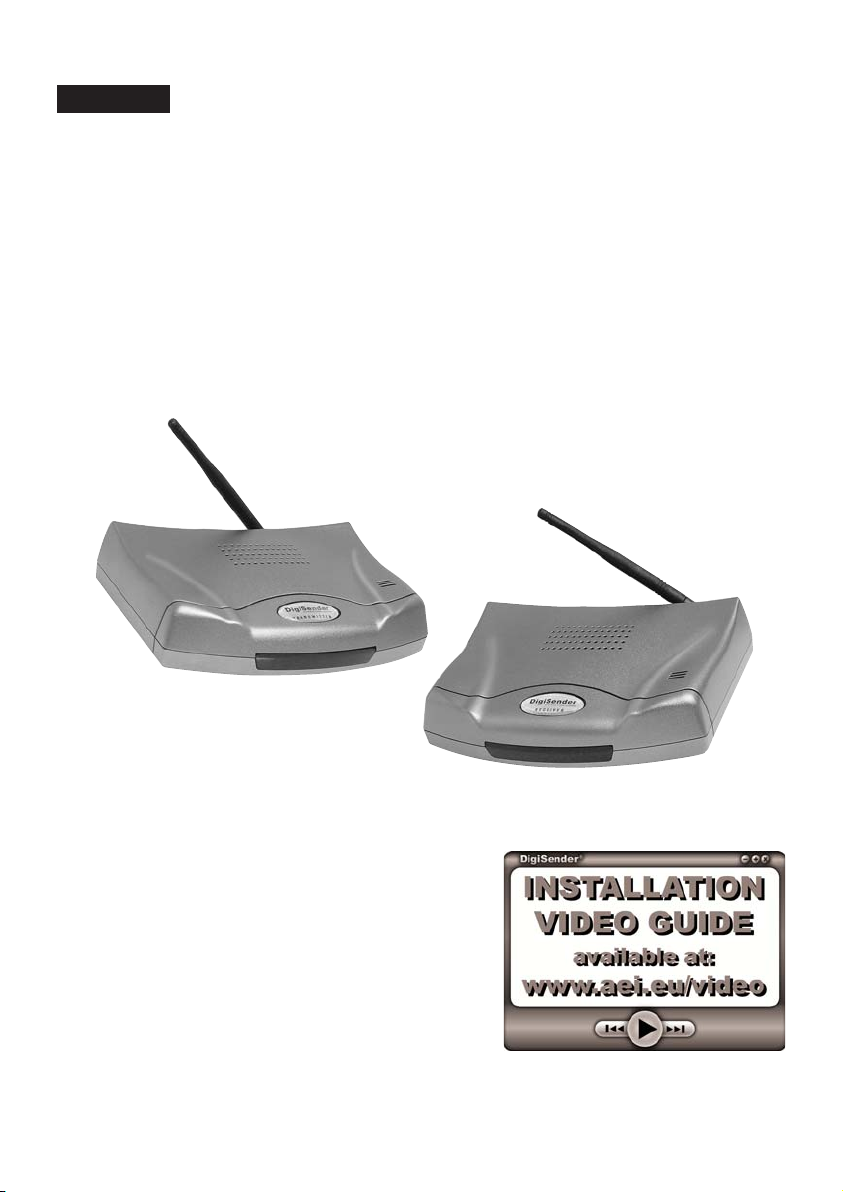
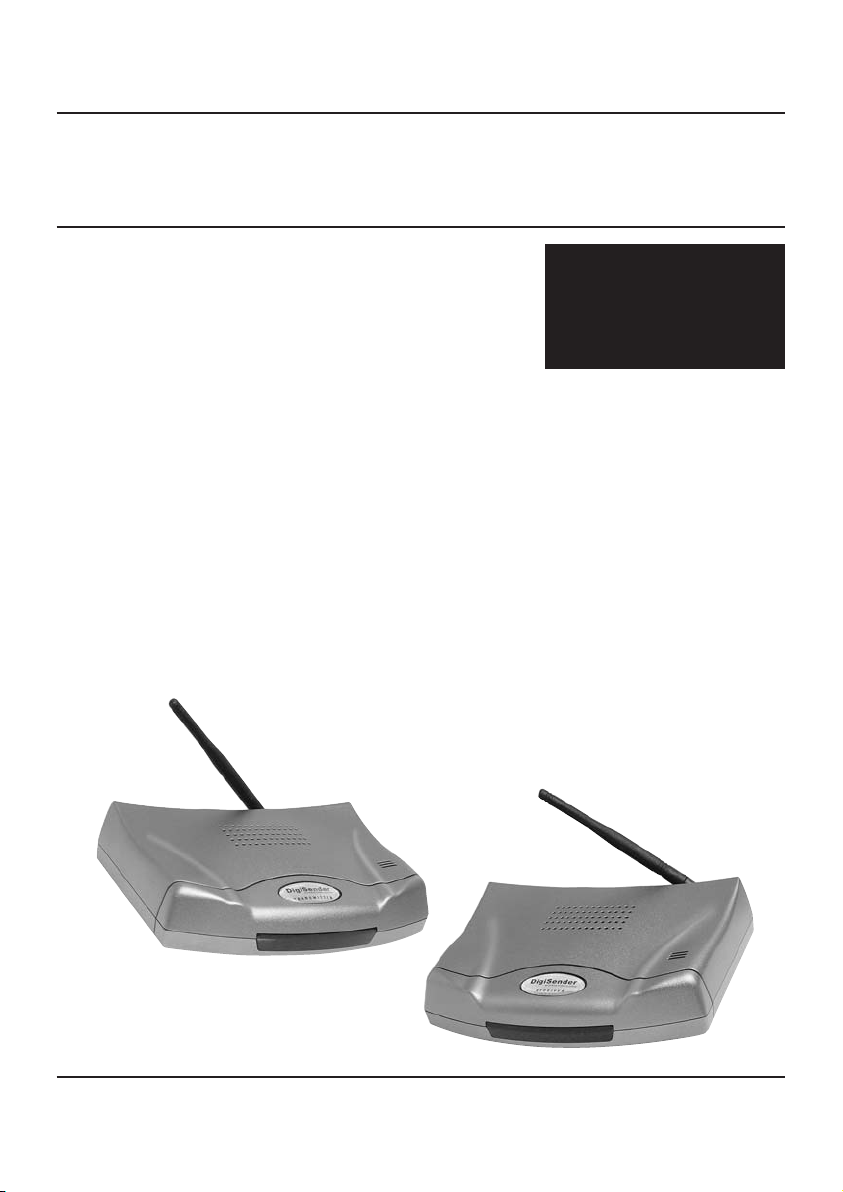
Congratulations on purchasing the DigiSender®
X2. This product represents state of the art wireless video technology and exceptional value for
money.
You can now enjoy crisp video and hi-fi stereo
sound from your Satellite, Freeview, DVD or VCR
in another room in your home.
The DigiSender® X2 Transmitter features 2 autoswitching DigiConnector™ SCART inputs and
the Receiver boasts SCART and RCA Phono outputs.
The DigiSender® X2 is designed to work with virtually any video source and is an ideal solution
for transmitting channels from a typical home
entertainment environment.
WARNING
To prevent damage do not
expose this unit to rain or
moisture.
Please read this instruction manual carefully prior to installation Page 03
DG200 - Wireless Video Sender System
STEP 1
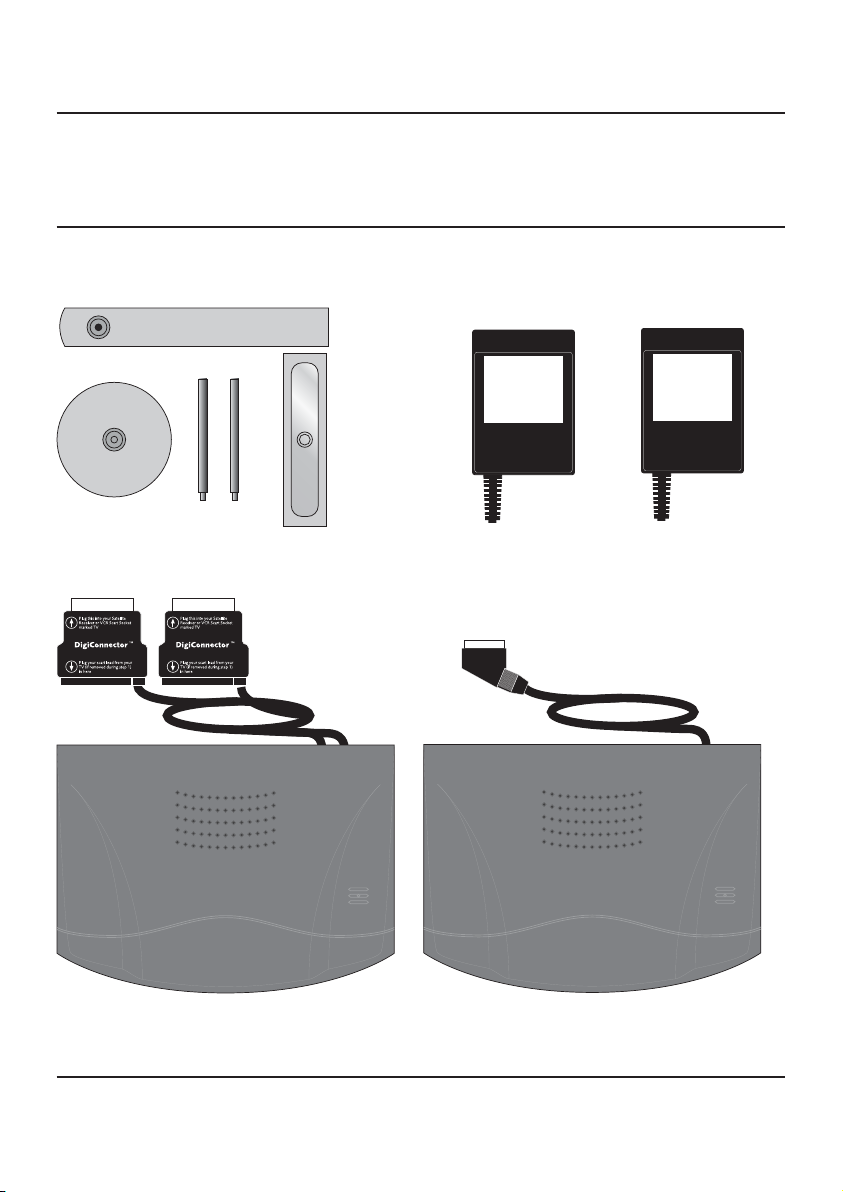
Unpack your DigiSender® X2
All packs are computer weigh checked when packed. However, it is a good idea to check all kit contents are present before proceeding with the installation.
IR Systeme Technik™
Transmitter
2 x Power Supply
Receiver
Please read this instruction manual carefully prior to installationPage 04
DG200 - Wireless Video Sender System
STEP 2
Install the DigiSender® X2 Transmitter
The DG200 Transmitter will send the sound and video from 2 connected sources (Satellite, Freeview,
DVD, VCR, etc.) to the DG200 Receiver, located in another room in your home.
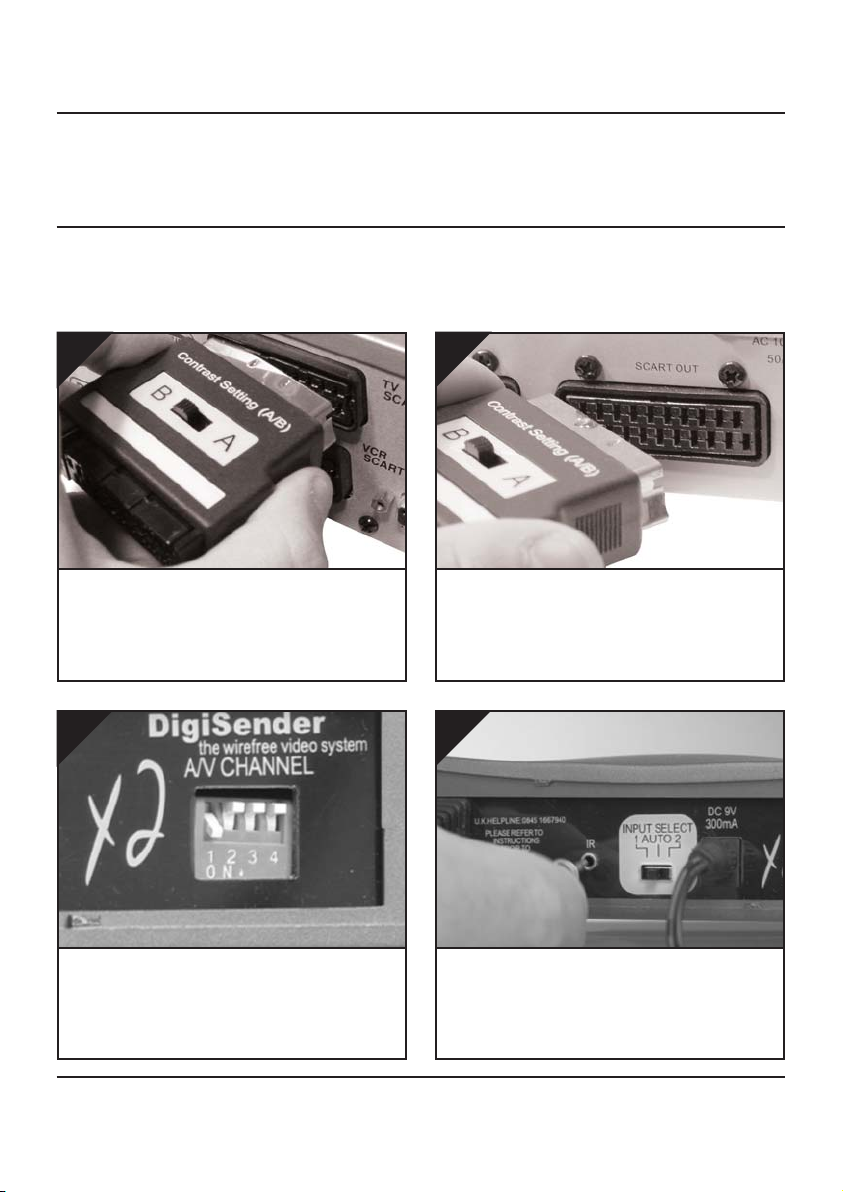
1.
Connect DigiConnector™ 1 to your Satellite or
Freeview box. Use the SCART socket labelled ‘TV’
or ‘OUT’. Connect any existing SCART lead into
the rear socket of the DigiConnector™.
3.
2.
Connect DigiConnector™ 2 to your DVD Player,
Recorder or VCR. Use the SCART socket labelled
‘TV’ or ‘OUT’. Connect any existing SCART lead
into the rear socket of the DigiConnector™.
4.
Ensure that the A/V Channel switch on the back
of the DG200 Transmitter is set to 1. Switch 1 up,
switches 2, 3 and 4 down.
Please read this instruction manual carefully prior to installation Page 05
Connect the IR Emitter to the socket labelled ‘IR’
on the back of the DG200 Transmitter. See Page
07 for more information on installing the IR
Systeme Technik™.
DG200 - Wireless Video Sender System
continued...
Important Note: Avoid positioning the DG200 Transmitter near to other wireless devices operating on
2.4GHz. These can include Wireless Routers, Laptops, Games Consoles, DECT Phones or Bluetooth devices.
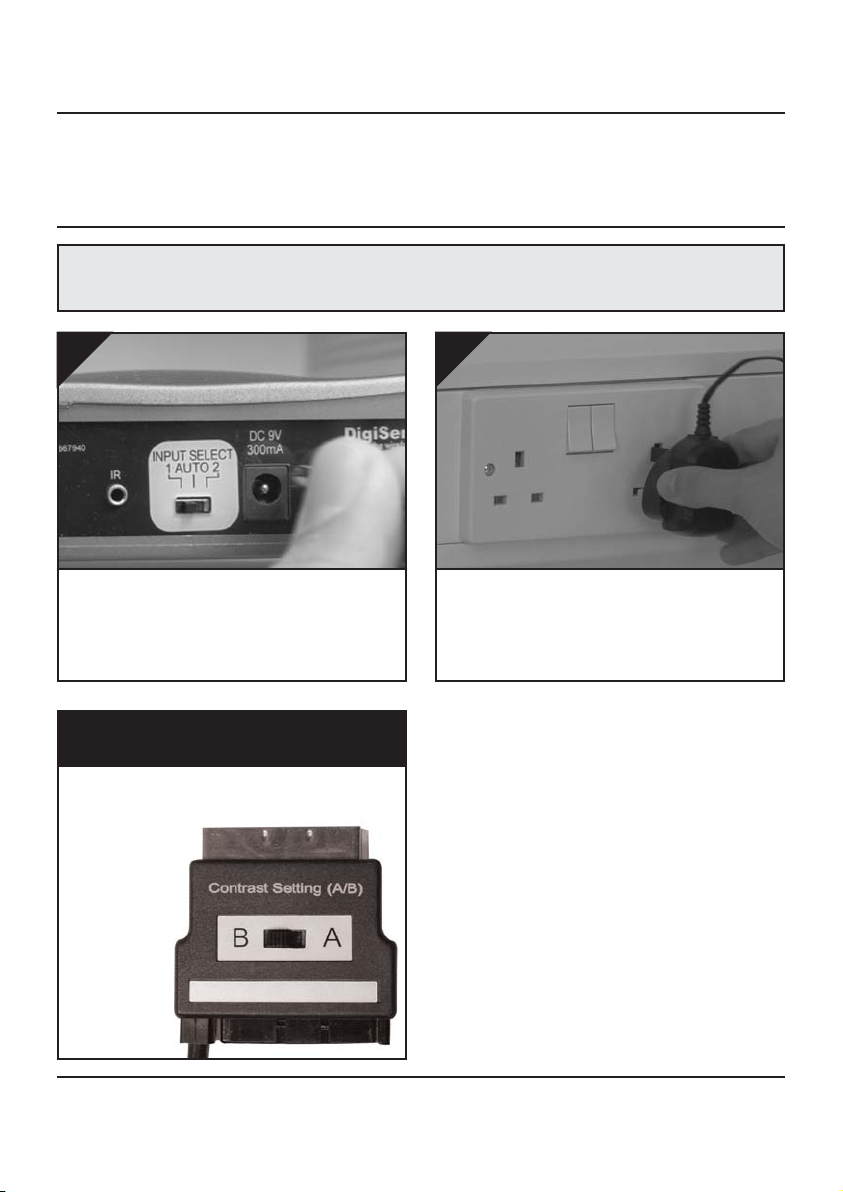
5.
Connect the Power Supply Unit (PSU) to the
socket labelled ‘DC 9V’ on the DG200
Transmitter.
What’s the A/B switch for??
The Contrast (A/B) switch is present to compensate for differences in equipment set-ups.
Once installation is
complete, if you
experience a poor
picture try
adjusting the
A/B setting.
6.
Connect the Power Supply Unit (PSU) to an
available mains socket.
Please read this instruction manual carefully prior to installationPage 06
 Loading...