

Page 1

user manual
Professional line
Induction Teppan Yaki
TY58TCICN
Page 2

We were thinking of you
when we made this product
Page 3

Welcome to the world of Electrolux
Thank you for choosing a first class
product from Electrolux, which hopefully
will provide you with lots of pleasure in
the future. The Electrolux ambition is to
offer a wide variety of quality products
that make your life more comfortable.
You will find some examples on the cover in this manual. Please take a few minutes to study this manual so that you
can take advantage of the benefits of
your new machine. We promise that it
will provide a superior User Experience
delivering Ease-of-Mind. Good luck!
electrolux 3
Page 4

4 electrolux contents
T
1
Contents
Safety instructions 5
Description of the Appliance 7
Before using for the first time 11
Operating the appliance 12
Tips for cooking with the
Te pp an Ya ki 1 7
Cleaning and Care 20
What to do if … 21
Disposal 22
Installation instructions 23
Installation general 24
Installation proud of the work
surface 25
Built-in installation 29
Service 34
he following symbols are used in this user information:
Warning! This must be read! Important advice for the safety of persons and
information on avoiding damage to the appliance
3 General information and advice
2 Information on environmental protection
z Dangerous voltage
Page 5

Safety instructions
Please comply with these instructions. If
you do not, any damage resulting is not
covered by the warranty.
Correct use
• Persons (including children) who,
due to their physical, sensory or
mental capacity or their inexperience
or lack of knowledge are unable to
use the appliance safely should not
operate this appliance without the
supervision or instruction of a responsible person.
• Do not leave the appliance unattended during operation.
• This appliance should be used only
for normal domestic cooking and frying of food.
• The appliance must not be used as a
work surface or as a storage surface.
• Additions or modifications to the appliance are not permitted.
• Do not place or store flammable liquids, highly inflammable materials or
fusible objects (e.g. plastic film, plastic, aluminium) on or near the appliance.
safety instructions electrolux 5
Child safety
• Small children must be kept away
from the appliance.
• Only let bigger children work on the
appliance under supervision.
• To avoid small children and pets unintentionally switching the appliance
on, we recommend activation of the
child safety device.
General safety
• The appliance may only be installed
and connected by trained, registered
service engineers, or competent persons.
• Built-in appliances may only be used
after they have been built in to suitable built-in units and work surfaces
that meet standards.
• In the event of faults with the appliance or damage to the glass ceramic
(cracks, scratches or splits), the appliance must be switched off and
disconnected from the electrical
supply to prevent the possibility of an
electric shock.
• Repairs to the appliance must only
be carried out by trained registered
service engineers.
Page 6

6 electrolux safety instructions
Safety during use
• Overheated fats and oils can ignite
very quickly. Warning! Fire hazard!
• IMPORTANT Risk of burns! Fat or oil
added to the cooking surface which
has already been heated ignites
quickly and can spit.
• There is the risk of burns from the
appliance if used carelessly.
• Remove stickers and film from the
glass ceramic and the cooking surface.
• Cables from electrical appliances
must not touch the hot surface of the
appliance or hot cookware.
• Switch cooking zone off after every
use.
• Users with implanted pacemakers
should keep their upper body at least
30 cm from the cooking zones that
are switched on.
• The ventilation gap of 5mm between
the worktop and front of the unit underneath it must not be covered.
• Do not use pots and pans made of
cast iron or those with damaged
bases that are rough and have burrs.
Pushing these about can cause
scratches.
Safety when cleaning
• For cleaning, the appliance must be
switched off and cooled down.
• For safety reasons, the cleaning of
the appliance with steam jet or highpressure cleaning equipment is not
permitted.
How to avoid damage to the appliance
• The ceramic glass can be damaged
by objects falling onto it.
• The edge of the ceramic glass can
be damaged by being knocked by
the cookware.
• Objects that melt and things that boil
over can burn on and should be removed straight away.
Special notes for the Teppan Yaki
• During operation, noises can be
caused by the grill expanding. This is
not a defect in the cooking surface
and its operation is not affected.
• If the grill is used frequently, a slight
depression may form in the middle of
the cooking surface where the two
zones meet. This is not a defect in
the cooking surface and its operation is not affected. Therefore:
– Do not place pots and pans over
the transition between the two
zones, as the depression can
make them unsteady.
– Frying on the transition between
the zones can result in uneven
browning (e. g. with pancakes).
Page 7

description of the appliance electrolux 7
Description of the Appliance
The most important features of
your appliance
• The grill surface is 11 mm thick. It
comprises of two stainless steel layers and an aluminium layer inbetween. The grilling surface has a
good heat storage function. The heat
storage function prevents the grilling
surface temperature from falling too
quickly, for example when preparing
meats taken from the fridge.
• Each Teppan Yaki grill surface is
unique. Due to their processing, they
are handled manually and ground by
grinding specialists. Deviations in the
grinding pattern are normal and will
not result in any functional limits.
The frequent use of the grill makes it
look more valuable.
• The grill surface is separated into two
large grilling zones that can be controlled separately (see “Equipment
Teppan Yaki”).
• The edge shaped as a trough fulfils
three important functions:
– It reduces the temperature on the
fitting surface that enables the
economy grill to be fitted into different kitchen worktops.
– The curved shape of the trough
takes on a part of the expansion of
the heated grill surface.
– Small food residues and liquids
can simply be pushed into the
trough and removed without effort.
• The desired temperature can be kept
constant using the thermostat with
temperature settings that can be
read-off. This prevents the foods
from overheating and allows a low fat
and preservative cooking.
• The dishes are prepared (heated) direct on the grill surface, with or without fat. However, there is also a
possibility of cooking with pots.
• The heating time, for example
180 °C, takes approx. 4 minutes.
The cooling time, for example from
180 °C to 100 °C, takes approx.
25 minutes or to 60 °C approx.
60 minutes.
• The economy grill must always be
pre-heated.
Page 8

8 electrolux description of the appliance
Te ppa n Yak i l a y o u t
rear grilling zone
2800 W
front grilling zone
2800 W
Control panel
Control panel layout
Temperature display
for rear grilling zone
Pilot light for
Child lock
pilot light
Te mp er at ur e
selection for rear
grilling zone
Child lock
temparature
160 °C / 180 °C
temperature preset
preset
Timer indicator
Timer
Timer
selection
Temperature display
for front grilling zone
Pilot light for
temparature
preset
Temperature
selection for front
grilling zone
160 °C / 180 °C
temperature preset
On/Off pilot
light
On/Off
Page 9
description of the appliance electrolux 9
Touch Control sensor fields
The appliance is operated using Touch
Control sensor fields. Functions are
controlled by touching sensor fields.
Touch the sensor fields from above,
without covering other sensor fields.
Sensor field Function
On / Off To switch the appliance on and off
Increase settings To increase the temperature
Reduce settings To reduce temperature
Timer Timer selection
Increase settings To increase Timer time
Reduce settings To reduce Timer time
Child lock Locking control panel for children
160 °C temperature preset To switch on 160 °C temperature preset
180 C° temperature preset To switch on 180 °C temperature preset
Displays
Display Description
Appliance is switched on
50 - 220 Temperature display in
degrees Celsius
Fault Malfunction has occurred
Residual heat Cooking zone is still hot
Child safety device Child safety device is engaged
Automatic switch off Switch off is active.
Temperature is set
Residual heat indicator
Warning! Risk of burns from residual heat. After being switched off, the
cooking zones need some time to
cool down. Look at the residual heat
indicator
.
Residual heat can be used for melting and keeping food warm.
Page 10
10 electrolux description of the appliance
Special accessories
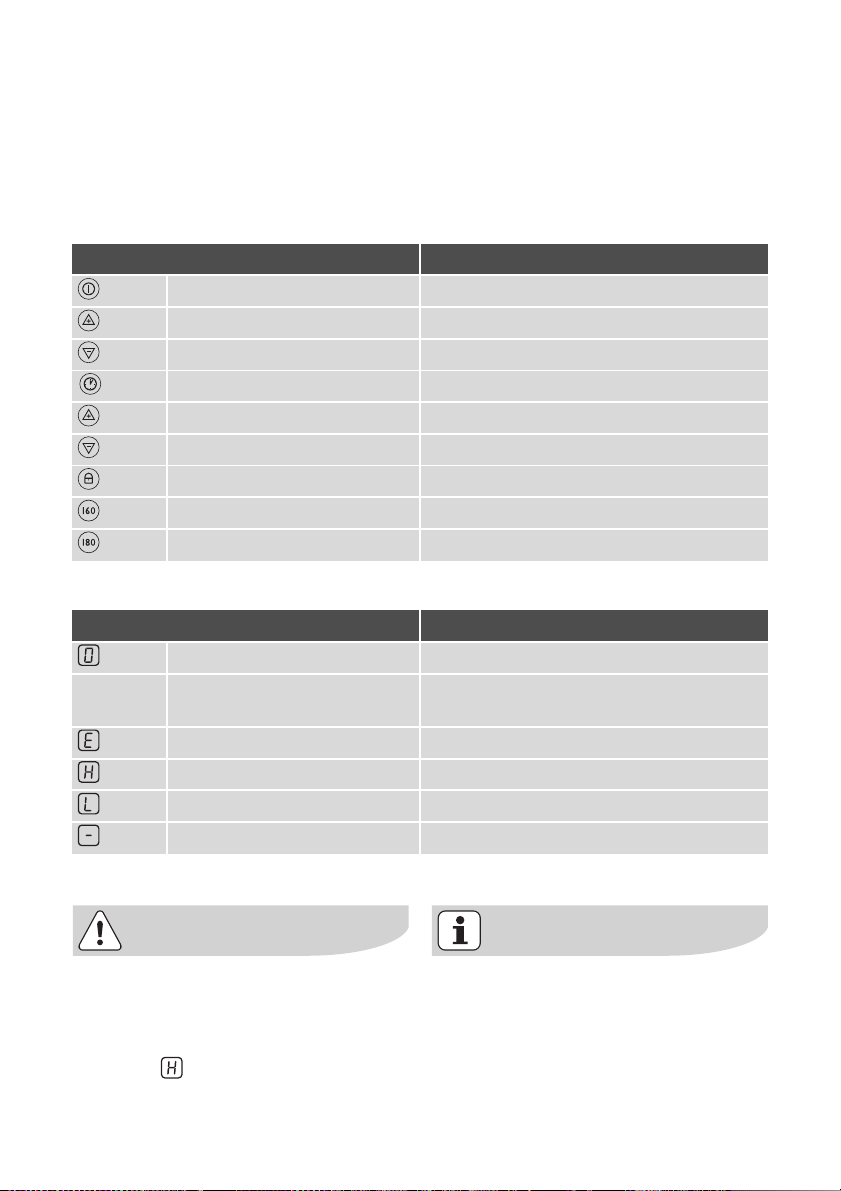
Turning spoon TY WS
(spatula)
The ergonomic spoon serves as a multipurpose tool for turning food or for removing burnt-on food remnants.
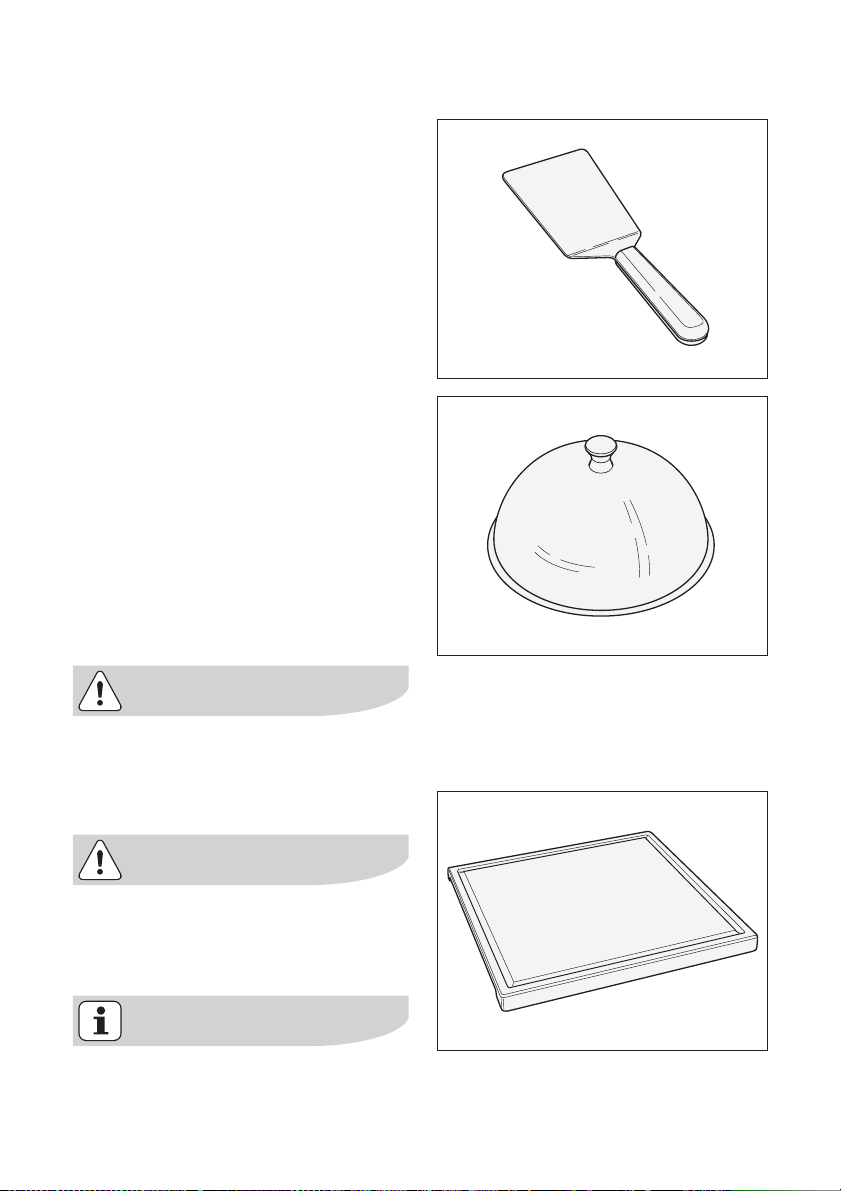
Stainless steel domed lid
TY GG24 (255 x 140mm)
The domed lid is particularly suitable for
steaming vegetables, for keeping
cooked food warm or re-heating foods,
e.g. rice, noodles.
If you bake or roast under the domed lid,
everything stays fresh and crispy. Undesirable steam or spitting is largely prevented.
Important The domed lid’s handle
can get hot. Please use oven gloves.
Cover/Chopping board TY SB58
(B 600/T 605)
Important The chopping board can
only be placed over the grill or cooking surface when it has cooled
down completely.
Wood is a natural product. As a result, warping and cracks can arise,
as can colour variations.
Page 11

Before using for the first time
Cleaning for the first time
• Remove protective film
• Wipe control panel with a damp
cloth.
• When the cooking surface is cold,
wipe it with a damp cloth in the direction of the grain.
Important do not use sharp or abrasive cleaning materials. These could
damage the surface.
before using for the first time electrolux 11
Page 12

12 electrolux operating the appliance
Operating the appliance
Preparing food with the
Te pp an Ya ki
The foods are prepared (heated) directly
on the cooking surface, with or without
fat. There is also the option of cooking
with pots or pans.
However, if pots and pans are used on
the cooking surface, the warm up time
is markedly longer than on glass ceramic, gas or cast-iron plates.
Accompaniments, e.g. sauces, rice,
etc., can be cooked or kept warm in
pots or pans placed directly on the
cooking surface.
We do not recommend boiling large
quantities on the cooking surface, such
as, e.g. for spaghetti.
When food is cooking on the cooking surface, don’t be frightened to
turn it or remove it from the grill surface using a flipper. Wear marks in
the cooking surface are normal and
do not limit the operation in any
way.
Temperature range
You can set the cooking surface to the
temperature you want in 10° steps in the
range 50 °C to 220 °C.
The heating up time, e.g. to 180 °C,
is approx. 4 minutes.
The induction Teppan Yaki may
make noises during operation.
These noises are not a fault in the
appliance and do not affect how it
works in any way.
Page 13

operating the appliance electrolux 13
Switching the appliance on and off
Control panel Display Pilot light
To s wi tc h o n touch for 2 seconds / lights up
To s wi tc h o ff touch for 2 seconds / none goes out
After switching on, within approx.
10 seconds a heat setting or a function must be set, otherwise the appliance automatically switches
itself off.
Setting the temperature
Control panel Display
To increase Touch 50 to 220
To decrease Touch 220 to 50
To s wi tc h o ff Touch and the same time 0
If a temperature is selected, the indicator flashes until the desired
temperature is reached. When the
selected temperature is reached, a
signal sounds. The indicator stops
flashing and displays the selected
temperature
Page 14

14 electrolux operating the appliance
Using the child safety device
The child safety device prevents unintentional use of the appliance.
Switching on the child safety device
Step Control panel Display/Signal
1. Switch on appliance. (Do not set a
heat setting.)
2. Touch for 4 seconds
Appliance switches off. The child safety device is switched on
Deactivate the child safety device
Step Control panel Display/Signal
1. Switch appliance on
2. To uc h for 4 seconds 0 lights up
Appliance switches off. The child safety device is switched off.
Overriding the child safety device
The child safety device can be switched
off in this way for a single cooking session; it remains activated afterwards.
Step Control panel Display/Signal
1. Switch appliance on
2. To uc h and of a grill zone the same
time
Until the next time the appliance is switched off, it can used as normal.
/ Acoustic alarm
Page 15

operating the appliance electrolux 15
Using the timer
Two functions are possible:
Function Pre-requisite Result after time has
elapsed
Automatic cut-out With heat setting set Acoustic signal
0 lights up
Cooking zone switches
off
Countdown timer Cooking zones are not
switched on
If a heat setting is set in addition to
a countdown timer that is set, the
countdown timer becomes a safety
cut-out. The cooking zone is
switched off after the time set has
elapsed.
Acoustic signal
0 lights up
Page 16

16 electrolux operating the appliance
Setting the time
Step Control panel Display
1. To uc h Pilot light flashes
2. To u c h o r 0 to 99 minutes
The pilot light lights up.
The time is set.
The time counts down to 0.
Switching timer function off
Step Control panel Display
1. To uc h Pilot light flashes
2. To uc h The remaining time counts down to 0.
The pilot light goes out.
The timer function is switched off.
Changing the time
Step Control panel Display
1. To uc h Pilot light flashes
2. To u c h o r 01 to 99 minutes
The pilot light lights up.
The time is set.
The time counts down to 0.
Switching off the acoustic signal
Step Control panel field Acoustic signal
1. To uc h Acoustic signal to acknowledge.
Acoustic signal stops.
Automatic switch off
• If a temperature is not set within approx. 10 seconds of the appliance
being switched on, the appliance automatically switches itself off.
• If both grill zones are switched off,
the Teppan Yaki automatically
switches itself off after approx.
10 seconds.
• If one of the grill zones is not
switched off after 90 minutes or if the
temperature is not modified, the grill
zone automatically switches itself off.
is displayed. Before being used
again, this grill zone must be set to
0.
Page 17

Tips for cooking with the
Teppan Yaki
Using fats and oils
When fats and oils are used, the correct
temperature is extremely important.
With the correct temperature setting,
the valuable components of the oils and
fats are retained for a long time. When
the temperature is too high, the fat begins to smoke (so-called “smoking point”).
tips for cooking with the teppan yaki electrolux 17
Fats / Oils
Butter 130 150
Pork fat 170 200
Beef fat 180 210
Olive oil 180 200
Sunflower oil 200 220
Groundnut oil 200 235
Coconut oil 200 240
Maximum temperature
(°C)
Smoking point (°C)
Note: Always pre-heat the economy
grill!
Ta bl e
Food to be cooked
Fish and shellfish
Salmon fillets 160
King prawns (without shell) 140
Shark steaks, approx. 2.5 cm thick 160
Sole, Müllerin Art (fried in butter) 140
Plaice filets 140
Temperature (°C) Time / Tips
140–160 Pre-heat the economy grill
8 minutes, turn after
4 minutes
6 minutes, turn after
3 minutes
10 minutes, turn after
5 minutes
8 minutes, turn after
4 minutes, light side first
6 minutes, turn after
3 minutes
Page 18

18 electrolux tips for cooking with the teppan yaki
Food to be cooked
Veal
Veal chop 180
Medallions of Veal, 4 cm thick 160
Veal steaks, 3 - 4 cm thick 160
Veal escalope, natural 180
Veal fricasee in cream sauce 180
Beef
Beef steak
blau, very rare
blutig, rare
rosa, medium
durch, well done
Hamburger 160
Châteaubriand
Pork
Medallions of pork 160
Pork steaks 180
Pork escalope 160
Spare ribs 160
Pork skewer 160
Temperature (°C) Time / Tips
160–180 Pre-heat the economy grill
160–180 Pre-heat the economy grill
180
180
180
180
160
100
160–180 Pre-heat the economy grill
10 minutes, turn after
5 minutes
10 minutes, turn after
5 minutes
6 minutes, turn after
3 minutes
5 minutes, turn after
2½ minutes
6 minutes, turn after
3 minutes (the meat strips
should not e stuck to each other)
2 minutes, turn after 1 minute
8 minutes, turn after
2 minutes
6 minutes, turn after
3 minutes
8 minutes, turn after
4 minutes
without fatty substances, the
roasting time increases
by approximately 20 %
6 - 8 minutes, turn after
3 - 4 minutes
Sauté the meat in oil on all sides
(turn only when the meat does
not stick to the pan)
Finish off on one side for
10 minutes
8 minutes, turn after
4 minutes (depending on the
thickness)
8 minutes, turn after
4 minutes
6 minutes, turn after
3 minutes
8 - 10 minutes, turn several
times
6 – 8 minutes, sauté well on all
sides
Page 19

tips for cooking with the teppan yaki electrolux 19
Food to be cooked
Lamb
Lamb chops 180
Filet of lamb 160
Lamb steaks 160
Poultry
Chicken supreme 140
Turkey breast strips 160 6 minutes, turn several times
Sausages
Fried egg
Crepes / Omelettes
Fruits
Veget ables
Veget ables
Cook the pre-cooked rice
Cook the pre-cooked noodles
Temperature (°C) Time / Tips
160–180 Pre-heat the economy grill
10 minutes, turn after
5 minutes
10 minutes, turn after
5 minutes
(important here is that the filets
are fried on all sides)
6 - 8 minutes, turn after
3 - 4 minutes
140–160 Pre-heat the economy grill
8 - 10 minutes, turn after
4 - 5 minutes
160 Pre-heat the economy grill
140 Pre-heat the economy grill
140-160 Pre-heat the economy grill
140-160 Pre-heat the economy grill
140-160
140-160
140-160
140-160
10 – 20 minutes, turn several
times
10 - 15 minutes, under a cooking lid (turn half way through)
10 – 15 minutes, turn several
times
15 - 20 minutes, turn half way
through
Information on acrylamides
According to the latest scientific
knowledge, intensive browning of
food, especially in products containing starch, can constitute a
health risk due to acrylamides.
Therefore we recommend cooking
at the lowest possible temperatures
and not browning foods too much.
Page 20

20 electrolux cleaning and care
Cleaning and Care
Important: There is a risk of being
burned when cleaning the hot economy grill!
Important: Never clean the grill surface using abraisive powders or aggressive detergents!
Cleaning the economy grill using ice
cubes
1. Turn the appliance off and allow to
cool to approx 80 °C.
2. Place the ice cubes onto the grill one
after another. At the same time, loosen the roasting leftovers using a
spatula and push them into the
trough until all leftovers have been
removed. Remove the leftovers from
the trough (e.g. using kitchen paper).
Cold water can also be used instead
of ice cubes.
3. Allow the grill surface to cool to approx 80 °C. Thoroughly clean with a
clean cloth and a little cold water.
4. Cleaning when in a cold condition:
– allow a suitable fat solvent to react
for 5 minutes
– remove the cooking residues using a
spatula or Inox steel knawl
– Carry out the subsequent cleaning
with water (wet cloth).
5. When the grill is cold, remove any
stains that may have been caused by
proteins or acids in the foodstuffs using some lemon juice and a clean
cloth. Then thoroughly clean using a
damp cloth.
If the economy grill has already
cooled down before cleaning, heat
up to approx. 80° C and switch back
off.
Cleaning the economy grill between
two dishes
Analogue to point 2-3 above
Cleaning the operating panel
1. Wipe the appliance with a damp
cloth and a little washing up liquid.
2. Dry the appliance using a clean
cloth.
Page 21

What to do if …
Problem Possible cause Remedy
what to do if … electrolux 21
The Teppan Yaki cannot be
switched on or is not operating
The residual heat indicator is
not displaying anything.
and number are displayed Electronics fault Disconnect the appliance from
More than 10 seconds have
passed since the appliance
was switched on
The child safety device is
switched on
Several sensor fields were
touched at the same time
Automatic switch-off has been
triggered
The cooking zone was only on
for a short time and is therefore
not yet hot
Switch the appliance on again.
Deactivate child safety device
(See the section “Child safety
device”)
Only touch one sensor field
Remove any objects (pan,
cloths, etc.) that are lying on
the control panel. Switch appliance on again
If the cooking zone is supposed to be hot, call the Customer Service Department.
the electrical supply for a few
minutes (Take the fuse out of
the house’s wiring system)
If after switching on again,
is displayed again, call the
customer service department
If you are unable to remedy the
problem by following the above
suggestions, please contact your
local Service Force Centre.
Warning! Repairs to the appliance
are only to be carried out by qualified service engineers. Considerable danger to the user may result
from improper repairs.
If the appliance has been operated
incorrectly, the engineer's visit will
be chargeable, even during the warranty period.
Page 22

22 electrolux disposal
Disposal
Packaging material
The packaging materials are envi-
ronmentally friendly and can be recycled. The plastic components are
identified by markings, e.g. >PE<,
>PS<, etc. Please dispose of the
packaging materials in the appropriate container at the community
waste disposal facilities.
Old appliance
The symbol
its packaging indicates that this
product may not be treated as
household waste. Instead it shall be
handed over to the applicable collection point for the recycling of
electrical and electronic equipment.
By ensuring this product is disposed of correctly, you will help prevent potential negative
consequences for the environment
and human health, which could otherwise be caused by inappropriate
waste handling of this product. For
more detailed information about recycling of this product, please contact your local city office, your
household waste disposal service
or the shop where you purchased
the product.
W on the product or on
Where should you take your old machines?
You can return these to any shop
selling new machines or dispose of
them at official S.EN.S collection
points or official S.EN.S recycling
facilities.
The official S.EN.S collection points
are listed at www.sens.ch.
Warning: So that the old appliance
can no longer cause any danger,
make it unusable before disposing
of it.
To do this, disconnect the appliance
from the mains supply and remove
the mains cable from the appliance.
Page 23

installation instructions electrolux 23
Installation instructions
Safety instructions
Warning! This must be read!
The laws, ordinances, directives and
standards in force in the country of use
are to be followed (safety regulations,
proper recycling in accordance with the
regulations, etc.)
Installation may only be carried out by a
qualified electrician.
The minimum distances to other appliances and units are to be observed.
Anti-shock protection must be provided
by the installation, for example drawers
may only be installed with a protective
floor directly underneath the appliance.
The cut surfaces of the worktop are to
be protected against moisture using a
suitable sealant.
The sealant seals the appliance to the
work top with no gap.
When building in, protect the underside
of the appliance from steam and moisture, e.g. from a dishwasher or oven.
Avoid installing the appliance next to
doors and under windows. Otherwise
hot cookware may be knocked off the
rings when doors and windows are
opened.
Distance from the wall: at least 50 mm.
z Risk of injury from electrical
current.
• The appliance must be free of voltage when installing and uninstalling.
• Observe connection schematic.
• Observe electrical safety rules.
• Ensure anti-shock protection
through correct installation by a
qualified installer.
• The appliance must be connected to
the electrical supply by a qualified
electrician.
z Risk of injury from electrical
current.
Loose and inappropriate plug and socket connections can make the terminal
overheat.
• Have the clamping connections correctedly installed by a qualified electrician.
• Use strain relief clamp on cable.
• In the event of single-phase or two-
phase connection, the appropriate
mains cable of type H05BB-F Tmax
90°C(or higher) must be used.
A device must be provided in the electrical installation which allows the appliance to be disconnected from the mains
at all poles with a contact opening width
of at least 3 mm.
Suitable isolation devices include line
protecting cut-outs, fuses (screw type
fuses are to be removed from the holder), earth leakage trips and contactors.
Page 24

24 electrolux installation general
Installation general
Page 25

Installation proud of the
work surface
installation proud of the work surface electrolux 25
Sticking on the seal
• If installing proud of the work surface, use the sealing tape with dimensions 16x2 mm.
• Clean the worktop in the area of the
cut-out.
• Cut the one-sided self-adhesive
sealing tape supplied into four parts
according to the edge length of the
cut-out and stick to the worktop
along the edge of the cut-out.
• In doing so, the sealing tape should
protrude by approx. 3 mm over the
edge of the appliance on all sides.
• Do not stretch the sealing tapes
when sticking. Do not stick the ends
on top of each other, these should
be pushed against each other.
• After fitting the Teppan Yaki (using
the provided fitting material), the
overlaying sealing tape must be cut
away on all sides using a sharp knife.
Take care not to damage the worktop.
Page 26

26 electrolux installation proud of the work surface
Important! A heat resistant sealing
ring must be installed between the
edge of the appliance and the worktop as the appliance can reach high
temperatures during operation.
Note! The surface of the grill protrudes 3 mm to the glass operating
panel because of heating reasons.
Page 27

installation proud of the work surface electrolux 27
Page 28

28 electrolux installation proud of the work surface
Page 29

Built-in installation
built-in installation electrolux 29
Sticking the seal in the rabbet
• Clean the rabbet in the work surface.
• Stick the one-sided self-adhesive
sealing tape supplied all the way
round the upper edge of the rabbet
cut-out.
– Cut the sealing tape into four piec-
es according to the edge length of
the rabbet.
– The ends of the sealing tape must
be cut to fit the four corners of the
rabbet. Do not stick the tape on
top of each other.
– Stick the sealing tape flush in the
corner of the rabbet to prevent silicone from running into the lower
part of the Teppan Yaki when jointing.
– Do not stretch the tapes when
sticking.
Page 30

30 electrolux built-in installation
Sticking the appliance in
• Clean the appliance and worktop
(should be free of fat)
• After installing the Teppan Yaki, fasten using the fixing parts provided.
• The gap between the appliance and
the worktop cut-out must be filled
with silicone. (We recommend that
the colour Anthracite RAL 7022 is
used!)
Important! A heat resistant sealing
ring must be installed between the
edge of the appliance and the worktop as the appliance can reach high
temperatures during operation.
Note! The surface of the grill protrudes 3 mm to the glass operating
panel because of heating reasons.
Page 31

built-in installation electrolux 31
Page 32

32 electrolux
Rating Plate
ELECTROLUX
220-240 V5,6 kW
Induction 5,6 kW
59TPA23KO
941 177 674
50/60
TY58TCICN
Page 33

electrolux 33
Garantie/Kundendienst, Garantie/service-clientèle, Garanzia/Servizio
clienti, Guarantee/Customer Service Centres
Servicestellen
5506 Mägenwil/Zürich
Industriestrasse 10
9000 St. Gallen
Zürcherstrasse 204 e
4127 Birsfelden
Hauptstrasse 52
6020 Emmenbrücke
Seetalstrasse 11
7000 Chur
Comercialstrasse 19
Ersatzteilverkauf/Points de vente de rechange
5506 Mägenwil, Industriestrasse 10, Tel. 0848 848 023
Fachberatung/Verkauf/Demonstration/Vente/Consulente (cucina)/Vendita
8048 Zürich, Badenerstrasse 587, Tel. 044 405 81 11
Garantie
Für jedes Produkt gewähren wir ab Verkauf bzw. Lieferdatum an den Endverbraucher eine Garantie
von 2 Jahren. (Ausweis durch Garantieschein, Faktura oder Verkaufsbeleg).
Die Garantieleistung umfasst die Kosten für Material, Arbeits- und Reisezeit. Die Garantieleistung entfällt bei Nichtbeachtung der Gebrauchsanweisung und Betriebs-vorschriften, unsachgerechter Installation, sowie bei Beschädigung durch äussere Einflüsse, höhere Gewalt, Eingriffe Dritter und
Verwendung von Nicht-Original Teilen.
Garantie
Nous octroyons sur chaque produit 2 ans de garantie à partir de la date de livraison ou de la mise en
service au consommateur (documenté au moyen d’une facture, d’un bon de garantie ou d’un justificatif d’achat). Notre garantie couvre les frais de mains d’œuvres et de déplacement, ainsi que les pièces de rechange. Les conditions de garantie ne sont pas valables en cas d’intervention d’un tiers non
autorisé, de l’emploi de pièces de rechange non originales, d’erreurs de maniement ou d’installation
dues à l’inobser-vation du mode d’emploi, et pour des dommages causés par des influences extérieures ou de force majeure.
Garanzia
Per ogni prodotto concediamo una garanzia di 2 anni a partire dalla data di consegna o dalla sua messa in funzione. (fa stato la data della fattura, del certificato di garanzia o dello scontrino d’acquisto) Nella
garanzia sono comprese le spese di manodopera, di viaggio e del materiale.
Dalla copertura sono esclusi il logoramento ed i danni causati da agenti esterni, intervento di terzi, utilizzo di ricambi non originali o dalla inosservanza delle prescrizioni d’istallazione ed istruzioni per l’uso.
Warranty
For each product we provide a two-year guarantee from the date of purchase or delivery to the consumer (with a guarantee certificate, invoice or sales receipt serving as proof). The guarantee covers the
costs of materials, labour and travel. The guarantee will lapse if the operating instructions and conditions of use are not adhered to, if the product is incorrectly installed, or in the event of damage caused
by external influences, force majeure, intervention by third parties or the use of non-genuine components.
Points de Service
3018 Bern
Morgenstrasse 131
Servizio dopo vendita
1028 Préverenges
Le Trési 6
/
Vendita pezzi di ricambio/spare parts service
Point of Service
6916 Grancia
Zona Industriale E
Page 34

34 electrolux service
Service
In the event of technical faults, please
first check whether you can remedy the
problem yourself with the help of the operating instructions (section “What to do
if…”).
If you were not able to remedy the problem yourself, please contact the Customer Care Department or one of our
service partners.
In order to be able to assist you quickly,
we require the following information:
– Model description
– Product number (PNC)
– Serial number (S No.)
(for numbers see rating plate)
– Typ e o f f a u l t
– Any error messages displayed by the
appliance
– three digit letter-number combina-
tion for glass ceramic
So that you have the necessary reference numbers from your appliance at
hand, we recommend that you write
them in here:
Model description: .....................................
PNC: .....................................
S No: .....................................
Page 35

Page 36

www.electrolux.com
www.electrolux.ch
374 483 003-O-221008-03
 Loading...