

Page 1

benutzerinformation
notice d'utilisation
istruzioni per l’uso
user manual
Kondensationstrockner
Sèche-linge à condensation
Asciugatrice
Condenser dryer
TK SL 3E
Page 2

2 electrolux
Electrolux. Thinking of you.
Mehr zu unserem Denken finden Sie unter www.electrolux.com
INHALT
Wichtige Sicherheitshinweise 2
Entsorgung 4
Aufstellen 5
Gerätebeschreibung 7
Bedienblende 8
Vor der ersten Inbetriebnahme 9
Programmtabelle 9
WICHTIGE SICHERHEITSHINWEISE
Wichtig! Lesen Sie zu Ihrer Sicherheit
und für eine optimale Nutzung des
Geräts vor der Installation und dem
ersten Gebrauch die vorliegende
Gebrauchsanweisung einschließlich
der Ratschläge und Warnungen
aufmerksam durch. Es ist wichtig, dass
zur Vermeidung von Fehlern und
Unfällen alle Personen, die das Gerät
benutzen, mit der Bedienung und den
Sicherheitsvorschriften vertraut sind.
Heben Sie die Benutzerinformation gut
auf und übergeben Sie sie bei einem
Weiterverkauf des Gerätes dem neuen
Besitzer, so dass jeder während der
gesamten Lebensdauer des Gerätes
über Gebrauch und Sicherheit
informiert ist.
- Bitte lesen Sie vor dem Gebrauch
des Gerätes die Gebrauchsanweisung
durch.
Allgemeine Sicherheit
• Aus Sicherheitsgründen dürfen keine Än-
derungen am Gerät vorgenommen werden.
• Personen (einschließlich Kinder), die auf-
grund ihrer eingeschränkten physischen,
sensorischen oder geistigen Fähigkeiten
oder ihrer Unerfahrenheit oder Unkenntnis nicht in der Lage sind, das Gerät sicher zu benutzen, dürfen dieses Gerät
nicht ohne Aufsicht oder Anweisung
durch eine für ihre Sicherheit verantwortliche Person benutzen.
Täglicher Gebrauch 12
Reinigung und Pflege 16
Was tun, wenn... 19
Technische Daten 21
Geräteeinstellungen 22
Hinweise für Prüfinstitute 22
Kundendienst 22
Änderungen vorbehalten
• Stellen Sie sicher, dass keine kleinen Kinder oder Haustiere in die Trommel klettern. Kontrollieren Sie daher vor dem Gebrauch die Trommel.
• Alle harten und scharfen Gegenstände
wie Münzen, Sicherheitsnadeln, Nägel,
Schrauben usw. können das Gerät
schwer beschädigen und gehören nicht
in die Maschine.
• Trocknen Sie zur Vermeidung von Brandgefahr durch zu langes Trocknen keine
der folgenden Wäschestücke in dem Gerät: Kissen, Schlafdecken und ähnliche
Dinge (die Wärme speichern können).
• Artikel wie Schaumgummi (Latexschaumgummi), Duschhauben, imprägnierte Textilien, gummibeschichte Wäschestücke,
Kleider oder Kissen mit Schaumgummipolster dürfen in dem Gerät nicht getrocknet werden.
• Ziehen Sie nach dem Trocknen und zum
Reinigen und Warten des Gerätes immer
den Netzstecker.
• Versuchen Sie unter keinen Umständen,
das Gerät selbst zu reparieren. Reparaturen durch unerfahrene Personen können
zu Verletzungen und schweren Funktionsstörungen führen. Wenden Sie sich an Ihren Kundendienst. Bestehen Sie immer
auf Original-Ersatzteilen.
• Wäschestücke, die mit Speiseöl verschmutzt sind oder die mit Aceton, Benzin, Kerosin, Fleckentfernern, Terpentin,
Wachsen und Wachsentfernern behandelt worden sind, müssen vor dem Trocknen in dem Wäschetrockner in heißem
Wasser und zusätzlichem Waschmittel gewaschen werden.
Page 3

electrolux 3
•
Explosionsgefahr: Trocknen Sie keine
Wäschestücke, die mit entflammbaren
Stoffen (Benzin, denaturiertem Alkohol,
Trockenreinigungsmittel oder Ähnlichem)
in Berührung gekommen sind. Da diese
Stoffe flüchtig sind, besteht Explosionsgefahr. Trocknen Sie nur mit Wasser gewaschene Wäschestücke.
• Brandgefahr: Wäschestücke, die mit
Speise- oder Pflanzenöl befleckt oder getränkt sind, stellen eine Brandgefahr dar
und gehören nicht in den Wäschetrockner.
• Für Wäsche, die mit Fleckenentferner behandelt wurde, muss vor dem Trocknen
ein zusätzlicher Spülgang durchgeführt
werden.
• Vergewissern Sie sich, dass keine Feuerzeuge oder Streichhölzer in den Taschen
von Wäschestücken geblieben sind, bevor Sie die Wäsche in die Trommel legen.
Warnung!
• Brandgefahr! Wenn Sie die Trockentrommel vor dem Ende des
Trockengangs anhalten müssen,
entnehmen Sie bitte sofort die gesamte Wäsche und breiten Sie
diese zur Wärmeableitung aus.
• Es dürfen sich keine Flusen außen am Trockner ansammeln bitte entfernen.
• Stromschlaggefahr! Spritzen Sie das
Gerät nicht mit einem Wasserstrahl ab.
• Der letzte Teil eines Trocknerzyklus findet
ohne Hitze statt (Abkühlzyklus), um sicherzustellen, dass die Wäsche auf einer Temperatur bleibt, bei der sie nicht beschädigt wird.
• Wäsche, die chemisch gereinigt wurde,
darf nicht im Trockner getrocknet werden.
• Der Raum, in dem der Trockner aufgestellt wird, muss gut belüftet sein, damit
es nicht zu einem Rückstrom von Gasen
von offenem Feuer oder von anderen Geräten, die mit Brennstoffen arbeiten, in
den Raum kommt.
Aufstellen
• Dieses Gerät ist schwer. Vorsicht beim
Transport.
• Überzeugen Sie sich beim Auspacken,
dass das Gerät nicht beschädigt ist. In
Zweifelsfällen benutzen Sie es nicht, son-
dern wenden Sie sich an den Kundendienst.
• Entfernen Sie vor dem ersten Gebrauch
das gesamte Verpackungsmaterial. Bei
Missachtung dieser Anweisung können
schwerwiegende Schäden am Gerät und
Sachschäden entstehen. Siehe den entsprechenden Abschnitt in der Gebrauchsanweisung.
• Der elektrische Anschluss des Gerätes
darf nur von qualifizierten Elektrikern oder
Fachkräften ausgeführt werden.
• Wird das Gerät auf einem Teppichboden
aufgestellt, stellen Sie mit den Füßen die
Höhe so ein, dass auch unter dem Gerät
eine ausreichende Luftzirkulation gewährleistet ist.
• Vergewissern Sie sich nach dem Aufstellen des Gerätes, dass es nicht auf dem
Netzkabel steht oder dagegen drückt.
• Wird der Trockner auf einer Waschmaschine installiert, muss der Bausatz
Wasch-Trocken-Säule (Zubehör) verwendet werden.
Einsatzbereich
• Dieses Gerät ist zur Verwendung im Haushalt bestimmt. Es darf nicht für andere
Zwecke, als für die es konstruiert wurde,
benutzt werden.
• Trocknen Sie nur Textilien, die trocknergeeignet sind. Beachten Sie die Pflegekennzeichen auf den Textiletiketten.
• Trocknen Sie keine ungewaschenen Wäschestücke im Trockner.
• Überfüllen Sie das Gerät nicht. Siehe den
entsprechenden Abschnitt in der Gebrauchsanweisung.
• Tropfnasse Kleidung darf nicht in den Wäschetrockner geladen werden.
• Textilien, die mit flüchtigen Erdölerzeugnissen in Kontakt gekommen sind, dürfen
nicht in dem Gerät getrocknet werden.
Wenn flüchtige Reinigungsflüssigkeiten
verwendet wurden, müssen diese Flüssigkeiten ausgewaschen werden, bevor das
Kleidungsstück in das Gerät gegeben
wird.
• Ziehen Sie stets am Netzstecker, nicht
am Kabel, um den Stecker aus der Steckdose zu ziehen.
• Benutzen Sie den Wäschetrockner niemals, wenn das Stromkabel, die Bedien-
Page 4

4 electrolux
blende, die Arbeitsplatte oder der Sockel
beschädigt ist, so dass das Geräteinnere
frei liegt.
• Weichspüler oder ähnliche Produkte dürfen nur entsprechend den Herstelleranweisungen benutzt werden.
• Achtung – heiße Oberfläche : Berühren Sie bei eingeschalteter Innenbeleuchtung nicht die Abdeckung der Glühlampe.
(Betrifft nur Trockner mit Innenbeleuchtung.)
Sicherheit von Kindern
• Dieses Gerät darf ohne Aufsicht nicht von
kleinen Kindern oder Behinderten bedient
werden.
• Kinder erkennen häufig nicht die Gefahren, die von elektrischen Geräten ausge-
ENTSORGUNG
Das Symbol auf dem Produkt oder
seiner Verpackung weist darauf hin, dass
dieses Produkt nicht als normaler
Haushaltsabfall zu behandeln ist, sondern
an einem Sammelpunkt für das Recycling
von elektrischen und elektronischen
Geräten abgegeben werden muss. Durch
Ihren Beitrag zum korrekten Entsorgen
dieses Produkts schützen Sie die Umwelt
und die Gesundheit Ihrer Mitmenschen.
Umwelt und Gesundheit werden durch
falsches Entsorgen gefährdet. Weitere
Informationen über das Recycling dieses
Produkts erhalten Sie von Ihrem Rathaus,
Ihrer Müllabfuhr oder dem Geschäft, in dem
Sie das Produkt gekauft haben.
Wohin mit den Altgeräten?
Überall dort wo neue Geräte verkauft
werden oder Abgabe bei den offiziellen
SENS-Sammelstellen oder offiziellen
SENS-Recyclern.
Die Liste der offiziellen SENSSammelstellen findet sich unter
www.sens.ch.
Hinweise zum Umweltschutz
• Die Wäsche wird im Trockner flauschig
und weich. Weichspüler beim Waschen
ist deshalb nicht nötig.
• Ihr Trockner arbeitet am wirtschaftlichsten, wenn Sie:
– darauf achten, dass die Lüftungsschlit-
ze im Gerätesockel immer frei sind,
hen. Kinder sind sorgsam zu beaufsichtigten, so dass sie nicht mit dem Gerät spielen können.
Warnung!
• Erstickungsgefahr! Verpackungen
(z.B. Folien, Polystyrol) können eine
Gefahr für Kinder darstellen - halten
Sie solche Materialien von Kindern
fern.
• Bewahren Sie Waschmittel außerhalb der
Reichweite von Kindern auf.
• Stellen Sie sicher, dass Kinder oder Haustiere nicht in die Trommel klettern.
– die in der Programmtabelle aufgeführ-
ten Füllmengen einhalten,
– auf gute Raumbelüftung achten,
– den Mikrofein- und den Feinfilter nach
jedem Trockengang reinigen und
– die Wäsche vor dem Trocknen ausrei-
chend schleudern.
Der Energieverbrauch hängt von der
Schleuderdrehzahl der Waschmaschine ab. Je höher die Schleuderdrehzahl, desto niedriger der Energieverbrauch.
Hinweise zum Umweltschutz
Das Verpackungsmaterial ist umweltfreundlich und recycelbar. Kunststoffteile sind mit
internationalen Abkürzungen wie z. B.
>PE<, >PS< usw. gekennzeichnet. Entsorgen Sie das Verpackungsmaterial in den dafür vorgesehenen Behältern der städtischen
Müllentsorgung.
Warnung! Vor der Entsorgung des
Altgeräts:
• Ziehen Sie den Netzstecker aus der
Steckdose.
• Schneiden Sie das Netzkabel ab und
entsorgen Sie es zusammen mit dem
Stecker.
• Entfernen Sie die Türverriegelung. Dadurch verhindern Sie, dass sich Kinder aus Versehen im Inneren des Geräts einsperren und in Lebensgefahr
geraten.
Page 5

AUFSTELLEN
Aufstellen der Maschine
• Aus praktischen Gründen sollte der Trockner neben der Waschmaschine aufgestellt werden.
• Der Wäschetrockner muss in einem sauberen und staubfreien Raum aufgestellt
werden.
• Um das Gerät muss genügend Freiraum
für die Luftzirkulation vorhanden sein.
Das vordere Belüftungsgitter und die hinteren Lufteinlassgitter dürfen nicht zugestellt werden.
• Das Gerät auf festem ebenen Boden aufstellen, um Vibrationen und das Betriebsgeräusch so gering wie möglich zu halten.
• Kontrollieren Sie nach dem Aufstellen den
waagrechten Stand des Gerätes mit einer
Wasserwaage. Richten Sie es gegebenenfalls mit den Schraubfüßen aus.
• Die Schraubfüße dürfen nicht entfernt werden. Auf keinen Fall den Bodenabstand
durch Florteppiche, Holzleisten oder ähnliche Materialien einschränken. Der entstehende mögliche Hitzestau kann den Gerätebetrieb beeinträchtigen.
Wichtig!
• Die von dem Trockner abgegebene
Warmluft kann Temperaturen bis zu 60
°C erreichen. Das Gerät darf daher nicht
auf Böden aufgestellt werden, die nicht
hochtemperaturbeständig sind.
• Während des Betriebs des Trockners
muss die Raumtemperatur im Bereich zwischen +5° C und +35° C liegen. Andernfalls wird die Leistung des Gerätes beeinträchtigt.
• Das Gerät darf nur aufrecht stehend transportiert werden, wenn es versetzt werden
muss.
• Das Gerät darf nicht hinter einer verschließbaren Tür, einer Schiebetür oder einer Tür, deren Scharnier sich an der gegenüberliegenden Seite des Scharniers
des Geräts befindet aufgestellt werden,
wenn dadurch die vollständige Öffnung
des Trockners nicht mehr möglich ist.
Entfernen der Transportsicherungen
Vorsicht!
electrolux 5
Entfernen Sie vor dem Gebrauch das gesamte Verpackungsmaterial.
1. Öffnen Sie die Einfülltür.
2. Ziehen Sie die Klebebänder innerhalb
der Maschine oben von der Trommel ab.
3. Entfernen Sie den Folienschlauch und
den Polystyrolblock aus dem Gerät.
Elektrischer Anschluss
Angaben über Netzspannung, Stromart und
die erforderliche Absicherung sind dem Typenschild zu entnehmen. Das Typenschild
ist neben der Einfüllöffnung angebracht (siehe Kapitel "Gerätebeschreibung").
Der Anschluss darf nur über eine vorschriftsmäßig installierte und geerdete
Steckdose erfolgen.
Warnung! Der Hersteller übernimmt
keinerlei Haftung für Schäden oder
Verletzungen, die durch
Missachtung der
Sicherheitshinweise entstehen
sollten.
Falls das Netzkabel des Geräts ersetzt werden muss, lassen Sie dies
durch unseren Kundendienst durchführen.
Warnung! Der Stecker muss nach
der Aufstellung der Maschine
zugänglich sein.
Wechsel des Türanschlags
Warnung! Ziehen Sie den Netzstecker,
bevor Sie den Türanschlag wechseln.
Page 6

6 electrolux
1.
A
A
B
C
B
Öffnen Sie die Einfülltür.
2. Das Türscharnier A von der Frontseite
des Gerätes abschrauben und die Einfülltür abnehmen.
3. Die Abdeckplatten B entfernen. Stecken Sie dazu einen Schraubendreher
in die Schlitze (siehe Abbildung), drücken Sie leicht nach unten und hebeln
Sie die Abdeckplatten heraus.
4. Drücken Sie mit einem geeigneten Werkzeug auf die Rastung des Schließkolbens C , um ihn zu lösen und herauszunehmen. Setzen Sie ihn dann auf der gegenüber liegenden Seite um 180° gedreht ein.
5. Türscharnier A von der Einfülltür abschrauben, um 180° drehen und auf
der gegenüber liegenden Seite wieder
anschrauben.
6. Die Abdeckplatten B um 180° drehen
und auf der gegenüber liegenden Seite
wieder einsetzen.
7.
D
E
E
D
FF
Die Abdeckplatten D von der Gerätefrontseite abschrauben, um 180° drehen und auf der gegenüber liegenden
Seite anschrauben.
8. Das Türschloss E abschrauben, etwas
nach unten drücken und von der Gerätefrontseite abnehmen.
9. Den Rastknopf F nach innen hinein drücken, die Abdeckung etwas nach unten
drücken und aus der Gerätefrontseite
herausnehmen.
10. Das Türschloss E auf die entgegen gesetzte Seite umsetzen und die Türverriegelung festschrauben.
11.
Auf der anderen Seite die Abdeckung F
einsetzen und den Rastknopf einrasten
lassen.
12. Die Einfülltür mit den Scharnieren in die
Aussparungen auf der Gerätefrontseite
einsetzen und festschrauben.
Hinweise zum Kontaktschutz: Das Gerät
ist nur nach dem Einsetzen aller Kunststoffteile wieder betriebssicher.
Sonderzubehör
• Bausatz Wasch-Trocken-Säule
Den Bausatz können Sie vom Kundendienst oder Ihrem Fachhändler beziehen
Mit diesem Bausatz können Sie den
Trockner mit einem Waschautomaten (60
cm breit, Frontbeladung) zu einer platzsparenden Wasch-Trocken-Säule kombinieren. Die Waschmaschine befindet sich
unten, der Trockner oben.
Lesen Sie aufmerksam die dem Bausatz
beiliegende Aufstellanweisung.
• Abpump-Satz
Den Bausatz können Sie vom Kundendienst oder Ihrem Fachhändler beziehen
Bausatz für direkte Ableitung des Kondensats in ein Waschbecken, einen Siphon,
einen Gully usw. Der Kondensatbehälter
braucht nicht mehr entleert zu werden, er
muss aber an seinem vorgesehenen
Platz im Gerät verbleiben.
Lesen Sie aufmerksam die dem Bausatz
beiliegende Aufstellanweisung.
• Sockel mit Schublade
Den Bausatz können Sie vom Kundendienst oder Ihrem Fachhändler beziehen
Bausatz, mit dem der Trockner auf eine
optimale Arbeitshöhe angehoben werden
kann. Die Schublade fungiert als zusätzlicher Stauraum (z. B. für Wäsche).
Lesen Sie aufmerksam die dem Bausatz
beiliegende Aufstellanweisung.
Page 7

GERÄTEBESCHREIBUNG
electrolux 7
2
3
6
7
9
12
1 Bedienblende
2 Kondensatbehälter
3 Trommelbeleuchtung
4 Feinfilter (Flusenfilter)
5 Filtersieb (Flusensieb)
6 Flusenfilter
1
4
5
8
10
11
7 Typenschild
8 Einfülltür (Türanschlag wechselbar)
9 Wärmetauscher hinter der Sockeltür
10 Taste zum Öffnen der Sockeltür
11 Lüftungsschlitze
12 Einstellbare Füße
Page 8

8 electrolux
BEDIENBLENDE
Bedienblende
6 5 4
321
1 Programm-Wahlschalter und Ein-/Aus-
schalter
2 Funktionstasten
3 Taste Start / Pause
Display-Anzeige
4
6
5
1 Restzeit / Fehlermeldung
2 Programmstand
3 Zusatzfunktionen
4 Warnhinweise
Beschreibung des Displays
Trockengrad (Stan-
dard)
U/Min. (Standard) minimale U/Min.
minimale Trockengrad mittlere Trockengrad maximale Trockengrad
4 Taste Zeitvorwahl
5 Betriebsanzeige
6 Anzeige
2
3
1
5 Auswahl Schleuderdrehzahl
6 Auswahl Trockenheitsgrad
-
U/Min. (Bereich, in
Schritten zu 200 U/
Min.)
maximale U/Min.
Page 9

Bügeltrocken (Trocken-
phasenanzeige)
Extratrocken (Trocken-
phasenanzeige)
Beschreibung des Displays
Leicht trocken (Tro-
ckenphasenanzeige)
Kühlphase (Trocken-
phasenanzeige)
Schranktrocken (Tro-
ckenphasenanzeige)
Knitterschutz (Trocken-
phasenanzeige)
electrolux 9
Sehr trocken (Trocken-
phasenanzeige)
-
-
Kondensatbehälter lee-
ren (Warnung)
Feinwäsche Knitterschutz Plus Schongang Summer
Zeitvorwahl Programmdauer
Wärmetauscher reini-
gen (Warnung)
- -
Filter reinigen (War-
nung)
Zeitprogrammdauer
(10 Min. - 3 Std.)
Die Zusatzfunktionen für Feinwä-
sche und Schongang können nicht
gleichzeitig ausgewählt werden.
VOR DER ERSTEN INBETRIEBNAHME
Reinigen Sie die Trommel des Trockners
mit einem feuchten Tuch oder führen Sie
ein kurzes Trockenprogramm (ca. 30 Min.)
mit feuchter Wäsche aus, um alle fertigungsbedingten Rückstände aus der Trommel zu
entfernen.
PROGRAMMTABELLE
Max.
Wäsche-
Programme
Extratrocken 8 kg
Starktrocken 8 kg
Schranktrocken 8 kg
Bügeltrocken 8 kg
Extratrocken 3 kg
menge
(Tro-
ckenge-
wicht)
Anwendung/Eigenschaften
Baumwolle
Durchtrocknen von dicken oder mehrlagigen Textilien wie z. B. Frotteehandtüchern, Bademänteln, Baumwolle.
Durchtrocknen von dicken Textilien wie
z. B. Frotteehandtüchern, Handtüchern.
Durchtrocknen von gleichmäßig dicken
Textilien wie z. B. Frotteehandtüchern,
Strickwaren, Handtüchern.
Für normale Koch-Buntwäsche aus
Baumwolle oder Leinen, z. B. Bett-,
Tischwäsche.
Mischgewebe
Durchtrocknen von dicken oder mehrlagigen Textilien wie z. B. Pullover, Bett-,
Tischwäsche.
funktionen
alle 1) außer
alle
alle
alle
alle
Kindersicherung
Zeitraum für Zeitvor-
wahl
Zusatz-
Zeitwahl
1)
außer
Zeitwahl
1)
außer
Zeitwahl
1)
außer
Zeitwahl
1)
außer
Zeitwahl
Pflege-
kennzei-
chen
2)
Page 10

10 electrolux
Max.
Wäsche-
Programme
menge
(Tro-
Anwendung/Eigenschaften
ckenge-
wicht)
Für dünne Textilien, die nicht gebügelt
werden müssen, z. B. bügelfreie Hem-
Schranktrocken 3 kg
den, Tischwäsche, Babykleidung, Socken, Damenunterwäsche mit Korsettstangen oder Drahteinlagen.
Für dünne Textilien, die noch gebügelt
Bügeltrocken 3 kg
werden müssen, z. B. Strickwaren, Hemden.
SONDERPROGRAMME
Zeitprogramm 8 kg Zum Trocknen einzelner Wäschestücke.
Auffrishen 1 kg
Zum Lüften von Textilien nach längerer
Lagerung.
Zum schnellen, knitterarmen Trocknen
55 Min. -3 Kg 3 kg
von Baumwolltextilien. Trockenergebnis:
schrankfertig.
Sportkleidung 2 kg
Bettwäsche 3 kg
Für dünne bügelfreie Sportkleidung aus
Polyester.
Bettwäsche (Einzel-/Doppelbettlaken,
Kopfkissen-, Bettbezüge, Tagesdecken).
Für Freizeitkleidung wie Jeans, Sweats-
Jeans 8 kg
hirts usw. mit unterschiedlicher Materialstärke (z.B. am Kragen, an den Manschetten und Nähten).
Mikrofaser 1 kg
Für dünne bügelfreie Textilien aus Polyester und Polyamid.
Zusatz-
funktionen
1)
alle
außer
Zeitwahl
1)
alle
außer
Zeitwahl
Feinwä-
sche , Knit-
terschutz
Plus, Sum-
mer , Zeit-
wahl , Zeit-
vorwahl
Feinwä-
sche , Knit-
terschutz
Plus, Sum-
mer , Zeit-
vorwahl
Knitter-
schutz
Plus, Sum-
mer , Zeit-
vorwahl
3)
alle
außer
Schongang
und Zeit-
wahl
alle außer
Schongang
und Zeit-
wahl
1)
alle
außer
Zeitwahl
alle 3) außer
Schongang
und Zeit-
wahl
Pflege-
kennzei-
chen
2)
2)
Page 11

Max.
Wäsche-
Programme
menge
(Tro-
ckenge-
wicht)
1,5 kg
Hemden
(oder 7
Hemden)
1 kg
Leichtbügeln Plus
(oder 5
Hemden)
Wolle 1 kg
Nachtprogramm
Mischgewebe
3 kg
Anwendung/Eigenschaften
Sonderprogramm mit Knitterschutz für
Feinwäsche wie Hemden und Blusen,
das das Bügeln kinderleicht macht. Das
Ergebnis hängt von der Art und der Qualität der Textilien ab. Legen Sie die Textilien sofort nach dem Schleudern in den
Trockner, nehmen Sie die Textilien nach
dem Trocknen sofort aus dem Trockner
und hängen Sie sie auf Kleiderbügel.
Zum Trocknen von Wollkleidung nach
dem Waschen mit Warmluft und minimaler mechanischer Belastung (siehe Abschnitt "Sortieren und Vorbereiten der
Wäsche"). Empfehlungen: Entnehmen
Sie die Wäsche sofort nach dem Trocknen, da kein Knitterschutzprogramm
folgt.
Das Programm Wolletrocknen dieses
Wäschetrockners wurde von Der Woolmark Company getestet und zugelassen. Das Programm eignet sich zum
Trocknen von gestrickten Wolltextilien
mit der Pflegekennzeichnung „Handwäsche“, vorausgesetzt dass diese mit einem von Woolmark empfohlenen Handwaschprogramm gewaschen und gemäß den Herstellerangaben getrocknet
werden. (M1022)
Besonders leises Programm zum schonenden Trocknen von Textilien aus Synthetikfasern. Zu empfehlen, wenn der
Trockner über Nacht laufen soll.
Zusatz-
funktionen
3)
alle
außer
Schongang
und Zeit-
wahl
3)
alle
außer
Schongang
und Zeit-
wahl
Trockengrad , U/
Min. , sum-
mer , Zeit-
vorwahl
Trockengrad , U/
Min. , Knit-
terschutz
Plus, Sum-
mer , Zeit-
vorwahl
electrolux 11
Pflege-
kennzei-
chen
3)
Page 12
12 electrolux
Max.
Wäsche-
Programme
Nachtprogramm
Baumwolle
1) Die Zusatzfunktionen für Feinwäsche und Schongang können nicht gleichzeitig ausgewählt werden.
2) Wählen Sie SCHON
3) Feinwäsche als Standard eingestellt
menge
(Tro-
ckenge-
wicht)
8 kg
Anwendung/Eigenschaften
Besonders leises Programm zum schonenden Trocknen von Textilien aus Baumwolle. Zu empfehlen, wenn der Trockner
über Nacht laufen soll.
Zusatz-
funktionen
Trockengrad , U/
Min. , Knit-
terschutz
Plus, Sum-
mer , Zeit-
vorwahl
TÄGLICHER GEBRAUCH
Sortieren der Wäsche
• Sortieren nach Gewebeart:
– Baumwolle/Leinen für Programme in
der Programmgruppe Baumwolle
– Mischgewebe und synthetische Stoffe
für Programme in der Programmgruppe Mischgewebe
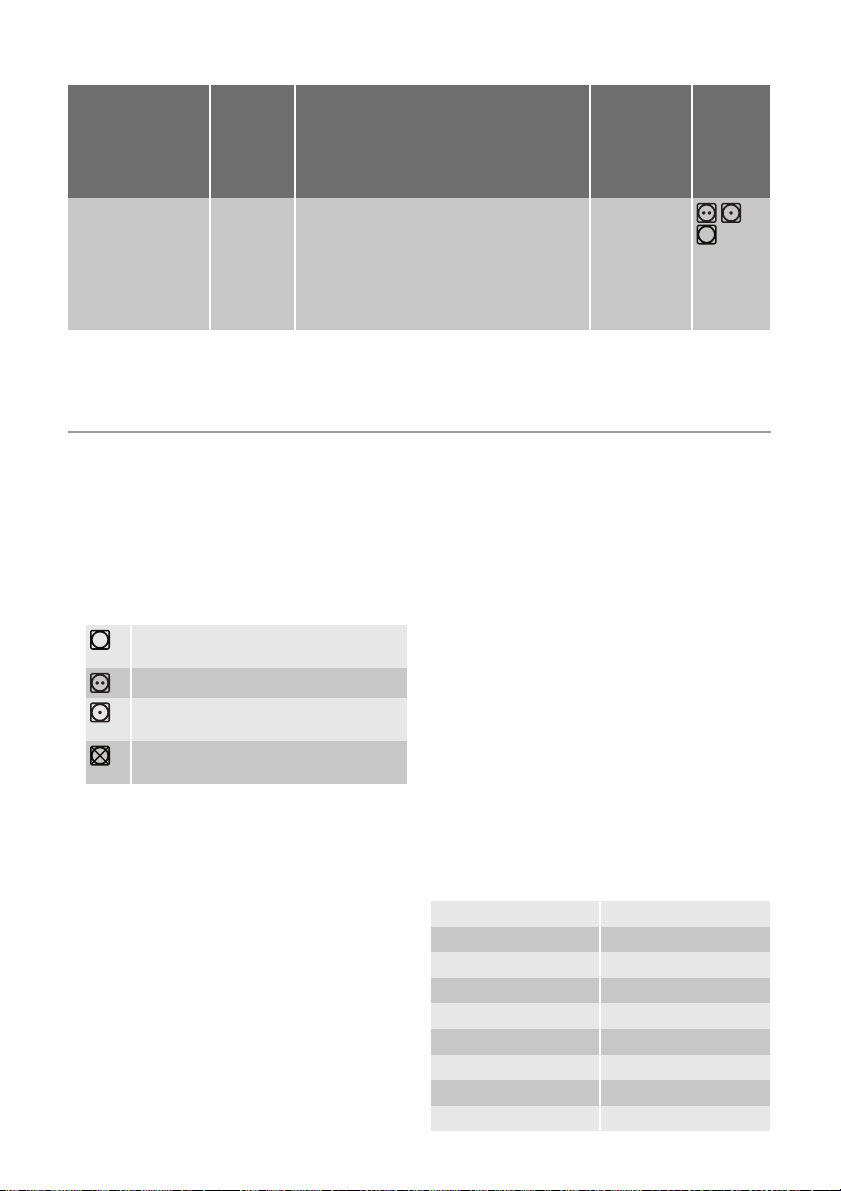
• Sortieren nach Pflegekennzeichen. Die
Pflegekennzeichen bedeuten:
Trocknen im Wäschetrockner grundsätzlich möglich
Trocknen mit normaler Temperatur
Trocknen bei reduzierten Temperaturen
Trocknen im Wäschetrockner nicht
möglich
Wichtig! Geben Sie keine feuchte Wäsche
in das Gerät, die nicht laut Pflegekennzeichen für die Trocknung in einem Trockner
geeignet ist.
In diesem Gerät können alle Wäschestücke
getrocknet werden, die entsprechend den
Pflegekennzeichen trocknergeeignet sind.
• Trocknen Sie neue farbige Textilien nicht
zusammen mit hellen Wäschestücken.
Die Textilien könnten abfärben.
• Trocknen Sie Trikotwäsche und Strickwaren nicht mit dem Programm Extra . Die
Textilien können einlaufen!
• Wolle und wollähnliche Textilien lassen
sich mit dem Programm Wolle trocknen.
Vor dem Trockenvorgang sollten auch
Textilien aus Wolle so gut wie möglich geschleudert werden (max. 1200 U/Min.).
Trocknen Sie nur Wolltextilien zusammen, die ähnliche Eigenschaften bezüglich Material, Farbe und Gewicht aufweisen. Schwere Wäschestücke aus Wolle
sollten einzeln getrocknet werden.
Vorbereiten der Wäsche
• Um Wäscheknäuel zu verhindern: Reißverschlüsse schließen, Kopfkissenbezüge zuknöpfen, lose Gürtel oder Bänder (z. B.
von Schürzen) zusammenbinden.
• Taschen leeren. Metallteile entfernen (z.
B. Büroklammern, Sicherheitsnadeln).
• Gefütterte Kleidung nach links wenden (z.
B. sollte bei mit Baumwolle gefütterten
Anoraks die Baumwollschicht außen liegen). Diese Gewebe trocknen dann besser.
Wichtig! Überfüllen Sie das Gerät nicht.
Beachten Sie die maximale
Wäschefüllmenge von 8 kg.
Durchschnittsgewicht verschiedener
Wäschestücke
Bademantel 1200 g
Bettbezug 700 g
Arbeitshemd 600 g
Schlafanzug 500 g
Bettlaken 500 g
Tischtuch 250 g
Herrenhemd 200 g
Nachthemd 200 g
Kopfkissenbezug 200 g
Pflege-
kennzei-
chen
Page 13

electrolux 13
Frottierhandtuch 200 g
Bluse 100 g
Damenslip 100 g
Herrenunterhose 100 g
Windel 100 g
Geschirrtuch 100 g
Einschalten des Gerätes / der
Trommelbeleuchtung
Drehen Sie den Programm-Wahlschalter
auf ein beliebiges Programm oder auf Beleuchtung . Das Gerät ist jetzt eingeschaltet. Die Trommelbeleuchtung wird beim Öffnen der Tür eingeschaltet.
Wäsche einfüllen
1.
Auswahl des Programms
Wählen Sie mit dem Programm-Wahlschalter das gewünschte Programm. Die voraussichtliche Programmdauer wird auf dem Dis-
play angezeigt, z. B.
( Stunden .
Minuten ).
Während des Programmablaufs verringert
sich die Restzeit in Schritten von einer Minute.
Trockengrad
Erhöht den Trockengrad der Wäsche ent-
sprechend der gewählten Stufe:
,
Öffnen Sie die Einfülltür:
Drücken Sie kräftig gegen die Einfülltür
(Druckpunkt)
2. Legen Sie die Wäsche locker in die Trommel.
Vorsicht! Achten Sie darauf, dass die
Wäsche nicht zwischen Tür und Gummidichtung eingeklemmt wird.
3. Drücken Sie die Tür fest zu. Das
Schloss muss hörbar einrasten.
, . Diese Option hilft Ihnen, zufrie-
denstellende Trockenergebnisse zu erzielen.
- Standard-Trockengrad.
U/Min.
Verkürzen Sie den Trockengang entsprechend der Schleuderdrehzahl, mit der die
Wäsche zuvor in der Waschmaschine geschleudert wurde. Je höher die Schleuderdrehzahl war, desto kürzer die Trockendauer. Verfügbare Schleuderdrehzahlen (U/
min): von
bis (in Schritten zu
200 U/min)
Mit dieser Option sparen Sie Zeit und Energie.
Auswahl von Zusatzfunktionen
Als Zusatzfunktionen für die Trockenprogramme gibt es Feinwäsche , Knitterschutz
Plus , Schongang und Summer .
Page 14

14 electrolux
1. Wählen Sie ein Trockenprogramm mit
dem Programm-Wahlschalter aus.
2. Um die entsprechende Zusatzfunktion
auszuwählen, drücken Sie die Taste Option . Die verfügbaren Zusatzfunktionen
werden im Display angezeigt:
Feinwä-
sche
Knitter-
schutz
Schon-
gang
Sum-
mer
Plus
Das Symbol Feinwäsche blinkt. Blinkende Symbole bedeuten Folgendes:
ausgewählt, aber nicht aktiv. Um die entsprechende Zusatzfunktion zu aktivieren, drücken Sie die Taste OK . Aktivierte Zusatzfunktionen sind durch ein blinkendes Symbol mit einem Strich darunter
markiert.
3. Drücken Sie so oft die Taste Option , bis
die gewünschte Zusatzfunktion ausgewählt ist, und aktivieren Sie sie dann mit
Taste OK . Aktive Zusatzfunktionen sind
durch ein Symbol mit einem Strich darunter markiert.
4. Der Auswahlmodus für Zusatzfunktionen ist zu Ende, wenn Sie alle Zusatzfunktionen durchgegangen sind oder die
Auswahl beenden. Nur Symbole für aktivierte Zusatzfunktionen leuchten.
Einige Zusatzfunktionen, beispielsweise
für Feinwäsche und Schongang , können nicht gleichzeitig ausgewählt werden. Einige von ihnen sind nicht bei allen Programmen wählbar.
Um eine Zusatzfunktion abzuwählen,
führen Sie die gleichen Schritte aus.
Das Symbol für die Zusatzfunktion verschwindet.
Feinwäsche
Für besonders sanftes Trocknen empfindlicher Fasern mit dem Pflegekennzeichen
und für temperaturempfindliche Textilien (z.
B. Acryl, Viskose). Bei diesem Programm ist
die Hitze verringert.
Feinwäsche ist nur für Füllmengen bis zu 3
kg geeignet.
Wenn diese Zusatzfunktion aktiv ist, leuch-
tet das Symbol Feinwäsche
.
Knitterschutz Plus
Die Knitterschutzphase (30 Min.) am Ende
des Trockenvorgangs wird um weitere 60
Minuten verlängert. Die Trommel dreht sich
in dieser Phase in kurzen Abständen. Die
Wäsche bleibt dadurch locker und knitterfrei. Diese Phase dauert insgesamt 90 Minuten. Die Wäsche kann während des Knitterschutzprogramms jederzeit entnommen
werden.
Wenn diese Zusatzfunktion aktiv ist, leuch-
tet das Symbol Knitterschutz Plus
.
Schongang
Für sanftes Trocknen häufig getragener Kleidungsstücke. Das Programm startet mit voller Heizleistung und reduziert dann die Heizleistung während des Programmverlaufs,
um die Textilien zu schonen.
Wenn diese Zusatzfunktion aktiv ist, leuchtet das Symbol Schongang
.
Summer
Das Gerät wird mit deaktiviertem Summer
geliefert.
Zum Aktivieren des Summers wählen Sie
die Zusatzfunktion Summer .
Wenn diese Zusatzfunktion aktiv ist, leuchtet das Symbol Summer .
In folgenden Fällen ertönt der Summer oder
eine Melodie:
– Programmende
– Knitterschutzphase und Phasenbeginn/-
ende
– Programmabbruch mit Warnsignal
–Alarm
Zeitwahl
Zur Auswahl der Programmdauer nach der
Einstellung von Zeitprogramm . Sie können
in 10-Minuten-Schritten eine Programmdauer von 10 Minuten bis 3 Stunden wählen.
1. Drehen Sie den Programm-Wahlschalter
auf Zeitprogramm . Die Zahl
blinkt
über der Taste Zeitwahl (entspricht der
Abkühlphase).
2. Drücken Sie die Taste Zeitwahl so oft,
bis die gewünschte Programmdauer auf
dem Display eingeblendet wird, z. B.
für ein Programm von 20 Minuten.
Wird keine Programmdauer eingegeben,
wählt das Gerät automatisch eine Dauer
von 10 Minuten.
Page 15
electrolux 15
Zeitvorwahl
Mit der Taste Zeitvorwahl kann der
Programmstart um 30 Minuten (30')
bis maximal 20 Stunden (20h) verzögert werden.
1. Wählen Sie das Programm und die Zusatzfunktionen.
2. Drücken Sie die Taste Zeitvorwahl so
oft, bis die gewünschte Startverzögerung auf dem Display angezeigt wird, z.
B.
, wenn das Programm in 12
Stunden anlaufen soll.
Zeigt das Display 20h an und Sie
drücken erneut die Taste, wird die
Zeitvorwahl wieder aufgehoben.
Das Display zeigt 0' und dann die
Dauer des gewählten Programms.
3. Drücken Sie Taste Start / Pause , um
die Zeitvorwahl zu aktivieren. Die verbleibende Vorwahlzeit bis zum Programmstart wird ständig angezeigt (z. B. 15h,
14h, 13h, …30' usw.).
Kindersicherung
Die Kindersicherung soll ein versehentliches
Starten, Verändern oder Löschen eines Programms verhindern. Die Kindersicherung
sperrt alle Tasten und den Programm-Wahlschalter. Um die Kindersicherung ein- oder
auszuschalten, halten Sie die Tasten Option
und OK gleichzeitig 5 Sekunden lang gedrückt.
– Vor dem Programmstart: Das Gerät
kann nicht in Betrieb gesetzt werden.
– Nach dem Programmstart: Das lau-
fende Programm kann nicht geändert werden.
Das Symbol
wird auf dem Display angezeigt und gibt an, dass die Kindersicherung
aktiv ist.
Die Kindersicherung wird nach Programmende nicht automatisch aufgehoben.
Wenn Sie ein neues Programm starten
möchten, müssen Sie zuvor die Kindersicherung deaktivieren.
Starten des Programms
Drücken Sie Taste Start / Pause . Das Programm läuft an.
Der Programmablauf wird auf dem LCD-Display durch entsprechende Symbole angezeigt, und zwar von links nach rechts, vom
Symbol Bügeltrocken
Knitterschutz
, je nach gewähltem Tro-
bis zum Symbol
ckenprogramm. Wurde z. B. das Programm Schranktrocken gewählt, werden
die folgenden Programmablaufsymbole an-
gezeigt:
. Der Fortgang des
Programms wird durch einen blinkenden
Strich unter dem Symbol des jeweiligen Programmabschnitts angezeigt. Nach dem Ende eines Programmabschnitts leuchtet der
Strich kontinuierlich und blinkt dann unter
dem Symbol des folgenden Programmabschnitts.
Ändern eines Programms
Um ein versehentlich gewähltes Programm
nach dem Start zu ändern, drehen Sie zuerst den Programm-Wahlschalter auf Aus
und dann auf ein neues Programm.
Nach dem Programmstart kann ein Programm nicht mehr direkt geändert werden. Wenn Sie den Programm-Wahlschalter während des Programmablaufs trotzdem auf ein anderes Programm drehen, beginnen die Programmablauf-Anzeige und die Wartungsanzeige zu blinken. Wird eine Zusatzfunktion gewählt (es sei denn, der
Summer ist gewählt), erscheint Err auf
dem Multidisplay. Dies wirkt sich jedoch nicht auf das Trockenprogramm
aus (Wäscheschutz).
Entnehmen der Wäsche
Nach dem Ende des Trockenprogramms
wird auf dem Display eine blinkende
ein-
geblendet und unter dem Symbol Knitterschutz
erscheint ein Strich. Wurde der
Summer als Zusatzfunktion gewählt, ertönt
etwa eine Minute lang ein intermittierendes
akustisches Signal.
Page 16

16 electrolux
Dem Trockenvorgang folgt automatisch
ein 30 Minuten dauerndes Knitterschutzprogramm. Die Trommel dreht
sich in dieser Phase in kurzen Abständen. Die Wäsche bleibt dadurch locker
und knitterfrei. Die Wäsche kann während des Knitterschutzprogramms jederzeit entnommen werden. Die Wäsche sollte jedoch spätestens nach
dem Ende des Knitterschutzprogramms entnommen werden, um Knitterbildung zu vermeiden. Wenn die Zusatzfunktion Knitterschutz Plus
wählt wurde, wird die Knitterschutzphase um 60 Minuten verlängert.
ge-
REINIGUNG UND PFLEGE
Reinigung des Flusenfilters
Die Filter sammeln die Flusen, die sich beim
Trocknen absetzen. Die Flusenfilter (Mikrofein- und Feinfilter) müssen nach jedem Trockengang gereinigt werden, um einen einwandfreien Betrieb des Trockners zu gewährleisten.
Das Warnsymbol
auf diese Aufgabe hin.
Vorsicht! Benutzen Sie den Trockner
nie ohne oder mit beschädigtem oder
verstopftem Flusenfilter.
1.
Öffnen Sie die Einfülltür
2. Streichen Sie mit der feuchten Hand
über den Mikrofeinfilter, der sich auf
dem unteren Rand der Einfüllöffnung befindet.
weist Sie am Display
1. Öffnen Sie die Tür.
2. Entfernen Sie die Flusen vom Mikrofeinfilter, bevor Sie die Wäsche entnehmen.
Am besten machen Sie das mit angefeuchteter Hand. Siehe Kapitel "Reinigung und Pflege".
3. Entnehmen Sie die Wäsche.
4. Drehen Sie den Programm-Wahlschalter
auf Aus .
Wichtig! Nach jedem Trockenprogramm:
- Reinigen Sie Mikrofein- und Feinfilter.
- Leeren Sie den Kondensatbehälter.
Siehe Kapitel "Reinigung und Pflege".
5. Schließen Sie die Tür.
3.
Nach einer gewissen Zeit bildet sich ein
weißlicher Belag auf den Filtern, der
durch Waschmittelrückstände in der
Wäsche verursacht wird. Reinigen Sie
in diesem Fall die Filter mit warmem
Wasser und einer Bürste. Nehmen Sie
den Filter in der Einfülltür nach oben heraus. Der Filter kann mit nach links oder
rechts gerichteter Grifföffnung eingebaut werden).
Vergessen Sie nicht, den Filter nach
dem Reinigen wieder einzusetzen.
Page 17

electrolux 17
4.
Drücken Sie den Entriegelungsknopf
auf dem Filtersieb nach unten.
Das Filtersieb springt heraus.
5.
7.
Dazu fassen Sie das Filtersieb oben an
und ziehen es nach vorn, bis es sich
aus den beiden Halterungen löst.
8. Entfernen Sie die Flusen von dem ge-
samten Filterbereich. Benutzen Sie dazu am besten einen Staubsauger.
9. Drücken Sie beide Zapfen des Filtersie-
bes in die Halterungen an der Einfülltür,
bis sie einrasten.
10. Setzen Sie den Feinfilter wieder ein.
11.
Ziehen Sie den Feinfilter heraus.
6. Entfernen Sie die Wäscheflusen von
dem Feinfilter. Am besten machen Sie
das mit angefeuchteter Hand.
Reinigen Sie den gesamten Filterbereich
Der Filterbereich braucht nicht nach jedem Trockenprogramm gereinigt zu
werden, muss jedoch regelmäßig kontrolliert und bei Bedarf von Flusen gesäubert werden.
Drücken Sie gegen das Filtersieb, bis
es in der Verriegelung einrastet.
Ohne Feinfilter rastet das Filtersieb
nicht vollständig ein und die Einfülltür
kann nicht geschlossen werden.
Reinigen der Türdichtung
Wischen Sie die Türdichtung mit einem
feuchten Tuch sofort nach dem Ende des
Trockenprogramms ab.
Page 18

18 electrolux
Entleeren des Kondensatbehälters
Der Kondensatbehälter muss nach jedem
Trockengang entleert werden.
Bei vollem Kondensatbehälter wird ein laufendes Programm automatisch abgebrochen und das Symbol Behälter entleeren
leuchtet auf. Um das Programm fortzusetzen, muss zuerst der Kondensatbehälter geleert werden.
Warnung! Das Kondenswasser ist kein
Trinkwasser und nicht für die
Zubereitung von Lebensmitteln
geeignet.
1.
Leeren Sie den Kondensatbehälter vollständig.
2.
Das Kondenswasser kann als destilliertes Wasser z. B. für Dampfprogramme
verwendet werden. Filtern Sie jedoch
zuvor das Kondenswasser (z. B. mit einem Kaffeefilter), um eventuelle Rückstände oder Flusen zurückzuhalten.
Wärmetauscher reinigen
Wird das Symbol Wärmetauscher
angezeigt, muss der Wärmetauscher gereinigt
werden.
Vorsicht! Der Betrieb mit verstopftem
Wärmetauscher kann den Trockner
beschädigen. Dadurch erhöht sich
auch der Energieverbrauch.
1. Öffnen Sie die Tür.
2.
Gießen Sie das Wasser in eine Wanne
oder einen Behälter.
3. Setzen Sie den Kondensatbehälter wieder ein.
Falls das Programm wegen des vollen
Behälters abgebrochen wurde: Drücken
Sie die Taste Start/Pause , um das Trockenprogramm fortzusetzen.
Der Kondensatbehälter hat ein Fassungsvermögen von ca. 4,5 l. Das
reicht für ca. 8 kg Wäsche aus, die zuvor mit 1000 U/Min. geschleudert wurde.
Öffnen Sie die Sockeltür. Drücken Sie dazu den Entriegelungsknopf am unteren
Rand der Einfüllöffnung und öffnen Sie
die Sockeltür nach links.
3. Entfernen Sie Flusen von der Innenseite
der Tür und aus dem Raum vor dem Wärmetauscher. Wischen Sie die Türdichtung mit einem feuchten Tuch ab.
4.
Drehen Sie beide Sicherungsscheiben
nach innen.
Page 19

electrolux 19
5.
Ziehen Sie den Wärmetauscher am Griff
aus dem Sockel und halten Sie ihn möglichst gerade, um zu verhindern, dass
verbliebenes Wasser verschüttet wird.
6. Zum Leeren des Wärmetauschers halten Sie ihn senkrecht über ein Spülbecken.
Vorsicht! Verwenden Sie für die
Reinigung keine scharfen
Gegenstände. Der Wärmetauscher
könnte undicht werden.
7. Wärmetauscher reinigen.
Hierfür verwenden Sie am besten eine
Bürste oder eine Handbrause.
8. Setzen Sie den Wärmetauscher wieder
ein und befestigen Sie ihn (drücken Sie
beide Sicherungsscheiben nach außen,
bis sie einrasten).
9. Schließen Sie die Sockeltür.
Vorsicht! Benutzen Sie den Trockner
nie ohne Wärmetauscher.
Reinigen der Trommel
Vorsicht! Benutzen Sie keine
Scheuermittel oder
Metallschwämmchen zum Reinigen der
Trommel.
Kalk im Wasser und Rückstände von
Waschmitteln bilden einen kaum sichtbaren Belag auf der Innenseite der
Trommel. Der Trockengrad der Wäsche kann daher beim Trocknen nicht
mehr zuverlässig festgestellt werden.
Die Wäsche ist beim Entnehmen aus
dem Trockner feuchter als erwartet.
Wischen Sie mit einem üblichen Haushaltsreinigungsmittel (z. B. Reiniger auf
Essigbasis) die Innenseite der Trommel
und die Trommelrippen ab.
Reinigen der Bedienblende und des
Gerätegehäuses
Vorsicht! Verwenden Sie zum
Reinigen des Gehäuses keine
Möbelputzmittel oder andere
aggressive Reinigungsmittel.
Wischen Sie mit einem feuchten Tuch
die Bedienblende und das Gehäuse ab.
WAS TUN, WENN...
Kleine Störungen selbst beheben
Problem
Der Trockner
läuft nicht.
Nicht zufriedenstellende
Trockenergebnisse.
1)
Der Trockner ist nicht an die Stromversorgung angeschlossen.
Die Einfülltür ist offen. Schließen Sie die Einfülltür.
Die Taste Start / Pause wurde nicht ge-
drückt.
Es wurde ein falsches Programm einge-
stellt.
Die Flusensiebe sind verstopft.
Der Wärmetauscher ist verstopft.
Die max. Wäschemenge wurde über-
schritten.
Das Lüftungsgitter ist bedeckt.
Mögliche Ursachen Abhilfe
Stecken Sie den Netzstecker in die
Steckdose. Kontrollieren Sie die Sicherung der Hausinstallation.
Drücken Sie die Taste Start / Pause .
Stellen Sie ein geeignetes Programm
2)
ein.
Reinigen Sie die Flusensiebe.
Reinigen Sie den Wärmetauscher.
Beachten Sie die maximale Füllmenge.
Legen Sie das Lüftungsgitter am Geräteboden frei.
3)
3)
Page 20

20 electrolux
Es befinden sich Rückstände in der
Trommel.
Hohe Wasserhärte.
Die Einfülltür
schließt nicht.
Err ( Fehler )
auf dem LCD.
5)
Keine Trommelbeleuchtung.
Ungewöhnlicher Zeitablauf im LCD-
5)
Display
Das Pro-
gramm ist
nicht aktiv.
Der Trockengang ist zu
kurz.
Der Trockengang ist zu
6)
lang.
1) Im Fall einer Fehlermeldung auf dem LCD (z. B. E51 - nur Trockner mit LCD): Schalten Sie den Trockner aus und
wieder ein. Stellen Sie ein Programm ein. Drücken Sie die Taste Start/Pause . Funktioniert das Gerät immer noch
nicht? - Benachrichtigen Sie den lokalen Kundendienst unter Angabe des Fehlercodes.
2) Befolgen Sie die Programmempfehlung - siehe Kapitel Programmübersicht .
3) Siehe Kapitel Reinigung und Pflege .
4) Siehe Kapitel Programmiermöglichkeiten
5) Nur bei Trocknern mit LCD-Display
6) Hinweis: Nach ca. 5 Stunden wird der Trockengang automatisch abgebrochen (siehe Kapitel Ende des
Trockengangs ).
Die Siebe wurden nicht eingesetzt.
Sie haben nach dem Programmstart versucht die Parameter zu ändern.
Programmwahlschalter in Stellung Aus .
Die Lampe ist durchgebrannt.
Die voraussichtliche Programmdauer
wird errechnet unter Berücksichtigung
von: Typ, Menge und Feuchtigkeitsgehalt der Wäsche.
.
Der Kondensatbehälter ist voll.
Kleine Wäschemenge./Die Wäsche ist
für das ausgewählte Programm zu trocken.
Die Flusensiebe sind verstopft. Reinigen Sie die Flusensiebe.
Die Wäschemenge ist zu groß. Beachten Sie die maximale Füllmenge.
Die Wäsche wurde unzureichend ge-
schleudert.
Besonders hohe Raumtemperatur - kei-
ne Gerätestörung.
Austausch der Lampe der
Trommelbeleuchtung
Benutzen Sie nur für Trockner geeignete
Lampen. Die Speziallampen erhalten Sie
beim Kundendienst.
Wichtig! Die Trommelbeleuchtung schaltet
sich bei geöffneter Tür automatisch nach 4
Minuten ab.
Warnung! Keine Standardglühlampen
verwenden! Diese entwickeln zu viel
Hitze und können das Gerät
beschädigen!
Reinigen Sie die Innenfläche der Trommel.
Stellen Sie die geeignete Wasserhärte
4)
.
ein
Setzen Sie das Feinsieb und/oder Grob-
sieb korrekt ein.
Schalten Sie den Trockner aus und wie-
der ein. Stellen Sie die erforderlichen Parameter ein.
Programmwahlschalter auf Trommelbeleuchtung (falls verfügbar) oder ein anderes Programm drehen.
Lampe austauschen (siehe nächsten Abschnitt).
Automatischer Vorgang - kein Gerätefehler.
Den Kondensatbehälter leeren
Taste Start/Pause drücken.
Ein Zeitprogramm oder eine höhere
Trocknungsstufe wählen (z. B. Extratrocken ).
Schleudern Sie die Wäsche entsprechend.
Falls möglich, die Raumtemperatur senken.
3)
, die
Ziehen Sie den Netzstecker, bevor Sie
die Lampe ersetzen; bei Festanschluss:
die Sicherung ganz herausdrehen oder
ausschalten.
1. Schrauben Sie die Abdeckung über der
Glühbirne ab (sie befindet sich direkt hinter der Einfüllöffnung oben. Weitere Einzelheiten dazu finden Sie im Abschnitt
„Gerätebeschreibung“).
2. Die defekte Lampe ersetzen.
3. Die Abdeckung wieder anschrauben.
Überprüfen Sie die O-Ringdichtung auf korrekten Sitz, bevor Sie die Abdeckung an-
Page 21

electrolux 21
schrauben. Benutzen Sie den Trockner
nicht, wenn die O-Ringdichtung an der Abdeckung der Türbeleuchtung fehlt.
angeschraubt sein. Anderenfalls darf
der Trockner nicht in Betrieb
genommen werden.
Warnung! Aus Sicherheitsgründen
muss die Abdeckung fest
TECHNISCHE DATEN
Höhe x Breite x Tiefe 85 x 60 x 58 cm
Trommelvolumen 108 l
Tiefe bei geöffneter Tür 109 cm
Höhenverstellbarkeit 1,5 cm
Leergewicht ca. 40 kg
Füllmenge (je nach Programm)
Anschlussspannung 220-230 V
Erforderliche Absicherung 10A
Gesamte Leistungsaufnahme 2350 W
Energie-Effizienzklasse
Energieverbrauch (8 kg Baumwolle, vorgeschleu-
dert mit 1000 U/min)
Durchschnittlicher Energieverbrauch/Jahr 282 kWh
Einsatzbereich Haushalt
zulässige Umgebungstemperatur + 5 °C bis + 35 °C
Die Verbrauchswerte wurden unter Standardbedingungen ermittelt. Sie können unter Haushaltsbe-
Baumwolle Schranktrocken
Baumwolle Bügeltrocken
Mischgewebe Schranktrocken
1) In einigen Ländern können Angaben der Füllmenge aufgrund unterschiedlicher Messmethoden abweichen.
2) gemäß EN 61121
2)
Programme
1)
Verbrauchswerte
dingungen unterschiedlich sein.
2)
2)
2)
max. 8 kg
B
4,48 kWh
Energieverbrauch in kWh / durchschnittl.
Trockenzeit in Min.
4.48 / 135 (8 kg Wäsche, vorgeschleudert mit
1000 U/min)
4.3 (8 kg Wäsche, vorgeschleudert mit 1200 U/
min)
4.0 (8 kg Wäsche, vorgeschleudert mit 1400 U/
min)
3.5 (8 kg Wäsche, vorgeschleudert mit 1800 U/
min)
3.8 / 108 (8 kg Wäsche, vorgeschleudert mit
1000 U/min)
1.3 / 45 (3 kg Wäsche, vorgeschleudert mit
1200 U/min)
Page 22
22 electrolux
GERÄTEEINSTELLUNGEN
Einstellung Vorgehen
Summer dauerhaft
aktiviert/deaktiviert
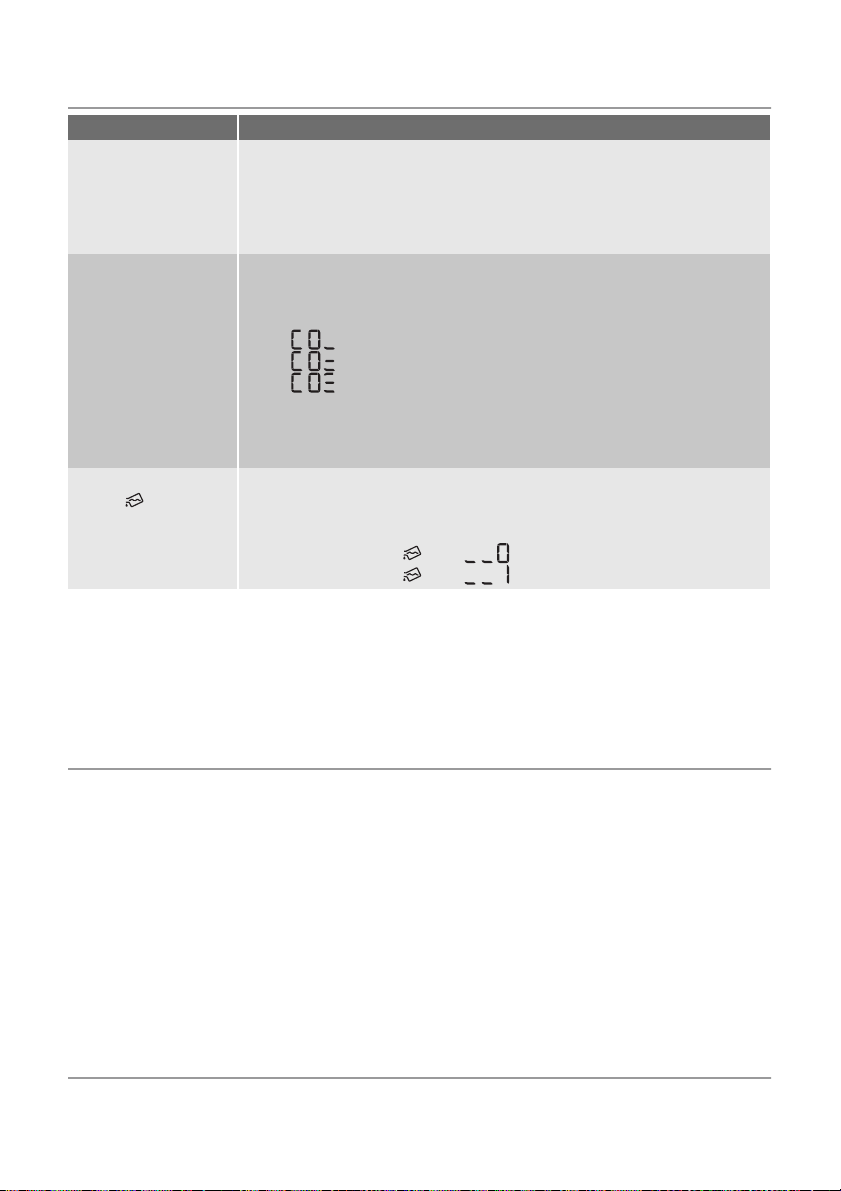
Wasserhärte
Kondensatbehälter
leeren
nung ausschalten.
1) Wasser enthält unterschiedliche Mengen an Kalk und Mineralsalzen, die je nach geografischem Standort variieren
und somit zu unterschiedlichen Leitfähigkeitswerten führen. Beträchtliche Abweichungen der Leitfähigkeit des
Wassers von den werkseitig voreingestellten Werten können die Restfeuchte der Wäsche nach der Trocknung
leicht beeinflussen. Sie können die Empfindlichkeit des Feuchtigkeitssensors entsprechend den
Leitfähigkeitswerten wie folgt einstellen.
2) Standardmäßig leuchtet die Warnlampe am Ende des Trockengangs und auch während des Trockengangs, wenn
der Kondensatbehälter voll ist. Bei Verwendung einer externen Ableitung für das Kondenswasser kann die
Warnung ausgeschaltet sein.
1)
- War-
1. Drehen Sie den Programm-Wahlschalter auf ein beliebiges Programm.
2. Halten Sie gleichzeitig die Tasten Trockengrad und U/Min etwa 5 Sekunden lang gedrückt.
3. Der Summer ist standardmäßig deaktiviert. Sie können mit der Option Summer das akustische Signal aktivieren oder deaktivieren. Das Gerät speichert die Einstellung jedoch nicht.
1. Drehen Sie den Programm-Wahlschalter auf ein beliebiges Programm.
2. Halten Sie gleichzeitig die Tasten Trockengrad und Zeitwahl etwa 5 Sekunden lang gedrückt. Die aktuelle Einstellung wird auf dem Display angezeigt:
–
–
–
3. Drücken Sie die Taste Start / Pause mehrmals hintereinander, bis die
gewünschte Stufe angezeigt wird.
4. Um die Einstellung abzuspeichern, drücken Sie gleichzeitig die Tasten
Trockengrad und Zeitwahl oder drehen Sie den Knopf in die Position Aus .
1. Drehen Sie den Programm-Wahlschalter auf ein beliebiges Programm.
2. Halten Sie gleichzeitig die Tasten U/Min und Zeitwahl etwa 5 Sekunden
lang gedrückt.
2)
Die aktuelle Einstellung wird auf dem Display angezeigt:
–
–
Geringe Leitfähigkeit <300 μS/cm
Mittlere Leitfähigkeit 300-600 μS/cm
Hohe Leitfähigkeit >600 μS/cm
Symbol Achtung
Symbol Achtung
und - Warnmeldung ist ausgeschaltet.
und - Warnmeldung ist eingeschaltet.
HINWEISE FÜR PRÜFINSTITUTE
Von den Prüfinstituten zu prüfende Parameter:
• Energieverbrauch (Korrektur entsprechend Feuchtegrad) beim Programm
Baumwolle Schranktrocken bei Standardbeladung.
• Energieverbrauch (Korrektur entsprechend Feuchtegrad) beim Programm
Baumwolle Schranktrocken bei halber Beladung.
• Feuchtegrad (beim Programm Baumwolle Schranktrocken, Baumwolle Bügeltrocken und Mischgewebe Schranktrocken)
KUNDENDIENST
Prüfen Sie bei einer technischen Störung zunächst, ob Sie anhand der Bedienungsanlei-
• Kondensationseffizienz (Korrektur entsprechend Feuchtegrad) beim Programm
Baumwolle Schranktrocken bei Standardbeladung und halber Beladung
Alle Programme sind nach IEC 61121 (Wäschetrockner für den Hausgebrauch – Verfahren zur Messung der Gebrauchseigenschaften) zu prüfen.
tung den Fehler selbst beheben können –
siehe Kapitel Was tun, wenn …
Page 23

electrolux 23
Können Sie die Störung nicht selbst beheben, wenden Sie sich an den Kundendienst
oder an Ihren Fachhändler.
Halten Sie folgende Angaben bereit, damit
man Ihnen schnell und korrekt helfen kann:
– Modellbezeichnung
– Produktnummer (PNC)
– Seriennummer (S No.). Diese Nummer finden Sie auf dem Typenschild des Gerätes,
siehe Kapitel Produktbeschreibung ))
– Störungsart
– Auf dem Display angezeigter Fehlercode.
Tragen Sie die Gerätenummern hier ein, so
dass Sie diese immer zur Hand haben:
Modellbezeichnung:
Produkt-Nr.
(PNC):
Seriennummer (S
No.):
........................................
........................................
........................................
Page 24

24 electrolux
Electrolux. Thinking of you.
Partagez notre imagination sur www.electrolux.com
SOMMAIRE
Avertissements importants 24
Environnement 26
Installation 27
Description de l'appareil 29
Bandeau de commande 30
Avant d'utiliser le sèche-linge pour la
première fois 31
Tableau des programmes 31
AVERTISSEMENTS IMPORTANTS
Important Pour votre sécurité et pour
garantir une utilisation correcte de
l'appareil, lisez attentivement cette
notice d'utilisation, ainsi que ses
conseils et avertissements, avant
d'installer et d'utiliser l'appareil pour la
première fois. Pour éviter tout risque
d’erreur ou d’accident, veillez à ce que
toute personne qui utilise l'appareil
connaisse bien son fonctionnement et
ses fonctions de sécurité. Conservez
cette notice d'utilisation avec votre
appareil. Si l'appareil doit être vendu
ou cédé à une autre personne, assurezvous que la notice d'utilisation
l'accompagne. Le nouvel utilisateur
pourra alors être informé du
fonctionnement de celui-ci et des
avertissements s'y rapportant.
veuillez lire la notice d'utilisation avant
d'utiliser l'appareil.
Consignes générales de sécurité
• Il est interdit de modifier ou d'essayer de
modifier les caractéristiques techniques
de cet appareil.
• This appliance is not intended for use by
persons (including children) with reduced
physical and sensory conditions or lack
of experience and knowledge, unless
they have been given supervision or instruction concerning use of the appliance
by a person responsible for their safety.
• Make sure that small children and pets
do not climb inside the drum. To avoid
Utilisation quotidienne 34
Entretien et nettoyage 38
En cas d'anomalie de fonctionnement ...
41
Caractéristiques techniques 42
Réglages de l'appareil 43
Conseils pour les organismes d'essai 44
Maintenance 44
Sous réserve de modifications
this, please check into the drum before
using.
• Les objets tels que les pièces de mon-
naie, les épingles de sûreté, les clous, les
vis, les cailloux ou tout autre objet dur,
tranchant, peuvent provoquer d'importants dégâts et ne doivent pas être placés dans l'appareil.
• Pour éviter les risques d'incendie dus à
un séchage excessif, n'utilisez pas l'appareil pour le séchage des pièces de linge
suivantes : coussins, oreillers, couvertures matelassées et similaires (ces pièces
accumulent la chaleur).
• Les pièces contenant de l'éponge de
caoutchouc (mousse de latex), les bonnets de bains, tissus imperméables, articles renforcés de caoutchouc ou vêtements et taies d'oreiller rembourrés
d'éponge de caoutchouc ne doivent pas
être séchés dans un sèche-linge.
• Débranchez toujours l'appareil après son
utilisation, nettoyage et entretien.
• N'essayez en aucun cas de réparer l'ap-
pareil vous-même. Les réparations effectuées par du personnel non qualifié peuvent provoquer des blessures ou le mauvais fonctionnement de l'appareil. Contactez le Service Après-vente de votre magasin vendeur. Exigez des pièces de rechange certifiées Constructeur.
• Le linge sale, taché d'huile culinaire, d'acé-
tone, d'essence, de kérosène, de produit
détachant, de térébenthine, de cire ou de
décapant pour cire doit être lavé à l'eau
chaude avec une plus grande quantité de
Page 25

electrolux 25
lessive avant d'être séché dans le sèchelinge.
• Risque d'explosion : ne séchez jamais
du linge qui serait entré en contact avec
des solvants inflammables (essence, alcool dénaturé, fluide de nettoyage à sec
et similaire). Ces substances sont volatiles et pourraient causer une explosion.
Ne séchez que du linge lavé à l'eau.
• Risque d'incendie : le linge taché ou imbibé d'huile végétale ou d'huile culinaire
peut être à l'origine d'un incendie et ne
doit pas être placé dans le sèche-linge.
• Si le linge a été lavé avec un produit détachant, effectuez un cycle de rinçage supplémentaire avant de le mettre dans le sèche-linge.
• Please make sure that no gas lighters or
matches have accidentally been left in
pockets of garments incase they are loaded into appliance
Avertissement
• Risk of fire! Never stop a tumble
dry before the end of the drying
cycle unless all items are quickly
removed and spread out so that
the heat is dissipated.
• Éliminez régulièrement les peluches présentes autour du sèchelinge.
• Risque de choc électrique ! N'utilisez
jamais d'appareils à vapeur ou à haute
pression pour nettoyer l'appareil.
• Le cycle de séchage se termine par une
phase sans chauffage (cycle de refroidissement) pour éviter que le linge ne reste
longtemps à haute température et ne subisse des dommages.
• Ne séchez jamais dans l'appareil d'articles ayant été traités avec des produits
chimiques, tels que les produits utilisés
pour le nettoyage à sec.
• Aérez suffisamment la pièce pour éviter le
reflux de gaz provenant d'appareils utilisant d'autres combustibles.
Installation
• Cet appareil est lourd. Faites attention
lors de son déplacement.
• Déballez l'appareil et vérifiez qu'il n'est
pas endommagé. En cas de doute, ne
l'utilisez pas et contactez le magasin vendeur.
• Avant d'utiliser l'appareil, enlevez tous les
éléments de protection de transport. En
cas de non-respect de cette recommandation, l'appareil ou les accessoires risquent d'être sérieusement endommagés.
Voir le chapitre correspondant dans cette
notice d'utilisation.
• Ne confiez les travaux électriques de votre habitation nécessaires à l'installation
de votre appareil qu'à un électricien qualifié.
• Si l'appareil est placé sur une moquette,
ajustez les pieds afin de permettre à l'air
de circuler librement sous l'appareil.
• Après avoir installé l'appareil, vérifiez qu'il
n'écrase pas le cordon d'alimentation.
• Si le sèche-linge est placé au-dessus
d'un lave-linge, utilisez le kit de superposition (accessoire en option).
Usage prévu
• Cet appareil est destiné à un usage particulier. Ne l'utilisez pas à des fins commerciales ou industrielles ou pour d'autres
buts que celui pour lequel il a été conçu.
• Ne séchez en machine que les articles
pouvant supporter ce traitement. Suivez
les indications se trouvant sur l'étiquette
dont chaque article est muni.
• N'introduisez dans le sèche-linge que du
linge propre.
• Ne surchargez pas l'appareil. Voir le chapitre correspondant dans cette notice
d'utilisation.
• Ne placez pas de linge non essoré dans
le sèche-linge.
• Ne séchez pas en machine les articles entrés en contact avec des détachants volatiles. Si de tels détachants sont utilisés
avant le lavage en machine, il faudra attendre que le produit se soit évaporé
avant d'introduire les articles dans l'appareil.
• Le cordon d'alimentation ne doit jamais
être tiré au niveau du cordon ; mais toujours au niveau de la prise.
• N'utilisez jamais le sèche-linge si le cordon d'alimentation, le bandeau de commande, le plan de travail ou la base sont
endommagés et permettent l'accès à l'intérieur de l'appareil.
Page 26

26 electrolux
• Les assouplissants ou autres produits similaires doivent être utilisés conformément aux instructions de leur fabricant.
•
Attention - surface chaude : Ne touchez pas le cache de l'ampoule d'éclairage de porte quand l'éclairage est en fonctionnement.
(Uniquement les sèche-linge avec éclairage intérieur du tambour)
Sécurité enfants
• Cet appareil ne doit pas être utilisé par
de jeunes enfants ou des personnes infirmes sans supervision.
• Les enfants ne sont pas toujours conscients des dangers associés à l'utilisation
ENVIRONNEMENT
Le symbole sur le produit ou son
emballage indique que ce produit ne peut
être traité comme déchet ménager. Il doit
plutôt être remis au point de ramassage
concerné, se chargeant du recyclage du
matériel électrique et électronique. En vous
assurant que ce produit est éliminé
correctement, vous favorisez la prévention
des conséquences négatives pour
l’environnement et la santé humaine qui,
sinon, seraient le résultat d’un traitement
inapproprié des déchets de ce produit.
Pour obtenir plus de détails sur le recyclage
de ce produit, veuillez prendre contact avec
le bureau municipal de votre région, votre
service d’élimination des déchets ménagers
ou le magasin où vous avez acheté le produit.
Où aller avec les appareils usagés?
Partout où des appareils neufs sont
vendus, mais aussi dans un centre de
collecte ou une entreprise de
récupération officiels SENS.
La liste des centres de collecte officiels
SENS est disponible sous
www.sens.ch.
Conseils relatifs à l'environnement
• Le sèche-linge rend le linge duveteux et
doux. Il est par conséquent inutile d'utiliser un adoucissant lors du lavage.
• Le sèche-linge fonctionne le plus économiquement possible si vous :
– laissez constamment dégagée la grille
d'aération située sur le socle du sèchelinge ;
des appareils électriques. Veillez à ce que
les enfants ne jouent pas avec l'appareil.
Avertissement
• Risque d'étouffement ! Les matériaux d'emballage (par ex. les films
plastiques, le polystyrène) représentent un danger pour les enfants - Gardez-les hors de leur portée.
• Rangez les détergents en lieu sûr, hors
de la portée des enfants.
• Assurez-vous que ni les enfants ni les animaux domestiques ne pénètrent dans le
tambour.
– respectez les charges indiquées dans
le tableau récapitulatif des program-
mes ;
– aérez suffisamment la pièce ;
– nettoyez les filtres fins et microfins
après chaque cycle de séchage ;
– essorez suffisamment le linge avant de
le sécher.
La consommation d'énergie dépend de
la vitesse d'essorage qui aura été sélectionnée sur le lave-linge. Plus la vitesse
d'essorage du lave-linge est élevée
plus la consommation d'énergie du sèche-linge sera basse.
Informations liées à la protection de
l'environnement
Les matériaux d'emballage respectent l'environnement et sont recyclables. Les éléments en plastique sont identifiés par les sigles >PE <, >PS <, etc. Veuillez jeter les matériaux d'emballage dans le conteneur approprié du centre de collecte des déchets
de votre commune.
Avertissement Si vous n'utilisez plus
votre appareil :
•Débranchez-le.
• Coupez le cordon d'alimentation au
ras de l'appareil et jetez-le avec la prise.
• Eliminez le loquet de la porte ; cela
évitera aux enfants de s'enfermer
dans l'appareil et de mettre ainsi leur
vie en danger.
Page 27

INSTALLATION
Emplacement
• Par commodité, il est conseillé d'installer
l'appareil près de votre lave-linge.
• Le sèche-linge doit être installé dans un
lieu propre, à l'abri de la poussière.
• L'air doit pouvoir circuler librement tout
autour de l'appareil. N'obstruez pas la grille d'aération frontale ou les grilles d'entrée d'air à l'arrière de l'appareil.
• Pour limiter au maximum les vibrations et
le bruit pendant le fonctionnement du sèche-linge, installez-le sur une surface robuste et horizontale.
• Après l'installation du sèche-linge, vérifiez
qu'il est bien d'aplomb à l'aide d'un niveau à bulle. S'il n'est pas d'aplomb, rectifiez en relevant ou en abaissant les pieds.
• Les pieds ne doivent jamais être retirés.
Veillez à ne pas limiter la circulation de
l'air au sol par des tapis à longs poils,
des baguettes de bois, etc. Cela pourrait
produire une accumulation de chaleur qui
nuirait au fonctionnement de l'appareil.
Important
• La température de l'air chaud dégagé par
le sèche-linge peut atteindre 60 °C. L'appareil ne doit donc pas être installé sur
des sols non résistants aux températures
élevées.
•Pendant le fonctionnement du sèche-linge, la température ambiante ne doit pas
être inférieure à +5 °C ou supérieure à
+35 °C pour ne pas compromettre les performances de l'appareil.
• Si l'appareil doit être déplacé, transportezle verticalement.
• L'appareil ne doit pas être installé derrière une porte à serrure, une porte coulissante ou une porte battante dotée d'une
charnière du côté opposé de celle de l'appareil qui pourrait empêcher l'ouverture
complète du sèche-linge.
Retrait des protections de transport
Attention
electrolux 27
1. Ouvrez la porte.
2. Enlevez les rubans adhésifs à l'intérieur
du tambour.
3. Enlevez la gaine plastique avec le rembourrage en polystyrène de l'appareil.
Branchement électrique
Contrôlez les caractéristiques électriques
de l'appareil (tension d'alimentation, type
de courant, fusibles, etc.) sur la plaque signalétique. La plaque signalétique est située près de la porte (voir le chapitre "Description du produit").
Branchez l'appareil sur une prise avec
terre, conformément aux normes et réglementations en vigueur.
Avertissement Le fabricant décline
toute responsabilité en cas de
dommage ou blessure, suite au nonrespect des consignes de sécurité
mentionnées ci-dessus.
Le remplacement du cordon d'alimentation de l'appareil doit être effectué par notre service après-vente.
Avertissement La prise doit être
facilement accessible après
l'installation de l'appareil.
Réversibilité de la porte
Avertissement Avant de changer le
sens d'ouverture de la porte,
débranchez votre appareil.
Avant de mettre l'appareil en service, il est
impératif d'enlever tous les éléments de protection de transport.
Page 28

28 electrolux
1.
A
A
B
C
B
Ouvrez la porte.
2. Dévissez la charnière A située sur la façade avant de l'appareil et démontez la
porte.
3. Retirez les plaques de revêtement B .
Pour ce faire, insérez un tournevis plat
dans les fentes, comme indiqué sur l'illustration, puis poussez un peu vers le
bas pour enlever les plaques.
4. Détachez le gong de fermeture C à l'aide d'un outil approprié en exerçant une
pression sur le cran, enlevez-le et remettez-le en place sur le côté opposé en le
faisant tourner de 180°.
5. Dévissez la charnière A de la porte, faites-la tourner de 180°, replacez-la sur
le côté opposé et revissez-la soigneusement.
6.
Tournez les caches B de 180° et replacez-les respectivement sur le côté opposé.
7.
D
E
E
D
FF
Dévissez les caches D de la façade
avant de l'appareil, tournez-les de 180°
et revissez-les sur le côté opposé.
8. Dévissez le dispositif de verrouillage de
la porte E, appuyez légèrement vers le
bas et enlevez-le de la façade avant de
l'appareil.
9. Enfoncez le fermoir F vers le bas, abaissez le cache légèrement et enlevez-le
de la façade de l'appareil.
10. Montez le connecteur du verrouillage E
sur le côté opposé et vissez soigneusement le dispositif de verrouillage de la
porte.
11.
De l'autre côté, insérez le cache F jusqu'à enclenchement du fermoir.
12. Montez la porte avec les charnières placées dans les logements sur la façade
avant de l'appareil et vissez soigneusement.
Remarque concernant la sécurité : La sécurité du fonctionnement de l'appareil n'est
de nouveau assurée que lorsque toutes les
pièces en matière isolante ont été remontées.
Accessoires spéciaux
• kit de superposition
Disponible auprès du service après-vente de votre magasin vendeur
Ces kits de superposition permettent
d'installer en colonne un sèche-linge et
un lave-linge (60 cm de largeur, à chargement frontal) afin de gagner de l'espace.
Le lave-linge doit être posé sur le sol et le
sèche-linge installé au-dessus.
Lisez attentivement la notice fournie avec
le kit.
• kit de vidange
Disponible auprès du service après-vente de votre magasin vendeur
Kit d'installation qui permet de vidanger
directement dans l'évier ou un siphon
l'eau de condensation qui se forme pendant chaque cycle de séchage. il n'est
plus nécessaire de vider le bac d'eau de
condensation mais celui-ci doit rester en
place dans l'appareil.
Lisez attentivement la notice fournie avec
le kit.
• socle à tiroir
Disponible auprès du service après-vente de votre magasin vendeur
Pour placer le sèche-linge à une hauteur
optimale et disposer de plus d'espace de
rangement (ex. pour le linge).
Lisez attentivement la notice fournie avec
le kit.
Page 29

DESCRIPTION DE L'APPAREIL
electrolux 29
2
3
6
7
9
12
1 Bandeau de commande
2 Bac d'eau de condensation
3 Eclairage du tambour
4 Filtre fin
5 Filtre grossier
6 Filtre à peluches
1
4
5
8
10
11
7 Plaque signalétique
8 Porte (réversible)
9 Portillon du condenseur thermique
10 Touche d'ouverture de la trappe du filtre
11 Grille d'aération
12 Pieds réglables
Page 30

30 electrolux
BANDEAU DE COMMANDE
Bandeau de commande
6 5 4
321
1 Sélecteur de programmes et touche Mar-
che/Arrêt
2 Touches de fonction
3 Départ / Pause Touche
Affichage
4
6
5
1 temps restant / message d'erreur
2 phase du cycle
3 options
4 avertissements
Description de l'affichage
Humidité Résiduelle
par défaut
T/Min par défaut minimum T/Min
minimum Humidité Ré-
siduelle
4 Départ Différé Touche
5 Voyant
6 Affichage
2
3
1
5 vitesse d'essorage
6 degré de séchage
moyen Humidité Rési-
duelle
-
T/Min (par palier de
200 tr/min)
maximum Humidité Ré-
siduelle
maximum T/Min
Page 31

prêt à repasser (voyant
du cycle de séchage)
extra sec (voyant du cy-
cle de séchage)
Description de l'affichage
légèrement humide
(voyant du cycle de sé-
chage)
refroidissement (voyant
du cycle de séchage)
prêt à ranger (voyant
du cycle de séchage)
anti-froissage (voyant
du cycle de séchage)
electrolux 31
très sec (voyant du cy-
cle de séchage)
-
-
vider le bac d'eau de
condensation (avertis-
sement)
délicat anti-froissage sensible alarme
départ différé durée du cycle
nettoyer le condenseur
(avertissement)
- -
nettoyer les filtres (aver-
tissement)
programme chronomé-
trique (10 min - 3h)
sécurité enfants
départ différé
Les options délicat et sensible
ne peuvent pas être sélectionnées simultanément.
AVANT D'UTILISER LE SÈCHE-LINGE POUR LA PREMIÈRE FOIS
Afin d'éliminer tout résidu éventuellement généré en cours de production, avant la première utilisation de votre sèche-linge, essuyez le tambour à l'aide d'un chiffon humi-
de ou démarrez un cycle court (30 minutes
environ) en plaçant quelques chiffons humides dans l'appareil.
TABLEAU DES PROGRAMMES
Charge
maxi-
Programmes
Très Sec 8 kg
Sec 8 kg
Prêt à Ranger 8 kg
Prêt à Repasser 8 kg
mum
(poids à
sec)
Utilisation/propriétés Options
Coton
Séchage complet des textiles épais ou
multicouches (par ex. linge en tissu éponge, peignoirs de bain).
Séchage complet des textiles épais, par
ex. du linge en tissu éponge ou des serviettes éponge.
Séchage complet de textiles d'une épaisseur homogène, par exemple, linge en
tissu éponge, des serviettes éponge ou
des lainages.
Pour le linge en coton ou en lin d'épaisseur normale (p.ex. le linge de lit ou de
table).
toutes
sauf Minute-
rie
toutes
sauf Minute-
rie
toutes
sauf Minute-
rie
toutes
sauf Minute-
rie
1)
1)
1)
1)
Etiquet-
tes
d'entre-
tien
Page 32

32 electrolux
Charge
maxi-
Programmes
mum
(poids à
sec)
Très Sec 3 kg
Prêt à Ranger 3 kg
Prêt à Repasser 3 kg
Minuterie 8 kg
Rafraîchir 1 kg
55 Min. - 3 Kg 3 kg
Sport 2 kg
Draps 3 kg
Jeans 8 kg
Microfibres 1 kg
Utilisation/propriétés Options
Synthétiques
Séchage complet des textiles épais ou
multicouches (par ex. pull-overs, linge
de lit, linge de table).
Pour les tissus fins ne nécessitant pas
de repassage (par ex. chemises en textiles mélangés, linge de table, vêtements
de bébé, chaussettes, lingerie à baleines ou armatures).
Pour les tissus fins à repasser (par ex. lainages, chemises).
spécial
Pour sécher des pièces de linge séparées.
Pour les textiles qui nécessitent d'être rafraîchis.
Pour le séchage rapide des textiles en
coton avec une réduction du froissage.
Résultat de séchage : prêt à ranger.
Pour tenues de sports, textiles fins, polyester, ne nécessitant pas de repassage.
Linge de lit (draps, taies d'oreillers, couvre-lits, housses de couettes).
Programme spécial pour vêtements de
sport comme les jeans, les sweats, etc.,
en tissus de résistances diverses (ex. au
niveau du poignet et du col ou des coutures).
Pour tissus fins, polyester et polyamide,
ne nécessitant pas de repassage.
1)
toutes
sauf Minute-
rie
1)
toutes
sauf Minute-
rie
1)
toutes
sauf Minute-
rie
délicat , anti-
froissa-
ge, alarme ,
Minuterie ,
Départ Diffé-
ré
délicat , anti-
froissa-
ge, alarme ,
Départ Diffé-
ré
anti-froissage, alarme ,
Départ Diffé-
ré
3)
tous
sauf
sensitif et
Minuterie
tous
sauf sensitif
et Minuterie
1)
toutes
sauf Minute-
rie
3)
toutes
sauf sen-
sible et Mi-
nuterie
Etiquet-
tes
d'entre-
tien
2)
2)
2)
Page 33

electrolux 33
Charge
maxi-
Programmes
mum
(poids à
sec)
1,5 kg
Chemises
(ou 7 che-
mises)
1 kg (ou
Facile à Repasser
5 chemi-
ses)
Laine 1 kg
Silence plus Synthétiques
3 kg
Utilisation/propriétés Options
Programme spécial doté d'un mécanisme anti-froissage pour un léger repassage de textiles mélangés tels que les chemises et les corsages ; pour un repassage sans peine. Le résultat dépend du type de textile et de sa qualité. Placez le
linge dans le sèche-linge immédiatement après l'essorage ; enlevez le linge
immédiatement après le séchage et suspendez-le sur un cintre.
Programme spécial afin de sécher les
textiles laineux après le lavage avec de
l'air chaud sans grosse charge mécanique (consultez le chapitre " Tri et préparation du linge "). Recommandation : Sortez le linge de l'appareil une fois qu'il est
sec, vous éviterez ainsi qu'il ne se froisse.
Le cycle de séchage Laine de ce sèchelinge a été testé et approuvé par La Woolmark Company. Ce cycle convient aux
vêtements en laine tricotés portant l'étiquette « lavage à la main » à condition
que les vêtements soient lavés avec un
cycle de lavage à la main homologué
par Woolmark et séchés au sèche-linge
selon les recommandations émises par
le fabricant. (M1022)
Pour un séchage peu bruyant et délicat
des synthétiques Recommandé pour un
séchage de nuit.
3)
tous
sauf
sensible et
Minuterie
3)
tous
sauf
sensible et
Minuterie
Humidité
Résiduelle ,
T/Min , alar-
me , Départ
Différé
3)
Humidité
Résiduelle ,
T/Min , anti-
froissa-
ge, alarme ,
Départ Diffé-
ré
Etiquet-
tes
d'entre-
tien
Page 34

34 electrolux
Charge
maxi-
Programmes
Silence plus Coton 8 kg
1) Les options délicat et sensible ne peuvent pas être sélectionnées simultanément
2) sélectionnez délicat
3) délicat réglé par défaut
mum
(poids à
sec)
Utilisation/propriétés Options
Pour un séchage peu bruyant et délicat
du coton. Recommandé pour un séchage de nuit.
UTILISATION QUOTIDIENNE
Tri du linge
• Triez le linge par type de textile :
– Coton/lin pour les programmes de type
Coton .
– Textiles mixtes et synthétiques pour les
programmes de type Synthétiques .
• Triez le linge en fonction du type d'étiquette : Les étiquettes d'entretien signifient :
Séchage en sèche-linge possible
dans tous les cas
Séchage en tambour à haute température
Séchage à température modérée
Séchage dans un sèche-linge non autorisé
Important N'introduisez pas dans l'appareil de linge humide n'étant pas désigné sur
l'étiquette d'entretien comme pouvant être
séché en sèche-linge.
Cet appareil peut être utilisé pour tous les articles dont l'étiquette mentionne qu'ils peuvent être séchés en sèche-linge.
• Ne séchez pas de vêtements neufs de
couleur avec du linge de couleur claire.
Les textiles pourraient déteindre.
• Ne séchez pas les lainages et la bonneterie à l'aide du programme Très . Risque
de rétrécissement !
• La laine et les textiles à base de laine peuvent être séchés à l'aide du programme
Laine . Il convient de bien essorer les vêtements en laine avant le cycle de séchage (maximum 1200 tr/min). Séchez uniquement les textiles en laine ensemble
s'ils sont similaires en texture, couleur et
poids, et s'ils peuvent supporter ce traitement. Séchez le linge en laine très lourd
séparément.
Préparation du linge
• Pour éviter que le linge ne s'enroule et forme des nœuds : fermez les fermetures
éclair, boutonnez les housses de couettes et nouez les cordons ou les rubans
(par ex. ceintures de tabliers).
• Videz les poches. Enlevez toutes les pièces métalliques (trombones, épingles de
sûreté, etc.).
• Retournez sur l'envers les articles doublés (par ex. les anoraks avec doublure
en coton : la doublure doit être à l'extérieur). Ces tissus sécheront mieux.
Important Ne surchargez pas l'appareil.
Ne chargez pas plus de 8 kg.
Poids moyen du linge
peignoir 1 200 g
housse de couette 700 g
chemise de travail
homme
pyjamas homme 500 g
drap 500 g
nappe 250 g
chemise homme 200 g
chemise de nuit 200 g
taie d'oreiller 200 g
drap de bain 200 g
chemisier 100 g
Humidité
Résiduelle ,
T/Min , anti-
froissa-
ge, alarme ,
Départ Diffé-
ré
Etiquet-
tes
d'entre-
tien
600 g
Page 35

electrolux 35
sous-vêtements femme
sous-vêtements homme
serviette 100 g
torchon 100 g
100 g
100 g
Mise sous tension de l'appareil/
Eclairage du tambour
Tournez le sélecteur de programmes sur
n'importe quel programme ou sur Éclairage . L'appareil est mis sous tension. Quand
la porte est ouverte, le tambour est éclairé.
Chargement du linge
1.
Ouvrez la porte :
Appuyez fortement sur la porte (point de
pression) pour l'ouvrir
2. Chargez votre linge sans le tasser.
Attention Prenez la précaution de ne
pas coincer de linge lors de la fermeture de la porte. Le linge pourrait être endommagé.
3. Refermez la porte en appuyant forte-
ment. Le verrouillage doit être audible.
Sélection du programme
Sélectionnez un programme à l'aide du sélecteur de programmes. La fenêtre d'affichage indique la durée prévue du programme,
par ex.,
( heures . minutes ).
Pendant le cycle, le temps restant est décompté par paliers d'une minute.
Humidité Résiduelle
Augmente le degré de séchage du linge jus-
qu'au niveau sélectionné :
, ,
. Cette option aide à obtenir des résul-
tats de séchage satisfaisants.
T/Min
Raccourcit le cycle de séchage à la vitesse
à laquelle le linge a été essoré préalablement dans le lave-linge. Plus la vitesse d'essorage était élevée, plus le cycle de séchage est court. Vitesses d'essorage disponi-
bles (tr/min) : de
à (par palier de
200 tr/min)
Cette option permet d'économiser du
temps et de l'énergie.
Sélection des options complémentaires
Les options complémentaires proposées
pour les programmes de séchage sont déli-
cat , anti-froissage , sensible et alarme
1. Tournez le sélecteur pour choisir un pro-
gramme de séchage.
2. Pour sélectionner une option, appuyez
sur la touche Option . Les options s'affichent à l'écran sous forme de symboles :
Page 36

36 electrolux
délicat anti-
sensible alarme
froissa-
ge
Le symbole délicat clignote. Un symbole clignotant signifie : que vous avez
sélectionné l'option mais que celle-ci
n'est pas activée. Pour activer l'option
sélectionnée, appuyez sur la touche
OK . Une option activée s'affiche sous la
forme d'un symbole clignotant souligné
d'un tiret.
3. Appuyez à plusieurs reprises sur la touche Option pour sélectionner les options
appropriées et sur la touche OK pour
les activer. Les options activées sont toujours affichées sous forme de symboles
soulignés d'un tiret.
4. Le mode de sélection des options prend
fin lorsque vous avez parcouru toutes
les options ou lorsque vous arrêtez la sélection. Seuls les symboles des options
activées sont affichés.
Certaines options ne peuvent pas être
sélectionnées en même temps que les
options délicat et sensible . Certaines
d'entre elles ne peuvent pas être sélectionnée avec certains programmes
Pour annuler la sélection, effectuez la
même démarche. Le symbole de l'option disparaît.
délicat
Ce programme permet de sécher les tissus
particulièrement délicats désignés par l'éti-
quette d'entretien
, ainsi que les textiles
sensibles à la chaleur (par exemple en acrylique ou en viscose). Ce programme diffuse
une température réduite.
delicate ne convient que pour des charges
de 3 kg maximum.
Lorsque l'option est active, le symbole deli-
cate
s'affiche.
anti-froissage
Si vous sélectionnez cette fonction complémentaire, la phase anti-froissage prolonge
de 60 minutes la phase anti-froissage (30 minutes) à la fin du cycle de séchage. Au
cours de cette phase, le tambour tourne
par intermittence. Ainsi, le linge ne se tasse
pas et ne se froisse pas. Cette phase dure
effectivement 90 minutes. Au cours de la
phase anti-froissage, le linge peut être retiré
à tout instant.
Lorsque l'option est activée, le symbole anti
froissage
s'affiche.
sensible
Ce programme permet de sécher délicatement des textiles fréquemment portés. Il démarre à pleine puissance de chauffage,
puis la chaleur diminue au fur et à mesure
que le cycle se poursuit, ce qui permet de
sécher le linge en douceur.
Lorsque l'option est activée, le symbole sen-
sitive
s'affiche.
alarme
L'appareil est livré avec la fonction buzzer
désactivée.
Pour l'activer, sélectionnez l'option alarme .
Lorsque l'option est activée, le symbole alar-
s'affiche.
me
Le signal sonore indique :
– la fin du programme
– le début et la fin de la phase anti-froissage
– un arrêt de cycle anormal
– une alarme
Minuterie
Sélectionnez la durée du programme après
avoir choisi Minuterie . Vous pouvez sélectionner une durée de séchage de 10 minutes à 3 heures par paliers de 10 minutes.
1. Tournez le sélecteur sur Minuterie . Le
chiffre
clignotant au-dessus de la
touche Minuterie s'affiche, (correspondant à la phase de refroidissement).
2. Appuyez sur la touche Minuterie jusqu'à
ce que la durée du programme souhaité
apparaisse sur l'écran d'affichage, par
exemple,
correspond à un program-
me de 20 minutes.
Si la durée du programme n'est pas précisée, une durée de 10 minutes est automatiquement sélectionnée (par défaut).
Départ Différé
La touche Départ Différé permet de
retarder le départ d'un programme
de 30 minutes (30') à 20 heures maximum (20h).
1. Sélectionnez le programme et les fonctions complémentaires.
Page 37

electrolux 37
2. Appuyez sur la touche Départ Différé jusqu'à ce que l'heure de départ différé ap-
paraisse sur l'affichage, par exemple,
si le programme doit démarrer dans
12 heures.
Si l'écran d'affichage indique 20 h
et si vous appuyez à nouveau sur
cette touche, le départ différé est
annulé. L'écran affiche alors 0' puis
la durée du programme sélectionné.
3. Pour activer le départ différé, appuyez
sur la touche Départ / Pause . Le décompte du départ différé s'affiche continuellement (ex. 15 h, 14 h, 13 h, ... 30'
etc.).
Sécurité des enfants
La sécurité enfants permet d'éviter le départ d'un programme par inadvertance et la
modification par inadvertance d'un programme en cours. La sécurité enfants verrouille
toutes les touches et le sélecteur de programmes. La sécurité enfants peut être activée ou désactivée en appuyant simultanément sur les touches Option et OK , et en
les maintenant appuyées pendant 5 secondes.
– Avant le départ du programme : l'ap-
pareil ne peut pas être utilisé
– Après le départ du programme : le
programme en cours ne peut pas
être modifié
Le symbole
apparaît sur l'écran d'affichage pour indiquer que la sécurité enfants a
été activée.
La sécurité enfants restera activée jusqu'à
la fin du programme.
Si vous souhaitez sélectionner un nouveau
programme, vous devez d'abord désactiver
la sécurité enfants.
Démarrage du programme
Appuyez sur la touche Départ / Pause . Le
programme démarre.
Des symboles de déroulement de programme vous indiquent les différentes phases du
programme en cours. De gauche à droite,
du symbole iron dry
au symbole anti-
crease selon le cycle de séchage choisi.
Ex. si un programme prêt à ranger a été sé-
lectionné, les symboles suivants s'affi-
chent :
. Le déroulement du
programme est signalé par des tirets clignotants sous les symboles. Quand une phase
du cycle est terminée, le tiret correspondant
reste fixe et le tiret sous le symbole suivant
clignote.
Modification du programme
Pour modifier un programme en cours, il
faut d'abord annuler celui-ci en tournant le
sélecteur de programmes sur Arrêt puis sélectionner le nouveau programme.
Après le départ du programme, il n'est
plus possible de modifier le programme
directement. Si vous tournez le sélecteur de programmes sur un autre programme lorsque l'appareil est en cours
de fonctionnement, les voyants d'affichage de déroulement de programme
et les indicateurs d'alarme clignotent.
Si vous sélectionnez une option (à l'exception de l'option alarme ), Err s'affiche. Toutefois, le programme de séchage se poursuit normalement (protection
du linge).
Retrait du linge
Quand le cycle de séchage est terminé, le
symbole
clignote à l'écran et un tiret
s'affiche sous le symbole anti-froissage. Si
l'option alarme a été sélectionnée, un signal
sonore retentit à intervalles réguliers pendant environ une minute.
Les cycles de séchage sont automatiquement suivis d'une phase d'anti-froissage qui dure environ 30 minutes. Au
cours de cette phase, le tambour tourne par intermittence. Ainsi, le linge ne
se tasse pas et ne se froisse pas. Au
cours de la phase anti-froissage, le linge peut être retiré à tout instant. (Il est
recommandé de sortir le linge au plus
tard vers la fin de la phase anti-froissage pour éviter qu'il ne se froisse). Si l'option anti-froissage
a été sélectionnée, la phase anti-froissage est prolongée de 60 minutes.
1. Ouvrez la porte.
2. Avant de retirer le linge, retirez les peluches du filtre microfin. Il est conseillé
d'enlever les peluches de préférence
Page 38

38 electrolux
avec un chiffon humide. (Reportez-vous
au chapitre "Entretien et nettoyage".)
3. Sortez le linge.
4. Tournez le sélecteur de programmes sur
Arrêt .
Important Après chaque cycle de séchage :
ENTRETIEN ET NETTOYAGE
Nettoyage des filtres
Les filtres retiennent toutes les peluches qui
s'accumulent pendant le séchage. Pour assurer un fonctionnement correct du sèchelinge, il est nécessaire de nettoyer les filtres
(filtres microfin et fin) après chaque cycle de
séchage.
Le symbole correspondant
à l'écran vous le rappelle.
Attention N'utilisez jamais votre sèchelinge sans avoir installé les filtres ou
avec des filtres endommagés ou
obstrués.
1.
qui s'affiche
- Nettoyez les filtres fin et microfin
- Videz le bac de récupération de l'eau
de condensation
(Reportez-vous au chapitre "Entretien et
nettoyage".)
5. Fermez la porte de chargement.
Après un certain temps, les filtres se
couvrent d'une patine due aux résidus
de lessive sur le linge. Pour éliminer cette patine, nettoyez les filtres à l'eau chaude en les frottant à l'aide d'une brosse.
Retirez le filtre situé dans l'ouverture de
la porte. Pour le remettre en place, veillez à orienter l'ergot vers la gauche ou
la droite).
N'oubliez pas de remettre le filtre en place après son nettoyage.
4.
Ouvrez la porte
2. Nettoyez le filtre microfin qui se trouve
au bas du hublot avec un chiffon humide.
3.
Appuyez sur la touche de déverrouillage située sur le filtre grossier.
Le filtre grossier se détache.
5.
Page 39

electrolux 39
Sortez le filtre fin.
6. Enlevez les peluches du filtre fin. Il est
conseillé d'enlever les peluches de préférence avec un chiffon humide.
Nettoyez l'ensemble de la zone du
filtre
Il n'est pas nécessaire de nettoyer l'ensemble de la zone du filtre après chaque cycle de séchage, mais elle doit
être régulièrement contrôlée et, le cas
échéant, les peluches enlevées.
7.
Pour cela, saisissez le filtre grossier par
le haut et tirez-le vers l'avant jusqu'à ce
qu'il se détache de ses deux supports.
8. Enlevez les peluches de l'ensemble de
la zone du filtre. Il est conseillé d'utiliser
un aspirateur pour cette opération.
9. Appuyez des deux côtés du filtre gros-
sier jusqu'à sa fixation.
10. Remettez le filtre fin en place.
11.
Appuyez sur le filtre grossier jusqu'à
son verrouillage.
Si le filtre fin n'est pas en place, le filtre
grossier ne se verrouille pas et il n'est
pas possible de fermer la porte.
Nettoyage du joint de porte
Nettoyez le joint de porte à l'aide d'un chiffon humide immédiatement après chaque
cycle de séchage.
Vidage du bac d'eau de condensation
Videz le bac d'eau de condensation après
chaque cycle de séchage.
Si le bac d'eau de condensation est plein,
le programme de séchage en cours s'interrompt automatiquement et le symbole cor-
respondant
apparaît sur la fenêtre d'affichage. Il est nécessaire de vider le bac
d'eau de condensation avant de poursuivre
le programme.
Avertissement L'eau de condensation
n'est pas potable et ne doit pas être
utilisée pour la préparation des aliments.
1.
Sortez le bac d'eau de condensation.
2.
Versez l'eau de condensation dans une
bassine ou tout autre récipient similaire.
3. Réinstallez le bac d'eau de condensation.
Page 40

40 electrolux
Si le programme s'était interrompu parce que le bac était plein : Appuyez sur la
touche Départ/Pause afin que le cycle
de séchage continue.
Le bac d'eau de condensation peut contenir 4,5 litres, ce qui est suffisant pour
environ 8 kg de linge préalablement essoré à 1000 tours/ minute.
L'eau de condensation récupérée peut
être utilisée dans un fer à repasser à vapeur. Il est toutefois nécessaire, avant
d'utiliser l'eau de condensation, de la filtrer (par ex. avec un filtre à café) pour
éliminer les résidus et les petites peluches.
Nettoyez le condenseur
Si le symbole du condenseur
s'affiche,
cela signifie qu'il faut nettoyer le condenseur.
Attention Ne faites pas fonctionner le
sèche-linge sans condenseur ou avec
un condenseur contenant des
peluches au risque de l'endommager.
Cela augmente par ailleurs la
consommation d'énergie.
1. Ouvrez la porte.
2.
Ouvrez la trappe. Pour cela, appuyez
sur la touche de déverrouillage sur la partie inférieure de la trappe et ouvrez celleci vers la gauche.
3. Nettoyez l'intérieur du portillon et la partie avant de la base du condenseur. Nettoyez le joint de la trappe à l'aide d'un
chiffon humide.
4.
Tournez les deux butées vers l'intérieur.
5.
Sortez le condenseur en le saisissant
par sa poignée. Maintenez-le à l'horizontal pour éviter de renverser l'eau résiduelle.
6. Tenez-le verticalement au-dessus de
l'évier pour le vider.
Attention N'utilisez pas d'objets
pointus pour le nettoyage du
condenseur thermique. Vous risqueriez
de l'endommager.
7. Nettoyez le condenseur.
Nettoyez le condenseur avec une brosse et rincez éventuellement à l'aide
d'une douchette.
8. Remettez le condenseur à sa place, tournez les deux butées vers le haut jusqu'à
enclenchement.
9. Refermez la trappe.
Attention N'utilisez jamais votre sèchelinge sans le condenseur thermique.
Nettoyage du tambour
Attention N'utilisez pas de produits
abrasifs, ni laine d'acier pour nettoyer
le tambour.
Page 41

electrolux 41
Le calcaire contenu dans l'eau ou les
détergents peut laisser un dépôt à peine visible à l'intérieur du tambour. Le détecteur d'humidité ne peut alors plus détecter efficacement le taux d'humidité,
ce qui peut expliquer que le linge est
plus humide que prévu lorsque vous le
sortez.
Nettoyez l'intérieur et les nervures du
tambour à l'aide d'un détergent doux
Nettoyage du bandeau de commandes
et de la carrosserie
Attention N'utilisez pas de produits
nettoyants pour meubles ou des
agents de nettoyage agressifs pour
nettoyer l'appareil.
Lavez la carrosserie et le bandeau de
commandes à l'eau savonneuse. Rincez et séchez soigneusement.
(par ex. à base de vinaigre) et d'un chiffon humide.
EN CAS D'ANOMALIE DE FONCTIONNEMENT ...
Dépannage
Anomalie
Le sèche-linge ne démarre pas.
Les résultats
de séchage
ne sont pas
satisfaisants.
La porte ne
ferme pas
Err ( Erreur )
s'affiche.
Pas d'éclairage du tambour
Durée anormalement longue apparaissant dans la
fenêtre d'affi-
chage
Programme
inactif
1)
5)
5)
Le sèche-linge n'est pas branché.
Porte ouverte. Fermez la porte de chargement
La touche DEPART PAUSE n'est pas ap-
puyée.
Sélection de programme erronée.
Filtres à peluches obstrués.
Condenseur thermique obstrué.
Charge max. dépassée. Respectez le volume de charge max.
Fentes d'aération recouvertes. Dégagez les fentes d'aération à la base.
Présence de résidus à l'intérieur du tam-
bour.
Dureté élevée de l'eau.
Filtres non encliquetés.
Tentative de modifier les paramètres
après le démarrage du programme.
Le sélecteur de programmes est sur la
position ARRET .
L'ampoule est défectueuse.
La durée restant jusqu'à la fin est calculée sur la base de : type, volume et humidité du linge.
Bac d'eau de condensation plein.
Cause possible Solution
Branchez l'appareil sur le secteur. Vérifiez le fusible dans la boîte à fusibles (installation domestique).
Appuyez sur la touche DEPART PAUSE .
Sélectionnez le programme approprié.
Nettoyez les filtres à peluches.
Nettoyez le condenseur.
Nettoyez l'intérieur du tambour.
Réglez la dureté correcte de l'eau 4).
Installez le filtre fin et/ou encliquetez le fil-
tre grossier.
Mettez le sèche-linge hors tension puis
de nouveau sous tension. Réglez les paramètres requis.
Tournez-le sur ECLAIRAGE (si disponible) ou sur un quelconque programme.
Remplacez l'ampoule (reportez-vous au
chapitre suivant).
C'est un processus automatique ; l'appareil n'est pas pour autant défectueux.
Videz le bac d'eau de condensation
apuyez sur la touche DEPART PAUSE .
2)
3)
3)
3)
,
Page 42

42 electrolux
Cycle de séchage trop
court
Cycle de séchage trop
6)
long
1) Si un message d'erreur s'affiche (par ex. E51 - uniquement pour les sèche-linge avec fenêtre d'affichage) : Mettez
le sèche-linge hors tension puis de nouveau sous tension. Réglez le programme. Appuyez sur la touche DEPART
PAUSE . Anomalie de fonctionnement ? - Contactez le Service Après-vente et indiquez-lui le code d'erreur.
2) Suivez les recommandations - reportez-vous au chapitre Tableau des programmes
3) Reportez-vous au chapitre Entretien et nettoyage
4) Reportez-vous au chapitre Réglages de l'appareil
5) uniquement pour les sèche-linge avec fenêtre d'affichage
6) Remarque : Après environ 5 heures, le cycle de séchage s'arrête automatiquement (reportez-vous au chapitre
Cycle de séchage complet ).
Volume de linge trop petit/Linge trop
sec pour le programme sélectionné.
Filtres à peluches obstrués. Nettoyez les filtres à peluches.
Volume de charge trop élevé. Respectez le volume de charge max.
Le linge n'a pas été suffisamment essoré. Essorez correctement le linge.
Température ambiante particulièrement
élevée - l'appareil n'est pas pour autant
défectueux.
Remplacement de l'ampoule
d'éclairage intérieur
Utilisez exclusivement une ampoule spéciale pour sèche-linge. Vous pouvez vous procurer cette ampoule auprès de votre service après-vente.
Important Lorsque l'appareil est sous
tension, l'éclairage intérieur s'éteint
automatiquement au bout de 4 minutes
après l'ouverture de la porte.
Avertissement N'utilisez pas
d'ampoules standard ! Elles émettent
trop de chaleur et peuvent
endommager l'appareil !
Avant de remplacer l'ampoule, débran-
Sélectionnez un programme chronométrique ou un niveau de séchage supérieur (par ex. TRES SEC ).
Si possible, réduisez la température de
la pièce.
1. Dévissez le diffuseur de l'ampoule (il se
trouve immédiatement derrière le hublot
de chargement, en haut ; reportez-vous
au chapitre « Description de l'appareil »).
2. Remplacez l'ampoule défectueuse.
3. Revissez soigneusement le cache.
Avant de revisser le diffuseur, vérifiez que le
joint torique est bien positionné. N'utilisez
pas le sèche-linge en l'absence du joint torique.
Avertissement Par mesure de
sécurité, assurez-vous que le cache est
bien serré. Dans le cas contraire, vous
ne devez pas mettre le sèche-linge en
fonctionnement.
chez l'appareil ; si le raccordement est
fixe : dévissez complètement le fusible
ou désactivez-le.
CARACTÉRISTIQUES TECHNIQUES
Hauteur x Largeur x Profondeur 85 x 60 x 58 cm
Capacité du tambour 108 l
Profondeur avec porte ouverte 109 cm
Possibilité de réglage en hauteur 1,5 cm
Poids à vide environ 40 kg
Charge (en fonction du programme)
Tension 220-230 V
Fusible requis 10 A
Puissance totale 2350 W
1)
max. 8 kg
Page 43

electrolux 43
Classe d'efficacité énergétique B
Consommation d'énergie (8 kg de coton, préala-
blement essoré à 1000 tr/min)
2)
4,48 kWh
Consommation d'énergie annuelle moyenne 282 kWh
Usage prévu Domestique
Température ambiante autorisée + 5°C à + 35°C
Données de consommation
Les consommations ont été mesurées dans des conditions d'essai normalisées. Les consomma-
tions réelles dépendent des conditions d'utilisation de l'appareil.
Programme
Consommation d'énergie en kWh / temps
de séchage moyen en minutes
4,48 / 135 (8 kg de linge préalablement essoré
à 1000 tr/min)
4,3 (8 kg de linge préalablement essoré à 1200
Coton Prêt à Ranger
2)
tr/min)
4,0 (8 kg de linge préalablement essoré à 1400
tr/min)
3,5 (8 kg de linge préalablement essoré à 1800
tr/min)
Coton Prêt à Repasser
Synthétiques Prêt à Ranger
1) Les charges indiquées peuvent varier d'un pays à l'autre en fonction des méthodes de mesure différentes.
2) conformément à la norme EN 61121
2)
2)
3.8 / 108 (8 kg de linge préalablement essoré à
1000 tr/min)
1,3 / 45 (3 kg de linge préalablement essoré à
1200 tr/min)
RÉGLAGES DE L'APPAREIL
Réglage Opérations à effectuer
Alarme activée/désactivée en permanence
Dureté de l'eau
1. Placez le sélecteur de programmes sur n'importe quel programme.
2. Appuyez simultanément sur les touches Humidité Résiduelle et T/Min et
maintenez-les appuyées pendant environ 5 secondes.
3. L'alarme est désactivée par défaut. Vous pouvez utiliser l'option alarme
pour activer ou désactiver l'alarme, mais l'appareil ne mémorise pas la
sélection.
1)
1. Placez le sélecteur de programmes sur n'importe quel programme.
2. Appuyez simultanément sur les touches Humidité Résiduelle et Minuterie et maintenez-les appuyées pendant environ 5 secondes. Le réglage
actuel s'affiche :
–
–
–
faible conductivité <300 μS/cm
conductivité moyenne 300-600 μS/cm
conductivité élevée >600 μS/cm
3. Appuyez sur la touche Départ / Pause jusqu'à ce que le niveau souhaité s'affiche.
4. Pour mémoriser le réglage, appuyez simultanément sur les touches Humidité Résiduelle et Minuterie ou mettez le sélecteur sur la position Arrêt .
Page 44

44 electrolux
Réglage Opérations à effectuer
Vidange du bac
d'eau de condensa-
- alarme à
tion
2)
l'arrêt
1) Selon les zones géographiques, l'eau contient en quantité variable des sels calcaires et minéraux qui changent la
valeur de la conductivité. Des variations importantes de la conductivité, par rapport aux valeurs affichées en usine,
pourraient légèrement influencer l'humidité résiduelle à la fin du séchage. Votre sèche-linge permet de régler la
sensibilité du capteur conductimétrique en fonction de la valeur de la conductivité de l'eau.
2) Par défaut, le voyant d'alarme est activé et s'allume toujours à la fin du cycle de séchage ou pendant le cycle si le
bac d'eau de condensation est plein. Si vous utilisez un système externe de vidange de l'eau de condensation, il
est possible que l'alarme soit désactivée.
1. Placez le sélecteur de programmes sur n'importe quel programme.
2. Appuyez simultanément sur les touches T/Min et Minuterie et maintenezles appuyées pendant environ 5 secondes.
Le réglage actuel s'affiche :
–
symbole
–
symbole
avertissement et message d'alarme désactivés
avertissement et message d'alarme activés
CONSEILS POUR LES ORGANISMES D'ESSAI
Paramètres pouvant être contrôlés par les
organismes d'essai :
• Consommation d'énergie (corrigée en
fonction de l'humidité résiduelle) pendant
un cycle Coton prêt à ranger avec charge
nominale.
• Consommation d'énergie (corrigée en
fonction de l'humidité résiduelle) pendant
un cycle Coton prêt à ranger avec demicharge.
• Humidité finale (pendant un cycle Coton
prêt à ranger, Coton prêt à repasser et Entretien facile prêt à ranger)
• Efficacité de condensation (corrigée en
fonction de l'humidité résiduelle) pendant
un cycle Coton prêt à ranger avec charge
nominale et demi-charge
Tous les cycles doivent être contrôlés en
conformité avec la norme EN 61121 (sèchelinge à tambour pour usage domestique –
Méthodes de mesure des performances).
MAINTENANCE
En cas d'anomalies de fonctionnement, vérifiez d'abord si vous ne pouvez pas remédier vous-même au dysfonctionnement à
l'aide de la notice d'utilisation (Consultez le
chapitre En cas d'anomalie de fonctionne-
ment ).
Si vous ne parvenez pas à remédier au dysfonctionnement, adressez-vous à votre service après vente.
Les informations suivantes sont nécessaires
pour pouvoir vous offrir une aide rapide :
– Description du modèle
– Numéro produit (PNC)
– Numéro de série (n° S sur la plaque signalétique collée sur l'appareil - pour trouver
son emplacement, voir le Chapitre Descrip-
tion du produit )
– Type d'anomalie
– Éventuellement le message d'erreur affiché par l'appareil.
Afin de disposer des numéros de référence
requis de l'appareil, nous vous conseillons
de les noter ci-dessous :
Description du
modèle :
PNC : ........................................
N° S : ........................................
........................................
Page 45

Electrolux. Thinking of you.
Per conoscere meglio il nostro modo di pensare, visitate il
sito www.electrolux.com
INDICE
Informazioni importanti per la sicurezza
Tutela ambientale 47
Installazione 48
Descrizione del prodotto 50
Pannello dei comandi 51
Primo utilizzo 52
Panoramica dei programmi 52
Utilizzo quotidiano 55
Manutenzione e pulizia 59
45
Cosa fare se ... 62
Caratteristiche tecniche 64
Impostazioni della macchina 64
Indicazioni per gli istituti di prova 65
Assistenza tecnica 65
INFORMAZIONI IMPORTANTI PER LA SICUREZZA
Importante Per la vostra sicurezza e
per garantire un impiego corretto,
prima di installare e utilizzare per la
prima volta l'apparecchio, vi
consigliamo di leggere con attenzione
il manuale per l'utente, inclusi i
suggerimenti e le avvertenze. Per
evitare errori e incidenti, è importante
garantire che tutte le persone che
utilizzano l'apparecchio ne conoscano
il funzionamento e le caratteristiche di
sicurezza. Conservare queste istruzioni
e accertarsi che rimangano unite
all'apparecchio in caso di vendita o
trasloco, in modo che chiunque lo
utilizzi sia correttamente informato
sull'uso e sulle norme di sicurezza.
- Leggere il libretto d'istruzioni perima
di usare l'apparecchiatura.
Sicurezza generale
• È pericoloso modificare le specifiche o cercare di alterare il prodotto in qualunque
modo.
• Questa apparecchiatura non deve essere
utilizzata da bambini o da persone le cui
capacità fisiche, sensoriali o mentali o la
cui mancanza di esperienza e conoscenze sull'uso dell'apparecchiatura impediscano loro di utilizzarlo senza rischi in assenza di una persona responsabile per la
loro incolumità.
• Evitare che i bambini o gli animali domestici entrino nel cestello. Per sicurezza,
ispezionare il cestello prima dell'utilizzo.
• Oggetti come monete, spille di sicurezza,
chiodi, viti, pietre o altri materiali duri e taglienti possono danneggiare gravemente
l'apparecchiatura; prestare attenzione a
non introdurli insieme alla biancheria.
• Per evitare il pericolo di incendio dovuto
all'eccessiva asciugatura, non utilizzare
l'apparecchiatura per asciugare i seguenti capi: cuscini, trapunte e altri imbottiti
(poiché possono accumulare calore).
• Oggetti di gommapiuma (schiuma di lattice), cuffie da bagno, tessuti impermeabili,
articoli in gomma e indumenti o cuscini
con imbottitura in gommapiuma non devono essere asciugati nell'asciugatrice.
• Dopo l'uso, per la manutenzione o la pulizia staccare sempre la spina dell'alimentazione.
• Non cercare in nessun caso di modificare
o riparare l'apparecchiatura da soli. Le
modifiche o riparazioni eseguite da persone non esperte possono causare seri danni o malfunzionamenti. Contattare il Centro di assistenza locale. Richiedere sempre l'installazione di ricambi originali.
• I capi con macchie di olio da cucina, acetone, benzina, cherosene, smacchiatori,
trementina, cere e prodotti per rimuovere
la cera devono essere lavati in acqua calda con abbondante detersivo prima di essere introdotti nell'asciugatrice.
electrolux 45
Con riserva di modifiche
Page 46

46 electrolux
•
Pericolo di esplosione: non inserire nell'asciugatrice capi che siano stati a contatto con solventi infiammabili (benzina, alcol denaturato, liquidi per la pulizia a secco e simili). Queste sostanze sono volatili,
perciò possono creare un rischio di esplosione. Inserire nell'asciugatrice solo capi
lavati in acqua.
• Pericolo di incendio! i capi che siano
stati sporcati o imbevuti con olio vegetale
o da cucina non devono essere inseriti nell'asciugatrice per evitare potenziali rischi
di incendio.
• I capi trattati con smacchiatori devono essere risciacquati in acqua prima di essere
introdotti nell'asciugatrice.
• Prima di inserire i capi nell'asciugatrice,
verificare che nelle tasche non siano stati
dimenticati accendini o fiammiferi
Avvertenza
•
Non arrestare mai l'asciugatrice
prima del termine del ciclo di
asciugatura. Nel caso sia assolutamente necessario, fare attenzione perché la biancheria e il cestello possono essere molto caldi. Pericolo di incendio!
• Non lasciare che si accumulino
residui e lanugine nell'asciugatrice.
• Pericolo di scosse elettriche! Non pulire l'apparecchiatura con getti d'acqua.
• L'ultima fase del programma di asciugatura è una fase di raffreddamento per proteggere i capi di biancheria.
• Non introdurre nell'asciugatrice capi che
siano stati lavati con sostanze chimiche industriali.
• Assicurare la buona ventilazione nell'ambiente in cui è installata la macchina.
Installazione
• Questa apparecchiatura è pesante. Prestare attenzione quando occorre spostarlo.
• Al momento del disimballaggio, verificare
che l'apparecchiatura non abbia subito
danni durante il trasporto. In caso di dubbi, non utilizzarlo e rivolgersi al Centro di
assistenza.
• Disimballare completamente l'apparecchiatura prima dell'installazione. L'eliminazione incompleta dei materiali di imballag-
gio può causare gravi danni all'apparecchiatura. Vedere la relativa sezione del libretto di istruzioni.
• Se si rendesse necessaria una modifica all'impianto elettrico per l'installazione dell'apparecchiatura, l'intervento dovrà essere effettuato da personale qualificato e
competente.
• Se l'apparecchiatura è installata su un pavimento in moquette o un tappeto, regolare i piedini in modo da permettere una
corretta circolazione dell'aria.
• Dopo aver installato la macchina, controllare che non sia posata sul cavo elettrico
di alimentazione.
• Se l'asciugatrice è installata sopra la lavabiancheria, deve obbligatoriamente essere utilizzato l'apposito kit di montaggio (accessorio opzionale).
Uso
• Questa apparecchiatura è destinata solo
all'uso domestico. e non deve essere utilizzato per scopi diversi da quelli per il quale è stato progettato.
• Introdurre solo capi idonei ad essere
asciugati a macchina. Seguire le istruzioni
riportate sull'etichetta dei singoli capi.
• Non introdurre nell'asciugatrice capi non
lavati.
• Non caricare eccessivamente l'apparecchiatura. Vedere la relativa sezione del libretto di istruzioni.
• Non introdurre nell'asciugatrice capi ancora troppo bagnati.
• Non introdurre nell'asciugatrice indumenti
che siano stati a contatto con prodotti volatili a base di petrolio. Se si utilizza uno
smacchiatore o un detergente volatile, attendere che il prodotto sia completamente evaporato prima di introdurre i capi nell'apparecchiatura.
• Per scollegare il cavo di alimentazione dalla presa elettrica; afferrare direttamente la
spina ed evitare di tirare il cavo.
• Non utilizzare mai l'asciugatrice se il cavo
di alimentazione, il pannello dei comandi,
il piano di lavoro o la base sono danneggiati in modo tale da rendere accessibili le
parti interne.
• Ammorbidenti o prodotti simili devono essere utilizzati come specificato nelle istruzioni del produttore.
Page 47

electrolux 47
•
Attenzione – superficie molto calda :
non toccare il coprilampada dello sportello se la luce è accesa.
Solo per le asciugatrici dotate di luce interna
Sicurezza bambini
• Questa apparecchiatura non deve essere
utilizzata da bambini o persone inferme
senza supervisione.
• I bambini non sono in grado di riconoscere i rischi associati alle apparecchiature
elettriche. È consigliabile controllare che i
bambini non giochino con l'apparecchiatura.
TUTELA AMBIENTALE
Il simbolo sul prodotto o sulla
confezione indica che il prodotto non deve
essere considerato come un normale rifiuto
domestico, ma deve essere portato nel
punto di raccolta appropriato per il
riciclaggio di apparecchiature elettriche ed
elettroniche. Provvedendo a smaltire questo
prodotto in modo appropriato, si
contribuisce a evitare potenziali
conseguenze negative, che potrebbero
derivare da uno smaltimento inadeguato del
prodotto. Per informazioni più dettagliate
sul riciclaggio di questo prodotto,
contattare l’ufficio comunale, il servizio
locale di smaltimento rifiuti o il negozio in
cui è stato acquistato il prodotto.
Dove portare gli apparecchi fuori
uso?
In qualsiasi negozio che vende
apparecchi nuovi oppure si
restituiscono ai centri di raccolta ufficiali
della SENS oppure ai riciclatori ufficiali
della SENS.
La lista dei centri di raccolta ufficiali
della SENS è visibile nel sito
www.sens.ch.
Suggerimenti ambientali
• Nell'asciugatrice la biancheria diventa
morbida e soffice. Non è perciò necessario utilizzare ammorbidenti o altri additivi
durante il lavaggio.
• Per limitare i consumi dell'asciugatrice,
adottare i seguenti accorgimenti:
Avvertenza
• Pericolo di soffocamento! I componenti di imballaggio (come il polistirolo o i sacchetti di plastica) possono
essere molto pericolosi. Tenerli fuori
dalla portata dei bambini.
• Tenere in un luogo sicuro e al di fuori della portata dei bambini anche tutti i detersivi.
• Evitare che i bambini o gli animali domestici entrino nel cestello.
– mantenere sempre libere le fessure di
ventilazione alla base della macchina;
– rispettare i carichi indicati nella panora-
mica dei programmi;
– assicurare la buona ventilazione nel-
l'ambiente in cui è installata la macchina;
– pulire il filtro ultrafine e il filtro fine dopo
ogni ciclo di asciugatura;
– centrifugare accuratamente la bianche-
ria prima dell'asciugatura.
Il consumo energetico dipende dalla velocità di centrifuga impostata nella lavabiancheria. Maggiore è la velocità di centrifuga - minore è il consumo energetico.
Protezione ambientale
I materiali di imballaggio sono riciclabili. I
componenti in plastica sono identificati mediante marchi quali >PE<, >PS< e devono
essere smaltiti in base alle normative locali
in vigore.
Avvertenza Se l'apparecchio non
viene più utilizzato:
• Togliere la spina dalla presa.
• Al momento dello smaltimento, tagliare il cavo di alimentazione e eliminarlo insieme alla spina.
• Eliminare il dispositivo di bloccaggio
della porta, per impedire che i bambini rimangano chiusi accidentalmente
all'interno.
Page 48

48 electrolux
INSTALLAZIONE
Posizionamento dell'apparecchiatura
• Per ragioni di comodità, si consiglia di collocare l'asciugatrice vicino alla lavabiancheria.
• L'asciugatrice deve essere installata in luogo pulito.
• L'aria deve circolare liberamente attorno
all'apparecchiatura. Non ostruire la griglia
di ventilazione frontale o le griglie di entrata dell'aria sul retro dell'apparecchiatura.
• Per assicurare un funzionamento più silenzioso e con meno vibrazioni, collocare l'asciugatrice su una superficie solida e piana.
• Quando l'apparecchiatura è stata posizionata, controllare che sia in piano servendosi di una livella. Se l'apparecchiatura
non è in piano, sollevare o abbassare i piedini.
• I piedini non devono essere rimossi. Non
ridurre la distanza libera dal pavimento
con tappeti, passatoie o simili. Si potrebbe causare un surriscaldamento che comprometterebbe il funzionamento dell'apparecchiatura.
Importante
• L'aria calda emessa dall'asciugatrice può
raggiungere temperature fino a 60°C.
L'apparecchiatura non deve essere installata su pavimenti non resistenti alle temperature elevate.
• Per non compromettere la prestazione
dell'asciugatrice, durante il funzionamento la temperatura ambiente non deve essere inferiore a +5°C e superiore a +35°C.
• Trasportare l'apparecchiatura solo in posizione verticale.
• L'apparecchiatura non deve essere installata dietro una porta bloccabile, una porta scorrevole o una porta con una cerniera sul lato opposto a quello dell'apparecchiatura in modo tale da impedire l'apertura completa dell'asciugatrice.
Rimozione del materiale di imballaggio
Attenzione
1. Aprire lo sportello
2. Togliere le strisce adesive applicate all'interno, sulla parte superiore del cestello.
3. Togliere le pellicole e le protezioni in polistirolo dal dispositivo.
Collegamento elettrico
I particolari sulla tensione di rete, sul tipo di
corrente e sui fusibili richiesti sono riportati
sulla targhetta nominale. Tale targhetta è
montata vicino all'apertura (vedere il capitolo "Descrizione del prodotto").
Collegare l'apparecchio ad una presa
di terra, conformemente alle normative
sui cavi in vigore.
Avvertenza Il fabbricante declina
qualsiasi responsabilità per danni o
lesioni che possano derivare dalla
mancata conformità alle
precauzioni di sicurezza sopra
riportate.
Dovesse essere necessario sostituire il cavo elettrico, il lavoro dovrà
essere effettuato dal nostro centro
di assistenza.
Avvertenza Il cavo di alimentazione
deve potere essere accessibile
dopo l'installazione della macchina.
Inversione dell'apertura della porta
Avvertenza Prima di procedere a
modificare la reversibilità della porta,
staccare la spina di alimentazione.
Prima di utilizzare l'apparecchiatura, tutti i
materiali di imballaggio utilizzati per il trasporto devono essere rimossi.
Page 49

electrolux 49
1.
A
A
B
C
B
Aprire la porta.
2. Svitare la cerniera A sulla parte anteriore della macchina e smontare la porta.
3. Rimuovere le piastre di copertura B . A
questo scopo, inserire un cacciavite sottile nelle scanalature come mostrato nella figura, premere leggermente verso il
basso ed estrarre le piastre di copertura.
4. Con l'utensile adatto, esercitare pressione per liberare il blocco C dal fissaggio,
estrarlo e inserirlo dall'altro lato con una
rotazione di 180°.
5. Svitare la cerniera A dalla porta di carico e reinserirla con rotazione di 180°
sul lato opposto, riavvitandola.
6. Reinserire le piastre di copertura B sul
lato opposto, con una rotazione di 180°.
7.
D
E
E
D
FF
Svitare le piastre di copertura D nella
parte anteriore della macchina e riavvitarle sul lato opposto, con una rotazione di 180°.
8.
Svitare il blocco della porta E , premere
leggermente e rimuoverlo dalla parte anteriore della macchina.
9. Premere il pulsante a scatto F verso il
basso, spingere leggermente il coperchio e rimuoverlo dal davanti della macchina.
10. Sostituire il blocco della porta E sul lato
opposto, riavvitarlo nella porta.
11. Sull'altro lato, inserire il coperchio F e
far scattare il pulsante.
12. Rimontare la porta e le cerniere e riavvitare.
Nota relativa alla protezione da contatto: La macchina è sicura soltanto quando
sono state installate tutte le parti in plastica.
Accessori
•
Kit di installazione in colonna
Disponibile presso il Centro di assistenza o il rivenditore
Presso i rivenditori autorizzati e i centri di
assistenza tecnica è disponibile un kit
che permette di installare l'asciugabiancheria sopra una lavabiancheria a carica
frontale con una profondità di 60 cm. Il kit
è disponibile con o senza ripiano estraibile. Leggere con attenzione le istruzioni di
montaggio contenute nel kit. La lavabiancheria deve essere posizionata sotto l'asciugatrice.
Leggere attentamente le istruzioni fornite
con il kit.
•
Kit di scarico
Disponibile presso il Centro di assistenza o il rivenditore
Serve per scaricare direttamente la condensa in un lavello, un sifone, una conduttura, ecc. Il contenitore della condensa
non deve più essere svuotato, ma deve
restare installato nella macchina nella posizione prevista.
Leggere attentamente le istruzioni fornite
con il kit.
• Piedistallo con cassetto
Disponibile presso il Centro di assistenza o il rivenditore
Per posizionare l'asciugatrice ad un'altezza ottimale e guadagnare spazio aggiuntivo (ad es. per riporre il bucato).
Leggere attentamente le istruzioni fornite
con il kit.
Page 50

50 electrolux
DESCRIZIONE DEL PRODOTTO
2
3
6
7
9
12
1 Pannello comandi
2 Contenitore acqua di condensa
3 Luce del cestello
4 Microfiltri
5 Filtri a maglie larghe
6 Filtri
7 Targa matricola
1
4
5
8
10
11
8 Porta (reversibile)
9 Porta dello scambiatore di calore
10 Pulsante di apertura dello sportellino nel-
lo zoccolo
11 Griglia di ventilazione
12 Piedini regolabili
Page 51

PANNELLO DEI COMANDI
Pannello dei comandi
electrolux 51
6 5 4
321
1 Selettore programmi con on/off
2 Tasti funzione
3 AVVIO PAUSA (Start / Pause) tasto
4 PARTENZA RITARDATA (Zeitvorwahl) ta-
sto
Display
4
6
5
1 Tempo residuo / messaggio di errore
2 fase del ciclo
3 opzioni
4 avvertenze
Descrizione del display
GRADO ASCIUGATU-
RA (Trockengrad) de-
fault
minimo GRADO
ASCIUGATURA (Troc-
kengrad)
5 LED
6 Display
2
3
1
5 selezione velocità della centrifuga
6 selezione grado di asciugatura
medio GRADO ASCIU-
GATURA (Trocken-
grad)
-
massimo GRADO
ASCIUGATURA (Troc-
kengrad)
Page 52

52 electrolux
CARICO CENTRIF. A
(U/Min.) default
Descrizione del display
minimo CARICO CEN-
TRIF. A (U/Min.)
CARICO CENTRIF. A
(U/Min.) intervallo (in-
crementi di 200 giri/
min)
massimo CARICO
CENTRIF. A (U/Min.)
pronto stiro (spia fase
di asciugatura)
extra (spia fase di asciu-
gatura)
svuotare la tanica del-
l'acqua di condensa
(avvertenza)
delicato extra antipiega sensitive segnale acustico
partenza ritardata durata ciclo
sport (spia fase di
asciugatura)
raffreddamento (spia
fase di asciugatura)
pulire il condensatore
(avvertenza)
- -
normale (spia fase di
asciugatura)
antipiega (spia fase di
asciugatura)
pulire i filtri (avvertenza) sicurezza bambini
asciugatura a tempo
(10 min - 3h)
forte (spia fase di asciu-
Le opzioni delicato e sensitive
non possono essere selezionate contemporaneamente.
PRIMO UTILIZZO
Per rimuovere gli eventuali residui di lavorazione passare un panno umido nel cesto oppure eseguire un breve ciclo (circa 30 min.)
inserendo degli stacci umidi nell'asciugatrice.
PANORAMICA DEI PROGRAMMI
carico
massi-
Programmi
EXTRA (Extratrocken)
FORTE (Starktrocken)
NORMALE
(Schranktrocken)
mo (pe-
so
asciutto)
8 kg
8 kg
8 kg
Impiego / Caratteristiche Opzioni
COTONI (Baumwolle)
Asciugatura di biancheria spessa o multistrato, ad es. tessuti di spugna, accappatoi.
Asciugatura di tessuti spessi, ad es.
asciugamani di spugna, accappatoi.
Per biancheria di cotone di spessore normale, ad es. biancheria da letto e da tavola.
tutti 1) tran-
ne ASCIUG.
A TEMPO
(Zeitwahl)
tutti
ne ASCIUG.
A TEMPO
(Zeitwahl)
tutti
ne ASCIUG.
A TEMPO
(Zeitwahl)
gatura)
-
-
partenza ritardata
Marchio
di atten-
zione
1)
1)
tran-
tran-
Page 53

carico
massi-
Programmi
mo (pe-
so
asciutto)
PRONTO STIRO
(Bügeltrocken)
EXTRA (Extratrocken)
NORMALE
(Schranktrocken)
PRONTO STIRO
(Bügeltrocken)
8 kg
3 kg
3 kg
3 kg
ASCIUGATURA A
TEMPO (Zeitpro-
8 kg Per l'asciugatura di un singolo capo.
gramm)
REFRESH (Auffrischen)
1 kg
COTONI (Baumwolle) 3KG RAPI-
3 kg
DO
SPORT 2 kg
Impiego / Caratteristiche Opzioni
Per biancheria di spessore normale di cotone o lino, per esempio lenzuola, tovaglie.
TESSUTI MISTI (Mischgewebe)
Asciugatura di tessuti spessi o multistrato, per esempio biancheria da letto, tovaglie.
Per tessuti sottili da non stirare, ad es.
camice lava e indossa, abbigliamento
per neonati, calzini, articoli di corsetteria.
Per tessuti sottili da ripassare col ferro,
per esempio maglieria o camicie.
speciale
Per rinfrescare i capi riposti per un lungo
periodo.
Per l'asciugatura rapida di capi in cotone per ridurre al minimo le pieghe. Risultato di asciugatura: capi pronti da riporre.
Per capi sportivi, tessuti sottili, poliestere, che non richiedono stiratura.
1)
tutti
tran-
ne ASCIUG.
A TEMPO
(Zeitwahl)
1)
tutti
tran-
ne ASCIUG.
A TEMPO
(Zeitwahl)
1)
tutti
tran-
ne ASCIUG.
A TEMPO
(Zeitwahl)
1)
tutti
tran-
ne ASCIUG.
A TEMPO
(Zeitwahl)
delicato , ex-
tra antipie-
ga, segnale
acustico ,
ASCIUG. A
TEMPO
(Zeitwahl) ,
PARTENZA
RITARDATA
(Zeitvorwahl)
delicato , ex-
tra antipie-
ga, segnale
acustico ,
PARTENZA
RITARDATA
(Zeitvorwahl)
extra antipiega, se-
gnale acu-
stico , PAR-
TENZA RI-
TARDATA
(Zeitvorwahl)
3)
tutti
tran-
ne sensitive
e ASCIUG.
A TEMPO
(Zeitwahl)
electrolux 53
Marchio
di atten-
zione
2)
2)
2)
Page 54

54 electrolux
carico
massi-
Programmi
mo (pe-
asciutto)
BIANCHERIA
(Bettwäsche)
3 kg
JEANS 8 kg
MICROFIBRA
(Mikrofaser)
CAMICIE (Hemden)
STIRO FACILE
(Leichtbügeln
Plus)
1 kg
1,5 kg (o
7 camicie)
1 kg (o 5
camicie)
LANA (Wolle) 1 kg
so
Impiego / Caratteristiche Opzioni
Biancheria da letto (lenzuola singole o
doppie, federe, copriletti, copripiumoni).
Per capi tempo libero, come jeans, felpe, in tessuti di spessore differente (es.
colletto, polsi e cuciture).
Per tessuti sottili, poliesteri e poliammide, che non richiedono stiratura.
Programma speciale con sistema antipiega per tessuti delicati come camicie
e camicette; per il minimo sforzo durante la stiratura. Il risultato dipende dal tipo
di tessuto e dalla finitura. Introdurre i capi nell'asciugatrice subito dopo la centrifuga; una volta asciutti, estrarre subito i
capi e metterli su un appendiabiti.
Programma speciale per asciugare tessuti di lana con aria calda e movimenti
delicati. (seguire la sezione "Suddivisione e preparazione della biancheria per il
lavaggio"). Raccomandazione: Estrarre i
capi subito dopo l'asciugatura, poiché
non è previsto il programma antipiega.
Il ciclo di asciugatura dei capi in lana di
questa asciugabiancheria è stato testato
e approvato da Woolmark Company. Il
ciclo è adatto per asciugare indumenti in
lana recanti l'etichetta "lavaggio a mano", a condizione che i capi vengano lavati con un ciclo di lavaggio a mano approvato da Woolmark e asciugati in osservanza delle istruzioni date dal produttore. (M1022)
tutti tranne
sensitive e
ASCIUG. A
TEMPO
(Zeitwahl)
1)
tutti
tran-
ne ASCIUG.
A TEMPO
(Zeitwahl)
tutti 3) tutti
tranne sen-
sitive e
ASCIUG. A
TEMPO
(Zeitwahl)
3)
tutti
tran-
ne sensitive
e ASCIUG.
A TEMPO
(Zeitwahl)
3)
tutti
tran-
ne sensitive
e ASCIUG.
A TEMPO
(Zeitwahl)
GRADO
ASCIUGA-
TURA (Troc-
kengrad) ,
CARICO
CENTRIF. A
(U/Min.) , se-
gnale acu-
stico , PAR-
TENZA RI-
TARDATA
(Zeitvor-
3)
wahl)
Marchio
di atten-
zione
Page 55

carico
massi-
Programmi
NIGHT CYCLE
SINTETICO
(Nachtprogramm
Mischgewebe)
NIGHT CYCLE
COTONE (Nachtprogramm Baumwolle)
1) Le opzioni delicato e sensitive non possono essere selezionate contemporaneamente.
2) selezionare DELICATO
3) delicato impostato come opzione predefinita
mo (pe-
so
asciutto)
3 kg
8 kg
Impiego / Caratteristiche Opzioni
Per un'asciugatura molto delicata di tessuti sintetici. Ideale per l'asciugatura durante la notte.
Per un'asciugatura molto delicata di tessuti di cotone. Ideale per l'asciugatura
durante la notte.
GRADO
ASCIUGA-
TURA (Troc-
kengrad) ,
CARICO
CENTRIF. A
(U/Min.) , ex-
tra antipie-
ga, segnale
acustico ,
PARTENZA
RITARDATA
(Zeitvorwahl)
GRADO
ASCIUGA-
TURA (Troc-
kengrad) ,
CARICO
CENTRIF. A
(U/Min.) , ex-
tra antipie-
ga, segnale
acustico ,
PARTENZA
RITARDATA
(Zeitvorwahl)
electrolux 55
Marchio
di atten-
zione
UTILIZZO QUOTIDIANO
Suddivisione della biancheria
• Suddivisione per tessuto:
– Cotone/lino per i programmi nel grup-
po COTONI (Baumwolle) .
– Tessuti misti e sintetici per programmi
del gruppo TESSUTI MISTI (Mischgewebe) .
• Suddivisione in base alle etichette: Le etichette indicano:
Asciugatura possibile nell'asciugatrice
Asciugatura a temperatura normale
Asciugatura a temperatura ridotta
Asciugatura nell'asciugatrice non possibile
Importante Non introdurre nell'apparecchio biancheria che non riporta nell'etichetta l'idoneità all'asciugatura a macchina.
Questo apparecchio può essere utilizzato
per tutti i capi bagnati sulla cui etichetta sia
riportato che sono adatti per l'asciugatura a
macchina.
• Non asciugare tessuti colorati nuovi con
capi di biancheria chiari. I colori dei tessuti potrebbero diffondersi.
• Non asciugare capi in jersey e maglieria
con il programma EXTRA (Extratrocken) .
I capi potrebbero restringersi!
• Tessuti di lana e simili possono essere
asciugati usando il programma LANA
(Wolle) . Prima di avviare il ciclo d'asciugatura, far centrifugare il più possibile i tessuti di lana (max. 1200 giri/min). Asciuga-
Page 56

56 electrolux
re insieme solo tessuti di simile o identico
materiale, colore e peso. Asciugare separatamente capi pesanti di lana.
Preparazione della biancheria
• Per evitare che la biancheria resti aggrovigliata: Chiudere cerniere, abbottonare fodere di piumini e annodare lacci liberi o nastri (esempio, grembiuli).
• Svuotare le tasche. Rimuovere oggetti di
metallo (graffette, spille di sicurezza, eccetera).
• Rivoltare capi con tessuti a doppio strato
(per esempio nel caso di giacche con interno in cotone, lo strato in cotone deve
trovarsi all'esterno). Questi tessuti si asciugheranno meglio.
Importante Non sovraccaricare
l'apparecchio. Rispettare il volume di carico
massimo di 8 kg.
Pesi medi della biancheria
Accappatoio 1.200 g
Copripiumino 700 g
Camice da lavoro da
uomo
Pigiama da uomo 500 g
Lenzuola 500 g
Tovaglia 250 g
Camicia da uomo 200 g
Camicia da notte 200 g
Federa 200 g
Asciugamano in spu-
gna
Camicetta 100 g
Intimo da donna 100 g
Mutande da uomo 100 g
Tovagliolo 100 g
Strofinaccio 100 g
600 g
200 g
Accensione della macchina/luce del
cestello
Ruotare la manopola di selezione su un programma qualsiasi o su Luce (Beleuchtung) .
La macchina è accesa. Quando la porta è
aperta il cestello è illuminato.
Come caricare la biancheria
1.
Aprire la porta:
Spingere energicamente sulla porta (sul
punto di pressione)
2. Caricare la biancheria (senza forzare).
Attenzione Fare attenzione a non inca-
strare la biancheria tra la porta e la guarnizione di gomma.
3. Chiudere la porta con decisione fino allo
scatto.
Selezione del programma
Usare la manopola di selezione per impostare il programma appropriato. Il tempo stimato richiesto per completare il programma è
visualizzato sul display nel formato
( ore . minuti ).
Durante il programma, il tempo si riduce
ogni minuto.
Grado Asciugatura (Trockengrad)
Migliora il grado di asciugatura della bian-
cheria in base al livello selezionato:
,
Page 57

, . Questa opzione consente di
ottenere un risultato di asciugatura soddisfacente.
CARICO CENTRIF. A (U/Min.)
Abbrevia il ciclo di asciugatura proporzionalmente alla velocità di centrifuga a cui è stata sottoposta la biancheria nella lavatrice.
Quanto maggiore era la velocità di centrifuga, tanto più breve il ciclo di asciugatura. Velocità di centrifuga disponibili (giri/min.): da
fino a (con incrementi di 200 giri/
min.)
Questa opzione consente di risparmiare tempo ed energia.
Selezione di altre opzioni
Le altre opzioni disponibili per i programmi
di asciugatura sono delicato , extra antipie-
ga , sensitive e segnale acustico
1. Scegliere il programma di asciugatura
desiderato ruotando il selettore programmi.
2. Per impostare l'opzione, premere il tasto
OPZIONI (Option). Le opzioni disponibili
sono visualizzate con i rispettivi simboli
sul display:
delicato extra
antipie-
ga
sensiti-vesegnale
acusti-
co
Il simbolo delicato lampeggia. Quando un simbolo lampeggia significa: che
un'opzione è stata selezionata ma non è
attiva. Per attivare l'opzione selezionata,
premere il tasto OK . L'opzione attivata
è indicata dal simbolo corrispondente
lampeggiante sottolineato da un trattino.
3. Premere alternativamente il tasto OPZIONI (Option) per selezionare le opzioni desiderate e il tasto OK per attivarle. Le opzioni attivate sono indicate da un simbolo fisso sottolineato da un trattino.
4. La modalità di selezione delle opzioni termina quando si sono fatte scorrere tutte
oppure quando si interrompe la selezione. Sono accesi solo i simboli delle opzioni attivate.
electrolux 57
Alcune opzioni non possono essere selezionate insieme, come per es. delica-
to e sensitive . Alcune opzioni non possono essere selezionate con determinati programmi
Per deselezionare un'opzione, procedere nello stesso modo. Il simbolo dell'opzione dovrebbe scomparire.
delicato
Per un'asciugatura molto delicata di tessuti
delicati con il simbolo
sull'etichetta e per
i tessuti sensibili alla temperatura (per es.
acrilico, viscosa). Il programma è eseguito a
temperatura ridotta.
La funzione delicato è indicata solo per carichi inferiori a 3 kg.
Quando quest'opzione è attivata, il simbolo
delicato
è acceso.
extra antipiega
Una fase anti-piega lunga prolunga la durata (30 min.) alla fine del ciclo di asciugatura
di ulteriori 60 minuti. Durante questa fase il
cesto ruota a intervalli. Questo mantiene la
biancheria morbida e senza pieghe. La fase
dura in totale 90 minuti. Durante la fase antipiega, la biancheria può essere estratta in
ogni momento.
Quando quest'opzione è attivata, il simbolo
extra-antipiega
è acceso.
sensitive
Per un'asciugatura delicata dei capi indossati di frequente. Il programma incomincia
alla massima temperatura, ridotta successivamente man mano che il programma avanza in modo da non danneggiare il bucato.
Quando quest'opzione è attivata, il simbolo
sensitive
è acceso.
segnale acustico
L'apparecchio è fornito con la funzione segnale acustico disattivata.
Per attivare il suono, selezionare l'opzione
segnale acustico .
Quando quest'opzione è attivata, il simbolo
segnale acustico
è acceso.
Il segnale acustico si attiva durante:
– fine ciclo
– fase antipiega e inizio o fine della fase
– interruzione ciclo, con un avviso
– allarme
Page 58

58 electrolux
ASCIUG. A TEMPO (Zeitwahl)
Per selezionare la durata del programma dopo l'impostazione di ASCIUGATURA A TEMPO (Zeitprogramm). È possibile selezionare
la durata di un programma da 10 min. a 3
ore con incrementi di 10 minuti.
1. Ruotare il selettore su ASCIUGATURA A
TEMPO (Zeitprogramm) . Il led sopra il
pulsante
è acceso ASCIUG. A TEMPO (Zeitwahl) . (corrispondente al programma di raffreddamento).
2. Premere ripetutamente il tasto ASCIUG.
A TEMPO (Zeitwahl) fino a che non compare sul display la durata di programma
desiderata, es.
per un programma
di 20 minuti.
Se la durata non viene selezionata, il programma si imposta automaticamente su 10
minuti.
PARTENZA RITARDATA (Zeitvorwahl)
Il tasto PARTENZA RITARDATA
(Zeitvorwahl) consente di posticipare l'inizio di un programma tra 30 minuti (30') e 20 ore (20h).
1. Selezione del programma e di ulteriori
funzioni.
2. Premere più volte il tasto PARTENZA RITARDATA (Zeitvorwahl) finché non compare sul display il tempo di ritardo desiderato, per es.
se si desidera che
il programma inizi dopo 12 ore.
Se si preme di nuovo il tasto quando sul display è visualizzato il valore "20h" la partenza ritardata viene
annullata. Il display mostra 0' quindi la durata del programma selezionato.
3. Per attivare la partenza ritardata, premere il tasto AVVIO PAUSA (Start / Pause) .
Il display visualizza continuamente il tempo residuo all'avvio del programma (es.
15h, 14h, 13h, ... 30' e così via).
Sicurezza bambini
Per impedire che un programma venga avviato o modificato accidentalmente è possibile impostare la sicurezza bambini. La funzione Sicurezza bambini consente di bloccare tutti i tasti e le manopole di programma.
Questa funzione può essere attivata o disattivata tenendo premuti i tasti OPZIONI (Op-
tion) e OK contemporaneamente per 5 secondi.
– Prima di avviare il programma: L'ap-
parecchio non può essere utilizzato
– Dopo l'avvio del programma: Il pro-
gramma in funzione non può essere
modificato
Il simbolo
viene visualizzato nel display
per indicare che la funzione di sicurezza per
i bambini è stata attivata.
Il dispositivo di sicurezza bambini non si disattiva al completamento del programma.
Se si desidera avviare un nuovo programma, occorre prima disattivare il dispositivo
di sicurezza bambini.
Avvio del programma
Premete il tasto AVVIO PAUSA (Start / Pause) . Il programma si avvia.
L'avanzamento del programma è indicato
nel display mediante i simboli relativi. Da si-
nistra a destra, dalle icone Asciutto stiro
a Antipiega in base al ciclo di asciugatura selezionato. Per es., nel caso del program-
ma Asciutto armadio sono visibili le seguenti icone di fase:
. La fase del
ciclo in corso è evidenziata dal trattino lampeggiante sotto l'icona. Quando una fase
del ciclo viene conclusa il relativo trattino
non lampeggia ma diventa fisso, mentre inizia a lampeggiare il trattino dell'icona relativa alla fase successiva.
Modifica del programma
Per modificare un programma selezionato
per errore dopo l'avvio del programma, ruotare dapprima il selettore dei programmi su
Off (Aus) quindi reimpostare il programma.
Una volta avviato, il programma non
può più essere modificato. Se si tenta
di modificare il programma girando la
manopola, il display e i led lampeggiano. Se viene premuto un tasto opzione
(ad esclusione del Segnale acustico ),
nel display viene visualizzato il messaggio Err . Il programma di asciugatura
non viene comunque modificato (protezione biancheria).
Estrazione della biancheria
Una volta completato il ciclo di asciugatura,
nel display lampeggia il valore
, sotto l'ico-
Page 59

electrolux 59
na della fase antipiega compare il trattino. Se è stato premuto il tasto Segnale acu-
stico , viene emesso un segnale acustico intermittente per circa un minuto.
I cicli di asciugatura sono immediatamente seguiti da una fase anti-piega,
che dura circa 30 minuti. Durante questa fase il cesto ruota a intervalli. Questo mantiene la biancheria morbida e
senza pieghe. Durante la fase antipiega, la biancheria può essere estratta in
ogni momento. (Estrarre la biancheria
verso la fine della fase antipiega per impedire che si formino pieghe). Se è stata selezionata l'opzione Extra antipiega
, la fase antipiega alla fine del ciclo
di asciugatura viene prolungata di 60 minuti.
MANUTENZIONE E PULIZIA
Pulizia del filtro
I filtri raccolgono tutta la lanugine che si accumula durante l'asciugatura. Perché l'asciugatrice funzioni perfettamente, i filtri (ultrafine e fine) devono essere puliti dopo
ogni ciclo.
Il simbolo di avvertimento
ricordare all'utente di eseguire questa operazione.
Attenzione Non mettere in funzione
l'asciugatrice senza i filtri o con filtri
danneggiati o intasati.
1.
si accende per
1. Aprire la porta.
2. Prima di estrarre la biancheria, rimuovere la lanugine dal filtro ultrafine. Allo scopo si consiglia di usare un panno umido.
(Vedere il capitolo "Manutenzione e pulizia").
3. Estrarre la biancheria.
4. Ruotare il selettore dei programmi in posizione OFF (Aus) .
Importante Dopo ciascun ciclo di asciugatura:
- Pulire il filtro ultrafine e il filtro fine
- Svuotare il contenitore dell'acqua di
condensa
(Vedere il capitolo "Manutenzione e pulizia").
5. Chiudere la porta.
3.
Dopo un certo periodo di tempo sui filtri
si forma una patina dovuta ai residui di
detersivo presenti nella biancheria.
Quando ciò avviene, pulire i filtri con acqua tiepida e una spazzola. Rimuovere
il filtro dalla porta tirandolo. Può essere
posizionato con il nottolino rivolto a destra o a sinistra.
Dopo la pulizia, non dimenticare di rimontarlo.
Aprire la porta
2. Con la mano umida pulire il filtro ultrafine incorporato nella parte inferiore dell'apertura di carico.
Page 60

60 electrolux
4.
Premere il pulsante di sblocco sul filtro
a rete larga.
Il filtro a maglia larga si stacca.
5.
7.
Per fare questo, prendere la parte superiore del filtro a maglia larga e tirarlo verso di sé fino a che non esce dai supporti.
8. Rimuovere la lanugine dall'intera area
del filtro. Si consiglia di usare un aspiratore.
9. Premere entrambi i perni del filtro a maglia larga nelle staffe sulla porta fino allo
scatto.
10. Rimontare il filtro fine.
11.
Estrarre il filtro fine.
6. Eliminare la lanugine dal filtro fine. Allo
scopo si consiglia di usare un panno
umido.
Pulire l'intera superficie del filtro
La superficie del filtro fine non deve essere pulita dopo ogni ciclo, ma deve essere controllata regolarmente e pulita all'occorrenza.
Premere sul gruppo filtro fino a bloccarlo in posizione corretta.
Se non è stato inserito il filtro fine, il filtro a rete larga non si blocca in posizione corretta e la porta non si chiude.
Pulizia della guarnizione della porta
Pulire la guarnizione della porta con un panno umido immediatamente dopo ogni ciclo
di asciugatura.
Svuotamento della vaschetta dell'acqua
Svuotare la vaschetta dell'acqua di condensa dopo ogni ciclo di asciugatura.
Page 61

electrolux 61
Se il serbatoio è pieno, il programma in corso si interrompe automaticamente e sul display si accende il simbolo serbatoio pieno
. Per continuare il programma, è neces-
sario svuotare la tanica dell'acqua.
Avvertenza L'acqua di condensa non
è potabile.
1.
Estrarre la tanica completamente.
2.
Versare l'acqua di condensa in una bacinella o in un recipiente simile.
3. Rimontare la tanica.
Se il programma è stato interrotto a causa della vaschetta piena: Premere il tasto Avvio/Pausa (Start/Pause) per continuare il ciclo di asciugatura.
Il serbatoio dell'acqua ha una capacità
di ca. 4,5 litri. Questi sono sufficienti
per circa 8 kg di biancheria precedentemente centrifugata a 1000 giri/minuto.
La condensa può essere utilizzata come acqua distillata, per esempio nel ferro a vapore. Tuttavia, occorre prima filtrare l'acqua di condensa, ad esempio
con un filtro per caffé, per eliminare
eventuali residui e pelucchi.
Pulizia dello scambiatore di calore
Se si accende il simbolo scambiatore di calore
, occorre pulire lo scambiatore di ca-
lore.
Attenzione Azionando l'asciugatrice
con lo scambiatore di calore intasato di
lanuggine, l'asciugatrice potrebbe
danneggiarsi. Sarebbe inoltre
aumentato il consumo di energia.
1. Aprire la porta.
2.
Aprire lo sportellino nello zoccolo. Premere il pulsante sul fondo dell'apertura
della porta e aprire lo sportellino di sinistra.
3. Pulire l'eventuale lanuggine all'interno
della porta e nella parte anteriore dello
scambiatore di calore. Pulire la guarnizione della porta con un panno umido.
4.
Ruotare verso l'interno entrambi i dispositivi di blocco.
Page 62

62 electrolux
5.
Mediante la maniglia, estrarre lo scambiatore di calore dalla base e trasportarlo in posizione orizzontale per impedire
la fuoriuscita di eventuale acqua residua.
6. Per vuotare lo scambiatore di calore, posizionarlo verticalmente sopra un lavandino.
Attenzione Non utilizzare oggetti
affilati per la pulizia. Lo scambiatore di
calore potrebbe causare perdite.
7. Pulizia dello scambiatore di calore.
Si consiglia di utilizzare una spazzola o
di risciacquarlo completamente sotto un
getto di acqua.
8. Riposizionare lo scambiatore di calore
(ruotare entrambi i dispositivi di blocco
verso l'esterno fino ad agganciarli).
9. Chiudere lo sportellino nello zoccolo.
Attenzione Non azionare mai
l'asciugatrice senza lo scambiatore di
calore.
Pulizia del cesto
Attenzione Non usate detergenti
corrosivi o pagliette metalliche per
pulire il cesto.
Il calcare dell'acqua o i residui di detergente della biancheria possono formare
un rivestimento quasi invisibile all'interno del cesto. Il grado di asciugatura della biancheria non viene rilevato correttamente. La biancheria è meno asciutta
del previsto quando viene estratta dall'asciugatrice.
Usare un detergente domestico standard, come un detergente all'aceto,
per pulire l'interno e le scanalature del
cesto.
Pulire il pannello e l'esterno
Attenzione Non usare pulitori per
mobili o detergenti abrasivi per pulire la
macchina.
Usare un panno umido per pulire il pannello e la struttura dell'apparecchio.
COSA FARE SE ...
Risoluzione dei problemi
Problema
L'asciugatrice
non funziona.
Risultati di
asciugatura
insoddisfacenti.
1)
L'asciugatrice non è collegata all'alimentazione di rete.
La porta è aperta. Chiudere l'oblò
Non è stato selezionato il tasto AVVIO
PAUSA .
Programma impostato non corretto.
Filtri otturati.
Scambiatore di calore intasato.
Peso massimo superato. Rispettare il volume di carico massimo.
Griglia di ventilazione ostruita.
Residui all'interno del cestello. Pulire l'interno del cestello.
Elevato livello di durezza dell'acqua.
Possibile causa Rimedio
Inserire la spina nella presa di rete. Controllare il fusibile nella scatola elettrica (installazione domestica).
Premere il tasto AVVIO PAUSA .
Impostare un programma adatto.
Pulire i filtri.
Pulizia dello scambiatore di calore.
Liberare la griglia di ventilazione alla base dell'apparecchiatura.
Impostare un livello corretto.
3)
2)
3)
4)
Page 63

electrolux 63
La porta non
si chiude.
Err ( Error )
sul display
5)
LCD.
Nessuna luce
nel cestello.
Trascorrere
del tempo
anomalo sul
display
5)
LCD.
Programma
inattivo.
Ciclo di asciu-
gatura troppo
breve.
Ciclo di asciugatura troppo
6)
lungo.
1) Se sul display LCD compare un messaggio di errore (per es. E51 - solo per le asciugatrici con display LCD):
Spegnere e riaccendere l'apparecchiatura. Impostare il programma. Premere il tasto AVVIO PAUSA .
L'asciugatrice non funziona? Contattare il centro di assistenza locale e riportare il codice di errore.
2) Seguire i consigli sui programmi; vedere il capitolo Panoramica dei programmi .
3) Vedere il capitolo. "Pulizia e cura"
4) Vedere il capitolo Impostazioni della macchina .
5) Solo per le asciugatrici con display LCD.
6) Nota: Dopo 5 ore, il ciclo di asciugatura termina automaticamente (vedere la sezione Ciclo di asciugatura
completato ).
Sostituzione della lampadina interna
Usare solo lampadine speciali per asciugatrici, reperibili presso uno dei centri di assistenza locali.
Importante Quando l'apparecchio è
acceso, la lampadina interna si spegne 4
minuti dopo l'apertura della porta.
Avvertenza Non usare lampadine
standard! Queste sviluppano troppo
calore e possono danneggiare la
macchina!
Prima di sostituire la lampadina, staccare la spina dalla presa di rete; in presenza di un collegamento fisso: svitare completamente e disattivare il fusibile.
I filtri non sono stati montati correttamente.
Tentativo di modificare i parametri dopo
l'avvio del programma.
Il selettore di programma è in posizione
OFF .
La lampadina è guasta.
Il tempo prima del termine è calcolato sulla base di: tipo, volume e umidità della
biancheria.
Serbatoio dell'acqua pieno.
Limitato carico di biancheria/Biancheria
troppo asciutta per il programma selezionato.
Filtri otturati. Pulire i filtri.
Volume di carico eccessivo. Rispettare il volume di carico massimo.
La biancheria non è stata sufficientemen-
te centrifugata.
La temperatura ambiente è troppo eleva-
ta: nessun malfunzionamento dell'apparecchiatura.
Installare il microfiltro e/o rimontare il filtro a maglie larghe.
Spegnere e riaccendere l'apparecchiatura. Impostare i parametri richiesti.
Ruotarlo su LUCE (se disponibile) o su
un programma qualsiasi.
Sostituire la lampadina (vedere la sezione successiva).
Si tratta di un processo automatico che
non segnala un errore dell'apparecchiatura.
Vuotare il serbatoio dell'acqua
re il tasto AVVIO PAUSA .
Selezionare il programma a tempo o un
grado di asciugatura più elevato (per es.
EXTRA ).
Centrifugare adeguatamente la biancheria.
Se possibile, abbassare la temperatura
ambiente.
3)
, preme-
1. Svitare il coprilampada (posto direttamente dietro l'apertura di carico, in alto;
fare riferimento al capitolo "Descrizione
del prodotto.)
2. Sostituire la lampadina difettosa.
3. Riavvitare il coprilampada.
Controllare che la guarnizione sia correttamente montata prima di riavvitare il coprilampada. Non mettere in funzione l'asciugatrice
se non è stata montata correttamente la
guarnizione del coprilampada.
Avvertenza Per ragioni di sicurezza, il
coprilampada deve essere riavvitato
perfettamente. Se ciò non avviene,
l'asciugatrice non deve essere messa
in funzione.
Page 64

64 electrolux
CARATTERISTICHE TECNICHE
Altezza x larghezza x profondità 85 x 60 x 58 cm
Volume del cestello 108 l
Profondità con porta aperta 109 cm
Altezza regolabile 1,5 cm
Peso a vuoto ca. 40 kg
Volume di carico (in base al programma)
1)
Tensione 220 – 230 V
Fusibile richiesto 10 A
Potenza totale assorbita 2350 W
Classe di efficienza energetica B
Consumo energetico (8 kg di cotone, pre-centri-
fugato a 1000 giri/min)
2)
Consumo energetico annuale medio 282 kWh
Uso Domestico
Temperatura ambiente consentita da +5°C a +35°C
Valori di consumo
I valori di consumo sono stati stabiliti in condizioni standard, pertanto possono differire nell'uso do-
Programma
Cotoni Normale (Baumwolle Schranktrocken)
Cotoni Pronto Stiro (Baumwolle Bügeltrocken)
Tessuti Misti Normale (Mischgewebe Schrank-
2)
trocken)
1) In alcuni paesi i dati sui volumi di carico possono variare a causa dei diversi sistemi di misurazione.
2) in conformità alla norma EN 61121
max. 8 kg
4,48 kWh
mestico.
Consumo di energia in kWh / tempo di asciu-
gatura medio in min.
4,48 / 135 (carico 8 kg pre-centrifugato a 1000
giri/min)
2)
4,3 (carico 8 kg pre-centrifugato a 1200 giri/min)
4.0 (carico 8 kg pre-centrifugato a 1400 giri/min)
3,5 (carico 8 kg pre-centrifugato a 1800 giri/min)
3,8 / 108 (carico 8 kg pre-centrifugato a 1000 giri/
2)
min)
1,3 / 45 (carico 3 kg pre-centrifugato a 1200 giri/
min)
IMPOSTAZIONI DELLA MACCHINA
Impostazione Implementazione
Segnale acustico
sempre attivato/disattivato
1. Ruotare il selettore dei programmi impostandolo su qualsiasi programma.
2. Premere simultaneamente i tasti GRADO ASCIUGATURA (Trockengrad)
e CARICO CENTRIF. A (U/Min.) e tenerli premuti per circa 5 secondi.
3. Per impostazione predefinita, il segnale acustico è sempre disattivato.
Utilizzare l'opzione Segnale acustico per attivare o disattivare il segnale
acustico; tenere presente, tuttavia, che la macchina non memorizza la
selezione.
Page 65

electrolux 65
Impostazione Implementazione
Durezza dell’ac-
1)
qua
Svuotamento della
tanica dell'acqua di
condensa
vertimento spento
1) L'acqua contiene calcare e sali minerali in quantità variabile a seconda dell'area geografica. Una variazione
significativa della conduttività dell'acqua rispetto ai valori prefissati in fabbrica può influire leggermente sull'umidità
residua della biancheria alla fine del ciclo. L'asciugatrice consente di regolare la sensibilità del sensore di
asciugatura in base ai valori di conduttività dell'acqua.
2) Per impostazione predefinita, il messaggio di avvertenza viene sempre visualizzato alla fine del ciclo di
asciugatura, oppure durante il ciclo di asciugatura se la tanica dell'acqua di condensa è piena. Se si utilizza uno
scarico esterno per l'acqua di condensa, è possibile che il messaggio non venga visualizzato.
- av-
1. Ruotare il selettore dei programmi impostandolo su qualsiasi programma.
2. Premere simultaneamente i tasti GRADO ASCIUGATURA (Trockengrad)
e ASCIUG. A TEMPO (Zeitwahl) e tenerli premuti per circa 5 secondi.
Sul display è visualizzata l'impostazione attuale:
–
–
–
3. Premere il tasto AVVIO/PAUSA (Start / Pause) in sequenza fino a impostare il livello desiderato.
4. Per memorizzare l'impostazione, premere contemporaneamente i tasti
GRADO ASCIUGATURA (Trockengrad) e ASCIUG. A TEMPO (Zeitwahl)
oppure ruotare la manopola sulla posizione OFF (Aus) .
1. Ruotare il selettore dei programmi impostandolo su qualsiasi programma.
2. Premere simultaneamente i tasti CARICO CENTRIF. A (U/Min.) e
ASCIUG. A TEMPO (Zeitwahl) e tenerli premuti per circa 5 secondi.
Sul display è visualizzata l'impostazione attuale:
2)
–
–
bassa conduttività <300 μS/cm
media conduttività 300-600 μS/cm
alta conduttività >600 μS/cm
l'icona di avvertimento
è spento
l'icona di avvertimento
è acceso
e - il messaggio di avvertimento
e - il messaggio di avvertimento
INDICAZIONI PER GLI ISTITUTI DI PROVA
Parametri soggetti a controllo da parte degli
Istituti di prova:
• Consumo energetico (corretto con umidità finale) durante il ciclo di Cotone Asciugatura Armadio con carico nominale.
• Consumo energetico (corretto con umidità finale) durante il ciclo di Cotone Asciugatura Armadio con mezzo carico.
• Umidità finale (durante il ciclo Cotone
Asciugatura Armadio, Cotone asciugatura stiro e Asciugatura Armadio Delicati)
• Efficienza di condensa (corretto con umidità finale) durante il ciclo Cotone Asciugatura Armadio con carico nominale e
mezzo carico
Tutti i cicli devono essere controllati in conformità alla IEC 61121 (Asciugatrici per uso
domestico – Metodi di misurazione della prestazione).
ASSISTENZA TECNICA
In caso di problemi tecnici, provare a risolverli consultando le istruzioni per l'uso (sezione Cosa fare se…).
In caso di dubbi, non utilizzare l'apparecchio e contattare il Centro di assistenza locale.
Per velocizzare gli interventi di assistenza, si
prega di fornire le seguenti informazioni:
– Modello
– Numero prodotto (PNC)
– Numero di serie (riportato sulla targhetta
matricola del prodotto – vedere la sezione
Descrizione prodotto )
– Tipo di problema
– Messaggi di errore visualizzati dall'apparecchio
Page 66

66 electrolux
Per avere sempre a portata di mano i dati
identificativi dell'apparecchio, annotarli in
questo spazio:
Modello: ........................................
PNC: ........................................
S N: ........................................
Page 67

Electrolux. Thinking of you.
Share more of our thinking at www.electrolux.com
CONTENTS
Important safety information 67
Environment 69
Installation 69
Product description 72
Control panel 73
Before first use 74
Programme overview 74
Daily use 76
Care and cleaning 80
What to do if ... 83
Technical data 84
Machine settings 85
Hints for test institutes 85
Service 86
IMPORTANT SAFETY INFORMATION
Important! In the interest of your safety
and to ensure the correct use, before
installing and first using the appliance,
read this user manual carefully,
including its hints and warnings. To
avoid unnecessary mistakes and
accidents, it is important to ensure that
all people using the appliance are
thoroughly familiar with its operation
and safety features. Save these
instructions and make sure that they
remain with the appliance if it is moved
or sold, so that everyone using it
through its life will be properly
informed on appliance use and safety.
- Please read the instruction book be-
fore using this appliance.
General safety
• It is dangerous to alter the specifications
or attempt to modify this product in any
way.
• This appliance is not intended for use by
persons (including children) with reduced
physical and sensory conditions or lack
of experience and knowledge, unless
they have been given supervision or instruction concerning use of the appliance
by a person responsible for their safety.
• Make sure that small children and pets
do not climb inside the drum. To avoid
this, please check into the drum before
using.
• Any objects such as coins, safety pins,
nails, screws, stones or any other hard,
• In order to avoid danger of fires caused
• Items such as foam rubber (latex foam),
• Always unplug the appliance after use,
• Under no circumstances should you at-
• Items that have been soiled with substan-
• Danger of explosion: Never tumble dry
• Risk of fire: items that have been spot-
electrolux 67
Subject to change without notice
sharp material can cause extensive damage and must not be placed into the machine.
by excessive drying, do not use appliance to dry the following items: Cushions, quilts etc. (these items accumulate
heat).
shower caps, waterproof textiles, rubber
backed articles and clothes or pillows fitted with foam rubber pads should not be
dried in the tumble dryer.
cleaning and maintenance.
tempt to repair the machine yourself. Repairs carried out by inexperienced persons may cause injury or serious malfunctioning. Contact your local Service Centre. Always insist on genuine spare parts.
ces such as cooking oil acetone, petrol,
kerosene, spot removers, turpentine, waxes and wax removers should be washed
in hot water with an extra amount of detergent before being dried in the tumble
dryer.
items that have been in contact with inflammable solvents (petrol, methylated
spirits, dry cleaning fluid and the like). As
these substances are volatile, they could
cause an explosion. Only tumble dry
items washed with water.
ted or soaked with vegetable or cooking
Page 68

68 electrolux
oil constitute a fire hazard and should not
be placed in the tumble dryer.
• If you have washed your laundry with
stain remover you must execute an extra
rinse cycle before loading your tumble dryer.
• Please make sure that no gas lighters or
matches have accidentally been left in
pockets of garments incase they are loaded into appliance
Warning!
• Risk of fire! Never stop a tumble
dry before the end of the drying
cycle unless all items are quickly
removed and spread out so that
the heat is dissipated.
• Lint must not be allowed to accumulate around the tumble dryer.
• Risk of electric shock! Do not spray
down the appliance with jets of water.
• The final part of a tumble dryer cycle occurs without heat ( cool down cycle ) to
ensure that the items are left at a temperature that ensures that items will not be
damaged.
• The tumble dryer is not to be used if industrial chemicals have been used for
cleaning.
• Ensure you have good ventilation in the installation room to avoid the back flow of
gases into the room from appliances burning other fuels, including open fires.
Installation
• This appliance is heavy. Care should be
taken when moving it.
• When unpacking the appliance, check
that it is not damaged. If in doubt, do not
use it and contact the Service Centre.
• All packaging must be removed before
use. Serious damage can occur to the
product and to property if this is not adhered to. See relevant section in the user
manual.
• Any electrical work required to install this
appliance should be carried out by a qualified electrician or competent person.
• If the machine is situated on a carpeted
floor, please adjust the feet in order to allow air to circulate freely under the appliance.
• After having installed the appliance,
check that it is not pressing or standing
on its electrical supply cable.
• If the tumble dryer is placed on top of a
washing machine, it is compulsory to use
the stacking kit (optional accessory).
Use
• This appliance is designed for domestic
use. It must not be used for purposes other than those for which it was designed.
• Only wash fabrics which are designed to
be machine dried. Follow the instructions
on each garment label.
• Do not dry unwashed items in the tumble
dryer.
• Do not overload the appliance. See the
relevant section in the user manual.
• Clothes which are dripping wet should
not be placed in the dryer.
• Garments which have been in contact
with volatile petroleum products should
not be machine dried. If volatile cleaning
fluids are used, care should be taken to
ensure that the fluid is removed from the
garment before placing in the machine.
• Never pull the power supply cable to remove the plug from the socket; always
take hold of the plug itself.
• Never use the tumble dryer if the power
supply cable, the control panel, the working surface or the base are damaged so
that the inside of the tumble dryer is accessible.
• Fabric softeners, or similar products
should be used as specified by the fabric
softener instructions.
•
Caution - hot surface : Do not touch
the door light cover surface when the
light is switched on.
(Only dryers equipped with internal drum
light)
Child safety
• This machine is not intended for use by
young children or infirm persons without
supervision.
• Children often do not recognise the hazards associated with electrical appliances. Children should be supervised to ensure that they do not play with the appliance.
Page 69

electrolux 69
Warning!
• Danger of suffocation! The packaging components (e.g. plastic film, polystyrene) can be dangerous to children - Keep them out of children’s
reach.
ENVIRONMENT
The symbol on the product or on its
packaging indicates that this product may
not be treated as household waste. Instead
it should be taken to the appropriate
collection point for the recycling of electrical
and electronic equipment. By ensuring this
product is disposed of correctly, you will
help prevent potential negative
consequences for the environment and
human health, which could otherwise be
caused by inappropriate waste handling of
this product. For more detailed information
about recycling of this product, please
contact your local council, your household
waste disposal service or the shop where
you purchased the product.
Environmental tips
• In the dryer, laundry becomes fluffy and
soft. Fabric softeners are not therefore
needed when washing.
• Your dryer will function most economically if you:
– Always keep the ventilation slots on the
base of the dryer unobstructed;
– Use the loading volumes specified in
the programme overview;
– Ensure you have good ventilation in the
installation room;
• Keep all detergents in a safe place out of
children’s reach.
• Make sure that children or pets do not
climb inside the drum.
– Clean the micro-fine filter and fine strain-
er after each drying cycle;
– Spin the laundry well before drying.
Energy consumption depends on spinning speed set in washing machine.
Higher spinning speed - lower energy
consumption.
Environmental information
The packaging materials are environmentally friendly and can be recycled. The plastic
components are identified by markings, e.g.
>PE<, >PS<, etc. Please dispose of the
packaging materials in the appropriate container at the community waste disposal facilities.
Warning! When the unit is no longer
being used:
• Pull the plug out of the socket.
• Cut off the cable and plug and dispose of them.
• Dispose of the door catch. This prevents children from trapping themselves inside and endangering their
lives.
INSTALLATION
Appliance positioning
• It is recommended that, for your convenience, the machine is positioned close to
your washing machine.
• The tumble dryer must be installed in a
clean place, where dirt does not build up.
• Air must be able to circulate freely all
round the appliance. Do not obstruct the
front ventilation grille or the air intake
grilles at the back of the machine.
• To keep vibration and noise to a minimum when the dryer is in use, it should
be placed on a firm, level surface.
• Once in its permanent operating position,
check that the dryer is absolutely level
with the aid of a spirit level. If it is not,
raise or lower the feet until it is.
• The feet must never be removed. Do not
restrict the floor clearance through deeppile carpets, strips of wood or similar.
This might cause heat built-up which
would interfere with the operation of the
appliance.
Page 70

70 electrolux
Important!
• The hot air emitted by the tumble dryer
can reach temperatures of up to 60°C.
The appliance must therefore not be installed on floors which are not resistant to
high temperatures.
• When operating the tumble dryer, the
room temperature must not be lower
than +5°C and higher than +35°C, as it
may affect the performance of the appliance.
• Should the appliance be moved, it must
be transported vertically.
• The appliance must not be installed behind the lockable door, a sliding door a
door with a hinge on the opposite side to
that of the appliance in such a way that a
full opening of the dryer is restricted.
Removing transport safety packaging
Caution!
Before use all parts of the transport packaging must be removed.
1. Open loading door
2. Pull off adhesive strips from inside ma-
chine on top of drum.
3. Remove foil hose and polystyrene pad-
ding from the machine.
Electrical connection
Details on mains voltage, type of current
and the fuses required should be taken
from the type plate. The type plate is fitted
near the loading aperture (see “Product description” chapter).
Connect the machine to an earthed
socket, in accordance with current wiring regulations.
Warning! The manufacturer
declines any responsibility for
damage or injury through failure to
comply with the above safety
precautions.
Should the appliance power supply
cable need to be replaced, this
must be carried out by our Service
Center.
Warning! The plug must be
accessible after installing the
machine.
Door reversal
Warning! Before changing the door
stop, disconnect the mains plug.
1.
A
A
B
C
B
Open loading door.
2. Unscrew hinge A from the front of the
machine and take off the loading door.
3. Remove cover plates B . To do this, insert a thin screwdriver into the slots as
1
shown in the illustration, press downwards slightly and pry out the cover
plates.
4. Use an appropriate tool and exert pressure to unfasten locking block C from
the snap-on fixture, take out and re-insert on the other side having rotated
the block through 180°.
5. Unscrew hinge A from the loading
door, rotate through 180°, re-insert on
the opposite side and screw down.
6. Re-insert cover plates B on the oppo-
site site having first rotated them
through 180°.
7.
D
E
E
D
FF
Unscrew cover plates D from the front
of the machine, rotate through 180°,
screw on the opposite side.
8. Unscrew door lock E , push down slightly and remove from the front of the machine.
Page 71

electrolux 71
9.
Press snap-in button F in and down,
press cover down slightly and remove
from front of the machine.
10. Change door lock E over to the opposite side, screw down the door interlock.
11. On the other side, insert cover F and allow snap-in button to lock into place.
12. Insert loading door and hinges into recesses on the front of the machine and
screw down.
Note regarding contact protection: The
machine is only secure for operations again
once all plastic parts have been inserted.
Special accessories
•
stack kit
Available from your Service Force Centre or your specialist dealer
These intermediate installation kits can
be used to arrange the dryer and an washing machine (60 cm wide, front loaded)
as a space-saving washer/dryer stack.
The washing machine is at the bottom
and the dryer is at the top.
Read carefully the instructions supplied
with the kit.
• drain kit
Available from your Service Force Cen-
tre or your specialist dealer
Installation kit for direct draining of condensate into a basin, siphon, gully, etc.
The condensate tank then no longer has
to be drained, it must however remain in
its intended position in the machine.
Read carefully the instructions supplied
with the kit.
•
pedestal with the drawer
Available from your Service Force Centre or your specialist dealer
To situate the dryer in optimal high and
have some additional space to store (e.g.
laundry).
Read carefully the instructions supplied
with the kit.
Page 72

72 electrolux
PRODUCT DESCRIPTION
2
3
6
7
9
12
1 Control panel
2 Water reservoir
3 Drum light
4 Fine fluff filters
5 Course fluff filters
6 Fluff filters
1
4
5
8
10
11
7 Rating plate
8 Loading door (reversible)
9 Heat exchanger door
10 Button for opening door in plinth
11 Ventilation grille
12 Adjustable feet
Page 73

CONTROL PANEL
Control panel
electrolux 73
6 5 4
321
1 Programme selector and on/off switch
2 Function buttons
3 START PAUSE button
Display
4
6
5
1 time to end / error message
2 cycle phase status
3 options
4 warnings
Display description
DRYNESS (Trocken-
grad) default
SPIN SPEED (U/Min.)
default
minimal DRYNESS
(Trockengrad)
minimal SPIN SPEED
(U/Min.)
4 DELAY START (Zeitvorwahl) button
5 Status LED
6 Display
2
3
1
5 spin speed selection
6 dryness selection
medium DRYNESS
(Trockengrad)
-
SPIN SPEED (U/Min.)
scope (200 rpm step)
maximal DRYNESS
(Trockengrad)
maximal SPIN SPEED
(U/Min.)
Page 74

74 electrolux
iron dry (drying phase
indicator)
extra dry (drying phase
indicator)
Display description
light dry (drying phase
indicator)
cooling (drying phase
indicator)
cupboard dry (drying
phase indicator)
crease guard (drying
phase indicator)
strong dry (drying
phase indicator)
-
-
empty water reservoir
(warning)
delicate long anti-crease sensitive buzzer
delay start cycle duration
clean condenser (warn-
ing)
- -
clean filters (warning) child lock
time program scope
(10 min - 3h)
The delicate and sensitive options cannot be selected together.
BEFORE FIRST USE
In order to remove any residues which may
have been produced during production,
wipe the dryer drum with a damp cloth or
carry out a brief drying cycle (ca. 30 min.)
with damp cloths in the machine.
PROGRAMME OVERVIEW
Programmes
EXTRA DRY (Extratrocken)
STRONG DRY
(Starktrocken)
CUPBOARD DRY
(Schranktrocken)
IRON DRY (Bügeltrocken)
EXTRA DRY (Extratrocken)
CUPBOARD DRY
(Schranktrocken)
max.
load
8 kg
8 kg
8 kg
8 kg
3 kg
3 kg
1)
Thorough drying of thick or multi- layered
fabrics, e.g. terry towelling items, bathrobes.
Thorough drying of thick fabrics, e.g. terry
towelling items, towels.
Thorough drying of fabrics of even thicknesses, e.g. terry towelling items, knitwear,
towels.
For normal thickness cotton or linen laundry, e.g. bedding, table linen.
Thorough drying of thick or multi-layered
fabrics, e.g. pullovers, bedding, table linen.
For thin fabrics which are not ironed, e.g.
easy care shirts, table linen, baby clothes,
socks, lingerie with bones or wires.
Application/properties Options
COTTONS (Baumwolle)
SYNTHETICS (Mischgewebe)
delay start scope
all2) except
TIME (Zeit-
wahl)
2)
all
except
TIME (Zeit-
wahl)
2)
all
except
TIME (Zeit-
wahl)
2)
all
except
TIME (Zeit-
wahl)
2)
all
except
TIME (Zeit-
wahl)
2)
all
except
TIME (Zeit-
wahl)
Care
mark
3)
3)
Page 75

electrolux 75
Programmes
IRON DRY (Bügeltrocken)
max.
load
3 kg
TIME PROGRAMME (Zeit-
8 kg For drying of individual items of laundry.
programm)
FRESHEN-UP
(Auffrischen)
1 kg
55 Min. - 3Kg 3 kg
SPORTS LIGHT
(Sportkleidung)
BED LINEN (Bettwäsche)
2 kg
3 kg
JEANS 8 kg
MICRO-FIBRE
(Mikrofaser)
1 kg
1.5 kg
SHIRTS (Hemden)
(or 7
shirts)
1)
Application/properties Options
For thin fabrics which are also to be ironed, e.g. knitwear, shirts.
SPECIAL
For refreshing textiles that have been in storage.
For quick drying cotton fabrics with minimum creasing. Drying result: ready to store.
For sportswear, thin fabrics, polyester,
which are not ironed.
Bed linen (single and double sheet, pillowcase, bedspread, duvet cover).
For leisure clothing, such as jeans, sweatshirts, etc., of different material thicknesses (e.g. at the neck, cuffs and seams).
For thin fabrics, polyester and polyamide,
which are not ironed.
Special program with anti-crease mechanism for easy care fabrics such shirts and
blouses; for minimum ironing effort. The results depend on the type of fabric and its
finish. Place fabrics in the dryer straight after spinning; once dried, immediately remove fabrics and place on a clothes hanger.
2)
all
except
TIME (Zeit-
wahl)
delicate , long
anti-
crease, buz-
zer , TIME
(Zeitwahl) ,
DELAY
START (Zeit-
vorwahl)
delicate , long
anti-
crease, buzzer , DELAY
START (Zeit-
vorwahl)
long anti-
crease, buzzer , DELAY
START (Zeit-
vorwahl)
4)
all
ex-
cept sensitive
and TIME
(Zeitwahl)
all except sen-
sitive and
TIME (Zeit-
wahl)
2)
all
except
TIME (Zeit-
wahl)
all4) ex-
cept sensitive
and TIME
(Zeitwahl)
4)
all
ex-
cept sensitive
and TIME
(Zeitwahl)
Care
mark
3)
Page 76

76 electrolux
Programmes
EASY IRON PLUS
(Leichtbügeln
Plus)
WOOL (Wolle) 1 kg
NIGHT CYCLE
SYNTHETICS
(Nachtprogramm
Mischgewebe)
NIGHT CYCLE
COTTON (Nachtprogramm Baumwolle)
1) maximal weight of dry clothes
2) The delicate and sensitive options cannot be selected together
3) select delicate
4) delicate set as default
max.
load
1 kg
(or 5
shirts)
3 kg
8 kg
1)
Special program with anti-crease mechanism for easy care fabrics such shirts and
blouses; for minimum ironing effort. The results depend on the type of fabric and its
finish. Place fabrics in the dryer straight after spinning; once dried, immediately remove fabrics and place on a clothes hanger.
For drying woollen fabrics after they have
been washed, using warm air at minimum
mechanical load (Follow section “Sorting
and preparing washing”). Recommendation: Remove fabrics immediately after drying, as no anti-crease programme follows.
The wool drying cycle of this tumble drying
machine has been tested and approved by
The Woolmark Company. The cycle is suitable to dry knitted wool garments which
are labelled "hand wash" provided that the
garments are washed in a Woolmark endorsed hand washing cycle and tumble
dried according to the instructions issued
by the manufacturer. (M1022)
For very quiet and gentle drying of synthetics. Recommend for drying during the night.
For very quiet and gentle drying of cotton.
Recommend for drying during the night.
Application/properties Options
4)
all
ex-
cept sensitive
and TIME
(Zeitwahl)
DRYNESS
(Trocken-
grad) , SPIN
SPEED (U/
Min.) , buz-
zer , DELAY
START (Zeit-
vorwahl)
DRYNESS
(Trocken-
grad) , SPIN
SPEED (U/
Min.) , long
anti-
crease, buzzer , DELAY
START (Zeit-
vorwahl)
DRYNESS
(Trocken-
grad) , SPIN
SPEED (U/
Min.) , long
anti-
crease, buzzer , DELAY
START (Zeit-
vorwahl)
Care
mark
DAILY USE
Sorting laundry
• Sort by fabric type:
– Cotton/linen for programmes in COT-
TONS (Baumwolle) programme group.
– Mixtures and synthetics for pro-
grammes in SYNTHETICS (Mischgewebe) programme group.
• Sort by care label: The care labels mean:
Drying in the tumble dryer possible in
principle
Page 77

electrolux 77
Drying at normal temperature
Drying at reduced temperature
Drying in the tumble dryer not possible
Important! Do not place in the appliance
any wet laundry which is not specified on
the care label as being suitable for tumbledrying.
This appliance can be used for all wet laundry items which are labelled as suitable for
tumble-drying.
• Do not dry new, coloured textiles together with light-coloured laundry items. Textile colours may bleed.
• Do not dry cotton jersey and knitwear
with the EXTRA (Extratrocken) programme. Items may shrink!
• Wool and wool-like textiles can be dried
using the WOOL (Wolle) programme. Before the drying cycle spin the woollen textiles as well as possible (max. 1200 rpm).
Only dry woollen textiles together of similar or the same material, colour and
weight. Please dry heavy laundry items
made of wool separately.
Preparing laundry
• To avoid laundry becoming tangled:
close zips, button up duvet covers and
tie loose ties or ribbons (e.g. of aprons).
• Empty pockets. Remove metal items (paper clips, safety pins, etc).
• Turn items with double-layered fabrics inside out (e.g. with cotton-lined anoraks,
the cotton layer should be outermost).
These fabrics will then dry better.
Important! Do not overload the appliance.
Observe max. loading volume of 8 kg.
Average laundry weights
bathrobe 1200 g
quilt cover 700 g
man’s work shirt 600 g
man’s pyjamas 500 g
sheet 500 g
tablecloth 250 g
man’s shirt 200 g
night dress 200 g
pillow case 200 g
towelling towel 200 g
blouse 100 g
ladies’ briefs 100 g
men’s underpants 100 g
napkin 100 g
tea cloth 100 g
Switching machine/drum light on
Turn the programme selector to any programme or turn it to DRUM LIGHT (Beleuchtung) . The machine has been switched on.
When the loading door is opened, the drum
light is illuminated.
Laundry loading
Caution! Do not jam laundry in
between the loading door and rubber
seal.
1.
Open loading door:
Use force to push against the loading
door (push point)
2. Load your laundry (do not force it in).
3. Close loading door securely. Lock must
audibly lock.
Page 78

78 electrolux
Selecting the programme
Use the programme selector to set the programme you require. The estimated time to
end of the programme appears on the
LCD, e.g.
( hours . minutes ).
During the cycle, time elapses by steps of
one minute.
DRYNESS (Trockengrad)
Increases the dryness of the dried laundry
adequately to the selected level:
,
, . This option helps to achieve
satisfying result of drying.
- default dryness level.
SPIN SPEED (U/Min.)
Shorten the drying cycle adequately to the
spin speed the laundry was spun previously
in the washing machine. The higher spin
speed was, the shorter drying cycle length.
Available spin speed values (rpm): from
up to (with 200 rpm steps)
This option allows to save time and energy.
Selecting additional options
The additional options available for the drying programmes are delicate , long anti-
crease , sensitive and buzzer
1. By turning the knob choose a drying pro-
gramme.
2. To set the option press OPTION but-
ton . You will see available options
shown as icons on the screen:
delicate long an-
ti-
sensi-
tive
buzzer
crease
delicate icon flashes. Flashing icon
means: selected but not active. To activate selected option press OK button.
Activated option is visible as flashing
icon with dash beneath.
3. Press alternately OPTION button to select appropriate options and OK button
to activate it. Active options are always
on as icons with dash beneath.
4. Option selection mode is finished when
you go through all of them or you stop
selecting. Only activated option icons
are on.
Some options cannot be selected together as delicate and sensitive . Some
of them are not selectable with certain
programmes
To deselect an option follow the same
steps. Option icon should disappear.
delicate
For especially gentle drying of sensitive fabrics with the
care label and for temperature-sensitive textiles (e.g. acrylic, viscose).
Programme is executed with reduced heat.
delicate is only suitable for use with loads of
up to 3kg.
When the option is active, the delicate
icon is on.
long anti-crease
A long anti-crease phase lengthens the anticrease phase (30 min.) at the end of the drying additionally by 60 minutes. The drum rotates at intervals during this phase. This
keeps the laundry loose and free of creases. Phase lasts in total 90 minutes. The
laundry can be removed at any time during
the anti-crease phase.
When the option is active, the long anti-
crease
icon is on.
sensitive
For gentle drying of fabrics that are frequently worn. Programme starts on full heat setting, which is then reduced as the programme progresses to be kind to the washing.
When the option is active, the sensitive
icon is on.
Page 79

electrolux 79
buzzer
The appliance is supplied with the buzzer
function deactivated.
To activate buzzer choose buzzer option.
When the option is active, the buzzer
icon is on.
The buzzer sounds or plays a tune during:
–cycle end
– anti-crease phase and when phase starts
or ends
– cycle interruption by a warning
–alarm
TIME (Zeitwahl)
Operates only with TIME PROGRAMME
(Zeitprogramm) . Allows to set individual
time of drying from minimum 10 min. to maximum of 3 hours (in 10 min. steps).
1. Turn the programme knob to the TIME
PROGRAMME (Zeitprogramm) .
2. Press the TIME (Zeitwahl) button repeat-
edly until the desired programme duration is shown in the display, e.g.
for a programme of 1 hour and 20 minutes.
DELAY START (Zeitvorwahl)
Allows to delay the start of a drying programme from minimum of 30 min. to
maximum of 20 hours.
1. Select the drying programme and addi-
tional options.
2. Press the DELAY START (Zeitvorwahl)
button repeatedly until the desired delay
start is shown in the display, e.g.
if
the programme has to start after 12
hours.
3. To activate the delay timer, press the
START PAUSE button. Time to start elapses in the displayed.
Child lock
The child lock can be set to prevent a programme being accidentally started or a programme in operation being accidentally
changed. The child lock function locks all
buttons and the programme knob. The
child lock can be activated or deactivated
by holding down the OPTION and OK buttons simultaneously for 5 seconds.
– Before programme is started: Appli-
ance cannot be used
– After programme is started: Pro-
gramme in operation cannot be
changed
The
icon appears in the display to indicate that the child safety device is activated.
The child safety device is not deactivated
once the programme comes to an end.
If you want to set a new programme, you
must first deactivate the child safety device.
Starting the programme
Press the START PAUSE button . The programme is started.
The programme progress is shown in LCD
by appropriate set of icons. From left to the
right, from iron dry
to anti-crease
icon depends on the drying cycle chosen.
E. g. in case of cupboard dry programme
the following status icons are visible:
. Current cycle progress is
marked by flashing dash under status icon.
When appropriate part of drying cycle is accomplished dash becomes steady and appears flashing under next status icon.
Changing programme
To change a programme which has been selected by mistake once the programme has
started, first turn the programme selector to
OFF (Aus) and then reset the programme.
The programme can no longer be
changed directly once the programme
has started. If nevertheless there is an
attempt to change the programme on
the programme knob, the programme
progress display and the maintenance
indicators flash. If an option (excluding
the buzzer ) is set, Err appears in the
multidisplay. The drying programme is
not however affected by this (laundry
protection).
Programme complete / Laundry
unloading
Once the drying cycle is complete, display
shows a blinking
, under anti-crease
icon appears dash. If the buzzer option has
been set, an acoustic signal sounds intermittently for about one minute.
Page 80

80 electrolux
The drying cycles are automatically followed by an anti-crease phase which
lasts around 30 minutes. The drum rotates at intervals during this phase. This
keeps the laundry loose and free from
creases. The laundry can be removed
at any time during the anti-crease
phase. (The laundry should be taken
out towards the end of the anti-crease
phase at the latest to prevent creases
from forming.) If long anti-crease
tion has been set, the anti-crease
phase is lengthened by 60 minutes.
1. Open door.
op-
CARE AND CLEANING
Cleaning fluff filter
The filters collect all the fluff which accumulates during drying. To ensure that the dryer
works perfectly, the fluff filters (micro-fine filter and fine strainer) must be cleaned after
every drying cycle.
The warning icon
this operation.
Caution! Never operate the dryer
without fluff filters or with damaged or
blocked fluff filters.
1.
is on to remind you of
2. Before removing the laundry, remove
fluff from the micro-fine filter. It is best to
use a damp hand for this purpose. (See
“Care and cleaning” chapter.)
3. Remove laundry.
4. Turn the programme selector to OFF
(Aus) .
Important! After each drying cycle:
- Clean the micro-fine filter and fine filter
- Drain the condensed water container
(See chapter “Care and cleaning”.)
5. Close the door.
3.
After a period of time, a patina due to
detergent residue on laundry forms on
the filters. When this occurs, clean the
filters with warm water using a brush.
Remove the filter from the door pulling
it out. It can be positioned with the
tooth facing to the left or to the right).
After cleaning do not forget to put it
back.
Open loading door
2. Use a damp hand to clean the microfine filter, which is built into the lower
part of the loading aperture.
Page 81

electrolux 81
4.
Push down unlock button on large
mesh filter.
Large mesh filter jumps up.
5.
7.
To do this, grip the top of the large
mesh filter and pull it forwards until it
comes loose from the two brackets.
8. Remove fluff from the entire filter area.
It is best to use a vacuum cleaner for
this purpose.
9. Press both journals of the large mesh filter into the brackets on the loading
door until they snap into place.
10. Re-insert fine strainer.
11.
Take out fine strainer.
6. Remove fluff from fine strainer. It is best
to use a damp hand for this purpose.
Clean the entire filter area
The strainer area does not have to be
cleaned after every drying cycle, but
should be checked regularly and
cleaned of fluff if necessary.
Press against the large mesh filter until
it locks into the interlock.
If the fine strainer is not fitted, the large
mesh filter will not snap into place and
the loading door cannot be closed.
Cleaning the door seal
Clean the door seal with a moist cloth immediately after the drying cycle is completed.
Emptying the water reservoir
Empty the water reservoir after every drying
cycle.
Page 82

82 electrolux
If the water reservoir is full, an active programme will break off automatically and the
empty container
icon on the display will
light up. In order to continue the programme, the water reservoir must first be
emptied.
Warning! The condensed water is not
suitable for drinking or for preparing
foodstuffs.
1.
Take out water reservoir completely.
2.
Cleaning heat exchanger
If the heat exchanger
icon is displayed,
the heat exchanger needs to be cleaned.
Caution! Operating when the heat
exchanger is blocked with fluff can
damage the dryer. This also increases
energy consumption.
1. Open door.
2.
Open door in plinth. To do this, press
the release button on the bottom of the
door aperture and open the door in the
plinth to the left.
3. Clean fluff from the inside of the door
and the heat exchanger front chamber.
Wipe the door seal with a damp cloth.
4.
Pour condensed water out into a basin
or similar receptacle.
3. Refit water reservoir.
If the programme has been interrupted
as a result of the water reservoir being
full: Press the START PAUSE button to
continue the drying cycle.
The water reservoir has a volume of approx. 4.5 litres. This is sufficient for
around 8 kg of laundry which has previously been spun at 1000 revolutions/
minute.
The condensed water can be used as
distilled water, e.g. for steam ironing.
However first filter the condensed water (e.g. with a coffee filter) to remove
any residue and small pieces of fluff.
Turn both lock washers inwards.
5.
Page 83

electrolux 83
Use the handle to pull the heat exchanger out of the base and carry it horizontally to prevent any remaining water from
spilling.
6. To empty the heat exchanger, hold vertically over a washing-up bowl.
Caution! Do not use sharp objects to
clean. The heat exchanger could
develop leaks.
7. Clean heat exchanger.
It is best to use a brush or to rinse thoroughly with a hand-held shower.
8. Replace heat exchanger and lock into
place (turn both lock washers outwards
until they snap into place).
9. Close door in plinth.
Caution! Never operate the dryer
without the heat exchanger.
WHAT TO DO IF ...
Troubleshooting by yourself
Problem
Dryer does
not work.
Unsatisfactory
drying results.
Loading door
does not close
Err ( Error )
on the LCD.
No drum light
Abnormally
elapsing time
on the LCD
Programme
inactive
1)
5)
5)
Dryer not connected to mains supply.
Loading door opened. Close loading door
The START PAUSE button not pressed. Press the START PAUSE button.
Incorrect programme set.
Fluff filters clogged.
Heat exchanger clogged.
Max. loading exceeded. Respect max. loading volume.
Covered ventilation grill. Uncover ventilation grill in base area.
Residue inside the drum. Clean the drum inside.
High water hardness.
Filters not locked in place.
Attempt to change parameters after
start of the programme.
Programme selector in OFF position.
Defective light bulb. Replace light bulb (see next section).
Time to end is calculated on the basis
of: type, volume and dampness of laundry.
Full water reservoir.
Possible cause Remedy
To clean the drum
Caution! Do not use abrasive materials
to clean the drum. Use a soft detergent
to clean the inner side of the drum and
the drum blades.
Keep the inner surface of the drum and
the drum blades clean. The minerals
from the water or cleaning agents can
collect on the inner surface of the
drum. This cause that the laundry is not
sufficient dry.
Clean operating screen and housing
Caution! Do not use furniture cleaners
or aggressive cleaning agents to clean
the appliance.
Use a damp cloth to wipe down the operating screen and housing.
Plug in at mains socket. Check fuse in
fuse box (domestic installation).
3)
3)
2)
3)
, press START
Set suitable programme.
Clean fluff filters.
Clean heat exchanger.
Set suitable water hardness4).
Install fine filter and/or snap course filter
into place.
Turn the dryer off and on. Set requested
parameters.
Turn it to DRUM LIGHT (if available) or
to any programme.
Automatic process; this is not a machine fault.
Empty water reservoir
PAUSE button.
Page 84

84 electrolux
Drying cycle
to short
Drying cycle
6)
to long
1) In case of error message on the LCD (e.g. E51 - only dryers with the LCD): Switch the dryer off and on. Set
programme. Press the START PAUSE button. Does not work? - inform local service and quote the error code.
2) follow program recommendation - see Programme overview chapter
3) see Care and cleaning chapter
4) see Machine settings chapter
5) only dryers with the LCD
6) Note: After around 5 hours the drying cycle ends automatically (see Drying cycle complete section).
Changing the bulb for interior lighting
Only use a special bulb which is designed
specially for dryers. The special bulb can be
obtained from your local service centre.
Important! When the appliance is switched
on, the interior lighting switches itself off
after 4 minutes when the door is open.
Warning! Do not use standard bulbs!
These develop too much heat and may
damage the appliance!
Before replacing the bulb, disconnect
the mains plug; with a permanent connection: fully unscrew or deactivate the
fuse.
Small laundry volume./Too dry laundry
for selected programme.
Fluff filters clogged. Clean fluff filters.
To high loading volume. Respect max. loading volume.
Laundry insufficiently spun. Spun adequately the laundry.
Particularly high room temperature - no
machine fault.
Select time programme or higher drying
level (e.g. EXTRA DRY ).
Lower the room temperature if possible.
1. Unscrew cover above the bulb (this can
be found directly behind the loading aperture, at the top; refer to "Description of
machine" section.)
2. Replace defective bulb.
3. Screw cover back down.
Check the correct positioning of o-ring gasket before screwing back the door light cover. Do not operate the dryer when missing oring gasket on door light cover.
Warning! For safety reasons, the cover
must be screwed down tightly. If this is
not done, the dryer must not be
operated.
TECHNICAL DATA
Height x width x depth 85 x 60 x 58 cm
Drum volume 108 l
Depth with loading door open 109 cm
Height can be adjusted by 1.5 cm
Weight when empty approx. 40 kg
Loading volume (depends on programme)
Voltage 220-230 V
Required fuse 10 A
Total power 2350 W
Energy efficiency class
Energy consumption (8 kg of cotton, pre-drained
at 1000 rpm)
Average annual energy consumption 282 kWh
Use Domestic
Permissible ambient temperature + 5°C to + 35°C
2)
1)
max. 8 kg
B
4.48 kWh
Page 85

electrolux 85
The consumption values have been established under standard conditions. They may deviate when
Consumption values
the machine is operated in domestic circumstances.
Programme
Energy consumption in kWh / average dry-
ing time in min.
4.48 / 135 (8 kg load pre-drained at 1000 rpm)
COTTON CUPBOARD DRY
2)
4.3 (8 kg load pre-drained at 1200 rpm)
4.0 (8 kg load pre-drained at 1400 rpm)
3.5 (8 kg load pre-drained at 1800 rpm)
COTTON IRON DRY
SYNTHETICS CUPBOARD DRY
1) Different loading volume data may be needed in some countries as a result of different measuring methods.
2) in accordance with EN 61121
2)
2)
3.8 / 108 (8 kg load pre-drained at 1000 rpm)
1.3 / 45 (3 kg load pre-drained at 1200 rpm)
MACHINE SETTINGS
Setting Implementation
Buzzer permanent
on/off
Water hardness
Emptying water reservoir
off
1) Water contains, a variable quantity of limestone and mineral salts of which quantities vary according to
2) By default the warning LED is always on at the end of the drying cycle or during the cycle if the water reservoir is
- warning
2)
geographical locations thus varying its conductivity values. Relevant variations of the conductivity of the water
compared to those prefixed by the factory could slightly influence the residual humidity of the laundry at the end of
the cycle. Your dryer allows you to regulate the sensitivity of the drying sensor based on conductivity values of the
water.
full. When using an external drain for the condensed water warning can be offi
1. Turn the programme selector to any programme.
2. Press simultaneously the DRYNESS (Trockengrad) and SPIN SPEED (U/
Min.) buttons and hold down for approx. 5 seconds.
3. The buzzer is by default always off. You can use the buzzer option to
activate or deactivate sound but the machine does not memorise your
selection.
1)
1. Turn the programme selector to any programme.
2. Press simultaneously the DRYNESS (Trockengrad) and TIME (Zeitwahl)
buttons and hold down for approx. 5 seconds. The current setting is on
the display:
–
–
–
low conductivity <300 μS/cm
medium conductivity 300-600 μS/cm
high conductivity >600 μS/cm
3. Press the START PAUSE button sequentially until you set desired level.
4. To memorise setting press simultaneously the DRYNESS (Trockengrad)
and TIME (Zeitwahl) buttons or turn knob to OFF (Aus) position
1. Turn the programme selector to any programme.
2. Press simultaneously the SPIN SPEED (U/Min.) and TIME (Zeitwahl) buttons and hold down for approx. 5 seconds.
The current setting is on the display:
–
warning
–
warning
icon and - warning message is off
icon and - warning message is switched on
HINTS FOR TEST INSTITUTES
Parameters possible to check by the Test Institutes:
• Energy consumption (corrected with final
humidity) during the cupboard dry cotton
cycle with nominal load.
Page 86

86 electrolux
• Energy consumption (corrected with final
humidity) during the cupboard dry cotton
cycle with half load.
• Final humidity (during cupboard dry cotton, iron dry cotton and cupboard dry
easy care)
• Condensation efficiency (corrected with final humidity) during cupboard dry cotton
cycle with nominal and half load
SERVICE
If there are technical faults, first check if you
can remedy the problem yourself with the
help of the operating instructions - see chapter What to do if….
If you cannot remedy the problem on your
own, get in touch with the Customer Care
Department or one of our service partners.
To assist you quickly, these data are necessary:
– Model description
– Product number (PNC)
– Serial number (S No. is on rating plate
stuck to the product - to find it see chapter
Product description ))
All the cycles have to be checked in accordance with EN 61121 (Tumble dryers for
household use – Methods for measuring
the performance).
– Type of failure
– Any error messages shown by the display.
So that you have the necessary reference
numbers from your appliance at hand, we
recommend that you write them in here:
Model description: ........................................
PNC: ........................................
S No: ........................................
Page 87

electrolux 87
Page 88

www.electrolux.com/shop
136911371-A-312010
 Loading...