

Page 1

ÖKO-SANTO
2642-6 KG
Kyl-/frys
Fridge-freezer
Bruksanvisning
Instructions for use
AEG Hausgeräte GmbH
Postfach 1036
D-90327 Nürnberg
http://www.aeg.hausgeraete.de
2222 003-73
Page 2
2
Till våra kunder!
Läs noga igenom denna bruksanvisning innan Du sätter igång Din
nya kyl/frys. Här finns viktiga informationer om skåpets säkra användning, dess uppställning och skötsel.
Förvara denna bruksanvisning väl så att den alltid finns till hands.
Lämna den till eventuella efterföljande ägare av skåpet
Med varningstriangeln och/eller texten (V arning!, Se upp!, OBS!). Ges
informationer som är viktiga för Din säkerhet eller för skåpets funktionsduglighet. De måste under alla omständigheter beaktas
Efter denna symbol erhåller Du kompletterande informationer om skåpets utformning och dess praktiska användning.
Med klöverbladet ges tips och anmärkningar för skåpets ekonomiska
och miljövänliga användning.
Beträffande störningar som eventuellt kan uppträda finns i bruksanvisningen informationer om hur man på egen hand kan undanröja dem,
se avsnitt "Om något inte fungerar". Om dessa informationer ej räcker
till står vår kundtjänst alltid till Ditt förfogande.
Tryckt på miljövänligt tillverkat papper .
den som tänker ekologiskt handlar även så ...
Page 3

3
Innehåll
Säkerhet . . . . . . . . . . . . . . . . . . . . . . . . . . . . . . . . . . . . . . . . . 4
Avfallshantering . . . . . . . . . . . . . . . . . . . . . . . . . . . . . . . . . . . 6
Informationer om skåpets förpacking . . . . . . . . . . . . . . . . . . . . 6
Avsfallshantering-gamla skåp. . . . . . . . . . . . . . . . . . . . . . . . . . 6
Avlägsna transportskyddet . . . . . . . . . . . . . . . . . . . . . . . . . 6
Uppställning. . . . . . . . . . . . . . . . . . . . . . . . . . . . . . . . . . . . . . 7
Uppställningsplats . . . . . . . . . . . . . . . . . . . . . . . . . . . . . . . . . . 7
Ventilation . . . . . . . . . . . . . . . . . . . . . . . . . . . . . . . . . . . . . . . . 8
Avståndbrickor för baksidan. . . . . . . . . . . . . . . . . . . . . . . . . . . 8
Avvägning . . . . . . . . . . . . . . . . . . . . . . . . . . . . . . . . . . . . . . . . 8
Ändra dörrhängning . . . . . . . . . . . . . . . . . . . . . . . . . . . . . . . . . 9
Före start . . . . . . . . . . . . . . . . . . . . . . . . . . . . . . . . . . . . . . . . 10
Elektrisk anslutning . . . . . . . . . . . . . . . . . . . . . . . . . . . . . . . . . 10
Manöverpanel . . . . . . . . . . . . . . . . . . . . . . . . . . . . . . . . . . . . . 11
Start - ställa in temperatur . . . . . . . . . . . . . . . . . . . . . . . . . . . 11
Inredning . . . . . . . . . . . . . . . . . . . . . . . . . . . . . . . . . . . . . . . . 12
Hyllor. . . . . . . . . . . . . . . . . . . . . . . . . . . . . . . . . . . . . . . . . . . . 12
Placering av dörrfack . . . . . . . . . . . . . . . . . . . . . . . . . . . . . . . . 12
Kylning av livsmedel . . . . . . . . . . . . . . . . . . . . . . . . . . . . . . . 12
Infrysning och lagring . . . . . . . . . . . . . . . . . . . . . . . . . . . . . . 13
Kylaccumulator . . . . . . . . . . . . . . . . . . . . . . . . . . . . . . . . . . . 14
Lagringsgossymboler/fryskalender . . . . . . . . . . . . . . . . . . . . 14
Göra iskuber . . . . . . . . . . . . . . . . . . . . . . . . . . . . . . . . . . . . . 14
Avfrostning . . . . . . . . . . . . . . . . . . . . . . . . . . . . . . . . . . . . . . . 14
Avstängning . . . . . . . . . . . . . . . . . . . . . . . . . . . . . . . . . . . . . . 15
Rengöring och skötsel . . . . . . . . . . . . . . . . . . . . . . . . . . . . . 16
Tips för energibesparing . . . . . . . . . . . . . . . . . . . . . . . . . . . . 17
Om något inte fungerar . . . . . . . . . . . . . . . . . . . . . . . . . . . . 17
Undanröjning av störningar . . . . . . . . . . . . . . . . . . . . . . . . . . . 17
Invändig belysning. . . . . . . . . . . . . . . . . . . . . . . . . . . . . . . . . . 19
Konsumentköp EHL - Service och reservdelar . . . . . . . . . . . 19
Bestämmelser, normer, riktlinier . . . . . . . . . . . . . . . . . . . . . . 20
2222 003-73
Page 4

4
Säkerhet
Våra kylenheters säkerhet motsvarar teknikens godkända regler och
säkerhetslagen om tekniska apparater. Trots detta vill vi göra Dig förtrogen med följande säkerhetsanvisningar:safety information:
Ändamålsenlig användning
• Skåpet är avsett att användas för normalt hushållsbruk. Skåpet är
avsett för kylning, infrysning och djupfryslagring av livsmedel samt
till glass-/isberedning.
• Ombyggnader eller förändringar på skåpet är av säkerhetsskäl ej tillåtna.
• Om Du använder skåpet yrkesmässigt eller för andra ändamål än för
kylning, infrysning och djupfryslagring av livsmedel - iaktta de lagliga bestämmelserna som gäller för Ditt område.
Före driftstart
• Kontrollera att skåpet inte uppvisar transportskador. Ett skadat skåp
får under inga omständigheter anslutas! Om skador föreligger - kontakta leverantören.
Köldmedel
Skåpet har som köldmedium i kylsystemet isobutan(R600a), en i hög
grad miljövänlig naturgas som emellertid är brännbar.
• Se till att inga delar av köldmedelskretsloppet skadas vid skåpets
transport och uppställning.
• När köldmedelskretsloppet skadas:
– undvik under alla omständigheter öppen eld och tändkällor;
– ventilera rummet väl där skåpet står.
Säkerhet för barn
• Förpackningsdelar (t.ex. folier, frigolit) kan bli farliga för barn. Risk
för kvävning! Se till att förpackningsmaterialet är oåtkomligt för barn!
• Gamla skåp som ej längre används skall göras obrukbara innan de
skaffas bort. Dra ur nätkontakten, kapa nätkabeln, avlägsna eller
förstör eventuellt existerande fjäder- eller regellås. Därigenom undviks att lekande barn kan låsa in sig i skåpet (risk för kvävning!) eller
kan råka ut för andra livsfarliga situationer.
Page 5
5
• Ofta kan barn inte inse farorna som ligger i hanteringen med hushållsapparater. Av denna anledning skall barnen hållas under
uppsyn.
Under den vardagliga driften
• Behållare med brännbara gaser eller vätskor kan bli otäta genom
köldinverkan. Explosionsfara! Lagra inga behållare med brännbara
ämnen som t.ex. sprejflaskor, påfyllningspatroner för cigarettändare
osv. i skåpet.
• Flaskor och burkar får inte lagras i frysutrymmet. De kan sprängas
när innehållet fryser - när innehållet är kolsyrehaltigt kan de även
explodera! Lägg aldrig lemonader, saft, öl, vin, mousserande vin
osv. i frysutrymmet.
• Glass och istärningar som kommer direkt ur frysutrymmet skall aldrig
tas i munnen. Is eller glass som är mycket kall kan frysa fast på läpparna eller tungan och förorsaka skador.
• Rör ej vid de djupfrysta varorna med våta händer. Händerna kan frysa fast.
• Använd inga elektriska apparater (t.ex. elektriska glassmaskiner,
omröringsapparater osv.) i skåpet.
• Stäng av skåpet före rengöring eller avfrostning, dra ur nätkontakten
eller skruva ur säkringen.
• När nätkontakten skall dras ur vägguttaget: drag i kontakten aldrig i
kabeln.
Vid fel
• Om något fel skulle uppstå på skåpet se då först efter i bruksanvisningen under "Om något inte.fungerar". Om informationerna som
finns under detta avsnitt inte är till någon hjälp - utför då inte själv
några vidare arbeten.
• Skåpet får endast repareras av behörig fackman. Arbete utfört av
personer med otillräckliga kunskaper kan förorsaka allvarliga faror.
Vid reparationer kontakta fackhandeln eller vår kundtjänst.
40
Regulations, Standards, Guidelines
This appliance was designed for household use and was manufactured in accordance with the appropriate standards. The necessary
measures in accordance with appliance safety legislation regulations
(GSG), accident prevention regulations for refrigeration appliances
(VBG 20) and the regulations of the German Society of Electrical
Engineers (VDE) were observed in the manufacture of this appliance.
The refrigerant circuit has been checked for leaks.
This appliance is in accordance with the following EU guidelines:
– 73/23/EWG dated 19 February 1973 - low voltage guidelines.
– 89/336/EWG dated 3 May 1989
(including guideline change notice 92/31/EWG) - EMV guideline
Customer Service
If you cannot find the remedy for a malfunction in these operating
instructions, please contact your dealer or our customer service
department. Addresses and telephone numbers are listed in the
accompanying booklet "Guarantee Conditions/Customer Service
Locations".
Selective ordering of replacement parts can save unnecessary travel
and costs. For this reason always provide the following appliance
information:
This information can be found on the serial plate in the interior at the
left of the appliance.
• Model Name
• Model Number (PNC)
• Serial Number (S-No.)
We recommend that you enter this information here, so that it is handy
if needed.
Note: The customer bears the costs of unjustified customer service
calls even during the guarantee period.
Page 6

6
Avfallshantering
Informationer om skåpets förpackning
Allt material som används är miljövänligt! Det kan riskfritt deponeras
eller förbrännas i sopförbränningsanläggningar! Om materialet: Plastmaterialet är återvinningsbart och kännetecknas på följande sätt:
>PE< för polyetylen, t.ex. i det yttre höljet och påsarna i det inre.
>PS< för skummad polystyrol, t.ex. i dämpningsdelarna, principiellt
fluorklorkolväte-fria.
Kartongdelarna tillverkas av returpapper och borde åter tillföras retur-
pappersinsamlingen.
Avfallshantering - gamla skåp
Av miljöskyddsskäl måste skåpet avfallshanteras på sakkunnigt och
föreskrivet sätt. Detta gäller för Ditt gamla skåp och även för det nya
skåpet när det en gång har tjänat ut och inte kan användas längre.
Varning! Gamla skåp som inte längre används skall göras obrukbara
innan de skaffas bort. Dra ur nätkontakten, kapa nätkabeln, avlägsna
eller förstör eventuellt existerande fjäder- eller regellås. Därigenom
undviks att lekande barn kan låsa in sig i skåpet (risk för kvävning!)
eller kan råka ut för andra livsfarliga situationer.
Informationer om avfallshanteringen:
• Skåpet får inte skaffas bort tillsammans med hushålls- eller grovsopor.
• Kylsystemet i synnerhet värmeväxlaren på skåpets baksida får inte
skadas.
• Upplysningar om hämtningstider eller samlingsplatser erhålls hos
det lokala renhållningsverket eller hos kommunalförvaltningen.
Avlägsna transportskyddet
Kyl/frysskåpet och delar av innerutrustningen är skyddade under transport.
• Innan ni tar kyl/frysskåpet i drift ska tejp, folie, förpackningsdelar och
stötskydd avlägsnas.
39
Heavy build up of frost, possibly also on the door seal.
Door seal is not air tight
(possibly after changing
over the hinges).
Carefully warm the leaking
sections of the door seal
with a hair dryer (not hotter
than approx. 50 °C). At the
same time shape the warmed door seal by hand such
that it sits correctly.
Unusual noises.
The appliance is touching
the wall or other objects.
Appliance is not level.
A component, e.g. a pipe,
on the rear of the appliance
is touching another part of
the appliance or the wall.
The compressor starts after
a period of time.
See the "Cleaning and
Care" section.
This is normal, no error has
occurred.
The compressor does not
start immediately after changing the temperature setting.
Water on the floor or on storage shelves.
Water drain hole is blocked.
If necessary, carefully bend
the component out of the
way.
Move the appliance slightly.
Readjust the feet.
Changing the light bulb
Warning! There is a risk of electric shocks! Before changing the light
bulb, switch off the appliance and unplug it, or pull the fuse or the circuit breaker.
Light bulb data: 220-240 V , max. 15 W
1. To switch off the appliance, turn the
temperature regulator to position "0".
2. Unplug the mains plug.
3. To change the light bulb, unscrew
the light cover.
4. Unhook the light bulb cover as shown.
5. Change the defective light bulb.
6. Refit the light bulb cover and the screw.
7. Put the refrigerator back into operation.
D731
Page 7
7
Uppställning
Uppställningsplats
Skåpet skall stå i ett väl ventilerat och torrt rum.
Omgivningstemperaturen påverkar strömförbrukningen. Därför borde
skåpet
– ej utsättas för direkt solljus;
– ej stå i närheten av värmeelement, spisar eller andra värmekällor;
– endast stå på en plats med en omgivningstemperatur motsvarande
den klimatklass som skåpet är avsett för.
Klimatklassen finns angiven på typskylten som befinner sig på vän-
ster sida inuti skåpet.
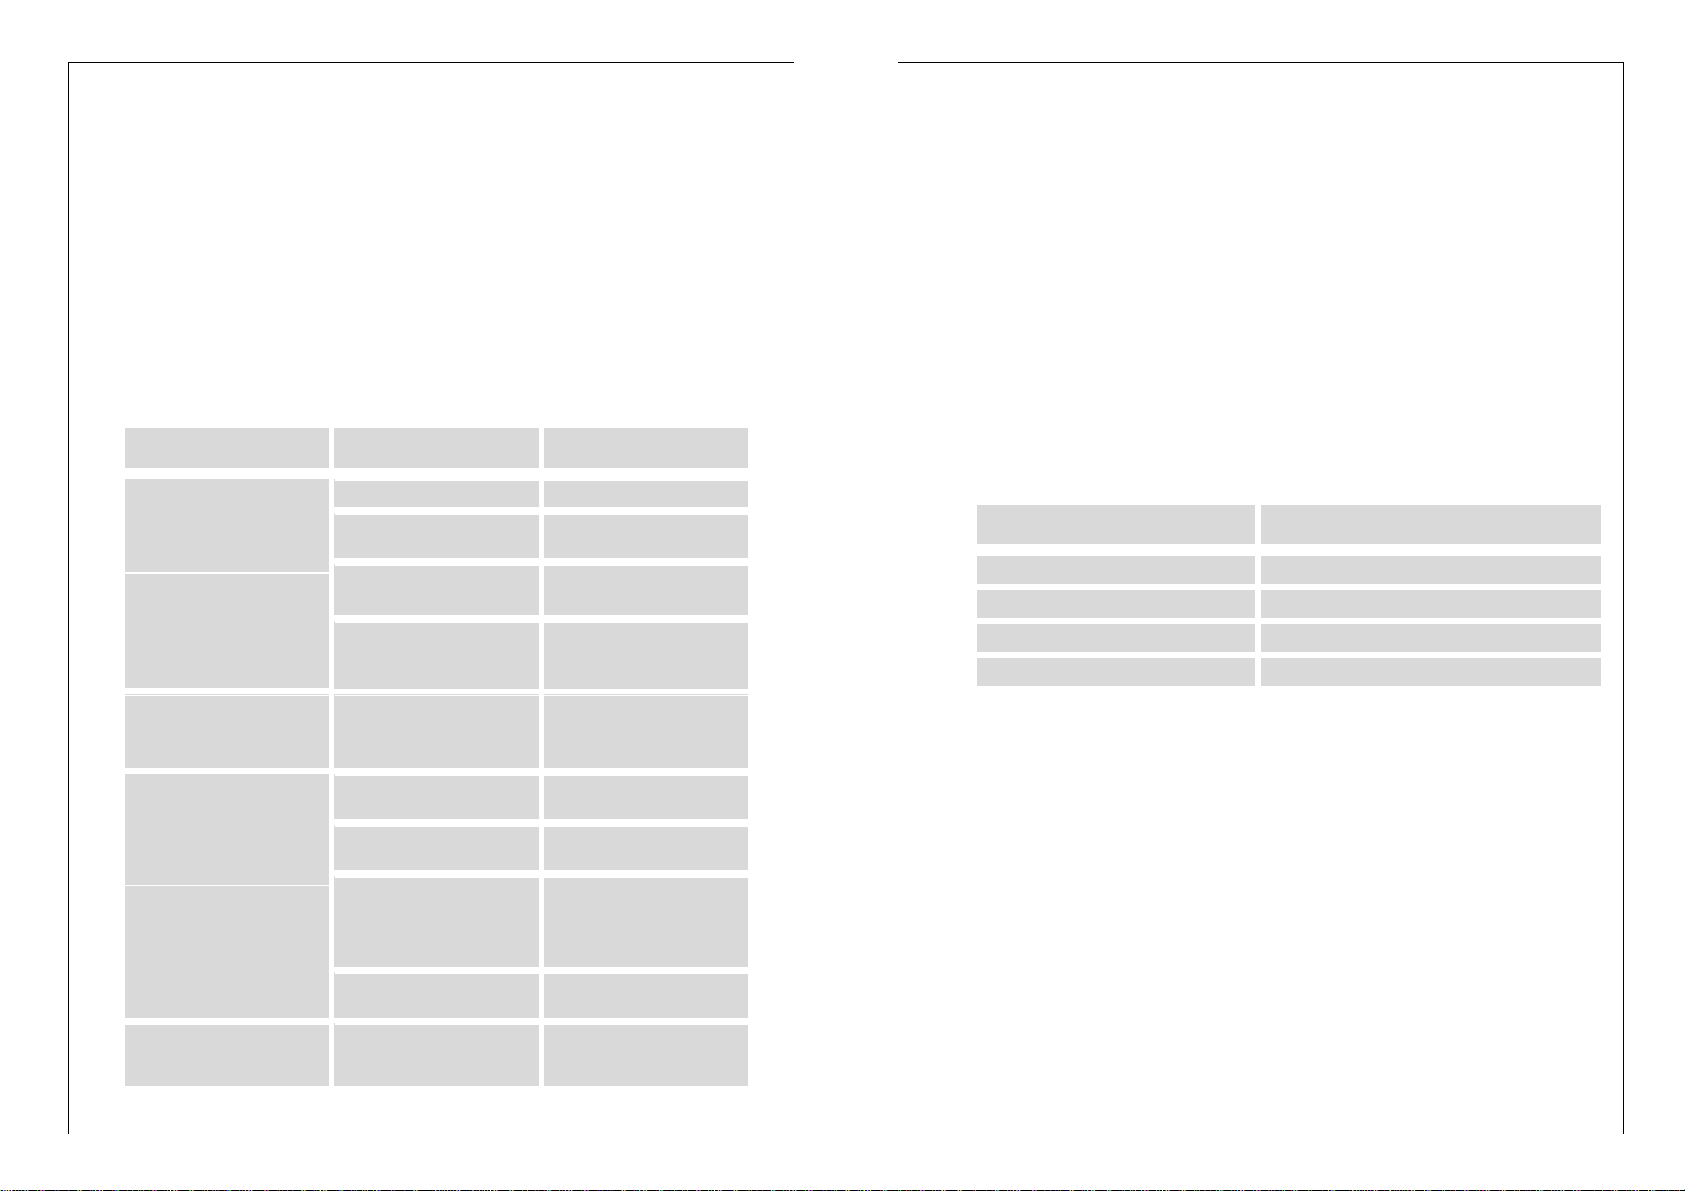
Nedanstående tabell visar omgivningstemperaturen för de olika kli-
matklasserna:
Klimatklass för omgivningstemperatur
SN +10 till +32 °C
N +16 till +32 °C
ST +18 till +38 °C
T +18 till +43 °C
Om det inte går att undvika att ställa upp skåpet bredvid en värmekälla, skall följande minimiavstånd iakttas:
– 3 cm från elspisar;
– 30 cm från olje- och koleldade kaminer.
Om dessa avstånd inte kan iakttas krävs en värmeisolerande platta
mellan värmekälla och skåp.
Om skåpet står bredvid ett annat kyl- eller frysskåp krävs ett avstånd
på 5 cm sidledes mellan dem för att undvika kondensbildning på skåpens utsida.
38
The food is too warm.
Interior lighting does not
work.
The appliance is near a heat
source.
Temperature is not properly
adjusted.
Please look in the "Initial
Start Up" section.
Light bulb is defective. Please look in the "Chan-
ging the Light Bulb" section.
Turn the temperature regulator to a colder setting temporarily.
Door was open for an extended period.
Please look in the "Installation location" section.
A large quantity of warm
food was placed in the
appliance within the last 24
hours.
Open the door only as long
as necessary.
Malfunction
Possible Cause
Remedy
Appliance does not work.
Appliance is not switched on Switch on the appliance.
Mains plug is not plugged in
or is loose.
Insert mains plug.
Fuse has blown or is defective.
Check fuse, replace if
necessary.
Socket is defective. Mains malfunctions are to
be corrected by an electrician.
Appliance cools too much. Temperature is set too cold. Turn the temperature regu-
lator to a warmer setting
temporarily..
What to do if ...
Correcting Malfunctions
A malfunction may be caused by only a minor fault that you can rectify yourself using the following instructions. Do not perform any other
work on the appliance if the following information does not provide
assistance in your specific case.
Warning! Repairs to refrigerators/freezers may only be performed by
qualified service engineers. Improper repairs can give rise to significant hazards for the user. If your appliance needs repairing, please
contact your specialist dealer or our Customer Service.
Page 8

8
Avvägning
Skåpet måste stå vågrätt och
stabilt. Ojämnheter i golvet
skall jämnas ut genom att man
skruvar de båda främre justeringsfötterna ut eller in.
AEG70
Ventilation
Lufttillförseln sker framtill
under dörren, ventilation längs
den bakre väggen uppåt. För
att luften ska kunna cirkulera
får dessa ventilationöppningar
inte täckas eller flyttas.
Viktigt! Om skåpet tex ställs
upp under ett skåp, måste det
finnas ett avstånd på minst 10
cm mellan skåpets överkant
och skåpet ovanför
Avståndbrickor för baksidan
Montera de bifogade båda
väggavståndshållarna så att
den värme som uppstår på
skåpets baksida avleds på ett
tillförlitligt sätt. Rätta er efter
nummerföljden i bilder.
PR153
37
2. Defrost the freezer compartment prior to cleaning (see "Defrosting"
section).
3. Switch the appliance off and remove the plug from the mains, or switch off or turn out the circuit breaker or fuse.
4. Clean the appliance and the interior accessories with a cloth and
lukewarm water. Commercially available dish washing detergents
may also be used.
5. After cleaning wipe with fresh water and rub dry.
Accumulation of dust at the condenser increases energy consump-
tion. For this reason carefully clean the condenser at the back of the
appliance once a year with a soft brush or a vacuum cleaner.
6. Check the water drain hole on
the rear wall of the fridge.
Clear a blocked drain hole with
the aid of the green peg in the
pack of accessories included
with the appliance.
7. After everything is dry place
appliance back into service.
Energy Saving Tips
• Do not install the appliance near cookers, radiators or other sources
of warmth. High ambient temperatures cause longer, more frequent
operation of the compressor.
• Ensure sufficient air circulation and exhaust at the appliance base
and at the back wall of the appliance. Never cover air vent openings.
• Do not place warm foods into the appliance. Allow warm foods to
cool first.
• Only leave door open as long as necessary.
• Do not set temperature any colder than necessary.
• Put frozen food in the fridge to defrost. The cold in the frozen food
will then be used to cool the fridge.
• Keep the heat emitting condenser, the metall grille on the rear wall
of your appliance, always clean.
Page 9

9
Ändra dörrhängning
Upphängningen kan ändras från vänster (vid leverans) till höger, om
uppställningsplats och bekvämlighet kräver det.
Varning! Under ändringen av upphängningen får skåpet inte vara
ansluten till nätet. Dra först ut nätkontakten.
Tillvägagångssätt:
1. Ta bort ventilationsgallret (D).
2. Skruva bort det nedre gångjärnet (E).
3. Skruva fast skruvarna igen.
4. Ta loss skruvarna täcklock ner
till vänster och sätt dem på
skruvar till höger.
5. Skruva loss båda skruvarna
nere till vänster.
6. Skruva loss gångjärnet mellan
dörrarna och ta av kyldörren
nedåt.
7. Lossa de båda håltäckbrickorna skruva fast dem på höger
sida.
8. Dra ut den övre gångjärnstappen och placera den på vänster sida. Glöm inte brickan.
9. Bänd loss plastpropparna på
kylens dörr uppe till vänster
med hjälp av en liten skruvmejsel och placera om på
höger sida.
10. Sätt in det mellersta gångjärnet i kyldörren nere till vänster.
Glöm inte brickorna.
11. Skruva fast det.
12. Sätt in frydörren i det mellersta
gåndjärnet.
13. Montera det nedersta gångjärnet (E) på motsatta dörrsidan
och fäst det med de tidigare
borttagna skruvarna.
F
D
PR185
F
F
E
F
H
G
36
Switching off the appliance
If the appliance is not going to be used for an extended period:
1. Remove all refrigerated and deep-frozen packages as well as ice trays.
2. Switch off the appliance by turning the temperature regulator to position "0".
3. Remove the mains plug or switch off or turn out the circuit breaker or
fuse.
4. Defrost freezer compartment and clean thoroughly (see section:
“Cleaning and Care”).
5. Leave the door open to avoid the build up of odours.
Cleaning and Care
For hygienic reasons the appliance interior, including interior accessories, should be cleaned regularly.
Warning!
• The appliance may not be connected to the mains during cleaning.
Danger of electrical shock! Before cleaning switch the appliance
offand rem ve the plug from the mains, or switch off or turn out the circuit breaker or fuse.
• Never clean the appliance with a steam cleaner. Moisture could
accumulate in electrical components, danger of electrical shock!
Hot vapours can lead to the damage of plastic parts.
• The appliance must be dry before it is placed back into service.
Attention!
• Ethereal oils and organic solvents can attack plastic parts, e.g.
– lemon juice or the juice from orange peals;
– butyric acid;
– cleansers which contain acetic acid.
Do not allow such substances to come into contact with appliance
parts.
• Do not use any abrasive cleansers.
1. Remove frozen food and the food from the refrigerator. Wrap frozen food
in several layers of newspaper. Store it in a cool place, well covered.
Page 10

14. Drag ut täckbiten (F) från ventilationsgallret (D) och montera
den på motsatta sidan.
15. Sätt tillbaka ventilationsgallret.
Såväl det mellersta som det
övre gångjärnet kan utnyttjas
för att justera in dörrarna.
Det mellersta gångjärnet kan
justeras horisontellt sedan de
båda skruvarna lossats med
hjälp av ett verktyg.
Det mellersta gångjärnet kan
justeras sedan muttern lossats
med en 10 mm nyckel. Gå tillväga som visas på bilden.
10
Före start
• Rengör skåpets inre och alla utrustningsdetaljer före första start (se
avsnittet “Rengöring och slötsel”).
Elektrisk anslutning
För den elektriska anslutningen krävs ett föreskriftsenligt installerat
skyddskontakt-vägguttag.
Den elektriska säkringen måste uppgå till minst 10 Ampere.
När vägguttaget inte längre är åtkomligt efter skåpets uppställning
måste med hjälp av en lämplig åtgärd i den elektriska installationen
säkerställas att skåpet vid behov kan göras strömlöst (t.ex. genom
säkring, LS-brytare, felström-skyddsbrytare eller dylikt med en kontaktöppningsvidd på minst 3 mm).
• Före igångsättning skall det på skåpets typskylt kontrolleras om
anslutningsspänning och strömart stämmer överens med nätets
värden på uppställningsplatsen.
t.ex: AC 220 ... 240 V 50 Hz eller
220 ... 240 V~50 Hz
(dvs. 220 till 240 Volt växelström, 50 Hertz)
Typskylten finns på vänster sida inuti skåpet.
PR228
35
Defrosting
Refrigerator
Frost is automatically eliminated from the evaporator of the refrigerator compartment every time the motor compressor stops, during normal use. The defrost water drains out through a trough into a special
container at the back of the appliance, over the motor compressor,
where it evaporates.
Freezer
The freezer compartment, however, will become progrssively covered
with frost. This should be removed with the special plastic scraper
provided, whenever the tickness of the frost exceeds 4 mm. During
this operation it is not necessary to switch off the power supply or to
remove the foodstuffs.
However when the ice becomes very thick on the inner liner, complete defrosting should be carried out as follows:
1. Remove the frozen food from
the freezer, wrap it in several
layers of newspaper and put it
in a very cool place.
2. Switch off the appliance and
pull out the plug, or remove or
unscrew the safety fuses.
3. Leave the freezer compartment door open.
4. Insert the plastic scraper into
the recess provided under the
defrost water channel and place a collecting basin under it.
5. Once defrosting is completed keep the scraper for future use;
6. Turn the thermostat knob to the required setting or replace the plug in
the power socket.
Warning!
Never use metal tools to scrape off the frost
Do not use a mechanical device or any artificial means to speed up the
thawing process other than those recommended by the manufacturer.
A temperature rise of the frozen food packs, during defrosting , may
shorten their safe storage life.
Page 11

11
Start-ställa in temperatur
• Anslut stickpropp i vägguttaget. Innerbelysningen tänds.
Läge “0”: från.
Läge “1”: varmaste läge, (minsta kyla).
Läge “4” (ändläge): kallaste läge, (största kyla).
Följande faktorer påverkar innertemperaturen:
- Omgivningstemperatur;
- Mängd och temperatur av de lagrade livsmedlen;
- När dörren öppnas ofta eller länge
Kylens och frysens temperaturer kan inte ställas in var för sig.
För snabbinfrysning av färska livsmedel i frysen kan termostatläge “4”
väljas. Se till att temperaturen i kylutrymmet inte skjunker under 0°C
och vrid i god tid tillbaka termostatvredet till läge “2” eller “3”.
Viktigt!
Höga omgivningstemperaturer (t.ex. heta sommardagar) kan vid kall
temperaturinställning (“3” till ”4”) leda till att kompressorn arbetar permanent.
Manöverpanel
123 4
4
32
1
0
Temperaturregleraren (4) är samtidigt huvudbrytare.
Den gröna kontrollampan (3) tänds lyser och visar att enheten står
under spänning.
Temperaturinställning vid rumstemperaturer under16°C
Om skåpet står i ett rum med en temperatur under 16°C måste man
slå på tillsats-omkopplaren (2). Den gula lampan (1) tänds.
Viktigt!
Om rumstemperaturen överstiger +16°C, ska du slå ifrån den extra
strömbrytaren igen. Följden blir annars en högre energiförbrukning.
34
Preparation of Ice Cubes
1. Fill the ice cube tray 3/4 full with cold water, place it in the freezer
compartment and leave to freeze.
2. To loosen the frozen cubes, either bend the ice cube tray or hold it
under running water for a few seconds.
Important! Never try to free an ice tray that is frozen to the freezer
compartment using pointed or sharp edged objects. Use the ice scraper supplied.
1. To achieve faster freezing of food or to freeze the maximum allowed
quantity , depress the ambient switch 12 hours before loading the food
without modifying the thermostat setting.
2. Place the food to be frozen in the top drawer.
3. Not open the door frequently or leave it open longer than absolutely
necessary.
Storage Goods Symbols/Freezing
Calendar
• The symbols on the drawers show different types of frozen goods.
• The numbers indicate storage times in months for the appropriate
types of frozen goods. Whether the upper or lower value of the indicated storage time is valid depends on the quality of the foods and
pre-treating before freezing. The lower value applies to foods with
high fat content.
• By attaching the included index-tabs to the drawers, they can be
marked according to which type of foods the individual compartments contain.
Ice pack
There is an ice pack in one drawer of the freezer.
In the event of a power failure or malfunction, the ice pack will
lengthen the amount of time it takes for the frozen food to become too
warm by several hours. The ice pack can only fulfil this task optimally if it is placed in the uppermost drawer, at the front, above the frozen
food. You can use the ice pack for cooling cold bags.
Page 12

12
Inredning
Hyllor
• En hylla skall alltid vara placerad i de understa spåren
ovanför frukt- och grönsakslådorna. Den måste alltid
vara i detta läge, så att frukt
och grönsaker håller sig färska längre.
• Övriga hyllor kan placeras på
olika höjder:
• Dra ut hyllan så långt att den kan vikas uppåt eller nedåt och kan tas ut.
• Sätt in den i en annan höjd i omvänd ordning. Ta ut den främre hälften av den tvådelade hyllan av varioglas och skjut in den på en
annan nivå. Därigenom vinner ni utrymme så att höga varor kan
ställas på den undre hyllan.
Placering av dörrfack
• För att möjliggöra förvaring
av matvaruförpackingar i
olika storlekar, kan dörrfacken och facket för vätskebehållare flyttas i höjdled.
Drag stegvis ut facket i pilarnas riktning tills det lossnar
och placera det därefter i
önskat läge.
Sätt temperaturregulatorn på en varmare inställning (“2” til ”3”). Vid
denna inställning regleras kompressorn och avfrostningsproceduren
inleds automatiskt.
D338
PR270
Kylning av livsmedel
Kylutrymmet är avsett för drycker och livsmedel som dagligen
behövs.
• För att kylskåpet skall fungera på bästa sätt får ingen varm mat eller
ångande vätskor (som t.ex. soppor och buljong) placeras i kylskåpet.
33
Freezing and storing frozen food
You can use your freezer for freezing fresh food yourself.
Important!
• The temperature in the freezer compartment must be –18 °C or colder before freezing food.
• Please observe the freezing capacity given on the rating plate. The
freezing capacity is the maximum quantity of fresh food that can be
frozen within a period of 24 hours. If you wish to freeze food several days in a row, please observe a maximum capacity of only 2/3 to
3/4 of that on the rating plate. The quality of the food is best preserved when it is frozen right through to the core as quickly as possible.
• Allow warm food to cool down before freezing. The warmth will cause increased ice formation and increase the power consumption.
• Please note the maximum storage times specified by the manufacturer.
• Thawed foods which have not been processed further (cooked into
meals) may not under any circumstances be frozen a second time.
• Containers with flammable gases or liquids can leak at low temperatures. There is a risk of an explosion! Do not store any containers
with flammable materials such as, for example, spray cans, fire
extinguisher refill cartridges etc in the refrigerator/freezer.
• Bottles and cans must not be placed in the freezer. They can burst
when the contents freeze, high carbonate content drinks can even
explode! Never store lemonade, juices, beer, wine, sparkling wine
etc. in the freezer. Exception: high alcohol content spirits can be stored in the freezer.
• All foods must be packed air tight prior to freezing, so that they do
not dry out or lose their flavour, and so that no flavour contamination of other frozen goods occurs.
Caution! Do not touch frozen food with wet hands. Your hands could
freeze to the food.
tainers or wapped in aluminium foil or polythene bags to exclude as
much air as possible.
Milk bootles: these should have a cap and should be stored in the
bottle rack on the door.
Bananas, potatoes, onions and garlic, if not packed, must not be
kept in the refrigerator.
Page 13

13
Infrysning och lagring
I frysdelen kan Du lagra djupfryst och frysa in färska livsmedel.
Obs!
• Före infrysning av livsmedel måste temperaturen i frysutrymmet
vara -18°C eller kallare.
• Beakta frysförmågan som finns angiven på typskylten. Frysförmåga
är den maximala mängd färska varor som kan frysas in inom 24 timmar. Skall varor frysas in flera dagar i rad skall endast 2/3 till 3/4 av
den på typskylten angivna mängden tas. Kvaliteten på den djupfrysta varan blir bättre om infrysningen sker snabbt.
• Låt varma livsmedel svalna före infrysningen. Värmen leder till höjd
isbildning och höjer energiförbrukningen.
• Se djupfrysprodukternas lagringstid resp. hållbarhetsdatum.
• Livsmedel som en gång tinats upp får under inga omständigheter
frysas in igen utan att de först bearbetats (såsom tillagning till färdiga rätter).
1. Om ni vill ha en snabb infrysning av livsmedlet eller om ni vill utnyttja
den maximala fryseffekten,skall tillsatsomkopplaren aktiveras minst
12 timmar innan färska matvaror läggs in i skåpet.
2. Lägg de förpackade livsmedlen i den översta korgen.
3. Undvika att öppna dörren till frysen ofta och inte lämna dörren öppen
längre än nödvändigt.
• Livsmedel som kan påverka smaken hos vissa födoämnen måste
täckas över med exempelvis aluminium- eller plastfolie.
Här nedan några praktiska råd:
Packa in rått kött i plastfolie och placera det på glasskivan.
På så sätt kan ni förvara köttet i högst 1-2 dagar.
Kokt mat, charkvaror etc. skall förvaras övertäckta. De kan placeras
på vilket galler som helst.
Frukt och grönsaker: efter rengöring och tvättning förvaras de i
grön-sakslådan.
Smör och ost: förvaras i särskilda askar eller i aluminium- eller pla-
stfolie/ plastpåsar så att de inte kommer i kontakt med luften.
Mjölk: i väl tillslutna förpackningar förvaras den på hyllorna på dör-
rens insida.
• To do this pull the storage
shelf forward until it can be
swivelledupwards or
downwards and removed.
• Please do the same in reverse to insert the shelf at a different height.Slide the front
half of the V ario storage shelf
in another level to the rear.
By this means you will gain
space to place tall items on
the storage shelf below.
Adjusting the upper door rack
• Depending on the food stored, the upper door racks
can be changed to other holders or removed. Take out
the refrigerators food, press
the door racks digonally
upwards at their edges,
reposition them, and press
them back into place.
32
D338
PR270
Fresh food refrigeration
To obtain the best performance:
• do not store warm food or evaporating liquide in the refrigeator
• do cover or wrap the food, particularly if it has a strong flavour.
• Position food so that air can circuiate freely round it.
Useful hints:
Meat (all types): wrap in polythene bags and place on the glass shelf
above the vegetable drawer(s)For safety , store in this way only one
or two days at the most.
Cooked foods, cold dishes, etc: these should be covered and may
be placed on any shelf.
Fruit and vegetables: these should be thoroughly cleaned and
placed in the special drawer(s) provided.
Butter and cheese: these should be placed in special airtight con-
Page 14

14
Avfrostning
Kylen
Kylens bakre vägg beläggs med frost medan kompressorn går och
avfrostas automatiskt när kompressorn står stilla.
Vattnet från avfrostningen samlas i uppsamlingsrännan på kyldelens
bakre vägg och leds genom avrinninghålet till uppsamlingsskålen vid
kompressorn och avdunstar.
Frysrummet
Vid öppen dörr och under drift sätter sig funkten som frost i skåpet..
Ta bort denna frost då och då med den medlevererade plastskrapan.
Göra iskuber
1. Fyll islådan till 3/4 med kallt vatten och placera den i en låda eller korg.
2. De färdiga iskuberna lossas lätt för hand, om ni vänder islådan upp
och ner och håller den helt kort under rinnande vatten.
Varning! Lossa inte iskuberna i islådan med spetsiga eller skarpa
föremål. Använd ett gaffelskaft eller liknande..
Lagringsgodssymboler/fryskalender
(inte på alla modeller)
• Symbolerna på lådorna visar olika sorters djupfrysta varor.
• Siffrorna anger lagringstiden i månader för respektive typ av djupfryst
vara. Om det är det övre eller det nedre värdet på de angivna lagringstiderna som gäller, beror på livsmedlens kvalitet och deras förbehandling före infrysningen. För livsmedel med hög fettandel gäl-ler
alltid det nedre värdet.
• Genom att applicera bifogade skjutbara markörer på lådorna kan
man markera vilka livsmedel som lagras i respektive låda.
Kylaccumulator
Vid ett eventuellt strömavbrott kommer kylaccumulatorn/accumulatorerna att förlänga förvaringstiden för frysta varor med några timmar.
Av säkerhetsskäl (gäller vissa modeller) är kylaccumulatorn/accumulatorerna under transport placerad/placerade i den understa lådan i
frysdelen. Det mest effektiva sättet att använda accumulatorerna är
att lägga dem ovanpå frysta livsmedel i den översta lådan.
31
Starting up and temperature regulation
• Insert the plug of the connection lead into the plug socket with pro-
tective earth contact.
Setting „0“ means: Off.
Setting „1“ means: Hightest temperature, (warmest setting).
Setting „4“ (end-stop) means: Lowest temperature, (coldest set-
ting).
However, the exact setting should be chosen keeping in the mind that
the temperature inside the refrigerator depends on:
-the quantity of food stored
-how often the door is opened
The temperatures in the refrigerator compartment and freezer co part-
ment cannot be independently regulated.
If you want the freeze fresh food rapidly, select setting „4“, ensuring
that the temperature in the refrigerator compartment does not drop
blow 0°C. You should also promptly reset the temperature regulator to
setting „2“ or „3“.
Important!
High ambient temperatures (e.g. on hot summer days) and a cold setting on the temperature regulator (position "4") can cause the compressor to run continuously.
If this happens, turn the temperature regulator back to a warmer setting (position "3" to "4"). At this setting the compressor will be switched
on and off as usual and automatic defrosting recommenced.
Interior Accessories
Storage shelves
• You should always slide one of the full size glass storage shelf into
the lowest set of guides, above the fruit and the vegetable containers, and keep it in this position.
• The height of the storage shelves can be adjusted:
Page 15

Stark frostbildning i frysdelen ökar energiförbrukningen. Därför ska
man avfrosta när frostskiktet har blivit cirka 4 mm tjockt. Minst en
gång om året. En lämplig tidpunkt för avfrostning är alltid när skåpet
är tomt eller det finns mycket lite i det.
Avfrostning görs enligt följande:
1. T a ut frysvarorna, slå inte dem i fle ra lager av tidningspapper och förvara dem täckta på en sval plats.
2. Stäng av skåpet, dra ut stickkontakten eller skruva ur säkringen.
3. Låt dörren till frysrummet stå
öppen.
4. Använd plastskrapan som vattenavledning i springan under vattenrännan och ställ en uppsamlingsskålen under.
5. Spara plastskrapan för framtida bruk.
6. Nät frostskicktet har smält, rengör grundligt frysutrymmet och inredningsdetaljern (se avsnittet “Rengöring och skötsel).
Varning!
Använd inte under några omständigheter metallföremål.
Använd inga elektriska uppvärmningsanordningar och inga andra
mekaniska eller konstgjorda hjälpmedel för att skynda på avfrostningen
med undantag av det som rekommenderas i denna bruksanvisning.
En temperaturstegring hos de djupfrysta matvrorna under avfrostningen kan resultera i att lagringstiden förkortas.
15
Avstängning
Man stänger av skåpet genom att vrida termostatknappen till symbolen “0”.
Om skåpet skall tas ur drift en längre tid:
1. Ta ut alla livsmedel som finns i skåpet
2. Stäng av skåpet, vrid termostatknappen till symbolen “0”.
3. Dra ur stickkontakten eller skruva ur säkringen.
4. Avfrosta frysutrymmet och rengör det noga (se avsnitt “Rengöring
och skötsel”).
5. Låt dörrarna därefter stå öppna för att undvika bildning av dålig lukt.
30
in your plug, proceed as follows:
1. The wire coloured green and yellow must be connected to the terminal marked with the letter „E“ or by the earth symbol or coloured green
and yellow.
2. The wire coloured blue must be connected to the terminal „N“ or
coloured black.
3. The wire coloured brown must be connected to the terminal marked
„L“ or coloured red.
4. Upon completion there must be not cut, or stray strands of wire present and the cord clamp must be secure over the outer sheat.
Warning! A cut-off plug inserted into a 13 amp socket is a serious
safety (shock) hazard. Ensure that the cut-off plug is disposed of
safely.
Control panel
The thermostat knob (4) is the on/off switch.
The green pilot lamp (3), which comes on when the panel is swit-
ched on and the mains voltage is available. In this switch position, the
refrigerating unit automatically operates by system control.
Temperature adjustment with ambient temperature below +16°C
When the ambient temperature in the room in which the appliance is
situated is less than 16° C, the ambient switch (2) must be depressed.
The yellow pilot light (1) comes on. In this way, when the ambient
temperature is low, the compressor operates for longer periods to
ensure that the storage temperature of -18° C is maintained inside the
freezer compartment.
Important!
If the ambient temperature rises to above +16°C, de-activate the
ambient switch in order to avoid unnecessary energy consumption.
The yellow pilot light goes out.
123 4
4
32
1
0
Page 16

16
Rengöring och skötsel
Av hygieniska skäl bör skåpets inre samt inredning regelbundet
rengöras.
Varning!
• Under rengöringen får skåpet ej vara anslutet till elnätet. Risk för
stöt! Stäng av skåpet före rengöringen dra ur stickkontakten eller
skurva ur säkringen.
• Skåpet får aldrig rengöras med ångrengöringsapparater. Fukt kan
komma in i elektriska enheter, risk för stöt! Het ånga kan leda till
skador på plastdetaljerna.
• Skåpet måste vara torrt innan det tas i drift igen.
OBS!
• Eteriska oljor och organiska lösningsmedel kan angripa plastdelarna, t.ex.
– saften från citron- eller apelsinskal;
– smörsyra;
– rengöringsmedel som innerhåller ättiksyra.
Dylika substanser får ej komma i kontakt med skåpet.
• Avänd inga rengöringmedel som kan förorsaka repor.
1. Ta ut kylvarorna och de djupfrysta varorna, slå in dem i flera lager tidningspapper och lagra varorna övertäckta på ett svalt ställe.
2. Avfrosta frysen före rengöringen (se avsnitt “Avfrostning”).
3. Stäng av skåpet och dra ur nätkontakten eller skruva ur säkringen .
4. Rengör skåp samt inredning med ljummet vatten och ett milt diskmedel.
5. Skölj därefter med rent vatten
och torka av.
6. Kontrollera avloppshålet för
smältvattnet på kylutrymmets
baksida. Om detta är tilltäppt,
så används en tops eller en
plastad gardinspiral vid rengöringen.
7. När allt är torrt kan livsmedlen
läggas in och skåpet kan tas i
drift igen
29
PR228
14. Insert the bottom hinge into the
bottom of the freezer compartment door.
15. Fully screw down the bottom
hinge.
16. Re-assemble the ventilationgrill (D)
17. Unscrew the handles. Refit
them on the opposite side after
having piercing the plugs with
a punch. Cover the holes left
open with the plugs contained
in the documentation pack.
Prior to Initial Start–Up
• Please clean the appliance interior and all accessories prior to ini-
tial start-up (see section: “Cleaning and Care”).
Electrical Connection
Any electrical work required to install this appliance should be carried out by a qualified electrician or competent person.
WARNING – THIS APPLIANCE MUST BE EARTHED
The manufacturer declines any liability should these safety
measures not be observed.
Before switching on, make sure the electricity supply voltage is the
same as that indicated on the appliance rating plate. The rating plate is inside, on the left.
The appliance is supplied with a 13 amp plug fitted. In the event of
having to change the fuse in the plug supplied, a 13 amp ASTA
approved (BS 1362) fuse must be used.
Important!
The wires in the mains lead are coloured in accordance with the following code:
Green and Yellow Earth
Blue Neutral
Brown Live
As the colours of the wires in the mains lead of this appliance may
not correspond with the coloured markings indentifying the terminals
Page 17

17
Tips för energibesparing
• Skåpet skall inte ställas upp i närheten av spisar, värmeelement eller
andra värmekällor. Vid hög omgivningstemperatur löper kompressorn oftare och längre.
• Tillräcklig ventilation vid skåpssockeln och skåpets baksida måste
vara garanterad. Täck aldrig över luftningsöppningarna.
• Ställ inte in varma rätter i skåpet. Varma rätter skall först svalna.
• Låt dörren stå öppen så kort tid som möjligt.
• Ställ inte in temperaturen kallare än nödvändigt.
• Lägg djupfryst vara för upptining i kylutrymmet. Kölden i de djupfrysta varorna utnyttjas på så vis för kylning i kylutrymmet.
• Kondensorn på skåpets baksida skall alltid hållas ren.
Dammavlagringer på kondensorn reducerar kyleffekten och höjer energiförbrukningen. Rengör därför kondensorn på skåpets baksida en
gång om året försiktigt med en mjuk borste eller med dammsugaren.
Om något inte fungerar
Undanröjning av störningar
Det ä möjligt att det endast handlar om ett litet fel som framkallar en
störning, ett fel som Du själv kan undanröja med ledning av följande
informationer. Om följande informationer inte är till någon hjälp i det
konkreta fallet - utför då själv inga vidare arbeten.
Varning! Reparationer på skåpet får endast genomföras av fackpersonal. Felaktigt utförda reparationer kan leda till skada på person och
egendom. Vid reparationer kontakta fackhandeln eller vår kundtjänst.
Störning Möjlig orsak Avhjälpande
Skåpet arbetar inte.
Skåpet är inte påsatt. Koppla in skåpet
Nätkontakten är inte isatt
eller lös.
Anslut nätkontakten till vägguttaget.
Säkringen har gått eller är
defekt.
Kontrollera säkringen, byt ut
den vid behov.
Vägguttaget är defekt Störningar i strömnätet
åtgärdas av Din el-specialist
Procced as follow:
1. Remove the ventilationgrill (D).
2. Remove plug (F) and refit it on
the opposite side of the ventilationgrill.
3. Unscrew the bottom hinge and
remove the freezer compartment door by pulling it
downwards.
4. Re-tighten the screws.
5. Remove the screw masking
plugs from the bottm left-hand
side and refit them on the righthand side.
6. Unscrew the two screws on
the bottom left-hand side.
7. Unscrew the middle hinge and
remove the refrigerator compartment door by pulling it
downwards.
8. With a screwdriver, unscrew
the two masking plugs covering the holes on the left-hand
side and refit them on the righthand side.
9. Unscrew the pin from the top
hinge and refit it on the lefthand side.
10. Slide the refrigerator compartment door onto the top pin.
1 1. Insert the middle hinge into the
bottom of the refrigerator compartment door. Remember to
fit the washers.
12. Fully screw up the middle hinge.
13. Fit the freezer compartment
door onto the middle hinge.
28
F
D
PR185
F
F
E
F
H
G
Page 18

18
Ovanliga ljud.
Skåpet har kontakt med
väggen eller med andra
föremål.
Skåpet står inte vågrätt.
En del, t.ex. ett rör på skåpets baksida har kommit i
kontakt med en annan skåpdel eller väggen.
Kompressorn startar automatiskt efter en viss tid.
Se avsnitt “Rengöring och
Skötsel”
Detta är normalt, det föreligger ingen störning.
Ändringar på temperaturinställningen sker inte omedelbart.
Vatten på kylutrymmets botten eller på hyllorna.
Smältvattens avloppshål är
tilltäppt.
Böj denna del försiktigt åt
sidan vid behov.
Skjut skåpet något åt sidan.
Justera inställningsfötterna
Aggregatet kyler för starkt. Temperaturinställningen är
för kall.
Vrid temperaturregultorn
kortvarigt till en varmare
inställning.
Livsmedlen är för varma.
Innerbelysningen fungerar ej.
Skåpet står bredvid en värmekälla.
Temperaturen är inte rätt
inställd.
Se avsnitt “Före start”
Lampan är defekt. Se avsnitt “Byte av lampa”
Vrid temperaturreglatorn
kortvarigt till en kallare
inställning
Dörren har varit öppen en
längre tid.
Se avsnitt “Uppställningsplats”
Inom de sista 24 timmarna
har större mängder varma
livsmedel lagrats in.
Låt dörren stå öppen så kort
tid som möjligt.
Stark rimfrostsbildning i skåpet eventuellt även på
dörrtätningen.
Dörrtätningen är otät (eventuellt efter byte dörrtätningen).
Värm försiktigt upp dörrtätningen på de otäta ställena
med en hårtork (inte varmare än ca. 50°C). Dra samtidigt den uppvärmda dörrtätningen i form för hand så att
den åter sluter tätt.
Störning Möjlig orsak Avhjälpande
27
Your appliance needs air
Air flows in from under the
door, at the front, and flows out
upwards, over the back. For
correct air circulation, it is
important that the ventilation
openings are not covered or
obstructed.
Important! If the appliance is
positioned under a kitchen wall
unit, a minimum clearance of
10 cm must be left between
the top of the appliance and
the overhanging wall unit.
Rear spacers
Fit the rear spacers contained
in the documentation bag to
ensure even dissipation of
heat genereted during operation. Proceed in the sequence
illustrated by the figures.
PR153
Levelling the appliance
Place the appliance on a flat
hard floor. Two adjustable feet
on the front of the appliance
enable it to accurately levelled
by screwingthem in or out as
required.
AEG70
Rehingeing the door
The side at which the door opens can be changed from the right side
(factory adjustment) to the left side, if the installation site requires.
Warning! When changing the side at which the door opens, the
appliance may not be connected to the mains. Remove plug from the
mains before hand.
Page 19

19
Invändig belysning
Varning! Dra alltid ur stickkontakten ur el-uttaget innan någon rengö-
ring påbörjas! Jordfelrisk!
Glödlampan i skåpets invändiga belysning kan kontrolleras på följan-
de sätt:
Om dörren är öppen och lampan
inte tänds, kontollera om glödlampan är ordentligt iskruvad. Om den
fortfarande inte fungerar, byt ut
den med en glödlampa av samma
styrka.
Lampdata: 220-240 V, max, fattning E 14
1. Skruvarna i lampans avskärmning
skruvas ur.
2. Den rörliga delen dras ut, se skiss.
D731
Konsumentköp EHL
Vid försäljning till konsument gäller konsumentköp EHL samt övriga
Ehl-bestämmelser som erhålls vid köpet.
Konsumentkontakt
Om Ni har frågor om produkten, ring vår Konsumentkontakt,
tel. 020-78 77 50.
Service och resevdelar
Innan service beställs
Läs igenom bruksanvisningen och följ de råd och anvisningar som
ges i avsnittet “Om något inte fungerar”. Om service tillkallas inom
EHL-åtagandet för att lösa de problem som finns inom denna lista,
riskerar du att själv få stå för kostnaden. Detta gäller också om du
använder skåpet till annat än det är avsett för. Service och reservdelar till ditt skåp får du via återförsäljare eller AB Elektroservice (se
under “Hushållsutrustning, vitvaror” i telefonkatalogens Gula Sidor).
Uppge skåpets modellbeteckning produkt- och serienummer.
26
Installation
Installation Location
The appliance should be set up in a well ventilated, dry room.
Energy use is affected by the ambi‡‡ent temperature. The appliance
should therefore
– not be exposed to direct sunlight;
– not be installed next to radiators, cookers or other sources of heat;
– only be installed at a location whose ambient temperature corre-
sponds to the climate classification, for which the appliance is designed.
The climate classification can be found on the serial plate, which is
located at the left on the inside of the appliance.
The following table shows which ambient temperature is correct for
each climate classification: each climate classification:
Climate classification ffor an ambient temperature of
SN +10 bis +32 °C
N +16 bis +32 °C
ST +18 bis +38 °C
T +18 bis +43 °C
If installation next to a source of heat is unavoidable, the following
minimum clearances must be maintained at the sides of the appliance:
– for electric cookers 3 cm;
– for oil and coal fired ranges 30 cm.
If these clearances cannot be maintained a heat insulating pad is
required between the cooker and the refrigeration appliance.
If the refrigeration appliance is installed next to another refrigerator or
freezer a clearance of 5 cm at the sides is required, in order to prevent the formation of condensation on the outside of the appliance.
Page 20

20
Bestämmelser, normer, riktlinjer
Skåpet är konstruerat för användning i hushållet och har tillverkats
under iakttagande av de för dessa skåp gällande normer. Vid tillverkningen har i synnerhet nödvändiga åtgärder enligt säkerhetslagen om
tekniska apparater (GSG), föreskrifter om förebyggande av olyckor
vid kylanläggningar (VBG 20) och bestämmelserna från Förbundet
tyska el-tekniker (VDE) vidtagits.
Kylkretsloppets täthet har kontrollerats.
Detta skåp motsvarar följande EG-riktlinjer:
– 73/23/EEG från 19.2.1973 - lågspänningsriktlinje
– 89/336/EEG från 3.5.1989
(inklusive ändringsriktlinjen 92/31/EEG) - EMK-riktlinje
Dessa uppgifter finns angivna på typskylten som finns på vänster sida
inuti skåpet.
• Modellbeteckning
• Produktnummer (PNC)
• Tillverkningsnummer (S-No.)
Vi rekommenderar att anteckna dessa data här så att de snabbt finns
till hands.
Anmärkning: Om service tillkallas i onödan så är det avgiftsbelagt
även under serviceåtagandetiden.
25
Disposal
Appliance Packaging Information
All materials are environmentally sound! They can be dumped or burned at an incinerating plant without danger!
About the materials: The plastics can be recycled and are identified
as follows:
>PE< for polyethylene, e.g. the outer covering and the bags in the
interior.
>PS< for polystyrene foam, e.g. the pads, which are all free of chlorofluorocarbon.
The carton parts are made from recycled paper and should be disposed of at a waste-paper recycling collection location.
Disposal of old Appliances
For environmental reasons, refrigeration appliances must be disposed of properly. This applies to your old appliance, and - at the end of
its service life - for your new appliance as well.
Warning! Before disposing of old appliances make them inoperable.
Remove plug from mains, sever the power cable, remove or destroy
any snap or latch closures. This eliminates the danger that playing
children lock themselves into the appliance (danger of suffocation!) or
place themselves into other life-endangering situations.
Disposal:
• The appliance may not be disposed of with domestic waste or bulky
refuse.
• The refrigerant circuit, especially the heat exchanger at the back of
the appliance, may not be damaged.
• Information concerning collection schedules or locations can be
obtained from the local disposal authorities or town hall.
Remove transport safeguard
The appliance and the interior fittings are protected for transport.
• Remove all adhesive tape and packing pieces from the interior of
the appliance.
Page 21

21
Dear customer,
Before placing your new refrigerator/freezer into operation please
read these operating instructions carefully. They contain important
information for safe use, for installation and for care of the appliance.
Please keep these operating instructions for future reference. Pass
them on to possible new owners of the appliance.
Notes which are important for your safety or for the proper functioning
of the appliance are stressed with a warning triangle and/or with
signal words (Warning!, Caution!, Attention!). Please observe the following carefully.
Supplementary information regarding operation and practical applications of the appliance appear after this symbol.
Tips and notes concerning economical and environmentally sound
use of the appliance are marked with the flower.
The operating instructions contain instructions for the correction of
possible malfunctions by the user in the section "What to do if ...". If
these instructions should not be sufficient, our customer service
department is always available to you.
Printed on paper manufactured with environmentally sound processes.
who thinks ecologically acts accordingly ...
24
catches, if fitted. By doing this you ensure that children cannot lock
themselves in the fridge when playing (there is risk of suffocation!)or
get themselves into other dangerous situations.
• Often children cannot recognise the hazards present in household
appliances. It is therefore important that you ensure adequate
supervision and never let children play with the appliance!
Daily Operation
• Containers with flammable gases or liquids can leak at low temperatures. There is a risk of an explosion! Do not store any containers
with flammable materials such as, for example, spray cans, fire
extinguisher refill cartridges etc in the refrigerator/freezer.
• Bottles and cans must not be placed in the freezer compartment.
They can burst when the contents freeze, high carbonate content
drinks can even explode! Never store lemonade, juices, beer, wine,
sparkling wine etc. in the freezer compartment. Exception: high
alcohol content spirits can be stored in the freezer compartment.
• Do not put ice creams or ice cubes in the mouth immediately after
removal from the freezer compartment. Very cold ice can freeze to
the lips or tongue and cause injury.
• Do not touch frozen food with wet hands. Your hands could freeze
to the food.
• Do not operate any electrical appliances in the refrigerator/freezer
(e.g. electric ice cream makers, mixers etc.).
• Before cleaning the appliance, always switch off the appliance and
unplug it, or pull the house fuse or switch off the circuit breaker.
• When unplugging always pull the plug from the mains socket, do not
pull on the cable.
In case of malfunction
• If the a malfunction occurs on the appliance, please look first in the
"What to do if ..." section of these instructions. If the information
given there does not help, please do not perform any further repairs
yourself.
• Refrigerators/freezers may only be repaired by qualified service
engineers. Improper repairs can give rise to significant hazards. If
your appliance needs repairing, please contact your specialist dealer or our Customer Service.
Page 22

22
Contents
Safety . . . . . . . . . . . . . . . . . . . . . . . . . . . . . . . . . . . . . . . . . . . 23
Disposal . . . . . . . . . . . . . . . . . . . . . . . . . . . . . . . . . . . . . . . . . 25
Appliance Packaging Information . . . . . . . . . . . . . . . . . . . . . . . 25
Disposal of old Appliances . . . . . . . . . . . . . . . . . . . . . . . . . .. . 25
Remove transport safeguard . . . . . . . . . . . . . . . . . . . . . . . . . 25
Installation . . . . . . . . . . . . . . . . . . . . . . . . . . . . . . . . . . . . . . . 26
Installation Location . . . . . . . . . . . . . . . . . . . . . . . . . . . . . . . . . 26
Your refrigerator needs air . . . . . . . . . . . . . . . . . . . . . . . . . . . . 27
Rear spacersr . . . . . . . . . . . . . . . . . . . . . . . . . . . . . ........ 27
Levelling the appliancer . . . . . . . . . . . . . . . . . . . . . . . . . . . . . . 27
Rehingeing the door . . . . . . . . . . . . . . . . . . . . . . . . . . . . . . . . . 27
Prior to Initial Start–Up . . . . . . . . . . . . . . . . . . . . . . . . . . . . . 29
Electrical Connection . . . . . . . . . . . . . . . . . . . . . . . . . . . . . . . . 29
Control panel........................................30
Starting up and temperature regulation . . . . . . . . . . . . . . . . 31
Interior Accessories . . . . . . . . . . . . . . . . . . . . . . . . . . . . . . . 31
Storage shelves . . . .................................. 31
Door rack . . . . . . . . . . . . . . . . . . . . . . . . . . . . . . ........... 32
Fresh food refrigeration. . . . . . . . . . . . . . . . . . . . . . . . . . . . . 32
Freezing and storing frozen food . . . . . . . . . . . . . . . . . . . . . . 33
Ice pack . . . . . . . . . . . . . . . . . . . . . . . . . . .. .............. 34
Preparation of Ice Cubes . . . . . . . . . . . . . . . . . . . . . . . . . . . . 34
Storage Goods Symbols/ Freezing calender . . . . . . . . . . . . . 34
Defrosting . . . . . . . . . . . . . . . . . . . . . . . . . . . ............. 35
Switching off the appliance . . . . . . .................... 36
Cleaning and Care . . . . . . . . . . . . . . . . . . . . . . . . . . . . . . . . . 36
Energy Saving Tips . . . . . . . . . . . . . . . . . . . . . . . . . . . . . . . . 37
What to do if . . . . . . . . . . . . . . . . . . . . . . . . . . . . . . ........ 38
Correcting Malfunctions . . . . . . . . . . . . . . . . . . . . . . . . . . . . . . 38
Changing the light bulb . . . . . . . . . . . . . . . . . . . . . . . . . . . . . . 39
Customer Service . . . . . . . . . . . . . . . . . . . . . . . . . . . . . . . . . 40
Regulations, Standards, Guidelines . . . . . . . . . . . . . . . . . . . 40
23
Safety
The safety aspects of our refrigerators/freezers comply with accepted
technical standards and the German Appliance Safety Law. Nevertheless, we consider it our obligation to make you aware of the following
safety information:
Intended use
• The refrigerator is intended for use in the home. It is suitable for the
cooling, freezing and storing of frozen food, as well as for making
ice. If the appliance is used for purposes other than those intended
or used incorrectly, no liability can be accepted by the manufacturer
for any damage that may be caused.
• Alterations or changes to the freezer are not permitted for reasons
of safety.
• If you use the refrigerator in a commercial application or forpurposes
other than the cooling, freezing or frozen storage of foods,please
observe all valid legal regulations for your application.
Prior to initial start–up
• Check the refrigerator for transport damage. Under no circumstance
should a damaged appliance be plugged in! In the event of damage,
please contact the vendor.
Refrigerant
The refrigerant isobutane (R600a) is contained within the refrigerant
circuit of the appliance, a natural gas with a high level of environmental compatibility, which is nevertheless flammable.
• During transportation and installation of the appliance, be certain that
none of the components of the refrigerant circuit become damaged.
• If the refrigerant circuit should become damaged:
– avoid open flames and sources of ignition;
– thoroughly ventilate the room in which the appliance is situated.
Safety of children
• Packaging (e.g. wraps, polystyrene) can be dangerous for children.
There is a risk of suffocation! Keep packaging material away from
children!
• Please make old appliances unusable prior to disposal. Pull out the
mains plug, cut off the mains cable, break or remove spring or bolt-
 Loading...