

Page 1
C61320M
Glaskeramik-Kochfeld
Keramische kookplaat
Glass Ceramic Cooking Surface
Glaskeramikhäll
Keraaminen keittotaso
Стеклокерамическая варочная
поверхность
Gebrauchsanweisung/Montageanweisung
Gebruiksaanwijzing/Montageaanwijzing
Operating/Installation Instructions
Bruksanvisning/Installationsanvisning
Käyttöohje/Asennusohje
Инструкция по эксплуатации и монтажу
Page 2

Dear Customer,
Please read these operating instructions through carefully.
Above all, please take note of the “Safety” section on the first few
pages. Please keep these operating instructions for future reference.
Pass them on to any subsequent owner of the appliance.
The warning triangle and/or specific words (Warning!, Caution!,
1
Important!) are used to highlight instructions that are important for
your safety or for the function of the appliance. It is imperative that
these instructions are observed.
0 1. This symbol guides you step by step when operating the appliance.
2. ...
3. ...
Next to this symbol you receive additional information and practical
3
tips on using the appliance.
Tips and information about the economical and ecological use of the
2
machine are marked with a cloverleaf.
Before calling out an engineer to a fault please read the chapter „What
to do if...“ as you may be able to resolve the problem yourself.
For further assistence contact your local AEG Service Force Centre, see
the chapter „Service“.
34
Printed on paper manufactured with environmentally sound processes.
He who thinks ecologically acts accordingly ...
Page 3

Contents
CONTENTS
Operating Instructions . . . . . . . . . . . . . . . . . . . . . . . . . . . . . . . . . . . . 36
Safety . . . . . . . . . . . . . . . . . . . . . . . . . . . . . . . . . . . . . . . . . . . . . . . . . . . . . . . . 36
Disposal . . . . . . . . . . . . . . . . . . . . . . . . . . . . . . . . . . . . . . . . . . . . . . . . . . . . . . 38
The Electronic Pot Recognition Function . . . . . . . . . . . . . . . . . . . . . . . . . . . 39
Digital Displays . . . . . . . . . . . . . . . . . . . . . . . . . . . . . . . . . . . . . . . . . . . . . . . . . 40
Before Using for the First Time . . . . . . . . . . . . . . . . . . . . . . . . . . . . . . . . . 41
Initial Cleaning . . . . . . . . . . . . . . . . . . . . . . . . . . . . . . . . . . . . . . . . . . . . . . . . . 41
Using the Cooking Zones . . . . . . . . . . . . . . . . . . . . . . . . . . . . . . . . . . . . . . . 41
Usage, Tips . . . . . . . . . . . . . . . . . . . . . . . . . . . . . . . . . . . . . . . . . . . . . . . . . . . . 42
Pans . . . . . . . . . . . . . . . . . . . . . . . . . . . . . . . . . . . . . . . . . . . . . . . . . . . . . . . . . . 42
Cleaning and Care . . . . . . . . . . . . . . . . . . . . . . . . . . . . . . . . . . . . . . . . . . . . . 43
Ceramic Glass . . . . . . . . . . . . . . . . . . . . . . . . . . . . . . . . . . . . . . . . . . . . . . . . . . 43
The Hob Frame . . . . . . . . . . . . . . . . . . . . . . . . . . . . . . . . . . . . . . . . . . . . . . . . . 44
What to do if ... . . . . . . . . . . . . . . . . . . . . . . . . . . . . . . . . . . . . . . . . . . . . . . . 45
Service . . . . . . . . . . . . . . . . . . . . . . . . . . . . . . . . . . . . . . . . . . . . . . . . . . . . . . 46
Installation Instructions . . . . . . . . . . . . . . . . . . . . . . . . . . . . . . . . . . . 47
Technical Data . . . . . . . . . . . . . . . . . . . . . . . . . . . . . . . . . . . . . . . . . . . . . . . . . 47
Regulations, Standards, Directives . . . . . . . . . . . . . . . . . . . . . . . . . . . . . . . . . 48
Safety Instructions for the Installer . . . . . . . . . . . . . . . . . . . . . . . . . . . . . . . . 49
Electrical connection . . . . . . . . . . . . . . . . . . . . . . . . . . . . . . . . . . . . . . . . . . . . 49
Installation . . . . . . . . . . . . . . . . . . . . . . . . . . . . . . . . . . . . . . . . . . . . . . . . . 104
35
Page 4
Operating Instructions
OPERATING INSTRUCTIONS
1 Safety
The safety aspects of this appliance comply with the accepted technical
standards and the German Appliance Safety Law. However, we also
consider it our obligation as a manufacturer to make you aware of the
following safety information.
Electrical Safety
• The new appliance may only be installed and connected up by qualified personnel, according to the manufacturers instructions and to
the relevant country standards.
Please observe this instruction, otherwise the warranty will not cover
any damage that may occur.
• Repairs to the appliance should only be carried out by approved service engineers. Improper repairs can cause injury or significant malfunction. If your appliance needs repairing, please contact your local
AEG Service Force Centre.
• If your appliance malfunctions or fractures and cracks or splits
appear:
– switch off all cooking zones,
– Disconnect the hob from the electricity supply.
36
Child Safety
The cooking zones will become hot when the hob is in use. Therefore,
always keep small children away.
The hob is designed to be operated by adults. Do not allow children to
play near or with the hob
Safety During Use
• This appliance is intended for domestic cooking only. It is not designed for commercial or industrial purposes
• Do not use the hob to heat the room.
• Take care when plugging electrical appliances into mains sockets near
the hob. Connecting leads must not come into contact with the hot
surface.
• Overheated fats and oils catch fire quickly. You should supervise cooking when preparing foods in fat or oil (e.g. chips).
• Switch the cooking zones off after use.
Page 5

Operating Instructions
• In the case of a mains failure that lasts more than 1 sec., all settings
and indications are cleared. In this situation, care should be taken as
hot cooking zones will no longer be indicated by the residual heat
indicators.
Safety When Cleaning
• For safety reasons do not clean the appliance with a steam jet or high
pressure cleaner.
• Clean the hob in accordance with the maintenance and cleaning
instructions in this manual.
How to Avoid Damage to Your Appliance
• Do not use the hob as a work surface or for storage.
• Do not use the cooking zones with empty pans, or without pans.
• Ceramic glass is insensitive to temperature shock and very robust,
however it is not unbreakable. Hard and sharp objects, in particular,
can damage the cooking surface if they fall on it.
• Do not use cast iron pans or pans with damaged bases that are rough
or burred. Scratching may occur when the pans are slid.
• Do not place any pans on the hob frame. Scratching may occur or the
paint damaged.
• Ensure that liquids containing acids, e.g. vinegar, lemon or scale
remover do not come into contact with the hob frame, otherwise
matt spots will appear.
• If sugar or a dish containing sugar comes into contact with a hot
cooking zone and then melts, remove the soiling immediately whilst
still hot using a scraper. If it cools, damage to the surface may occur
on removal.
• Keep all items and materials that can melt away from the ceramic
glass surface, e.g. plastics, aluminium foil, or oven foils. If something
of this nature should melt onto the ceramic glass surface, it must also
be removed immediately using the scraper.
• If you wish to use special types of pan (e.g. a pressure cooker, simmering pan, wok, etc.), please observe the manufacturer's instructions.
• Avoid boiling pans dry. The bases could be irreparably damaged in the
process and the glass ceramic cooking surface also damaged.
37
Page 6
Operating Instructions
2 Disposal
Disposing of Packaging Materials
• All packaging can be recycled, sheet and hard foam parts are appropriately marked. Please dispose of packaging material and any old
appliance with due regard to safety and the environment.
Information on disposal
• The appliance must not be disposed of in the household rubbish.
• You can obtain information about collection dates or public tips from
your local Council or Environmental Health Office.
• Warning! Before disposing of old appliances make them inoperable.
Cut off the mains cable.
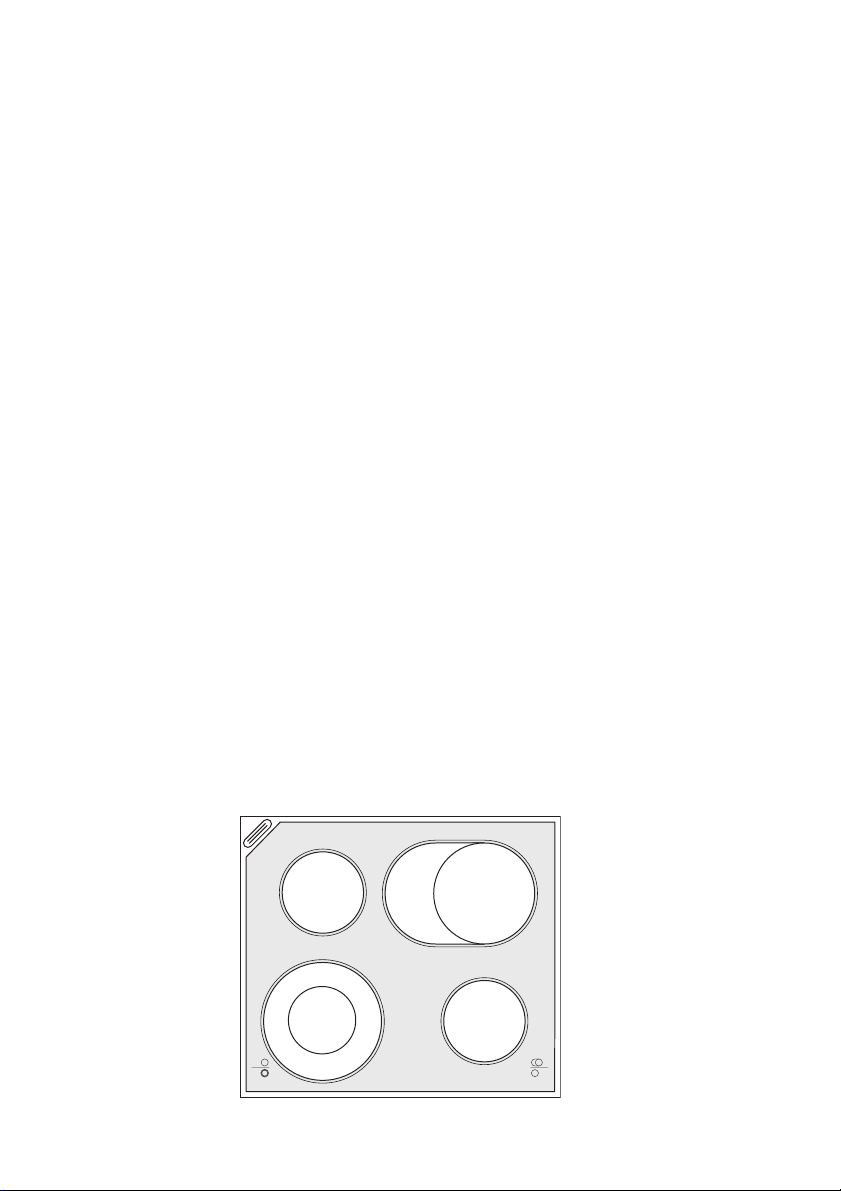
Appliance Description
Single ring
cooking zone
Outlet for
steam from the
oven
Digital
displays
Double ring
cooking zone
Casserole zone
Digital
displays
Single ring
cooking zone
38
Page 7
Operating Instructions
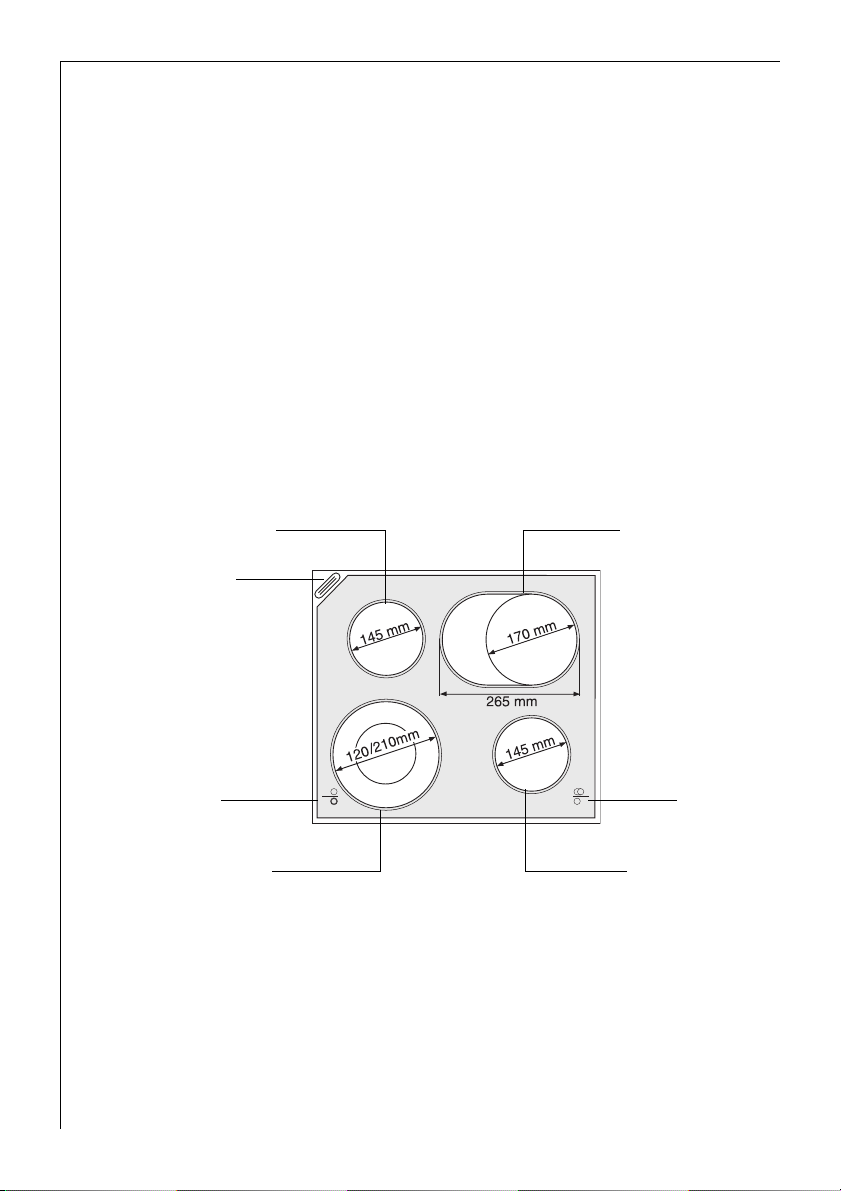
The Electronic Pot Recognition Function
There are electronic sensors under the cooking zones of the glass ceramic hob. These recognise:
• whether there is a flat, metallic pot on the cooking zone,
• whether there are unsuitable cookware (glass, ceramic) on the
cooking zone,
• the diameter of the base of the pot.
The sensor automatically switches on the small or large cooking zone,
depending on the size of the pot.
Cooking zone size
Single ring cooking zone 145 mm 120 mm
Single ring cooking zone 180 mm 155 mm
Casserole zone 170 mm x 265 mm, inside 145 mm
Casserole zone 170 mm x 265 mm, outside 165 mm x 260 mm
Double ring cooking zone 120 mm, inside 80 mm
Double ring cooking zone 210 mm, outside 185 mm
Check the diameter of the base when buying pots and pans as the
3
manufacturer usually states the diameter of the upper rim.
The cooking zone switches itself on at a
minimum pot or pan size of:
39
Page 8
Operating Instructions
Digital Displays
The current operating state of the relevant cooking zone can be read
off in the digital displays.
1. . . 9 = heat setting
1 = lowest heat setting
9 = highest heat setting
% = intermediate stage (= 6.5)
14 heat settings (including intermediate settings) can be set in the ran-
3
ges 1 - 9.
You can select intermediate settings in the ranges 2 - 7.
A = Automatic Heating-Up
The cooking zone is set to automatic heating-up.
A is lit until the automatic feature switches over to the set further coo-
3
king stage.
H = Residual Heat Indication
40
Danger! The cooking zone is still hot! The display goes out after the
1
cooking zone cools down.
H is only displayed when the cooking zone is switched off.
3
You can use the residual heat for melting and keeping food warm.
2
F = Fault Indicator
F flashes if the cooking zone is switched on and
• there is no pot on the cooking zone
• there is an unsuitable pot on the cooking zone
• the pot base diameter is too small.
Page 9

Operating Instructions
Before Using for the First Time
Initial Cleaning
0 1. Remove the film from the digital display panel.
2. Wipe the ceramic glass cooking surface with a damp cloth to remove
any traces left from manufacturing.
Important: Do not use any caustic, abrasive cleaners! The surface could
1
be damaged.
Using the Cooking Zones
When the cooking zones are switched on, they may hum briefly. This is
3
a characteristic of all ceramic glass cooking zones and does not impair
either the function or the life of the appliance.
The cooking zones are operated using the ring switches on the coo-
3
ker or switch box as described in the relevant set of instructions.
41
Page 10

Operating Instructions
Usage, Tips
Pans
The better the pan, the better the results.
• You can recognise good pans by their bases. The base should be thick
and as flat as possible.
• Pans with aluminium or copper bases can leave
metal discoloration on the glass ceramic surface
that is very difficult or impossible to remove.
• Do not use cast iron pans or pans with damaged
bases that are rough or burred. Permanent
scratching may occur when the pans are slid.
• When cold, pan bases are normally bowed slightly
inwards (concave). They should under no circumstances be bowed outwards (convex).
Tips on Saving Energy
2
You will save valuable energy if you observe the following tips:
• Always place pans on the cooking zone before switching on.
• Soiled cooking zones and pan bases increase the
electricity consumption.
• If possible, always fit pans with a lid.
• Switch off the cooking zones before the end of
cooking to make use of the residual heat, e.g. to
keep food warm or for melting.
• The pan base and cooking zone should be the
same size.
When purchasing pans, pay attention to the diameter of the base. Manufacturers often state the
diameter of the top of the pan
• Cooking times are reduced by up to 50% when a
pressure cooker is used.
42
Page 11

Operating Instructions
Cleaning and Care
Ceramic Glass
Important: Cleaners must not come into contact with the ceramic
1
glass when hot! All cleaners must be removed with plenty of clean
water after cleaning as they may have a caustic effect when the rings
are next heated!
Do not use any aggressive cleaners, such as e.g. grill or oven sprays,
coarse scouring cleaners or pan cleaners that cause scratches.
Clean the ceramic glass surface after each use when it is hand warm or
3
cold. By this means you will avoid soiling becoming burnt on.
Remove scale and water marks, fat spots and metallic shimmering discoloration with a commercially available ceramic glass or stainless steel
cleaner, e.g. with “Stahl-Fix“ or “Vitroclen“.
Light Soilage
1. Wipe the ceramic glass surface with a damp cloth and a little washing
up liquid.
2. Then rub dry with a clean cloth. No residues of cleaner must be left on
the surface.
3. Once a week, thoroughly clean the entire ceramic glass surface with a
commercially available ceramic glass cleaner such as “Vitroclen“.
4. Then wipe the ceramic glass surface with plenty of clean water and rub
dry with a clean fluff-free cloth.
Stubborn Soilage
0 1. To remove food that has boiled over or
burnt on spots, use a glass scraper.
2. Place the glass scraper at an angle to the
glass ceramic surface.
3. Remove soiling by sliding the scraper.
You can obtain glass scrapers and cera-
3
mic glass cleaners from your specialist
retailers.
43
Page 12

Operating Instructions
1 Burnt on Soilage
0 1. Remove burnt on sugar, melted plastic,
aluminium foil or other melted materials
immediately, while the hob is still hot,
using a glass scraper.
Important: When using the glass scraper
1
on the hot cooking zone, there is a risk of
burns!
2. Clean the cooking surface as normal once
it is cold.
If the cooking zone has cooled down
3
already prior to the soilage being removed, warm it up again for cleaning.
Scratches or dark marks on the ceramic glass surface, which have been
caused by a pan base with sharp edges, cannot be removed. However,
they do not impair the function of the cooking surface.
The Hob Frame
Important! Do not put vinegar, lemons or scale removers on the hob
1
frame, otherwise mat spots will appear.
0 1. Wipe the frame with a damp cloth and a little washing up liquid.
2. Soften dried dirt with a wet cloth. Then wipe off and rub dry.
44
Page 13

Operating Instructions
What to do if ...
... the cooking zones do not function?
0 Check whether
• the corresponding cooking zone is switched on,
• the switch is set to the correct heat setting,
• the mains fuse (fuse box) has blown.
... after the cooking zones are switched off, no H for residual heat
appears in the display?
0 Check whether
• the cooking zone was only in operation for a short time and is therefore not yet hot enough,
• there has been a power cut.
If the cooking zone is still hot, call AEG Customer Service
... the letter F in the digital display flashes?
0 Check whether
• the pan is on the right cooking zone,
• the pot base diameter is too small for the cooking zone,
• there is an unsuitable pan on the cooking zone.
j appears in the digital display?
...
The automatic 3 hour switch-off feature for the cooking zone has
responded.
0 • You can reactivate the cooking zone by turning it quickly off and
then on again.
If this information does not provide you with the necessary assistance, please seek specialist advice.
Warning: Repairs to the appliance may only be carried out by approved
1
service engineers! Improper repairs can give rise to significant hazards
for the user. If your appliance needs repairing, please contact your dealer or customer service.
45
Page 14

Service
SERVICE
In the “What to do, if …” section a number of malfunctions are listed
that you can rectify yourself. In the event of a malfunction, look there
first.
Is it a technical malfunction?
Then please contact your customer service centre. (You will find addresses and telephone numbers in the "Customer Service Centres" list.)
Always take the time to prepare yourself for the call. By this means you
will make diagnosis of the problem easier and also make it easier to
decide if a customer service visit is necessary:
Please determine as accurately as
possible:
• How is the malfunction noticeable ?
• Under what circumstances does
the malfunction occur?
Prior to the telephone call it is imperative that you make a note of the
following appliance code numbers that are given on the rating plate:
• PNC Code (9 digits),
• S-No Code (9 digits).
We recommend you to record the code numbers here so that you
always have them at hand:
46
PNC . . . . . . . . .
S-No . . . . . . . . .
When will you be charged, also during the warranty period?
• when you could have rectified the malfunction with aid of the Table
of Malfunctions (see “What to do, if ...” section),
• if the customer service engineer has to make several calls because he
was not given important information prior to his visit, and therefore,
e.g., had to fetch replacement parts. You can avoid multiple calls if
you prepare yourself well for the telephone call, as described above.
Page 15

Installation Instructions
INSTALLATION INSTRUCTIONS
1 Important! This appliance must be installed by qualified personnel,
according to the manufacturer’s instructions and to the relevant country standards.
Please observe this instruction, otherwise the warranty will not cover
any damage that may occur.
Technical Data
Appliance Dimensions
Width 570 mm
Depth 500 mm
Height 41 mm
Cut-Out Dimensions
Width 560 mm
Depth 490 mm
Corner radius R3
Power Consumption
Single ring cooking zone ø 145 mm 1200 W
Double ring cooking zone ø 120/210 mm 2200 W
Casserole zone ø 170 mm – 265 mm 2300 W
Heating element voltage 230 V ~
Total power, max. 6.9 kW
47
Page 16

Installation Instructions
Regulations, Standards, Directives
This appliance meets the following standards:
• EN 60 335-1 and EN 60 335-2-6
in respect of the safety of electrical appliances for household use and
similar purposes and
• DIN 44546 / 44547 / 44548
in respect of properties of electric cookers for the household.
• EN 55014-2 / VDE 0875 part 14-2
• EN 55014 / VDE 0875 part 14/12.93
• EN 61000-3-2 / VDE 0838 part 2
• EN 61000-3-3 / VDE 0838 part 3
in respect of basic electromagnetic compatibility (EMC) requirements.
This appliance complies with the EU Directives
;
• 73/23/EWG dated 19.02.1973 (Low Voltage Directive)
• 89/336/EWG dated 03./05.1989 (EMC Directive
including Directive Amendment 92/31/EWG).
48
Page 17

Installation Instructions
1 Safety Instructions for the Installer
• This hob must be installed by qualified personnel, according to the
manufacturer’s instructions and to the relevant country standards.
• In respect of fire protection, this appliance corresponds to type Y (IEC
335-2-6). Only this type of appliance may be installed with a high
cupboard or wall on one side.
• It is not permitted to fit drawers below the cooking surface.
• Protection against electric shock must be provided by the installation.
• The kitchen unit in which the appliance is fitted must satisfy the
requirements of DIN 68930 in respect of stability.
• Built-in ovens and cooking surfaces are fitted with special connector
systems. They may only be combined with appliances with a matching
system.
• All cut surfaces are to be sealed with a suitable sealant for protection
against moisture.
• On tiled work surfaces, the joints in the area where the hob sits on
the surface must be completely filled with grout.
• On natural, artificial stone, or ceramic tops, the snap action springs
must be bonded in place.
• Ensure that the seal is correctly seated in the frame and that it is seated against the work surface without leaving any gaps. Additional
silicon sealant must not be applied, this will make removal more difficult in the event of the need for service.
• To remove the hob, it must be pressed out from below.
Electrical connection
• Connect the wiring harness plugs with the respective sockets of the
same colour of the built-in oven or switch box.
49
Page 18

MONTAGE / INSTALLATION / ASENNUS /
МОНТАЖ
104
Page 19

min.
25 mm
min.
5 mm
105
Page 20

E XXXX-1: 1.1 - 1.6
E XXXX: 2.1 - 2.12
E XXXX-1
1.1
106
Page 21

1
1.2
107
Page 22

1.3 1.4
1.5
108
1.6
Page 23

2.1
E XXXX
109
Page 24

110
2.2
2.3
Page 25

2.4
2.5
2.6
111
Page 26

2.7 2.8
2.9
112
2.10
Page 27

2.11
2.12
Ausbau in umgekehrter Reihenfolge
Demonteren in omgekeerde volgorde
Remove in reverse order
Demontering utförs i omvänd ordningsföljd
Purkaminen päinvastaisessa järjestyksessä
Демонтаж â обратном порядке
113
Page 28

E XXXX-1 + E XXXX
114
Page 29

115
 Loading...