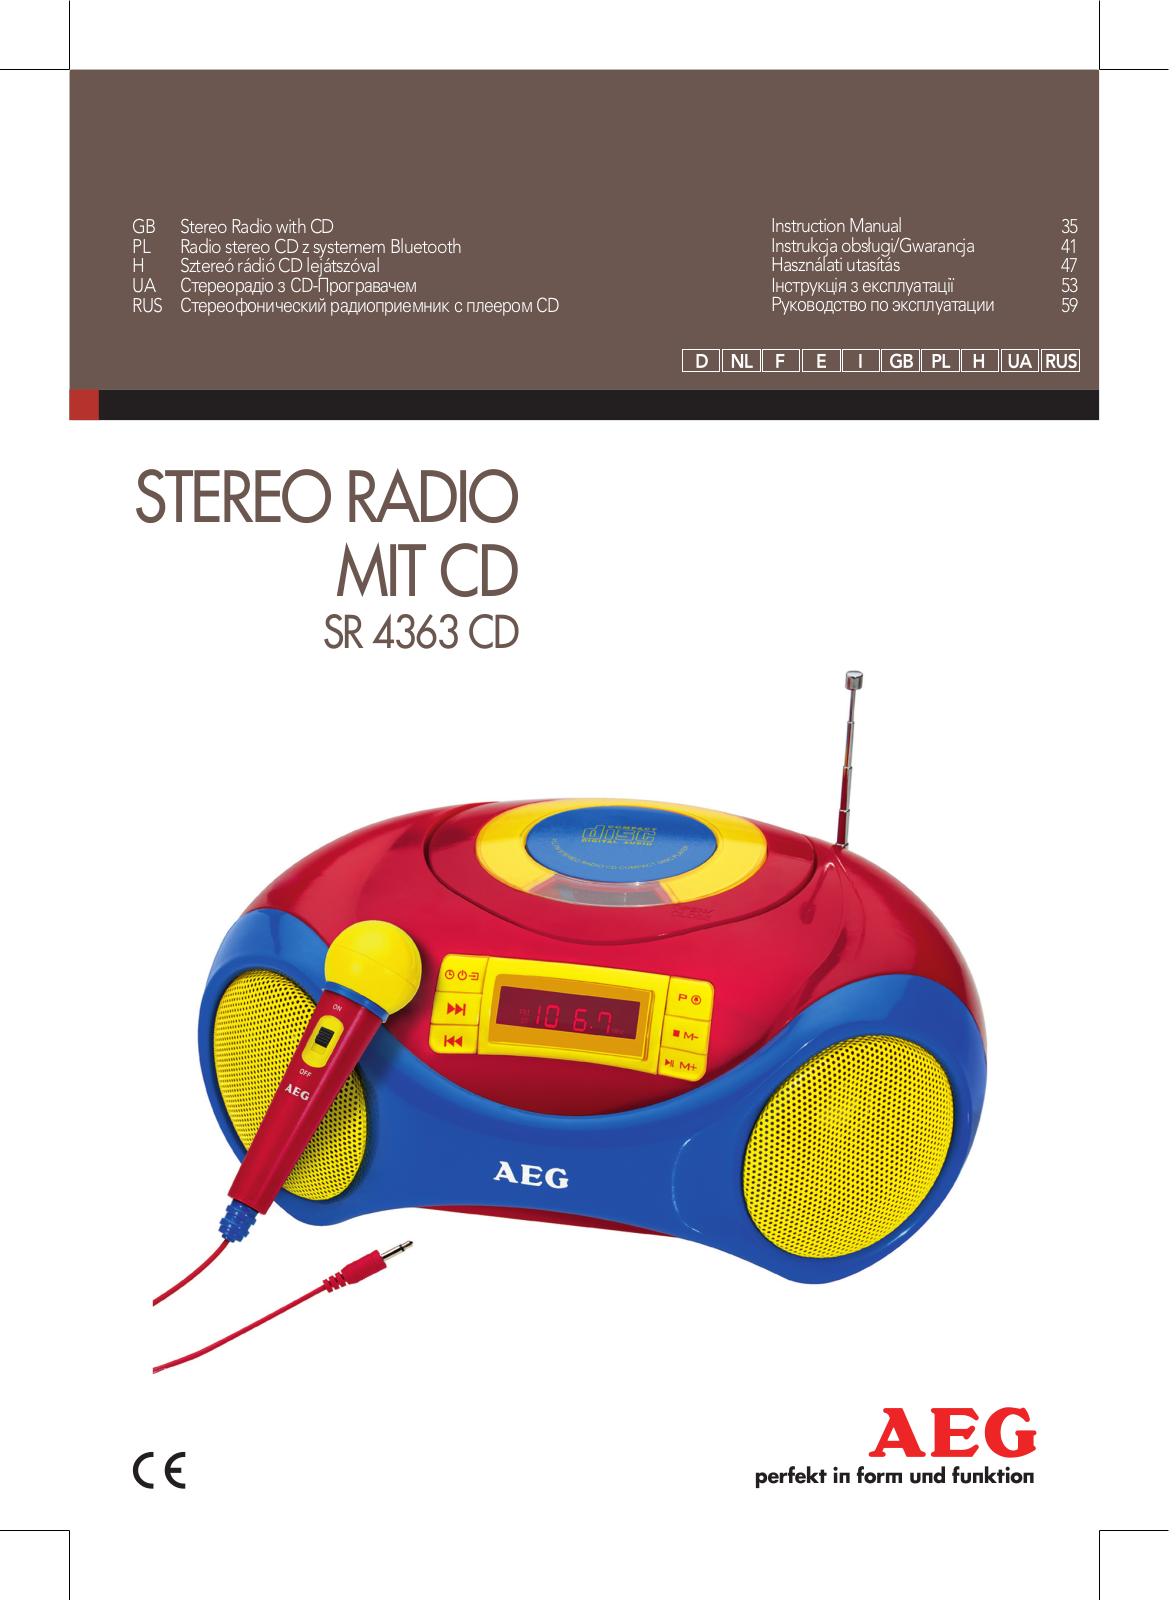
AEG SR 4363 CD User guide [ml]

AEG SR 4363 CD User guide


GB

Stereo Radio with CD

Instruction Manual

35


PL

Radio stereo CD z systemem Bluetooth

Instrukcja obsługi/Gwarancja

41


H

Sztereó rádió CD lejátszóval

Használati utasítás

47


UA

Стереорадіо з CD-Програвачем

Інструкція з експлуатації

53


RUS

Стереофонический радиоприемник с плеером CD

Руководство по эксплуатации

59


STEREO RADIO

MIT CD

SR 4363 CD

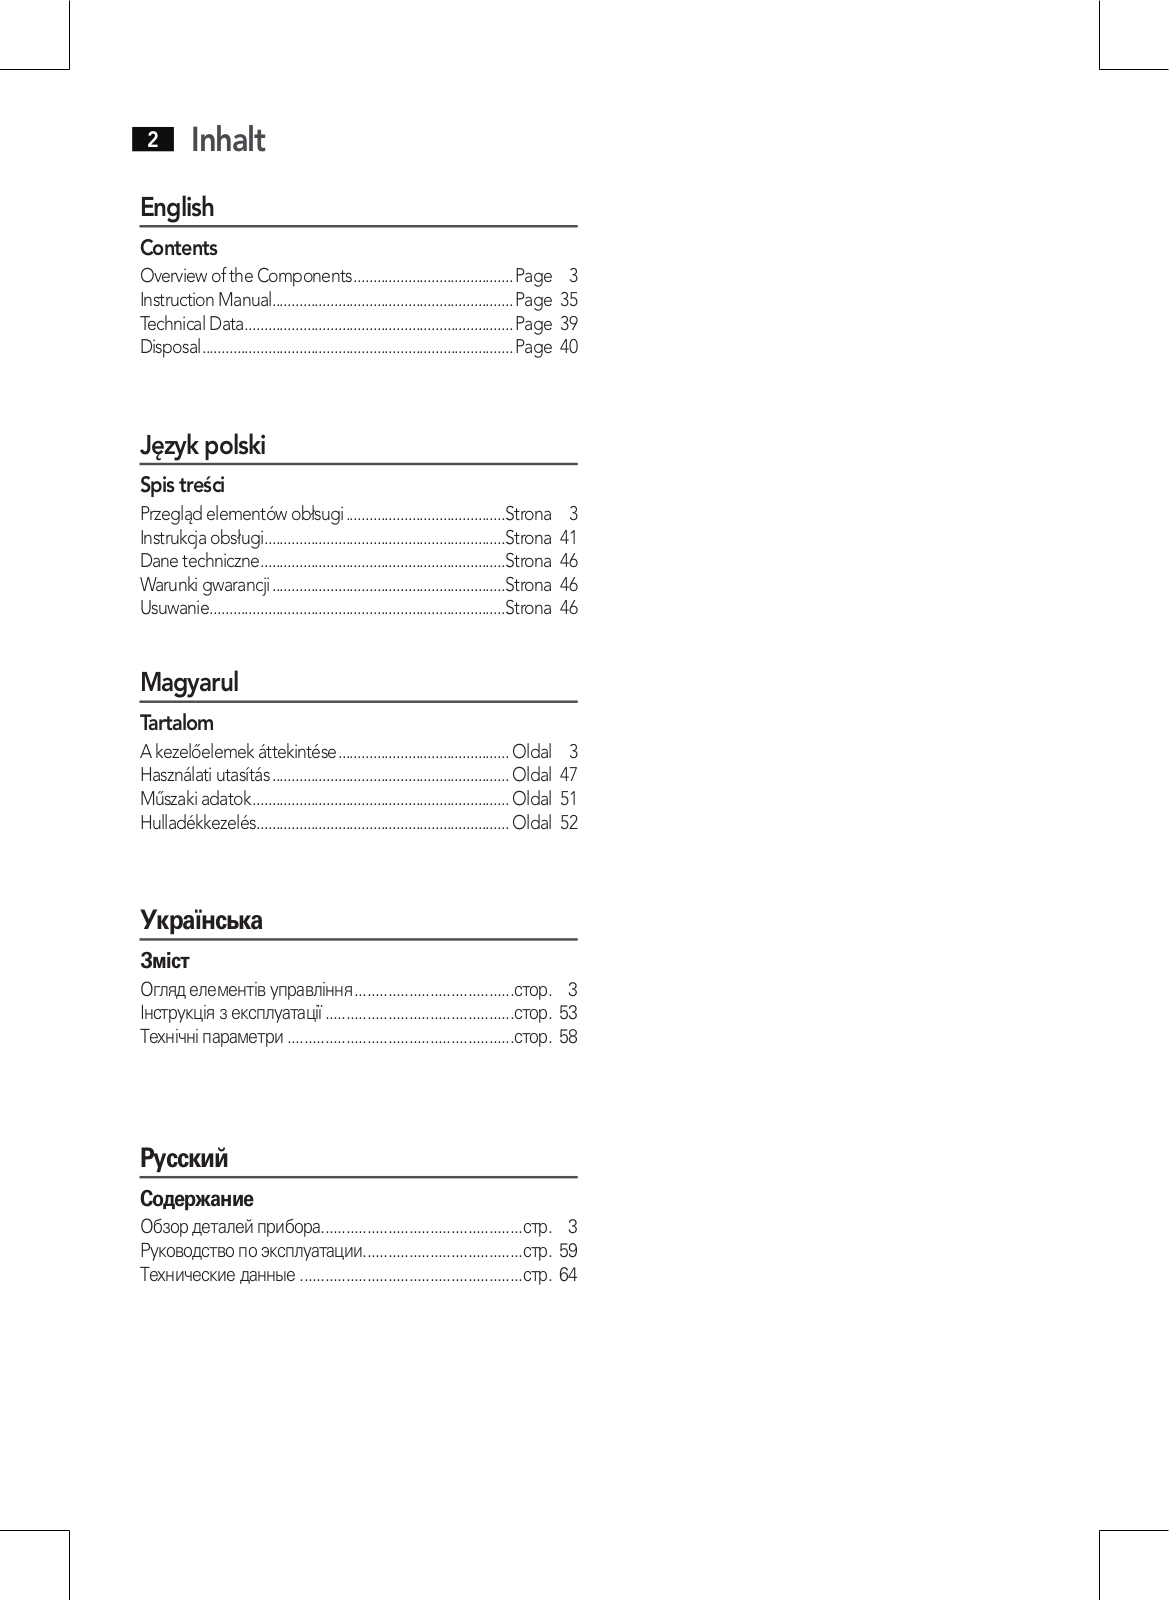
2 Inhalt

English

Contents

Overview of the Components..........................................

Page

3

Instruction Manual..............................................................

Page 35

Technical Data.....................................................................

Page 39

Disposal................................................................................

Page

40

Język polski

Spis treści

Przegląd elementów obłsugi

.........................................Strona

3

Instrukcja obsługi..............................................................

Strona 41

Dane techniczne...............................................................

Strona 46

Warunki gwarancji.............................................................

Strona 46

Usuwanie............................................................................

Strona

46

Magyarul

Tartalom

A kezelőelemek áttekintése............................................

Oldal

3

Használati utasítás..............................................................

Oldal 47

Műszaki adatok..................................................................

Oldal 51

Hulladékkezelés.................................................................

Oldal

52

Українська

Зміст

Огляд елементів управління.......................................

стор.

3

Інструкція з експлуатації..............................................

стор. 53

Технічні параметри.......................................................

стор.

58

Русский

Содержание

Обзор деталей прибора................................................

стр. 3

Руководство по эксплуатации......................................

стр. 59

Технические данные......................................................

стр. 64

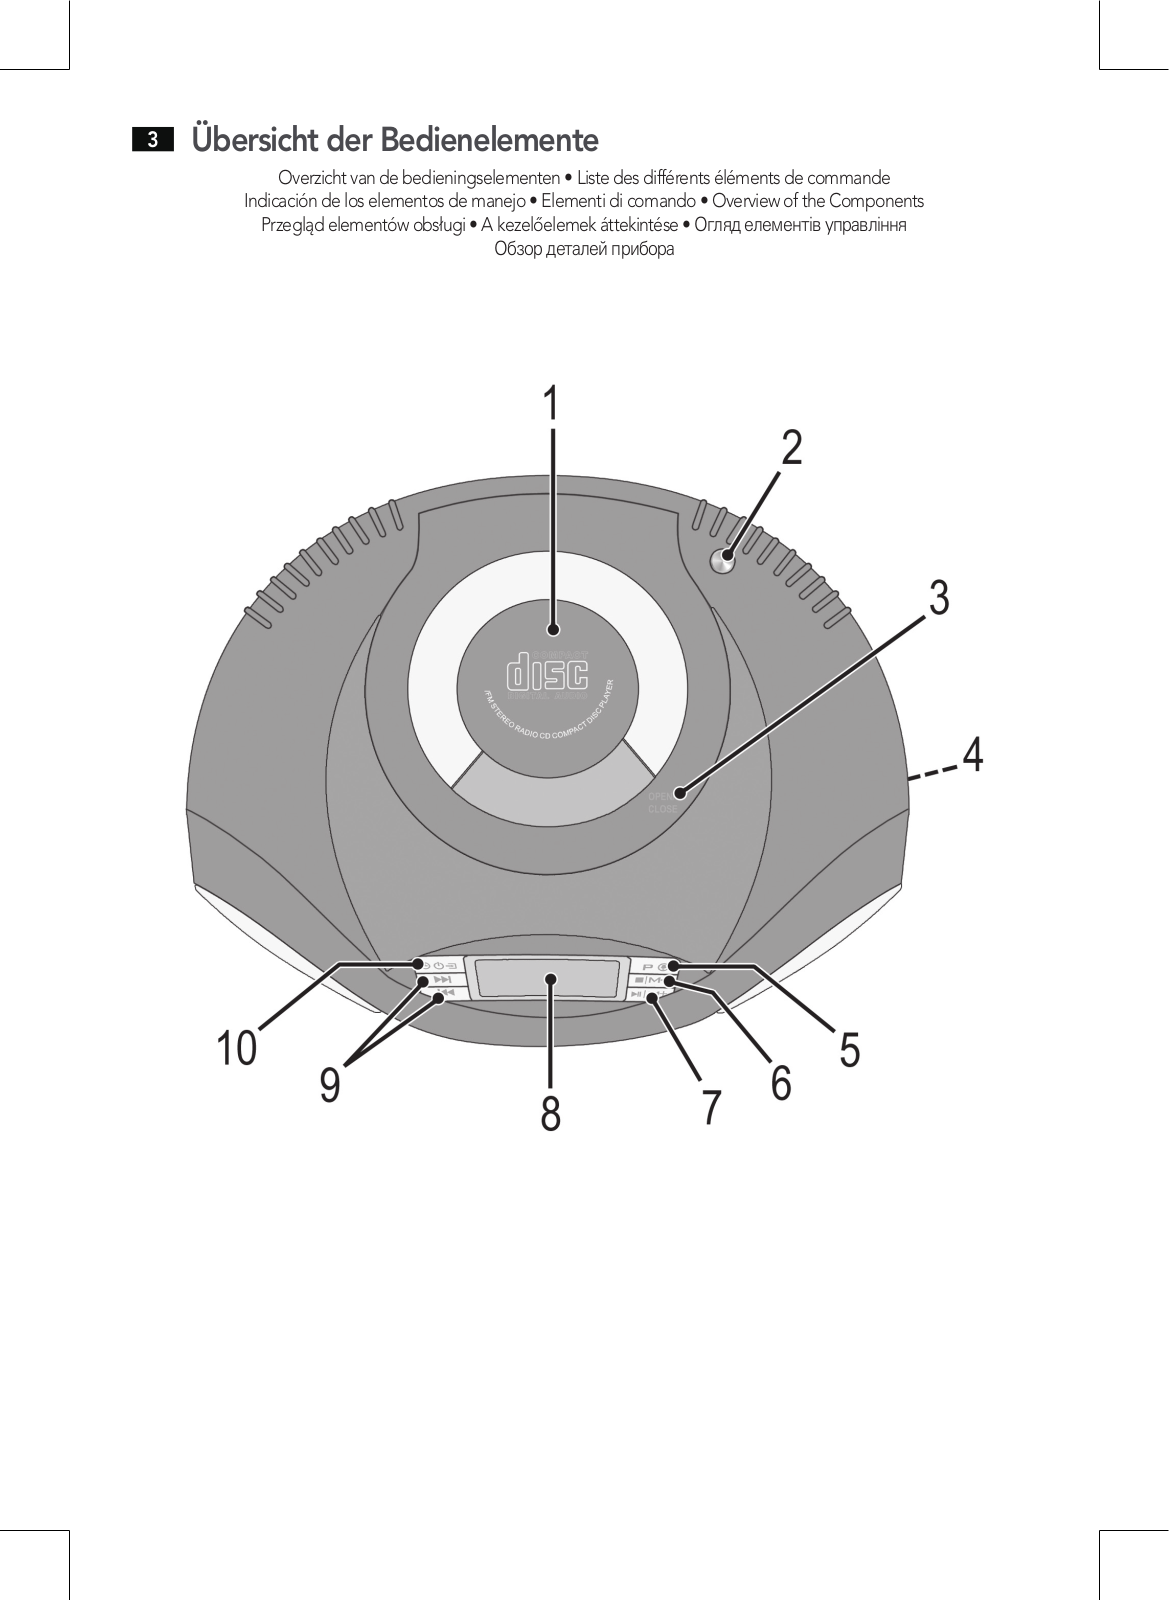
3 Übersicht der Bedienelemente

Overzicht van de bedieningselementen • Liste des différents éléments de commande Indicación de los elementos de manejo • Elementi di comando • Overview of the Components Przegląd elementów obsługi • A kezelőelemek áttekintése •Огляд елементів управління Обзор деталей прибора

Instruction Manual

Thank you for choosing our product. We hope you enjoy using the device.

Read the operating instructions carefully before putting the appliance into operation and keep the instructions including the warranty, the receipt and, if possible, the box with the internal packing. If you give this device to other people, please also pass on the operating instructions.

Safety Instructions

Caution!

Not suitable for children under 3. Small parts may break off and be swallowed.

To avoid the risk of fire or electric shock, you should not expose the device to rain or humidity. Do not use the device near water (e.g. bathroom, swimming pool, humid cellars).

Do not use the unit in extremely hot, cold, dusty, or damp places.

The unit is designed solely for private use and its intended purpose. This unit is not designed for commercial use.

Make sure that the power cable is not bent, pinched, or comes into contact with heat sources.

Make sure that the power cable is not a tripping hazard.

The power supply unit is only suitable for use in dry rooms.

Never touch the power supply unit or the cable with wet hands.

Only connect the power supply unit to a properly installed wall outlet. Ensure that the listed voltage matches the voltage of the wall outlet. Also ensure that the output current, voltage and the polarity of the power supply unit match the information on the connected device.

Always install batteries in the correct direction.

Avoid covering the device’s vent openings.

Never cover the vent holes with objects, such as magazines, tablecloths, curtains etc.

This appliance shall not be exposed to dripping or splashing water and that no object filled with liquids such as vases shall be placed on apparatus.

Open sources of fire, such as e.g. burning candles may not be placed onto the unit.

Never open the device’s case. Improper repairs can cause severe danger to the user. If the device or particularly the power cord is damaged, don’t use the device any further and have it repaired by a qualified specialist. Check the power cord regularly for damage.

If you do not use the device for a long period of time, pull the power supply unit from the wall socket and/or remove the batteries.

English 35

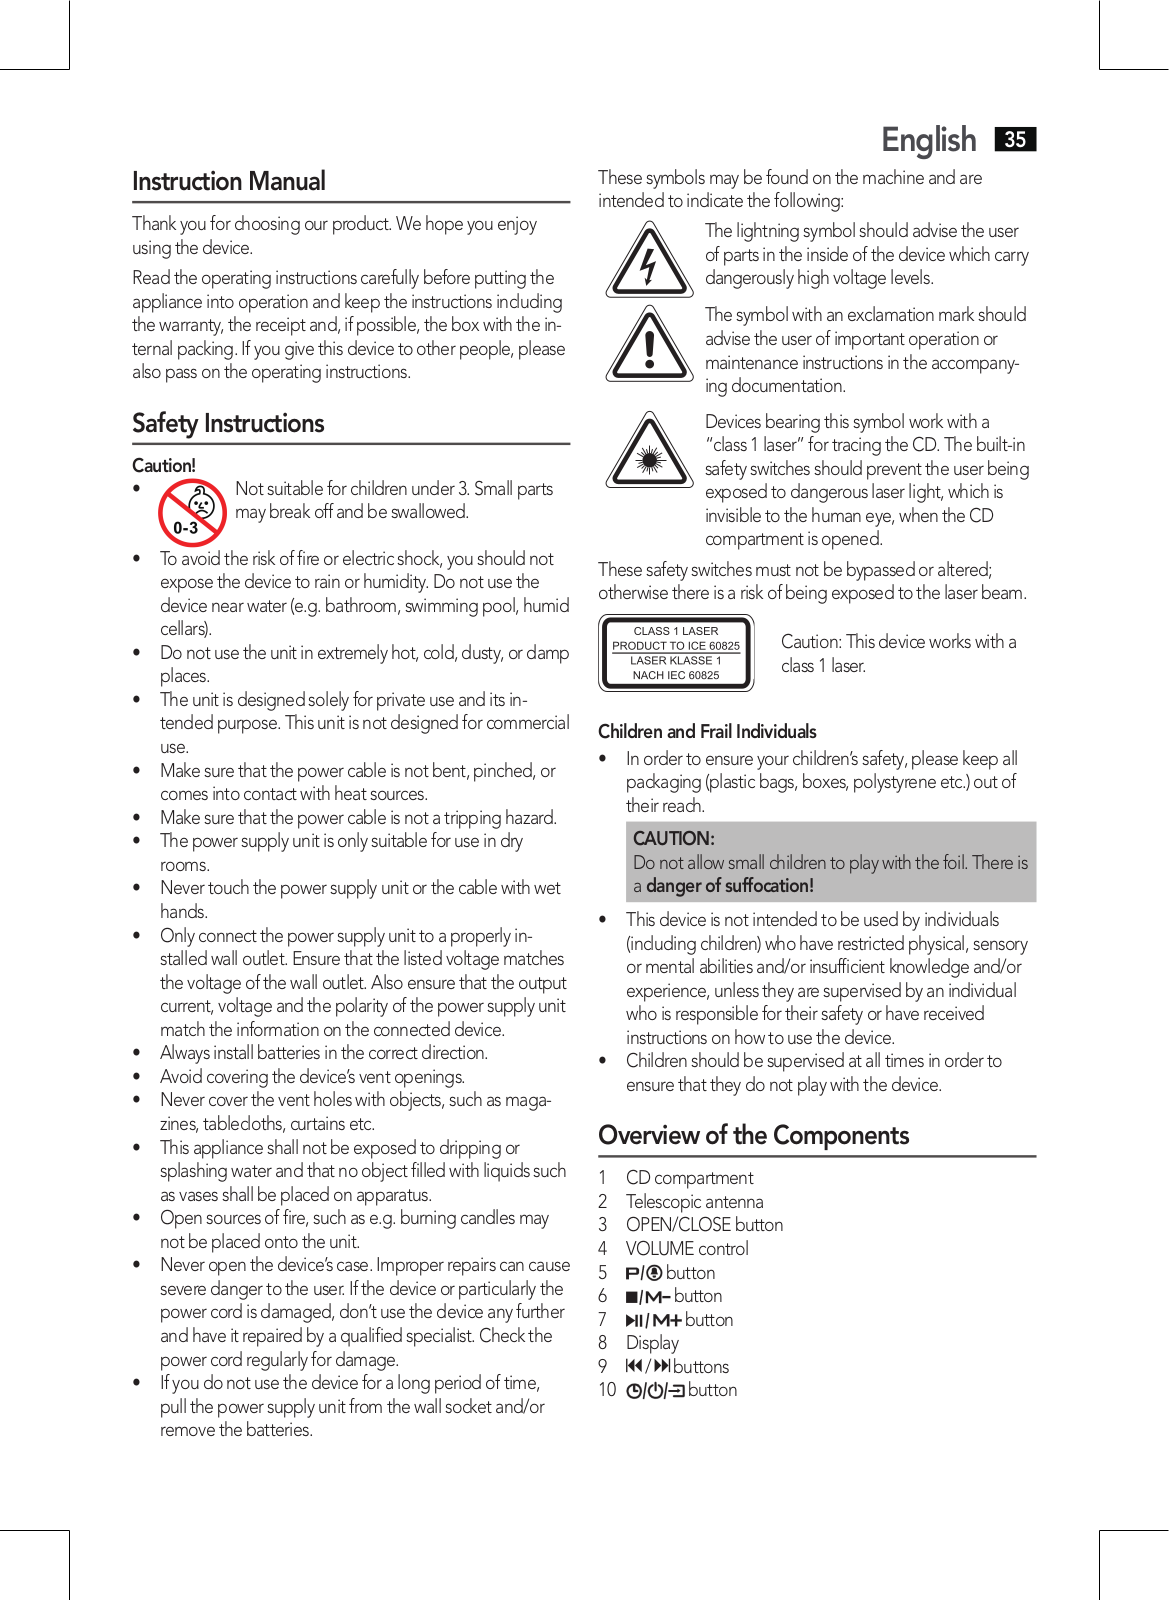
These symbols may be found on the machine and are intended to indicate the following:

The lightning symbol should advise the user of parts in the inside of the device which carry dangerously high voltage levels.

The symbol with an exclamation mark should advise the user of important operation or

maintenance instructions in the accompanying documentation.

Devices bearing this symbol work with a “class 1 laser” for tracing the CD. The built-in

safety switches should prevent the user being exposed to dangerous laser light, which is invisible to the human eye, when the CD compartment is opened.

These safety switches must not be bypassed or altered; otherwise there is a risk of being exposed to the laser beam.

Caution: This device works with a class 1 laser.

Children and Frail Individuals

In order to ensure your children’s safety, please keep all packaging (plastic bags, boxes, polystyrene etc.) out of their reach.

CAUTION:

Do not allow small children to play with the foil. There is a danger of suffocation!

This device is not intended to be used by individuals

(including children) who have restricted physical, sensory or mental abilities and/or insufficient knowledge and/or experience, unless they are supervised by an individual who is responsible for their safety or have received instructions on how to use the device.

Children should be supervised at all times in order to ensure that they do not play with the device.

Overview of the Components

1CD compartment

2Telescopic antenna

3OPEN/CLOSE button

4VOLUME control

5 button

6 button

7 button

8Display

9/ buttons

10 button

36 English

Reverse (not shown)

DC 5 V power adapter socket

AUX input

MIC (microphone input)

USB port

Underside (not shown)

Battery compartment

Start-up of the device/introduction

Select a suitable location for the device, such as a dry, flat, non-slip surface on which it is easy to operate the machine.

Ensure that the device is sufficiently ventilated!

Remove the protective film from the display if it is still present.

Power supply

Make sure the grid voltage corresponds to the figures on the rating plate.

Plug the power supply unit into a properly installed protective contact socket.

Connect the device with the power supply unit by plugging the jack of the power supply unit into the “DC 5 V “ jack.

CAUTION:

This device should only be used with the mains supply unit (included). Do not use it for other devices.

Only use a 5 V power supply unit ( ). A different supply unit may damage the device.

NOTE:

Disconnect from mains power supply during longer periods of non-use.

Inserting the Batteries (not supplied)

1.Open the lid of the battery compartment on the bottom.

2.Insert 4 batteries of type UM 2/R14 1.5 V. Please ensure that the polarity is correct (see the floor of the battery compartment)!

3.Then close the battery lid.

CAUTION:

Do not expose the batteries to high temperatures or direct sunlight. Never throw batteries into the fire. There is a danger of explosion!

Batteries may leak and lose battery acid. If the device is out of use for long periods, remove the batteries.

Non-rechargeable batteries may not be charged.

Chargeable batteries may only be charged under adult supervision.

Chargeable batteries must be removed from the toy before they are charged.

CAUTION:

Different battery types or new and used batteries must not be used together.

Batteries must be inserted with the correct polarity.

Spent batteries must be removed from the toy.

Batteries are not to be disposed of together with domestic wastes. Dispose of the used batteries at the relevant collection bin or at your dealer’s.

The terminals may not be short-circuited.

NOTE:

When the power adapter is connected, the device will automatically disconnect the batteries.

Setting the clock

The system must be in standby mode in order to set the clock.

1.Press and hold the button (10) for approx.

2 seconds. “24H” starts flashing in the display.

2.Use the / buttons (9) to select 24-hour or 12-hour display format.

NOTE:

If the 12-hour format has been selected, “AM” will be displayed in the morning.

3.Press the button to confirm your settings. The hour indicator starts flashing.

4.Use the / buttons to set the hours accordingly.

5.Press again. The minute digits start flashing.

6.Use the / buttons to set the hours accordingly.

7.Press again.

NOTE:

The clock time settings will be erased in the event of power interruptions.

If you do not press any button within 4 seconds, the settings are adopted automatically.

Transport Safety Device, CD Compartment

1.Open the CD compartment (1) by pressing the OPEN/ CLOSE button (3).

2.Before operating the machine for the first time, remove the transport safety device from the CD player if it is still in place.

Turning device on/ off

Press the button (10) to turn the device on.

To turn off the device, keep the button pressed for approx. 3 seconds.

NOTE:

After about 15 minute without a signal, the device will automatically switch to standby.

Volume

Use the VOLUME control (4) to adjust the volume as desired.

Microphone

You may connect the microphone during CD, USB or AUX mode to use the Karaoke function.

1.Connect the microphone to the MIC socket on the back.

2.Use the switch on the microphone to turn the function on (ON) or off (OFF).

NOTE:

In order to avoid acoustic feedback (sharp whistling sound), use the microphone outside the speaker radiation zone.

Listening to the Radio

1.Use the button (10) to select the radio mode.

2.Completely extend the telescopic antenna. Change its position to improve the reception.

3.Searching radio stations:

Briefly press the / button (9), until you have found the radio station which you are looking for. If you keep one of the buttons pressed down, the device will search to the previous, respectively next radio station.

Preset station:

1.Search for the desired radio station with the / button (9).

2.To store the radio station, press the button (5). The notification “P 01” flashes on the display.

3.Use the / buttons to select the desired preset location.

4.Press the button. The radio station will be stored.

NOTE:

“ST” appears in the display during stereo reception.

Select the preset radio station

Select a preset radio station by repeatedly pressing the / buttons (6/7).

Playing CDs/MP3

1.Select the CD mode with the button (10). The following will appear in the display “CD - - -”.

2.Open the CD compartment (1) by pressing the OPEN/ CLOSE button (3).

3.Insert an audio CD with the printed side facing upwards on to the central cone so that the CD clicks into place and then close the lid of the CD compartment.

4.After a few seconds the total number of songs/tracks is shown in the display.

NOTE:

In the case of CDs in MP3 format the number of folders is briefly displayed at first.

English 37

5.The CD will play from the first title. The elapsed play time

and the message “” respectively “MP3” are shown in the display.

6.In order to remove a CD, please press the button (6), open the CD compartment and lift the CD out carefully.

Always keep the CD deck closed.

NOTE:

If a disc is inserted the wrong way around, respectively if no disc is inserted, then the message “- - -” will blink and “” appears on the display.

Playback of CDs produced by the user cannot be guaranteed due to the large variety of software and CD media available.

Playing music via USB

This device has been developed in line with the latest technical advances in the USB field. The wide range of different USB storage devices of all types which are currently on the market, unfortunately do not allow us to guarantee full compatibility with all USB storage devices. For this reason, in rare cases there may be problems in playing back files from USB storage devices. This is not a malfunction of the device.

1.Press the button (10) repeatedly until “- - - USB” is shown on the display.

2.Connect a USB storage device directly into the port. The display briefly shows the number of folders and then the total number of tracks. Playback will automatically start after a few seconds.

For operation, please refer to the section “Description of the control buttons”.

NOTE:

Always directly connect a USB storage medium to the USB port to prevent any malfunctions.

The USB port is not designed for charging external devices.

Important: Switch the device to a different operating mode before you remove the USB storage device.

Description of the control buttons

NOTE:

Not all the functions may be supported depending on the playback device.

(7)

You can briefly interrupt and resume playback using this button. The display shows the elapsed playback time flashing. Pressing again continues playback.

For selecting a preset radio station during radio mode.

38 English

/ (9)

With you can jump to the next or previous track etc.

If the button is kept pressed down, the machine starts to search through the tracks.

The button can be used as follows:

Pressonce=

Thisstartsthecurrenttrackagainfrom


the beginning.

Presstwice=

Thisjumpsbacktotheprevioustrack.

Pressthreetimes= Thisplaysthesongbeforeetc.Ifthebutton is kept pressed down, the machine starts to search through the tracks.

(6)

The playback is stopped.

For selecting a preset radio station during radio mode.

(5)

In stop mode for programming any order of tracks (see the section on “Programmed Play”).

For setting the alarm time in standby mode (see the chapter “Alarm function“).

During playback:


Pressonce=

thecurrenttrackisrepeatedcontinu-


ously. The symbol is lit in the display.

Presstwice=

thewholeCDisplayedcontinuously.


The symbol

is lit in the display.

Pressthreetimes=

RANappearsonthedisplay.Alltracks


will be played in random order.

Pressfourtimes=

allfunctionsarecancelled.Thenormal


play mode is resumed.

Programmed Play

This can be used to program any desired sequence of tracks.

1.Press the button (6).

2.Press the button (5). “P01” (Storage space) and the notification “” will appear in the display. Use the / buttons (9) to select the desired track and then press the button again. The display changes to memory slot P02.

3.Select the next track with the / buttons and press the button again. Repeat the procedure until all the desired tracks are selected.

NOTE:

When the memory capacity for programming tracks has been reached, “FUL” will appear in the display.

4.Press the button (7). The playback starts. The notification “” will appear additionally in the display.

5.Press once the button to stop the playback while retaining the program.

6.To play the programme back again, press the button.

7.To delete the program, press the button twice. The notification “” will disappear.

The device stops automatically after all programmed titles have been played. The programmed sequence will be stored in the memory until you switch to another mode.

Playing back Music in MP3 Format

With this device it is possible to play back pieces of music in MP3 format. The device also supports all standard CD types: CD, CD-RW, CD-R.

This machine of is able to play MP3 CDs. Up to 200 tracks can be compressed and stored on these CDs. Your machine detects an MP3 CD automatically (the total number of tracks and MP3s appears in the display). If you would like to play one of these CDs, proceed as described under “Playing CDs/MP3”. Tracks can be programmed as described under “Playing Back Programmed Tracks”.

Please note:

There are a number of different recording and compression methods, as well as quality differences between CDs and selfrecorded CDs.

Furthermore, the music industry does not adhere to fixed standards (copy protection).

For these reasons it is possible that in rare cases there are problems with the playback of CDs and MP3 CDs. This is not a malfunction of the device.

AUX IN socket

To connect analogue replay devices. Via this socket you can also hear the sound of other playback devices such as MP3 players, CD players etc. through the loudspeakers.

1.Please connect the external device with a 3.5 mm stereo jack plug to the AUX socket.

2.Repeatedly press the button (10), until “AU” is shown in the display.

3.You will hear the sound playback from the external device through the loudspeakers. Use the VOLUME control (4) to adjust the volume. The CD buttons are not functional.

4.For the remaining procedure please see the operating instructions of the external sound source.

NOTE:

Adjust the volume of the external device to a comfortable level.

Alarm function

Setting the alarm time

1.Briefly press the button to activate the standby mode.

2.Briefly press the button. “” appears in the display and the hour indicator starts flashing.

3.Use the / buttons to adjust the settings.

4.Press to confirm. The minute indicator starts flashing in the display.

5.Use the / buttons to adjust the settings.

6.Then select the wake-up mode. Choose one of the following settings:

- (buzzer): The buzzer sounds when the alarm time has been reached.

- (radio): When the pre-set alarm time has been reached, the radio turns on and tunes in the radio station listened to last.

- (CD): Make sure a CD has been inserted in the CD compartment. Playback starts when the alarm time has been reached.

- (USB): Make sure a USB device has been connected. Playback starts when the alarm time has been reached.

7.Press the button again to store the alarm time.

8.Use the VOLUME control (4) to select a volume setting at which you like to wake up.

When the pre-set alarm time has been reached, the device will turn on activating the selected mode.

NOTE:

If no CD has been inserted or no USB device has been connected, the device will wake you with the buzzer instead.

Turning off the alarm sound

Press the button (10) to turn off the alarm signal until the next day.

NOTE:

The alarm function will turn off automatically after 60 minutes.

Deactivating the alarm function

Press the button (5) repeatedly during standby mode until the “” symbol disappears from the display.

Cleaning and Maintenance

CAUTION:

Do not immerse the device in water.

Always remove the mains plug before cleaning the machine.

Any marks on the surface can be wiped off with a slightly damp cloth without any additives.


English


39


Troubleshooting


Symptoms

Course


Solution


CD can not be

CD is not inserted


Ensure that the disc is


played back.

or inserted incor-


inserted with the label


rectly.


facing upwards.


Batteries too weak.

Insert new batteries


or operate the device


with the mains lead.


CD jumps dur-

Check the disc for


Check the disc for


ing playback.

fingerprints, dirt or


fingerprints, dirt or


scratches.


scratches.


Device cannot

Device crashes and

Disconnect the power


be operated.

“hangs”.


supply for 5 sec. Then


switch the device on


again.


Sharp whistling

Acoustic feedback.

Use the microphone


sound during


outside the speaker


microphone


radiation zone.


use.


Technical Data


Model:.............................................................................


SR 4363 CD

Power supply:............................................


DC 5 V, 1.2 A,


Battery operation:...................................

4 x 1.5 V, Type UM2/R 14

Power consumption:...................................................................


9 W

Protection class:................................................................................


III

Net weight:...............................................................


approx. 1.05 kg

Radio section:


Frequency ranges:................................


FM 87.5 ~ 108.0 MHz

Power supply unit


Protection class:.................................................................................


II

Input:........................................................


AC 100-240 V~ 50/60 Hz

Output:...........................................................................


DC 5 V, 1.2 A

The right to make technical and design modifications in the course of continuous product development remains reserved.

This device has been tested according to all relevant current CE guidelines, such as electromagnetic compatibility and low voltage directives, and has been constructed in accordance with the latest safety regulations.

40 English

Disposal

Meaning of the “Dustbin” Symbol

Protect our environment: do not dispose of electrical equipment in the domestic waste.

Please return any electrical equipment that you will no longer use to the collection points provided for their disposal.

This helps avoid the potential effects of incorrect disposal on the environment and human health.

This will contribute to the recycling and other forms of reutilisation of electrical and electronic equipment.

Information concerning where the equipment can be disposed of can be obtained from your local authority.

Instrukcja obsługi

Dziękujemy za wybranie tego produktu. Mamy nadzieję, że korzystanie z tego urządzenia będzie przyjemne.

Przed uruchomieniem urządzenia proszę bardzo dokładnie przeczytać instrukcję obsługi. Proszę zachować ją wraz z kartą gwarancyjną, paragonem i w miarę możliwości również kartonem z opakowaniem wewnętrznym. Przekazując urządzenie innej osobie, oddaj jej także instrukcję obsługi.

Instrukcje dotyczące bezpieczeństwa

Uwaga!

Nie odpowiednie dla dzieci poniżej 3 roku


życia. Małe części mogą się odłamać i zostać

połknięte.

• Aby uniknąć ryzyka porażenia prądem, nie wolno narażać urządzenia na działanie deszczu ani wilgoci. Nie korzystać z urządzenia w pobliżu wody (np. w łazience, na basenie, w wilgotnych piwnicach)

• Urządzenia nie należy używać w bardzo gorących, zimnych, zakurzonych ani wilgotnych miejscach.

• Z urządzenia należy korzystać wyłącznie do celów prywatnych i zgodnie z przeznaczeniem. Urządzenie to nie jest przeznaczone do użytku komercyjnego.

• Sprawdzić, czy kabel zasilający nie jest skręcony, zaczepiony lub nie styka się ze źródłami gorąca.

• Sprawdzić, czy kabel zasilania nie powoduje ryzyka potknięcia.

• Zasilacz może być używany wyłącznie w suchych pomieszczeniach.

• Zasilacza ani kabla nie należy nigdy dotykać mokrymi rękoma.

• Zasilacz należy podłączać wyłącznie do odpowiednio zamontowanego gniazda elektrycznego. Należy upewnić się, że wskazane napięcie jest zgodne z napięciem gniazda elektrycznego. Należy także sprawdzić, czy prąd wyjściowy, napięcie i biegunowość zasilacza są zgodne z danymi podłączonego urządzenia.

• Zawsze instalować baterię we właściwym kierunku.

• Nie przykrywać otworów wentylacyjnych urządzenia.

• Nie należy nigdy zasłaniać otworów wentylacyjnych przedmiotami, takimi jak czasopisma, obrusy, firanki itp.

• Urządzenia nie należy wystawiać na działanie kapiącej ani rozchlapującej się wody, a także nie należy na nim stawiać naczyń wypełnionych wodą, takich jak wazony z kwiatami.

• Na urządzeniu nie należy stawiać źródeł otwartego ognia, takich jak zapalone świeczki.

• Nie otwierać obudowy urządzenia. Nieprawidłowo wykonane naprawy mogą stwarzać niebezpieczeństwo dla użytkownika. Jeśli samo urządzenie lub, w szczególności, kabel zasilający, są uszkodzone, nie korzystać z urządzenia i zlecić jego naprawę specjaliście z odpowiednimi kwalifikacjami. Regularnie sprawdzać kabel pod kątem uszkodzeń.

Język polski 41

Jeśli urządzenie nie będzie używane przez dłuższy czas, należy odłączyć zasilacz od gniazda elektrycznego i/lub wyjąć baterie.

Poniższe symbole mogą znajdować się na urządzeniu i mają zwracać Państwa uwagę na:

Symbol błyskawicy ma zwrócić uwagę użytkownika na znajdujące się we wnętrzu urządzenia części, które są pod niebezpiecznie wysokim napięciem.

Symbol z wykrzyknikiem ma zwrócić uwagę użytkownika na znajdujące się w załączonych

dokumentach ważne wskazówki związane z obsługą i konserwacją urządzenia.

Urządzenia z tym symbolem używają do odczytywania dźwięku z płyty kompaktowej

„Lasera klasy A“. Wbudowany wyłącznik bezpieczeństwa ma zapobiec temu, żeby użytkownik w czasie otwierania kieszeni odtwarzacza płyt kompaktowych został poddany niebezpiecznemu dla ludzkich oczu oddziaływaniu niewidocznego światła lasera.

Wyłączników bezpieczeństwa nie wolno obchodzić i zmieniać; w przeciwnym razie występuje ryzyko wystawienia na promień lasera.

Uwaga: W tym urządzeniu zastosowano laser klasy 1.

Dzieci i osoby niepełnosprawne

Dla bezpieczeństwa dzieci proszę nie zostawiać swobodnie dostępnych części opakowania (torby plastikowe, kartony, styropian itp.).

UWAGA:

Nie pozwalaj dzieciom bawić się folią. Niebezpieczeństwo uduszenia!

To urządzenie nie może być używane przez osoby (w tym dzieci) o ograniczonych możliwościach fizycznych, motorycznych lub umysłowych lub nie posiadające niezbędnego doświadczenia i/lub wiedzy. Użytkowanie urządzenia przez takie osoby jest możliwe wyłącznie pod nadzorem opiekuna lub po otrzymaniu wskazówek dotyczących używania urządzenia.

Nie pozwalaj dzieciom bawić się urządzeniem.

Przegląd elementów obsługi

1Komora CD

2Antena teleskopowa

3Przycisk OPEN/CLOSE

4Kontrola VOLUME

5Przycisk

6Przycisk

42 Język polski

7Przycisk

8Wyświetlacz

9Przyciski /

10Przycisk

Tył (nie pokazano)

Gniazdko zasilacza DC 5 V

Wejście AUX

MIC (gniazdko mikrofonu)

Port USB

Spód (nie pokazano)

Kieszeń na baterie

Uruchomienie urządzenia / wprowadzenie

Proszę wybrać odpowiednie miejsce do ustawienia urządzenia np. suchą, równą i bezpoślizgową powierzchnię, na której będziecie Państwo mogli łatwo obsługiwać urządzenie.

Proszę uwzględnić wystarczającą wentylację urządzenia!

Zdejmij folię ochronną z wyświetlacza, jeżeli jest na nim założona.

Zasilanie

Upewnij się, że napięcie zasilania odpowiada wartościom na tabliczce znamionowej.

Podłącz zasilacz do odpowiednio zamontowanego i zabezpieczonego gniazda elektrycznego.

Podłącz urządzenie do zasilacza, wkładając wtyczkę typu jack zasilacza do gniazda „DC 5 V“.

UWAGA:

Urządzenie to może być używane wyłącznie z zasilaczem (dostarczony). Nie należy go używać z innymi urządzeniami.

Można używać wyłącznie zasilacza 5 V (). Zasilacz innego typu może uszkodzić urządzenie.

WSKAZÓWKA:

W przypadku dłuższych okresów nieużywania urządzenie należy odłączyć od zasilania.

Wkładanie baterii (nie objęte dostawą)

1.Proszę otworzyć pokrywę kieszeni na baterie znajdującą się w dolnej części urządzenia.

2.Proszę umieścić w środku 4 baterii typu UM2/R14 1,5V. Proszę pamiętać o właściwej polarności (patrz na spód kieszeni na baterie)!

3.Zamknąć kieszeń na baterie.

UWAGA:

Nie narażaj baterii na bezpośrednie działanie ciepła lub promieniowania słonecznego. Nigdy nie wrzucaj baterii do ognia. Niebezpieczeństwo wybuchu!

Z baterii może wyciec elektrolit. Jeśli urządzenie będzie nieużywane przez dłuższy czas, wyjmij z niego baterie.

Zwykłe baterie nie mogą być ładowane.

Akumulatorki można ładować tylko pod nadzorem osób dorosłych.

Akumulatorki należy wyjąć z zabawki przed ich ładowaniem.

Nie mieszać baterii różnych typów ani nowych ze starymi.

Batteries must be inserted with the correct polarity.

Spent batteries must be removed from the toy.

Baterii nie należy wrzucać do zwykłych domowych

śmieci. Zużyte baterie proszę oddać do punktu zbiórki odpadów specjalnych lub do punktu sprzedaży.

Styki baterii nie mogą być narażone na spięcie.

WSKAZÓWKA:

Po podłączeniu zasilacza urządzenie automatycznie odłączy zasilanie z baterii.

Ustawianie zegara

Aby ustawićzegar, system musi być w trybie pogotowia.

1.Nacisnąć i przytrzymać przycisk (10) przez ok. 2 sekundy. Na wyświetlaczu “24H” zaczyna migać.

2.Przyciskami / (9) należy wybrać 24-godziny lub 12-godzinny format wyświetlania.

WSKAZÓWKA:

W przypadku wyboru formatu 12-godzinnego w porze przedpołudniowej będą się wyświetlały litery “AM”.

3.W celu potwierdzenia ustawień należy nacisnąć przycisk . Zacznie migać wskazanie godziny.

4.Przyciskami / ustawić właściwą godzinę.

5.Ponownie nacisnąć przycisk . Zaczną migać cyfry minuty.

6.Przyciskami / ustawić właściwą godzinę.

7.Ponownie nacisnąć przycisk .

WSKAZÓWKA:

Ustawienia zegara znikną w przypadku przerwy w zasilaniu.

Jeśli nie naciśniemy żadnego przycisku w ciągu 4 sekund, ustawienia zostaną zapisane automatycznie.

Zabezpieczenie transportowe kieszeni CD

1.Otworzyć kieszeń na płytę CD (1) naciskając przycisk OPEN/CLOSE (3).

2.Przed uruchomieniem urządzenia proszę usunąć z odtwarzacza CD zabezpieczenie transportowe, o ile takie zostało przewidziane.

Loading...
+ 24 hidden pages