

Page 1

QUICK USER GUIDE
NLFRDEUK
IT
GR
ES
PT
CORDLESS
TELEPHONE
Lloyd 15
V1
Page 2

2
P1 P2
11
P4
3
1
5
8
P3
2
6
4
7
9
10
P5
13 14 12
Page 3

3
1 BECAUSE WE CARE
Thank you for purchasing this product. This product has been designed
and assembled with utmost care for you and the environment. This is
why we supply this product with a quick installation guide to reduce
the number of paper (pages) and therefor save trees to be cut for
making this paper. A full and detailed user guide with all the features
descripted can be found on our website www.aegtelephones.eu.
Please download the full user guide in case you want to make use of
all the advanced features of your product. To save the environment we
ask you not to print this full user guide. Thank you for supporting us to
protect our environment.
2 IMPORTANT SAFETY INSTRUCTIONS
Please follow these safety instructions when using your telephone
equipment to reduce risk of fire, electric shock and injury:
•Read and understand all the instructions.
•Follow all warnings and instructions marked on the product.
•Unplug this product from the wall outlet before cleaning. Do not use
liquid cleaners or aerosol cleaners. Use a damp cloth for cleaning.
•Keep this product away from hot, humid conditions or strong
sunlight, and don’t let it get wet or use it near water (for example,
near a bath tub, kitchen sink, and swimming pool).
•Do not overload wall outlets and extension cords as this can result in
the risk of fire or electric shock.
•Unplug this product from the wall outlet under the following
conditions:
>When the power supply cord or plug is damaged.
>If the product fails to operate normally despite following the
operating instructions.
>If the product has been dropped and the cabinet has been
damaged.
>If the product exhibits a distinct change in performance.
UK
Page 4

4
•NEVER use your phone outdoors during a thunderstorm. Unplug the
base from the telephone line and the mains socket when there are
storms in your area. Damage caused by lightning is not covered by
the guarantee.
•Do not use the telephone to report a gas leak in the vicinity of the
leak.
•Use only the supplied NiMH (Nickel Metal Hydride) batteries that
came with your phone or an authorized replacement recommended
by the manufacturer. There is a risk of explosion if you replace the
battery with an incorrect battery type. The use of other battery types
or non-rechargeable batteries/primary cells can be dangerous. They
may cause interference and/or damage to the unit or surroundings.
The manufacturer will not be held liable for damage arising from
such non-compliance.
•Do not use third party charging pods. Damage may be caused to
the batteries.
•Please ensure that the batteries are inserted in the correct polarity.
Dispose of batteries safely. Do not burn, immerse them in water,
disassemble, or puncture the batteries.
3 INTENDED USE
This telephone is intended to be connected to a public analogue
telephone network or to an analogue extension of a compatible PBX
system.
4 INSTALLING YOUR PHONE
4.1 Connecting the Base Station (See P5)
•Plug the mains power cable and telephone line cord into the base
station.
•Plug the power adapter into a 100 - 240Vac, 50 - 60Hz mains power
socket and the telephone line cord into a telephone line socket.
Warning: Always use the cables provided in the box. Use only the
supplied adaptor. Using other power adapter may damage the unit.
Page 5

5
Note: Place the base unit within easy reach of the mains power socket.
Never try to lengthen the mains power cable. The base station needs
mains power for normal operation and the cordless handsets will not
work without it.
4.1 Installing and Charging the Rechargeable Batteries(see P3)
•Insert the 2 supplied batteries into the battery compartment,
observing the correct polarity (see markings inside battery
compartment).
Warning: Use only the supplied NiMH rechargeable batteries.
•Place the back cover over the back of the handset and press down
until it clicks into place.
•Place the handset on the base and charge for 15 hours before using
the handset for the first time.
>The handset will give a double beep when it is properly
placed on the base and the battery charging indicator
on the base lights up to indicate charging.
Note:
The handset may become warm when the batteries are being charged
or during prolonged periods of use. This is normal and does not
indicate a fault.
CAUTION
Risk of explosion if the battery is replaced by an incorrect type. Dispose
of used batteries according to the instructions.
UK
5 SET THE HANDSET LANGUAGE
M
•Press
•Press
•Press
•Press
and . to select HS SETTINGS.
M
and . to select LANGUAGE.
M
and . to select the desired language.
M
to confirm.
Page 6

6
6 GET TO KNOW YOUR PHONE
6.1 Handset Overview(see P1)
1
M
2 •In idle mode: Press to initiate an intercom call.
3
=
4
-
•In idle mode: Press to access the main menu.
•In sub-menu mode: Press to confirm the
selection.
•During a call: Press to access Intercom/
Phonebook/Redial List/ Call List.
•In main menu mode: Press to go back to the
idle screen.
•In sub-menu mode: Press to go back to the
previous option, or press and hold to go back
to the idle screen.
•In editing / pre-dial mode: Press to delete a
character / digit, or press and hold to delete all
the characters / digits.
•During a call: Press to mute / unmute the
microphone.
•In idle mode: Press to access the call list.
•In menus and lists: Press to move up the options.
During a call: Press to increase the volume.
•During ringing: Press to increase the handset
ringer volume.
•In idle mode: Press to access the redial list.
•In menus and lists: Press to move down the
options.
•During a call: Press to decrease the volume.
•During ringing: Press to decrease the handset
ringer volume.
Page 7

5 •In idle mode / predialling mode / Redial list /
Call List / Phonebook List: Press to make a call.
•During ringing: Press to answer a call.
•During a call: Press to turn on / off the
speakerphone.
•In Idle mode / predialling mode / Redial list /
Call List / Phonebook List: Press to make a call
with speakerphone.
•During ringing: Press to answer a call with
speakerphone.
6
O
7 ALPHA-
NUMERIC
KEYPAD,
*, #
•During a call: Press to end a call and go back to
the idle screen.
•In menu / editing mode: Press to go back to the
previous menu, or press and hold to go back to
the idle screen.
•In idle mode: Press and hold to power on/off
the handset.
•Presstoinsertadigit/character/*/#
•*keyinidlemode:Pressandholdtoenableor
disable the keypad lock.
•#keyinidlemode:Pressandholdtoturnon/
off the handset ringer.
•# key in predialling / number editing mode:
Press and hold to insert a pause.
•*keyinCallListmode:Presstoviewmoredigits
of the caller’s number if applicable.
7
UK
8
F
9 •Microphone
10 •Speaker
•During a call press to send a Recall signal (also
called Flash) for network services.
Page 8

8
6.2 Base Station Overview(see P4)
•PAGE - Press to page your handset(s).
12
13
14
6.3 Handset LCD Display Icons and Symbols(see P2)
The LCD display gives you information on the current status of the
telephone.
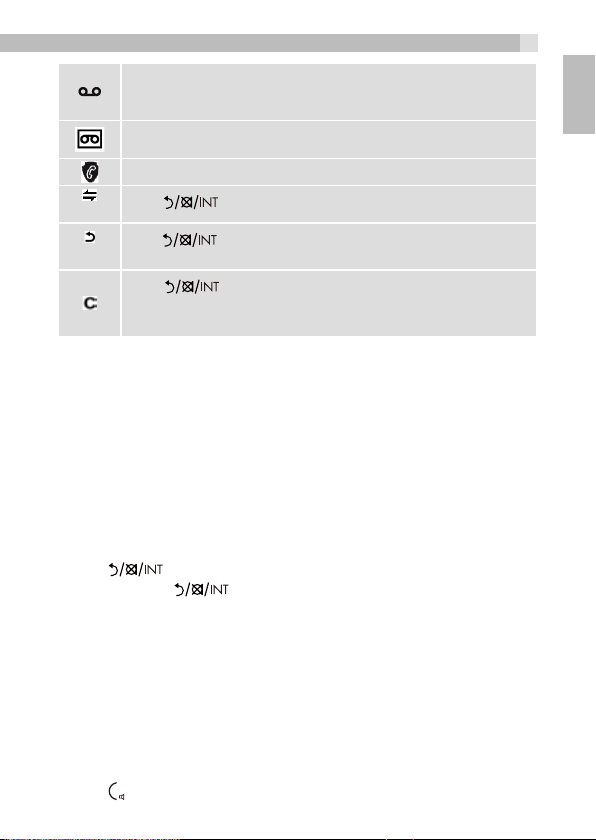
TAM
INDICATOR
LIGHT
CHARGING
CRADLE
Displays when the handset is registered and within range
of the base station, with more blocks indicating a stronger
signal.
Indicates the handset is on a call.
Flashes when there is an incoming call.
Indicates the handset ringer is switched off.
Indicates an alarm is set. Flashes when the alarm is
sounding.
Indicates the keypad is locked.
Indicates the battery is fully charged.
Battery segments cycle during charging.
Indicates the battery needs charging. Flashes when
low battery power level is detected. (Note: the handset
backlight will not turn on when the battery is low.)
Indicates a new TAM message is playing or a new call is
being viewed in the calls list.
Indicates the speakerphone is turned on.
•Press and hold to enter registration
mode
•On when the answering machine (TAM) is
ON
•Flashes if new TAM messages are
recorded, when the TAM is being used,
or when there is incoming ringing.
•Handset cradle for battery charging.
Page 9
9
Indicates you have a new voicemail message. (This is a caller
display service and is not usually available from UK network
providers.)
Indicates the answering machine (TAM) is turned on.
Flashes if there is a new TAM message.
Indicates when any block mode is turned on.
Press to start an intercom call.
(INT)
(BACK)
6.4 Text and Digit Entry
In editing mode, a cursor is displayed to indicate the current text entry
position. It is positioned at the right of the last character entered.
Writing Tips:
Once a character is selected, the cursor will move to the next position
after a short pause.
You can move the cursor within the text by.to amend the text
entry.
•Press to delete the last character.
•Press and hold to delete the entire text string.
Press to go back to the previous menu or cancel the
current action.
Press to mute / unmute the microphone during a
call, delete characters during predialling / editing or stop
an alarm.
UK
7 USE YOUR PHONE
7.1 Make a Call
7.1.1 Preparatory Dialing
•Enter the phone number, maximum 24 digits. If you make a mistake,
M
press
•Press to dial the number.
to delete the last digit.
Page 10

10
7.1.2 Direct Dialing
•Press to take the line.
•Enter the phone number to dial.
7.1.3 Call from the Phonebook
M
•Press
show ALL CONTACTS.
•Press
NOTE
The first phonebook entry will be displayed. If there is no entry in the
phonebook, it will show EMPTY.
•Press . to select the desired phonebook entry.
•Press to dial the number.
7.1.4 Call from the Call List
•In idle, press to access the call list and press . to select.
• OR
• Press
NOTE
The first entry in the call list will be displayed. If there is no entry in the
call list, it will show EMPTY.
•Press
•Press / H to dial the number.
7.1.5 Call from the Redial List
•Press
redial number.
•Press / H to dial out to the selected redial number.
then . to select PHONEBOOK. Press
M
again to access phonebook.
M
then . to select CALL LIST.
M
then.to select desired number.
-
to access the redial list and press . to select the desired
M
to
7.2 Answer a Call
If the handset is not on the charging cradle:
When the phone rings, press / H to answer a call.
If the handset is on the base or charger and if AUTO ANSWER is set
to ON:
When the phone rings, pick up the handset to answer a call.
If you wish to switch AUTO ANSWER Off, see Set the Auto Answer.
The default setting is ON.
Page 11

11
7.3 Adjust Earpiece and Speakerphone Volume
There are 5 levels (VOLUME 1 to VOLUME 5) to choose from for each
of earpiece and speakerphone volume.
During a call:
Press . to select from VOLUME 1 to VOLUME 5. The current
setting is shown. When you end the call, the setting will remain at the last
selected level.
7.4 Mute a Call
You can mute the microphone so that you can talk to someone nearby
without letting the caller hear you during a call.
During a call:
•Press to mute the microphone and MUTED will display on
the LCD. Your caller cannot hear you.
•Press again to unmute the microphone.
7.5 End a Call
During a call connection, press O to end the call.
OR
Put the handset on the base or charger to end the call.
UK
7.6 Turn the Keypad Lock ON/OFF
•In idle, press and hold
is displayed on the LCD.
•To unlock the keypad, press and hold X.
7.7 Find the Handset (PAGING)
Paging is a useful way for finding lost handset(s).
•Press on the base station. All the registered and available
handsets will produce the paging tone and PAGING is displayed
on the LCD.
•Press / O / on any handset or on the base station again
to stop paging.
to turn on the keypad lock. The “X” icon
Page 12
12
NOTE
If there is an incoming call during paging, the phone will ring with the
incoming call instead of paging.
7.8 Make an Internal Call
This feature is only applicable when there are at least two registered
handsets. It allows you to make internal calls, transfer external calls
from one handset to another handset and make conference calls.
If the called handset is not answered within 60 seconds, the called
handset will stop ringing and the calling handset will return to standby
mode.
7.8.1 Call Another Handset
•In idle mode, press M and the screen displays all registered
handsets except the calling handset.
•Enter the desired handset number to intercom with.
•The called handset rings and press on the called handset to
establish the internal call.
NOTES
• Ifonlyonehandsetisregisteredtothebasestation,press
and it will display NOT POSSIBLE.
• If only two handsets are registered to the base station, press
will connect to another handset immediately.
7.8.2 Transfer an External Call to Another Handset
During an external call:
M
•Press
•Press
•The external call is put on hold automatically and the called handset
rings.
•Press on the called handset to establish an internal call.
•Press O on the calling handset or put the calling handset on the
charging cradle to end the current call with the external party.
•The external call is transferred to the called handset.
and . to select INTERCOM.
M
and . to select the desired handset to intercom with.
Page 13

13
8 PRIVATE PHONEBOOK
Your phone can store up to 100 private phonebook entries with names
and numbers. Each phonebook entry can have a maximum of 24 digits
for the phone number and 12 characters for the name. You can also
select different melodies for your phonebook entries. The entries are
store alphabetically.
8.1 Store a Number Entry in the Phonebook
M
• Press
to show All CONTACTS.
• Press
NOTE
The first entry in the phonebook will be displayed. If there is no entry
stored in the phonebook, it will show EMPTY.
•Press
•Press
•Press
•Press
•Press
8.1.1 Entering Names
Use the keypad letters to enter names, e.g. to store Tom:
Press 8 once to enter T.
Press 6 three times to enter o .
Press 6 once to enter m.
8.1.2 Dial an Entry
While in the phonebook list, press . to select the entry you want,
or search alphabetically using the alphanumeric keypad.
•Press /
and . to select PHONEBOOK. Press
M
again to access phonebook.
M
to select ADD.
M
and enter the name.
M
and enter the number.
M
and . to select the desired melody.
M
to save.
H
to dial the selected entry.
M
again
UK
8.2 Delete a Phonebook Entry
M
• Press
to show All CONTACTS.
• Press
•Press . to select the desired phonebook entry.
and . to select PHONEBOOK. Press
M
again to access phonebook.
M
again
Page 14

14
M
•Press
•Press
8.3 Add a Phonebook Entry to VIP list
•Press
ALL CONTACTS. Press
•Press . to select the desired phonebook entry.
•Press
•Press
indicates it is now a VIP entry.
and . to select DELETE.
M
to confirm.
M
and . to select PHONEBOOK, then
M
and . to select ADD TO VIP.
M
to add the entry to the VIP list. A * next to the name
M
again to access the phonebook.
M
to show
9 PHONE SETTINGS
Your phone comes with a selection of settings that you can change to
personalize your phone the way you like it to work.
9.1 Date and Time Settings
9.1.1 Set the Time, Date, and Year
M
•Press
•Press
•Press
•Press
24 HR format. The time will be in the format you set.
•Press
the year will flash for year input.
•Press
YY or MM-DD-YY format. The date will be in the format you set.
•Press
and . to select HS SETTINGS.
M
and . to select DATE & TIME.
M
and . to select SET TIME.
M
then enter the time information according to 12 HR or
M
then enter the year information. The last two digits of
M
then enter the date information according to DD-MM-
M
to confirm.
9.2 Handset Settings
9.2.1 Alarm
You can use this phone to set an alarm clock. When an alarm is set,
<ALARM ICON> displays on the LCD. When the alarm time is
reached, the <ALARM ICON> and “ALARM ON” flash on the screen.
The handset also rings for 45 seconds.
Page 15

15
M
•Press
•Press
•Press
•Press
9.3 Register a Handset
Your handset is pre-registered to the base station. Up to five handsets
can be registered to a a single base station.
If for some reason, the handset is not registered to the base station,
REGISTER will be displayed on the handset screen, register your
handset following the process below.
•Press and hold on the base station for about five seconds, the
base station is entered into registration mode.
•Press
•Press
•Enter the 4-digit system PIN and press
NOTE
If the handset registration is successful, the handset will automatically
be allocated the next available handset number. This handset number
is shown in the handset display in standby mode.
and . to select HS SETTINGS.
M
and . to select ALARM.
M
and . to select ON or OFF.
M
to confirm.
M
and . to select REGISTRATION.
M
and you are requested to enter the 4-digit system PIN.
M
to confirm.
10 CALLER DISPLAY (NETWORK DEPENDENT)
10.1 Call List
This feature is available if you have subscribed to the Caller Line
Identification service from your telephone company. Your phone can
store up to 50 received calls with date/time information in the Call List.
The number will be shown on the LCD when the phone is ringing. If the
number matches with one of the entries in your Private Phonebook,
the caller’s name stored in the private phonebook will be displayed
with the number. The handset will ring with melody associated with
that phonebook entry.
UK
Page 16

16
The call list information might not be available for every incoming call.
The callers might intentionally block their names and / or telephone
numbers.
Call log display screen messages
WITHHELD The caller is blocking the telephone number.
OUT OF AREA This caller’s number is unavailable.
When the list is full, and a new call is received, the oldest entry will be
deleted automatically.
10.2 View the Call List
Review the caller log history to find out who called, to easily return a
call, or to save the caller’s name and number into your phonebook.
EMPTY appears if there are no records in the call list.
•Press to access the call list.
OR
M
• Press
•Press . to select the desired entry.
and . to select CALL LIST. Press
M
.
11 CALL BLOCKER
If you have subscribed to Caller ID service, you can use the call blocker
feature to block certain calls automatically by adding numbers into the
Black List (see 11.2). You can also choose to block all calls or allow only
calls from numbers in the VIP list (see 5.8). Each handset can store up
to a total of 100 entries shared between the phonebook (including the
VIP list) and the black list.
Calls can also be blocked by the following Call Types: Withheld,
Unavailable, International and Payphone. (See 11.5)
When a call is blocked, the telephone will not ring. If the answering
machine is turned on, the blocked call will be answered by the
answering machine.
Page 17

17
11.1 Choose the Block Mode
•To activate the number call blocker feature, you must first choose the
block mode. You can choose to block all calls, allow only VIP entries,
or only block blacklist entries. Press
BLOCKER.
M
•Press
•Press
•Press
BLOCK BLIST.
•Press
•If OFF is selected, the set up is complete and all calls will be received
normally.
If BLOCK ALL, ALLOW VIP or BLOCK BLIST are selected, it will show
ALWAYS ON.
•Press
time, or press .to show TIMED, and then press
the TIME ON and TIME OFF for the period you want the blocking
to be active.
11.2 Add a Number to the Black List
•Press
•Press
•Press
•Press
Number.
•Press
Note: Each Black List entry reduces the capacity of the Phonebook
store.
Note: If the phonebook is full, LIST FULL appears after selecting ADD,
and you will have to delete an entry from the phonebook or blacklist
before you can store another blacklist entry.
and . to show SETTINGS.
M
to show BLOCK MODE.
M
and . to select OFF, BLOCK ALL, ALLOW VIP, or
M
to confirm.
M
if you want the selected block mode to be on all the
M
and . to show CALL BLOCKER.
M
to show BLACK LIST.
M
twice to show ADD.
M
M
and then enter a Name, then
to store the number to the black list.
M
and . to show CALL
M
M
and set
and enter the
UK
11.3 View a Black List Entry
M
•Press
•Press
•Press
•Press
and . to show CALL BLOCKER.
M
to show BLACK LIST.
M
and . to select the desired black list entry.
M
and . to show VIEW.
Page 18

18
M
•Press
List entry. If the number is more than 12 digits, press to see the
other digits.
11.4 Delete All Black List Entries
•Press
•Press
•Press
•Press
•Press
display will show EMPTY.
11.5 Block Calls by Call Type
You can choose to block different types of incoming calls that normally
do not have a caller ID number by setting the respective call type to
ON.
Each Call Type (Withheld, International, Unavailable and Payphone)
can be blocked independently of the others.
•Press
•Press
•Press
•Press
UNAVAILABLE, or PAYPHONE.
•Press
•Press
•To set for other call types, repeat from step 4.
to review the number and name of the selected Black
M
and . to show CALL BLOCKER.
M
to show BLACK LIST.
M
twice and then .to show DELETE ALL.
M
to display CONFIRM?.
M
to confirm. All Black List entries will be deleted and the
M
and . to show CALL BLOCKER.
M
and . to show SETTINGS.
M
and . to show CALL TYPE.
M
M
M
and . to select WITHHELD, INTERNAT’L,
and . to select ON or OFF.
to confirm the setting for that type.
Page 19

19
12 ANSWERING MACHINE (TAM)
Your phone system includes a telephone answering machine (TAM)
that records unanswered calls when it is switched on. The answering
system can store up to 59 messages within the maximum recording
time of about 15 minutes. As well as recording incoming messages,
you can record memos for other users of your phone. If the answering
machine memory is full, the handset will display TAM FULL alternately
with the handset name, and you will have to delete messages before
more new ones can be recorded.
When the TAM is full, it will only play your Answer Only outgoing
message and not allow the caller to leave a message.
12.1 Switching TAM On/Off
You can turn the answering machine on or off using the handset. When
the answering machine is set to ON, the base TAM indicator will be
on and the handset will display the TAM icon. Calls will be answered
after the set answer delay and if it is set to Answer and Record mode,
the caller can then leave you a message. When the answering system
is set to OFF, calls will be answered after 14 rings and the answer only
message will be played to your callers. They will not be able to leave
you a message.
•In idle mode, press
M
•Press
M
•Press
M
•Press
12.2 Play messages on TAM
When new messages are recorded, the TAM indicator on the base and
TAM icon on the handset both flash.
If you have new messages, they are played first, and then saved as old
messages, until they are deleted. Old messages are played again after
all new messages are played completely.
•In idle mode, press
M
•Press
M
•Press
M
and . to show ANS. MACHINE.
and . to show TAM ON/OFF.
and . to choose ON or OFF.
to confirm the setting.
M
and . to show ANS. MACHINE.
to show MSG PLAYBACK.
to start playing any messages through its loudspeaker.
UK
Page 20

20
•Note: The display shows the time and date that the message was
recorded, and a symbol at the top of the screen if it is a new
message.
• For options during playback:
Press . to increase or decrease the playback volume.
Press H to listen more privately from the earpiece.
M
Press
STOP to stop the playback.
FORWARD to skip on to the next message.
PREVIOUS to repeat the current message playing.
DELETE to delete the current message playing.
Alternatively, press the following digit keys:
5 to stop the playback.
6 to skip on to the next message.
4 to repeat the current message playing.
4,4 to skip back to the previous message.
2 to delete the current message playing.
and . for the options:
NOTE:
You cannot delete new messages, so you will have to play them before
trying to delete.
12.3 Answering Machine Settings
12.3.1 Set the Answer mode
You can select ANS & REC, the default mode, if you want to allow
callers to leave a message, or ANSWER ONLY mode if you don’t want
callers to leave a message on the answering machine.
•In idle mode, press
M
•Press
M
•Press
M
•Press
M
•Press
12.3.2 Record your Outgoing Message (OGM)
You can record your own OGM for ANS & REC mode or ANSWER
ONLY mode. When you record your own OGM, it will be used when
the answering machine answers the call. If your personal OGM is
deleted, the pre-set OGM will be restored automatically.
M
and . to show ANS. MACHINE.
and . to show TAM SETTINGS.
to show ANSWER MODE.
and . to select ANS & REC or ANSWER ONLY.
to confirm the setting.
Page 21

21
•In idle mode, press
M
•Press
M
•Press
M
•Press
M
•Press
M
•Press
is displayed on the screen.
M
•Press
playback automatically.
Alternatively, press
without saving the personal OGM, and restoring the pre-set OGM
automatically.
M
and . to show ANS. MACHINE.
and . to show TAM SETTINGS.
and . to show OGM SETTINGS.
and . to select ANS & REC or ANSWER ONLY.
and . to show RECORD MESS.
to start recording your personal OGM and RECORDING
to stop and save your personal OGM, which will then
to return to the previous screen
13 TECHNICAL DETAILS
STANDARD DECT
FREQUENCY RANGE 1.88 TO 1.9 GHZ (BANDWIDTH = 20 MHZ)
CHANNEL
BANDWIDTH
OPERATING RANGE UP TO 300M OUTDOORS; UP TO 50M INDOORS
OPERATING TIME STANDBY: 100 HOURS, TALKING: 10 HOURS
TEMPERATURE RANGE OPERATING 00C TO 400C, STORAGE -200C TO 600C
ELECTRICAL POWER BASE UNIT:
1.728 MHZ
BATTERY CHARGE TIME:15 HOURS
VT04EUK06045 / VT04EEU06045
INPUT 100-240VAC 50/60HZ 150MA, OUTPUT
6VDC 450MA
TENPAO:S003IB0600045/S003IV0600045
INPUT 100-240VAC 50/60HZ 150MA, OUTPUT
6VDC 450MA
RJ-AS060450B001 / RJ-AS060450E002
INPUT 100-240VAC 50/60HZ 150MA, OUTPUT
6VDC 450MA
BATTERY INFORMATION
TYPE NI-MH (RECHARGEABLE BATTERY) 400MAH,
2 X 1.2V AAA
UK
Page 22

22
14 CLEANING AND CARE
Do not clean any part of your unit with benzene, thinners or other
solvent chemicals as this may cause permanent damage which is not
covered by the Guarantee.
When necessary, clean it with a damp cloth.
Keep your phone system away from hot, humid conditions or strong
sunlight, and don‘t let it get wet.
15 GUARANTEE AND SERVICE
The unit is guaranteed for 24months from the date of purchase shown
on your sales receipt. This guarantee does not cover any faults or
defects caused by accidents, misuse, fair wear and tear, neglect, faults
on the telephone line, lightning, tampering with the equipment, or any
attempt at adjustment or repair other than through approved agents.
Please keep your sales (till) receipt this is your proof of guarantee.
15.1 While the unit is under Guarantee
•Disconnect the base unit from the telephone line and the mains
electricity supply.
•Pack up all parts of your device, using the original package.
•Return the unit to the shop where you bought it, making sure you
take your sales receipt.
•Remember to include the mains adapter.
15.2 After the Guarantee has expired
If the unit is no longer under Guarantee, contact us via www.
aegtelephones.eu
This product works with rechargeable batteries only. If you put
nonrechargeable batteries in the handset and place it on the base, the
handset will be damaged and this in NOT covered under the warranty
conditions.
Page 23

23
16 CE DECLARATION
This product is in compliance with the essential requirements and
other relevant provisions of the R&TTE directive 1999/5/EC.
The Declaration of conformity can be found on:
www.aegtelephones.eu
17 DISPOSAL OF THE DEVICE (ENVIRONMENT)
At the end of the product lifecycle, you should not throw this
product into the normal household garbage but bring the product
to a collection point for the recycling of electrical and electronic
equipments. The symbol on the product, user guide and/or box
indicate this. Some of the product materials can be re-used if you bring
them to a recycling point. By reusing some parts or raw materials from
used products you make an important contribution to the protection
of the environment. Please contact your local authorities in case you
need more information on the collection points in your area.
Batteries must be removed before disposing
of the device. Dispose of the batteries in an
environmental manner according to your country regulations.
UK
Page 24

24
1 UNSER EINSATZ FÜR DIE UMWELT
Vielen Dank, dass Sie sich für dieses Produkt entschieden haben. Dieses
Gerät wurde mit größter Sorgfalt entwickelt und zusammengebaut,
um Ihnen ein ausgezeichnetes Produkt zu bieten und die Umwelt zu
schonen. Deshalb liegt diesem Produkt eine Kurzanleitung bei, um
die Papiermenge (Seiten) zu reduzieren und um die Anzahl der für
Papier benötigten, gefällten Bäume zu vermindern. Eine vollständige
und ausführliche Bedienungsanleitung finden Sie auf unserer
Website www.aegtelephones.eu. Bitte laden Sie die vollständige
Bedienungsanleitung herunter, wenn Sie alle erweiterten Funktionen
Ihres Produkts nutzen möchten. Zum Schutz der Umwelt bitten wir
Sie, die vollständige Bedienungsanleitung nicht auszudrucken. Vielen
Dank, dass Sie uns beim Umweltschutz unterstützent.
2 WICHTIGE SICHERHEITSANWEISUNGEN
Bitte beachten und befolgen Sie diese Hinweise, um die Gefahr eines
Feuers, elektrischen Schlags und Personenschäden so gering wie
möglich zu halten:
•Lesen und verstehen Sie alle Anweisungen.
•Befolgen Sie alle auf dem Produkt angegebenen Warnhinweise und
Anleitungen.
•Ziehen Sie vor dem Reinigen den Gerätestecker aus der Steckdose.
Keine flüssigen Reinigungsmittel oder Sprays verwenden. Nur mit
einem weichen und feuchten Tuch abwischen.
•Setzen Sie Ihr Telefon weder Hitze, feuchten Bedingungen noch
starkem Sonnenlicht aus und lassen Sie es nicht nass werden.
Benutzen Sie es auch nicht in der Nähe von Wasser (zum Beispiel
in der Nähe einer Badewanne, einer Küchenspüle oder eines
Swimmingpools).
•Überlasten Sie nicht die Steckdosen und Verlängerungskabel, weil
dies zum Risiko eines Feuers oder eines Stromschlags führen kann.
Page 25

25
•Ziehen Sie das Produkt unter folgenden Umständen aus der
Steckdose:
>Bei beschädigtem Netzkabel oder Netzstecker.
>Wenn das Produkt trotz Beachten der Bedienungsanleitung nicht
richtig funktioniert.
>Wenn das Produkt hingefallen ist und das Gehäuse beschädigt
wurde.
>Wenn das Produkt starke Leistungsänderungen aufweist.
•Benutzen Sie das Produkt NIEMALS während eines Gewitters,
sondern trennen Sie die Basisstation bei Gewitter vom Telefonnetz
und von der Netzsteckdose. Schäden, die aufgrund von Blitzeinschlag
entstanden sind, werden nicht von der Garantie abgedeckt.
•Verwenden Sie das Telefon nicht, um eine undichte Gasstelle in der
Nähe zu melden.
•Nur die im Lieferumfang enthaltenen Nickel-Metallhydrid (Ni-Mh)Asskus oder vom Hersteller empfohlene Ersatzakkus verwenden.
Beim Einsetzen falscher Akku- oder Batterietypen besteht
Explosionsgefahr. Die Verwendung anderer Akkutypen oder nicht
aufladbarer Einwegbatterien/Primärzellen kann gefährlich sein. Dies
kann zu Funkstörungen und/oder Schäden am Gerät oder in seiner
Umgebung führen. Der Hersteller lehnt jegliche Haftung für Schäden
ab, die aufgrund solcher Nichtbeachtungen verursacht wurden.
•Bitte verwenden Sie keine Ladestationen anderer Hersteller. Dies
könnte die Akkus beschädigen.
•Bitte achten Sie darauf, dass die Akkus mit der richtigen Polarität von
Plus und Minus eingelegt sind.
Verbrauchte Akkus vorschriftsmäßig entsorgen. Akkus nicht ins Feuer
oder Wasser werfen, auseinandernehmen oder durchstechen.
DE
3 BESTIMMUNGSGEMÄSSE VERWENDUNG
Dieses Telefon ist für den Anschluss an ein öffentliches analoges
Telefonnetz oder an eine analoge Nebenstelle einer kompatiblen
PBX-Telefonanlage vorgesehen.
Page 26

26
4 AUFSTELLEN DES TELEFONS
4.1 Basisstation anschließen (Siehe P5)
•Den Netzstromstecker und das Telefonkabel in die Basisstation
stecken.
•Verbinden Sie den Netzadapter mit einer 100 - 240 V, 50 - 60Hz
Wechselstromsteckdose und das Telefonleitungskabel mit einer
Telefonbuchse.
Warnung: Verwenden Sie nur die im Lieferumfang enthaltenen Kabel.
Nur das beiliegende Netzteil verwenden. Die Verwendung anderer
Netzteile kann zur Beschädigung des Gerätes führen.
Hinweis: Stellen Sie die Basisstation am besten direkt neben einer
leicht zugänglichen Steckdose auf. Versuchen Sie niemals, das
Netzkabel zu verlängern. Die Basisstation sowie die schnurlosen
Mobilteile benötigen elektrischen Strom, um normal zu funktionieren.
4.2 Einsetzen und Aufladen der Akkus (siehe P3)
•Legen Sie die zwei beiliegenden Akkus unter Beachtung der Polarität
korrekt ein (siehe Markierungen im Akkufach).
Warnung: Bitte nur die im Lieferumfang enthaltenen Ni-MH-Akkus
verwenden.
•Richten Sie die Akkufachabdeckung auf der Rückseite des Akkufachs
aus und lassen Sie die Abdeckung mit etwas Druck einrasten.
•Legen Sie den Telefonhörer auf die Basisstation und laden Sie die
Akkus vor der ersten Inbetriebnahme 15 Stunden lang auf.
>Sie hören einen doppelten Signalton, wenn Sie den Telefonhörer
richtig auf die Basisstation gelegt haben, und die Akkuanzeige an
der Basis leuchtet, um den Ladevorgang zu bestätigen.
Hinweis:
Der Telefonhörer kann sich während des Ladens der Akkus oder
während längerer Benutzungszeiten erwärmen. Dies ist ganz normal
und stellt keine Störung dar.
Page 27

27
ACHTUNG
Beim Einsetzen falscher Akku- oder Batterietypen besteht
Explosionsgefahr. Verbrauchte Batterien immer nur unter Beachtung
der gesetzlichen Vorschriften entsorgen.
5 EINSTELLEN DER ANZEIGESPRACHE
•Drücken Sie
EINSTELLUNGEN) auszuwählen.
•Drücken Sie
auszuwählen.
•Drücken Sie
auszuwählen.
•Drücken Sie
M
M
M
M
zum Bestätigen.
und ., um “HS SETTINGS” (MT-
und ., um “LANGUAGE” (SPRACHE)
und ., um die gewünschte Sprache
6 MACHEN SIE SICH MIT IHREM TELEFON
VERTRAUT
6.1 Überblick Mobilteil (siehe S. P1)
•Im Stand-by-Modus: Zum Aufrufen des
Hauptmenüs drücken.
•Im Untermenü-Modus: Zum Bestätigen der
1
M
Auswahl drücken.
•Während eines Anrufs: Zum Anwählen anderer
interner Mobilteile/des Telefonbuchs/der
Wiederwahlliste/der Anrufliste.
DE
Page 28

28
•Im Stand-by-Modus: Drücken, um intern
anzurufen.
•Im Hauptmenü-Modus: Drücken, um zum
Stand-by-Display zurückzukehren.
•Im Untermenü-Modus: Drücken, um zur
vorherigen Option zurückzukehren oder
2
3
=
4
-
drücken und gedrückt halten, um zum Standby-Display zurückzukehren.
•Im Bearbeitungs- / Wahlvorbereitungsmodus:
Drücken, um ein Zeichen / eine Ziffer zu löschen,
oder drücken und halten, um alle Zeichen /
Ziffern zu löschen.
•Während eines Anrufs: Zum Deaktivieren/
Aktivieren des Mikrofons drücken.
•Im Stand-by-Modus: Zum Aufrufen der
Anrufliste drücken.
•In Menüs und Listen: Drücken, um in der Liste
nach oben zu blättern. Während eines Anrufs:
Zum Erhöhen der Lautstärke drücken.
•Während des Ruftons: Zum Erhöhen der
Ruftonlautstärke des Handapparates drücken.
•Im Stand-by-Modus: Zum Aufrufen der
Wahlwiederholungsliste drücken.
•In Menüs und Listen: Drücken, um in der Liste
nach unten zu blättern.
•Während eines Anrufs: Zum Verringern der
Lautstärke drücken.
•Während des Ruftons: Zum Vermindern der
Ruftonlautstärke des Handapparates drücken.
Page 29

5
6
7
O
ALPHA-
NUME-
RISCHE
TASTA-
TUR, *, #
29
•Im Stand-by-/Wahlvorbereitungsmodus/
Wahlwiederholungsliste/Anrufliste/
Telefonbucheintrag: Zum Anrufen drücken.
•Während des Ruftons: Zum Annehmen eines
Anrufs drücken.
•Während eines Anrufs: Zum ein- und ausschalten
der Freisprecheinrichtung.
•Im Stand-by-/Wahlvorbereitungsmodus/
Wahlwiederholungsliste/Anrufliste/
Telefonbucheintrag: Zum Anrufen über die
Freisprecheinrichtung drücken.
•Während des Ruftons: Zur Annahme eines
Anrufs über die Freisprecheinrichtung drücken.
•Während eines Anrufs: Drücken, um den Anruf
zu beenden und um zum Stand-by-Display
zurückzukehren.
•Im Menü-/Bearbeitungsmodus: Drücken, um
zum vorherigen Menü zurückzukehren oder
drücken und gedrückt halten, um zum Standby-Display zurückzukehren.
•Im Stand-by-Modus: Zum ein-/ausschalten des
Mobilteils drücken und gedrückt halten.
•Zur Eingabe einer Zahl/ eines Zeichens/*/#
drücken.
•* Taste im Stand-by-Modus: Drücken und
halten, um die Tastensperre ein-/auszuschalten.
•# -Taste im Stand-by-Modus: Zum ein-/
ausschalten des Ruftons des Mobilteils drücken
und gedrückt halten.
•#- Taste bei der Wahlvorbereitung/beim
Eingeben von Rufnummern: Drücken und
halten, um eine Pause einzufügen.
•* Taste im Anruflistenmodus: Drücken, um
mehr Ziffern der Anrufernummer zu sehen, falls
verfügbar.
DE
Page 30

30
•Während eines Anrufs drücken, um ein Recall-
8
F
R
9 •Mikrofon
10 •Lautsprecher
6.2 Überblick der Basisstation (siehe P4)
12
13
KONTROLLLEUCHTE
14 LADESCHALE
Signal (auch Flash genannt) für Netzwerkdienste
zu senden.
•PAGE - Drücken, um das/die
Mobilteil(e) zu finden.
•Drücken und gedrückt halten,
um den Registrierungsmodus
aufzurufen.
•Schaltet sich ein, wenn
der Anrufbeantworter (AB)
eingeschaltet (ON) ist.
AB-
•Blinkt, wenn neue ABNachrichten aufgezeichnet
werden, wenn der AB gerade
benutzt wird, oder bei einem
eingehenden Rufton.
•Mobilteil-Ladestation für
Akkus.
6.3 Mobilteil - Symbole und Zeichen (siehe P2)
Das Display erteilt hilfreiche Informationen zum aktuellen Zustand des
Telefons.
Wird angezeigt, wenn das Mobilteil registriert ist und sich
innerhalb der Reichweite der Basisstation befindet, mit
mehr Empfangsbalken, die ein stärkeres Signal anzeigen.
Gibt an, dass das Mobilteil gerade einen Anruf führt.
Blinkt bei einem eingehenden Anruf.
Page 31

(INT)
(ZURÜCK)
31
Zeigt an, dass der Rufton ausgeschaltet ist.
Gibt an, dass ein Alarm eingestellt ist. Blinkt, wenn der
Alarm läutet.
Zeigt an, dass die Tastensperre aktiviert ist.
Zeigt an, dass der Akku voll aufgeladen ist.
Die Batteriesegmente zirkulieren während des
Ladevorgangs.
Zeigt an, dass der Akku aufgeladen werden muss.
Blinkt, wenn der Akku fast leer ist. (Hinweis: Die
Hintergrundbeleuchtung des Mobilteils schaltet sich
nicht ein, wenn der Akku fast leer ist.)
Gibt eine neue AB-Nachricht an, oder einen neuen Anruf,
der in der Anruferliste angezeigt wird.
Zeigt an, dass die Freisprecheinrichtung eingeschaltet ist.
Wird angezeigt, wenn Sie neue Textnachrichten
haben. (Dieser CLIP-Service zur Anruferanzeige ist im
Allgemeinen nicht innerhalb von UK verfügbar).
Schaltet sich ein, wenn der Anrufbeantworter (AB)
eingeschaltet (ON) ist.
Blinkt, wenn Sie eine neue Nachricht auf dem
Anrufbeantworter haben.
Zeigt an, wenn ein Blockmodus eingeschaltet ist.
Drücken Sie, um intern anzurufen.
Drücken Sie, um zum vorherigen Menü
zurückzukehren oder um die aktuelle Aktion aufzuheben.
Drücken Sie, um das Mikrofon während eines
Anrufs ein-/auszuschalten, Zeichen während des
Vorwählens/Bearbeitens zu löschen oder um einen Alarm
zu stoppen.
DE
Page 32

32
6.4 Telefontastaturzeichen
Im Bearbeitungsmodus erscheint ein Cursor, der die aktuelle
Position der Texteingabe anzeigt. Er befindet sich rechts vom zuletzt
eingetippten Zeichen.
Beschriftungstipps:
Sobald ein Zeichen gewählt wurde, bewegt sich der Cursor nach einer
kurzen Pause zur nächsten Position.
Sie können den Cursor innerhalb des Textes mithilfe der Tasten .
bewegen, um die Texteingabe zu ändern.
•Drücken Sie zum Löschen des letzten Zeichens.
•Drücken und halten Sie gedrückt, um den ganzen
Zeichensatz zu löschen.
7 VERWENDUNG DES TELEFONS
7.1 Extern anrufen
7.1.1 Wählen mit Wahlvorbereitung
•Die Rufnummer eingeben, max. 24 Ziffern. Wenn Sie einen Fehler
gemacht haben, können Sie mit
•Drücken Sie , um die Nummer zu wählen.
7.1.2 Direktruf
•Drücken Sie , um die Verbindung zum Telefonnetz herzustellen.
•Geben Sie die Telefonnummer ein.
7.1.3 Anruf aus dem Telefonbuch
•Drücken Sie
(PHONEBOOK) zu wählen. Drücken Sie
(ALL CONTACTS) anzuzeigen.
•Drücken Sie erneut M, um das Telefonbuch aufzurufen.
HINWEIS
Der erste Telefonbucheintrag wird angezeigt. Wenn kein Eintrag im
Telefonbuch vorhanden ist wird “EMPTY”(LEER) angezeigt.
•Wählen Sie mit . den gewünschten Telefonbucheintrag.
M
M
die letzte Ziffer löschen.
, dann ., umt TELEFONBUCH
M
, um ALLE KONTA.
Page 33

33
•Drücken Sie , um die Nummer zu wählen.
7.1.4 Anruf von der Anrufliste
•Drücken Sie im Stand-by , um zur Anrufliste zu gelangen und
drücken Sie . , um die Anrufliste zu wählen.
•ODER
•Drücken Sie
wählen.
HINWEIS
Der erste Eintrag in der Anrufliste wird angezeigt. Wenn kein Eintrag
in der Anrufliste vorhanden ist wird “EMPTY” angezeigt.
•Drücken Sie
wählen.
•Drücken Sie / H , um die Rufnummer zu wählen.
7.1.5 Anruf aus der Wahlwiederholungsliste
•Drücken Sie - , um zur Wahlwiederholungsliste zu gelangen und
drücken Sie . , um die gewünschte Wahlwiederholungsnummer
anzurufen.
•Drücken Sie / H , um die gewünschte Wahlwiederholungsnummer
auszuwählen.
7.2 Anruf annehmen
Wenn sich das Mobilteil noch auf der Ladeschale befindet:
Wenn das Telefon klingelt, drücken Sie / H , um den Anruf entgegen
zu nehmen.
Wenn sich das Mobilteil auf der Basistation befindet und AUTO
ANSWER (AUTO-ANTWORT) auf ON (EIN) gestellt ist:
Wenn das Telefon klingelt, drücken Sie, nehmen Sie das Mobilteil von
der Basisstation ab.
Zum Ausschalten von AUTO ANSWER, siehen Auto-Antwort
einstellen. Die werkseitige Einstellung ist ON (EIN).
M
und . , um CALL LIST (ANRUFLISTE) zu
M
und. um den gewünschten Eintrag zu
DE
Page 34

34
7.3 Laustärkeregelung von Hörer und Lautsprecher
Es können 5 Lautstärkestufen (VOLUME 1 bis VOLUME 5) (LAUTST.
1 bis LAUTST. 5) des Hörers und der Freisprecheinrichtung eingestellt
werden.
Während eines Anrufs:
Drücken Sie . , um VOLUME 1 bis VOLUME 5 (LAUTST. 1 bis
LAUTST. 5). anzuzeigen. Die aktuelle Einstellung wird angezeigt.
Wenn Sie das Gespräch beenden bleibt die Einstellung auf dem zuletzt
gewählten Niveau stehen.
7.4 Mikrofon stummschalten
Sie können mit jemandem in Ihrer Umgebung sprechen, ohne dass Sie
der Anrufer während des Gespräches hört.
Während eines Anrufs:
•Drücken Sie , um das Mikrofon stummzuschalten und
“MUTED” wird auf dem Display angezeigt. Ihr Anrufer kann nicht
mithören.
•Drücken Sie erneut , um das Mikrofon wieder einzuschalten.
7.5 Anruf beenden
Während eines Anrufs O drücken, um den Anruf zu beenden.
ODER
Stellen Sie das Mobilteil auf die Basisstation, um den Anruf zu beenden.
7.6 Tastensperre EIN-/AUSSCHALTEN
•Im Stand-by-Modus “X” drücken und gedrückt halten, um die
Tastensperre zu aktivieren. Das Symbol wird auf dem Display
angezeigt.
•Um die Tastensperre zu deaktivieren, wieder die Taste X gedrückt
halten.
7.7 Mobilteile suchen (PAGING)
Diese Funktion is nützlich, wenn Sie das Mobilteil verlegt haben.
Page 35

35
•Drücken Sie auf der Basisstation. Alle an der Basis angemeldeten
Mobilteile in Funktionsreichweite klingeln gleichzeitig und es
erscheint “PAGING” auf dem Display.
•Drücken Sie / O / auf einem der Mobilteile oder auf
der Basisstation, um die Suche zu beenden.
HINWEIS
Wenn während des Paging ein Anruf eingeht, klingelt das Telefon mit
dem eingehenden Anruf anstelle mit dem Pagingsignal.
7.8 Intern anrufen
Diese Funktion ist nur möglich, wenn mindestens zwei Mobilteile
auf der Basisstation angemeldet sind. Es ermöglicht Ihnen intern
anzurufen, externe Anrufe von einem Mobilteil auf das andere
weiterzuleiten und Dreierkonferenzen zu schalten. Wenn das
angerufene Mobilteil nicht innerhalb von 60 Sekunden antwortet, hört
das angerufenen Mobilteile auf zu klingen und es kehrt in den StandBy zurück.
7.8.1 Ein anderes Mobilteil anrufen
•Im Stand-by-Modus M drücken und auf dem Display werden alle
angemeldeten Mobilteile angezeigt, mit Ausnahme des anrufenden
Mobilteils.
•Geben Sie die Mobilteilnummer ein, die Sie anrufen möchten.
•Das angerufene Mobilteil klingelt, drücken Sie dann auf des
angerufenen Mobilteils, um das Gespräch herzustellen.
HINWEIS
•Wenn nur ein Mobilteil an der Basisstation angemeldet ist, drücken
Sie und es wird “NOT POSSIBLE”(NICHT MÖGLICH)
angezeigt.
•Wenn nur zwei Mobilteile an der Basisstation angemeldet sind,
drücken Sie und das zweite Mobilteil wird sofort angerufen.
7.8.2 Einen externen Anruf auf ein anderes Mobilteil
Während eines externen Anrufs:
•Drücken Sie
weiterleiten
M
und . , um INTERCOM zu wählen.
DE
Page 36

36
•Drücken Sie
wählen.
•Der externe Anruf wird in die Warteschleife versetzt und das andere
Mobilteil klingelt.
•Drücken Sie auf dem anrufenden Mobilteil oder legen Sie das
Mobilteil wiedeauf dem angerufenen Mobilteil, um einen internen
Anruf herzustellen.
•Drücken Sie O auf dem anrufenden Mobilteil oder legen Sie das
Mobilteil wieder auf die Ladeschale zurück, um das Gespräch mit
dem externen Anrufer zu beenden.
•Der externe Anrufer wird auf das andere Mobilteil übertragen.
M
und ., um das gewünschte Mobilteil zu
8 PRIVATES TELEFONBUCH
Jedes Mobilteil kann bis zu 100 private Telefonbucheinträge mit
Namen und Rufnummern speichern. Jeder Telefonbucheintrag kann
maximal 24 Ziffern für die Rufnummer und 12 Buchstaben für den
Namen erhalten. Sie können auch verschiedene Ruftöne für Ihre
Telefonbucheinträge wählen. Die Einträge werden alphabetisch
gespeichert.
8.1 Rufnummer im Telefonbuch speichern tore a Number
• Drücken Sie
zu wählen. Drücken Sie M, um ALLE KONTA. (ALL CONTACTS)
anzuzeigen.
• Drücken Sie erneut
HINWEIS
Der erste Eintrag in der Anrufliste wird angezeigt. Wenn kein Eintrag
im Telefonbuch vorhanden ist, wird “EMPTY” (LEER) angezeigt.
•Drücken Sie
•Drücken Sie
•Drücken Sie
•Drücken Sie
zu wählen.
•Drücken Sie
M
, dann ., um TELEFONBUCH (PHONEBOOK)
M
, um das Telefonbuch aufzurufen.
M
, um ADD (HINZUFÜGEN) zu wählen.
M
und geben Sie den Namen ein.
M
und geben Sie die Rufnummer ein.
M
und . ,um die gewünschte Ruftonmelodie
M
, um den Eintrag zu speichern.
Page 37

37
8.1.1 Namen eingeben
Verwenden Sie zum Eingeben der Namen die Buchstaben des
Tastenfelds, z. B. zum Speichern von Tom:
Drücken Sie 8 einmal, um T einzugeben.
Drücken Sie 6 dreimal, um o einzugeben.
Drücken Sie6 einmal, um m einzugeben.
8.1.2 Einen Eintrag anwählen
Drücken Sie im Telefonbuch die Taste . tum den gewünschten
Eintrag zu wählen oder suchen Sie ihn mithilfe der alphanumerischen
Tasten.
•Drücken Sie / H um den Eintrag anzuwählen.
8.2 Telefonbuchzeintrag löschen
• Drücken Sie
zu wählen. Drücken Sie M, um again ALLE KONTA. (ALL
CONTACTS) anzuzeigen.
• Drücken Sie erneut
•Wählen Sie mit . den gewünschten Telefonbucheintrag.
•Drücken Sie
•Zum Bestätigen
M
, dann ., um TELEFONBUCH (PHONEBOOK)
M
, um das Telefonbuch aufzurufen.
M
und ., um LOESCHEN (DELETE) zu wählen.
M
drücken.
DE
8.3 Hinzufügen eines Telefonbucheintrags zur VIP-Liste
•Drücken Sie
zu wählen, dann M, um ALLE KONTAKTE (ALL CONTACTS)
anzuzeigen. Drücken Sie erneut M, um das Telefonbuch
aufzurufen.
•Wählen Sie mit . den gewünschten Telefonbucheintrag.
•Drücken Sie
zu wählen.
•Drücken Sie M, den Eintrag zur VIP-Liste hinzuzufügen. Ein *
neben dem Namen gibt an, dass es jetzt ein VIP-Eintrag ist.
8.4 Einen VIP-Telefonbucheintrag anzeigen
•Drücken Sie
anzuzeigen und dann mit
M
und ., um TELEFONBUCH (PHONEBOOK)
M
und ., um ZU VIP HINZU (ADD TO VIP)
M
und ., um TELEFONBUCH (PHONEBOOK)
M
auswählen.
Page 38

38
•Drücken Sie ., um VIP anzuzeigen, dann mit
öffnen.
•Wählen Sie mit . den gewünschten VIP-Listeneintrag.
•Drücken Sie M, um ANSICHT (VIEW) anzuzeigen.
•Drücken Sie M, um die Ruftonmelodie und die Nummer des
Eintrags anzuzeigen. Bei mehr als 12 Ziffern, drücken Sie für die
weiteren und . für den Namen bzw. die Ruftonmelodie.
8.5 Einen Eintrag aus der VIP-Liste entfernen
•Drücken Sie
anzuzeigen und dann
KONTAKTE (ALL CONTACTS) anzuzeigen.
•Wählen Sie mit . den gewünschten VIP-Telefonbucheintrag, der
mit einem * gekennzeichnet ist.
•Drücken Sie
wählen.
•Drücken Sie M, um den Eintrag aus der VIP-Liste zu entfernen.
Der Eintrag bleibt im Telefonbuch, aber das * wird nicht mehr neben
dem Namen angezeigt.
Wahlweise:
•Im Stand-by-Modus
(PHONEBOOK) anzuzeigen.
•Drücken Sie
•Drücken Sie
anzuzeigen.
•Drücken Sie
•Drücken Sie
jedoch bleibt er als normaler Telefonbucheintrag erhalten.
M
und ., um TELEFONBUCH (PHONEBOOK)
M
zur Auswahl und erneut M, um ALLE
M
und ., um VIP ENTF. (DEL FROM VIP) zu
M
drücken und ., um TELEFONBUCH
M
und ., um VIP anzuzeigen.
M
und ., um den gewünschten VIP-Eintrag
M
und ., um LOESCHEN (DELETE) anzuzeigen.
M
zum Bestätigen. Der VIP-Eintrag wird gelöscht,
M
die VIP-Liste
9 TELEFONEINSTELLUNGEN
Ihr Telefon verfügt über verschiedene Einstellungen, die Sie ändern
können, um Ihrem Telefon eine persönliche Note zu geben.
Page 39

39
9.1 Datum und Uhrzeit einstellen
9.1.1 Datums- und Uhrzeiteinstellungen
•Drücken Sie
EINSTELLUNGEN).
•Drücken Sie
U. UHRZEIT)
•Drücken Sie
EINSTELLEN).
•Drücken Sie
24-STUNDEN-Format einzustellen. Die Uhrzeit wird in dem von
Ihnen eingestellten Format angezeigt.
•Drücken Sie
beiden Ziffern der Jahresangabe blinken.
•Drücken Sie
DD-MM-YY (TT-MM-JJ) MM-DD-YY (MM-TT-JJ) ein. Das Datum
wird in dem von Ihnen eingestellten Format angezeigt.
•Zum Bestätigen
9.2 Mobilteileinstellungen
9.2.1 Weckereinstellungen
Das Mobilteil kann als Wecker benutzt werden. Wenn eine Weckzeit
eingestellt ist; erscheint <ALARM ICON> auf dem Display. Wenn die
Weckzeit erreicht ist, escheint ein blinkendes <ALARM ICON> und
“ALARM ON” (WECKER EIN) auf dem Display. Das Mobilteil klingelt
außerdem 45 Sekunden lang.
•Drücken Sie
EINSTELLUNGEN).
•Drücken Sie
•Drücken Sie
(AUS).
•Zum Bestätigen
M
und wählen Sie mit . HS SETTINGS (MT-
M
und wählen Sie mit . DATE & TIME (DATUM
M
und wählen Sie mit . SET TIME (UHRZEIT
M
, um die Zeitangaben im 12-STUNDEN - oder
M
M
M
M
M
, um die Jahreszahl einzustellen. Die letzten
und geben Sie das Datum anhand des Formats
M
drücken.
und wählen Sie mit . HS SETTINGS (MT-
und wählen Sie mit . ALARM (WECKER).
und wählen Sie mit . ON (EIN) oder OFF
M
drücken.
DE
9.3 Mobilteil anmelden
Ihr Mobilteil ist im Lieferzustand bereits an der Basisstation
angemeldet. An einer Basisstation können Sie bis zu fünf Mobilteilen
anmelden.
Page 40

40
Sollte jedoch das Mobilteile nicht an der Basisstation angemeldet
sein, wird „REGISTER” (ANMELDEN) auf dem Display des Mobilteils
angezeigt; gehen Sie dann wie folgt vor.
•Drücken und halten Sie fünf Sekunden lang an der Basisstation
gedrückt, um den Anmeldevorgang aufzurufen.
•Drücken Sie
(ANMELDEN).
•Drücken Sie
System PIN-Code einzugeben.
•Geben Sie den 4-stelligen PIN-Code ein und drücken Sie
Bestätigen.
HINWEIS
War die Anmeldung erfolgreich, ertönt ein Bestätigungston und es
wird automatisch die nächst verfügbare Mobilteilnummer zugewiesen.
Diese Mobilteilnummer wird im Stand-by auf dem Mobilteildisplay
angezeigt.
M
M
und wählen Sie mit . REGISTRATION
und Sie werden aufgefordert, den 4-stelligen
M
zum
10 ANRUFER ID-ANZEIGE (NETZWERKABHÄNGIG)
10.1 Anrufliste
Diese Funktion steht nur zur Verfügung, wenn Sie den CLIP-Service
bei Ihrem Telefonanbieter abonniert und auf Ihrem Telefon aktiviert
haben. Ihr Telefon kann bis zu 50 eingehende Anrufe mit Datum/
Uhrzeit in der Anrufliste speichern. Sobald das Telefon klingelt, wird
die Rufnummer auf dem Display des Mobilteils angezeigt. Haben Sie
zu einer Rufnummer in Ihrem.
Telefonbuch einen Eintrag gespeichert, wird anstelle der Rufnummer
der Telefonbucheintrag gezeigt. Das Mobilteil klingelt mit der dem
Eintrag zugeordneten Ruftonmelodie.
Die Informationen werden nicht bei jedem ankommenden Anruf
angezeigt. Es kann sein, dass der Anrufer die Übermittlung seines
Namens/seiner Rufnummer unterdrückt hat.
Anrufübersicht
WITHHELD PRIVAT Der Anrufer hat die Übermittlung der
Rufnummer unterdrückt.
Page 41

41
OUT OF AREA (NICHT VERFÜGBAR) Die Rufnummer des
Anrufers ist nicht verfügbar.
Ist die Anrufliste voll, wird der älteste Anruf durch einen neuen ersetzt.
10.2 Anrufliste anzeigen
Sie können die Anrufliste aufrufen, um einfacher einen Anrufer
zurückzurüfen oder um seinen Namen und seine Rufnummer ins
Telefonbuch zu speichern. “EMPTY” (LEER) erscheint, wenn keine
Aufzeichnungen vorhanden sind.
•Drücken Sie , um zur Anrufliste zu gelangen.
ODER
•Drücken Sie
auszuwählen. Drücken Sie
•Wählen Sie mit . den gewünschten Eintrag.
M
und ., um “CALL LIST” (ANRUFLISTE)
M
.
11 RUFSPERRE
IWenn Sie die Anruferkennung abonniert haben, können Sie
die Rufsperrenfunktion benutzen, um automatisch bestimmte
Rufnummern abzulehnen, indem Sie diese Nummern in die Blacklist
aufnehmen (siehe 11.2). Sie können auch alle Anrufe blockieren
oder nur Anrufe von Nummern in der VIP-Liste erlauben (siehe 5.8).
Jedes Mobilteil kann bis zu insgesamt 100 Einträge gemeinsam mit
dem Telefonbuch (einschließlich der VIP-Liste) oder der Blacklist
aufnehmen.
Anrufe können auch über folgende Rufarten blockiert werden:
Anonym-Anruf, nicht verfügbar, international und Münzfernsprecher.
(Siehe 11.7)
Wenn ein Aufruf blockiert wird, klingelt das Telefon nicht. Wenn der
Anrufbeantworter eingeschaltet ist, wird der blockierte Anruf durch
den Anrufbeantworter angenommen.
DE
Page 42

42
11.1 Blockmodus wählen
Zum Aktivieren der Rufnummernblockierung müssen Sie zunächst
den Blockmodus wählen. Sie können entweder alle Anrufe blockieren,
oder nur VIP-Einträge annehmen oder aber alle Blacklisteinträge
blockieren.
•Drücken Sie
anzuzeigen.
•Drücken Sie
anzuzeigen.
•Drücken Sie
anzuzeigen.
•Drücken Sie
(BLOCK ALL), VIP ERLAUB. (ALLOW VIP) oder BLIST BLOCK.
(BLOCK BLIST) zu wählen.
•Drücken Sie
•Wenn AUS (OFF) gewählt wurde, ist die Einstellung abgeschlossen
und sämtliche Anrufe werden normal empfangen.
Wenn ALLES BLOCK.(BLOCK ALL), VIP ERLAUB. (ALLOW VIP)
oder BLIST BLOCK. (BLOCK BLIST) gewählt sind, wird IMMER EIN
(ALWAYS ON) angezeigt.
•Drücken Sie M, wenn Sie den gewählten Blockmodus ständig
aktiviert lassen wollen, oder drücken Sie ., um ZEITZÄHL.
(TIMED), und dann
(TIME ON) und ZEIT AUS (TIME OFF) auf, um den gewünschten
Zeitraum einzustellen, in dem Sie die Anrufe blockieren wollen.
M
und ., um RUFSPERRE (CALL BLOCKER)
M
M
M
und ., um EINSTELLUNG (SETTINGS)
M
, um BLOCKMODUS (BLOCK MODE)
und ., um AUS (OFF), ALLES BLOCK.
zum Bestätigen.
M
und rufen Sie die Optionen ZEIT EIN
11.2 Eine Rufnummer zur Blacklist hinzufügen
•Drücken Sie
BLOCKER) auf.
•Drücken Sie
•Drücken Sie zweimal M, um EINTRAG NEU (ADD) anzuzeigen.
•Drücken Sie
M
•Drücken Sie
Anmerkung: Jeder Blacklisteintrag vermindert die Aufnahmekapazität
des Telefonbuchs.
M
M
M
und geben Sie die Rufnummer ein.
M
und . rufen Sie RUFSPERRE (CALL
, um BLACKLIST (BLACK LIST) anzuzeigen.
und geben Sie einen Namen ein, dann wieder
um den Eintrag zur Blacklist hinzuzufügen.
Page 43

43
Anmerkung: Wenn das Telefonbuch voll ist, erscheint LISTE VOLL
(LIST FULL) nachdem Sie EINTRAG NEU (ADD) gewählt haben, und
Sie müssen einen Eintrag aus dem Telefonbuch löschen oder schwarze
Liste, bevor Sie einen weiteren Blacklist-Eintrag speichern können.
11.3 Einen Blacklist-Eintrag anzeigen
•Drücken Sie
BLOCKER) auf.
•Drücken Sie
•Drücken Sie
zu wählen.
•Drücken Sie
•Drücken Sie
gewünschten Blacklisteintrags anzuzeigen. Wenn die Nummer
mehr als 12 Ziffern hat, drücken Sie , um die anderen Ziffern
anzuzeigen.
11.4 Alle Blacklist-Einträge löschen
•Drücken Sie
BLOCKER) auf.
•Drücken Sie
•Drücken Sie zweimal auf
(DELETE ALL) anzuzeigen.
•Drücken Sie
•Zum Bestätigen
auf dem Display erscheint LEER (EMPTY).
11.5 Anrufe nach Rufart blockieren
Sie können aber auch verschiedene Anruftypen blockieren, die über
keine Anruferkennung verfügen, indem Sie diese Rufart auf EIN stellen.
Jede Rufart (Anonym-Anruf, International, Nicht verfügbar und
Münztelefon) kann unabhängig von den anderen blockiert werden.
•Drücken Sie
BLOCKER) auf.
•Drücken Sie
anzuzeigen.
•Drücken Sie
M
M
M
M
M
M
M
M
M
M
M
und . rufen Sie RUFSPERRE (CALL
, um BLACKLIST (BLACKLIST) anzuzeigen.
und ., um den gewünschten Blacklisteintrag
und ., um ANSICHT (VIEW) zu wählen.
, um die Rufnummer und den Namen des
und . rufen Sie RUFSPERRE (CALL
, um BLACKLIST (BLACKLIST) anzuzeigen.
M
und dann . um LOESCHEN
, um BESTAE.? (CONFIRM?) anzuzeigen.
M
drücken. Alle Einträge werden gelöscht und
und . rufen Sie RUFSPERRE (CALL
und ., um EINSTELLUNG (SETTINGS)
und . um RUFART (CALL TYPE) anzuzeigen.
DE
Page 44

44
•Drücken Sie
INTERNAT. (INTERNAT’L), NICHT VERF. (UNAVAILABLE), oder
MUENZTELEFON (PAYPHONE) zu wählen.
•Drücken Sie
wählen.
•Drücken Sie
•Zum Einstellen anderer Rufarten, ab Schritt 4 wiederholen.
M
und . um ANONYM-ANRUF ((WITHHELD),
M
und . um EIN (ON) oder AUS (OFF) zu
M
um die Einstellung für diese Rufart zu bestätigen..
12 ANRUFBEANTWORTER (AB)
Ihr Telefon verfügt über einen eingebauten Anrufbeantworter, der
unbeantwortete Anrufe aufnimmt, wenn er eingeschaltet ist. Der
Anrufbeantworter kann bis zu 59 Nachrichten mit einer maximalen
Aufnahmezeit von etwa 15 Minuten speichern. Er kann nicht nur
eingehende Nachrichten, sondern auch ein Memo für andere Nutzer
Ihres Telefons aufnehmen. Sobald der Speicher des Anrufbeantworters
voll ist, wird auf dem Handteil (AB VOLL) (TAM FULL) sowie der Name
des Handteils und Sie müssen ein paar Nachrichten löschen, bevor Sie
wieder neue aufnehmen können.
Wenn der AB voll ist, wird nur Ihre Ansage abgespielt und der Anrufer
hat keine Möglichkeit, eine Nachricht zu hinterlassen.
12.1 AB ein-/ausschalten
Sie können mithilfe des Handteils den Anrufbeantworter ein-/oder
ausschalten. Wenn der Anrufbeantworter auf EIN (ON) steht, dann
schaltet sich die AB-Anzeige auf dem Basisteil ein und auf dem Handteil
wird das AB-Symbol angezeigt. Anrufe werden nach der eingestellten
Verzögerungszeit beantwortet und wenn der Anrufbeantworter auf
den Aufnahmemodus eingestellt ist, dann kann der Anrufer eine
Nachricht hinterlassen. Wenn der Anrufbeantworter auf AUS (OFF)
steht, werden die Anrufe nach 14-mal klingeln mit der Standardansage
beantwortet und der Anrufer kann keine Nachricht hinterlassen.
Anrufer können keine Nachricht auf den Anrufbeantworter sprechen.
•Im Stand-by-Modus
(ANS. MACHINE) anzuzeigen.
M
drücken und ., um ANRUFBEANTW.
Page 45

45
•Drücken Sie dann
OFF) anzuzeigen.
•Drücken Sie
wählen.
•Drücken Sie
12.2 Nachrichten auf dem AB abspielen
Sobald neue Nachrichten aufgezeichnet werden, blinkt die ABAnzeige auf der Basis und das AB-Symbol auf dem Handteil blinken.
Neue Nachrichten werden zuerst abgespielt und dann als alte
Nachrichten gespeichert, bis sie gelöscht werden. Alte Nachrichten
werden wiedergegeben, nachdem alle neuen Nachrichten abgehört
wurden.
•Im Stand-by-Modus
(ANS. MACHINE) anzuzeigen.
•Drücken Sie M, um NACHR.HOEREN (MSG PLAYBACK)
anzuzeigen.
•Drücken Sie M, um alle Nachrichten über die Freisprecheinrichtung
abzuspielen.
•Anmerkung: Das Display zeigt die Uhrzeit und das Datum an, an
dem die Nachricht aufgenommen wurde, und ein Symbol am
oberen Rand des Bildschirms, wenn es sich um eine neue Nachricht
handelt.
• Für Optionen während der Wiedergabe:
Drücken Sie ., um die Wiedergabelautstärke zu erhöhen oder
zu vermindern.
Drücken Sie H, um um die Freisprechanlage auszuschalten und über
das Mobilteil zu hören.
Drücken Sie
STOP zum Anhalten der Wiedergabe.
FWEITER (FORWARD) zum Übergang auf die nächste Nachricht.
PZURUECK (PREVIOUS), um die aktuelle Nachricht zu wiederholen.
LOESCHEN (DELETE), um die aktuelle Nachricht zu löschen.
Alternativ können Sie auch folgende Zahlentasten drücken:
5 zum Anhalten der Wiedergabe.
6 zum Übergang auf die nächste Nachricht.
M
und ., um AB EIN/AUS (AM ON/
M
und ., um EIN (ON) oder AUS (OFF) zu
M
, um die Einstellung zu bestätigen.
M
drücken und ., um ANRUFBEANTW.
M
und . für die Optionen:
DE
Page 46

46
4 um die aktuelle Nachricht zu wiederholen.
4,4 zum Übergang auf die vorherige Nachricht.
2 um die aktuelle Nachricht zu löschen.
HINWEIS:
Sie können keine neuen Nachrichten löschen, daher müssen Sie sie
zuerst die Nachrichten abhören, bevor Sie sie löschen können.
12.3 Einstellungen des Anrufbeantworters
12.3.1 Automatische Rufannahme einstellen
Sie können den werkseitig eingestellten Modus MIT AUFZ. (ANS &
REC) einstellen, wenn Sie möchten, dass die Anrufer eine Nachricht
hinterlassen, oder OHNE AUFZ. (ANSWER ONLY), wenn Sie nicht
möchten, dass die Anrufer eine Nachricht hinterlassen.
•Im Stand-by-Modus
(ANS. MACHINE) anzuzeigen.
•Drücken Sie dann
anzuzeigen.
•Drücken Sie
anzuzeigen.
•Drücken Sie
OHNE AUFZ. (ANSWER ONLY) zu wählen.
•Drücken Sie
12.3.2 Ansage aufnehmen (OGM)
Sie können Ihre eigene Ansage im Modus ANS & REC oder im Modus
ANSWER ONLY (NUR ANSAGE) aufnehmen. Wenn Sie Ihre eigene
Ansage aufnehmen, wird diese abgespielt, sobald ein Anruf eingeht.
Wenn Ihre Ansage gelöscht wurde, schaltet sich automatisch die
voreingestellte Ansage wieder ein.
•Im Stand-by-Modus
(ANS. MACHINE) anzuzeigen.
•Drücken Sie dann
anzuzeigen.
•Drücken Sie
anzuzeigen.
•Drücken Sie
OHNE AUFZ. (ANSWER ONLY) zu wählen.
M
drücken und ., um ANRUFBEANTW.
M
und ., um AB EINST. (TAM SETTINGS)
M
, um ANTWORTMODUS (ANSWER MODE)
M
und ., um MIT AUFZ. (ANS & REC) oder
M
, um die Einstellung zu bestätigen.
M
drücken und ., um ANRUFBEANTW.
M
und ., um AB EINST. (TAM SETTINGS)
M
und . um ANSAGEN (OGM SETTINGS)
M
und ., um MIT AUFZ. (ANS & REC) oder
Page 47

47
•Drücken Sie
M
und ., um NACHR.AUFZ. (RECORD MESS)
anzuzeigen.
•Drücken Sie
M
Aufnahme Ihrer persönlichen Ansage zu starten
und RECORDING (AUFNAHME) wird auf dem Display angezeigt.
•Drücken Sie
M
, um Ihre persönliche Ansage zu stoppen und zu
speichern, die dann automatisch abgespielt wird.
Sie können aber auch
drücken, um zum vorherigen Bildschirm
zurückzukehren, ohne die persönliche Ansage zu speichern und um
die automatisch voreingestellte Ansage wiederherzustellen.
13 TECHNISCHE DATEN
STANDARD DECT
FREQUENZBEREICH 1,88 BIS 1,9 GHZ (BANDBREITE = 20 MHZ)
KANALBANDBREITE 1,728 MHZ
REICHWEITE BIS ZU 300 M IM FREIEN; BIS ZU 50 M IM
BETRIEBS-/LADEZEITEN STANDBY: 100 STUNDEN,GESPRÄCHZEIT: 10
UMGEBUNGSBEDINGUNGEN
STROMVERSORGUNG BBASISSTATION:
INNENBEREICH
STUNDEN AKKULADEZEIT: 15 STUNDEN
BETRIEB: 0°C BIS 40°C, LAGERUNG: -20°C BIS
60°C
VT04EUK06045 / VT04EEU06045
EINGANG 100-240VAC 50/60Hz 150MA AUSGANG
6VDC 450MA
TENPAO:S003IB0600045/S003IV0600045
EINGANG 100-240VAC 50/60Hz 150MA AUSGANG
6VDC 450MA
RJ-AS060450B001 / RJ-AS060450E002
EINGANG 100-240VAC 50/60Hz 150MA AUSGANG
6VDC 450MA
ANGABEN ZUM AKKU:
TYP Ni-MH (AKKU) 400mAh, 2 X 1,2V, AAA
DE
Page 48

48
14 REINIGUNG UND PFLEGE
Reinigen Sie keine Teile Ihres Telefons mit Benzin, Verdünnungsmitteln
oder Chemikalien auf Lösungsmittelbasis, da dies zu bleibenden
Schäden führen kann, die nicht von der Garantie abgedeckt werden.
Reinigen Sie das Gerät, falls notwendig, mit einem feuchten Tuch.
Halten Sie Ihr Telefon von Hitze, Feuchtigkeit/Nässe oder starker
Sonneneinstrahlung fern und lassen sie es nicht nass werden.
15 GARANTIE UND SERVICE
Die Garantiefrist für das Gerät beträgt 24 Monate ab dem Datum des
Kaufbeleges. . Diese Garantie deckt keine Fehler oder Defekte ab,
die durch Unfälle, Missbrauch, normalen Verschleiß, Nachlässigkeit,
Defekte im Telefonnetz, Blitzeinschlag, jegliche Versuche zur
Veränderung/Reparatur des Geräts seitens des Kunden oder nicht
zugelassenen Servicepersonals entstanden sind.
Bitte heben Sie Ihren Kaufbeleg (Kassenzettel) auf; er dient als
Garantiebeweis.
15.1 Während der Garantiezeit
•Trennen Sie die Basisstation von der Telefonleitung und dem
Stromnetz.
•Verpacken Sie alle Teile des Telefons in der Originalverpackung.
•Bringen Sie das Gerät zu dem Händler, bei dem Sie es gekauft
haben, und nehmen Sie auch Ihren Kaufbeleg mit.
•Vergessen Sie nicht, das Netzteil einzupacken.
15.2 Reparaturen nach Ablauf der Garantiezeit
Wenn für das Gerät keine Garantie mehr besteht, kontaktieren Sie uns
bitte über www.aegtelephones.eu.
Dieses Gerät arbeitet ausschließlich mit wiederaufladbaren Akkus.
Wenn Sie nicht wiederaufladbare Batterien verwenden und das
Mobilteil auf die Basisstation stellen, wird das Mobilteil beschädigt
und die Garantie erlischt.
Page 49

49
16 CE-KONFORMITÄTSERKLÄRUNG
Dieses Produkt entspricht den maßgeblichen Anforderungen und
anderen relevanten Bestimmungen der FuTKEE-Richtlinie 1999/5/EG.
Die Konformitätserklärung liegt vor unter:
www.aegtelephones.eu
17 ENTSORGUNG DES GERÄTS
(UMWELTSCHUTZ)
Am Ende des Produktlebenszyklus sollten Sie dieses Gerät nicht über
den normalen Hausmüll entsorgen, sondern es zu einer Sammelstelle
für das Recycling von elektrischen und elektronischen Geräten
bringen. Das Symbol auf dem Produkt, auf der Bedienungsanleitung
und/oder der Verpackung weist darauf hin. Einige der Materialen
können wiederverwendet werden, wenn sie an einer Recyclingstelle
abgegeben werden. Mit der Verwertung einiger Teile oder Rohstoffe
aus gebrauchten Produkten leisten Sie einen wichtigen Beitrag zum
Umweltschutz. Bitte setzen Sie sich mit Ihren örtlichen Behörden in
Verbindung, falls Sie mehr Informationen zu den Sammelstellen in
Ihrer Gegend benötigen.
Die Akkus müssen entfernt werden, bevor das Gerät entsorgt
wird. Die Akkus sind umwelt-schonend und gemäß den nationalen
Bestimmungen an Ihrem Wohnort zu entsorgen.
DE
Page 50

50
1 NOTRE ENGAGEMENT
Merci d’avoir acheté ce produit. Ce produit a été conçu et fabriqué
avec le plus grand soin pour vous satisfaire tout en préservant
l’environnement. C’est pourquoi nous vous fournissons ce produit
avec un guide de démarrage rapide, afin de réduire la quantité de
papier (le nombre de pages) utilisée et d’éviter ainsi à des arbres d’être
abattus pour fabriquer ce papier. Un guide de l’utilisateur complet et
détaillé décrivant toutes les fonctions est disponible sur notre site
web : www.aegtelephones.eu. Si vous souhaitez utiliser l’ensemble
des fonctions avancées de votre produit, nous vous prions de bien
vouloir télécharger le guide de l’utilisateur complet. Afin de préserver
l’environnement, nous vous demandons de ne pas imprimer ce guide
de l’utilisateur dans son intégralité. Merci de nous aider à protéger
l’environnement.
2 INSTRUCTIONS DE SÉCURITÉ IMPORTANTES
Veuillez suivre ces consignes de sécurité lorsque vous utilisez votre
téléphone afin de réduire les risques d’incendie, d’électrocution et de
blessure :
•Veuillez lire et vous assurer d’avoir compris toutes les consignes.
•Respectez toutes les mises en garde et instructions figurant sur le
produit.
•Débranchez le produit de la prise murale avant de le nettoyer.
N’utilisez pas de produits d’entretien liquides ou en aérosol.
Nettoyez avec un chiffon humide.
•Maintenez votre téléphone à l’abri de la chaleur, de l’humidité ou
d’un rayonnement solaire intense. Ne le mouillez pas et ne l’utilisez
pas à proximité d’un point d’eau (par exemple, près d’une baignoire,
d’un évier, ou d’une piscine).
•Ne surchargez pas les prises murales et les rallonges ; cela peut
entraîner un risque d’incendie ou de décharge électrique.
•Dans les situations suivantes, débranchez ce produit de la prise
murale:
>lorsque le cordon d’alimentation ou la prise est endommagé(e) .
>si le produit ne fonctionne pas normalement en respectant les
consignes d’utilisation.
Page 51

51
>si le produit est tombé et le boîtier a été endommagé
>si les performances du produit changent de manière significative.
•N’utilisez JAMAIS votre téléphone à l’extérieur pendant un orage.
Débranchez la base de la ligne téléphonique et de la prise secteur
en cas d’orage proche. Les dommages causés par la foudre ne sont
pas couverts par la garantie.
•N’utilisez pas le téléphone pour signaler une fuite de gaz si vous
vous trouvez à proximité de celle-ci.
•Utilisez uniquement les piles NiMH (Nickel Métal Hydrure) fournies
avec votre téléphone ou des piles de rechange recommandées par
le fabricant. Il existe un risque d’explosion si vous remplacez les
piles par un type de pile inadapté. L’utilisation d’autres types de
piles ou de piles non rechargeables/piles primaires peut s’avérer
dangereuse. Celles-ci peuvent provoquer des interférences et/
ou endommager l’appareil ou son environnement. Le fabricant
ne saurait être tenu responsable de dommages résultant du nonrespect de ces instructions.
•N’utilisez pas de stations de charge tierces. Cela pourrait
endommager les piles.
•Veuillez vous assurer que les piles sont installées selon la bonne
polarité.
Mettez les piles au rebut en toute sécurité. Ne les faites pas brûler,
ne les plongez pas dans l’eau, ne démontez pas ou ne percez pas les
piles.
3 UTILISATION CONFORME
Ce téléphone est destiné à être raccordé à un réseau téléphonique
analogique public ou à l’extension analogique d’un standard
téléphonique (PBX) compatible.
FR
4 INSTALLATION DE VOTRE TÉLÉPHONE
4.1 Raccordement de la station de base (voir P5)
•Branchez l’adaptateur secteur et le cordon téléphonique sur la
station de base.
Page 52

52
•Branchez l’adaptateur secteur sur une prise secteur 100 - 240VAC, 50
- 60 Hz et le cordon téléphonique sur une prise téléphonique murale.
Avertissement : utilisez toujours les câbles fournis dans la boîte.
Utilisez uniquement l’adaptateur secteur fourni. L’utilisation d’un autre
adaptateur secteur peut endommager l’appareil.
Remarque : installez la station de base à proximité de la prise
électrique murale. N’essayez en aucun cas de rallonger le câble
d’alimentation secteur. La station de base doit être raccordée à
l’alimentation secteur pour fonctionner normalement ; les combinés
sans fil ne fonctionneront pas sans cela.
4.2 Mise en place et chargement des piles (voir P3)
•Insérez les 2 piles fournies dans le compartiment des piles, en veillant
à respecter la polarité (voir les repères à l’intérieur du compartiment
des piles).
Avertissement : UtilisezuniquementlespilesrechargeablesNiMH
fournies.
•Placez le couvercle à l’arrière du combiné et appuyez dessus jusqu’à
ce qu’il se mette en place avec un clic.
•Placez le combiné sur la base et laissez-le charger pendant 15 heures
avant la première utilisation.
>Le combiné émet un double bip lorsqu‘il est correctement installé
sur la base et le témoin de charge des piles situé sur la base
s‘allume pour signaler que la charge est en cours.
Remarque :
Le combiné peut s’échauffer pendant le chargement des piles ou au
cours d’une période d’utilisation prolongée. Ceci est normal et n’est
pas le signe d’une anomalie.
ATTENTION
Risque d’explosion si les piles sont remplacées par des piles de type
inapproprié. Mettez les piles usagées au rebut conformément aux
instructions.
Page 53

5 RÉGLAGE DE LA LANGUE DU COMBINÉ
•Appuyez sur
(RÉGLAGES COMBINÉ)”.
•Appuyez sur
(LANGUE)”.
•Appuyez sur
•Appuyez sur
M
et sur . pour sélectionner “HS SETTINGS
M
et sur . pour sélectionner “LANGUAGE
M
et sur . pour sélectionner la langue désirée.
M
pour confirmer.
53
6 DESCRIPTION DE VOTRE TÉLÉPHONE
6.1 Présentation du combiné (voir P1)
•En mode veille : appuyez pour accéder au
menu principal.
1
2
M
•En mode sous-menu : appuyez pour confirmer
la sélection.
•Pendant un appel : appuyez pour accéder à
Intercom/ Répertoire/ Liste bis/ Journal.
•En mode veille : appuyez pour effectuer un
appel par intercom.
•En mode menu principal : appuyez pour
retourner à l‘écran de veille.
•En mode sous-menu : appuyez pour retourner
à l‘option précédente, ou maintenir appuyée
pour retourner à l‘écran de veille.
•En mode modification / pré-numérotation :
appuyez pour éliminer un caractère / chiffre,
ou maintenir appuyée pour éliminer tous les
caractères / chiffres.
•Pendant un appel : appuyez pour activer /
désactiver le micro.
FR
Page 54

54
•En mode veille : appuyez pour accéder au
journal.
•Dans les menus et listes : appuyez pour aller
3
=
4
-
5
vers les options supérieures.
•Pendant un appel : appuyez pour augmenter
le volume.
•Pendant une sonnerie : appuyez pour
augmenter le volume de sonnerie du combiné.
•En mode veille : appuyez pour accéder à la
liste bis.
•Dans les menus et listes : appuyez pour faire
défiler les options vers le bas.
•Pendant un appel : appuyez pour baisser le
volume.
•Pendant une sonnerie : appuyez pour baisser
le volume de sonnerie du combiné.
•En mode veille / mode pré-numérotation/ Liste
bis / Journal / Liste de répertoire : appuyez
pour effectuer un appel.
•Pendant une sonnerie : appuyez pour
répondre à un appel.
•Pendant un appel : appuyez pour allumer /
éteindre le haut-parleur.
•En mode veille / pré-numérotation / Liste bis
/ Journal / Liste de répertoire : appuyez pour
effectuer un appel avec haut-parleur.
•Pendant une sonnerie : appuyez pour
répondre à un appel avec haut-parleur.
Page 55

55
•Pendant un appel : appuyez pour terminer un
appel et retourner à l‘écran de veille.
6
O
•En mode menu / modification : appuyez pour
retourner au menu précédent, ou maintenir
appuyée pour retourner à l‘écran de veille.
•En mode veille : maintenir appuyée pour
allumer/éteindre le combiné.
•Appuyez pour introduire un chiffre / caractère
/ * / #
•* touche en mode veille : appuyez pour activer
ou désactiver le verrouillage du clavier.
CLAVIER
ALPHA-
7
NUMÉRIQUE,
*, #
8
9 •Microphone
10 •Haut-parleur
6.2 Présentation de la station de base (voir P4)
12
F
•Touche # en mode veille : maintenir appuyée
pour allumer / éteindre la sonnerie du
combiné.
•Touche # en mode pré-numérotation /
modification de numéro : maintenir appuyée
pour introduire une pause.
•Touche * en mode Journal : appuyez pour
voir plus de chiffres du numéro appelant, si
applicable.
•Pendant un appel, appuyez pour envoyer un
signal de Rappel (aussi appelé Flash) pour les
services de réseau.
•RECH. BASE : appuyez pour rechercher
votre/vos combiné(s).
•Maintenir appuyée pour entrer dans le
mode enregistrement.
FR
Page 56

56
13
VOYANT
LUMINEUX
RÉPONDEUR
•Allumé lorsque le répondeur automatique
est ACTIVÉ
•Clignote si de nouveaux messages sont
enregistrés, lorsque le répondeur est en
cours d‘utilisation, ou lorsqu‘il y a une
sonnerie entrante.
SUPPORT DE
14
CHARGEMENT
6.3 Icônes et symboles de l’écran LCD du combiné (voir P2)
L’écran LCD vous donne des informations sur l’état actuel du
téléphone.
S‘affiche lorsque le combiné est associé et se trouve
à la portée de la station de base. Plus il y a de barres
allumées, plus le signal est fort.
Indique qu‘un appel est en cours sur le combiné.
Clignote pour signaler un appel entrant.
Indique que la sonnerie du combiné est éteinte.
Indique qu‘une alarme est activée. Clignote lorsque
l‘alarme sonne.
Indique que le clavier est verrouillé.
Indique que la batterie est entièrement chargée.
Segments de la batterie pendant le cycle de
chargement.
Indique que la batterie doit être chargée. Clignote
lorsqu‘un niveau faible de la batterie est détecté.
(Remarque : le rétro-éclairage du combiné ne s‘allume
pas lorsque le niveau de la batterie est faible).
•Support du combiné pour chargement de
la batterie.
Page 57

57
Indique la lecture d‘un nouveau message du répondeur
automatique ou signale un nouvel appel dans le journal
d‘appels.
Indique que le haut-parleur est activé.
Indique que vous avez un nouveau message sur
votre boîte vocale. (Ceci est un service d‘affichage
de l‘appelant, qui n‘est généralement pas disponible
auprès des fournisseurs de réseau de UK).
Indique que le répondeur automatique est activé.
Clignote s‘il y a un nouveau message sur le répondeur.
Indique qu‘un mode de blocage est activé.
(INT)
(RETOUR)
6.4 Saisie de texte et de chiffres
En mode modification, un curseur est affiché pour signaler
l’emplacement sur lequel la saisie est en cours. Il se trouve à droite du
dernier caractère entré.
Conseils pour la saisie :
Dès lors qu’un caractère est sélectionné, le curseur se positionne sur
l’emplacement suivant après un court instant.
Vous pouvez déplacer le curseur à l’aide des touches . afin de
modifier le texte saisi.
•Appuyez sur pour effacer le dernier caractère.
•Appuyez et maintenez la touche enfoncée pour effacer tout
le texte.
Appuyez sur pour commencer un appel
d‘intercom.
Appuyez sur pour retourner au menu précédent
ou pour annuler l‘action en cours.
Appuyez sur pour activer / désactiver le micro
pendant un appel, éliminer des caractères pendant une
pré-numérotation / modification, ou arrêter une alarme.
FR
Page 58

58
7 UTILISATION DE VOTRE TÉLÉPHONE
7.1 Émettre un appel
7.1.1 Numérotation préalable
•Saisissez le numéro de téléphone, avec un maximum de 24 chiffres.
Si vous avez fait une erreur, appuyez sur
chiffre.
•Appuyez sur pour composer le numéro.
7.1.2 Numérotation directe
•Appuyez sur pour prendre la ligne.
•Saisissez le numéro de téléphone.
7.1.3 Appel à partir du répertoire
•Appuyez sur
(PHONEBOOK). Appuyez sur
(ALL CONTACTS).
•Appuyez à nouveau sur
REMARQUE
La première entrée du répertoire s’affiche. Si le répertoire ne contient
aucune entrée, l’écran affiche “EMPTY (VIDE)”.
•Appuyez sur . pour sélectionner l’entrée désirée dans le
répertoire.
•Appuyez sur pour composer le numéro.
7.1.4 Appel à partir du journal d’appels
•En mode inactif, appuyez sur pour ouvrir le journal d’appels et
appuyez sur . pour sélectionner une entrée.
OU
• Appuyez sur
(JOURNAL D’APPELS).
REMARQUE
La première entrée du journal d’appels s’affiche. Si le journal d’appels
ne contient aucune entrée, l’écran affiche “EMPTY (VIDE)”.
•Appuyez sur
désiré.
•Appuyez sur / H pour composer le numéro.
M
puis sur . pour sélectionner RÉPERTOIRE
M
M
M
puis sur . pour sélectionner CALL LIST
M
puis sur . pour sélectionner le numéro
M
pour effacer le dernier
pour afficher TOUS CONTA.
pour accéder au répertoire.
Page 59

59
7.1.5 Appel à partir de la liste bis
•Appuyez sur
sélectionner le numéro à rappeler.
•Appuyez sur / H pour composer le numéro sélectionné.
7.2 Répondre à un appel
Si le combiné n’est pas posé sur la station de chargement :
Lorsque le téléphone sonne, appuyez sur / H pour répondre à un
appel.
Si le combiné est posé sur la base ou le chargeur et si la fonction
AUTO ANSWER (RÉPONSE AUTOMATIQUE) est réglée sur ON
(ACTIVÉE) :
Lorsque le téléphone sonne, décrochez le combiné pour répondre à
un appel.
Si vous souhaitez désactiver la fonction AUTO ANSWER (RÉPONSE
AUTOMATIQUE), reportez-vous au paragraphe Réglage de la
réponse automatique. Cette fonction est réglée par défaut sur ON
(ACTIVÉE).
7.3 Régler le volume de l’écouteur et du haut-parleur
Il existe 5 niveaux de volume au choix (VOLUME 1 à VOLUME 5)
pour l’écouteur, ainsi que pour le haut-parleur.
Pendant une communication:
Appuyez sur . pour sélectionner un niveau sonore entre VOLUME 1
à VOLUME 5. Le réglage actuel est affiché. À la fin de la communication,
le réglage restera sur le dernier niveau sélectionné.
-
pour ouvrir la liste bis et appuyez sur . pour
FR
7.4 Mode muet
Vous pouvez couper le microphone au cours d’un appel, de manière
à pouvoir parler avec quelqu’un qui se trouve près de vous sans que
l’appelant puisse vous entendre.
Pendant une communication :
Page 60

60
•Appuyez sur pour mettre le microphone en mode muet ; le
message “MUTED (MUET)” s’affiche sur l’écran LCD. L’appelant ne
peut pas vous entendre.
•Appuyez à nouveau sur pour réactiver le microphone.
7.5 Terminer une communication
Pendant un appel, appuyez sur O pour mettre fin à la communication.
OU
Posez le combiné sur la base ou le chargeur pour mettre fin à la
communication.
7.6 VERROUILLER/DÉVERROUILLER le clavier
•En mode inactif, appuyez sur la touche “X” et maintenez-la
enfoncée pour activer le verrouillage du clavier. L‘icône apparaît sur
l’écran LCD.
•Pour déverrouiller le clavier, appuyez sur la touche X et maintenez-
la enfoncée.
7.7 Rechercher le combiné (PAGING) (RECHERCHE)
La fonction de recherche est un moyen pratique de retrouver un/des
combiné(s) égaré(s).
•Appuyez sur sur la station de base. Tous les combinés enregistrés
et disponibles émettent la tonalité de recherche et le message
“PAGING (RECHERCHE)” s’affiche sur l’écran LCD.
•Appuyez sur / O / sur n’importe lequel des combinés,
ou à nouveau sur la touche de la station de base pour arrêter la
recherche.
REMARQUE
S’il y a un appel entrant durant la recherche, le téléphone émet la
sonnerie correspondant à un appel entrant au lieu de la tonalité de
recherche.
Page 61

61
7.8 Émettre un appel interne
Cette fonctionnalité n’est applicable que s’il y a au moins deux
combinés enregistrés. Elle permet d’effectuer des appels internes, de
transférer des appels extérieurs vers un autre combiné et de réaliser
des conférences téléphoniques. Si le combiné appelé ne répond
pas dans les 60 secondes, il arrête de sonner et le combiné appelant
revient en mode veille.
7.8.1 Appeler un autre combiné
•En mode inactif, appuyez sur M et l’écran affiche tous les
combinés enregistrés, sauf le combiné appelant.
•Saisissez le numéro du combiné que vous souhaitez appeler.
•Le combiné appelé sonne ; appuyez sur la touche du combiné
appelé pour établir la communication interne.
REMARQUES
•Si un seul combiné est enregistré sur la station de base, appuyez sur
et le message “NOT POSSIBLE (IMPOSSIBLE)” apparaît.
•Si seulement deux combinés sont enregistrés sur la station de base,
il suffit d’appuyer sur pour être immédiatement connecté à
l’autre combiné.
7.8.2 Transférer un appel externe à un autre combiné
Pendant un appel externe :
•Appuyez sur
(INTERPHONE).
•Appuyez sur
l’on souhaite appeler.
•L’appel extérieur est automatiquement mis en attente et le combiné
appelé sonne.
•Appuyez sur la touche du combiné appelé pour établir la
communication interne.
•Appuyez sur la touche O du combiné appelant ou posez celui-ci sur
la station de chargement pour mettre fin à l’appel en cours avec la
personne tierce.
•L’appel extérieur est transféré au combiné appelé.
M
et sur . pour sélectionner INTERCOM
M
et sur . pour sélectionner le combiné que
FR
Page 62

62
8 RÉPERTOIRE PRIVÉ
Votre téléphone peut enregistrer jusqu’à 100 entrées de répertoire
privé comprenant des noms et numéros. Chaque entrée du répertoire
peut comporter au maximum 24 chiffres pour le numéro de téléphone
et 12 caractères pour le nom. Vous pouvez également choisir des
mélodies différentes pour vos entrées de répertoire. Les entrées sont
classées dans l’ordre alphabétique.
8.1 Enregistrer un numéro dans le répertoire
• Appuyez sur
(PHONEBOOK). Appuyez à nouveau sur M pour afficher TOUS
CONTA. (All CONTACTS).
• Appuyez à nouveau sur
REMARQUE
La première entrée du répertoire s’affiche. Si le répertoire ne contient
aucune entrée, l’écran affiche “EMPTY (VIDE)”.
•Appuyez sur
•Appuyez sur
•Appuyez sur
•Appuyez sur
•Appuyez sur
8.1.1 Saisie des noms
Pour saisir les noms, utilisez les lettres du clavier. Par exemple, pour
enregistrer Tom :
Appuyez une fois sur 8 pour taper T.
Appuyez trois fois sur 6 pour taper o .
Appuyez une fois sur 6 pour taper m.
M
M
et sur . pour sélectionner RÉPERTOIRE
M
pour accéder au répertoire.
M
pour sélectionner ADD (AJOUTER).
M
et saisissez un nom.
M
et saisissez le numéro.
et sur . pour sélectionner la mélodie désirée.
M
pour enregistrer.
8.1.2 Appeler une entrée du répertoire
Dans la liste du répertoire, appuyez sur . pour sélectionner
l’entrée désirée, ou faites une recherche alphabétique à l’aide du
clavier alphanumérique.
•Appuyez sur / H pour composer le numéro sélectionné.
Page 63

63
8.2 Effacer une entrée du répertoire
•Appuyez sur
(PHONEBOOK). Appuyez à nouveau sur M pour afficher TOUS
CONTA. (All CONTACTS).
•Appuyez à nouveau sur
•Appuyez sur . pour sélectionner l‘entrée de répertoire
sélectionnée.
•Appuyez sur
(DELETE).
•Appuyez sur
M
et sur . pour sélectionner RÉPERTOIRE
M
pour accéder au répertoire.
M
et sur . pour sélectionner SUPPRIMER
M
pour confirmer.
FR
8.3 Ajouter une entrée de répertoire à la liste VIP
•Appuyez sur
(PHONEBOOK), puis sur
(ALL CONTACTS). Appuyez à nouveau sur
répertoire.
•Appuyez sur . pour sélectionner l‘entrée de répertoire
sélectionnée.
•Appuyez sur
(ADD TO VIP).
•Appuyez sur
nom indique que cette entrée est maintenant une entrée VIP.
M
et sur . pour sélectionner RÉPERTOIRE
M
pour afficher TOUS CONTA.
M
pour accéder au
M
et sur . pour sélectionner AJOUTER VIP
M
pour ajouter l‘entrée à la liste VIP. Un * à côté du
9 PARAMÈTRES DU TÉLÉPHONE
Votre téléphone dispose d’un ensemble de paramètres que vous
pouvez modifier afin de personnaliser son fonctionnement.
9.1 Paramètrage de la date et de l’heure
9.1.1 Réglage de l’heure, la date et l’année
•Appuyez sur
(RÉGLAGES COMBINÉ).
•Appuyez sur
(DATE & HEURE).
M
et sur . pour sélectionner HS SETTINGS
M
et sur . pour sélectionner DATE & TIME
Page 64

64
•Appuyez sur
(RÉGLAGE HEURE).
•Appuyez sur
HEURES) ou 24 HR (24 HEURES). L’heure sera au format que vous
avez réglé.
•Appuyez sur
l’année clignotent pour saisie.
•Appuyez sur
ou MM-DD-YY (JJ-MMAA ou MM-JJ-AA). La date sera au format
que vous avez réglé.
•Appuyez sur
9.2 Paramètres du combiné
9.2.1 Alarme
Vous pouvez utiliser ce téléphone comme un réveil. Quand une
alarme est activée, <ALARM ICON (L’ICÔNE D’ALARME)> s’affiche
sur l’écran LCD. Quand l’heure de réveil est atteinte, <ALARM ICON
(L’ICÔNE D’ALARME)> et “ALARM ON (ALARME ACTIVÉE)”
clignotent sur l’écran. Le combiné sonne également pendant 45
secondes.
•Appuyez sur
(RÉGLAGES COMBINÉ).
•Appuyez sur
•Appuyez sur
OFF (DÉSACTIVÉE)..
•Appuyez sur
9.3 Enregistrer un combiné
Votre combiné est préenregistré sur la station de base. Jusqu’à cinq
combinés peuvent être enregistrés sur une seule station de base.
Si pour une raison quelconque, votre combiné n’était pas enregistré
sur la station de base, le message “REGISTER (ENREGISTRER)”
s’afficherait sur l’écran du combiné enregistrez votre combiné en
suivant la procédure ci-dessous.
M
M
M
M
M
M
M
M
M
et sur . pour sélectionner SET TIME
puis entrez l’heure suivant le format 12 HR (12
puis entrez l’année. Les deux derniers chiffres de
puis entrez la date suivant le format DD-MM-YY
pour confirmer.
et sur . pour sélectionner HS SETTINGS
et sur . pour sélectionner ALARM (ALARME).
et sur . pour sélectionner ON (ACTIVÉE) ou
pour confirmer.
Page 65

65
•Appuyez sur la touche la station de base et maintenez-la enfoncée
pendant environ cinq secondes ; la station de base se met en mode
enregistrement.
•Appuyez sur
(ENREGISTREMENT).
•Appuyez sur
demandé.
•Saisissez le code PIN système à 4 chiffres et appuyez sur
confirmer.
REMARQUE
Si l’enregistrement du combiné est réussi, le numéro disponible
suivant est automatiquement attribué au combiné. Ce numéro de
combiné apparaît sur l’écran de celui-ci en mode veille.
M
et sur . pour sélectionner REGISTRATION
M
et le code PIN système à 4 chiffres vous est
M
pour
10 AFFICHAGE DU NUMÉRO D’APPELANT
(EN FONCTION DU RÉSEAU)
10.1 Journal d’appels
Cette fonctionnalité est disponible si vous avez souscrit au service
d’identification de l’appelant auprès de votre opérateur téléphonique.
Votre téléphone peut enregistrer jusqu’à 50 appels reçus, avec la date
et l’heure, dans le journal d’appels. Le numéro s’affiche sur l’écran LCD
lorsque le téléphone sonne. Si le numéro correspond àune entrée de
votre répertoire privé, le nom de l’appelant enregistré dans celui-ci
s’affiche en même temps que le numéro. Le combiné émet la sonnerie
associée à cette entrée du répertoire.
Il est possible que les informations du journal d’appels ne soient pas
disponibles pour tous les appels entrants. Les appelants peuvent
cacher délibérément leurs noms et / ou numéros de téléphone.
Messages-écrans concernant l’affichage du journal d’appels
WITHHELD (PRIVÉ) L’appelant refuse de communiquer son numéro
de téléphone.
FR
Page 66

66
OUT OF AREA (HORS ZONE) Le numéro de l’appelant n’est pas
disponible.
Lorsque la liste est pleine et qu’un nouvel appel est reçu, l’entrée la
plus ancienne est automatiquement effacée.
10.2 Affichage du journal d’appels
Consulter le journal des appels permet de savoir qui a appelé, de
retourner facilement un appel, ou d’enregistrer le nom et le numéro
d’un appelant dans votre répertoire. Si le journal d’appels ne contient
aucune entrée, le message “EMPTY (VIDE)” apparaît.
•Appuyez sur pour ouvrir le journal d’appels.
OU
• Appuyez sur
(JOURNAL D’APPELS). Appuyez sur
•Appuyez sur . pour sélectionner l’entrée désirée.
M
puis sur . pour sélectionner CALL LIST
M
.
11 BLOCAGE D‘APPEL
Si vous avez souscrit le service d‘identification de l‘appelant,
vous pouvez utiliser la fonction de blocage d‘appel pour bloquer
automatiquement certains appels, en ajoutant des numéros à la liste
de blocage (voir 11.2). Vous pouvez aussi choisir de bloquer tous les
appels ou de permette seulement des appels de numéros de la liste
VIP (voir 5.8). Chaque combiné peut mémoriser jusqu‘à 100 entrées
partagées avec l‘agenda (liste VIP comprise) et la liste de blocage.
Les appels peuvent aussi être bloqués en fonction des types d‘appel
suivants : Privé, Non disponible, International et Cabine. (Voir 11.7).
Lorsqu‘un appel est bloqué, le téléphone ne sonnera pas. Si le
répondeur est activé, l‘appel bloqué sera dirigé vers le répondeur.
11.1 Choisir le mode de Blocage
Pour activer la fonction de blocage d‘appel de numéro, vous devez
d‘abord choisir le mode de blocage. Vous pouvez choisir de bloquer
tous les appels, de ne permettre que les entrées VIP, ou de ne bloquer
que les entrées de la liste de blocage.
Page 67

67
•Appuyez sur
BLOCKER).
•Appuyez sur
(SETTINGS).
•Appuyez sur
•Appuyez sur
(BLOCK ALL), PERM. VIP (ALLOW VIP), ou BLOC.BLIST (BLOCK
BLIST).
•Appuyez sur
•Si vous sélectionnez ARRÊT (OFF), le réglage est terminé, et tous les
appels seront reçus normalement.
Si vous sélectionnez BLOC. TOUT (BLOCK ALL), PERM. VIP (ALLOW
VIP), ou BLOC.BLIST (BLOCK BLIST), TOUJ ACTIVE (ALWAYS ON)
s‘affichera.
•Appuyez sur
soit actif à tout moment, ou appuyez sur . pour afficher COMPT.
HEURE (TIMED), puis appuyez sur
(TIME ON) et HEURE ARRÊT (TIME OFF) pour définir la période
pendant laquelle vous souhaitez que le blocage soit actif.
M
et sur . pour afficher BLOC. APPEL (CALL
M
et sur . pour afficher RÉGLAGES
M
pour afficher MODE BLOC. (BLOCK MODE).
M
pour sélectionner ARRÊT (OFF), BLOC.TOUT
M
pour confirmer.
M
si vous voulez que le mode de blocage sélectionné
M
et régler HEURE MARCHE
FR
11.2 Ajouter un numéro à la Liste de blocage
•Appuyez sur
BLOCKER).
•Appuyez sur
•Appuyez deux fois sur
•Appuyez sur
le Numéro.
•Appuyez sur
Remarque : chaque entrée de la liste de blocage réduit la capacité de
mémoire du Répertoire.
Remarque : si le répertoire est plein, LISTE PLEINE (LIST FULL)
s‘affiche après avoir sélectionné AJOUTER (ADD), et vous devrez
éliminer une entrée du répertoire ou de la liste de blocage avant de
pouvoir enregistrer une nouvelle entrée sur la liste de blocage.
M
et sur . pour afficher BLOC. APPEL (CALL
M
pour afficher BLOC. LISTE (BLACK LIST).
M
M
puis saisir un Nom, et appuyez sur
M
pour enregistrer le numéro sur la liste de blocage.
pour afficher AJOUTER.
M
et saisir
Page 68

68
11.3 Voir une entrée de la Liste de blocage
•Appuyez sur
BLOCKER).
•Appuyez sur
•Appuyez sur
de blocage souhaitée.
•Appuyez sur
•Appuyez sur
sélectionnée de la liste de blocage. Si le numéro a plus de 12 chiffres,
appuyez sur pour voir les autres chiffres.
M
et sur . pour afficher BLOC. APPEL (CALL
M
pour afficher BLOC. LISTE (BLACK LIST).
M
et sur . pour sélectionner l‘entrée de la liste
M
et sur . pour afficher VOIR (VIEW).
M
pour voir le numéro et le nom de l‘entrée
11.4 Supprimer toutes les entrées de la Liste de blocage
•Appuyez sur
BLOCKER).
•Appuyez sur
•Appuyez deux fois sur
TOUT (DELETE ALL).
•Appuyez sur
•Appuyez sur
blocage seront supprimées et l‘écran affichera VIDE (EMPTY).
11.5 Bloquer les appels par type d‘appel
Vous pouvez choisir de bloquer différents types d‘appels entrants qui
normalement n‘ont pas de numéro d‘identification d‘appelant, en
ACTIVANT le blocage du type d‘appel respectif.
Chaque type d‘appel (Privé, Non disponible, International et Cabine)
peut être bloqué indépendamment des autres.
•Appuyez sur
BLOCKER).
•Appuyez sur
(SETTINGS).
•Appuyer sur
TYPE).
•Appuyez sur
(WITHHELD), INTERNAT. (INTERNAT’L), NON DISPO
(UNAVAILABLE) ou CABINE (PAYPHONE).
M
et sur . pour afficher BLOC. APPEL (CALL
M
pour afficher BLOC. LISTE (BLACK LIST).
M
puis sur . pour afficher SUPPRIM.
M
pour afficher CONFIRM? (CONFIRM?).
M
pour confirmer. Toutes les entrées de la liste de
M
et sur . pour afficher BLOC. APPEL (CALL
M
et sur . pour afficher RÉGLAGES
M
et sur . pour afficher TYPE D‘APPEL (CALL
M
et sur . pour sélectionner PRIVÉ
Page 69

69
•Appuyez sur
ou DÉSACTIVER (OFF).
•Appuyez sur
•Pour effectuer un réglage pour d‘autres types d‘appel, répéter
depuis l‘étape 4.
M
et sur . pour sélectionner ACTIVER (ON)
M
pour confirmer le réglage pour ce type.
12 RÉPONDEUR
Votre système de téléphone inclut un répondeur qui enregistre les
appels auxquels vous n‘avez pas répondu lorsqu‘il est activé. Le
système de répondeur peut mémoriser jusqu‘à 59 messages sur
une durée maximum d‘enregistrement d‘environ 15 minutes. Outre
les messages entrants, vous pouvez aussi enregistrer des mémos
destinés aux autres utilisateurs de votre téléphone. Si la mémoire du
répondeur est pleine, le combiné affichera MEM REP SAT (TAM FULL)
en alternance avec le nom du combiné, et vous devrez supprimer des
messages avant que d‘autres puissent être enregistrés.
Lorsque le répondeur est plein, il lit seulement votre message sortant
de Répondeur Seul, et ne permet pas à l‘appelant de laisser un
message.
12.1 Activer/Désactiver le répondeur
Vous pouvez activer ou désactiver le répondeur à l‘aide du combiné.
Lorsque le répondeur est activé, le voyant de répondeur de la base
sera allumé, et le combiné affichera l‘icône du répondeur. Les appels
sont dirigés vers le répondeur après le nombre de sonneries défini
pour le mode répondeur et enregistrement. L‘appelant peut alors vous
laisser un message. Lorsque le système de répondeur est DÉSACTIVÉ
(OFF), les appels sont dirigés vers le répondeur après 14 sonneries, et
le message de répondeur seul est lu à vos appelants. Ils ne pourront
pas laisser de message.
•En mode veille, appuyez sur
RÉPONDEUR (ANS. MACHINE).
•Appuyez sur
(TAM ON/OFF).
M
et sur . pour afficher REP. MARCHE/ARRÊT
M
et sur . pour afficher
FR
Page 70

70
•Appuyez sur
ARRÊT (OFF).
•Appuyez sur
12.2 Lire des messages sur le répondeur
Lorsque de nouveaux messages sont enregistrés, le voyant du
répondeur de la base et l‘icône du répondeur sur le combiné
clignotent.
Si vous avez de nouveaux messages, ils sont lus en premier, puis
seront lus les anciens messages conservés, jusqu‘à ce qu‘ils soient
supprimés. Les anciens messages sont lus à nouveau une fois que tous
les nouveaux messages ont été lus dans leur totalité.
•En mode veille, appuyez sur
RÉPONDEUR (ANS. MACHINE).
•Appuyez sur
•Appuyez sur
à travers le haut-parleur.
•Remarque : l‘affichage montre l‘heure et la date à laquelle le
message a été enregistré, et un symbole indique en haut de
l‘écran, si c‘est un nouveau message.
• Pour utiliser les options pendant la lecture :
Appuyez sur . pour augmenter ou diminuer le volume de
lecture.
Appuyez sur H pour écouter en privé à travers l‘écouteur.
Appuyez sur
STOP (STOP) pour arrêter le lecture.
TRANSFÉRER (FORWARD) pour passer au message suivant.
PRÉCÉDENT (PREVIOUS) pour répéter la lecture du message
actuel.
SUPPRIMER (DELETE) pour supprimer le message en cours de lecture.
Vous pouvez aussi appuyer sur les touches numériques suivantes :
5 pour arrêter la lecture.
6 pour passer au message suivant.
4 pour répéter la lecture du message actuel.
4,4 pour retourner au message précédent.
2 pour supprimer le message en cours de lecture.
M
et sur . pour choisir MARCHE (ON) ou
M
pour confirmer le réglage.
M
et sur . pour afficher
M
pour afficher LIRE MSG (MSG PLAYBACK).
M
pour commencer à lire n‘importe quel message
M
et sur . pour accéder aux options :
Page 71

71
REMARQUE :
Vous ne pouvez pas supprimer les nouveaux messages. Vous devez
donc les lire avant d‘essayer de les supprimer.
12.3 Réglages du répondeur
12.3.1 Régler le mode du répondeur
Vous pouvez sélectionner REP & ENREG (ANS & REC), le mode par
défaut, si vous voulez laisser les appelants laisser un message, ou le
mode REP. SEUL (ANSWER ONLY) si vous ne voulez pas que les
appelants laissent de messages sur le répondeur.
•En mode veille, appuyez sur
RÉPONDEUR (ANS. MACHINE).
•Appuyez sur
SETTINGS).
•Appuyez sur
•Appuyez sur
(ANS & REC) ou REP. SEUL (ANSWER ONLY).
•Appuyez sur
12.3.2 Enregistrer votre annonce
Vous pouvez enregistrer votre propre annonce pour le mode REP &
ENREG (ANS & REC) ou pour le mode REP. SEUL (ANSWER ONLY).
Lorsque vous enregistrez votre propre annonce, elle sera utilisée
lorsque le répondeur répond à un appel. Si votre annonce personnelle
est supprimée, l‘annonce prédéfinie sera automatiquement rétablie.
•En mode veille, appuyez sur
RÉPONDEUR (ANS. MACHINE).
•Appuyez sur
SETTINGS).
•Appuyez sur
(OGM SETTINGS).
•Appuyez sur
(ANS & REC) ou REP. SEUL (ANSWER ONLY).
•Appuyez sur
(RECORD MESS).
•Appuyez sur
personnelle. ENREG (RECORDING) s‘affiche à l‘écran.
M
et sur . pour afficher REGLAGES REP (TAM
M
pour afficher MODE REP. (ANSWER MODE).
M
et sur . pour sélectionner REP & ENREG
M
pour confirmer le réglage.
M
et sur . pour afficher REGLAGES REP (TAM
M
et sur . pour afficher RÉGLAGES REP
M
et sur . pour sélectionner REP & ENREG
M
et sur . pour afficher ENR ANONCE
M
pour commencer à enregistrer votre annonce
M
et sur . pour afficher
M
et sur . pour afficher
FR
Page 72

72
•Appuyez sur
M
pour arrêter et sauvegarder votre annonce
personnelle, qui sera alors automatiquement lue.
Vous pouvez aussi appuyer sur
pour retourner à l‘écran
précédent, sans sauvegarder l‘annonce personnelle, et rétablir
automatiquement l‘annonce prédéfinie.
13 CARACTERISTIQUES TECHNIQUES
STANDARD DECT
GAMME DE
FRÉQUENCES
LARGEUR DE BANDE
DU CANAL
PLAGE DE
FONCTIONNEMENT
DURÉE DE
FONCTIONNEMENT
PLAGE DE TEMPÉRATURE EN FONCTIONNEMENT : 0 °C À 40 °C, STOCKAGE
PUISSANCE ÉLECTRIQUE UNITÉ DE BASE :
1,88 À 1,9 GHZ (LARGEUR DE BANDE = 20 MHZ)
1,728 MHZ
JUSQU’À 300 M EN EXTÉRIEUR ; JUSQU’À 50 M EN
INTÉRIEUR
EN VEILLE : 100 HEURES, EN CONVERSATION : 10
HEURES
DURÉE DE CHARGEMENT DES PILES : 15 HEURES
: -20 °C À 60 °C
VT04EUK06045 / VT04EEU06045
ENTRÉE 100-240VAC 50/60HZ 150mA, SORTIE 6VDC
450MA
TENPAO:S003IB0600045/S003IV0600045
ENTRÉE 100-240VAC 50/60HZ 150mA, SORTIE 6VDC
450mA
RJ-AS060450B001 / RJ-AS060450E002
ENTRÉE 100-240VAC 50/60HZ 150mA, SORTIE 6VDC
450mA
INFORMATIONS SUR LES PILES
TYPE NI-MH (PILE RECHARGEABLE) 400mAh, 2 X
1,2V AAA
14 NETTOYAGE ET ENTRETIEN
Ne nettoyez aucun élément de votre téléphone avec du benzène,
des diluants ou d’autres produits chimiques solvants ; cela pourrait
Page 73

73
causer des dommages irréversibles, qui ne sont pas couverts par la
garantie.
Si nécessaire, nettoyez-le avec un chiffon humide.
Maintenez votre téléphone à l’abri de la chaleur, de l’humidité ou
d’un rayonnement solaire intense et ne le laissez pas mouiller.
15 GARANTIE ET SERVICE
L’appareil est garanti pendant 24 mois à compter de la date d’achat
figurant sur votre ticket de caisse. Cette garantie ne couvre pas
les pannes ou les défauts dus à des accidents, une utilisation non
conforme, l’usure normale, la négligence, aux défaillances de la ligne
téléphonique, à la foudre, à une altération de l’équipement, ou à toute
tentative de réglage ou de réparation réalisée par des personnes
autres que les agents agréés.
Veuillez conserver votre ticket de caisse ; il tient lieu de certificat
de garantie.
15.1 Durant la période garantie
•Débranchez la base de la ligne téléphonique et de la prise
d’alimentation secteur.
•Rangez toutes les pièces de votre téléphone dans l’emballage
d’origine.
•Retournez l’appareil au magasin où vous l’avez acheté, en veillant à
vous munir de votre ticket de caisse.
•N’oubliez pas de retourner également l’adaptateur secteur.
15.2 Lorsque la garantie a expiré
Si l’appareil n’est plus sous garantie, contactez-nous via notre site
www.aegtelephones.eu
FR
Cet appareil fonctionne uniquement avec des batteries rechargeables.
Si vous installez des batteries non rechargeables dans le combiné et
placez celui-ci sur la base, il sera endommagé et ceci NE SERA PAS
couvert par les conditions de la garantie.
Page 74

74
16 DÉCLARATION CE
Ce produit est conforme aux prescriptions essentielles et aux autres
dispositions pertinentes de la directive 1999/5/EC de la R&TTE.
La déclaration de conformité est disponible à l’adresse suivante :
www.aegtelephones.eu
17 MISE AU REBUT DE L‘APPAREIL (RESPECT
DE L‘ENVIRONNEMENT)
Lorsque l’appareil est hors d’usage, ne le jetez pas dans les ordures
ménagères mais apportez-le à un point de collecte où ses composants
électriques et électroniques pourront être recyclés. Ceci est indiqué
par le symbole figurant sur le produit, dans le mode d’emploi ou sur
l‘emballage. Certains matériaux de l’appareil sont réutilisables si vous
l‘apportez à un centre de recyclage. En permettant la réutilisation de
certaines pièces ou matières premières d’appareils hors d’usage, vous
contribuez de façon importante à la protection de l‘environnement.
Veuillez vous adresser aux autorités locales pour plus d‘informations
concernant les points de collecte de votre région.
Les piles doivent être retirées avant la mise au
rebut de l‘appareil. Éliminez les piles en respectant
l’environnement et la réglementation de votre pays.
Page 75

75
1 ONZE ZORG
Wij willen u bedanken voor de aankoop van dit product. Bij
de ontwikkeling en montage van dit product stonden u en het
milieu centraal. Daarom krijgt u bij dit product een verkorte
installatiehandleiding, zodat er minder papier wordt gebruikt en
er dus minder bomen moeten worden gekapt. Een volledige,
gedetailleerde gebruikershandleiding met beschrijvingen van alle
functies vindt u op onze website www.aegtelephones.eu. Hier
kunt u de gebruikershandleiding integraal downloaden zodat u alle
geavanceerde functies van uw product kunt gebruiken. Met het oog
op het milieu zouden wij u evenwel willen verzoeken om de volledige
handleiding niet af te drukken. Bedankt dat u ons steunt in onze zorg
voor het milieu.
2 BELANGRIJKE VEILIGEIDSINSTRUCTIES
Volg deze veiligheidsvoorschriften wanneer u uw telefoonapparatuur
gebruikt om het risico van brand, elektrische schokken of lichamelijk
letsel te verminderen:
•Lees en begrijp alle instructies.
•Volg alle waarschuwingen en instructies op die zijn gemarkeerd op
het product.
•Ontkoppel dit product van het stopcontact voor het reinigen.
Gebruik geen vloeibare schoonmaakmiddelen of spuitbussen.
Gebruik een vochtige doek voor het reinigen.
•Houd dit product uit de buurt van warme, vochtige omstandigheden
of fel zonlicht, en laat het niet nat wordt of gebruiken in de buurt van
water (bijvoorbeeld bij een bad, gootsteen en zwembad).
•Overbelast geen stopcontacten en verlengsnoeren, want dit kan
resulteren in het risico van brand of elektrische schokken.
•Trek de stekker uit het stopcontact in de volgende situaties:
>Wanneer het voedingssnoer of de stekker is beschadigd.
NL
Page 76

76
>Als het product niet normaal functioneert, ondanks het volgen van
de gebruiksaanwijzing.
>Als het product is gevallen en de behuizing is beschadigd.
>Als het product een duidelijke verandering in de prestaties
vertoont.
•Gebruik NOOIT uw telefoon buitenshuis tijdens een onweersbui.
Ontkoppel de basis van de telefoonlijn en het stopcontact als er
onweer is in uw omgeving. Schade veroorzaakt door bliksem wordt
niet gedekt door de garantie.
•Gebruik de telefoon niet in de buurt van een gaslek, om het lek te
rapporteren.
•Gebruik alleen de NiMH nikkelmetaalhydride) batterijen die met
uw telefoon zijn meegeleverd of een goedgekeurde vervanging
die door de fabrikant wordt aanbevolen. Er is explosiegevaar als
u de batterij vervangt met een verkeerd type batterij. Het gebruik
van andere typen batterijen of niet-oplaadbare batterijen/primaire
cellen kan gevaarlijk zijn. Zij kunnen storing en/of schade aan het
apparaat of aan de omgeving veroorzaken. De fabrikant kan niet
aansprakelijk worden gesteld voor schade als gevolg van een
dergelijke niet-naleving.
•Gebruik geen opladers van derden. Schade kan aan de batterijen
worden toegebracht.
•Zorg ervoor dat de batterijen in de juiste richting worden geplaatst.
Batterijen inleveren als KCA. De batterijen niet branden, in water
dompelen, demonteren of doorboren.
3 BEOOGD GEBRUIK
Deze telefoon is ontworpen voor aansluiting op een analoog
openbaar telefoonnet of een analoge uitbreiding van een compatibel
PBX-systeem.
Page 77

77
4 UW TELEFOON INSTALLEREN
4.1 Het basis station aansluiten (Zie P5)
•Steek het voedingssnoer en het telefoonsnoer in het basisstation.
•Steek de voedingsadapter in een 100 - 240Vac, 50 - 60Hz stopcontact
en het telefoonsnoer in een telefoonaansluiting.
Waarschuwing: Gebruik altijd de meegeleverde kabels in de doos.
Gebruik alleen de meegeleverde adapter. Het gebruik van een andere
adapter kan het apparaat beschadigen.
Opmerking: Plaats het basisstation in de buurt van het stopcontact.
Probeer nooit om het voedingssnoer te verlengen. Het basisstation
heeft netspanning nodig voor de normale werking en zonder dat
werken de draadloze handsets niet.
4.2 Installeren en opladen van de oplaadbare batterijen (Zie P3)
•Plaats de 2 meegeleverde batterijen in het batterijcompartiment,
en houd rekening met de juiste polariteit (zie markeringen in
batterijcompartiment).
Waarschuwing: Gebruik alleen de meegeleverde NiMH oplaadbare
batterijen.
•Plaats het achterste deksel op de achterzijde van de handset en druk
het naar beneden totdat deze vastklikt.
•Plaats de handset op het basisstation en laad deze 15 uur op alvorens
de handset voor de eerste keer te gebruiken
>De handset zal een dubbele piep laten horen als het goed op de
basis is geplaatst en de batterij oplaad indicator op de basis gaat
branden om het opladen weer te geven.
Opmerking:
De handset kan warm worden als de batterijen opgeladen worden of
tijdens langdurig gebruik. Dit is normaal en duidt niet op een storing.
VOORZICHTIG
Er is risico voor een explosie als de batterij wordt vervangen door een
verkeerd type. Gooi gebruikte batterijen weg volgens de instructies.
NL
Page 78

78
5 DISPLAY TAAL INSTELLEN
•Druk op
•Druk op
•Druk op
•Druk op
M
te selecteren.
M
M
M
en op . om “HS SETTINGS” (HS INSTELLINGEN)
en op . om “LANGUAGE” (TAAL) te selecteren.
en op . om de gewenste taal te selecteren.
om te bevestigen.
6 UW TELEFOON
6.1 Handset overzicht (Zie P1)
•In inactieve modus: Druk om toegang tot het
hoofdmenu te krijgen.
1
2
M
•In submenu modus: Druk om de selectie te
bevestigen.
•Tijdens een gesprek: Druk om toegang te krijgen
tot Intercom/ Telefoonboek/ Opnieuw bellen lijst/
Bellijst.
•In inactieve modus: Druk om een intercom
gesprek te starten.
•In hoofdmenu modus: Druk om terug te gaan nar
het inactieve scherm.
•In submenu modus: Druk om terug te gaan naar
de vorige optie, of houdt het ingedrukt om terug
te gaan naar het inactieve scherm.
•In bewerking / voorkeuze modus: Druk om een
teken / cijfer te verwijderen, of houdt ingedrukt
om alle tekens / cijfers te verwijderen.
•Tijdens een gesprek: Druk om de microfoon te
dempen / niet te dempen.
•In inactieve modus: Druk om toegang te krijgen
tot de bellijst.
3
•In menu’s en lijsten: Druk om de opties omhoog
=
te verplaatsen. Tijdens een gesprek: Druk om het
volume te verhogen.
•Tijdens het rinkelen: Druk om het belvolume van
de handset te verhogen.
Page 79

4
5
6
7
-
O
ALFANU-
MERIEK
TOET-
SEN-
BORD,
*, #
79
•In inactieve modus: Druk om toegang te krijgen
tot de opnieuw bellen lijst.
•In menu’s en lijsten: Druk om de opties omlaag te
verplaatsen.
•Tijdens een gesprek: Druk om het volume te
verlagen.
•Tijdens het rinkelen: Druk om het belvolume van
de handset te verlagen.
•In inactieve modus / voorkeuze modus / opnieuw
bellen lijst / Bellijst / Telefoonboek lijst: Druk om
een oproep te maken.
•Tijdens het rinkelen: Druk om een oproep te
beantwoorden.
•Tijdens een gesprek: Druk om de luidspreker aan
/ uit te schakelen.
•In Inactieve modus / voorkeuze modus / Opnieuw
bellen lijst / Bellijst / Telefoonboek lijst: Druk om
een oproep te maken met de luidspreker.
•Tijdens het rinkelen: Druk om een oproep te
beantwoorden met luidspreker.
•Tijdens een gesprek: Druk om een oproep te
beëindigen en terug te gaan naar het inactieve
scherm.
•In menu / bewerking modus: Druk om terug te
gaan naar het vorige menu, of houdt ingedrukt
om terug te gaan naar het inactieve scherm.
•In inactieve modus: Houdt ingedrukt om de
handset aan/uit te schakelen.
•Drukomeencijfer/teken/*/#intevoeren.
• * toets in inactieve modus: Houdt ingedrukt
om de toetsenbord vergrendeling aan of uit te
schakelen.
•# toets in inactieve modus: Houdt ingedrukt om
het rinkelen van de handset aan / uit te schakelen.
•#toetsinvoorkeuze/nummerbewerkingmodus:
Houdt ingedrukt om een pauze in te voeren.
• * toets in Bellijst modus: Druk om meer cijfers
van het nummer van de beller te zien indien
toepasbaar.
NL
Page 80

80
8
9 •Microfoon
10 •Luidspreker
6.2 Basis station overzicht (Zie P4)
12
13
INDICATORLAMPJE
14 LAADSTATION
6.3 Handset LCD display iconen en symbolen (Zie P2)
Het LCD display geeft u informatie over de huidige status van uw
telefoon.
•Druk tijdens een oproep om een Recall signaal
F
Toont wanneer de handset is geregistreerd en binnen het
bereik van het basisstation, met meer blokkeringen wat
wijst op een sterker signaal.
Toont dat de handset in een gesprek is.
Knippert wanneer er een inkomende oproep is.
Toont dat de het rinkelen van de handset uitgeschakeld is.
Toont dat een alarm is ingesteld. Knippert wanneer het
alarm afgaat.
(ook bekend als Flash) te verzenden voor
netwerkdiensten.
•PAGINA - Druk om uw handset(s) op
te piepen.
•Houdt ingedrukt om naar de
registratie modus te gaan.
•Aan wanneer het antwoordapparaat
(TAM) AAN is
TAM
•Knippert als nieuwe TAM berichten
opgenomen zijn, wanneer de TAM
wordt gebruikt, of wanneer er een
inkomende oproep is.
•Handset station voor batterij op te
laden.
Page 81

81
Toont dat het toetsenbord vergrendeld is.
Toont dat de batterij volledig opgeladen is.
Batterij segmenten cyclus tijdens het opladen.
Toont dat de batterij opgeladen moet worden. Knippert
wanneer een laag batterij niveau gedetecteerd wordt.
(Opmerking: het achtergrondlicht van de handset schakelt
niet aan wanneer de batterij laag is.)
Toont dat een nieuw TAM bericht aan het afspelen is of een
nieuwe oproep wordt bekeken in de oproepenlijst.
Toont dat de luidspreker aangeschakeld is.
Toont dat u een nieuw voicemail bericht heeft. (Dit is
een beller display dienst en is normaal gesproken niet
beschikbaar vanaf VK netwerk providers.)
Toont dat het antwoordapparaat (TAM) aangeschakeld is.
Knippert als er een nieuw TAM bericht is.
Geeft aan wanneer een blok modus aangeschakeld is.
Druk op om een intercom oproep te starten
(INT)
(TERUG)
6.4 Tekst en cijfer invoeren
In de bewerkingsmodus, wordt een cursor weergegeven om de
huidige tekstinvoer positie aan te geven. Het is gepositioneerd aan de
rechterkant van het laatst ingevoerde teken.
Schrijf tips:
Zodra een teken is geselecteerd, zal de cursor na een korte pauze naar
de volgende positie bewegen.
Druk op om terug te gaan naar het vorige menu of
de huidige actie te annuleren.
Druk op om de microfoon tijdens een oproep te
dempen / niet te dempen, tekens te verwijderen tijdens
voorkeuze / bewerking of een alarm te stoppen.
NL
Page 82

82
U kunt de cursor in de tekst bewegen met . om de tekst invoer
aan te passen.
•Druk op om het laatste teken te verwijderen.
•Houd ingedrukt om de gehele tekstreeks te verwijderen.
7 UW TELEFOON GEBRUIKEN
7.1 Een oproep maken
7.1.1 Voorbereidend bellen
•Voer het telefoonnummer in, maximaal 24 cijfers. Als u een fout
maakt, drukt u op
•Druk op om het nummer te bellen.
7.1.2 Direct bellen
•Druk op om de lijn op te nemen.
•Voer het te bellen telefoonnummer in.
7.1.3 Bellen vanuit het telefoonboek
•Druk op
selecteren. Druk op
tonen.
•Druk nogmaals op
OPMERKING
De eerste telefoonboek invoer wordt weergegeven. Als er geen invoer
in het telefoonboek is, zal “EMPTY” (“LEEG”) weergegeven worden.
•Druk op . om de gewenste telefoonboek invoer te selecteren.
•Druk op om het nummer te bellen.
7.1.4 Bellen vanuit de gesprekslijst
•In stand-by, druk op om toegang te krijgen tot de gesprekslijst en
druk op . om te selecteren.
OF
• Druk op
selecteren.
M
M
M
om het laatste cijfer te verwijderen.
dan op . om TEL.BOEK (PHONEBOOK) te
M
om ALLE CONT. (ALL CONTACTS) te
M
om toegang te krijgen tot telefoonboek.
dan op . om CALL LIST (GESPREKSLIJST) te
Page 83

83
OPMERKING
De eerste telefoonboek invoer wordt weergegeven. Als er geen
invoer in het telefoonboek is, zal “EMPTY” (“LEEG”).
•Druk op
•Druk op / H om het nummer te bellen.
7.1.5 Bellen vanuit de herhaallijst
•Druk op
M
dan op.om het gewenste nummer te selecteren.
-
om toegang te krijgen tot de herhaallijst en druk op
. om het gewenste herhaal nummer te selecteren.
•Druk op / H om het geselecteerde herhaal nummer te bellen.
7.2 Een oproep beantwoorden
Als de handset niet in de oplader staat:
Wanneer de telefoon rinkelt, drukt u op / H om een oproep te
beantwoorden.
Als de handset op de basis of oplader staat en als AUTO ANSWER
(AUTOMATISCH BEANTWOORDEN) ON (AAN) geschakeld is:
Wanneer de telefoon rinkelt, pakt u de handset op om een oproep te
beantwoorden.
Als u wenst om AUTO ANSWER (AUTOMATISCH BEANTWOORDEN)
uit te schakelen, zie, see Set the Auto Answer (Het automatisch
beantwoorden instellen). De standaard instelling is ON (AAN).
7.3 Volume regelen
Er zijn vijf volumeniveaus (VOLUME 1 tot“VOLUME 5) waarmee u het
volume van de handset en de luidspreker kunt kiezen.
Tijdens een oproep:
Druk op . om van VOLUME 1 tot VOLUME 5 te selecteren. De
huidige instelling wordt weergegeven. Wanneer u de oproep beëindigd,
zal de instelling in het laatste geselecteerde niveau blijven.
NL
7.4 Microfoon uit
U kunt de microfoon dempen zodat u met iemand kunt praten zonder
dat de beller u kan horen tijdens een oproep.
Page 84

84
Tijdens een oproep:
•Druk op om de microfoon te dempen en “MUTED”
(“GEDEMPT”) wordt weergegeven op de LCD. Uw beller kan u niet
horen.
•Druk nogmaals op om het dempen van de microfoon uit te
schakelen.
7.5 Een oproep beëindigen
Tijdens een oproep verbinding, drukt u op O om de oproep te
beëindigen.
OF
Plaats de handset op de basis of oplader om de oproep te beëindigen.
7.6 De toetsenbord vergrendeling AAN/UIT schakelen
•In stand-by, houd “X” ingedrukt om de toetsenbord vergrendeling
aan te schakelen. Het icoon wordt weergegeven op de LCD.
•Om het toetsenbord te ontgrendelen, houd u X ingedrukt.
7.7 Een handset zoeken
U kunt een handset lokaliseren door op de zoektoets te drukken.
•Druk op op het basis station. Alle geregistreerde en beschikbare
handsets zullen een pieptoon laten horen en “PAGING” (“PIEPEN”)
wordt weergegeven op de LCD.
•Druk op / O / op een handset of nogmaals op op het
basis station om het zoeken te stoppen.
OPMERKING
Als er een inkomende oproep is tijdens het zoeken, zal de telefoon
rinkelen met de inkomende oproep in plaats van zoeken.
7.8 Een interne oproep maken
Deze functie is alleen van toepassing als er ten minste twee handsets
zijn geregistreerd. Het staat u toe om interne oproepen te maken,
externe gesprekken van de ene handset naar een andere handset door
te schakelen en conference calls et maken. Als de gebelde handset
niet binnen 60 seconden wordt beantwoord, stopt de opgeroepen
Page 85

85
handset te rinkelen en zal de bellende handset terugkeren naar de
stand-by modus.
7.8.1 Een andere handset bellen
•In stand-by modus, druk op M en het scherm geeft alle
geregistreerde handsets weer behalve de bellende handset.
•Voer het gewenste handset nummer in voor de intercom.
•De gebelde handset rinkelt en druk op op de gebelde handset
om de interne oproep aan te nemen.
OPMERKINGEN
•Als er slechts één handset is geregistreerd op het basis station,
zal drukken op , “NOT POSSIBLE” (“NIET MOGELIJK”)
weergeven.
•Als er slechts twee handsets zijn geregistreerd op het basis station,
zal drukken op direct verbinding maken met de andere
handset.
7.8.2 Een externe oproep doorschakelen naar een andere handset
Tijdens een externe oproep:
•Druk op
selecteren.
•Druk op
te selecteren.
•De externe oproep wordt automatisch in de wacht gezet en de
gebelde handset rinkelt.
•Druk op op de gebelde handset om een intern gesprek aan te
nemen.
•Druk op O op de bellende handset of plaats de bellende handset
op de oplader om de huidige oproep met de externe partij te
beëindigen.
•De externe oproep is doorgeschakeld neer de gebelde handset.
M
en op . om INTERCOM (INTERCOM) te
M
en op . om de gewenste handset voor intercom
NL
8 PRIVÉ TELEFOONBOEK
Uw telefoon kan maximaal 100 privé telefoonboek invoeren met
namen en nummers opslaan. Elk telefoonnummer mag uit maximaal
24 cijfers bestaan voor het telefoonnummer en 12 tekens voor de
Page 86

86
naam. U kunt ook verschillende melodieën voor uw telefoonboek
invoeren selecteren. De invoeren worden alfabetisch opgeslagen.
8.1 Een nummer invoer opslaan in het telefoonboek
• Druk op
selecteren. Druk nogmaals op M om ALLE CONT. (ALL
CONTACTS) te tonen.
• Druk nogmaals op
OPMERKING
De eerste invoer in het telefoonboek wordt weergegeven. Als er geen
invoer is opgeslagen in het telefoonboek, zal het “EMPTY” (“LEEG”)
weergeven.
•Druk op
•Druk op
•Druk op
•Druk op
•Druk op
8.1.1 Namen invoeren
Gebruik de toetsenbord letters om namen in te voeren, bijvoorbeeld
om Tom op te slaan:
Druk eenmaal op 8 om T in te voeren.
Druk driemaal op 6 om o in te voeren.
Druk eenmaal op 6 om m in te voeren.
8.1.2 Een invoer bellen
Terwijl u in de telefoonboeklijst bent, drukt u op . om de invoer
te selecteren die u wilt, of zoek alfabetisch met gebruik van het
alfanumerieke toetsenbord.
•Druk op / H om de geselecteerde invoer te bellen.
M
M
M
M
M
M
en . om TEL.BOEK (PHONEBOOK) te
M
om toegang te krijgen tot telefoonboek.
om ADD (TOEVOEGEN) te selecteren.
en voer de naam in.
en voer het nummer in.
en op . om de gewenste melodie te selecteren.
om op te slaan.
8.2 Een telefoonboek invoer verwijderen
•Druk op
selecteren. Druk nogmaals op
CONTACTS) te tonen.
•Druk nogmaals op . om toegang te krijgen tot telefoonboek.
M
en . om TEL.BOEK (PHONEBOOK) te
M
om ALLE CONT. (ALL
Page 87

87
•Druk op
•Druk op
•Druk op
8.3 Voeg een telefoonboek invoer toe aan VIP (VIP) lijst
•Druk op
•Druk op . om de gewenste telefoonboek invoer te selecteren.
•Druk op
•Druk op
M
om de gewenste telefoonboek invoer te selecteren.
M
en . om WISSEN (DELETE) te selecteren.
M
om te bevestigen.
M
en . om TEL.BOEK (PHONEBOOK) te
selecteren, dan op M om ALLE CONT. (ALL CONTACTS) te
tonen. Druk nogmaals op
telefoonboek.
M
en . om TOEV. VIP (ADD TO VIP) te selecteren.
M
om de invoer toe te voegen aan de VIP (VIP) lijst. Een
* naast de naam geeft aan dat het nu een VIP (VIP) invoer is.
M
om toegang te krijgen tot het
9 TELEFOON INSTELLINGEN
Uw telefoon wordt geleverd met een selectie van instellingen die u
kunt aanpassen om uw telefoon te personaliseren op de manier zoals
u ermee wilt werken.
9.1 Datum en tijd instellingen
9.1.1 De tijd, de datum en het jaar instellen
•Druk op
•Druk op
•Druk op
•Druk op
•Druk op
M
en op . om HS SETTINGS (HS INSTELLINGEN)
te selecteren.
M
en op . om DATE & TIME (DATUM & TIJD) te
selecteren.
selecteren.
of 24 UUR formaat. De tijd zal in het formaat zijn zoals u het heeft
ingesteld.
cijfers van het jaar zullen knipperen voor de jaar invoer.
M
en op . om SET TIME (TIJD INSTELLEN) te
M
en voer dan de tijd informatie in volgens het 12 UUR
M
en voer dan de jaar informatie in. De laatste twee
NL
Page 88

88
•Druk op
•Druk op
9.2 Handset instellingen
9.2.1 Alarm
U kunt deze telefoon gebruiken om een alarm klok in te stellen.
Wanneer een alarm is ingesteld, zal <ALARM ICON> (<ALARM
ICOON>) worden weergegeven op de LCD. Wanneer de alarm tijd
bereikt is, zal <ALARM ICON> (<ALARM ICOON>) en “ALARM
ON” (“ALARM AAN”) fin het scherm knipperen. De handset zal ook
45 seconden rinkelen.
•Druk op
•Druk op
•Druk op
•Druk op
9.3 Een handset registreren
Uw handset is vooraf geregistreerd op het basis station. Tot vijf
handsets kunnen worden geregistreerd op een basis station.
Als om enige reden, de handset niet is geregistreerd op het basis
station, wordt “REGISTER” (“REGISTREER”) weergegeven op het
scherm van de handset, registreer uw handset door het volgen van
het onderstaande proces.
•Houd ongeveer vijf seconden ingedrukt op het basis station, het
•Druk op
•Druk op
•Voer de 4-cijfewrige systeem PIN in en druk op
OPMERKING
M
en voer dan de datum informatie in volgens het DD-
MM-JJ of MM-DD-JJ formaat. De datum zal in het formaat zijn zoals
u het heeft ingesteld.
M
om te bevestigen.
M
en op . om HS SETTINGS (HS INSTELLINGEN)
te selecteren.
M
en op . om ALARM (ALARM) te selecteren.
M
en op . om ON (AAN) of OFF (UIT) te
selecteren.
M
om te bevestigen.
basis station gaat naar registratie modus.
M
en op . om REGISTRATION (REGISTRATIE) te
selecteren.
M
en u wordt gevraagd de 4-cijferig systeem PIN in te
voeren.
bevestigen.
M
om te
Page 89

89
Als de handset registratie succesvol is, zal de handset automatisch het
eerstvolgende beschikbare handset nummer worden toegewezen. Dit
nummer wordt in de stand-by modus weergegeven in het display van
de handset
10 NUMMERWEERGAVE (NETWERKAFHANKELIJK)
10.1 Oproeplijst
Deze functie is beschikbaar als u bij uw telefoonprovider een
abonnement op de dienst nummerweergave hebt. Uw telefoon kan
tot 50 inkomende oproepen met datum/tijd informatie opslaan in
de gesprekslijst. Het nummer zal worden weergegeven op de LCD
wanneer de telefoon rinkelt. Als het nummer overeenkomt met één van
de invoeren in uw privé telefoonboek, zal de naam met het nummer
van de beller die is opgeslagen in het privé telefoonboek worden. De
handset zal rinkelen met de melodie die hoort bij de telefoonboek
invoer.
De nummer informatie zal niet voor elke inkomende oproep
beschikbaar zijn. De beller kan moedwillig zijn naam en / of
telefoonnummer blokkeren.
Weergave :
WITHHELD (ONBEKEND) De beller blokkeert zijn telefoonnummer.
OUT OF AREA (BUITEN BEREIK) Het nummer van deze beller is
niet beschikbaar.
Wanneer de lijst vol is en een nieuwe oproep wordt ontvangen, wordt
de oudste invoer automatisch verwijderd.
NL
10.2 De oproeplijst bekijken
Bekijk de oproeplijst om te zien wie er heeft gebeld, om makkelijk terug
te bellen, of om de naam en het nummer van de beller op te slaan in
uw telefoonboek. “EMPTY” (“LEEG”) wordt weergegeven als er geen
gegevens in de oproeplijst staan.
Page 90

90
•Druk op om toegang te krijgen tot de oproeplijst.
OF
• Druk op
selecteren. Druk op
•Druk op . om de gewenste invoer te selecteren.
M
en op . om CALL LIST (GESPREKSLIJST) te
M
.
11 OPROEP BLOK (CALL BLOCKER)
Indien u zich heeft geabonneerd op een Beller ID dienst, kunt u de bel
blokkering functie gebruiken om bepaalde oproepen automatisch te
blokkeren door nummers toe te voegen aan de Zwarte lijst (zie 11.2). U
kunt er ook voor kiezen alle oproepen te blokkeren of allen nummers
in de VIP (VIP) lijst toe te staan (zie 5.8). Elke handset kan tot een totaal
van 100 invoeren opslaan die worden gedeeld met het telefoonboek
(met inbegrip van de VIP (VIP) lijst) en de zwarte lijst.
Oproepen kunnen ook geblokkeerd worden door de volgende
Oproep typen: Onbekend, Niet beschikbaar, Internationaal en
Telefooncel. (Zie 11.7)
Wanneer een oproep geblokkeerd is, zal de telefoon niet rinkelen.
Als het antwoordapparaat aangeschakeld is, wordt de geblokkeerde
oproep beantwoord door het antwoordapparaat.
11.1 Kies de blokkering modus
Om de nummer bel blokkering functie te activeren, moet u eerst de
blokkering modus kiezen. U kunt ervoor kiezen om alle oproepen te
blokkeren, alleen VIP (VIP) invoeren toe te staan of alleen zwarte lijst
invoeren te blokkeren.
•Druk op
•Druk op
•Druk op
•Druk op
•Druk op
M
en . om OPROEP BLOK (CALL BLOCKER) te
tonen.
M
en . om INSTELLINGEN (SETTINGS) te tonen.
M
om MODUS (BLOCK MODE) te tonen.
M
en . om UIT (OFF), ALLES (BLOCK ALL), VIP
TOESTAAN (ALLOW VIP), of ZWARTE LIJST (BLOCK BLIST) te
selecteren.
M
om te bevestigen.
Page 91

91
•Indien UIT (OFF) geselecteerd is, zal de instelling compleet zijn en
zullen alle oproepen normaal ontvangen worden.
Als ALLES (BLOCK ALL), VIP TOESTAAN (ALLOW VIP) of ZWARTE
LIJST (BLOCK BLIST) zijn geselecteerd, zal het ALTIJD AAN (ALWAYS
ON) tonen.
•Druk op
M
als u wilt dat de geselecteerde blokkering modus
altijd aan is, of druk op . om TIJD STURING (TIMED) te tonen,
en druk dan op
(TIME OFF) in voor de periode dat u wilt dat de blokkering actief is.
M
en stel de TIJD AAN (TIME ON) en TIJD UIT
11.2 Voeg een nummer toe aan de zwarte lijst
•Druk op
•Druk op
•Druk tweemaal op
•Druk op
•Druk op
Opmerking: Elke Zwarte lijst invoer reduceert de capaciteit van de
Telefoonboek opslag.
Opmerking: Als het telefoonboek vol is verschijnt LIJST VOL (LIST
FULL) nadat TOEVOEGEN (ADD) geselecteerd wordt, en u zult een
invoer uit het telefoonboek of de zwarte lijst moeten verwijderen
voordat u een andere zwarte lijst invoer kunt opslaan.
11.3 Een zwarte lijst invoer bekijken
•Druk op
•Druk op
•Druk op
•Druk op
•Druk op
M
en . om OPROEP BLOK (CALL BLOCKER) te
tonen.
M
om ZWARTE LIJST (BLACK LIST) te tonen.
M
M
en voer dan een naam in, druk dan op
het nummer in.
M
om het nummer op te slaan in de zwarte lijst.
M
en . om OPROEP BLOK (CALL BLOCKER) te
tonen.
M
om ZWARTE LIJST (BLACK LIST) te tonen.
M
selecteren.
M
en . om BEKIJKEN (VIEW) te tonen.
M
om het nummer en de naam van de geselecteerde
Zwarte lijst invoer te bekijken. Indien het nummer meer dan 12 cijfers
heeft, drukt u op om de andere cijfers te zien.
tom TOEVOEGEN (ADD) te selecteren.
en . om de gewenste zwarte lijst invoer te
M
en voer
NL
Page 92

92
11.4 Alle zwarte lijst invoeren verwijderen
•Druk op
•Druk op
•Druk tweemaal op
•Druk op
•Druk op
11.5 Blokkeer oproepen per oproep type
U kunt ervoor kiezen om verschillende soorten inkomende oproepen
te blokkeren die normaal gesproken geen beller ID nummer hebben
door de respectieve oproep type in te stellen op AAN.
Elke oproep type (Onbekend, Internationaal, Onbeschikbaar en
Telefooncel) kan onafhankelijk van de anderen geblokkeerd worden.
•Druk op
•Druk op
•Druk op
•Druk op
•Druk op
•Druk op
•Om voor andere oproep typen in te stellen herhaalt u vanaf stap 4.
M
en . om OPROEP BLOK (CALL BLOCKER) te
tonen.
M
om ZWARTE LIJST (BLACK LIST) te tonen.
M
en dan . om ALLES WISSEN (DELETE
ALL) te tonen.
M
om BEVES.? (CONFIRM?) weer te geven.
M
zullen worden verwijderd en het beeldscherm zal LEEG (EMPTY)
weergeven.
M
tonen.
M
M
M
(INTERNAT’L), ONBESCHIKB. (UNAVAILABLE), of BETAALTELEF.
(PAYPHONE) te selecteren.
M
M
om te bevestigen. Alle Zwarte lijst invoeren
en . om OPROEP BLOK (CALL BLOCKER) te
en . om INSTELLINGEN (SETTINGS) te tonen.
en . om OPROEP TYPE (CALL TYPE) te tonen.
en . om ONBEKEND (WITHHELD), INTERNAT.
en . om AAN (ON) of UIT (OFF) te selecteren.
om de instelling voor dat type te bevestigen.
12 ANTWOORDAPPARAAT (TAM)
Uw telefoonsysteem bevat een telefoon antwoordapparaat (TAM)
dat onbeantwoorde oproepen opneemt wanneer het aangeschakeld
is. Het beantwoordsysteem kan tot 59 berichten opslaan binnen de
maximale opnametijd van ongeveer 15 minuten. Zowel als inkomende
berichten op te nemen, kunt u ook memo’s voor andere gebruikers van
uw telefoon opnemen. Als het geheugen van het antwoordapparaat
Page 93

93
vol is zal de handset TAM VOL weergeven, als alternatief met de
naam van de handset, en u zult berichten moeten verwijderen voordat
nieuwe kunnen worden opgenomen.
Wanneer de TAM vol is zal het alleen uw Alleen Beantwoorden
uitgaande bericht afspelen en de beller niet toelaten om een bericht
achter te laten.
12.1 TAM aan-/uitschakelen
U kunt het antwoordapparaat aan- of uitschakelen met behulp van
de handset. Wanneer het antwoordapparaat is ingesteld op AAN,
de basis TAM indicator zal aan zijn en de handset zal het TAM icoon
weergeven. Oproepen zullen worden beantwoord na de ingestelde
antwoord vertraging en als het is ingesteld op Antwoord en Opnemen
modus, de beller kan u dan een bericht achterlaten. Wanneer het
beantwoordsysteem is ingesteld op UIT (OFF), worden oproepen
na 14 keer rinkelen beantwoord en het alleen beantwoorden bericht
zal worden afgespeeld voor uw bellers. Ze zullen niet in staat zijn een
bericht voor u achter te laten.
•Druk in inactieve modus op
(ANS. MACHINE) te tonen.
•Druk op
tonen.
•Druk op
•Druk op
12.2 Berichten afspelen op TAM
Wanneer nieuwe berichten worden opgenomen knipperen de TAM
indicator op de basis en het TAM icoon op de handset allebei.
Als u nieuwe berichten heeft, worden deze eerst afgespeeld en dan
opgeslagen als oude berichten totdat ze worden verwijderd. Oude
berichten worden opnieuw afgespeeld nadat alle nieuwe berichten
volledig zijn afgespeeld.
•Druk in inactieve modus op
(ANS. MACHINE) te tonen.
•Druk op
•Druk op
M
en . om ANTW AAN/UIT (TAM ON/OFF) te
M
en . om AAN (ON) of UIT (OFF) te kiezen.
M
om de instelling te bevestigen.
M
om WEERG.BDSCHP (MSG PLAYBACK) te tonen.
M
om berichten via de luidspreker af te spelen.
M
en . om BEANTWOORDER
M
en . om BEANTWOORDER
NL
Page 94

94
•Opmerking: Het beeldscherm toont de tijd en datum dat het bericht
was opgenomen, en een symbool aan de bovenzijde van het
beeldscherm als het een nieuw bericht is.
• Voor opties tijdens het afspelen:
Druk op . om het afspeelvolume te verhogen of verlagen.
Druk op H om meer privé te luisteren vanaf het oordopje.
M
Druk op
STOP (STOP) om het afspelen te stoppen.
VOLGENDE (FORWARD) om verder te gaan naar het volgende
bericht.
VORIGE (PREVIOUS) om het huidige bericht dat afspeelt te
herhalen.
WISSEN (DELETE) om het huidige bericht dat afspeelt te
verwijderen.
Als alternatief, kunt u de volgende cijfertoetsen indrukken:
5 om het afspelen te stoppen.
6 om verder te gaan naar het volgende bericht.
4 om het huidige bericht dat afspeelt te herhalen.
4,4 om terug te gaan naar het vorige bericht.
2 om het huidige bericht dat afspeelt te verwijderen.
en . voor de opties:
OPMERKING:
U kunt geen nieuwe berichten verwijderen, dus u zult ze moeten
afspelen voordat u probeert ze te verwijderen.
12.3 Antwoordapparaat instellingen
12.3.1 De beantwoord modus instellen
U kunt ANTW & OPN (ANS & REC), de standaard modus, selecteren
als u wilt dat bellers een bericht achter kunnen laten, of ANTW.
(ANSWER ONLY) modus als u niet wilt dat bellers een bericht
achterlaten op het antwoordapparaat.
•Druk in inactieve modus op
(ANS. MACHINE) te tonen.
•Druk op
tonen.
•Druk op
•Druk op
(ANSWER ONLY) te selecteren.
M
en . om ANTW. INSTEL (TAM SETTINGS) te
M
om ANTW. MODUS (ANSWER MODE) te tonen.
M
en . om ANTW & OPN (ANS & REC) of ANTW.
M
en . om BEANTWOORDER
Page 95

95
•Druk op
12.3.2 Neem uw uitgaande bericht op (OGM)
U kunt uw eigen OGM opnemen voor de ANTW & OPN (ANS & REC)
modus of ANTW. (ANSWER ONLY) modus. Wanneer u uw eigen OGM
opneemt, zal het worden gebruikt wanneer het antwoordapparaat de
oproep beantwoordt. Indien uw persoonlijke OGM verwijderd is, zal
de vooraf ingestelde OGM automatisch worden hersteld.
•Druk in inactieve modus op
•Druk op
•Druk op
•Druk op
•Druk op
•Druk op
•Druk op
Als alternatief, drukt u op
scherm zonder de persoonlijke OGM op te slaan, en automatisch de
vooraf ingestelde OGM te herstellen.
M
om de instelling te bevestigen.
M
en . om BEANTWOORDER
(ANS. MACHINE) te tonen.
tonen.
tonen.
(ANSWER ONLY) te selecteren.
tonen.
nemen en OPNEMEN (RECORDING) wordt op het beeldscherm
weergegeven.
die dan automatisch zal afspelen.
M
en . om ANTW. INSTEL (TAM SETTINGS) te
M
en . om UITG BS INST (OGM SETTINGS) te
M
en . om ANTW & OPN (ANS & REC) of ANTW.
M
en . om BERICHT OPN. (RECORD MESS) te
M
om te starten met uw persoonlijke OGM op te
M
om te stoppen en uw persoonlijke OGM op te slaan,
om terug te gaan naar het vorige
NL
Page 96

96
13 TECHNISCHE DETAILS
STANDAARD DECT
FREQUENTIE BEREIK 1.88 TOT 1.9 GHZ (BANDBREEDTE = 20 MHZ)
KANAAL BANDBREEDTE 1.728 MHZ
WERKINGSBEREIK TOT 300M BUITENSHUIS; TOT 50M
WERKINGSTIJD STAND-BY: 100 UUR, SPREEKTIJD: 10 UUR
TEMPERATUUR BEREIK IN GERBUIK 00C TOT 400C, OPSLAG -200C TOT
ELEKTRISCHE
AANSLUITING
BINNENSHUIS
BATTERIJ OPLAADTIJD:15 UUR
600C
BASIS EENHEID:
VT04EUK06045 / VT04EEU06045
INGANG 100-240VAC 50/60HZ 150MA, UITGANG
6VDC 450MA
TENPAO:S003IB0600045/S003IV0600045
IINGANG 100-240VAC 50/60HZ 150MA,
UITGANG 6VDC 450MA
RJ-AS060450B001 / RJ-AS060450E002
INGANG 100-240VAC 50/60HZ 150MA, UITGANG
6VDC 450MA
BATTERIJ INFORMATIE
TYPE NI-MH (HERLAADBARE BATTERIJ)
400MAH, 2 X 1.2V AAA
14 REINIGING EN ZORG
Reinig geen onderdelen van de telefoon met benzeen, thinners of
andere chemicaliën met oplosmiddelen. Hierdoor kan permanente
schade ontstaan die niet onder de garantie valt.
Reinig het toestel wanneer nodig met een vochtige doek.
Houd uw telefoonsysteem uit de buurt van hete, vochtige
omstandigheden of fel zonlicht en laat het niet nat worden.
Page 97

97
15 GARANTIE EN SERVICE
Het toestel heeft een garantie van 24 maanden vanaf de aankoopdatum
vermeld op uw aankoop bon. Onder deze garantie vallen geen
storingen of defecten als gevolg van ongevallen, verkeerd gebruik,
normale slijtage, onachtzaamheid, storingen in de telefoonlijn,
blikseminslag, knoeien met de apparatuur of pogingen om het
toestel aan te passen of te repareren die niet door goedgekeurde
servicepunten zijn uitgevoerd
Bewaar uw aankoopbon; dat is uw garantiebewijs
15.1 Tijdens de garantieperiode
•Ontkoppel het basisstation van de telefoonlijn en het elektriciteitsnet.
•Pak alle onderdelen van het apparaat in, met de originele verpakking.
•Breng het toestel terug naar de winkel waar u het hebt gekocht en
neem uw aankoopbon mee.
•Vergeet niet om de netadapter mee te nemen.
15.2 Na de garantieperiode
Als het toestel niet meer onder garantie valt, kunt u contact met ons
opnemen via www.aegtelephones.eu
Dit product werkt alleen op oplaadbare batterijen. Als u nietoplaadbare batterijen in de handset gebruikt en hem op de basis
plaatst, zal de handset beschadigd raken en dit wordt NIET gedekt
door de garantievoorwaarden.
NL
16 CE-VERKLARING
Dit product voldoet aan de essentiële vereisten en andere relevante
voorschriften van de R&TTE-richtlijn 1999/5/EG.
U vindt de conformiteitsverklaring op:
www.aegtelephones.eu
Page 98

98
17 HET TOESTEL AFDANKEN (MILIEU)
Aan het einde van de levensduur van het product mag u dit product
niet weggooien met het normale huishoudafval, maar moet u het
product naar een inzamelingspunt voor de recycling van elektrische
en elektronische apparatuur brengen. Dat wordt aangegeven met
het symbool op het product, in de gebruikershandleiding en/of
op de verpakking. Sommige productmaterialen kunnen worden
hergebruikt als u ze naar een inzamelingspunt brengt. Door sommige
onderdelen of grondstoffen van gebruikte producten aan te bieden
voor hergebruik levert u een belangrijke bijdrage aan de bescherming
van het milieu. Neem contact op met de plaatselijke autoriteiten voor
meer informatie over de inzamelingspunten in uw regio.
De batterijen moeten worden verwijderd voordat het toestel
wordt weggegooid. Gooi de batterijen op een milieuvriendelijke
manier weg, volgens de voorschriften van uw land.
Page 99

99
1 CI PREOCCUPIAMO
Grazie per aver acquistato questo prodotto. Questo prodotto
è stato progettato e montato con massima attenzione a voi e
all‘ambiente. Ecco perché forniamo questo prodotto con una guida
rapida all‘installazione per ridurre il numero di pagine di carta e, di
conseguenza, salvare alberi che verrebbero tagliati per produrre
carta. Grazie del supporto dato nella protezione dell‘ambiente. Il
manuale d‘uso completo e dettagliato con la descrizione di tutte
le caratteristiche è disponibile sul sito Web www.aegtelephones.
eu. Scaricare il manuale completo se si desidera utilizzare tutte le
caratteristiche avanzate del prodotto. Per salvaguardare l’ambiente,
si raccomanda di non stampare il manuale per intero. Grazie per
sostenerci nel nostro impegno alla protezione dell‘ambiente.
2 IMPORTANTI ISTRUZIONI DI SICUREZZA
Osservare queste istruzioni di sicurezza quando si usa il telefono per
ridurre il rischio di incendio, scosse elettriche e lesioni:
•Leggere e comprendere tutte le istruzioni.
•Segue un elenco di tutte le avvertenze ed istruzioni impresse sul
prodotto.
•Disinserire la presa del prodotto prima di pulirlo. Non usare detersive
liquidi o aerosol. Per pulire l’unità utilizzare un panno umido.
•Tenere il telefono lontano da condizioni calde, umide o forte luce
solare e non lasciarlo bagnare se viene utilizzato vicino ad acqua (ad
esempio, vicino vasche, lavelli di cucina, piscine).
•Il sovraccarico di prese e prolunghe potrebbe causare incendi e
scosse elettriche.
•Scollegare questo prodotto dalla presa a parete nelle seguenti
situazioni:
>Se il cavo d’alimentazione o la spina sono danneggiati.
>Se l’unità non funziona normalmente dopo aver rispettato tutte le
istruzioni operative.
>Se il prodotto è caduto o il telaio è stato danneggiato.
>Se il prodotto non funziona come dovrebbe.
IT
Page 100

100
•NON usare mai il telefono all’aperto durante una tempesta —
scollegare la base dalla linea telefonica e dalla presa di corrente in
caso di tempesta. I danni causati dalla luce non sono coperti dalla
garanzia.
•Non usare il telefono per riportare perdite di gas in prossimità di
una perdita.
•Usare solo le batterie NiMH (nichel-idruro di metallo) fornite in
dotazione col telefono o una sostituzione autorizzata consigliata
dal produttore. C‘è un rischio di esplosione se la batteria viene
sostituita con un tipo di batteria non corretto. L‘uso di altri tipi
di batteria o batterie non ricaricabili/celle primarie può essere
pericoloso. Potrebbero causare interferenze e/o danneggiare l‘unità
e l‘ambiente. Il produttore non sarà responsabile per danni derivanti
da tale non rispetto.
•Non usare caricatori di terzi. Le batterie potrebbero causare danni.
•Verificare che le batterie sono inserite nella corretta polarità.
Smaltire le batterie in modo sicuro. Non bruciare o immergere in
acqua, smontare o perforare le batterie.
3 USO PREVISTO
Questo telefono è previsto per la connessione ad una rete telefonica
analogica pubblica o ad un‘estensione analogica di un sistema PBX
compatibile.
4 INSTALLARE IL TELEFONO
4.1 Connessione della base (vedere P5)
•Collegare il cavo di corrente e il cavo della linea telefonica alla
stazione fissa.
•Collegare l‘adattatore di corrente in una presa di corrente 100 240Vac, 50 - 60Hz e il cavo della linea telefonica in una presa per
linea telefonica.
 Loading...