

Page 1
ÖKO-LAVAMAT 76669 update
The environmentally friendly washing machine
User information
Page 2

Dear Customer,
Please read this instruction book carefully before using the appliance.
Please ensure you fully understand the safety instructions on the first
pages of this instruction book.
Retain the instruction book for future reference, and pass it on to any
future owners.
The warning triangle and / or key words (Warning!, Caution!, Impor-
1
tant!) give information that is important for your safety or the function of the appliance is highlighted. It is imperative that this
information is observed.
0 1. This symbol guides you step by step through the operation of the
appliance.
2. ...
This symbol gives you additional information and practical tips on using
3
the appliance.
Tips and information about the economical and environmentally
2
friendly use of the machine are marked with the clover leaf.
In the event of a malfunction, these operating instructions contain information on how to remedy these faults yourself. See the section
"What to do if ..."
Printed on recycled paper.
Thinking ecologically means acting ecologically ...
2
Page 3

Contents
Operating Instructions . . . . . . . . . . . . . . . . . . . . . . . . . . . . . . . . . . . . 6
Safety . . . . . . . . . . . . . . . . . . . . . . . . . . . . . . . . . . . . . . . . . . . . . . . . . . . . . . . . 6
Disposal . . . . . . . . . . . . . . . . . . . . . . . . . . . . . . . . . . . . . . . . . . . . . . . . . . . . . . 8
Environmental tips . . . . . . . . . . . . . . . . . . . . . . . . . . . . . . . . . . . . . . . . . . . . . 8
Description of the Appliance . . . . . . . . . . . . . . . . . . . . . . . . . . . . . . . . . . . . 9
Front view . . . . . . . . . . . . . . . . . . . . . . . . . . . . . . . . . . . . . . . . . . . . . . . . . . . . 9
Detergent dispenser drawer . . . . . . . . . . . . . . . . . . . . . . . . . . . . . . . . . . . . 9
Control panel . . . . . . . . . . . . . . . . . . . . . . . . . . . . . . . . . . . . . . . . . . . . . . . . . 10
Programme selector . . . . . . . . . . . . . . . . . . . . . . . . . . . . . . . . . . . . . . . . . . 10
Additional programme buttons . . . . . . . . . . . . . . . . . . . . . . . . . . . . . . . . 12
Consumption data . . . . . . . . . . . . . . . . . . . . . . . . . . . . . . . . . . . . . . . . . . . . . 13
Run time display . . . . . . . . . . . . . . . . . . . . . . . . . . . . . . . . . . . . . . . . . . . . . . . 13
What does UPDATE mean? . . . . . . . . . . . . . . . . . . . . . . . . . . . . . . . . . . . . . 14
Before the first wash . . . . . . . . . . . . . . . . . . . . . . . . . . . . . . . . . . . . . . . . . . 14
Preparing a Wash Load . . . . . . . . . . . . . . . . . . . . . . . . . . . . . . . . . . . . . . . . . 15
Sorting and preparing a wash load . . . . . . . . . . . . . . . . . . . . . . . . . . . . . . . . 15
Types of Washing and Care Symbols . . . . . . . . . . . . . . . . . . . . . . . . . . . . . . . 16
Detergent and Conditioners . . . . . . . . . . . . . . . . . . . . . . . . . . . . . . . . . . . . . . 17
Which detergent and conditioners? . . . . . . . . . . . . . . . . . . . . . . . . . . . . 17
Quantities of detergent and conditioners? . . . . . . . . . . . . . . . . . . . . . . . 17
Water softening . . . . . . . . . . . . . . . . . . . . . . . . . . . . . . . . . . . . . . . . . . . . . . . . 17
Running a washing cycle . . . . . . . . . . . . . . . . . . . . . . . . . . . . . . . . . . . . . . . 18
Brief instructions . . . . . . . . . . . . . . . . . . . . . . . . . . . . . . . . . . . . . . . . . . . . . . . 18
Setting the Washing Programme . . . . . . . . . . . . . . . . . . . . . . . . . . . . . . . . . . 19
Changing the spin speed/Selecting the rinse hold function . . . . . . . . . . . . 20
Setting the delay timer/soaking time . . . . . . . . . . . . . . . . . . . . . . . . . . . . . . 20
Opening and closing the door . . . . . . . . . . . . . . . . . . . . . . . . . . . . . . . . . . . . 21
Loading the washing . . . . . . . . . . . . . . . . . . . . . . . . . . . . . . . . . . . . . . . . . . . . 21
Add detergent / conditioner . . . . . . . . . . . . . . . . . . . . . . . . . . . . . . . . . . . . . 22
Starting a wash programme . . . . . . . . . . . . . . . . . . . . . . . . . . . . . . . . . . . . . . 23
Washing Programme Progress . . . . . . . . . . . . . . . . . . . . . . . . . . . . . . . . . . . . 24
End of the wash cycle/removing the washing . . . . . . . . . . . . . . . . . . . . . . . 25
3
Page 4

Programme tables . . . . . . . . . . . . . . . . . . . . . . . . . . . . . . . . . . . . . . . . . . . . . 27
Washing . . . . . . . . . . . . . . . . . . . . . . . . . . . . . . . . . . . . . . . . . . . . . . . . . . . . . . 27
Separate conditioning/starching . . . . . . . . . . . . . . . . . . . . . . . . . . . . . . . . . 28
Separate rinsing . . . . . . . . . . . . . . . . . . . . . . . . . . . . . . . . . . . . . . . . . . . . . . . . 28
Separate spin . . . . . . . . . . . . . . . . . . . . . . . . . . . . . . . . . . . . . . . . . . . . . . . . . . 28
Maintenance and Cleaning . . . . . . . . . . . . . . . . . . . . . . . . . . . . . . . . . . . . . 29
Control panel . . . . . . . . . . . . . . . . . . . . . . . . . . . . . . . . . . . . . . . . . . . . . . . . . . 29
Detergent Dispenser Drawer . . . . . . . . . . . . . . . . . . . . . . . . . . . . . . . . . . . . . . 29
Washing Machine Drum . . . . . . . . . . . . . . . . . . . . . . . . . . . . . . . . . . . . . . . . . 30
Main door . . . . . . . . . . . . . . . . . . . . . . . . . . . . . . . . . . . . . . . . . . . . . . . . . . . . . 30
What to do if... . . . . . . . . . . . . . . . . . . . . . . . . . . . . . . . . . . . . . . . . . . . . . . . . 31
Trouble Shooting . . . . . . . . . . . . . . . . . . . . . . . . . . . . . . . . . . . . . . . . . . . . . . . 31
If the washing results are not satisfactory . . . . . . . . . . . . . . . . . . . . . . . . . . 35
Carrying out an emergency emptying . . . . . . . . . . . . . . . . . . . . . . . . . . . . . . 36
Drain pump . . . . . . . . . . . . . . . . . . . . . . . . . . . . . . . . . . . . . . . . . . . . . . . . . . . . 37
Additional Rinse (RINSE+) . . . . . . . . . . . . . . . . . . . . . . . . . . . . . . . . . . . . . . . . 39
Water Cooling . . . . . . . . . . . . . . . . . . . . . . . . . . . . . . . . . . . . . . . . . . . . . . . . . 40
Additional Rinse and Water Cooling . . . . . . . . . . . . . . . . . . . . . . . . . . . . . . . 40
Child Safety Feature . . . . . . . . . . . . . . . . . . . . . . . . . . . . . . . . . . . . . . . . . . . 41
Installation and connection instructions . . . . . . . . . . . . . . . . 42
Installation Safety Precautions . . . . . . . . . . . . . . . . . . . . . . . . . . . . . . . . . . 42
Installation of the appliance . . . . . . . . . . . . . . . . . . . . . . . . . . . . . . . . . . . . 43
Transporting the appliance . . . . . . . . . . . . . . . . . . . . . . . . . . . . . . . . . . . . . . . 43
Remove transport packaging . . . . . . . . . . . . . . . . . . . . . . . . . . . . . . . . . . . . . 43
Installation-Site preparation . . . . . . . . . . . . . . . . . . . . . . . . . . . . . . . . . . . . . 44
Installation on a Suspended Floor . . . . . . . . . . . . . . . . . . . . . . . . . . . . . . . . . 45
Levelling the Appliance . . . . . . . . . . . . . . . . . . . . . . . . . . . . . . . . . . . . . . . . . . 45
4
Page 5

Electrical Connection . . . . . . . . . . . . . . . . . . . . . . . . . . . . . . . . . . . . . . . . . . 46
Water connection . . . . . . . . . . . . . . . . . . . . . . . . . . . . . . . . . . . . . . . . . . . . . 47
Water pressure . . . . . . . . . . . . . . . . . . . . . . . . . . . . . . . . . . . . . . . . . . . . . . . . . 48
Inlet Hose Connection . . . . . . . . . . . . . . . . . . . . . . . . . . . . . . . . . . . . . . . . . . . 49
Water Drainage . . . . . . . . . . . . . . . . . . . . . . . . . . . . . . . . . . . . . . . . . . . . . . . . 50
Pump head of greater than 1m . . . . . . . . . . . . . . . . . . . . . . . . . . . . . . . . . . . 51
Technical Data . . . . . . . . . . . . . . . . . . . . . . . . . . . . . . . . . . . . . . . . . . . . . . . . 52
Dimensions . . . . . . . . . . . . . . . . . . . . . . . . . . . . . . . . . . . . . . . . . . . . . . . . . . 52
Warranty conditions . . . . . . . . . . . . . . . . . . . . . . . . . . . . . . . . . . . . . . 53
Index . . . . . . . . . . . . . . . . . . . . . . . . . . . . . . . . . . . . . . . . . . . . . . . . . . . . . . . . 54
Service & Spare Parts . . . . . . . . . . . . . . . . . . . . . . . . . . . . . . . . . . . . . 55
5
Page 6

Operating Instructions
Operating Instructions
1 Safety
The safety features of AEG electrical appliances comply with accepted
technical standards and the German Appliance Safety Law. However, we
also consider it our obligation as a manufacturer to inform you about
the following safety information.
Prior to initial start-up
• Observe the "Installation and Connection Instructions" in this in-
struction book.
• If the appliance is delivered in the winter months and temperatures
are below freezing: Store the washing machine at room temperature
for a few hours before putting it into operation.
Intended Use
• The washing machine is only intended for washing normal domestic
washing. If the appliance is used for any other purpose or incorrectly
operated, the manufacturer accepts no liability for any damages
which may result.
• It is dangerous to alter the specifications or attempt to modify this
product in any way.
• Only use detergents which are suitable for automatic washing ma-
chines, and follow the recommendations of the detergent manufacturer.
• Garments which have been in contact with flammable solvents
should not be washed. Also bear this in mind when washing precleaned washing.
• Do not use the washing machine for dry-cleaning.
• Dyes and bleaching agents may only be used if specifically permitted
by the manufacturer of these products. We cannot be held liable for
any damages.
• This appliance must be connected to the cold water supply only.
• Damage due to frost is not covered by the guarantee. If the washing
machine is located in a room in which below freezing temperatures
may occur, emergency emptying must be carried out (see "carrying
out an emergency emptying“).
6
Page 7

Operating Instructions
Child Safety
• Packaging materials (e.g. films, styrofoam) can be dangerous for chil-
dren. There is a risk of suffocation! Keep all packaging well away from
children.
• This appliance is designed to be operated by adults. Do not allow
children to tamper with the controls or play with the appliance.
• Pets and children have been known to climb into washing machines.
Please check the drum before use.
• When disposing of the appliance, cut off the mains cable, and destroy
the plug. Disable the door lock to prevent young children being
trapped inside.
General Safety
• Repairs to washing machines must only be carried out by qualified
personnel. Repairs carried out by inexperienced persons may cause
injury or serious malfunctioning. Contact your local AEG Service
Force Centre.
• Never operate the washing machine if the mains cable is damaged or
the control panel, work top or base area are damaged allowing internal components to be accessible.
• Switch off the appliance and isolate from the mains supply before
carrying out any cleaning or maintenance work.
• If operation is stopped, disconnect the appliance from the mains sup-
ply and shut off the tap.
• Do not use the mains cable to remove the plug from the socket. Al-
ways pull the plug itself.
• Adapters and extension cables must not be used. There is a danger
of overheating!
• Do not clean the washing machine with a water jet. There is a danger
of electric shock!
• During high temperature wash programmes the glass of the door may
become hot. Do not touch!
• Allow the water to cool down before cleaning the drain pump, carry-
ing out emergency emptying or opening the door in an emergency.
• Small animals/pets can chew on power cables and water hoses. This
can lead to the risk of electric shock and water damage to the appliance and property. Keep small animals away from the appliance.
7
Page 8

Operating Instructions
2 Disposal
Packaging
Dispose of the packaging material correctly. All packaging materials
used are environmentally friendly and can be disposed of without any
danger to the environment.
• Plastic parts can be recycled and are identified as follows:
>PE<
>PS< for polystyrene, e.g. padding (always CFC-free)
>POM< for polyoxymethylene, e.g. plastic clips
• Cardboard packaging is manufactured from recycled paper and
should be deposited in the waste paper collection for recycling.
When disposing of the washing machine!
Cut off the mains cable and destroy the plug. Disable the door catch to
prevent young children becoming trapped inside. Use an authorised
disposal site.
for polyethylene, e.g. the outer covering and the bags in
the interior.
2 Environmental tips
To save water and energy, and to help protect the environment, we recommend that you follow these tips.
• Do not use a pre-wash for normally soiled washing.
• It is more economical to wash full loads.
• When washing small loads, reduce the detergent by half to two
thirds.
• Pre-treat stains, and then wash at a lower temperature.
• Use the energy-saving programme when washing light to normally
soiled garments.
• In hard water areas, the use of a water softening agent can reduce
the amount of detergent necessary. See manufacturers recommendations.
8
Page 9
Description of the Appliance
Front view
Detergent
dispenser
drawer
Operating Instructions
Control panel
Rating plate
(behind door)
Main door
Screw feet
(height-adjustable)
Detergent dispenser drawer
Main wash detergent
in powder form and
water softening
agent if required
Stain removers
Flap in front of
drain pump
Pre-wash detergent/
soaking agent or
water softening
agent if used
Liquid conditioners
(fabric softener,
starch)
9
Page 10
Operating Instructions
Control panel
Spin speed / RINSE HOLD button
Programme op-
tion buttons
DOOR Indicator
Multi-display
DELAY TIMER button
START/ PAUSE button
Programme selector
The programme selector is used
to select the type of wash cycle
(e.g. level of water, drum movement, number of rinse cycles,
spin speed) according to the type
of washing.
Programme progress display
Programme selector
OVER DOSING indicator
10
OFF
Switches the washing machine
off; it is switched on at all other
positions.
To amend a programme setting
which was selected by mistake, turn the programme selector to the OFF
position.
This restores the original settings.
Page 11

Operating Instructions
COTTONS/ LINEN
Main cycle for whites/coloureds (cotton/linen) at 30 °C to 95 °C.
ENERGY SAVING position: Energy saving programme at approx. 67 °C
2
for lightly to normally soiled cottons, increased wash period (not able
to be used together with TIME SAVING or STAIN).
40 - 60 MIX position: Programme for cottons/linen, which is indicated for various wash temperatures.
Various items of washing which according to their labels are usually
washed separately at 40 °C or at 60 °C, can be washed together in the
40 - 60 MIX programme. In this way better use is made of the drum capacity, saving energy. Due to the increased wash time, a wash result as
for a normal 60°C programme is achieved.
EASY-CARES
Main wash cycle for easy-care textiles (mixed weave) at 40 °C to 60 °C.
EASY IRON : Main wash cycle at 40 °C for easy-care textiles which
thanks to this programme must then be only lightly ironed or not
ironed at all.
DELICATES
Main wash cycle for delicates at 30 °C or 40 °C.
WOOL/SILK P (Hand-wash)
Main wash cycle (cold to 40 °C) for machine-washable wool and for
hand-washable wool textiles and silk with the ï care label (handwash).
GENTLE RINSE
Separate gentle rinse, e.g. for rinsing hand-washed textiles (2 rinse cycles, liquid conditioner from the compartment æ is rinsed in, gentle
spin).
STARCHING
Separate starching, separate conditioning, separate impregnating of
damp washing (1 rinse cycle, liquid conditioner from the compartment
æ is rinsed in, spin).
DRAIN
Draining the water following a rinse hold (without spinning).
Rinse hold means: The washing remains in the final rinse water and is
3
not spun.
SPIN
Draining the water following a rinse hold and spinning or separate
spinning of hand-washed cottons/ linen.
11
Page 12
Operating Instructions
SHORT SPIN
Draining the water following a rinse hold and gentle spinning or separate spinning of delicate textiles (easy-care washing, delicates, wool).
Additional programme buttons
The additional programme buttons are used to adjust the wash programme to the degree of soiling of
the washing. Additional programmes are not necessary for washing that is soiled to a normal degree.
Various functions can be combined depending on
the programme.
PRE WASH
Cold pre wash before the main wash cycle which
follows automatically; with intermediate spinning
for COTTONS/LINEN and EASY-CARE, without intermediate spinning for DELICATES.
SOAKING
Approx. 1 hour at 30 °C or 40 °C, according to the programme set. Can
be increased to a maximum of 19 hours using the DELAY TIMER button.
The main wash cycle follows automatically.
QUICK WASH
Shortened main wash cycle for lightly soiled washing.
12
STAIN
For treating heavily soiled washing or stained washing. (Stain salt is
rinsed in at an optimal time in the cycle.)
If the WOOL/SILK P (hand-wash) setting is used the additional pro-
3
grammes cannot be selected (buttons that have been pressed have no
effect).
Page 13
Operating Instructions
Consumption data
The values given in the following table for selected programmes were
calculated under standard conditions. They provide a useful guide for
operation in the home.
Programme selector/
temperature
COTTONS/LINEN 95 6 50 2,05
COTTONS/LINEN 60
COTTONS/LINEN 40 6 58 0,66
EASY-CARES 40 3 52 0,55
DELICATES 30 3 56 0,36
WOOL/SILK/ P (hand wash) 30 2 42 0,18
1) Note: The selected programme is tested in accordance with EN 60 456. The
consumption values, however, can deviate depending on the following: water
pressure, water hardness, water inlet temperature, room temperature, washing
type and quantity, the detergent used, fluctuations in the mains voltage and the
selected programme options.
1)
Load
in kg
6 49 1,14
Water
in litres
Run time display
The multi-display indicates the estimated
3
duration, in minutes, of the programme.
These timings are estimates and vary.
During the programme countdown the remaining time can be recalculated due to any of the following: incoming water temperature, type and quantity of laundry, out of balance spin
detection and foam detection.
Energy
in kWh
13
Page 14

Operating Instructions
What does UPDATE mean?
The control system of your machine is fully electronic. The software
which determines this control system can be reprogrammed. If a further improvement to washing technology is introduced by AEG then
your machine can be updated.
The cost of the update will be advised at the time of the request. For
further information regarding this please contact the AEG Customer
Care Department.
Before the first wash
0 Run a washing cycle without washing (COTTONS 95, with half the
amount of detergent).
This removes any residues from the drum which may have been left
during manufacturing.
14
Page 15

Operating Instructions
Preparing a Wash Load
Sorting and preparing a wash load
• Sort washing according to the care symbol and type (see "Washing
types and care symbols").
• Empty all pockets.
• Remove metal objects (paper clips, safety pins etc.).
• In order to prevent bunching up of washing and damage to washing,
close zippers, button up duvet covers and pillow cases, and tie up
loose straps such as from aprons.
• Turn articles with double layered textiles inside out (sleeping bags,
anoraks etc.).
• Coloured, knitted fabrics, as well as wool and fabrics with appliqués
should be turned inside out.
• Place small and delicate items (e.g. socks, tights and stockings, bras
etc.) in a washing net, or pillow case.
• Handle curtains with care. Metal rollers or burred, plastic rollers must
be removed or tied into a net or bag. We cannot accept liability for
damage.
• Do not wash coloured and white washing together. This could discol-
our white washing or turn it grey.
• New, coloured washing often contains excessive dye. Wash these sep-
arately the first time.
• Mix small and large items of washing. This improves washing effi-
ciency and the washing is more evenly distributed during the spinning cycle.
• Shake out washing before placing into the washing machine.
• Do not place folded washing into the drum.
• Observe tips such as "wash separately“ and "wash separately several
times".
15
Page 16

Operating Instructions
Types of Washing and Care Symbols
Care symbols help you to choose the correct wash programme.
Washing should be sorted by type, and according to their care symbols.
The temperature indicated on the care symbol is the maximum wash
temperature.
Cottons ç
Cotton and linen items with this care symbol are not sensitive to machine washing or high temperatures. The COTTONS/LINEN programme is
suitable for this type of washing.
Linen èë
Cotton and linen items with this care symbol are not sensitive to machine washing. The COTTONS/LINEN programme is suitable for this type
of washing.
Easy-Cares êí
Materials such as fine cotton, wool-blend fabrics, viscose, and synthetics with these care symbols require gentler treatment. The EASY-CARES/
EASY IRON programmes are suitable for this type of washing.
Delicatesì
Materials such as layered fibres, microfibres, viscose, synthetics, and net
curtains with this care symbol require particularly careful treatment.
The DELICATES programme is suitable for this type of washing.
16
Wool/silk and especially sensitive materials 9ìï
Woollens, wool blends and silk with these care symbols are particularly
sensitive to machine washing. The WOOL/SILK P (Handwash) programme is suitable for this type of washing.
Important! Materials with the care symbol ñ (Not machine-washa-
ble!) should not be washed in the washing machine.
Page 17

Operating Instructions
Detergent and Conditioners
Which detergent and conditioners?
Only use detergents and conditioners that are suitable for use in washing machines. Always follow the manufacturer's instructions.
Quantities of detergent and conditioners?
The quantity to be used will depend on:
• degree of soiling of the washing
• degree of hardness of the water supply
• load
If the manufacturer does not indicate the amounts to use for smaller
2
loads, for half-loads use a third less than the amount recommended for
a full load, and for smaller loads and EASY IRON use half the amount
recommended for a full load.
Please follow the detergent and conditioner manufacturers’ instructions for use and dosing recommendations.
Water softening
For medium to high water hardness (hardness class II upwards) a water
softening agent can be used. Refer to the manufacturer's instructions.
Then always add the appropriate amount of detergent (underdosing)
for hardness class I (soft). Your local Water Authority can advise you on
the hardness of the water in your area.
Water hardness details
Hardness class
I - soft 0 - 7 to 125
II - medium hard 7 - 14 125 - 250
III - hard 14 - 21 250 - 375
IV - very hard greater than 21 greater than 375
Water hardness in °dH
(German hardness scale)
Water hardness in ppm
(Parts Per Million)
17
Page 18

Operating Instructions
Running a washing cycle
Brief instructions
A washing cycle consists of the following steps:
0 1. Set the correct washing programme:
– Select the programme and temperature with the programme selector.
– Select any programme options if required.
2. If necessary, change the spin speed/select RINSE HOLD.
3. Set the DELAY TIMER if required.
4. Open the door and load the washing.
5. Close the door.
6. Add the detergent/conditioner.
7. Start the washing programme with the START/PAUSE button.
When the washing programme has ended:
Important! If the washing cycle ended with a rinse hold, carry out
DRAIN, SPIN, or SHORT SPIN before opening the door.
8. Open the door and remove the washing.
9. Switch off the washing machine: Set the programmes selector to OFF.
18
Page 19

Operating Instructions
Setting the Washing Programme
See "Programme tables" for a suitable programme, correct temperature
3
and possible programme options to suit the type of washing.
0 1. Set the programme selector to
the desired washing programme
with the desired temperature.
The expected duration of the
programme selected is displayed
in the multi display in minutes.
2. If required, select programme option(s):
The indicator of the programme selected lights up.
– To change the selection press another button.
– To cancel a selection, press the button again.
19
Page 20

Operating Instructions
Changing the spin speed/Selecting the rinse
hold function
If required, change the spin speed for the final
spin/select rinse hold:
Changing the spin speed
0 Continue pressing the spin speed/RINSE HOLD but-
ton until the indicator for the desired spin speed is
illuminated.
If you do not change the spin speed, the final spin
3
will be adjusted automatically depending on the
type of wash cycle:
– COTTONS/LINEN 1600 revolutions per minute
– EASY-CARES/EASY IRON 1200 revolutions per minute
– DELICATES 1200 revolutions per minute
– WOOL/SILK/P (hand wash) 1200 revolutions per minute
The speed for the intermediate spin cycle is dependent on the wash cycle selected and cannot be altered.
Selecting the rinse hold function
0 Continue pressing the spin speed/RINSE HOLD button until the RINSE
HOLD indicator is illuminated.
If RINSE HOLD is selected, the washing will remain in the final rinse wa-
3
ter and will not be spun.
Setting the delay timer/soaking time
Delay timer
The DELAY TIMER button allows you to delay the start of a wash
programme by 1 to a maximum of 19 hours.
0 To do this, continue pressing the DELAY
TIMER button until the desired start delay
is displayed in the multi-display, like 12h
for a delay of the start of the programme
by 12 hours.
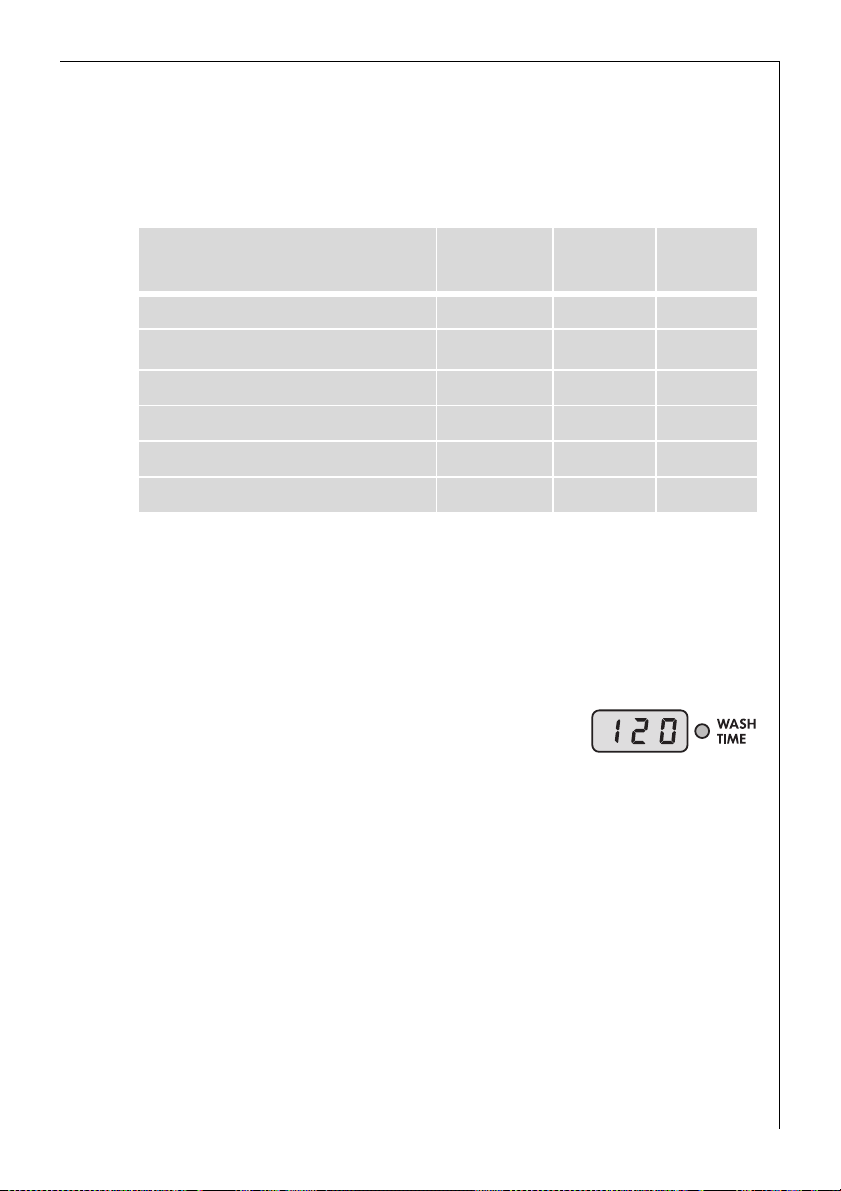
If 19h is shown and you press the button
once again, the duration of the wash programme set will be shown
(display in minutes, e. g.120). In this situation no time delay has been
set.
20
Page 21

Operating Instructions
Soak time
If the SOAKING button is pressed you can use the DELAY TIMER button
to increase the soak time by 1 to a maximum of 19 hours.
Without the delay timer, the soak time is approx. 1 hour.
3
Opening and closing the door
0 Open: Pull the handle on the door.
0 Close: Press the door firmly closed.
The displays DOOR and START/PAUSE
show when the appliance is switched
on whether the door can be opened:
DOOR Indicator Display START/PAUSE Door opening possible?
lights up green flashes red yes
lights up red lights up red
1) The door is locked because of a high water level or high temperature
If
3
– the the error code Cd appears in the multi display,
– and the PRE WASH, RINSE and RINSE+ displays are flashing,
an attempt was made to start a washing programme without the door
being correctly closed. In this case, press the door firmly closed and
start the washing programme again.
no
1)
Loading the washing
See "Programme Tables" for maximum loads.
3
For information about the correct preparation of the washing see "Sort
and prepare washing".
0 1. Sort and prepare the washing according to type.
2. Open the door: Pull the handle on the door.
3. Load the washing.
Important! Do not trap washing when
closing the door. The fabrics and the machine could be damaged.
4. Close the door firmly.
21
Page 22

Operating Instructions
Add detergent / conditioner
For instructions concerning detergent
3
and conditioners, see "Detergents and
conditioners".
0 1. Open the detergent dispenser drawer.
press in the flap on the drawer so as to
be able to grasp the handle(1), and pull
out the drawer (2).
2. Adding detergent / conditioner
Compartment for in-wash
stain treatment
Compartment for powder
main detergent
(If you use water softening agent and
require the right compartment for the
pre-wash/soaking detergent , add the
water softening agent to the main detergent in the left compartment.)
Compartment for liquid conditioner
(Softener, finisher, starch)
Important! Do not fill above the MAX mark. When using
thick concentrated fabric conditioners and starches we
recommend you dilute the concentrate with water to ensure
trouble-free dispensing. If using starch powder dissolve
according to the manufacturer´s instructions.
Note: It is normal for a small amount of water to be left in
the compartment for liquid conditioner; this will not affect
the wash results.
Compartment for pre-wash/soaking detergent
(Only for programme options PRE WASH/SOAKING)
or for water softening agent
3. Push the detergent dispenser drawer fully in.
If using liquid detergent / tablets
3
Add liquid detergent / tablets in the quantity recommended by the
washing detergent manufacturer. Add liquid detergent with dosage
containers provided by the detergent manufacturer.
22
Page 23

Operating Instructions
Starting a wash programme
0 1. Ensure that the tap has been turned on.
2. Starting a wash programme: Press the START/PAUSE
button
The wash programme will start, or starts after the
countdown of the time delay set.
The door has not been shut properly if, when the START/PAUSE button
3
is pressed,
– the error code Cd appears in the multi-display,
– and the PRE WASH, RINSE and RINSE+ indicators are flashing,
Should this happen, press the door firmly closed and press the START/
PAUSE button once more.
if a time delay has been set:
The time delay set counts down, the time remaining to the start of the
programme (always in whole hours, e.g. 5h) will be shown in the multidisplay. During this time you can add additional washing or change or
cancel the delay timer.
• Adding washing: Press the START/PAUSE button; the door can be
opened. Then close the door and press the START/PAUSE button
again.
• Changing or cancelling the delay timer: Continue pressing the DELAY
TIMER button until the desired time is displayed; when the programme length is displayed (display in minutes, e.g.120) the wash
programme will start straight away.
23
Page 24

Operating Instructions
Washing Programme Progress
Programme progress display
Prior to the start, the programme steps chosen are
displayed by the programme progress display. During
the washing programme the current programme step is
displayed.
Multi-display
The expected time remaining (in minutes) to
the end of the programme is shown in the
multi-display.
The multi-display indicates the estimated duration, in minutes, of the
3
programme. These timings are estimates and can be varied and influenced by incoming water temperature, type and quantity of laundry,
out of balance spin detection and foam detection. During the programme countdown the remaining time can be recalculated due to any
of the above factors.
Changing the Spin Speed
During the washing programme, the spin speed can still be changed or
the RINSE HOLD can be set.
Other settings cannot be changed.
Stopping the programme
0 Turn the programme selector to OFF in order to stop the washing pro-
gramme prematurely.
The washing programme can be interrupted at any time with the
3
START/PAUSE button and can be continued again by pressing this button again.
24
Page 25

Operating Instructions
End of the wash cycle/removing the washing
After the programme has ended:
When a wash programme has ended, END will illuminate in the
programme progress display.
0 3. Open the door.
As soon as the DOOR indicator shows green, the door can be opened.
4. Remove the washing.
5. Turn the programme selector to OFF.
6. After washing, pull out the detergent drawer a little to enable it to dry
out. Keep the door ajar so that the washing machine can air.
If RINSE HOLD has been selected:
If a programme ends with RINSE HOLD, the indicator next to the
START/PAUSE button will flash.
0 1. After a rinse hold the water must first be drained:
– Either press the START/PAUSE button (water is drained and the wash-
ing spun in accordance with the programme that has ended; the spin
speed can still be changed during the spin cycle by pressing the spin
speed/RINSE HOLD button),
or
– Turn the programme selector to OFF, then to DRAIN, and press the
START/ PAUSE button
(the water will be drained without spinning),
or
– Turn the programme selector to OFF, then to SPIN or SHORT SPIN, and
press the START/PAUSE button (the water will be drained and the
washing spun or gently spun).
After the end of this programme stage the END indicator will illuminate. The wash programme has ended.
2. Open the door and remove the washing.
3. Turn the programme selector to OFF.
4. Turn off the tap.
25
Page 26

Operating Instructions
If the EASY IRON programme has been selected:
For EASY IRON, following the end of the programme an anti-crease
phase of approx. 30 minutes is performed. During this time the multidisplay shows the time remaining (e.g. 1 minute) and the END display
will illuminate.
You can remove the washing at any time during the anti-crease phase.
0 1. To do this, press the START/PAUSE button
The door can now be opened and the washing removed.
2. Then turn the programme selector to OFF.
The wash programme has ended.
If the OVERDOSING indicator illuminates, then too
3
much detergent was used in the washing programme
just completed. Observe the dosing recommendations
of the detergent manufacturer as well as the load quantity for the next
wash.
Important! If the washing machine is not to be used for a long period:
Close the water tap and disconnect the washing machine from the
electricity mains.
26
Page 27

Operating Instructions
Programme tables
Washing
The following list does not describe all the possible settings, only those
normally used in everyday use.
Type of washing,
care symbol
Cottons
ç
Energy saving
programme:
Cottons ç
Linen3)
èë
Easy-cares
êí
Delicates
ì
Max. load size
(dry weight)
6kg
6kg
6kg
3kg
1kg
3kg
(or 15-20m
curtains)
1)
2)
COTTONS/
LINEN
95
COTTONS/
LINEN
ENERGY SAVING
COTTONS/
LINEN
30, 40, 60
COTTONS/
LINEN
40 - 60 MIX
EASY-CARES
40, 50, 60
EASY IRON
DELICATES
2
30, 40
Programme selector
Temperature [°C]
5)
40
Possible
additional pro-
grammes
PRE WASH
SOAKING
QUICK WASH
STAIN
PRE WASH
SOAKING
PRE WASH
SOAKING
QUICK WASH
4)
STAIN
PRE WASH
SOAKING
QUICK WASH
STAIN
PRE WASH
SOAKING
QUICK WASH
4)
STAIN
Wool/silk/hand-wash
9ìï
1) The load size is determined in accordance with the EN 60456 standard load.
2) A 10 litre bucket contains approximately 2.5 kg dry washing (cotton).
3) Programme settings for tests in accordance with or similar to EN 60 456 and
IEC 60 456 are described in the chapter “Consumption values”.
4) For STAIN a temperature of at least 40°C is necessary so that the stain removal agent becomes effective.
5) Creases in the washing can only be largely avoided if a load size of 1kg is not exceeded.
5 to7 easy-care men’s shirts are equivalent to approximately 1kg of dry washing.
2kg
P WOOL/ SILK
COLD, 30, 40
27
Page 28

Operating Instructions
Separate conditioning/starching
Type of washing
Cottons/ linen 6kg STARCHING
Max. load size
(dry weight)
Separate rinsing
Type of washing
Cottons/ linen 6kg
Easy-cares 3kg
Delicates 3kg
Wool/silk/hand-wash 2kg
Max. load size
(dry weight)
Separate spin
Type of washing
Cottons/ linen 6kg SPIN
Easy-cares 3kg
Max. load size
(dry weight)
Programme selector
Programme selector
GENTLE RINSE
Programme selector
28
SHORT SPINDelicates 3kg
Wool/silk/hand-wash 2kg
Page 29

Operating Instructions
Maintenance and Cleaning
Control panel
Important! Do not use household furniture polish or abrasive cleaners
to clean panel and operating parts.
0 Wipe over the operating panels with a damp cloth. Use warm water.
Detergent Dispenser Drawer
The detergent dispenser drawer should be cleaned from time to time.
0 1. Pull the detergent dispenser drawer out as far as it will go.
2. Remove the detergent dispenser drawer by pulling sharply.
3. Take the conditioner insert out of the
middle compartment.
4. Clean the conditioner insert under
running water.
5. Clean the separate compartments
with warm water. It is best to use
a flat brush.
6. Push on the conditioner insert
as far as it will go so that it is
securely in place.
29
Page 30

Operating Instructions
7. Use a brush to clean the entire
compartment area of the washing
machine, particularly also the
nozzles on the top side of the
compartment.
8. Set the detergent dispensing
drawer into the guide tracks and
push it in.
Washing Machine Drum
The washing machine drum is made from rust-free stainless steel. Any
objects left in the laundry which are likely to rust can stain the drum.
Important! Do not clean the stainless steel drum with descaling agents
containing acids, scouring agents containing chlorine or iron, or steel
wool. Your local AEG Service Force Centre has suitable agents available.
0 Remove any rust stains on the drum using a stainless steel cleaning
agent.
Maintenance Wash
With the use of low temperature washes it is possible to get a build up
3
of residues inside the drum.
We recommend that a maintenance wash be performed on a regular
basis.
To run a maintenance wash:
The drum should be empty of laundry.
0 1. Select the hottest cotton wash programme.
2. Use a normal measure of detergent, must be a powder.
Main door
0 Regularly check to see if there are deposits or foreign objects in the
rubber seal behind the door, and remove them.
30
Page 31

Operating Instructions
What to do if...
Trouble Shooting
If the appliance is not working correctly, please carry out the following
checks before contacting your local AEG Service Force Centre.
Important: If you call out an engineer to a fault listed below, or to repair a fault caused by incorrect use or installation, a charge will be
made even if the appliance is in guarantee.
• If the fault code C1, C2 or Cd is shown in the
multi-display, you may be able to remedy the
fault yourself (see the Faults table below).
When you have remedied the fault, press the
START/ PAUSE button.
• With all other displayed faults (C plus number or letter): switch appli-
ance off and on again. Reset the wash programme and press the
START/PAUSE button.
If the fault code is displayed again, please contact the Customer Service
department quoting the fault code.
Problem Possible Cause Remedy
The mains plug is not
plugged in.
The house fuse has blown. Replace the fuse.
The washing machine
does not work.
Door cannot be closed. The child safety feature is set
The fault code Cd appears. The displays PRE
WASH, RINSE and
RINSE+ are flashing.
The door is not correctly
closed.
START/ PAUSE button not
pressed long enough.
The door is not correctly
closed.
Plug in the mains plug.
Close the door; The lock must
engage audibly.
Keep the START/PAUSE button pressed until the programme begins.
Cancel the child safety feature (see Section "Child
Safety Feature“).
Close the door correctly.
Start the programme again.
31
Page 32

Operating Instructions
Problem Possible Cause Remedy
No water flows.
Fault code
(1 appears.
Water tap is closed. Open the water tap.
Close the water tap. Unscrew
Filter in screw connection of
the inlet hose is blocked.
the hose from the tap, re-
move the filter and clean un-
der running water
The washing machine
vibrates during operation or is unstable.
Excessive foaming during the main wash.
Water tap is blocked with
limescale or is faulty.
The transport packaging has
not been removed.
The machine is not level.
There is very little washing in
the drum (e.g. only one
dressing gown).
The water could not be completely pumped out before
spinning because the drainage hose is kinked or the
drain pump is blocked.
Probably too much detergent
was used.
Check the water tap and
have it repaired if necessary.
Remove transport packaging
according to the installation
and connection instructions.
Adjust the feet according to
the installation and connec-
tion instructions.
This does not impair the op-
eration of the machine.
Check the the drain hose and
remove any kink if necessary,
or clean the drain pump and,
if required, remove foreign
bodies from the pump hous-
ing.
It may be necessary to re-
duce the amount of deter-
gent used. Follow the
detergent manufacturer's
recommendations.
32
Page 33

Operating Instructions
Problem Possible Cause Remedy
Water runs out from
under the washing machine.
Fabric softener was not
washed in, compartment æ for conditioners is filled with water.
Washing heavily
creased
The screw connection on the
inlet hose is leaking.
The drainage hose is leaking.
The washing drain pump
cover is not correctly closed.
Washing is caught in the
door.
The emergency emptying
hose is not correctly closed
or is leaking.
The conditioner insert in the
compartment for the conditioners is not correctly attached or is blocked.
Probably too much washing
put in the drum.
Tighten the inlet hose screw
connection
Check the drainage hose and
replace it if necessary.
Close cover correctly.
Stop the programme and re-
move the washing caught in
the door. Restart the
programme.
Close the emergency empty-
ing hose correctly (see the
section "Carrying out Emer-
gency Emptying"). Call your
local Service Force Centre if
the emergency emptying
hose leaks.
Clean the detergent dis-
penser drawer and attach the
conditioner insert securely.
Pay attention to the maxi-
mum load quantity (see Pro-
gramme tables). In the case
of easy-care fabrics, select
the EASY IRON programme.
The washing has not
been spun as dry as
usual.
The washing is not sufficiently spun. Water is
left in the drum.
The fault code
pears.
(2 ap-
The washing was not able to
be distributed evenly in the
drum prior to spinning.
Drain hose is kinked. Remove the kink.
Maximum pump head (discharge height 1m from the
appliance's base) is exceeded.
Drain pump is blocked.
Always load the drum as ful
as possible with a combina-
tion of large and small items.
Contact your local Service
Force Centre. For pumping
heights over 1m a conver-
sion kit is available as a spe-
cial accessory.
Switch off the appliance and
pull out the mains plug.
Clean the drain pump.
33
Page 34

Operating Instructions
Problem Possible Cause Remedy
The door cannot be
opened when the appliance is switched on.
The door is locked due to a
high water level or a high
temperature. (the DOOR display lights up red).
Power failure! (All displays
have gone off.)
For safety reasons the door
remains locked for 4 to 10
minutes.
Wait until the DOOR display
lights up green.
If it is still necessary to open
the door:
turn the programme selector
to OFF; turn the programme
selector to DRAIN. Press the
START/ PAUSE button.
After the water has been
pumped out, the door can be
opened.
If water can be seen through
the window in the door, first
carry out emergency empty-
ing (see section “Carrying out
Emergency Emptying Opera-
tion").
After approx. 4 to 10 minutes
the door can be opened
again by pulling the handle.
34
Remnants of detergent
are building up in the
detergent dispenser
drawer.
The rinsing water is
cloudy.
When pressing a programme option button
the corresponding display does not light up.
Water tap is not fully
opened.
The inlet hose filter in the
coupling inlet hose at the
tap is blocked.
The cause is probably a detergent with a high silicate
content.
The selected programme option cannot be combined
with the set programme.
Open the water tap fully.
Close the water tap. Unscrew
the inlet hose from the water
tap and from the appliance.
Clean the filter.
No negative effect on the
rinsing results, use a liquid
detergent if necessary.
Make another selection.
Page 35

Operating Instructions
If the washing results are not satisfactory
If the washing turns greyish and limescale deposits are present in
the drum
• Insufficient detergent has been added.
• Incorrect detergent was used.
• Stains were not pre-treated.
• Programme or temperature was not set correctly.
• If using modular detergents, the individual components were not
used in the correct ratio.
If there are still grey stains on the washing
• Soiled garments with ointments, grease or oils were washed with insufficient detergent.
• The temperature selected for the wash was too low.
• A frequent cause is that fabric softener - particularly a concentrated
one - has come into contact with the washing. Wash out these types
of stains as soon as possible and use the fabric softener carefully.
If after the last rinse foam is still visible
• Modern detergents can still cause foam in the final rinse cycle. However, the washing is still sufficiently rinsed.
If there are white residues on the washing
• These are insoluble contents of modern detergents. They are not the
result of an insufficient rinse. Shake out the washing or brush it off.
Turn the washing inside out before washing it. Review your choice of
detergent and if necessary use liquid detergent.
35
Page 36

Operating Instructions
Carrying out an emergency emptying
• If the washing machine no longer pumps out the water, emergency
emptying must be carried out.
• If the washing machine is located in a room in which below freezing
temperatures might occur, emergency emptying must be carried out.
Furthermore: unscrew the inlet hose from the water tap and drain off
the water. Empty the drainage hose.
Warning! Switch off the washing machine and pull out the mains plug
1
prior to performing emergency emptying.
Warning! The water, which flows out of the emergency emptying hose
can be hot. First allow the water to cool down before you carry out the
emergency emptying.
0 1. Have a flat container on hand to catch the water.
2. Pull down the flap in the right corner of
the base strip outwards and pull it off.
3. Remove the emergency emptying hose
from its holder.
4. Place the container under the hose.
5. Detach the plug of the emergency emp-
tying hose by turning it anticlockwise
and pull it out.
The water runs out. Depending on the
amount of water, it may be necessary to
empty the collecting vessel several
times. To do this, close the emergency
emptying hose temporarily with the
plug.
Discard the water from the container, replace it under the emergency
emptying hose and remove the plug from the hose.
36
Page 37

Operating Instructions
When the water is completely drained:
6. Push the plug securely into the emergency emptying hose and turn it
clockwise to secure it.
7. Replace the emergency emptying hose in its holder.
8. Put on the flap and close.
Drain pump
The drain pump is maintenance free. The cover of the drain pump must
only opened in the event of a malfunction when no more water is being pumped out, e.g. if the pump is blocked.
Before loading the machine, please always ensure that there are no foreign objects left in the pockets or in between the items to be washed.
Paper clips, nails etc. which may find their way into the washing machine along with the washing will remain in the drain pump housing.
To restart the drain pump when it is blocked, please proceed as follows:
Warning! Switch off the washing machine and remove the mains plug
1
before cleaning the drain pump!
0 1. First carry out an emergency emptying procedure (see section “Carrying
out emergency emptying”).
2. Place a cloth on the floor in front of the cover of the drain pump.
Residual water may run out.
3. Unscrew the drain pump cover in an
anti-clockwise direction and pull it out.
4. Remove any foreign objects and fabric
lint from the pump housing.
37
Page 38

Operating Instructions
5. Replace the pump cover. Laterally insert
the webs on the cover into the guide
slots and screw on the cover in a clockwise direction.
6. Close the emergency emptying hose and
place it in the holder.
7. Close the flap.
38
Page 39

Operating Instructions
Additional Rinse (RINSE+)
The washing machine is set for very economical water consumption.
However, for persons who suffer from allergies to detergents, it can be
helpful to rinse with extra water.
If RINSE + is set, an additional rinse cycle is carried out with the COT-
3
TONS/LINEN, EASY CARES/EASY IRON and DELICATES programmes.
When the appliance is supplied from the factory, the additional rinse
function is not set.
Setting the additional rinse function:
0 1. Turn the programme selector to SHORT SPIN.
2. Press the SOAKING button for at least 5 seconds.
After the button has been pressed for 5 seconds, RINSE
the programme progress display for 5 seconds.
3. Release the SOAKING button while RINSE
After it has stopped flashing, the additional rinse cycle has been set. It
remains set until it is manually cancelled.
When the additional rinse cycle is set, the indicator RINSE
on the programme progress display before the programme start and
during the additional rinse cycle.
4. If you wish to check whether the additional rinse function is enabled:
– Turn the programme selector to SHORT SPIN.
– Press the SOAKING button briefly.
If RINSE
rinse cycle is set.
+ flashes on the programme progress display, the additional
+ flashes.
+ flashes on
+ lights up
Cancelling the additional rinse function:
0 1. Turn the programme selector to SHORT SPIN.
2. Press the SOAKING button for at least 5 seconds.
RINSE
+ flashes on the programme progress display as soon as the but-
ton is pressed. After 5 seconds, RINSE
constantly for a further 5 seconds.
3. Release the SOAKING button while RINSE
After RINSE
celled.
An additional rinse cycle increases water consumption and the pro-
3
gramme duration.
+ has stopped lighting up, the additional rinse cycle is can-
+ stops flashing and lights up
+ lights up constantly.
39
Page 40

Operating Instructions
Water Cooling
It may be necessary to cool down the water before pumping it out in
order to prevent thermal damage to the plastic drainage pipes.
The water is cooled down before pumping out at the end of the main
3
washing cycle (by adding cold water).
(This setting is only active for COTTONS/LINEN with a temperature of
over 40 °C.).
When the appliance is supplied from the factory, the water cooling
function is not set.
Setting the water cooling function:
0 1. Turn the programme selector to SHORT SPIN.
2. Press the PRE WASH button for at least 5 seconds.
After the button has been pressed for 5 seconds, MAIN WASH flashes
on the programme progress display for 5 seconds.
3. Release the PRE WASH button while MAIN WASH is flashing.
After it has stopped flashing, the water cooling function is set. It remains set until it is manually cancelled.
4. If you wish to check whether the water cooling function is set:
– Turn the programme selector to SHORT SPIN.
– Press the PRE WASH button briefly.
If the MAIN WASH indicator on the programme progress display
flashes, the water cooling function is set.
Cancelling the water cooling function:
0 1. Turn the programme selector to SHORT SPIN.
2. Press the PRE WASH button for at least 5 seconds.
MAIN WASH flashes on the programme progress display as soon as the
button is pressed. After 5 seconds, MAIN WASH stops flashing and illuminates for 5 seconds.
3. Release the PRE WASH button while MAIN WASH is continuously illuminated. Once MAIN WASH has ceased to be illuminated, the water
cooling function is cancelled.
Water cooling increases water consumption and the programme dura-
3
tion.
Additional Rinse and Water Cooling
You can combine the additional rinse cycle and water cooling. The setting is performed as under "Additional rinse cycle“ and "Water cooling“.
40
Page 41

Child Safety Feature
If the child safety feature is set,
the door cannot be closed and no
washing programme can be
started.
Setting the child safety feature
0 Use a coin to turn the rotary knob
on the inside of the door clockwise as far as it will go.
Warning! The rotary knob must
1
not be in a vertical position after
adjustment, otherwise the child
safety feature is not active. The rotary knob must project as shown in
the diagram.
Cancelling the child safety
feature
0 Turn the rotary knob anticlockwise
as far as it will go.
Operating Instructions
41
Page 42

Installation and connection instructions
Installation and connection instructions
Installation Safety Precautions
• When moving do not tilt the washing machine onto its front or onto
its right hand side (viewed from the front). This is to prevent the possibility of the electronic components becoming wet.
• Before installation inspect the machine for transport damage. Do not
connect the appliance if it is damaged - contact your retailer.
• Ensure all packaging and transit bolts/bars have been removed, see
„Removal of Transit Packaging“. Failure to remove transit bolts/bars
may cause serious damage to the appliance or property.
• Always insert the plug into a correctly installed earthed socket.
• Any plumbing work required to install this appliance should be
carried out by a plumber or competent person.
• Check that the electricity supply is the same as that indicated on the
appliance´s rating plate.
• Any electrical work required to install this appliance should be carried
out by an electrician or competent person.
42
Page 43

Installation and connection instructions
Installation of the appliance
Transporting the appliance
• Do not place the washing machine on its front or on its right hand
side (viewed from the front). This is to prevent the possibility of the
electronic components becoming wet.
• Never transport the unit without the transport packaging and bolts/
bars. Do not remove the transport packaging until the appliance is at
the installation location. Transporting the unit without the transport
packaging can damage it.
• Never lift the appliance by the door.
• When transporting the unit with a sack trolley: Attach the sack trol-
ley at the side only.
Remove transport packaging
Important! It is essential to re-
move the transport packaging before putting the appliance into
operation. Keep all parts of the
transport packaging in a safe
place for future use.
0 1. Open both hose holders on the
appliance's rear side and remove
the hoses and mains cable.
2. Pull both hose holders off the appliance with a strong pull.
43
Page 44

Installation and connection instructions
The special spanner A and the
3
caps B (2 each) and C (1 each)
are supplied with it.
3. Remove the screw D, including
the compression spring with the
special spanner A.
4. Cover the hole with the cap C.
Important! When fitting the
plastic caps, press until they snap
into the rear panel securely.
5. Remove the two screws E with
the special spanner A.
6. Remove the 4 screws F.
7. Remove the transit bar G.
8. Screw the 4 screws F back in for
safe keeping.
9. Close the 2 large holes with the
caps B.
Important! When fitting the
plastic caps, press until they snap
into the rear panel securely.
Installation-Site preparation
• The installation surface must be clean, dry and level. Do not install on
a deep pile carpet.
• Minor unevenness of the floor surface should never be levelled out by
laying pieces of wood, card or similar materials, but should always be
compensated for by adjusting the screw feet.
• If the appliance is installed next to a heat source (e.g. cooking appli-
ance), a heat insulating pad (87 x 57 cm) must be placed between the
appliance and the heat source.
• Do not install the appliance in locations where the temperature may
fall below freezing.
• Please ensure that when the appliance is installed it is easily accessi-
ble for the engineer in the event of a breakdown.
44
Page 45

Installation and connection instructions
Installation on a Suspended Floor
Suspended wooden floors are particularly susceptible to vibration. To
help prevent vibration we recommend you place a waterproof wood
panel, at least 15 mm thick under the appliance, secured to at least
2 floor beams with screws. If possible install the appliance in one of the
corners of the room, where the floor is more stable.
Levelling the Appliance
Floor unevenness can be compensated for and the height can be corrected with the four adjustable screw feet. The height can be adjusted
in a range of +10 ... -5 mm.
To adjust the feet use the special spanner supplied.
0 1. Slide the special key firmly onto
the hexagon head of the
threaded foot as far as it will go.
2. Adjust the screw feet so that the
appliance is horizontal and stable.
3. Check that the appliance is level
using a spirit level.
Important. Never use strips or
shins of wood or cardboard etc.
To compensate for any unevenness in the floor. Always use the
adjustable feet.
45
Page 46

Installation and connection instructions
Electrical Connection
Any electrical work required to install this appliance should be carried
out by a qualified electrician or competent person.
WARNING - THIS APPLIANCE MUST BE EARTHED.
1
The manufacturer declines any liability should these safety
measures not be observed.
Before switching on, make sure
the electricity supply voltage is
the same as that indicated on the
appliance rating plate.
The rating plate is located at the
top of the rim of the open door.
The appliance is supplied with a
13amp plug fitted. In the event of
having to change the fuse in the
plug supplied, a 13amp ASTA approved (BS 1362) fuse must be used.
Should the plug need to be replaced
for any reason, proceed as described
below.
The wires in the mains lead are
coloured in accordance with the
following code:
Blue
Green & Yellow
Brown
46
Green and Yellow: Earth
Blue: Neutral
Brown: Live
• The wire coloured green and yellow must be connected to the termi-
nal marked with the letter “E“ or by the earth symbol or coloured
green and yellow.
• The wire coloured blue must be connected to the terminal “N“ or
coloured black.
• The wire coloured brown must be connected to the terminal marked
“L“ or coloured red.
• Upon completion there must be no cut, or stray strands of wire
present and the cord clamp must be secure over the outer sheath.
WARNING! A cut off plug inserted into a 13 amp socket is a
1
serious safety (shock) hazard. Ensure that the cut off plug is
disposed of safely.
Cord Clamp
Page 47

Installation and connection instructions
Permanent Connection
In the case of a permanent connection it is necessary that you install a
double pole switch between the appliance and the electricity supply
(mains), with a minimum gap of 3 mm between the switch contacts
and of a type suitable for the required load in compliance with the
current electrical regulations.
The switch must not break the yellow and green earth cable at any
point.
This appliance is in accordance with the following EU Guidelines:
;
– Low Voltage Guidelines 73/23 EEC dated 19 February 1973, include
Guideline Change Notice 93/68 EEC
– EMC Guideline 89/336 EEC dated 3 May 1989, including Guideline
Change Notice 92/31 EEC.
This appliance complies with the requirements laid out in the EEC Directive 76/899.
Voltage 240 V AC: Fuse rating 13 amps
See rating plate for further information.
This appliance meets VDE requirements.
Particular regulations of local electricity authorities must be observed.
This appliance conforms to EEC Directive No. 82/499/EWG on radio interference.
WARNING! Repairs to electrical appliances must only be carried out by
1
trained personnel. Improper repairs may lead to serious risks for the
user.
Water connection
The washing machine is provided with safety devices preventing back-
3
contamination of the water supply and complies with local water authority requirements.
This appliance is designed to be permanently plumbed into your home’s
water supply.
Before connecting up the machine to new pipework or to pipework
that has not been used for some time, run off a reasonable amount of
water to flush out any debris that may have collected in the pipes.
Important!
– Appliances for connecting to cold water must not be connected to
hot water.
– Only use new hose sets for the connection.
47
Page 48

Installation and connection instructions
Water pressure
The appliance is designed to operate within the following water
pressure units. Minimum 1 bar (= 10N/cm
10 bar (= 100 N/cm
2
= 1 Mpa).
2
= 0.1 Mpa), maximum
• If more than 10 bar: Install a pressure-reduction valve upstream
• If less than 1 bar: Unscrew the inlet hose from the appliance at the
inlet solenoid valve and remove the flow regulator (to do this, remove
the filter with needle nose pliers and remove the rubber washer behind the filter). Replace the filter.
48
Page 49

Installation and connection instructions
Inlet Hose Connection
A pressure hose of 1.35m in length is supplied.
If a longer inflow hose is required, only a VDE-approved, complete set
of hoses with fitted hose screw connections is permissible, available
from AEG Service Force Centres.
– Hose sets in lengths of 2.2m, 3.5m, and 5m are available for washing
machines without Aqua-Control.
– Hose sets in lengths of 2.0 m, 2.9m and 3.9m are available for wash-
ing machines with Aqua-Control.
Important! Never cut into pieces in order to extend the hoses!
Sealing rings are supplied either in the plastic
3
nuts of the hose screw connection or in the
enclosed pack. Do not use other seals!
0 1. Connect the hose with the angled connection to
the machine.
Important!
– Do not lay the inlet hose verti-
cally downwards, instead run it
to the right or left as shown in
the diagram.
– Tighten firmly to prevent
leakage but do not use
excessive force.
2. Connect the hose with the straight connection
to a water tap with a screw thread R 3/4 (inches)
Important! Only tighten the screw connection
by hand.
3. By slowly opening the water tap before putting
the washing machine into operation, check that
the connection is free of leaks.
49
Page 50

Installation and connection instructions
Water Drainage
The appliance drain hose should hook into a standpipe, the hook in the
drain hose is formed using the plastic “U-Piece“ supplied. The standpipe
should have an internal diameter of approximately 38 mm (see diagram) thus ensuring there is an air break between the drain hose and
standpipe.
Important! It is essential to lay
the drainage hose without kinks.
When discharging into a standpipe ensure that the top of the
curve in the hose end is no more
than 90 cm (35.4’’) and no less
than 60 cm (23.6’’) above floor
level.
50
The upright standpipe should
have a minimum, length of
30 cm (12’’) from the bottom of
the elbow to the top of the pipe
(see diagram). Make sure that it is
designed in such a way that the
end of the drain hose cannot be
covered with water.
Longer drain hoses are available
in lengths of 2.7 and 4 metres
from your AEG Service Force
Centre.
Page 51

Installation and connection instructions
If you intend the drain hose from
the washing machine to empty
into a sink, make sure that the
sink is empty and the plug hose
is not blocked. Use the plastic
“U-Piece“ supplied.
Important! The end of the
drainage hose must not be
submerged in the pumped-out
water. Otherwise, the water
could be sucked back into the appliance.
Pump head of greater than 1m
Every washing machine includes a wash water pump for the removal of
wash and rinse water, which can pump fluids through the outlet hose
up to a height of 1m, measured from the surface on which the machine
stands.
For pump heads of greater than 1m please contact your local
AEG Service Force Centre.
51
Page 52

Installation and connection instructions
Technical Data
Height adjustment of about +10/-5mm
Load (depending on programme) up to 6kg
Area of use Domestic
Drum spin speed see Rating Plate
Water pressure 1-10bar
(=10–100N/cm
Dimensions
2
= 0.1–1.0MPa)
52
(dimensions in mm)
Page 53

Warranty conditions
Warranty conditions
Great Britain
Standard guarantee conditions
We, AEG, undertake that if within 12 months of the date of the purchase this AEG appliance or
any part thereof is proved to be defective by reason only of faulty workmanship or materials, we
will, at our discretion repair or replace the same FREE OF CHARGE for labour, materials or carriage
on condition that:
• The appliance has been correctly installed and used only on the electricity or gas supply stated
on the rating plate.
• The appliance has been used for normal domestic purposes only, and in accordance with the
manufacturer's operating and maintenance instructions.
• The appliance has not been serviced, maintained, repaired, taken apart or tampered with by any
person not authorised by us.
• All service work under this guarantee must be undertaken by a Service Force Centre. Any appli-
ance or defective part replaced shall become the Company's property.
• This guarantee is in addition to your statutory and other legal rights.
• Home visits are made between 8.30am and 5.30pm Monday to Friday. Visits may be available
outside these hours in which case a premium will be charged.
Exclusions
This guarantee does not cover:
• Damage or calls resulting from transportation, improper use or neglect, the replacement of any
light bulbs or removable parts of glass or plastic.
• Costs incurred for calls to put right an appliance which is improperly installed or calls to appli-
ances outside the United Kingdom.
• Appliances found to be in use within a commercial environment, plus those which are subject
to rental agreements.
• Products of AEG manufacture which are not marketed by AEG.
European Guarantee
If you should move to another country within Europe then your guarantee moves with you to
your new home subject to the following qualifications:
• The guarantee starts from the date you first purchased your product.
• The guarantee is for the same period and to the same extent for labour and parts as exists in
the new country of use for this brand or range of products.
• This guarantee relates to you and cannot be transferred to another user.
• Your new home is within the European Community (EC) or European Free Trade Area.
• The product is installed and used in accordance with our instructions and is only used domesti-
cally, i.e. a normal household.
• The product is installed taking into account regulations in your new country.
Before you move please contact your nearest Customer Care centre, listed below, to give them details of your new home. They will then ensure that the local Service Organisation is aware of your
move and able to look after you and your appliances.
France Senlis +33 (0) 3 44 62 29 29
Germany Nürnberg +49 (0) 800 234 7378
Italy Pordenone +39 (0) 800 117511
Sweden Stockholm +46 (0) 8 672 5360
UK Slough +44 (0) 1753 219899
53
Page 54

Index
Index
A
Adjusting a programme . . . . . . . . . . . . . . . 10
C
Child safety feature . . . . . . . . . . . . . . .31, 41
Conditioner
Conditioning
Cottons
Curtains
Customer Service
. . . . . . . . . . . . . . . . 9, 17, 18, 22
. . . . . . . . . . . . . . . . . . . . .11, 28
. . . . . . . . . . . . . . . . . . .11, 16, 27, 28
. . . . . . . . . . . . . . . . . . . . . . . . .15, 27
. . . . . . . . . . . . . . . . .30, 55
D
Delay timer . . . . . . . . . . . 10, 12, 20, 21, 23
Delicates
Detergent
Detergent dispenser drawer
Drain pump
Draining
. . . . . . . . . . . . . . . . . . . . . 11, 16, 27
. . . . . . . . . . . . . . . . . . 9, 17, 18, 22
. . . . . . . . . . 9, 22
. . . . . . . . . . . . . . . . . . . . . . .9, 37
. . . . . . . . . . . . . . . . . . . . . . . . . . . . 25
E
Easy iron . . . . . . . . . . . . . . . . . .11, 26, 27, 33
Easy-cares
Emergency emptying
Energy saving
. . . . . . . . . . . . . . . . . . . 11, 16, 27
. . . . . . . . . . . . . . . . . 36
. . . . . . . . . . . . . . . . . . . .11, 27
F
Fabric softener . . . . . . . . . . . . . . . . . . . . . . 22
G
Gentle rinse . . . . . . . . . . . . . . . . . . . . . .11, 28
H
Hand-washables . . . . . . . . . . . . . . 11, 27, 28
L
Linen . . . . . . . . . . . . . . . . . . . . .11, 16, 27, 28
Load
. . . . . . . . . . . . . . . . . . . . . . . . . . . . . . . 13
Load size
. . . . . . . . . . . . . . . . . . . . . . . . . . . . 27
M
Multi-display . . . . . . . . . . . . . .10, 23, 24, 31
O
Open the door . . . . . . . . . . . . . . . . 21, 25, 34
Over-dosed
. . . . . . . . . . . . . . . . . . . . . . . . . 26
P
Pre wash . . . . . . . . . . . . . . . . . . . . . 12, 22, 27
Pre-wash detergent
Programme progress display
Pump out drain
. . . . . . . . . . . . . . . .9, 22
. . . . . . . .10, 24
. . . . . . . . . . . . . . . . . . . . . . 11
Q
Quick wash . . . . . . . . . . . . . . . . . . . . . . . . . .27
R
Rating plate . . . . . . . . . . . . . . . . . . . 9, 46, 47
Rinse +
. . . . . . . . . . . . . . . . . . . . . . . . . . . . .39
Rinse hold
Risk of frost
Run time
. . . . . . . . . . . . . . . . . . . .11, 20, 25
. . . . . . . . . . . . . . . . . . . . . . 6, 36
. . . . . . . . . . . . . . . . . . . . . . . . . . . .24
S
Silk . . . . . . . . . . . . . . . . . . . . . . 11, 16, 27, 28
Soaking
. . . . . . . . . . . . . . . . . . 12, 21, 22, 27
Softener
Spin
Stain
Stain removers
Starching
Stopping the program
. . . . . . . . . . . . . . . . . . . . . . . . . . . . .9
. . . . . . . . . . . . . . . . . .11, 18, 20, 24, 28
. . . . . . . . . . . . . . . . . . . . . . . . . . . 12, 27
. . . . . . . . . . . . . . . . . . . . 9, 22
. . . . . . . . . . . . . . . . . . . . . . . . 11, 28
. . . . . . . . . . . . . . . . .24
U
Update . . . . . . . . . . . . . . . . . . . . . . . . . . . . . .14
W
Warranty . . . . . . . . . . . . . . . . . . . . . . . . . 6, 53
Washing
lightly soiled
Water
drain
hardness
pump out
softener
Water Cooling
Wool
. . . . . . . . . . . . . . . . . . . . 11, 16, 27, 28
hand-washable
. . . . . . . . . . . . . . . . . . . . . . .12
. . . . . . . . . . . . . . . . . . . . . . . . . . . . .25
. . . . . . . . . . . . . . . . . . . . . . . . . .17
. . . . . . . . . . . . . . . . . . . . . . . . .11
. . . . . . . . . . . . . . . . . . . . . 9, 17, 22
. . . . . . . . . . . . . . . . . . . . . . .40
. . . . . . . . . . . . . . . . . 11, 27
54
Page 55

Service & Spare Parts
Service & Spare Parts
If the event of your appliance requiring service, or if you wish to purchase spare parts, please contact Service Force by telephoning:
0870 5 929 929
Your telephone call will be automatically routed to the Service Force
Centre covering your post code area.
For the address of your local Service Force Centre and further information about Service Force, please visit the website at
www.serviceforce.co.uk
Before calling out an engineer, please ensure you have read the details
under the heading „What to do if...“
When you contact the Service Force Centre you will need to give the
following details:
1. Your name, address and post code.
2. Your telephone number.
3. Clear and concise details of the
fault.
4. The model and serial number of
the appliance (found on the rating
plate).
5. The purchase date.
Please not that the valid purchase receipt or guarantee documentation
is required for in-guarantee service calls.
Customer Care
For general enquiries concerning your AEG appliance, or for further information on AEG products please contact our Customer Care Department by letter or telephone at the address below or visit our website at
www.aeg.co.uk.
Customer Care Department
AEG Domestic Appliances
55-77 High Street
Slough
Berkshire, SL1 1DZ
Tel: 08705 350350(*)
(*)Calls may be recorded for training purposes
55
Page 56

From the Electrolux Group. The world´s No.1 choice.
The Electrolux Group is the world´s largest producer of powered appliances for kitchen, cleaning and outdoor
use. More than 55 million Electrolux Group products (such as refrigerators, cookers, washing machines,
vacuum cleaners, chain saws and lawn mowers) are sold each year to a value of approx. USD 14 billion in more
than 150 countries around the world.
AEG Hausgeräte GmbH
Postfach 1036
D-90327 Nürnberg
http://www.aeg.hausgeraete.de
© Copyright by AEG
822 943 810-01-070703-01
Subject to change without notice
Page 57

documentation manual, user maintenance, brochure, user reference, pdf manual
This file has been downloaded from:
User Manual and User Guide for many equipments like mobile phones, photo cameras, monther board, monitors, software, tv, dvd, and othes..
Manual users, user manuals, user guide manual, owners manual, instruction manual, manual owner, manual owner's, manual guide,
manual operation, operating manual, user's manual, operating instructions, manual operators, manual operator, manual product,
 Loading...