

Page 1
60
30
95
UIT
ARRET
AQUA ALARM
ECO
20 MIN.
40
40 - 60 M
IX
FIJNSPOELEN
RINC.DELICAT
POMPEN
VIDANGE
CENTRIFUG
EREN
ESSORAGE
40
40
30
30
1400
1000
700
500
VOORWAS
PRELAVAGE
HOOFDWAS
LAVAGE
CENTRIFUG.
ESSORAGE
EINDE
FIN
OVERDOSERING
SURDOSAGE
DEUR
PORTE
FIJNE WAS
LINGE DELICAT
KOOK WAS
BLANC
74900
KATOEN
SYNTHETISCH
COTONS
SYNTHETIQ
UES
40
30
WOL
LAINE
STRIJKVRIJ
SANS REPASSA
GE
ZIJDE
SOIE
ZACHT CENTRIFUGEREN
ESSORAGE DELICAT
SPOELEN
RINCAGE
>>TIJD
>>TEMPS
STARTTIJDKEUZE
DEPART DIFF.
LOOPTIJD
TPS.REST.
VOORWAS
PRELAVAGE
VLEKKEN
TACHES
BEHOEDZAAM
SENSIBLE
START/PAUZE
MARCHE/PAUSE
SPOELEN
RINCAGE
SPOELEN
RINCAGE
8 Kg
LAVAMAT 74900
The environmentally friendly washing machine
De milieuvriendelijke wasmachine
Instruction booklet
Gebruiksaanwijzing
PERFEKT IN FORM UND FUNKTION
Page 2
Dear customer,
Please read these operating instructions carefully and pay particular
attention to the safety notes indicated in the first pages. We recommend that you keep this instruction booklet for future reference and
pass it on to any future owners.
The warning triangle and/or the key words (Warning!, Caution!) emphasize information that is particularly important for your safety or correct
functioning of the appliance.
This symbol guides you, step by step, in the operation of the appliance.
The information marked with this symbol provides additional instructions and practical tips on the use of the appliance.
Tips and information about economical and ecological use of the
machine are marked with the clover symbol.
Should any problems arise, this booklet provides instructions on how to
solve them by yourself; see section “Something not working?”.
If this information is not sufficient, please contact our nearest SERVICE
CENTRE.
Printed on recycled paper.
People who think ecologically, act accordingly…
2
Page 3

Contents
Safety instructions. . . . . . . . . . . . . . . . . . . . . . . . . . . . . . . . . . . . . . . . . . . . . 5-6
Disposal . . . . . . . . . . . . . . . . . . . . . . . . . . . . . . . . . . . . . . . . . . . . . . . . . . . . . . . . 7
Tips for environmental protection
Main features of your washing machine . . . . . . . . . . . . . . . . . . . . . . . . . . . 8
Description of the appliance. . . . . . . . . . . . . . . . . . . . . . . . . . . . . . . . . . . . . . . 9
Control panel . . . . . . . . . . . . . . . . . . . . . . . . . . . . . . . . . . . . . . . . . . . . . . . . . . . . 10
Programme selector dial . . . . . . . . . . . . . . . . . . . . . . . . . . . . . . . . . . . . . 10-12
START/PAUSE button . . . . . . . . . . . . . . . . . . . . . . . . . . . . . . . . . . . . . . . . . . 12
DELAY START button . . . . . . . . . . . . . . . . . . . . . . . . . . . . . . . . . . . . . . . . . . 12
Programme Option buttons . . . . . . . . . . . . . . . . . . . . . . . . . . . . . . . . . . . . . 12
SPIN SPEED button . . . . . . . . . . . . . . . . . . . . . . . . . . . . . . . . . . . . . . . . . . . . 13
RINSE HOLD . . . . . . . . . . . . . . . . . . . . . . . . . . . . . . . . . . . . . . . . . . . . . . . . . . 13
PREWASH . . . . . . . . . . . . . . . . . . . . . . . . . . . . . . . . . . . . . . . . . . . . . . . . . . . . 14
STAIN. . . . . . . . . . . . . . . . . . . . . . . . . . . . . . . . . . . . . . . . . . . . . . . . . . . . . . . . 14
SENSITIVE . . . . . . . . . . . . . . . . . . . . . . . . . . . . . . . . . . . . . . . . . . . . . . . . . . . . 14
EXTRA RINSE. . . . . . . . . . . . . . . . . . . . . . . . . . . . . . . . . . . . . . . . . . . . . . . . . . 14
QUICK WASH . . . . . . . . . . . . . . . . . . . . . . . . . . . . . . . . . . . . . . . . . . . . . . . . . 15
Display. . . . . . . . . . . . . . . . . . . . . . . . . . . . . . . . . . . . . . . . . . . . . . . . . . . . . . . 15
Programme progress display. . . . . . . . . . . . . . . . . . . . . . . . . . . . . . . . . . . . . 15
Cancelling a programme. . . . . . . . . . . . . . . . . . . . . . . . . . . . . . . . . . . . . . . . 16
Altering a programme which is running. . . . . . . . . . . . . . . . . . . . . . . . . . . 16
Altering an optin which is running . . . . . . . . . . . . . . . . . . . . . . . . . . . . . . . 16
Opening the door after the programme has started. . . . . . . . . . . . . . . . . 16
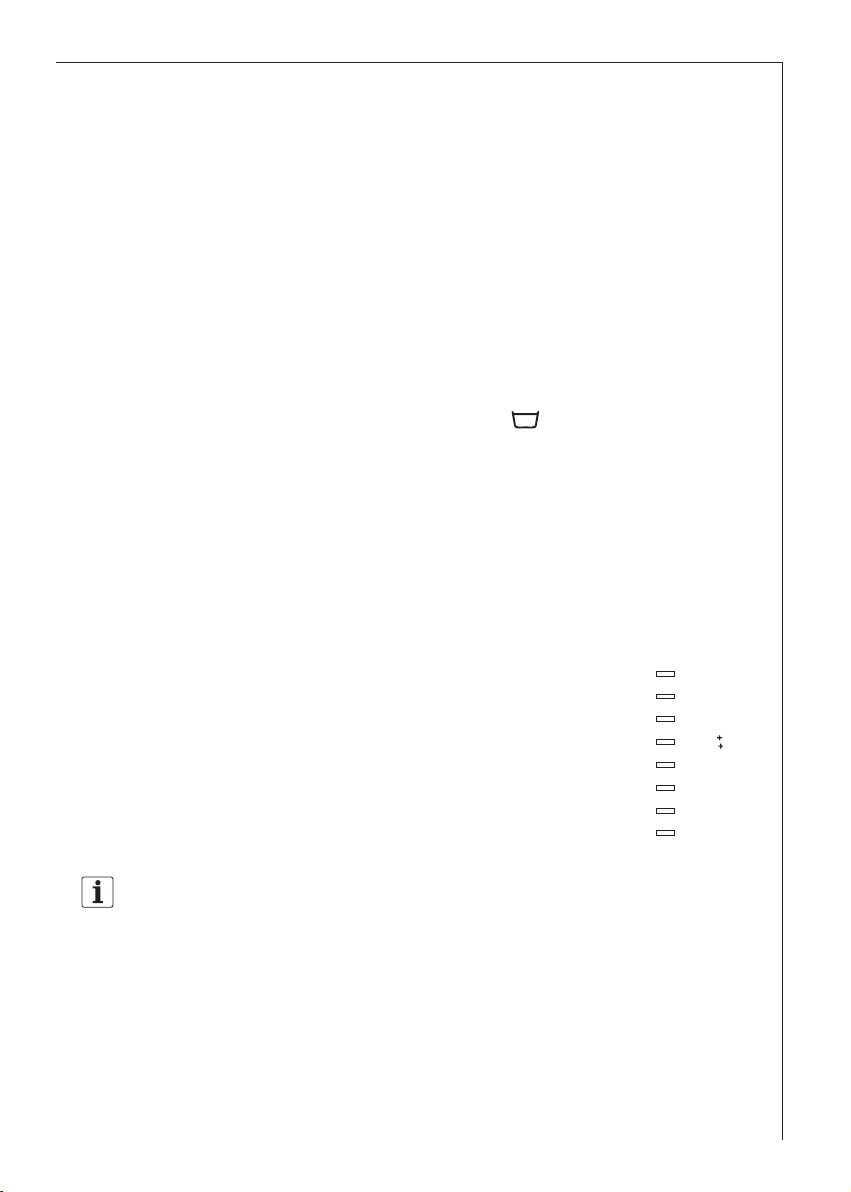
Detergent dispenser drawer . . . . . . . . . . . . . . . . . . . . . . . . . . . . . . . . . . . . . . 17
Preparing the wash cycle. . . . . . . . . . . . . . . . . . . . . . . . . . . . . . . . . . . . . . . . . 18
Sorting out and preparing the laundry . . . . . . . . . . . . . . . . . . . . . . . . . . . . . . 18
Weight of laundry . . . . . . . . . . . . . . . . . . . . . . . . . . . . . . . . . . . . . . . . . . . . . . . . 19
Types of fabric and care labels . . . . . . . . . . . . . . . . . . . . . . . . . . . . . . . . . . . . . 19
Detergents and additives . . . . . . . . . . . . . . . . . . . . . . . . . . . . . . . . . . . . . . . . . . 21
Which detergent and additive? . . . . . . . . . . . . . . . . . . . . . . . . . . . . . . . . . . 21
How much detergent?. . . . . . . . . . . . . . . . . . . . . . . . . . . . . . . . . . . . . . . . . . 21
Liquid detergent. . . . . . . . . . . . . . . . . . . . . . . . . . . . . . . . . . . . . . . . . . . . . . . 21
Adding a water softener (descaling product). . . . . . . . . . . . . . . . . . . . . . . . . . 21
Information on water hardness . . . . . . . . . . . . . . . . . . . . . . . . . . . . . . . . . . . . . 21
. . . . . . . . . . . . . . . . . . . . . . . . . . . . . . . 7-8
3
Page 4

Contents
How to wash
. . . . . . . . . . . . . . . . . . . . . . . . . . . . . . . . . . . . . . . . . . . . . . . . . . . . 22
Load the laundry . . . . . . . . . . . . . . . . . . . . . . . . . . . . . . . . . . . . . . . . . . . . . . . . . 22
Add detergent and additives . . . . . . . . . . . . . . . . . . . . . . . . . . . . . . . . . . . . . . . 22
Select the desired wash programme. . . . . . . . . . . . . . . . . . . . . . . . . . . . . . . . . 22
Select the desired options . . . . . . . . . . . . . . . . . . . . . . . . . . . . . . . . . . . . . . . . . 23
Select the SPIN SPEED or RINSE HOLD option . . . . . . . . . . . . . . . . . . . . . . . . 23
Select the DELAY START option . . . . . . . . . . . . . . . . . . . . . . . . . . . . . . . . . . . . . 23
Starting the programme. . . . . . . . . . . . . . . . . . . . . . . . . . . . . . . . . . . . . . . . . . . 24
Programme progress display . . . . . . . . . . . . . . . . . . . . . . . . . . . . . . . . . . . . . . . 24
Display . . . . . . . . . . . . . . . . . . . . . . . . . . . . . . . . . . . . . . . . . . . . . . . . . . . . . . . . . 24
At the end of the programme . . . . . . . . . . . . . . . . . . . . . . . . . . . . . . . . . . . . . . 25
Programme charts: wash and special programmes . . . . . . . . . . . . . . . 26-28
Cleaning and maintenance . . . . . . . . . . . . . . . . . . . . . . . . . . . . . . . . . . . . . . . 29
After each wash . . . . . . . . . . . . . . . . . . . . . . . . . . . . . . . . . . . . . . . . . . . . . . . . . 29
Periodical cleaning . . . . . . . . . . . . . . . . . . . . . . . . . . . . . . . . . . . . . . . . . . . . . . . 29
Exterior . . . . . . . . . . . . . . . . . . . . . . . . . . . . . . . . . . . . . . . . . . . . . . . . . . . . . . 29
Detergent dispenser drawer . . . . . . . . . . . . . . . . . . . . . . . . . . . . . . . . . . . . . 29
Door seal. . . . . . . . . . . . . . . . . . . . . . . . . . . . . . . . . . . . . . . . . . . . . . . . . . . . . 30
Drain pump. . . . . . . . . . . . . . . . . . . . . . . . . . . . . . . . . . . . . . . . . . . . . . . . . . . 30
Water inlet filter . . . . . . . . . . . . . . . . . . . . . . . . . . . . . . . . . . . . . . . . . . . . . . 31
Emergency emptying out . . . . . . . . . . . . . . . . . . . . . . . . . . . . . . . . . . . . . . . . . . 32
Frost precautions. . . . . . . . . . . . . . . . . . . . . . . . . . . . . . . . . . . . . . . . . . . . . . . . . 32
Something not working? . . . . . . . . . . . . . . . . . . . . . . . . . . . . . . . . . . . . . . . . . 33
Troubleshooting. . . . . . . . . . . . . . . . . . . . . . . . . . . . . . . . . . . . . . . . . . . . . . . 33-35
Unsatisfactory washing results . . . . . . . . . . . . . . . . . . . . . . . . . . . . . . . . . . . . . 36
Technical data . . . . . . . . . . . . . . . . . . . . . . . . . . . . . . . . . . . . . . . . . . . . . . . . . . 37
Service . . . . . . . . . . . . . . . . . . . . . . . . . . . . . . . . . . . . . . . . . . . . . . . . . . . . . . . . 38
Instructions for installation and electrical connection. . . . . . . . . . . . . . . 39
Safety instructions for the installer . . . . . . . . . . . . . . . . . . . . . . . . . . . . . . . . . 39
Installation . . . . . . . . . . . . . . . . . . . . . . . . . . . . . . . . . . . . . . . . . . . . . . . . . . . . . 40
Unpacking . . . . . . . . . . . . . . . . . . . . . . . . . . . . . . . . . . . . . . . . . . . . . . . . . . . . . . 40
Positioning . . . . . . . . . . . . . . . . . . . . . . . . . . . . . . . . . . . . . . . . . . . . . . . . . . . . . . 41
Levelling . . . . . . . . . . . . . . . . . . . . . . . . . . . . . . . . . . . . . . . . . . . . . . . . . . . . . . . . 42
Water inlet . . . . . . . . . . . . . . . . . . . . . . . . . . . . . . . . . . . . . . . . . . . . . . . . . . . . . 42
Water drainage . . . . . . . . . . . . . . . . . . . . . . . . . . . . . . . . . . . . . . . . . . . . . . . . . . 43
Electrical connection . . . . . . . . . . . . . . . . . . . . . . . . . . . . . . . . . . . . . . . . . . . . . 44
Permanent connection . . . . . . . . . . . . . . . . . . . . . . . . . . . . . . . . . . . . . . . . . . . . 44
4
Page 5

Safety instructions
The safety of AEG/ELECTROLUX appliances complies with the industry
standards and with legal requirements on the safety of appliances.
However, as manufacturers, we feel it is our duty to provide the following safety notes.
General safety
• Repairs to the machine must be carried out only by qualified personnel. Repairs carried out by inexperienced persons could cause serious
danger. Contact your local AEG/ELECTROLUX Service Force Centre.
• Never start the machine if the electrical supply cable is damaged or
the control panel or worktop are so damaged that inner components
can be reached.
• Unplug the appliance before carrying out any cleaning or maintenance operations.
• Never pull the power supply cable to remove the plug from the socket; always take hold of the plug itself.
• Never spray the machine with a jet of water. Danger of electric shock!
• During high temperature wash programmes the door glass may get
hot. Do not touch it!
• Let the water cool down before carrying out emergency emptying or
before opening the door in an emergency.
• Small animals can gnaw electric wires and water hoses causing electrocution hazard and damage due to water leaks.
Positioning, connection, starting up
• Follow the instructions for positioning and connection.
• Carry out a first wash without laundry (COTTONS 95, with half the
amount of detergent) in order to remove any manufacturing residue
from the tub and the drum.
• Should the machine be purchased in winter, when temperatures can
be below 0°, leave the appliance for 24 hours at ambient temperature
before starting it.
5
Page 6

Safety instructions
Child safety
• Children are often not aware of how dangerous electrical appliances
can be. When the machine is working, children should be carefully
supervised and not be allowed to play with the appliance - there is a
risk that they could become trapped inside.
• The packaging components (e.g. plastic film, polystyrene) can be dangerous to children - danger of suffocation! Keep them out of children’s reach.
• Keep all detergents in a safe place out of children’s reach.
• Make sure that children or pets do not climb into the drum.
• When the appliance is to be scrapped, cut off the electrical supply
cable and destroy the plug with the remaining cable. Disable the door
catch in order to prevent children from becoming trapped inside
while playing.
Proper use
• This appliance is designed for domestic use only. If the machine is
used for any other purposes or is not used correctly, the manufacturer accepts no responsibility for any damage that might occur.
• For safety reasons, the appliance must not be modified.
• Use only detergents suitable for washing machines and follow the
manufacturer’s instructions.
• Garments which have been in contact with flammable solvents
should not be machine washed.
• Do not use your machine for dry cleaning.
• Dyes and bleaching agents may only be used if specifically permitted
by the manufacturer of these products. We cannot be held responsible for any damage.
• Always unplug the appliance and turn off the water tap after use.
6
Page 7
Disposal
Packaging materials
The materials marked with the symbol are recyclable.
>PE<=polyethylene
>PS<=polystyrene
>PP<=polypropylene
This means that they can be recycled by disposing of them properly in
appropriate collection containers.
Machine
Use authorised disposal sites for your old appliance. Help to keep your
country tidy!
The symbol on the product or on its packaging indicates that this
product may not be treated as household waste. Instead it shall be
handed over to the applicable collection point for the recycling of
electrical and electronic equipment. By ensuring this product is
disposed of correctly, you will help prevent potential negative
consequences for the environment and human health, which could
otherwise be caused by inappropriate waste handling of this product.
For more detailed information about recycling of this product, please
contact your local city office, your household waste disposal service
or the shop where you purchased the product.
Tips for environmental protection
To save water, energy and to help protect the environment, we recommend
that you follow these tips:
• Normally soiled laundry may be washed without prewashing in order
to save detergent, water and time (the environment is protected too!).
• Use the energy saving programmes (ECO) when washing normally soiled
garments.
• The machine works more economically if it is fully loaded.
• When small loads are washed, use only half to two thirds of the recommended amount of detergent.
• With adequate pre-treatment, stains and limited soiling can be
removed; the laundry can then be washed at a lower temperature.
7
Page 8

DIsposal
• If the water has a medium or high degree of hardness (starting from
hardness degree II, see “Detergents and additives”) water softeners
must be added.
The amount of detergent can then be adjusted to hardness degree I (= soft).
Main features of your washing machine
• Programme and temperature setting using the programme selector.
• Stain (VLEKKEN TACHES) option for effectively treating stained
washing.
• Energy saving programme (ECO) for normally soiled cotton items.
• Speed for the final spin can be reduced to 1000, 700 or 500 rpm.
• RINSE HOLD : the laundry is left immersed in the final rinse
water to prevent creasing.
• The programme “40-60 MIX” can be selected for slightly soiled cot-
ton or mixed fabrics items. The washing performance will achieve the
AA class.
• Delay Start: programme start can be delayed up to 23 hours (e.g. to
times with a more economical power rate).
• Programme progress display showing the programme steps select-
ed and the programme phase which is running.
• Because of its gentle washing action, the special WOOL cycle washes your garments with extreme care.
• Programmes
ton/linen items and delicate mixed fabrics and synthetics. The programme will automatically adapt the type of washing to the different kind of fabrics and loads. In case of washing only of synthetic
items, the maxumum load will be 4 kg.
• 4-compartment drawer for detergent, fabric softener and stainremover.
• Balance control device: to prevent vibration during spinning.
•
The new water safety system “Aqua Alarm” allows you to prevent
any flooding due to water leakage.
COTTON SYNTHETICS: for white and coloured cot-
8
Page 9
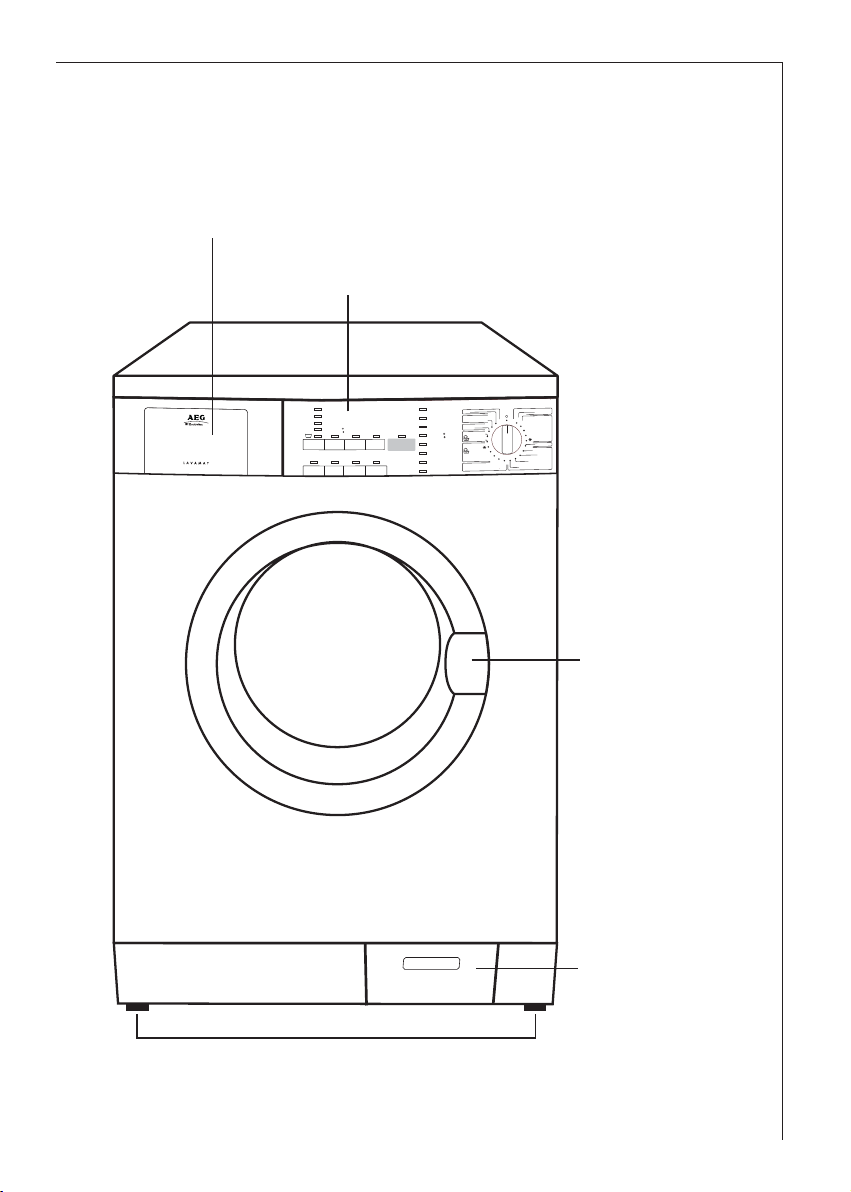
Description of the appliance
Drain pump
Door
Control panel
Detergent drawer
Adjustable feet
8 Kg
60
30
95
UIT
ARRET
AQUA ALARM
ECO
20 MIN.
40
40 - 60 MIX
FIJNSPOELEN
RINC.DELICAT
POMPEN
VIDANGE
CENTRIFUGEREN
ESSORAGE
40
40
30
30
1400
1000
700
500
VOORWAS
PRELAVAGE
HOOFDWAS
LAVAGE
CENTRIFUG.
ESSORAGE
EINDE
FIN
OVERDOSERING
SURDOSAGE
DEUR
PORTE
FIJNE WAS
LINGE DELICAT
KOOK WAS
BLANC
74900
KATOEN
SYNTHETISCH
COTONS
SYNTHETIQUES
40
30
WOL
LAINE
STRIJKVRIJ
SANS REPASSAGE
ZIJDE
SOIE
ZACHT CENTRIFUGEREN
ESSORAGE DELICAT
SPOELEN
RINCAGE
>>TIJD
>>TEMPS
STARTTIJDKEUZE
DEPART DIFF.
LOOPTIJD
TPS.REST.
VOORWAS
PRELAVAGE
VLEKKEN
TACHES
BEHOEDZAAM
SENSIBLE
START/PAUZE
MARCHE/PAUSE
SPOELEN
RINCAGE
SPOELEN
RINCAGE
Front view
9
Page 10
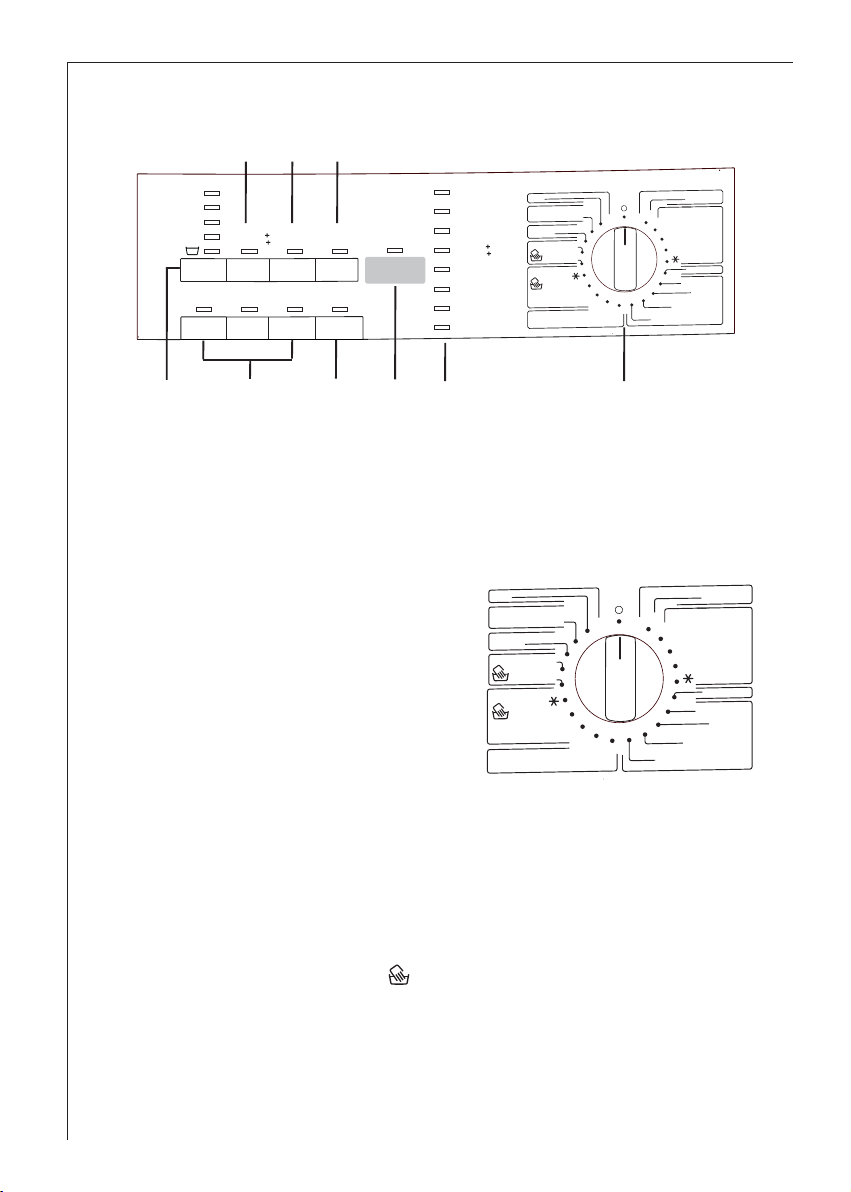
Control panel
GHL
B
C
D
E
A
F
60
30
95
UIT
ARRET
AQUA ALARM
ECO
20 MIN.
40
40 - 60 MIX
FIJNSPOELEN
RINC.DELICAT
POMPEN
VIDANGE
CENTRIFUGEREN
ESSORAGE
40
40
30
30
1400
1000
700
500
VOORWAS
PRELAVAGE
HOOFDWAS
LAVAGE
CENTRIFUG.
ESSORAGE
EINDE
FIN
OVERDOSERING
SURDOSAGE
DEUR
PORTE
FIJNE WAS
LINGE DELICAT
KOOK WAS
BLANC
74900
KATOEN
SYNTHETISCH
COTONS
SYNTHETIQUES
40
30
WOL
LAINE
STRIJKVRIJ
SANS REPASSAGE
ZIJDE
SOIE
ZACHT CENTRIFUGEREN
ESSORAGE DELICAT
SPOELEN
RINCAGE
>>TIJD
>>TEMPS
STARTTIJDKEUZE
DEPART DIFF.
LOOPTIJD
TPS.REST.
VOORWAS
PRELAVAGE
VLEKKEN
TACHES
BEHOEDZAAM
SENSIBLE
START/PAUZE
MARCHE/PAUSE
SPOELEN
RINCAGE
SPOELEN
RINCAGE
A = SPIN SPEED button B = OPTIONS buttons
C = START/PAUSE button D = Display
E = Programme progress display F = Programme selector dial
G = EXTRA RINSE button H = START/PAUSE button
L = DELAY START button
AQUA ALARM
ECO
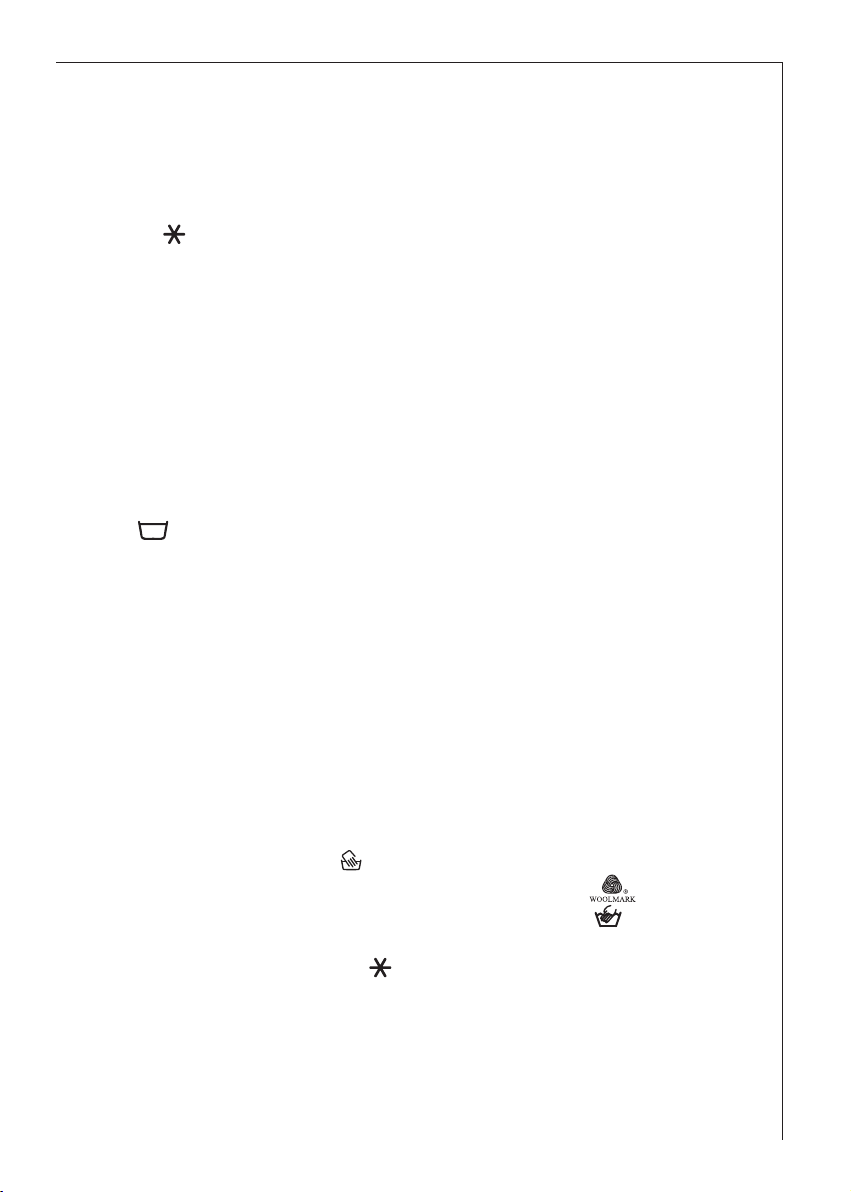
Programme selector dial
The programme selector determines the type of washing cycle
STRIJKVRIJ
SANS REPASSAGE
20 MIN.
30
ZIJDE
SOIE
40
(e.g. water level, drum movement,
number of rinses) and the washing
temperature according to the type
of laundry.
WOL
LAINE
FIJNE WAS
LINGE DELICAT
30
The selector dial is divided into the following sections:
• Withe cotton
• Cottons & Synthetics
•“40-60 Mix” programme
• Special programmes
• Delicates
• Woollens / Hand washing
• Woollens / Silk
• Extra programmes (20MIN., EASY IRON and ECO)
• Reset programme O
The selector dial can be turned either clockwise or anticlockwise.
ARRET
40
30
40
UIT
KOOK WAS
95
SYNTHETISCH
COTONS
60
SYNTHETIQUES
40
30
40 - 60 MIX
FIJNSPOELEN
RINC.DELICAT
POMPEN
VIDANGE
CENTRIFUGEREN
ESSORAGE
ZACHT CENTRIFUGEREN
ESSORAGE DELICAT
74900
BLANC
KATOEN
10
Page 11
Description of the appliance
WHITE COTTON
Washing programme for white cotton at 95°C (main wash - rinses/softener - long spin).
COLOURED COTTONS & SYNTHETICS
Washing programme for cotton and synthetics (main wash from 60°C
to cold - rinses/softener - long spin).
40-60 MIX
Washing programme for slightly soiled cotton items or mixed fabrics. It
is not compatible with QUICK WASH option.
DELICATE RINSE
Separate cycle of delicate rinses for hand washed items (3 rinses - softener, if needed - short spin)
DRAIN
Drain of the water left in the tub when interrupting a running programme in order to select a new one or at the end of a programme with the
RINSE HOLD option.
SPIN
Separate long spin for white and coloured cotton items, that have been
washed by hand.
DELICATE SPIN
Separate short spin for delicate items (synthetics, delicate fabrics and
wool), handwashed.
DELICATES
Gentle washing programme for delicate items (main wash from 40°C to
30°C - rinses/softener - short spin)
WOOL / HANDWASH and SILK
Particularly gentle washing for machine washable woolens
and silk items to be washed by hand with the label (handwashing).
Main wash from 40°C to cold (for wool from 40°C to 30°C)- rinses/softener - short spin, reduced intensity of washing cycle).
20 MIN.
Special programme at about 30°C. Quick wash for sport items, new
clothing or items worn once. The programme lasts about 20 minutes.
11
Page 12

Description of the appliance
EASY IRON
With this programme the laundry is gently washed at 40°C and spun to
avoid any creasing. In this way ironing is easier. It cannot be combined
with SENSITIVE ( BEHOEDZAAM/SENSIBLE) option.
Position ECO (economy) corresponds to the ENERGY SAVING program-
E
me for normally soiled laundry with extended washing time. It cannot
be combined with QUICK WASH option.
O
Cancellation of the selected programme and switching the machine off.
START/PAUSE button
This button has two functions:
a) Start
After having selected the required programme, press this button to start
the machine (the corresponding flashing light will become fixe). If you
have selected the DELAY START option, the machine starts its hourly
countdown.
b) Pause
To interrupt a programme which is running, press the START/PAUSE
button: the relevant light starts to flash.
To restart the programme from the point at which it was interrupted,
press the START/PAUSE button again.
12
DELAY START button
The wash programme can be delayed from 30 min – 60 min – 90 min,
2 hours and then by 1 hour up to a maximum of 23 hours by means of
this button. This option connot be selected with DRAIN, SPIN and DELICATE SPIN programmes.
Selecting the delayed start
• Select the programme and the required options.
• Select the delay start.
• Depress START/PAUSE button: the machine starts its hourly count
down.
The programme will start after the selected delay has expired.
Cancelling the delayed start
• Depress START/PAUSE button.
• Depress DELAY START button until the the symbol 0’ is displayed.
Page 13
Description of the appliance
• Depress START/PAUSE button again to restart the machine
. • To modify the delay time, after the programme has already started,
turn the selector dial to RESET O in order to cancel the current
washing programme, set a new programme again and select the new
desired delay time.
Programme Option buttons
Depending on the programme, different functions can be combined.
These must be selected after choosing the desired programme and
before depressing the START/PAUSE button.
When these buttons are pressed, the corresponding pilot lights come
on. When they are pressed again, the pilot lights go out.
SPIN SPEED
Press this button to reduce the maximum speed of the
final speed proposed by the machine for the selected
programme or to select option RINSE HOLD. The
corresponding light illuminates.
1400
1000
700
500
The maximum spin speed for White cotton, Coloured
Cottons & Synthetics programmes, 40-60 MIX, ECO
and SPIN programme is 1400 rpm.
For Delicate spin, Delicates, Wool/Silk , Wool/Handwash , 20
MIN. and Easy Iron the spin speed is 1000 rpm.
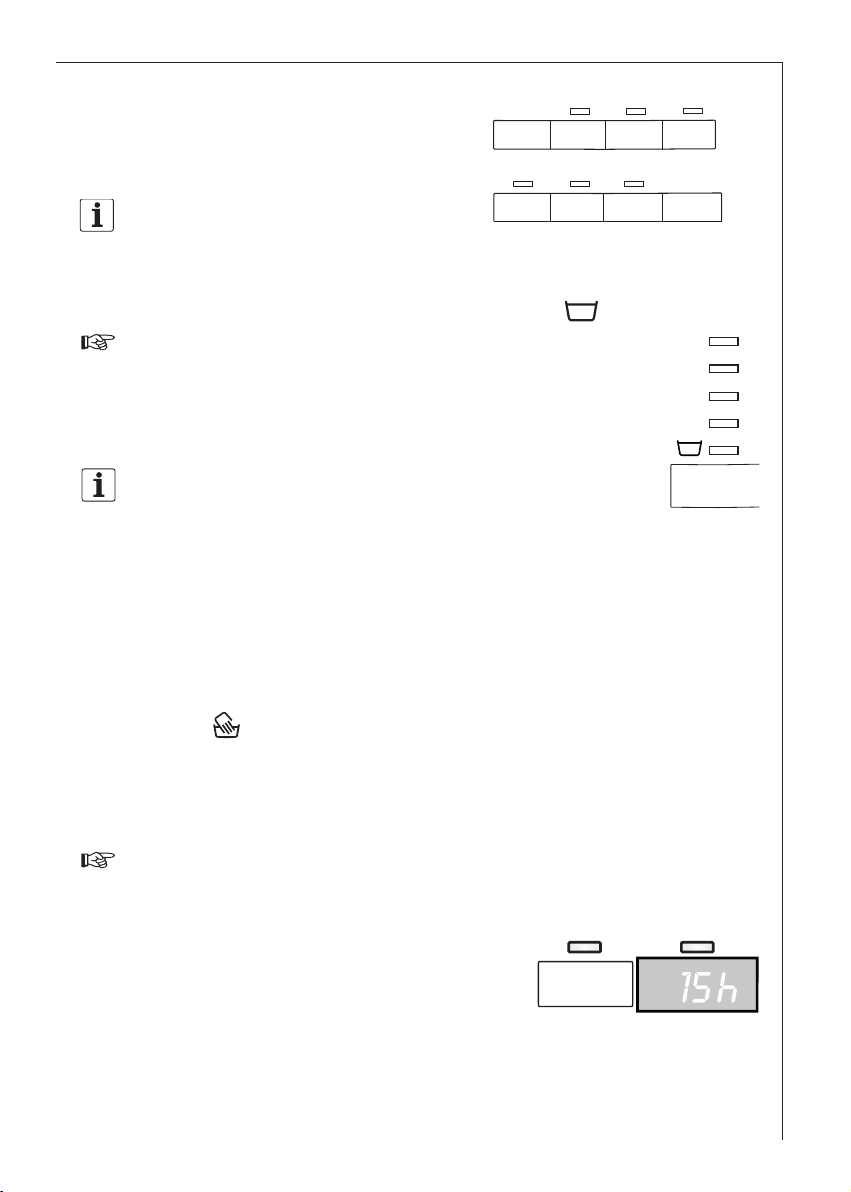
RINSE HOLD
By selecting this option, the last rinse water is not emptied out, to
prevent the fabrics from creasing.
When the programme has finished, the START/PAUSE button goes off,
the END pilot light and the DOOR light (in red) on the programme
progress display remain alight, the display shows a static
is locked to indicate that the water must be emptied out.
To empty out water there are two possibilities:
• Select programme DRAIN:
The water is emptied out without spinning.
• Select programme SPIN or DELICATE SPIN. Select the spin speed by
means of the relevant button and then depress the START/PAUSE button. The water is emptied out and the laundry is spun at the selected
spin speed.
Warning! The programme selector dial must be turned first to RESET
O and then to the DRAIN programme or SPIN or DELICATE SPIN.
0 and the door
13
Page 14
Description of the appliance
PREWASH
The machine performs a prewash cycle at 30ºC before the main wash.
The prewash cycle ends with a short spin in programmes for White Cotton and Cotton & Synthetics, and with emptying of the water without
spinning for Delicates.
This option is not available with the Wool/Silk and 20 MIN. programmes.
To be used for heavily soiled laundry.
STAIN
To treat heavily soiled or stained laundry with stain remover (extended
main wash with time optimised stain action phase). This option is not
selectable for
40°C.
Wool/Silk
or programmes with temperatures lower than
SENSITIVE
If you depress this button, the washing machine adds one rinse in
“White Cotton” and “Cottons & Synthetics” programmes and reduces
the spinning of the drum and the washing intensity. To be used for non
fast delicate colours or reapeted washing.
This option connot be selected with the EASY IRON programme.
14
EXTRA RINSE
This option can be selected with all programmes, except the
Wool/Silk/Handwash programmes and 20 MIN.
,
”
The machine will add 2 rinses for “White cotton
ics” and 1 rinse for “Delicates”.
This option is recommended for people who are allergic to detergents,
and in areas where the water is very soft.
Important! If you depress simultaneously the EXTRA RINSE + and SPIN
buttons for about 4 secondes the acoustic signal will be deactivated at
the end of the cycle, while selecting a programme or in case of an
incorrect option selection. By pressing these buttons again the acoustic
signal is reactivated.
“Cottons & Synthet-
Page 15
Description of the appliance
QUICK WASH
By pressing this button the washing time is reduced with “White cot-
,
”
“Cottons & Synthetics” and “Delicates” programmes. For use when
ton
washing lightly soiled laundry.
This option is not available with 40-60 MIX and ECO programmes.
Display
The display shows the following information:
• Duration of the selected programme (in minutes), calculated auto-
matically on the basis of the maximum recommended load for each
type of fabric.
• When the programme has finished, a flashing zero is displayed.
• When a programme with RINSE HOLD option has finished, a
steadily lit zero is displayed.
• Delay start, (23 hours max.) programmed using the button DELAY
START. The countdown is updated every hour during the first two
hours and then every thirty minutes.
• Wrong option selection. When selecting a programme if you choose
Err
an option not compatible with the programme the
on the display.
• Alarm code indicating a fault in the machine operation (see page 78).
code appears
VOORWAS
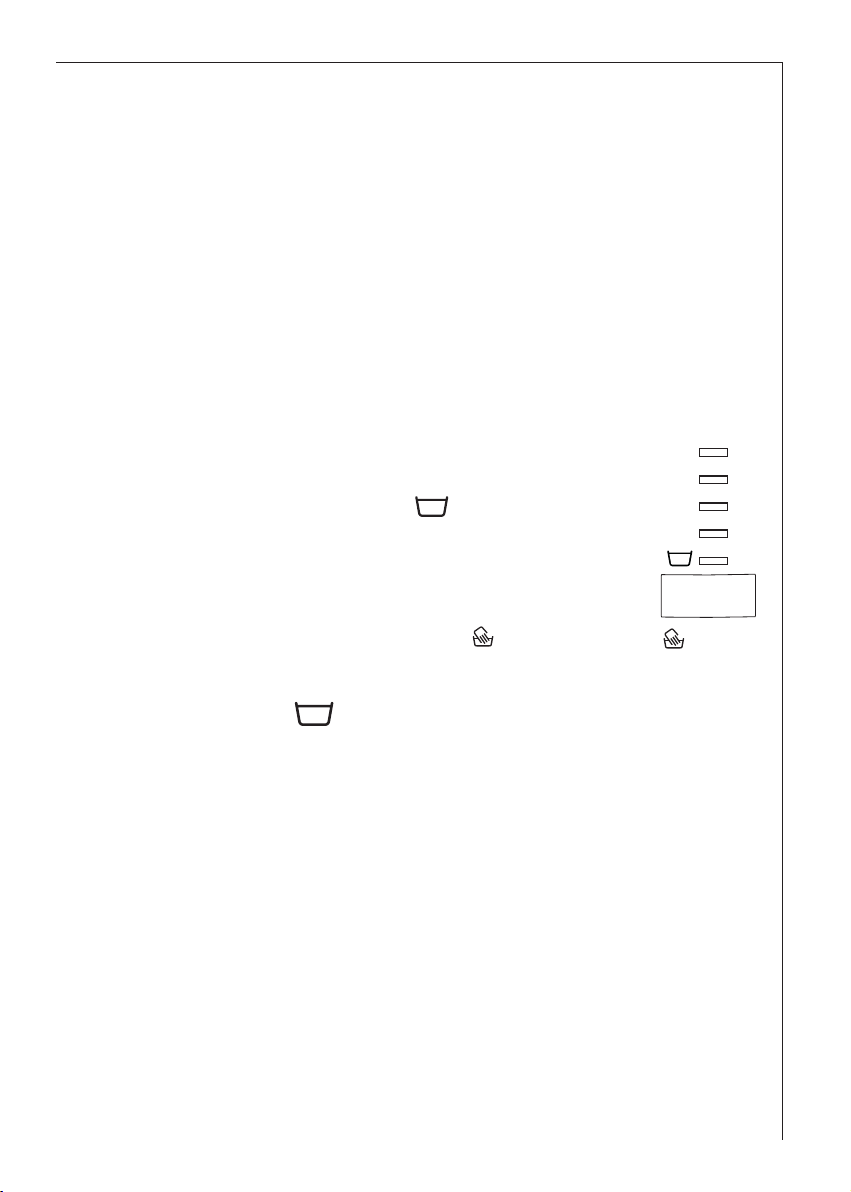
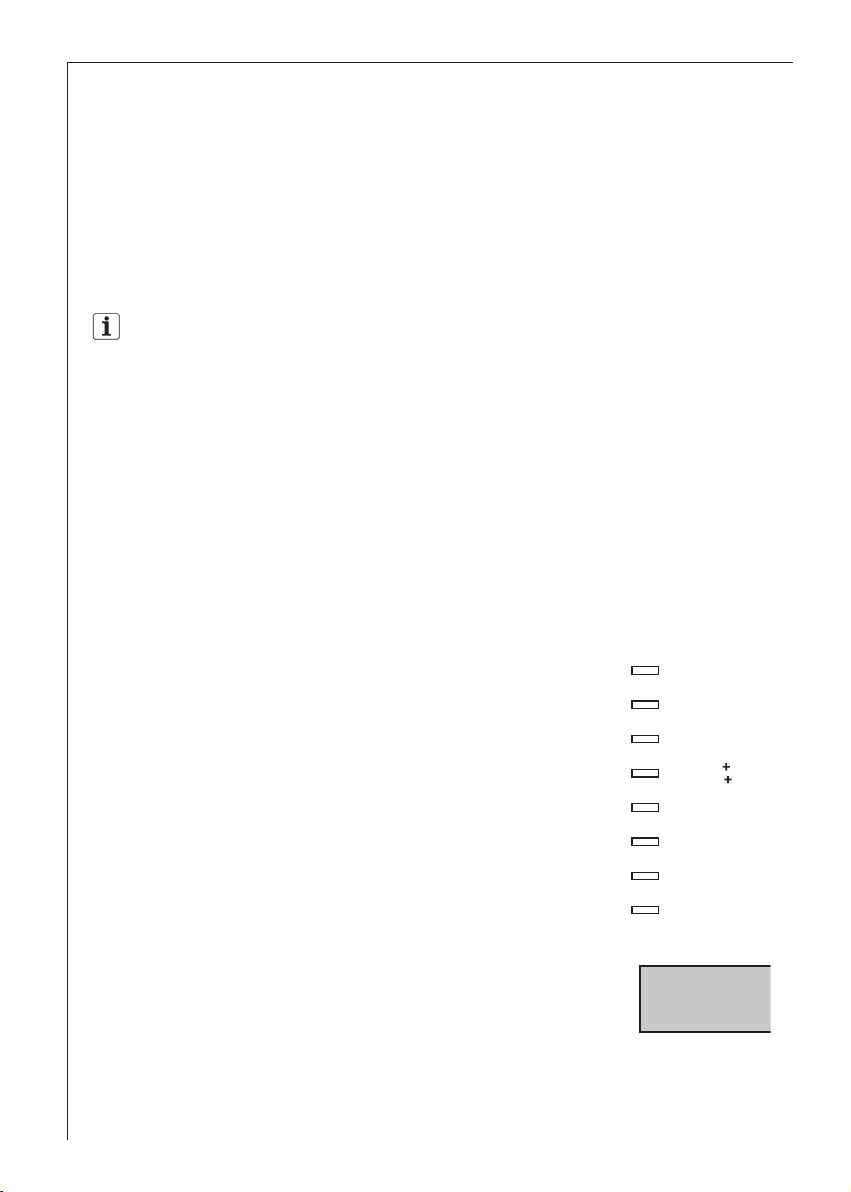
Programme progress display
By selecting the wash programme, the pilot lights
corresponding to the various phases making up the
programme come on.
After the machine has started, only the running phase
pilot light stays on. When the programme has finished,
the END pilot light comes on.
PRELAVAGE
HOOFDWAS
LAVAGE
SPOELEN
RINCAGE
SPOELEN
RINCAGE
CENTRIFUG.
ESSORAGE
EINDE
FIN
OVERDOSERING
SURDOSAGE
DEUR
PORTE
When the programme has finished, if the OVERDOSAGE light comes on,
it indicates that too much detergent has been used.
15
Page 16

Description of the appliance
Cancelling a programme
To cancel a programme which is running, turn the programme selector
dial to the RESET O position.
Warning! After cancelling a programme, please check if there is water
left in the drum, otherwise turn the selector dial first to O, then select
the programme DRAIN and the end press the “START/PAUSE” button.
Altering a programme which is running
To modify the selected programme turn the programme selector dial to
O and then choose a new programme.
The water is not emptied out and after pressing the START/PAUSE button again the machine restarts with the newly selected programme.
Altering an option which is running
To alter an option, first set the machine to PAUSE by pressing the
START/PAUSE button.
Any option can be modified before the machine starts it. After selecting the new option press the START/PAUSE button again to re-start the
selected programme.
To modify the selected programme turn the programme selector dial to
O and then choose a new programme.
The water is not emptied out and after pressing the START/PAUSE button again the machine restarts with the newly selected programme.
Opening the door after the programme has started
To open the door set the machine to PAUSE by pressing the START/PAUSE
button.
The door can be opened if:
• the machine is not already heating;
• the water level is not above the bottom edge of the door;
The light DOOR on the control panel indicates if the door can be
opened:
• green light: the door can be opened;
• red light: the door cannot be opened;
If you cannot open the door, but you need to open it you have to
switch the machine off by turning the selector dial to O. After about
3 minutes the door can be opened (pay attention to the water level
and temperature!).
16
Page 17
Detergent dispenser drawer
*
Compartment for prewash detergent and stain remover. The prewash detergent is added at the beginning of the wash programme. The stain remover
is added during the STAIN-Action phase in the main wash.
Compartment for powder or liquid detergent used for main wash.
It is emptied at the beginning of the wash cycle.
Compartment for liquid additives (fabric softener, starch).
It is emptied at the last rinse.
The quantity of additives must not exceed the “MAX” mark in the
drawer.
Compartment for Stain Remover.
*
The stain remover is added during the STAIN-Action phase during the main
wash.
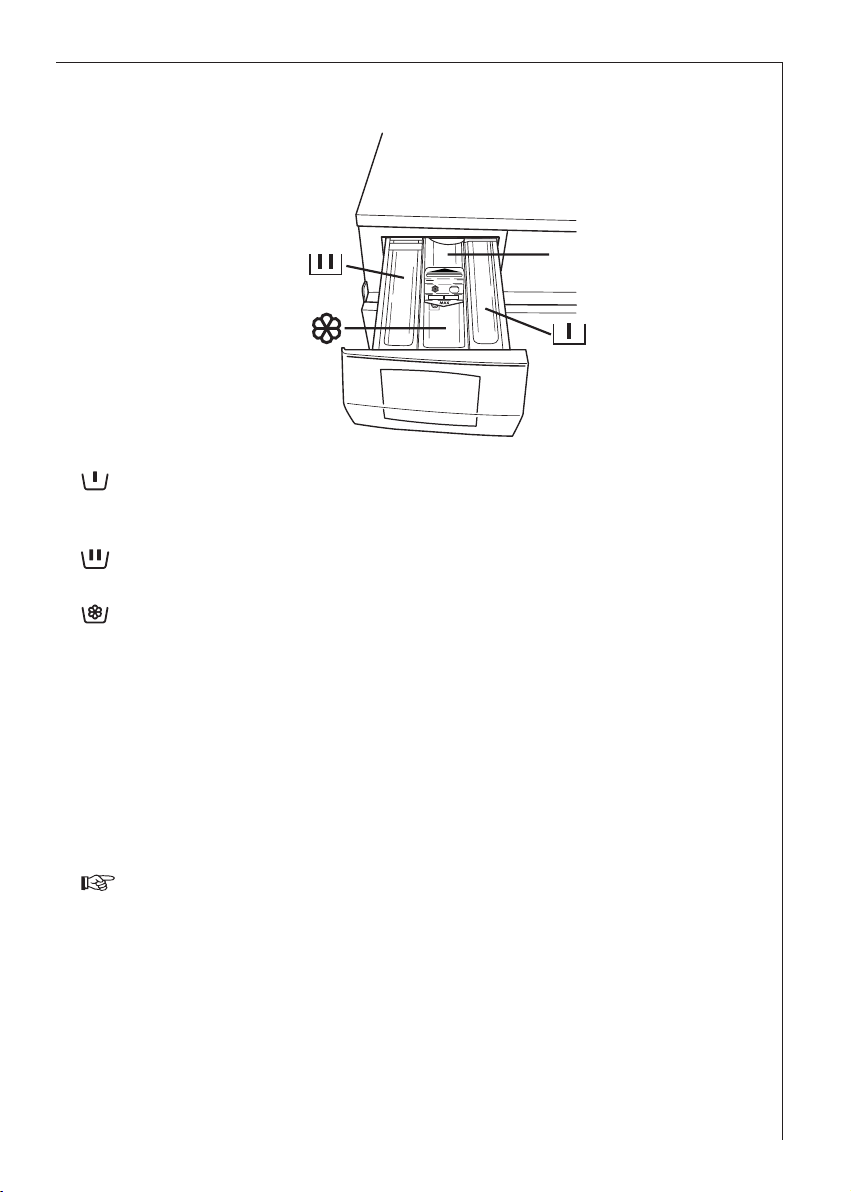
Before the first wash
Run a cotton cycle at 95° (White Cotton), without any laundry in
the machine, to remove any manufacturing residue from the drum
and tub.
Pour 1/2 a measure of detergent into the dispenser drawer and start the
machine.
17
Page 18

Preparing the wash cycle
Sorting out and preparing the laundry
• Sort out the laundry according to type of fabrics and care labels (see
“Types of fabric and care labels”).
• Empty pockets.
• Remove any metal parts (safety pins, clips, etc.).
• To prevent the laundry from getting damaged and forming bundles,
it is advisable to close zips, button up pillowcases and quilt covers and
tie up loose straps such as those of aprons.
• Turn double faced items inside out (sleeping bags, anoraks, etc.)
• Turn coloured knitted fabrics, woollens and fabrics with trim inside
out.
• Wash small and delicate items (baby socks, tights) inside a laundry net
or in a pillow case closed with a zip, or in larger socks.
• Treat curtains with special care. Remove all metal or plastic hooks or
put them in a net or a bag. We take no responsibility for any damage.
• Whites and coloureds must be washed separately: white items can
loose their whiteness.
• New coloured fabrics often have excess dyes; it is advisable to wash
them separately for the first time.
• Wash small and large items together; this improves the washing result
and the laundry is better distributed during spinning.
• Shake out garments before putting them into the machine.
• Insert each garment separately.
18
Page 19
Weight of laundry
60
40
30
40
50
60
95
Preparing the wash cycle
Sort of laundry
1200 gBathrobes
300-600 gWork shirts
700 gQuilt covers
500 gSheets
100 gBlouses
200 gHand towels
100 gTea towels
200 gShirts
200 gPillowcases
200-250 gNight-gowns/Pyjamas
200-300 gTablecloths
250 gUnderwear
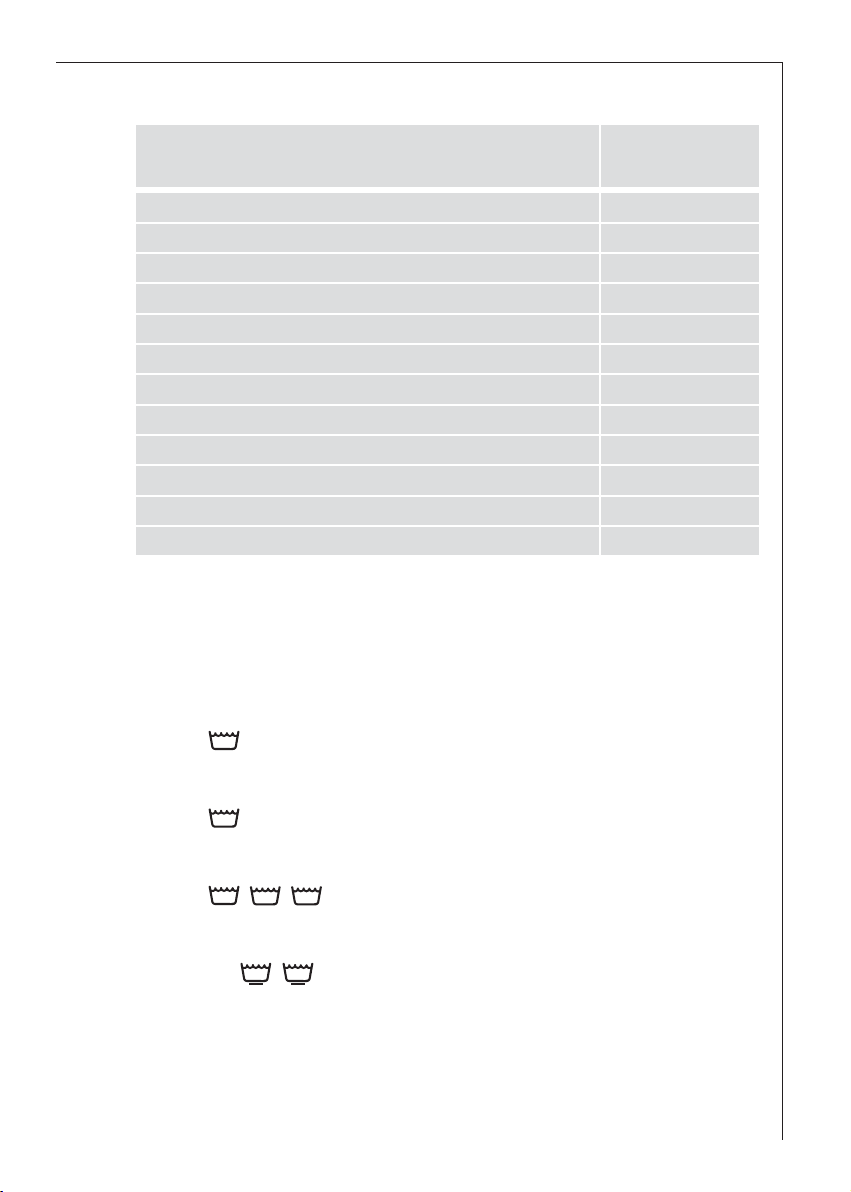
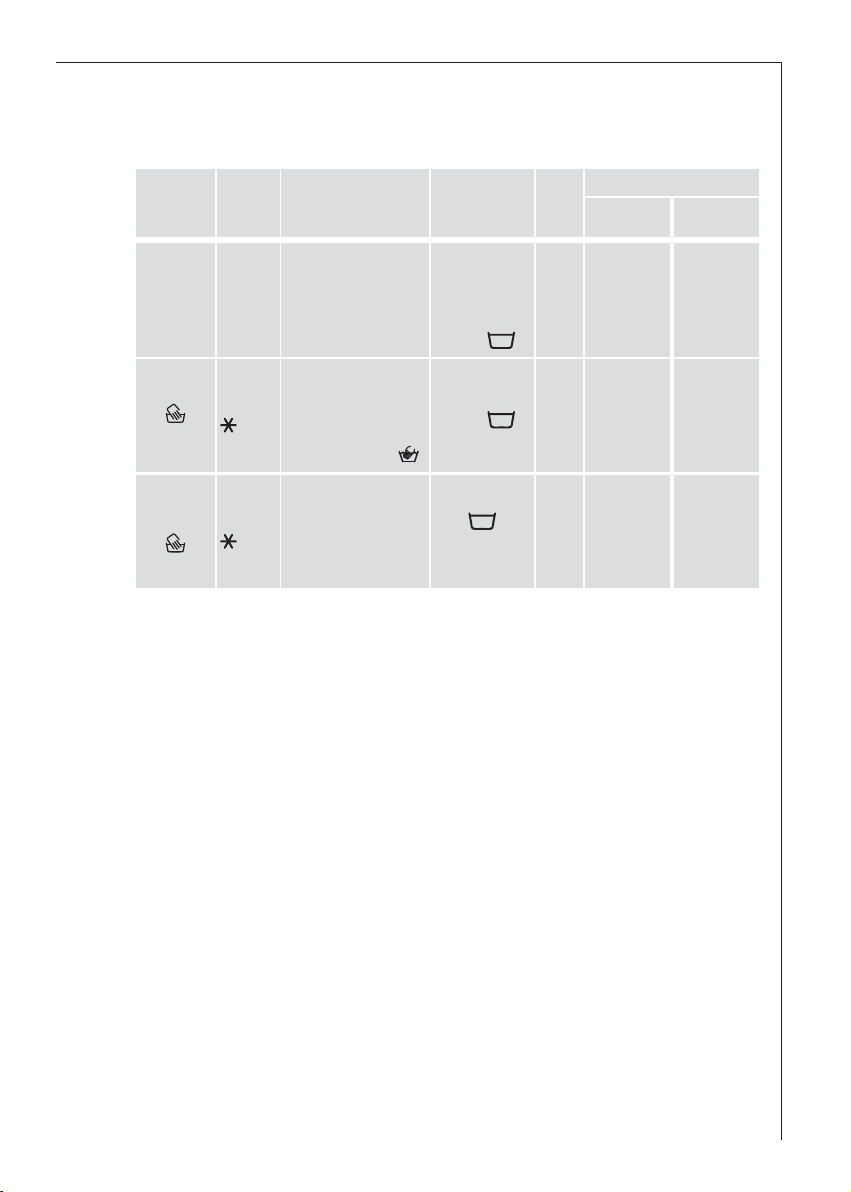
Types of fabric and care labels
The labels on garments help you to select the most suitable wash programme. The laundry should be sorted out according to the type of fabric and the instructions indicated on care labels.
Temperatures indicated on labels are always maximum temperatures.
Cotton
Linen and cottons marked with this symbol can be washed at high temperatures.
Cotton
Linen and cottons marked with this symbol are colourfast and can be
washed at 60°C.
Cotton
Garments marked with these symbols have delicate colours, therefore
the washing temperature must not exceed these values.
Synthetics
Mixed and synthetic fabrics marked with these symbols require a gentle
wash programme and they must therefore be washed using the specific
programme.
Approximate
dry weights
19
Page 20

30
40
30
40
Preparing the wash cycle
Delicates
Microfibres, synthetics or curtains marked with these symbols require a
very gentle treatment.
The DELICATES programme is suitable for this type of fabric.
Woollens and particularly delicate items
Fabrics such as wool, wool mix or silk marked with this symbol are particularly sensitive to machine washing.
The WOOL programme is suitable for this type of fabric.
If the label has the symbol (do not wash), the garments must not
be machine washed!
The wool wash cycle of this machine has been approved by Woolmark
for the washing of machine washable Woolmark products provided
that the garments are washed according to the instructions on the
garment label and those issued by the manufacturer of this washing
machine. M9604.
20
Page 21

Detergents and additives
Which detergent and additive?
Use only detergents and additives for washing machines. Follow the
manufacturer’s instructions.
How much detergent?
The quantity depends on:
• the load:
if the manufacturer does not provide any indications on the amount of
detergent for small loads, use about one third less than the suggested
amount for half loads and half the amount for very small loads;
• the degree of soil:
use a small amount of detergent for lightly soiled garments. Judge
the amount according to the detergent manufacturer’s instructions
and size of the load;
• the water hardness:
the harder the water, the more detergent required. Instructions
according to water hardness are given on the detergent pack.
Liquid detergent
Liquid detergent can be poured directly into the main wash compartment
of the dispenser drawer immediately before starting the programme, or
a special dispenser can be used that is placed directly in the drum. Measure the detergent according to the manufacturer’s instructions.
Adding a water softener (descaling product)
A water softener must be added when water has a medium-high degree
of hardness (from degree of hardness II). Follow the manufacturer’s
instructions. The quantity of detergent can then always be adjusted to
degree of hardness I (= soft). Information on water hardness can be
obtained from your local water supply authority.
Information on water hardness
Degree of hardness French degrees °TH
German degrees °dH
0-7I=Soft
0-15
16-257-14II=Medium
26-3715-21III=Hard
more than 37more than 21IV=Very hard
21
Page 22
How to wash
Load the laundry
Open the door.
Place the laundry in the drum, one item at a time. Distribute laundry as
evenly as possible. Close the door.
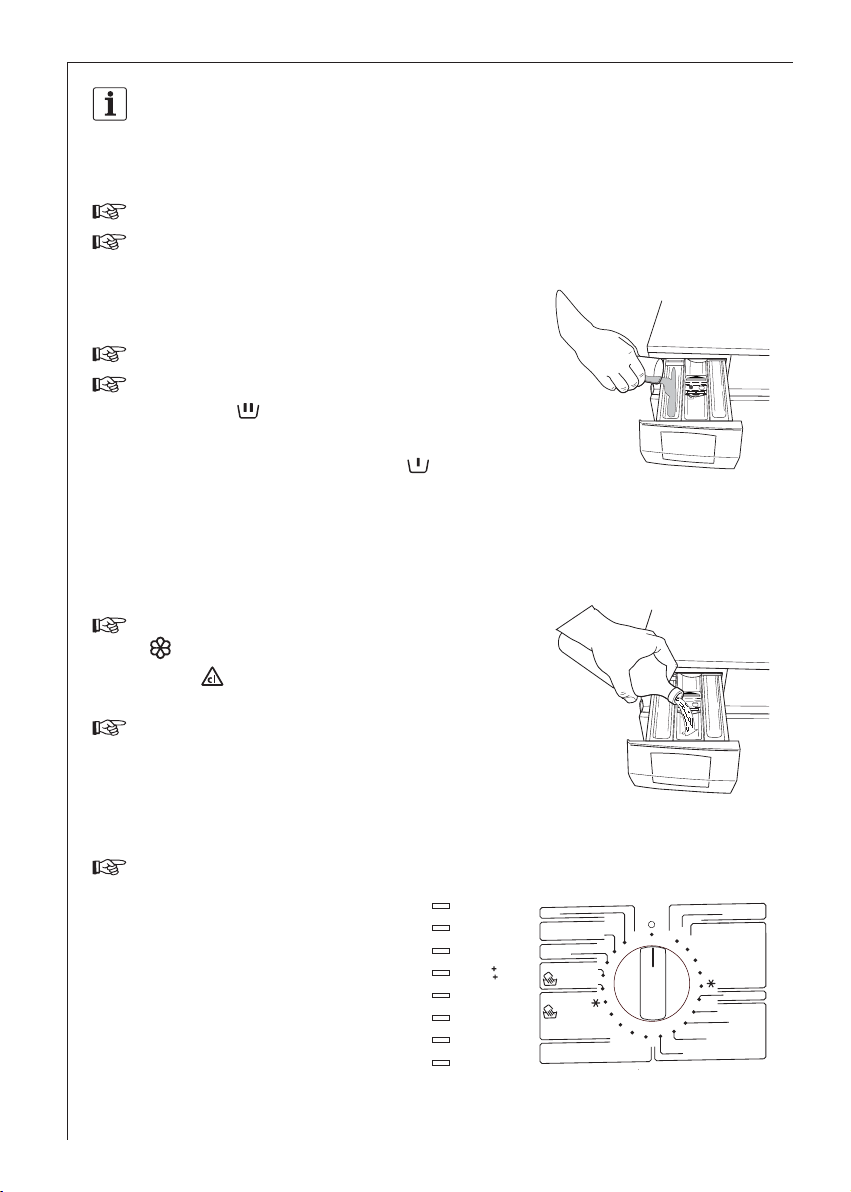
Add detergent and additives
Pull the drawer out till it stops.
Pour the main wash detergent into com-
partment .
If you wish to perform a PREWASH pour
detergent into compartment . If you
wish to perform a STAIN pour the Stain
Remover into compartment
Important!
Do not use normal detergent for the STAIN-Action programme,
always use a STAIN remover.
Pour the fabric softener into compartment
and the bleaching agent into compartment without exceeding the “MAX”
mark.
Close the drawer gently, pushing it fully in.
.
*
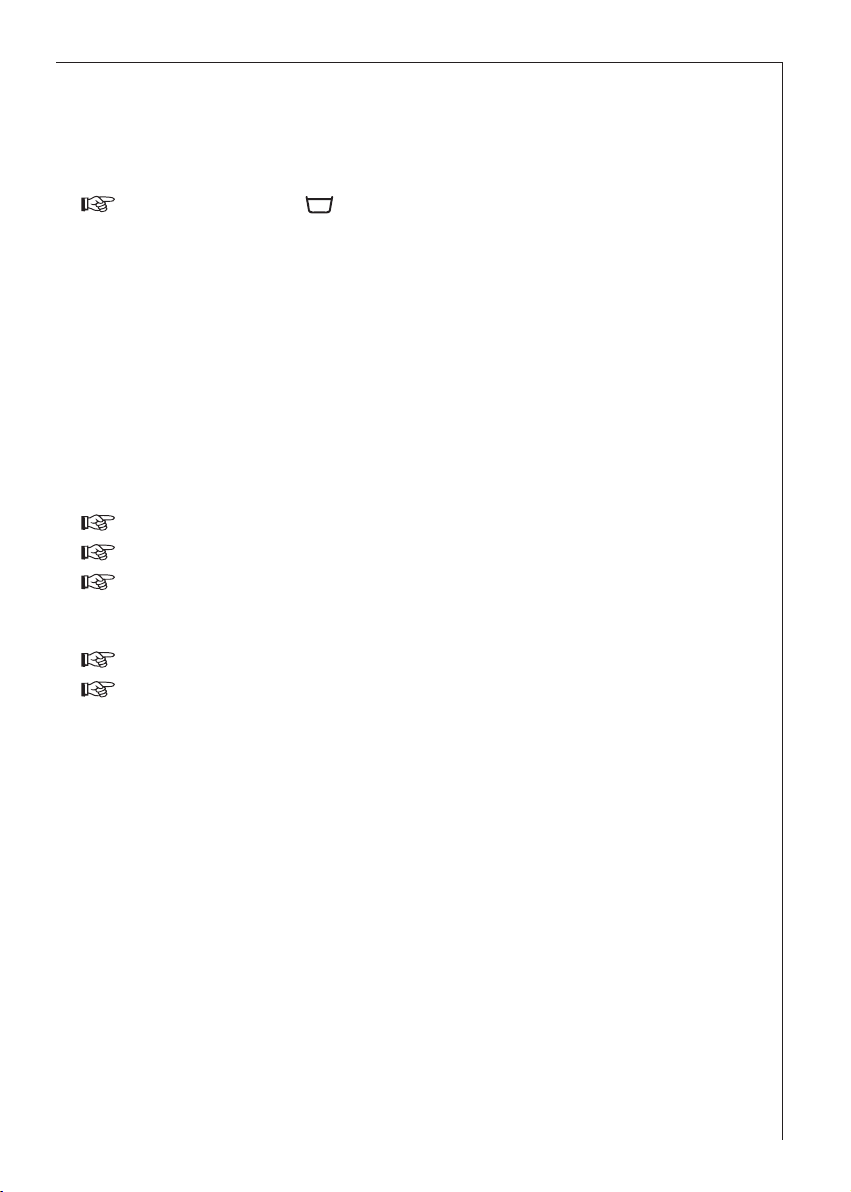
Select the desired wash programme
Turn the programme selector dial to the desired position: the lights corresponding to the different phases
making up the selected programme light on.
The display shows the duration of the programme in
minutes.
22
VOORWAS
PRELAVAGE
HOOFDWAS
LAVAGE
SPOELEN
RINCAGE
SPOELEN
RINCAGE
CENTRIFUG.
ESSORAGE
EINDE
FIN
OVERDOSERING
SURDOSAGE
DEUR
PORTE
AQUA ALARM
ECO
STRIJKVRIJ
SANS REPASSAGE
20 MIN.
ZIJDE
30
SOIE
40
WOL
LAINE
FIJNE WAS
LINGE DELICAT
UIT
ARRET
95
30
40
30
40
74900
KOOK WAS
BLANC
KATOEN
SYNTHETISCH
COTONS
60
SYNTHETIQUES
40
30
40 - 60 M
FIJNSPOELEN
RINC.DELICAT
POMPEN
VIDANGE
CENTRIFUGEREN
ESSORAGE
ZACHT CENTRIFUGEREN
ESSORAGE DELICAT
IX
Page 23
How to wash
Select the desired options
depending on the degree of soil of
the laundry.
The corresponding light comes on.
VOORWAS
PRELAVAGE
Select the spin speed or RINSE HOLD option
It is possible to select a lower spin speed by means
of the relevant button; the light corresponding to
the selected speed comes on.
Selecting the option RINSE HOLD the laundry is left
immersed in the final rinse water.
If the spin speed is not reduced, the final spin speed
will be as follows:
- WHITE COTTON 1400 r.p.m.
- UNIV. COTTONS/SYNTHETICS 1400 r.p.m.
- EASY IRON 1000 r.p.m.
- 20 MIN. 1000 r.p.m.
SPOELEN
RINCAGE
VLEKKEN
TACHES
>>TIJD
>>TEMPS
BEHOEDZAAM
SENSIBLE
STARTTIJDKEUZE
DEPART DIFF.
1400
1000
700
500
- DELICATES 1000 r.p.m.
- WOOL (hand washing) 1000 r.p.m.
Select the DELAY START option
To delay starting of a programme, press the DELAY START button
before starting the machine.
The figures corresponding to the selected
delay will be displayed for about 3 seconds, after which the duration of the
selected programme will appear on the
display.
When the START/PAUSE button is pressed, the selected delay will
appear again on the display and the machine starts its countdown.
STARTTIJDKEUZE
DEPART DIFF.
LOOPTIJD
TPS.REST.
23
Page 24
How to wash
Starting the programme
1. Check that the water tap is opened and the drain hose is correctly
connected.
2. Press START/PAUSE to start the programme. The corrisponding light
stops flashing and only the pilot light of the running phase wiil stay
on
If the Delay Start option has been selected the programme will start
at the end of the countdown.
If the light END flashes and on the display appears the alarm code
at the start of the programme, it indicates that the door is open. Close
firmly the door and press the START/PAUSE button again.
If the delay start option has been selected, the machine starts its
countdown, in hours for the first two hours and then every 30 minutes, which will appear on the display. During this period it is possible to load other laundry, or to cancel the delay time.
• Load other laundry: press the START/PAUSE button. Open the door.
Load the laundry. Close the door and press the START/PAUSE button
again.
• Cancel the delay time: press the START/PAUSE button. Press the
DELAY START button until the symbol 0’ appears on the display.
Press the START/ PAUSE button again if you wish to restart the programme.
Programme progress display
By selecting the wash programme, the pilot lights
corresponding to the various phases making up the
programme come on. After the machine has started,
only the running phase pilot light stays on.
Display
By selecting the wash programme, the display shows
the duration of the selected programme. After having
pressed the Star/Pause button, the time to the end of
the programme decreases minute by minute and it
appears on the display. If the laundry load is smaller
on the display appears the duration of a maximum laundry load.
E40
VOORWAS
PRELAVAGE
HOOFDWAS
LAVAGE
SPOELEN
RINCAGE
SPOELEN
RINCAGE
CENTRIFUG.
ESSORAGE
EINDE
FIN
OVERDOSERING
SURDOSAGE
DEUR
PORTE
2.05
24
Page 25
At the end of the programme
The machine stops automatically. A steadly zero appears on the display.
The END light comes on in the programme progress display and the
START/PAUSE pilot light has gone out.
If the RINSE HOLD option has been selected, the light DOOR will
be red and the DOOR will be locked to indicate that the water must be
emptied out. The display will show a static zero.
To empty out water there are two possibilities:
• Select programme DRAINING: the water is emptied out without spin-
ning.
• Select programme SPIN or DELICATE SPIN. Select the spin speed by
means of the relevant button and then depress the START/PAUSE button. The water is emptied out and the laundry is spun at the selected
spin speed.
Warning! The programme selector dial must be turned first to O
(RESET) and then to the DRAIN programme SPIN or DELICATE SPIN.
Turn the selector dial to O to switch the machine off.
Remove the laundry from the drum.
Check that the drum is empty so as to avoid any forgotten items
being damaged in a subsequent wash (e.g. shrinking) or their colour
running into a load of whites.
Close the water tap.
Leave the door open to prevent the formation of mildew and unpleas-
ant smells.
How to wash
25
Page 26
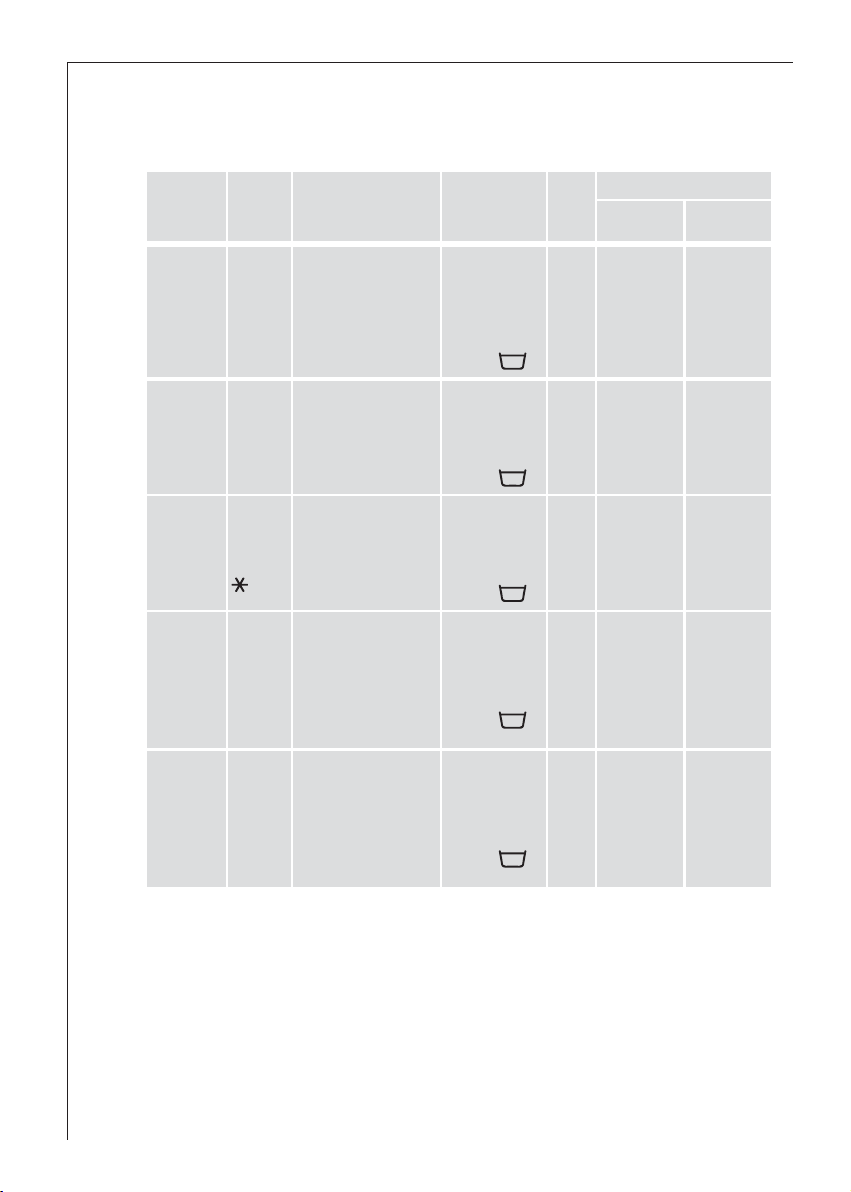
Programme chart
Wash programmes for cottons, mixed and synthetics
Wash
programme
WHITE
COTTONS
and Linens
ECO
Cottons
ECONOMY
UNIV.
COTTONS/
SINTHE-
TICS
40-60
MIX
Temp.
95°
(●)60E
60°40°30°-
(cold)
40°
Fabrics
Cotton and linen,
for example normally soiled work
garments, sheets,
household linen,
underwear, towels.
Whites and fastcoloureds.
Coloured cotton or
linen fabric, shirts,
underwear, towels.
Synthetic fabrics,
underwear,
coloured garments,
non-shrink shirts,
blouses.
Additional
functions
PREWASH,
STAIN
SENSITIVE
QUICK WASH
EXTRA RINSE
SPIN SPEED
RED. /
PREWASH,
STAIN
SENSITIVE
EXTRA RINSE
SPIN SPEED
RED. /
PREWASH,
STAIN
**
SENSITIVE
EXTRA RINSE
SPIN SPEED
RED. /
PREWASH,
STAIN
SENSITIVE
EXTRA RINSE
SPIN SPEED
RED. /
*
Max.
load
8 kg
8 kg
8/4 kg
8 kg
Consumption*
Energy
kWh
2.9
1.36
1.2
1.2
Water lt.
75
60
65
65
26
PREWASH,
STAIN
EXTRA RINSE
QUICK WASH
SPIN SPEED
RED. /
2 kg 0.55 63
EASY
IRON
Synthetic fabrics,
underwear,
40°
coloured garments,
blouses.
(●) In compliance with EC directive 92/75, the consumption figures indi-
cated on the energy label refer to the ECO wash programme for cotton.
* The consumption data shown on this chart is to be considered purely
indicative, as it may vary depending on the quantity and type of laundry,
on the inlet water temperature and on the ambient temperature. It refers
to the highest temperature for each wash programme.
** Only at 40° or higher.
Page 27
Programme chart
Wash programmes for delicates, wool and silk
Wash
programme
Delicates 40°-30°
Wool
Hand wash
Silk
Temp. Fabrics
40°-30°
(cold)
40°-30°
(cold)
Delicate fabrics, for
example curtains.
Wool, wool mixtures
bearing the
“Pure new wool,
non-shrink, machine
washable” label
Silk items
Additional
functions
PREWASH,
STAIN
**
EXTRA RINSE
QUICK WASH
SPIN SPEED
RED. /
SPIN SPEED
RED. /
SPIN SPEED
Max.
load
3.5 kg
2 kg
1 kg 0.3 75
Consumption*
Energy
kWh
0.6
0.45
Water lt.
65
65
* The consumption data shown on this chart is to be considered purely
indicative, as it may vary depending on the quantity and type of laundry,
on the inlet water temperature and on the ambient temperature. It refers
to the highest temperature for each wash programme.
** Only at 40° or higher.
27
Page 28

Programme chart
Special programmes
Programme
DELICATE
RINSES
DRAIN
Descrip-
tion
This programme can
be used for
rinsing hand
washed garments.
For emptying
out the last
rinse water in
programmes
with the RINSE
HOLD option
Programme phases
3 rinses with liquid
additive.
Short spin
(max. 1000 r.p.m.)
The water is emptied out.
Additional
functions
SPIN SPEED
RED. /
Max.
load
8 kg
/
Consumption*
Energy
kWh
0.04
-
Water lt.
60
-
SPIN
DELICATE
SPIN
20 MIN.
RESET/OFF
O
Separate spin
for cottons.
Separate spin
for synthetics,
delicate fabrics and wool.
Separate spin
for synthetics,
delicate fabrics and wool.
Long spin.
Short spin.
(max. 1000 r.p.m.)
Wash at 30°
2 Rinses
Short spin.
For cancelling the
programme which
is running or to
switch the machine
off.
SPIN SPEED
RED.
SPIN SPEED
RED.
SPIN SPEED
RED.
8/4 kg
3.5 kg
3.5 kg 0.35 52
-
-
-
-
* The consumption data shown on this chart is to be considered purely
indicative, as it may vary depending on the quantity and type of laundry,
on the inlet water temperature and on the ambient temperature.
28
Page 29

Cleaning and maintenance
After each wash
At the end of the wash programme, pull the dispenser drawer out a little to let it dry.
Leave the door ajar to allow air to circulate.
If the machine is not used for a prolonged period:
Close the water tap and unplug the appliance.
Periodical cleaning
Exterior
Clean the outside of the cabinet with soap and water only. Rinse with
clean water and dry.
Important: do not use methylated spirits, solvents or similar products
to clean the cabinet.
Detergent dispenser drawer
After a while, detergents and fabric softeners leave deposits in the drawer.
Clean the drawer, from time to time, by
rinsing it under a running tap. To remove
the drawer from the machine, press the
button in the rear left-hand corner.
To facilitate cleaning, the top part of the
additive compartments can be removed.
Detergent can also accumulate inside the
drawer recess: clean it with an old toothbrush.
Refit the drawer after cleaning.
29
Page 30

Cleaning and maintenance
Door seal
Check from time to time the door seal and
eliminate eventual possible objects that could
be trapped in the fold.
Drain pump
The pump should be inspected regularly and particularly if
the machine does not empty and/or spin
the machine makes an unusual noise during draining due to objects
such as safety pins, coins etc. blocking the pump.
Proceed as follows:
Disconnect the appliance.
If necessary wait until the water
has cooled down.
Open the pump door.
Place a container close to the
pump to collect any spillage.
30
Release the emergency emptying
hose, place it in the container
and remove its cap.
When no more water comes out, unscrew the pump and remove it.
Always keep a rag nearby to dry
up spillage of water when
removing the pump.
Page 31

Remove any objects from the
pump impeller by rotating it.
Put the cap back on the emergency emptying hose and place
the latter back in its seat.
Screw the pump fully in.
Close the pump door.
Water inlet filter
Cleaning and maintenance
If you notice that the machine is taking longer to fill, check that the
filter in the water inlet hose is not blocked.
Turn off the water tap.
Unscrew the hose from the tap.
Clean the filter in the hose with a stiff brush.
Screw the hose back onto the tap.
31
Page 32

Cleaning and maintenance
Emergency emptying out
If the water is not discharged, proceed as follows to empty out the
machine:
pull out the plug from the power socket;
close the water tap;
if necessary, wait until the water has cooled down;
open the the pump door;
place a bowl on the floor and place the end of the emergency empty-
ing hose into the bowl. Remove its cap. The water should drain by gravity into the bowl. Whe the bowl is full, put the cap back on the hose.
Empty the bowl. Repeat the procedure until water stops flowing out;
clean the pump if necessary as previously described;
replace the emergency emptying hose in its seat after having plugged
it;
screw the pump again and close the door.
Frost precautions
If the machine is installed in a place where the temperature could drop
below 0°C, proceed as follows:
Close the water tap and unscrew the water inlet hose from the tap.
Place the end of the emergency emptying hose and that of the inlet
hose in a bowl placed on the floor and let water drain out.
Screw the water inlet hose back on and reposition the emergency emp-
tying hose after having put the cap on again
By doing this, any water remaining in the machine is removed, avoiding ice forming and consequently damage to the appliance.
When you use the machine again, make sure that the ambient temperature is above 0°C.
.
32
Page 33

Something not working?
If during the spin cycle the machine makes an unusual
whistling noise, different from the noise made by traditional washing machines, this is due to a new type of
motor.
If water is not visible in the drum, this is due to the modern technology of new washing machines
that use less water than traditional machines.
Troubleshooting
If a problem arises, you can try to solve it
yourself following the instructions below.
If you call out an engineer when one of the following problems arises, or to repair a fault due to incorrect use, the call-out will be
charged even if requested within the guarantee period.
During machine operation it is possible that an acoustic warning signal
sounds, the END light blinks and the following alarm codes may be displayed:
E10 : problem with the water supply
-
E20 : problem with water draining
-
E40: door open
-
EF0 : the water safety system (AQUA ALARM) is running.
Once the problem has been eliminated, press the START/PAUSE button
to restart the programme. If after all checks, the problem persists, contact your local AEG/ELECTROLUX Service Force Centre.
Problem
The machine does not work
Possible cause
The main electrical fuse Replace the fuse.
has blown.
The door is not properly Close the door; the click
closed (E40). of the lock should be heard.
The plug is not connected. Insert the plug.
The START button has not Press the button.
been pressed.
The DELAY START Check the selected delay on
option has been selected. the display.
Solution
33
Page 34

Something not working?
34
Problem
The machine does not fill
The machine fills then
empties immediately
The machine does not
empty and/or does not spin
There is water on the floor
The display shows the
alarm code
EF0
Possible cause
The water tap is closed (E10). Open the water tap.
The water inlet hose is Check the whole length of the
squashed or kinked (E10). hose and remove the kink.
The small filter of the water Clean the filter.
inlet hose is clogged (E10).
The door is not properly Close the door.
closed (E40).
The end of the drain hose Place the hose at the right
is too low. height (see Installation
section).
The drain hose is Check the whole length of
squashed or kinked (E20). the hose and remove the
kink.
The drain pump or the Clean the pump or check
drain hose are clogged (E20). the hose.
The RINSE HOLD option Empty out the water by
(stop with water in drum) selecting the DRAIN, SPIN
has been selected. or DELICATE SPIN program-
mes.
The laundry is not evenly Redistribute the laundry
distributed inside the drum. manually in the drum.
Too much detergent has Measure detergent
been used. according to the
manufacturer’s instructions.
An unsuitable detergent Use a suitable washing
has been used that machine detergent.
creates too much foam.
One of the connectors on Check that the hose is
the water inlet hose is firmly screwed on at both
leaking. ends.
The drain pump has not Fully screw the pump into
been properly screwed on place.
after cleaning.
The cap on the emergency Replace the cap on the
emptying hose has not been emergency emptying hose
replaced after cleaning the after cleaning the pump.
pump.
The water safety system Switch the machine off,
starts working to prevent close the inlet pipe, and
any flooding.a call the Service Force Centre
Solution
Page 35

Something not working?
Problem
The machine vibrates or is
noisy
The door will not open
Spinning starts late or the
machine does not spin
Possible cause
The transit bolts have Check that the machine
not been removed. has been unpacked as
described in the Installation
section.
The feet have not been Carefully level the machine.
adjusted.
There is little laundry in Correct operation of the
the drum. machine is not affected.
The programme is still Wait until the end of the
running and the drum programme before opening
is turning. the door.
The water level is above the Before opening the door,
bottom edge of the door. the water must be emptied
out.
The machine is heating the Wait until the end of the
water. heating phase.
The unbalance detection If the laundry is not evenly
device that prevents distributed inside the drum
excessive vibration during at the beginning of the
spinning has cut in. spin cycle, the machine
detects this and tries to
redistribute it more evenly
by means of a few drum
rotations.
Only when the laundry is
more evenly distributed
will the spin cycle be
performed, at a lower speed,
if the laundry is not evenly
distributed.
If, after about 10 minutes,
the laundry is still tangled,
the machine will not spin.
Therefore, if the laundry is
still wet at the end of the
cycle, it is advisable to
redistribute it manually
inside the drum and to
select the spin programme.
Solution
35
Page 36

Something not working?
Unsatisfactory washing results
If the laundry looks grey and lime scale is found in the drum
• Too little detergent has been used.
• An unsuitable detergent has been used.
• Stubborn stains have not been treated prior to washing.
• The programme/temperature has not been correctly selected.
If grey stains remain on the laundry
• Laundry stained with ointments, grease or oil has been washed with
an insufficient amount of detergent.
• The temperature selected for the wash programme was too low.
• Fabric softener - especially the concentrated type - has come into
direct contact with the laundry. Wash these stains immediately and
pour fabric softener carefully.
Foam is still visible even after the last rinse
• Modern detergents often produce foam, even in the last rinse. How-
ever the laundry has been completely rinsed.
White residue is left on the laundry
• This is due to insoluble components in modern detergents and is
therefore not the result of insufficient rinsing. Shake or brush the
laundry. In future, it may be better to turn garments inside out before
washing them. Check the choice of detergent; try using liquid detergents.
36
Page 37

Technical data
Height x Width x Depth 85x60x63 cm
Height adjustment ± 10 mm approx.
Load (depending on programme) 8 kg max.
Use domestic
Drum speed during washing max. 55 rpm
Drum speed during spinning 1400/1000/700/500 rpm
Water pressure 0.05 - 0.8 MPa
This appliance complies with the following EC directives:
- 73/23/EEC of 19.2.1973 “Low voltage directive”, including directive
93 / 68 / EEC
- 89/336/EEC of 3.5.1989 “Electromagnetic Compatibility Directive”.
37
Page 38

Something not working?
Service
In the section “Something not working?” some problems that can be
solved by yourself are listed. Read this section in the event of problems.
If you are not able to find a solution, contact the Service centre.
In all cases, explain your problem carefully, in order to facilitate troubleshooting: the engineer will be able to decide whether a service call
is necessary.
Take note of the serial number (Ser.No.) and the product number (Prod.
No.) indicated on the rating plate.
Ser. No. . . . . . . . . . . . . . . . . . . . . . . .
Prod. No. . . . . . . . . . . . . . . . . . . . . . .
geprüfte
Sicherheit
Mod. L74900 Type P6968538
Prod.No. 914526301 00
220-230V~50Hz 2200 W 10 A
Ser.No.
IPX4
38
Furthermore, try to specify, as precisely as possible:
- The symptoms of the fault
- When the fault occurs
- The alarm code displayed
When can a service visit be charged during the guarantee period?
- when it should have been possible to solve the problem by yourself,
with the help of the troubleshooting chart (see section “Something
not working?”)
- when the engineer has to come out several times because he has
not been given all the relevant information he needs and so, for
example, has to fetch spare parts. Repeated trips can be avoided if
you prepare your call to the Service centre as described above.
Page 39

Instructions for installation and electrical connection
Safety instructions for the installer
• This appliance is heavy, care should be taken when moving it.
• When unpacking the appliance, check that it is not damaged. If in
doubt, do not use it and contact the retailer.
• All internal packing must be removed before using the appliance.
Serious damage may be caused to the machine or adjacent furniture
if the protective transit devices are not completely removed. Refer to
the relevant paragraph.
• Any electrical work required to install this appliance must be carried
out by a qualified electrician.
• Any plumbing work required to install this appliance must be carried
out by a qualified plumber.
• After having installed the machine, check that it is not standing on
its electrical supply cable.
• If the appliance is placed on a carpeted floor, ensure that air can circulate freely between the adjustable feet and the floor.
• The installation should comply with local water authority and building regulations requirements.
• Should the appliance power supply cable need to be replaced, this
should be carried out by our Service Force Centre.
39
Page 40

Installation
Unpacking
All transit bolts and packing must be
removed before using the appliance.
After removing all the packaging, carefully
lay machine on it’s back to remove the polystyrene base from the bottom.
Remove the power supply cable and the
draining hose
from the hose
holders on the
rear of the appliance.
With a suitable
spanner, supplied
with the machine
HEC0001
unscrew and
remove the central
rear bolt A. Slide
out the relevant
plastic spacer.
Unscrew and
remove the two
large rear bolts B
HEC0003S
C
B
and the six smaller bolts C.
Remove the bracket D. Tighten up the six
smaller bolts C.
HEC0008
A
HEC0002S
C
D
B
HEC0011S
C
40
HEC0014
C
Page 41

Open the porthole,
P0002
take out the inlet
hose from the
drum and remove
the polystyrene
block fitted with
the adhesive tape
on the door seal.
HEC0010
Fill the smaller
upper hole and the two large ones with the
corresponding plastic plug caps supplied in the
bag containing the instruction booklet.
Important!
All the different plug caps are supplied with
the appliance in the plastic bag containing the
instruction booklet.
Connect the water inlet hose as described
under the paragraph “Water inlet”.
Positioning
Installation
HEC0005
Install the machine on a flat hard floor.
Make sure that air circulation around the machine is not impeded by
carpets, rugs etc.
• Before placing it on small tiles, apply a rubber coating.
• Never try to correct any unevenness in the floor by putting pieces of
wood, cardboard or similar materials under the machine.
• If it is impossible to avoid positioning the machine next to a gas
cooker or coal-burning stove, an insulating panel (85x57 cm) covered
with aluminium foil on the side facing the cooker or stove, must be
inserted between the two appliances;
• The machine must not be installed in rooms where the temperature
can drop below 0.
• The water inlet hose and the drain hose must not be kinked.
• Please ensure that when the appliance is installed, it is easily accessible for the engineer in the event of a breakdown.
41
Page 42

Installation
Levelling
Carefully level by screwing the adjustable
feet in or out. Never place cardboard, wood
or similar materials under the machine to
compensate for any unevenness in the
floor.
Water inlet
Attention!
• An inlet hose is supplied and can be found inside the machine drum.
• Do not use the hose from your previous machine to connect to
the water supply.
• This appliance must be connected to a cold water supply.
1. Open the porthole and extract the inlet hose.
2. Connect the hose with the angled connection to the machine.
Important!
Do not place the inlet hose downwards.
Angle the hose to the left or right
depending on the position of your water
tap.
3. Set the hose correctly by loosening the
ring nut. After positioning the inlet hose, be sure to tighten the ring nut
again to prevent leaks.
4. Connect the hose to a tap with a 3/4” thread.
Always use the hose supplied with the appliance.
HEC0006
42
Installation should comply with local water
authority and building regulations’ requirements. A minimum water pressure of 0.05
MPa (0.5 bar) is required for safe operation
of the appliance.
If you cannot make the cold water connection direct from the rising mains, you may
be able to operate the appliance from your cold water storage system.
There should be a minimum distance of 5.02m (16.5 ft) between theappliance’s inlet and the bottom of the water storage tank.
Page 43

Aqua Stop
The inlet hose is provided with a water stop
device, which protects against damage
caused by water leaks in the hose which
could develop due to natural ageing of the
A
hose. This fault is shown by a red sector in
the window „A”. Should this occur, turn the
water tap off and refer to your Service Cen-
P0352
tre to replace the hose.
Water drainage
The end of the drain hose can be positioned in three ways:
Hooked over the edge of a sink using
the plastic hose guide supplied with the
machine. In this case, make sure the end
cannot come unhooked when the machine
is emptying.
This could be done by tying it to the tap
with a piece of string or attaching it to the
wall.
In a sink drain pipe branch. This branch
must be above the trap so that the bend is at least 60 cm above the
ground.
Directly into a drain pipe at a height of not less than 60 cm and
not more than
90 cm.
The end of the
drain hose must
always be venti-
lated, i.e. the
inside diameter of
the drain pipe must be larger than the outside diameter of the drain
hose.
The drain hose must not be kinked.
Important!
The drain hose may be extended to a maximum of 4 metres. An additional
drain hose and joining piece is available from your local Service Centre.
Installation
43
Page 44

Electrical connection
This machine is designed to operate on a 220-230 V, single-phase,
50 Hz supply.
Check that your domestic electrical installation can take the maximum
load required (2.2 kW), also taking into account any other appliances in
use.
Connect the machine to an earthed socket.
The manufacturer does not accept any responsibility for damage or
injury through failure to comply with the above safety precaution.
Permanent connection
In the case of a permanent connection it is necessary that you install a
double pole switch between the appliance and the electricity supply
(mains), with a minimum gap of 3 mm between the switch contacts and
of a type suitable for the required load in compliance with the current
electrical regulations.
The switch must not break the yellow and green earth cable at any
point.
This operation must be performed by a qualified electrician.
Important: The power supply cable must be easily accessible after
installing the machine.
44
Page 45

Geachte klant,
Lees deze gebruiksaanwijzing aandachtig door. Lees vooral de
aanwijzingen met betrekking tot de veiligheid op de eerste pagina’s van
deze gebruiksaanwijzing! Wij raden u aan de gebruiksaanwijzing goed te
bewaren, zodat u nog eens iets kunt nalezen en geef hem door aan een
eventuele volgende eigenaar van het apparaat.
Met de waarschuwingsdriehoek en/of door signaalwoorden
(Waarschuwing!, Voorzichtig!, Attentie!) geven wij aanwijzingen die
belangrijk zijn voor uw veiligheid of voor het correct functioneren van
de machine.
Dit symbool voert u stap voor stap door de bediening van het apparaat.
De informatie die voorzien is van dit symbool bevat extra aanwijzingen
en praktische tips over het gebruik van dit apparaat.
Het klaverblad staat voor tips en aanwijzingen met betrekking tot
economisch en milieuvriendelijk gebruik van het apparaat.
Mocht er een storing optreden, dan treft u in deze gebruiksaanwijzing
aanwijzingen aan hoe u deze storing kunt verhelpen; zie “Wat te doen
als...?”.
Als deze informatie niet voldoende is om de storing op te lossen, dient u
contact op te nemen met DE KLANTENSERVICE BIJ U IN DE BUURT.
Gedrukt op chloorvrij papier.
Wie milieubewust denkt, handelt ook zo...
Page 46

Inhoud
Veiligheidsinstructies. . . . . . . . . . . . . . . . . . . . . . . . . . . . . . . . . . . . . . . . . . . . 48
Afvalverwerking. . . . . . . . . . . . . . . . . . . . . . . . . . . . . . . . . . . . . . . . . . . . . 49-50
Milieutips
De belangrijkste functies van uw wasmachine . . . . . . . . . . . . . . . . . . . . . 51
Beschrijving van de machine . . . . . . . . . . . . . . . . . . . . . . . . . . . . . . . . . . . . . 52
Bedieningspaneel. . . . . . . . . . . . . . . . . . . . . . . . . . . . . . . . . . . . . . . . . . . . . . . . . 53
Programmakiezer. . . . . . . . . . . . . . . . . . . . . . . . . . . . . . . . . . . . . . . . . . . 53-54
toets START/PAUZE . . . . . . . . . . . . . . . . . . . . . . . . . . . . . . . . . . . . . . . . . . . . 55
toets
Programmakeuzetoetsen. . . . . . . . . . . . . . . . . . . . . . . . . . . . . . . . . . . . . . . . 56
toets CENTRIFUGEREN . . . . . . . . . . . . . . . . . . . . . . . . . . . . . . . . . . . . . . . . . 56
toets SPOELSTOP . . . . . . . . . . . . . . . . . . . . . . . . . . . . . . . . . . . . . . . 56-57
toets VOORWAS . . . . . . . . . . . . . . . . . . . . . . . . . . . . . . . . . . . . . . . . . . . . . . . 57
toets SPOELEN+ . . . . . . . . . . . . . . . . . . . . . . . . . . . . . . . . . . . . . . . . . . . . . . 57
toets VLEKKEN . . . . . . . . . . . . . . . . . . . . . . . . . . . . . . . . . . . . . . . . . . . . . . . . 58
toets BEHOEDZAAM . . . . . . . . . . . . . . . . . . . . . . . . . . . . . . . . . . . . . . . . . . . 58
toets >>TIJD . . . . . . . . . . . . . . . . . . . . . . . . . . . . . . . . . . . . . . . . . . . . . . . . . . 58
Display. . . . . . . . . . . . . . . . . . . . . . . . . . . . . . . . . . . . . . . . . . . . . . . . . . . . 58-59
Indicatie programmaverloop . . . . . . . . . . . . . . . . . . . . . . . . . . . . . . . . . . . . 59
Een programma annuleren . . . . . . . . . . . . . . . . . . . . . . . . . . . . . . . . . . . . . . 59
Een instelling of lopend programma wijzigen . . . . . . . . . . . . . . . . . . . . . . 60
Deur openen tijdens een lopend programma. . . . . . . . . . . . . . . . . . . . . . . 60
Lade voor was- en nabehandelingsmiddel . . . . . . . . . . . . . . . . . . . . . . . . . . . . 61
Vóór het in gebruik nemen. . . . . . . . . . . . . . . . . . . . . . . . . . . . . . . . . . . . . . . 61
Voordat u gaat wassen. . . . . . . . . . . . . . . . . . . . . . . . . . . . . . . . . . . . . . . . 62-64
Wasgoed sorteren en voorbereiden. . . . . . . . . . . . . . . . . . . . . . . . . . . . . . . . . . 62
Gewicht van het wasgoed . . . . . . . . . . . . . . . . . . . . . . . . . . . . . . . . . . . . . . . . . 62
Textielsoorten en wasetiketten . . . . . . . . . . . . . . . . . . . . . . . . . . . . . . . . . . . . .
Was- en nabehandelingsmiddelen . . . . . . . . . . . . . . . . . . . . . . . . . . . . . . . . . . 63
Welk was- en nabehandelingsmiddel? . . . . . . . . . . . . . . . . . . . . . . . . . . . . 65
Hoeveel was- en nabehandelingsmiddel?. . . . . . . . . . . . . . . . . . . . . . . . . . 65
Vloeibare wasmiddelen . . . . . . . . . . . . . . . . . . . . . . . . . . . . . . . . . . . . . . . . . 65
Waterontharder gebruiken. . . . . . . . . . . . . . . . . . . . . . . . . . . . . . . . . . . . . . . . . 65
Waterhardheid. . . . . . . . . . . . . . . . . . . . . . . . . . . . . . . . . . . . . . . . . . . . . . . . . . . 65
Wassen
Wasgoed in de machine doen . . . . . . . . . . . . . . . . . . . . . . . . . . . . . . . . . . . . . . 66
Was- en nabehandelingsmiddelen doseren . . . . . . . . . . . . . . . . . . . . . . . . 66-67
Wasprogramma instellen . . . . . . . . . . . . . . . . . . . . . . . . . . . . . . . . . . . . . . . . . . 67
Gewenste instellingen kiezen. . . . . . . . . . . . . . . . . . . . . . . . . . . . . . . . . . . . . . . 67
. . . . . . . . . . . . . . . . . . . . . . . . . . . . . . . . . . . . . . . . . . . . . . . . . . . . . 50
STARTTIJDKEUZE. . . . . . . . . . . . . . . . . . . . . . . . . . . . . . . . . . . . . . . 55-56
63
. . . . . . . . . . . . . . . . . . . . . . . . . . . . . . . . . . . . . . . . . . . . . . . . . . . . . . . . . 66
46
Page 47

Inhoud
CENTRIFUGEREN of SPOELSTOP KIEZEN . . . . . . . . . . . . . . . . . . . . . . . . . . . . . . 67
STARTTIJD instellen . . . . . . . . . . . . . . . . . . . . . . . . . . . . . . . . . . . . . . . . . . . . . . . 68
Programma starten . . . . . . . . . . . . . . . . . . . . . . . . . . . . . . . . . . . . . . . . . . . . . . . 68
Einde van het programma . . . . . . . . . . . . . . . . . . . . . . . . . . . . . . . . . . . . . . . . . 69
Programmatabellen: was- en extra programma’s
. . . . . . . . . . . . . . . . . 70-71
Reiniging en onderhoud. . . . . . . . . . . . . . . . . . . . . . . . . . . . . . . . . . . . . . . . . . 72
Na iedere wasbeurt . . . . . . . . . . . . . . . . . . . . . . . . . . . . . . . . . . . . . . . . . . . . . . . 72
Regelmatig schoonmaken . . . . . . . . . . . . . . . . . . . . . . . . . . . . . . . . . . . . . . . . . 72
Extern . . . . . . . . . . . . . . . . . . . . . . . . . . . . . . . . . . . . . . . . . . . . . . . . . . . . . . . 72
Wasmiddellade . . . . . . . . . . . . . . . . . . . . . . . . . . . . . . . . . . . . . . . . . . . . . . . 72
De pomp reinigen . . . . . . . . . . . . . . . . . . . . . . . . . . . . . . . . . . . . . . . . . . 73-74
Waterinloopzeef. . . . . . . . . . . . . . . . . . . . . . . . . . . . . . . . . . . . . . . . . . . . . . . 74
Nooddlediging . . . . . . . . . . . . . . . . . . . . . . . . . . . . . . . . . . . . . . . . . . . . . 74-75
Kans op vorst . . . . . . . . . . . . . . . . . . . . . . . . . . . . . . . . . . . . . . . . . . . . . . . . . . . . 75
Wat te doen als.? . . . . . . . . . . . . . . . . . . . . . . . . . . . . . . . . . . . . . . . . . . . . . . . 76
Problemen oplossen . . . . . . . . . . . . . . . . . . . . . . . . . . . . . . . . . . . . . . . . . . . 76-78
Als het wasresultaat niet bevredigend is . . . . . . . . . . . . . . . . . . . . . . . . . . . . . 79
Technische gegevens. . . . . . . . . . . . . . . . . . . . . . . . . . . . . . . . . . . . . . . . . . . . . 80
Service . . . . . . . . . . . . . . . . . . . . . . . . . . . . . . . . . . . . . . . . . . . . . . . . . . . . . 80-81
Instructies met betrekking tot de installatie en de elektrische
aansluiting . . . . . . . . . . . . . . . . . . . . . . . . . . . . . . . . . . . . . . . . . . . . . . . . . . . . . 82
Veilighe
idsinstructies voor de installateur . . . . . . . . . . . . . . . . . . . . . . . . . . . . 82
Installatie . . . . . . . . . . . . . . . . . . . . . . . . . . . . . . . . . . . . . . . . . . . . . . . . . . . 83-84
Uitpakken . . . . . . . . . . . . . . . . . . . . . . . . . . . . . . . . . . . . . . . . . . . . . . . . . . . . . . . 83
Plaatsing. . . . . . . . . . . . . . . . . . . . . . . . . . . . . . . . . . . . . . . . . . . . . . . . . . . . . . . . 83
Horizontaal afstellen. . . . . . . . . . . . . . . . . . . . . . . . . . . . . . . . . . . . . . . . . . . . . . 83
Wateraansluiting . . . . . . . . . . . . . . . . . . . . . . . . . . . . . . . . . . . . . . . . . . . . . . . . . 83
Waterblokkensysteem . . . . . . . . . . . . . . . . . . . . . . . . . . . . . . . . . . . . . . . . . . . . 83
Waterafvoer . . . . . . . . . . . . . . . . . . . . . . . . . . . . . . . . . . . . . . . . . . . . . . . . . . . . . 84
Elektrische aansluiting . . . . . . . . . . . . . . . . . . . . . . . . . . . . . . . . . . . . . . . . . . . . 85
Vaste aansluiting . . . . . . . . . . . . . . . . . . . . . . . . . . . . . . . . . . . . . . . . . . . . . . . . . 85
47
Page 48

Veiligheidsinstructies
De veiligheid van elektrische apparaten van AEG/ELECTROLUX voldoen
aan de Europese en Nederlandse normen. Toch zien wij ons als fabrikant
genoodzaakt u en uw eventuele medegebruikers op het volgende te
wijzen.
Algemene veiligheid
• Reparaties aan de machine mogen alleen door vakmensen worden
uitgevoerd. Onvakkundige reparaties kunnen tot aanzienlijke risico’s
voor de gebruiker leiden. Neem contact op met de service-afdeling
van AEG/ELECTROLUX bij u in de buurt.
• Neem de machine nooit in gebruik als het netsnoer is beschadigd of
als het bedieningspaneel of het bovenblad zo beschadigd zijn dat de
binnenkant van het apparaat toegankelijk is.
• Schakel de machine eerst uit en trek het netsnoer uit het stopcontact,
voordat u de machine gaat schoonmaken.
• Trek de stekker nooit uit het stopcontact door aan het snoer te
trekken, maar aan de stekker zelf.
• Sproei de machine nooit af met een waterstraal. Kans op kortsluiting!
• Bij wasporgramma’s met hoge temperaturen kan het glas in de deur
heet worden. Niet aanraken!
• Laat het water eerst afkoelen voordat u het in een noodsituatie aftapt
of voordat u de deur opent.
• Kleine huisdieren kunnen aan elektrische draden en waterslangen
knagen, waardoor er tengevolge van waterlekkages kortsluiting en
schade ontstaat.
48
Het plaatsen, aansluiten en in gebruik nemen van de
machine
• Lees de volgende instructies door voor het plaatsen en aansluiten
van de machine.
• Voer een eerste wasgang uit zonder wasgoed (WITTE WAS 95º, met
een halve maatbeker wasmiddel) om eventuele fabricagerestanten in
de wastrommel en de kuip te verwijderen.
• Als de machine wordt geleverd terwijl de buitentemperatuur onder de
0° is, dient u de machine vóór het ingebruik nemen 24 uur op
kamertemperatuur te laten staan.
Page 49

Veiligheidsinstructies
Veiligheid van kinderen
• Kinderen realiseren zich vaak niet hoe gevaarlijk elektrische apparaten
kunnen zijn. Houd daarom de kinderen nauwlettend in de gaten als de
machine is ingeschakeld en laat de kinderen niet met de machine spelen
- ze zouden zichzelf of andere kinderen in de machine kunnen opsluiten.
• Houd de verpakking (bijvoorbeeld plastieke folie, polystyreen) uit de
buurt van kinderen, kans op verstikkingsgevaar!
• Berg de wasmiddelen op een veilige plaats op, buiten het bereik van
kinderen.
• Zorg er voor dat kinderen en huisdieren niet in de trommel van de
wasmachine kunnen klimmen.
• Als u de machine afdankt, dient u de machine onmiddellijk onbruikbaar
te maken door de stekker uit het stopcontact te trekken en het netsnoer
af te snijden en weg te gooien. Maak bovendien het deurslot
onbruikbaar, om te voorkomen dat kinderen zichzelf of andere kinderen
opsluiten in de machine.
Gebruik volgens voorschriften
• De wasmachine is alleen bedoeld voor huishoudelijk gebruik. Als de
machine voor verkeerde doeleinden wordt gebruikt of foutief wordt
bediend, wordt de ontstane schade niet door de garantiebepalingen
gedekt.
• Constructieve wijzigingen aan de machine zijn uit oogpunt van
veiligheid niet toegestaan.
• Gebruik alleen wasmiddelen die geschikt zijn voor wasmachines en let
hierbij op de aanwijzingen van de fabrikant.
• Wasgoed dat in aanraking is geweest met ontvlambare oplosmiddelen,
dienen niet in de wasmachine gewassen te worden.
• De wasmachine mag niet voor chemische reiniging worden gebruikt.
• Kleur- en ontkleuringsmiddelen mogen alleen worden gebruikt als de
fabrikant van deze middelen duidelijk aangeeft dat gebruik in de
wasmachine mogelijk is. Wij zijn niet verantwoordelijk voor eventuele
schade.
• Trek na gebruik altijd de stekker uit het stopcontact en draai de
waterkraan dicht.
Afvalverwerking
Verpakkingsmaterialen
De materialen die worden aangeduid met het symbool zijn
recyclebaar.
>PE<=polyethyleen
>PS<=polystyreen
>PP<=polypropyleen
49
Page 50

Veiligheidsinstructies
Dit betekent dat deze materialen gerecycled kunnen worden door ze op
de correcte wijze weg te gooien in de hiervoor bestemde containers.
Machine
Als uw apparaat is afgedankt, lever hem dan in op de door de gemeente
aangewezen afvalverwerkingsplaatsen. Houd uw land schoon!
Het symbool op het product of op de verpakking wijst erop dat dit
product niet als huishoudafval mag worden behandeld. Het moet echter
naar een plaats worden gebracht waar elektrische en elektronische
apparaten worden gerecyled. Als u er voor zorgt dat dit product op de
correcte manier wordt verwijderd, voorkomt u mogelijke negatieve
gevolgen voor de mens en het milieu die zich zouden kunnen voordoen
in geval van verkeerde afvalbehandeling. Voor meer details in verband
met het recyclen van dit product, kunt u het beste contact op opnemen
met de gemeentelijke instanties, het bedrijf of de dienst die belast is
met de verwijdering van huisafval of de winkel waar u het product hebt
gekocht.
Milieutips
Om water en energie te besparen en het milieu te beschermen, raden wij u
aan de volgende tips op te volgen:
• Normaal vervuild wasgoed hoeft u niet voor te wassen. Zo bespaart u
wasmiddel, water en tijd (het milieu wordt ook ontzien!).
• Gebruik het energiespaarprogramma als u normaal vervuild wasgoed
wilt wassen.
• De wasmachine werkt het zuinigst met een volle trommel.
• Gebruik bij kleine hoeveelheden wasgoed slechts 1/2 of 2/3 van de
aangegeven hoeveelheid wasmiddel.
• Door een geschikte voorbehandeling kunnen vlekken en lichte
vervuilingen worden verwijderd. Het wasgoed kan dan op een lagere
temperatuur worden gewassen.
• Gebruik bij een gemiddelde tot hoge waterhardheid (vanaf hardheid II,
zie “Was- en nabehandelingsmiddelen”) een waterontharder.
dan het wasmiddel doseren voor hardheid I (= zacht).
U kunt
50
Page 51

Veiligheidsinstructies
De belangrijkste functies van uw wasmachine
• Programma- en temperatuurinstelling m.b.v. de programmakiezer.
• De optie VLEKKEN biedt een geschikte behandeling voor bevlekt
wasgoed.
• Het programma ECO is een energiebesparend programma om
normaal bevuilde katoenen stukken te wassen.
• Uw wasmachine biedt u de mogelijkheid om de snelheid van de
laatste centrifugeerbeurt te beperken tot 1000, 700 of 500
toeren/min.
• Het programma 40-60 MIX is aanbevolen voor licht bevuild
gemengd textiel of katoentextiel. Hiermee bereikt men wasklasse AA.
• U kunt de start van een geselecteerd programma maximum 23 uur
uitstellen.
• Het programma WOL behandelt uw was in alle zachtheid, dankzij de
voorzichtige bewegingen, net alsof u hem met de hand zou wassen.
• Het programma KATOEN SYNTHETISCH is een universeel
programma: voor linnen, wit en gekleurd katoen en voor synthetisch,
delicaat en gemengd textiel. Het programma past zich automatisch
aan aan de verschillende soorten textiel en ladingen. Wanneer u
alleen synthetische stoffen wast, bedraagt de maximale lading 4 kg.
• De productverdeler bestaat uit 4 vakken voor wasmiddel (hoofdwas
en voorwas), wasverzachter en vlekkenzout.
• Uw wasmachine is uitgerust met een waterblokkeersysteem (AQUA
ALARM) die geactiveerd wordt in geval van een waterlek.
• Stabiliteitscontrolesysteem: om trillingen tijdens het centrifugeren
te voorkomen.
51
Page 52

Beschrijving van de machine
Bedieningspaneel
Lade voor was- en nabehandelingsmiddelen
Deur
Afvoerpomp
In hoogte verstelbare voeten
8 Kg
60
30
95
UIT
ARRET
AQUA ALARM
ECO
20 MIN.
40
40 - 60 MIX
FIJNSPOELEN
RINC.DELICAT
POMPEN
VIDANGE
CENTRIFUGEREN
ESSORAGE
40
40
30
30
1400
1000
700
500
VOORWAS
PRELAVAGE
HOOFDWAS
LAVAGE
CENTRIFUG.
ESSORAGE
EINDE
FIN
OVERDOSERING
SURDOSAGE
DEUR
PORTE
FIJNE WAS
LINGE DELICAT
KOOK WAS
BLANC
74900
KATOEN
SYNTHETISCH
COTONS
SYNTHETIQUES
40
30
WOL
LAINE
STRIJKVRIJ
SANS REPASSAGE
ZIJDE
SOIE
ZACHT CENTRIFUGEREN
ESSORAGE DELICAT
SPOELEN
RINCAGE
>>TIJD
>>TEMPS
STARTTIJDKEUZE
DEPART DIFF.
LOOPTIJD
TPS.REST.
VOORWAS
PRELAVAGE
VLEKKEN
TACHES
BEHOEDZAAM
SENSIBLE
START/PAUZE
MARCHE/PAUSE
SPOELEN
RINCAGE
SPOELEN
RINCAGE
Vooraanzicht
52
Page 53

Bedieningspaneel
GHL
B
C
D
E
A
F
60
30
95
UIT
ARRET
AQUA ALARM
ECO
20 MIN.
40
40 - 60 MIX
FIJNSPOELEN
RINC.DELICAT
POMPEN
VIDANGE
CENTRIFUGEREN
ESSORAGE
40
40
30
30
1400
1000
700
500
VOORWAS
PRELAVAGE
HOOFDWAS
LAVAGE
CENTRIFUG.
ESSORAGE
EINDE
FIN
OVERDOSERING
SURDOSAGE
DEUR
PORTE
FIJNE WAS
LINGE DELICAT
KOOK WAS
BLANC
74900
KATOEN
SYNTHETISCH
COTONS
SYNTHETIQUES
40
30
WOL
LAINE
STRIJKVRIJ
SANS REPASSAGE
ZIJDE
SOIE
ZACHT CENTRIFUGEREN
ESSORAGE DELICAT
SPOELEN
RINCAGE
>>TIJD
>>TEMPS
STARTTIJDKEUZE
DEPART DIFF.
LOOPTIJD
TPS.REST.
VOORWAS
PRELAVAGE
VLEKKEN
TACHES
BEHOEDZAAM
SENSIBLE
START/PAUZE
MARCHE/PAUSE
SPOELEN
RINCAGE
SPOELEN
RINCAGE
A = Aan/uit-lampje
B = toets Aan/uit
C = toets VOORWAS
D = toets Centrifugetoerental
E = Keuzetoetsen
F = toets Starttijd
G = toets START/PAUZE
H = Indicatie programmaverloop
J = Display
L = Programmakiezer
Beschrijving van de machine
Programmakiezer
De programmakiezer bepaalt de
wasmodus (bijvoorbeeld waterpeil,
beweging van de trommel, aantal
AQUA ALARM
ECO
STRIJKVRIJ
SANS REPASSAGE
20 MIN.
30
ZIJDE
SOIE
40
spoelingen) in functie van de aard en de
graad van bevuiling van het wasgoed, en
de temperatuur van het waswater.
Deze programmakiezer kan naar rechts of naar links gedraaid worden.
KOOK WAS (BLANC)
Hoofdwas voor wit katoen op 95°C.
KATOEN SYNTHETISCH (COTONS SYNTHETIQUES)
Hoofdwas voor wit en gekleurd katoen van (KOUD) tot 60°C.
WOL
LAINE
FIJNE WAS
LINGE DELICAT
30
40
30
40
ARRET
UIT
KOOK WAS
95
SYNTHETISCH
COTONS
60
SYNTHETIQUES
40
30
40 - 60 MIX
FIJNSPOELEN
RINC.DELICAT
POMPEN
VIDANGE
CENTRIFUGEREN
ESSORAGE
ZACHT CENTRIFUGEREN
ESSORAGE DELICAT
74900
BLANC
KATOEN
53
Page 54

Beschrijving van de machine
40 - 60 MIX
Hoofdwas voor katoen of gemengd textiel dat licht bevuild is.
Dit programma is niet verenigbaar met de optie >>TIJD (>>TEMPS).
FIJNSPOELEN (RINC. DELICAT)
Apart spoelen, bijvoorbeeld voor het spoelen van reeds met de hand
gewassen textiel; (3 spoelstappen en kort centrifugeren).
POMPEN (VIDANGE)
Wegpompen van het water na stop met volle kuip (optie
SPOELSTOP) of na een lopend programma te hebben onderbroken om
een nieuw programma te kiezen.
CENTRIFUGEREN (ESSORAGE)
Aparte lange spoeling van wit/gekleurd wasgoed dat met de hand
gewassen werd.
ZACHT CENTRIFUGEREN (ESSORAGE DELICAT)
Apart kort centrifugeren voor fijne stoffen (synthetische, fijne en
wollen stoffen) die met de hand gewassen werden.
FIJNE WAS (LINGE DELICAT)
Hoofdwas voor fijne was, 30°C of 40°C.
WOL (LAINE)/(HANDWAS) en ZIJDE (SOIE)
Hoofdwas (30°C, 40°C of (KOUD), behalve zijde) voor wol en
wasgoed met het label "handwas" of "Zuivere scheerwol" .
54
20 MIN.
Speciaal, snel programma op ca. 30°C voor sportkleding of om wasgoed
op te frissen.
STRIJKVRIJ (SANS REPASSAGE)
Was op 40°C: voorzichtig draaien en zacht centrifugeren zodat het
wasgoed niet kreukt, wat het strijken vergemakkelijkt. Deze optie is niet
verenigbaar met de optie BEHOEDZAAM/ SENSIBLE.
De stand ECO (ECO-stand) komt overeen met de
ENERGIESPAARPROGRAMMA’s voor normaal vervuild wasgoed,
verlengde wastijd (kan niet worden gecombineerd met KORT). De
wastemperatuur wordt verlaagd en de tijdsduur wordt verlengd.
Stand = koud wassen
O (UIT/ARRET) (ANNULATIE)
Laat toe om de wasmachine opnieuw in te stellen bij een fout.
Page 55

Beschrijving van de machine
Toets START/PAUZE
START/PAUZE
MARCHE/PAUSE
Deze toets heeft twee functies:
a) Start
Zodra u het programma en de eventuele opties
geselecteerd hebt, drukt u op deze toets om het programma te starten.
Het verklikkerlampje boven de toets stopt met knipperen en blijft vast
branden.
Indien een starttijd geselecteerd werd met de overeenkomstige toets,
dan begint het aftellen op het scherm.
b) Pauze
indien u nogmaals op de toets drukt, wordt het lopende programma
onderbroken. Het verklikkerlampje boven de toets begint te knipperen.
Om het programma te laten verdergaan, drukt u nogmaals op deze
toets.
Wanneer het lopende programma onderbroken wordt, kan de deur
geopend worden op voorwaarde dat:
• de wasmachine niet in de verwarmingsfase is
• het waterpeil niet hoog is
Opgelet!
Alvorens een wijziging uit te voeren aan het lopende programma,
moet de wasmachine op PAUZE gezet worden.
Toets STARTTIJDKEUZE (DÉPART DIFFÉRÉ)
Met deze toets kan het begin van het programma met 30 - 60 - 90
minuten tot 2 uur uitgesteld worden, en dan van uur tot uur nogmaals
worden uitgesteld tot maximum 23 uur.
Over hoeveel uren u het programma wenst
STARTTIJDKEUZE
DEPART DIFF.
te laten beginnen, verschijnt gedurende ca.
3 seconden op het scherm. Daarna
verschijnt opnieuw de duur van het eerder
geselecteerde programma.
Deze optie moet worden geselecteerd na het programma
geselecteerd te hebben en alvorens op de toets
START/PAUZE te drukken.
Het aftellen (in uren en minuten) wordt op het scherm
weergegeven.
De starttijd kan op ieder ogenblik gewijzigd worden zolang
u niet op de toets START/PAUZE gedrukt hebt.
LOOPTIJD
TPS.REST.
1400
1000
700
500
55
Page 56

Beschrijving van de machine
Om de starttijd te annuleren, nadat u reeds op de toets START/PAUZE
gedrukt hebt:
• druk op de toets START/PAUZE;
• druk op de toets STARTTIJDKEUZE totdat het symbool «0’» op het
scherm verschijnt;
• druk nogmaals op de toets START/PAUZE.
De starttijd kan niet geselecteerd worden voor de programma's
POMPEN, CENTRIFUGEREN en ZACHT CENTRIFUGEREN.
Opgelet!
Tijdens de hele duur van de uitgestelde starttijd, is de deur geblokkeerd.
Indien u de deur wilt openen, moet u eerst op de toets PAUZE drukken.
Wanneer u de deur sluit moet u nogmaals op de toets START/PAUZE
drukken.
Programmakeuzetoetsen
Naargelang het programma kunnen verschillende functies
gecombineerd worden.
De keuze van de opties gebeurt na selectie van het gewenste
programma en voor men op de toets START/PAUZE drukt.
Wanneer men op deze toetsen drukt, lichten de overeenkomstige
verklikkerlampjes op.
Door nogmaals te drukken, doven de verklikkerlampjes.
Indien u bij de selectie van het wasprogramma een optie kiest die niet
verenigbaar is met dit programma, dan verschijnt de code "Err" op het
scherm en knipperen de verklikkerlampjes van de toetsen gedurende 2
seconden.
56
CENTRIFUGEREN (ESSORAGE)
Druk op deze toets om de door de machine voorgestelde maximale
centrifugeersnelheid te verlagen of om de optie SPOELSTOP. te
kiezen; het overeenkomstige verklikkerlampje licht op. Voor de
programma's KOOKWAS, KATOEN SYNTHETISCH, 40-60 MIX,
CENTRIFUGEREN en ECO, bedraagt de maximumsnelheid 1400 t/min.
Voor de programma's ZACHT CENTRIFUGEREN, FIJNE WAS, WOL, ZIJDE,
20 MIN. en STRIJKVRIJ 1000 t/min.
SPOELSTOP
Wanneer u deze functie kiest wordt het water van de laatste spoelbeurt
niet weggepompt aan het einde van het geselecteerde programma om
te vermijden dat het wasgoed gaat kreuken indien het niet onmiddellijk
uit de trommel gehaald wordt wanneer het toestel stopt.
Page 57

Beschrijving van de machine
Aan het einde van het programma, blijven de faselampjes EINDE/FIN en
DEUR/PORTE (dit laatste in het rood) branden, dooft het lampje van de
toets START/PAUZE, en verschijnt een vaste nul op het scherm. Maar de
deur is geblokkeerd om aan te geven dat het water nog weggepompt
moet worden.
Om deze cyclus te voltooien, kiest u één van de volgende
mogelijkheden:
• selecteer het programma POMPEN
De wasmachine voert het water af zonder te centrifugeren;
• selecteer het programma CENTRIFUGEREN of ZACHT
CENTRIFUGEREN: kies de centrifugeersnelheid door op de toets
CENTRIFUGEREN te drukken en vervolgens op de toets START/PAUZE.
Het water wordt weggepompt en het wasgoed wordt gecentrifugeerd
op de gekozen centrifugeersnelheid.
Opgelet!
Vergeet niet om eerst de programmakiezer op "
draaien, en vervolgens op POMPEN, CENTRIFUGEREN en ZACHT
CENTRIFUGEREN te zetten.
O" UIT (Annulatie) te
VOORWAS
Voorwas op 30°C vóór de was die er automatisch op volgt. De voorwas
eindigt met kort centrifugeren in de programma's KOOKWAS en
KATOEN SYNTHETISCH, en met wegpompen van het water in de
programma's FIJNE WAS. Deze functie, voor zeer vuile was, is niet
verenigbaar met de programma's WOL/ZIJDE en 20 MIN.
SPOELEN+ (RINCAGE +)
Deze functie kan worden geselecteerd voor alle programma's, behalve
voor de programma's WOL, ZIJDE en 20 MIN. De machine voert
twee extra spoelbeurten uit in de programma's KOOKWAS en KATOEN
SYNTHETISCH en 1 extra spoelbeurt in de programma's FIJNE WAS.
Extra spoelbeurten zijn aan te raden voor personen die allergisch zijn
aan wasmiddelen en bij zeer zacht water.
Belangrijk! Door de toetsen SPOELEN+ en CENTRIFUGEREN tegelijk
ingedrukt te houden gedurende 4 seconden, wordt het geluidssignaal
aan het einde van de cyclus uitgeschakeld wanneer men de
programma's selecteert en in geval van een verkeerde selectie van de
opties.
57
Page 58

Beschrijving van de machine
VLEKKEN (TACHES)
Voor de behandeling van zeer vuil of bevlekt wasgoed met vlekkenzout
(langere hoofdwas met geoptimaliseerde aanvoer van het product
tijdens het wassen).
Deze is niet verenigbaar met de programma's WOL, ZIJDE en 20
MIN., met de toets VOORWAS en met wastemperaturen lager dan 40°C.
BEHOEDZAAM (SENSIBLE)
Door deze functie te kiezen, vermindert de intensiteit van de wasbeurt
en voert de machine een extra spoelbeurt uit in de programma's
KOOKWAS en KATOEN SYNTHETISCH. Deze functie is niet verenigbaar
met het programma STRIJKVRIJ.
Omdat het wassen zeer zacht gebeurt, wordt deze functie aanbevolen
voor fijne was of voor frequent wassen.
>>TIJD/>> TEMPS
Door op deze toets te drukken in de programma's KOOKWAS, KATOEN
SYNTHETISCH en FIJNE WAS, wordt de wastijd verkort. Te gebruiken
voor licht vuile was. Deze functie is niet verenigbaar met de
programma's 40-60 MIX en ECO.
58
DISPLAY LOOPTIJD (TPS.REST)
Het scherm geeft de volgende informatie:
• Duur van het gekozen programma (in minuten), automatisch
berekend in functie van de voor elke type wasgoed voorziene
maximumlading.
• Het stoppen van de wasmachine met de kuip vol water, na de
programma's met de optie SPOELSTOP , weergegeven door een
vaste nul.
• Een knipperende nul zodra het programma beëindigd is.
• De gekozen starttijd, aangeduid in uren en minuten, geselecteerd
door middel van de overeenkomstige toets (maximum 23 uur).
De starttijd wordt gedurende 3 seconden op het scherm weergegeven,
waarna opnieuw de duur van het geselecteerde programma
verschijnt.
Zodra u op de toets START/PAUZE gedrukt hebt, begint het aftellen.
De starttijd neemt uur na uur af en wanneer er slechts 2 uur
overblijft, wordt er afgeteld per 30 minuten.
Page 59

Beschrijving van de machine
S
R
E
• Verkeerde selectie van de opties. Indien u bij de selectie van het
wasprogramma een optie kiest die niet verenigbaar is met dit
Err
programma, dan verschijnt de code
gedurende 2 seconden op het
scherm.
• Alarmcode die werkingsonregelmatigheden meldt (zie meer
gedetailleerde informatie op blz. 30).
Indicatie van het programmaverloop
Het verloop van het programma geeft de onderdelen
van het geselecteerde programma aan vóór de start
van het programma. Tijdens het verloop van het
programma, verschijnt de desbetreffende fase van het
programma.
OVERDOSERING (SURDOSAGE)
Indien dit verklikkerlampje oplicht, dan werd er te
veel wasmiddel gebruikt. Giet de correcte dosis
wasmiddel in het bakje volgens het type wasgoed, de
graad van bevuiling en de hardheid van het water.
Indien het lampje aan het einde van het programma oplicht, dan
betekent dit dat het afvoerfilter verstopt is en schoongemaakt moet
worden.
VOORWAS
PRELAVAGE
HOOFDWA
LAVA GE
SPOELEN
RINCAGE
SPOELEN
RINCAGE
CENTRIFUG.
ESSORAGE
EINDE
FIN
OVERDOSE
SURDOSAG
DEUR
PORTE
EINDE (FIN)
Geeft het einde van de wascyclus aan. Het wasgoed mag uit de
wasmachine genomen worden.
Indien dit lampje knippert, dan duidt dit op een afwijking in de werking
van het toestel. Tegelijk verschijnt een alarmcode op het scherm (zie blz.
30 voor meer gedetailleerde informatie):
E10 = er wordt geen water toegevoerd
E20 = het water wordt niet weggepompt
E40 = de deur is niet goed gesloten
Een programma annuleren
Om een lopend programma te annuleren, draait u de programmakiezer op
stand "O" (UIT).
Opgelet! Na een programma dat met de kuip vol water stopt (functie
SPOELSTOP ), kiest u eerst "
O" (UIT), en dan POMPEN.
59
Page 60

Beschrijving van de machine
Een instelling of lopend programma wijzigen
Een optie kan altijd gewijzigd worden voordat ze door het programma
wordt uitgevoerd.
Indien het programma aan de gang is, dient u, alvorens een wijziging uit te
voeren, eerst de wasmachine op PAUZE te zetten, daarna de opties te
veranderen en nogmaals op de toets START/PAUZE te drukken.
Indien u het lopende programma wilt veranderen, dan moet u de
keuzeschakelaar op "O" zetten (UIT) om het programma dat de machine
aan het uitvoeren is te annuleren. Daarna selecteert u het nieuwe
programma en drukt u nogmaals op de toets START/PAUZE om het te
starten. De wasmachine herneemt de cyclus van bij het begin en het water
blijft in de kuip.
De deur openen tijdens een programma
Indien de deur geopend moet worden, moet u de machine eerst stilleggen
door op START/PAUZE te drukken. De deur mag worden geopend op
voorwaarde dat:
• de machine zich niet in de fase van verwarming van het water bevindt.
• het waterpeil niet te hoog is.
Het verklikkerlampje "DEUR" op het bedieningspaneel kan rood of groen
oplichten naargelang het geval en duidt aan of de deur geopend mag
worden:
• Rood licht: de deur mag worden geopend.
• Groen licht: de deur is geblokkeerd.
60
Indien de deur niet geopend kan worden, maar dat wel absoluut nodig is,
dan moet de wasmachine spanningsloos gemaakt worden door de
programmakiezer op stand "O" (UIT) te draaien. Na 3 minuten kan de deur
geopend worden.
Let op het waterpeil en de temperatuur van het water in de
wasmachine!
Page 61

Lade voor was- en nabehandelingsmiddel
*
Doseervakje voor voorwasmiddel of vlekkenzout. Het voorwasmiddel of
vlekkenzout wordt aan het begin van het wasprogramma toegevoegd.
Doseervakje voor poedervormig of vloeibaar hoofdwasmiddel.
Wordt aan het begin van de wascyclus ingespoeld.
Doseervakje voor vloeibare nabehandelingsmiddelen (wasverzachter,
stijfsel...). Wordt in de laatste spoelgang ingespoeld.
Vlekkenzout in poedervorm of in tabletten voor programma met
*
optie VLEKKEN.
Vóór het in gebruik nemen
• Vóór het in gebruik nemen raden wij aan een wasgang te draaien
zonder wasgoed (witte was 95°C), om eventuele fabricagerestanten
in de wastrommel en de kuip te verwijderen.
• Vul de wasmiddellade met een halve maatbeker wasmiddel en start de
machine.
61
Page 62

Voordat u gaat wassen
Wasgoed sorteren en voorbereiden
• Wasgoed volgens soort en wasetiket sorteren (zie “Textielsoorten en
wasetiketten).
• Zakken leegmaken.
• Metalen delen verwijderen (veiligheidsspelden, paperclips enz.).
• Om te voorkomen dat het wasgoed beschadigt en in een kluwen
raakt: is het raadzaam om ritssluitingen te sluiten, slopen en
dekbedovertrekken dicht te knopen en losse stofceintuurs en lange
shortbanden samen te binden.
• Wasgoed dat uit meer lagen bestaat (slaapzakken enz.) binnenste
buiten wassen.
• Gebreid gekleurd textiel, wol en textiel met applicaties binnenste
buiten wassen.
• Kleine en tere stukken wasgoed (bijvoorbeeld babysokjes, panty’s) in
een wasnetje, een kussensloop met ritssluiting of in een grote sok
stoppen.
• Vitrages bijzonder voorzichtig behandelen. Verwijder alle metalen of
kunststof haken uit de vitrages of plaats de vitrages in een net of een
zak. Bij eventuele schade aan de vitrages kunnen wij niet
aansprakelijk worden gesteld.
• Gekleurd en wit wasgoed moeten afzonderlijk worden gewassen: wit
wasgoed wordt anders grauw.
• Nieuw gekleurd wasgoed geeft vaak af. Het is daarom raadzaam
dergelijke stukken de eerste keer apart te wassen.
• Grote en kleine stukken tegelijk wassen. Dit verbetert het
wasresultaat en het wasgoed wordt bij het centrifugeren gunstiger
verdeeld.
• Wasgoed niet in elkaar gevouwen in de machine doen.
• Wasgoed (kledingstukken) afzonderlijk in de machine stoppen.
62
Page 63

Gewicht van het wasgoed
304060
95
Voordat u gaat wassen
Wasgoed sorteren
drooggewichten
1200 gBadjassen
300-600 gWerkoverhemden
700 gDekbedden
500 gLakens
100 gBloezen
200 gHanddoeken
100 gTheedoeken
200 gT-shirts
200 gKussenslopen
200-250 gNachtjapons/pyjama’s
200-300 gTafelkleden
250 gOndergoed
Textielsoorten en wasetiketten
De wasetiketten helpen u bij de keuze van het juiste wasprogramma.
Het wasgoed moet volgens textielsoort en wasetiket worden gesorteerd.
De aangegeven temperaturen in de wasetiketten zijn maximale
temperaturen.
Witte was
Linnen en katoen met dit wasetiket kunnen op hoge temepraturen
worden gewassen.
Witte was
Linnen en katoen met dit wasetiket zijn kleurvast en kunnen worden
gewassen op 60°C.
Kreukherstellend wasgoed
Wasgoed met dit wasetiket hebben gevoelige kleuren, daarom mag dit
wasgoed niet worden gewassen op wastemperaturen boven deze
aangegeven waarden.
Ongeveer
63
Page 64

Voordat u gaat wassen
30
40
30
40
605040
Kreukherstellend
Gemengde en kreukherstellend textiel dat voorzien is van deze
wasetiketten vereist een fijn wasprogramma en moet derhalve worden
gewassen met een speciaal programma.
Fijne was
Microvezels, kreukherstellende was of vitrages die voorzien zijn van dit
wasetiket vereisen een erg voorzichtige behandeling.
Voor deze textielsoort is het programma FIJNE WAS geschikt.
Wol en bijzonder teer wasgoed
Textiel van wol, weefsels gemengd met wol en zijde met dit wasetiket
zijn bijzonder gevoelig voor mechanische belasting.
Voor deze textielsoorten is het programma ZIJDE/WOL(handwas)
geschikt.
Textiel met het wasetiket (niet wassen!) mag niet in de
wasmachine worden gewassen!
De wolwascyclus van deze machine is goedgekeurd door Woolmark,
d.w.z. dat producten van Woolmark in de machine gewassen mogen
worden. Het wasgoed moet echter wel worden gewassen
overeenkomstig de instructies die op het wasetiket staan en de
voorschriften die zijn uitgegeven door de fabrikant van deze
wasmachine. M9605.
64
Page 65

Was- en nabehandelingsmiddelen
Welk was- en nabehandelingsmiddel?
Gebruik alleen was- en nabehandelingsmiddelen die geschikt zijn voor
wasmachines. Let hierbij altijd op de aanwijzingen van de fabrikant.
Hoeveel was- en nabehandelingsmiddel?
De hoeveelheid is afhankelijk:
• van het vulgewicht:
Als de wasmiddelenfabrikant geen doseeraanwijzingen geeft voor
kleine hoeveelheden wasgoed, gebruik dan bij een halve belading 1/3
minder dan de voorgestelde hoeveelheid en 1/2 minder dan normaal bij
zeer kleine hoeveelheden.
• van de mate van vervuiling van het wasgoed:
Bij licht vervuild wasgoed dient u de hoeveelheid wasmiddel te
doseren. Let hierbij op de aanwijzingen van de wasmiddelfabrikant en
op het vulgewicht.
• van de hardheid van het water:
Des te harder het water des te hoger de dosering! Let hierbij op de
doseeraanwijzingen die op het wasmiddel staan.
Vloeibare wasmiddelen
Het vloeibaar wasmiddel kan onmiddellijk voor het starten van het
programma rechtstreeks in het hiervoor bestemde doseervakje van de
wasmiddellade worden gegoten. Ook kan gebruik worden gemaakt van
een wasbol die rechtstreeks in de trommel wordt geplaatst. Doseer het
vloeibare wasmiddel volgens de aanwijzingen van de fabrikant.
Waterontharder gebruiken
Gebruik een waterontharder bij een gemiddelde tot hoge
waterhardheid (vanaf hardheid II). Let hierbij altijd op de aanwijzingen
van de fabrikant. De hoeveelheid wasmiddel kan altijd worden
aangepast aan de mate van hardheidI (= zacht). Informatie over de
hardheid van het water kan worden verkregen bij het plaatslijke
waterleidingsbedrijf.
Informatie over de waterhardheid
Mate van hardheid Franse graden °TH
Duitse graden °dH
0-7I=Zacht
0-15
16-257-14II=Medium
26-3714-21III=Hard
meer dan 37meer dan 21IV=Erg hard
65
Page 66

Wassen
Alvorens een eerste wasbeurt te doen in uw wasmachine, raden wij u aan om
een voorafgaande wasbeurt, zonder wasgoed, te doen om de trommel, de kuip
en de productlade te reinigen.
• Giet een ½ dosis wasmiddel in de verdeler voor de "was".
• Zet het toestel onder spanning door de programmakiezer op het
programma KOOKWAS (op 95°C) te draaien.
• Druk op de toets START/PAUZE
Vulgewichten:
KOOKWAS 8.0 kg
SYNTHETISCH KATOEN 8/4 kg
FIJN WASGOED / STRIJKVRIJ 3.5 kg
WOL 2 kg
ZIJDE 1 kg
Wasgoed in de machine doen
Open de deur.
De stukken wasgoed uit elkaar halen en losjes in de trommel doen.
Wasgoed zo goed mogelijk verdelen (grote en kleine stukken door
elkaar wassen) Sluit de deur.
Was- en nabehandelingsmiddel doseren
Trek de
wasmiddellade zo
ver mogelijk naar
buiten.
Doseer het
wasmiddel in het
vakje voor de
hoofdwas .
Als u de instelling
66
VOORWAS of VLEKKEN kiest, in het vak doseren.
Doseer het nabehandelingsmiddel in
het vak Overschrijd hierbij niet de markering “MAX”.
Opgelet !
Doe geen wasmiddel in het bakje
gebruik hiervoor het speciale product (vlekkenzout) dat in de handel
verkocht wordt. Indien u een ander soort wasmiddel gebruikt, zie de
voor de cyclus VLEKKEN, maar
*
Page 67

paragraaf "Producten" van de wasgids.
Schuif de wasmiddellade weer volledig naar binnen.
Wassen
Wasprogramma instellen
Draai de programmakiezer op de
gewenste stand. De
verklikkerlampjes die
overeenkomen met de fasen van
het programma lichten op.
De duur van het programma in
VOORWAS
PRELAVAGE
HOOFDWAS
LAVAGE
SPOELEN
RINCAGE
SPOELEN
RINCAGE
CENTRIFUG.
ESSORAGE
EINDE
FIN
OVERDOSERING
SURDOSAGE
DEUR
PORTE
AQUA ALARM
ECO
STRIJKVRIJ
SANS REPASSAG
20 MIN.
ZIJDE
SOIE
WOL
LAINE
FIJNE WAS
LINGE DELICAT
E
30
40
30
40
30
minuten verschijnt op het scherm.
SPOELEN
RINCAGE
De gewenste instellingen kiezen
Afhankelijk van de mate van vervuiling
van het wasgoed. Het betreffende lampje
gaat branden.
VOORWAS
PRELAVAGE
VLEKKEN
TACHES
Centrifugetoerental of kiezen
Indien u dat wenst, kan u de centrifugeersnelheid verlagen met de
toets CENTRIFUGEREN; het overeenkomstige verklikkerlampje licht op.
Indien de centrifugeersnelheid niet verlaagd wordt,
voert de machine de laatste centrifugeerbeurt uit op
de volgende snelheden:
- WIT 1400 toeren/min.
- KATOEN SYNTHETISCH 1400 toeren/min.
- STRIJKVRIJ en 20 MIN 1000 toeren/min.
- FIJN WASGOED 1000 toeren/min.
- WOL (HANDWAS) 1000 toeren/min.
UIT
ARRET
95
40
ZACHT CEN
>>TIJD
>>TEMPS
BEHOEDZAAM
SENSIBLE
1400
1000
700
500
KOOK WAS
SYNTHETISCH
60
SYNTHETIQUES
40
30
40 - 60 MIX
FIJNSPOELEN
RINC.DELICA
CENTRIFUGEREN
ESSORAGE
TRIFUGEREN
ESSORAGE DELICAT
STARTTIJDKEUZ
DEPART DIFF.
74900
BLANC
KATOEN
COTONS
POMPEN
VIDANGE
T
67
Page 68

Wassen
STARTTIJDKEUZE instellen
Indien men de start van een programma wenst uit te stellen, dan
volstaat het om op de toets STARTTIJDKEUZE. te drukken alvorens op
de toets START/PAUZE te drukken, totdat
het aantal uren na hetwelk u het
STARTTIJDKEUZE
DEPART DIFF.
programma wilt laten beginnen op het
scherm verschijnt. Het wordt gedurende
ongeveer 3 seconden weergegeven, waarna
de duur van het vooraf geselecteerde
programma verschijnt.
Met een druk op de toets START/PAUZE, verschijnt op het scherm
opnieuw de geselecteerde starttijd en begint de machine af te tellen.
Programma starten
LOOPTIJD
TPS.REST.
1. Controleer of de waterkraan open is.
2. Druk op START/PAUZE om het programma te
START/PAUZE
MARCHE/PAUSE
starten. Het verklikkerlampje bij deze toets stopt met
knipperen en alleen het verklikkerlampje van de
lopende fase blijft branden.
Indien, wanneer u het programma start, het verklikkerlampje EINDE
knippert en op het scherm de code
E40 verschijnt, dan betekent dit dat
de deur niet goed gesloten werd. Sluit ze en druk op de toets
START/PAUZE.
Indien een starttijd gekozen werd, begint het aftellen van de uren
en wordt dit aangeduid op het scherm. Gedurende deze tijdsspanne
is het mogelijk om meer wasgoed in de trommel te steken en de
starttijd te wijzigen of te annuleren.
• Wasgoed toevoegen: druk op START/PAUZE. De deur kan nu worden
geopend. Steek het wasgoed erin, sluit de deur en druk nogmaals op
START/PAUZE.
• De starttijd annuleren: druk op START/PAUZE en druk daarna op
0’
STARTTIJDKEUZE, totdat het symbool «
» op het scherm verschijnt.
Druk nogmaals op START/PAUZE om het programma te starten
68
Page 69

Wassen
Indicatie van het programmaverloop
Het programmaverloop duidt de onderdelen van het
geselecteerde wasprogramma aan voordat het
programma begint. Tijdens het wasprogramma wordt
de desbetreffende fase van het programma aangeduid.
Looptijd
De resterende tijd neemt van minuut tot minuut af
en wordt op het scherm aangeduid.
Einde van het programma
De machine stopt automatisch. Een knipperende nul verschijnt op het
scherm. Het verklikkerlampje EINDE licht op en dat van de toets
START/PAUZE gaat uit.
Indien de optie SPOELSTOP gekozen werd, dan licht het
verklikkerlampje DEUR rood op, de deur is geblokkeerd om aan te
geven dat het water nog moet worden weggepompt. Op het scherm is
een vaste nul te zien.
Om deze cyclus te voltooien, kiest u één van de volgende mogelijkheden:
• enkel leegpompen: draai de programmakiezer op "O" (UIT), en
vervolgens op het programma POMPEN. Druk op de toets START/PAUZE.
• enkel centrifugeren: draai de programmakiezer op "O" (UIT) en
vervolgens op het programma CENTRIFUGEREN of ZACHT
CENTRIFUGEREN (verlaag eventueel de centrifugeersnelheid). Druk op
de toets START/PAUZE.
Wanneer het programma voltooid is, verschijnt een knipperende nul
op het scherm.
Draai de programmakiezer op "O" (UIT) om het toestel spanningsloos
te maken.
Haal het wasgoed uit de machine.
Controleer of de trommel leeg is door hem met de hand te doen
draaien, om te vermijden dat het wasgoed beschadigd raakt bij de
volgende wasbeurt (in geval van gekleurd wasgoed, zou dit kunnen
afgeven op witte weefsels bijvoorbeeld).
Draai de waterkraan dicht.
Laat de deur open om te vermijden dat er schimmel of slechte geuren
ontstaan.
VOORWAS
PRELAVAGE
HOOFDWAS
LAVAGE
SPOELEN
RINCAGE
SPOELEN
RINCAGE
CENTRIFUG.
ESSORAGE
EINDE
FIN
OVERDOSERING
SURDOSAGE
DEUR
PORTE
2.05
69
Page 70

Programmatabel
Wasprogramma’s
Was
programma’s
WITTE
WAS
Energie-
spaar-
programm
KATOEN
SYNTHETIS
CH
40-60
MIX
Temp.
Witte was en linnen,
normaal vervuild voor
95°
ex. werkkleding, lakens,
linnen en doeken.
Katoen en linnen,
bijvoorbeeld weinig of
ECO
a
normaal vuile lakens en
huishoudlinnen.
60°-
Gekleurd wasgoed uit
40°-
katoen of linnen,
30°-
hemden, ondergoed,
wasgoed uit badstof
Synthetische
weefsels, ondergoed,
gekleurde kleding,
40°
strijkvrije hemden,
dameshemden
Textiel
Extra functies
VOORWAS, VLEKKEN,
>>TIJD,
SPOELEN +,
BEHOEDZAAM,
CENTRIFUGEREN/
VOORWAS, VLEKKEN,
>>TIJD, SPOELEN +,
BEHOEDZAAM,
CENTRIFUGEREN/
VOORWAS, VLEKKEN ** ,
>> TIJD, SPOELEN +,
BEHOEDZAAM,
CENTRIFUGEREN/
VOORWAS, VLEKKEN,
SPOELEN+, BEHOEDZAAM,
CENTRIFUGEREN/
Max.
vulgew
icht
8 kg
8 kg
8/4 kg
8 kg
Verbruik*
Energie
kWh
2,9
1,36
1,2 65
1,2
Water
lt.
75
60
65
70
Gemengde synthetische
STRIJKVRIJ
FIJNE WAS 40°-30°
40°-30°
WOL
●
Het referentieprogramma voor de gegevens op het energie-etiket, volgens de norm EEG
(HANDWAS)
92/75 is het programma "ECO".
weefsels,
40°
die niet gestreken
moeten worden
Fijne stoffen,
bijvoorbeeld vitrages
Wol, gemengd met
wol, zijde en textiel
voor de handwas
VOORWAS, VLEKKEN,
SPOELEN +, >>TIJD,
CENTRIFUGEREN/
VOORWAS, VLEKKEN**
SPOELEN +, >>TIJD,
CENTRIFUGEREN/
CENTRIFUGEREN/
2 kg
0,55
63
3.5 kg 0,6 65
2 kg
0,45
65
* Deze informatie wordt ter indicatie gegeven en kan variëren naargelang de hoeveelheid
en het type te wassen wasgoed, de omgevingstemperatuur en de aankomsttemperatuur
ZIJDE
van het water. Ze verwijst naar de hoogste temperatuur die voor elk programma voorzien
is.
40°-30°
Kleding uit zijde.
CENTRIFUGEREN/
1 kg
0,3
75
Page 71

Programmatabel
Extra programma’s
Programma Beschrijving Programmafases Extra functies
Met dit
programma kan
FIJNSPOELEN
LEEGPOMPEN
met de hand
gewassen
wasgoed
gespoeld worden
Het water
wegpompen voor
de programma's
met optie
SPOELSTOP
3 spoelingen met
vloeibaar additief.
Kort centrifugeren
(max. 1000 t/min.
Het water wegpompen
CENTRIFUGEREN
/
Vulge
wicht
8 kg
/
Verbruik*
Energie
kWh
0,04
-
Water
lt.
60
-
REN
O
Apart centrifugeren
voor katoen en
linnen
Apart
centrifugeren
voor synthetische
en fijne weefsels
Licht bevuild
wasgoed
(behalve wol)
Lang centrifugeren
Kort centrifugeren
(max. 1000 t/min.
Wassen op 30°C
2 spoelbeurten
Kort centrifugeren
Annulatie van het
lopende programma
CENTRIFUGEREN
CENTRIFUGEREN
CENTRIFUGEREN
8/4 kg
5 kg
-
-
3.5 kg 0,35 52
- - -
-
-
CENTRIFUGE
ZACHT
CENTRIFU-
GEREN
20 MIN.
EINDE
* De verbruiksgegevens die in deze abel worden weergegeven dienen
slechts als richtlijn en kunnen afhankelijk van de hoeveelheid en het soort
wasgoed, de watertemperatuur en de omgevingstemperatuur variëren.
71
Page 72

Reiniging en onderhoud
In het dagelijks gebruik
Na beëindiging van het wasprogramma dient u de wasmiddellade een
klein stukje naar buiten te trekken, zodat hij kan drogen.
Laat de deur open staan om de lucht te laten circuleren.
Als u de machine langere tijd niet gebruikt:
Waterkraan dichtdraaien en de spanning van het apparaat halen.
Regelmatig schoonmaken
Extern
Maak de buitenkant van de behuizing schoon met een beetje zeep en
wat water. Spoel het apparaat af met schoon water en droog het
apparaat.
Belangrijk: gebruik geen gemethyleerde spiritus, oplosmiddelen of
gelijksoortige producten om de behuizing schoon te maken.
Manchet (rubberen deurring)
Controleer regelmatig of zich aanslag of
vreemde voorwerpen in de rubberen manchet
achter de deur bevinden en verwijder deze.
72
Wasmiddellade
Na verloop van tijd blijven er restanten van was- en
nabehandelingsmiddelen achter in de lade.
Maak de wasmidellade van tijd tot tijd
schoon, door de lade onder stromend water
te houden. Als u de lade uit de machine wilt
halen, dient u linksachter in de hoek de
vergrendelingsknop in te drukken.
Om het schoonmaken gemakkelijker te
maken kan het bovenste deel van het vakje
worden verwijderd.
Page 73

Reiniging en onderhoud
Er kunnen ook restanten van was- en
nabehandelingsmiddelen achterblijven in de
lade: Maak de lade schoon met een oude
tandenborstel.
Schuif de lade weer in de machine, nadat u
deze heeft schoongemaakt.
De pomp reinigen
De pomp moet regelmatig worden nagezien, maar vooral indien
• de wasmachine het water niet wegpompt en/of niet centrifugeert
• de wasmachine een ongewoon geluid voortbrengt tijdens het
wegpompen omdat de pomp geblokkeerd is door voorwerpen zoals
veiligheidsspelden, muntstukken, nietjes, enz.
Ga als volgt tewerk
Trek de stekker van het toestel
uit.
Wacht indien nodig tot het water
afkoelt.
Open het luik van de pomp.
Zet een kom in de nabijheid van
de pomp om eventueel water op
te vangen.
Maak de kleine afvoerslang los,
plaats hem in de kom en
verwijder de stop.
Wanneer er geen water meer
uitloopt, schroeft u het deksel
van de pomp eraf. Houd altijd een
vod binnen handbereik om water
dat uit de pomp loopt wanneer
het deksel verwijderd wordt op te
kuisen.
73
Page 74

Reiniging en onderhoud
Verwijder de eventuele
voorwerpen die de pomp
blokkeren door deze te doen
draaien zoals aangeduid.
Plaats de stop terug op de kleine
afvoerslang en zet hem terug op
zijn plaats.
Schroef het deksel van de pomp
terug vast.
Sluit het luik.
Waterinloopzeef
Als u merkt dat de machine er langer over doet om te vullen, dient u te
controleren of het filter in de watertoevoerslang verstopt is.
74
Draai de waterkraan dicht.
Ontkoppel de slang van de kraan. Om dit te
kunnen uitvoeren moet u eerst de gele knop op
de slang indrukken.
Maak het filter schoon met een harde borstel.
Bevestig de slang weer aan de kraan.
Noodlediging
Indien de machine het water niet wegpompt (pomp geblokkeerd, filter
verstopt of afvoerleiding verstopt), voer dan de onderstaande
handelingen uit om het water uit de machine af te voeren:
Trek de stekker van het toestel uit.
Draai de waterkraan dicht.
Wacht indien nodig tot het water afgekoeld is.
Page 75

Reiniging en onderhoud
Zet een kom op de vloer, maak de kleine afvoerslang los, zet het
uiteinde ervan in de kom en verwijder de stop. Door de zwaartekracht
stroomt het water in de kom. Wanneer de kom vol is, zet u de stop op
de kleine slang en giet u het water weg. Herhaal dit tot er geen water
meer uit de machine loopt.
Reinig de pomp, indien nodig, zoals hoger beschreven.
Zet de kleine afvoerslang terug op zijn plaats na hem te hebben
afgedicht.
Schroef het deksel van de pomp vast en sluit het luik.
Kans op vorst
Indien uw toestel blootgesteld wordt aan een temperatuur lager dan
0°C, neem dan volgende voorzorgsmaatregelen:
Draai de waterkraan dicht en schroef de toevoerleiding van de kraan
los.
Plaats het uiteinde van de kleine afvoerslang en van de toevoerleiding
in een kom op de vloer en laat het water eruit lopen.
Draai de watertoevoerleiding terug op de kraan en zet de kleine
afvoerslang terug op zijn plaats na hem te hebben afgedicht.
Zo wordt het water dat in de leidingen is achtergebleven, afgevoerd en
wordt bovendien de vorming van vorst, en dus beschadiging van het
toestel, vermeden.
Om uw toestel opnieuw te doen werken, moet u ervoor zorgen dat het
geïnstalleerd wordt op een plaats waar de temperatuur hoger is dan
0°C.
75
Page 76

Wat te doen als...?
Als tijdens een centrifugegang de machine een
ongebruikelijk fluitgeluid maakt, dat afwijkt van het
geluid van een oudere wasmachine, komt dit door het
nieuwe type motor.
Als er geen water zichtbaar is in de trommel,
komt dat door het moderne wassysteem van de
machine. De moderne wasmachines verbruiken
namelijk veel minder water dan oudere
wasmachines.
Problemen oplossen
Als zich een probleem voordoet, kunt u aan de hand van de
onderstaande aanwijzingen proberen de storing zelf op te lossen.
Als u voor één van de hier vermelde storingen of vanwege een
bedieningsfout de service-afdeling heeft ingeschakeld, wordt dit
bezoek ook tijdens de garantieperiode niet door onze
garantiebepalingen gedekt.
Tijdens de werking kunnen op het scherm volgende alarmcodes
verschijnen en kan het toestel geluidssignalen voortbrengen.
Tezelfdertijd beginnen het verklikkerlampje EINDE en één van de
volgende verklikkerlampjes te knipperen:
E10: probleem bij het vullen
E20: probleem bij het ledigen
E40: deur open
EF0:het AQUA ALARM systeem (waterblokkeersysteem) werd ingeschakeld
Als de storing is opgelost dient u de toets START/PAUZE in te drukken
en het programma opnieuw te starten. Als na het uitvoeren van alle
controles het probleem zich blijft voordoen, neem dan contact op met
de service-afdeling van AEG/ELECTROLUX bij u in de buurt.
76
Storing
De wasmachine werkt niet
Mogelijke oorzaak
De hoofdzekering is doorgebrand. Vervang de zekering.
De deur is niet goed gesloten (E40). Sluit de deur; u moet klik horen.
De stekker zit niet in het stopcontact Stekker in het stopcontact steken.
stopcontact.
De toets START/PAUZE is niet Toets indrukken.
ingedrukt.
De optie STARTTIJDKEUZE werd geselecteerd Tijd op het display controleren.
Oplossing
Page 77

Wat te doen als...?
Storing
Er wordt geen water toegevoerd.
De machine neemt water op, maar
dit water stroomt er onmiddellijk
weer uit.
De machine pompt het water niet
weg en/of centrifugeert niet.
Mogelijke oorzaak
De waterkraan is dicht. (E10)
De watertoevoerslang is
samengedrukt of geknikt. (E10)
De zeef van toevoerslang is
verstopt. (E10)
De deur is niet goed gesloten.
(E40)
Het uiteinde van de afvoerslang
ligt niet hoog genoeg.
De afvoerslang is samengedrukt
of geknikt. (E20)
Afvoerpomp of afvoerslang zijn
verstopt. (E20)
SPOELSTOP gekozen stoppen
met water in de trommel).
Wasgoed niet gelijkmatig in de
trommel verdeeld.
Oplossing
Waterkraan opendraaien.
Slang controleren en knik
verwijderen.
Zeef schoonmaken.
Deur sluiten: u moet een klik
horen.
Slang op de correcte hoogte
plaatsen (zie paragraaf
installatie).
Slang controleren en knik
verwijderen.
Pomp schoonmaken of slang
controleren.
Water wegpompen door het
kiezen van het programma
POMPEN, CENTRIFUGEREN of
ZACHTCENTRIFUGEREN.
Wasgoed beter verdelen
Onder de wasmachine komt water
te voorschijn.
Te veel wasmiddel gebruikt.
Er zijn lekken aan één van de
uiteinden van de
watertoevoerleiding.
Het ledigingsfilter werd niet goed
aangespannen na de reiniging.
De stop van de kleine afvoerslang
werd niet teruggeplaatst na het
reinigen van de pomp
Hoeveelheid wasmiddel
afstemmen op de aanwijzingen
van de wasmiddelfabrikant.
Controleer of beide uiteinden van
de leiding goed vastgeschroefd
zijn
Schroef het filter helemaal vast
Dicht de kleine afvoerslang terug
af en zet hem terug op zijn plaats.
77
Page 78

Wat te doen als...?
Storing Mogelijke oorzaak
De machine trilt of maakt veel
geluid.
De deur kan niet worden
geopend.
Het centrifugeren begint traag of
de machine centrifugeert helemaal
niet.
De transportbeveiliging is niet
geheel verwijderd.
De in hoogte verstelbare voeten
zijn niet goed ingesteld.
Er zit erg weinig wasgoed in de
trommel.
Het programma draait nog en de
trommel is in beweging.
Het waterniveau in de machine
bevindt zich boven het onderste
gedeelte van de deur.
De machine is het water aan het
opwarmen.
Het elektronische stabilisatiecontrolesysteem, dat overmatige
trillingen tijdens het centrifugeren
voorkomt, is in werking getreden.
Oplossing
Controleren of de machine is
uitgepakt zoals beschreven in de
paragraaf installatie.
Voeten correct afstellen en de
machine waterpas zetten.
Dit heeft geen invloed op de
werking van de machine.
Wacht tot het programma is
beëindigd voordat u de deur
opent.
Water wegpompen, voordat de
deur kan worden geopend.
Wacht tot de opwarmfase is
beëindigd.
Als het wasgoed aan het begin
van de centrifugegang niet goed
verdeeld is in de trommel,
detecteert de machine dit en
probeert hij het wasgoed beter te
verdelen door de trommel een
paar keer te laten draaien. Alleen
als het wasgoed beter is verdeeld
wordt het centrifugeproces
afgewerkt. Is dit niet het geval
wordt er gecentrifugeerd op een
lager toerental. Als na ongeveer
16 minuten het wasgoed nog
steeds voor een onbalans zorgt,
voert de machine het
centrifugeprogramma niet uit. Als
het wasgoed nog nat is aan het
eind van de cyclus, is het
raadzaam het wasgoed met de
hand in de trommel te verdelen
en het programma centrifugeren
te kiezen.
78
De foutcode EF0 verschijnt
op het scherm.
De beveiliging tegen
overstromingen werd ingeschakeld
Trek de stekker van het toestel uit,
draai de watertoevoerkraan dicht
en neem contact op met de
technische dienst.
Page 79

Wat te doen als...?
Als het wasresultaat niet bevredigend is
Als het wasgoed grauw is en zich in de trommel kalkaanslag bevindt
• U hebt niet genoeg wasmiddel gebruikt.
• U hebt niet het juiste wasmiddel gebruikt.
• U hebt hardnekkige vervuilingen niet voorbehandeld.
• U hebt niet het juiste programma of de juiste temperatuur gekozen.
Als op het wasgoed nog grijze vlekken zitten
• U hebt wasgoed waarin vlekken van smeersels, smeer of olie zitten
met te weinig wasmiddel gewassen.
• U hebt een te lage temperatuur gekozen voor het wasprogramma.
• Er is een wasverzachter (vooral in geconcentreerde vorm) direct op
het wasgoed terechtgekomen. Was dergelijke vlekken er zo snel
mogelijk uit en ben voorzichtig in het gebruik met wasverzachters.
Als na de laatste spoelgang nog schuim zichtbaar is
• Moderne wasmiddelen kunnen ook in het laatste spoelwater nog
schuim veroorzaken. Het wasgoed is dan echter voldoende gespoeld.
Als op het wasgoed witte resten zitten
• Dit is het gevolg van onoplosbare bestandsdelen van moderne
wasmiddelen. Ze zijn dus niet het gevolg van een onvoldoende
spoeleffect. Wasgoed uitborstelen of uitschudden. In de toekomst
eventueel het wasgoed binnenste buiten wassen. Controleer de
kwaliteit van het wasmiddel. Eventueel vloeibare wasmiddelen
gebruiken.
79
Page 80

Technische gegevens
Hoogte x breedte x diepte 82x60x63 cm
In hoogte verstelbaar ca. 13 mm
Vulgewicht (afhankelijk van het programma) 8 kg
Toepassingsgebied huishoudelijk
Trommeltoerental wassen max. 55 tpm
Trommeltoerental centrifugeren 1400/1000/700/500 tpm
Waterdruk 0,05-0,8 MPa
Dit apparaat voldoet aan de volgende EG-richtlijnen:
- 73/23/EG van 19.2.1973 “Laagspanningsrichtlijn”, inclusief richtlijn
93 / 68 / EG
- 89/336/EG van 3.5.1989 “EMC-richtlijn”.
Service
In de paragraaf “Wat te doen als...?” zijn sommige storingen opgesomd
die uzelf kunt oplossen. Lees deze paragraaf door in het geval van een
storing. Als u het probleem (storing) niet kunt oplossen, neem dan
contact op met het servicecentrum.
Leg uw probleem zo duidelijk mogelijk uit om het oplossen van uw
probleem te vergemakkelijken: de servicemonteur bepaalt dan of het
noodzakelijk is een monteur te sturen.
Schrijf het serienummer (Ser. nr.) en het productnummer op (Prod. nr.)
die op het plaatje staan.
Ser. nr. . . . . . . . . . . . . . . . . . . . . . . . .
Prod. nr. . . . . . . . . . . . . . . . . . . . . . . .
80
Mod. L74900 Type P6968538
Prod.No. 91 4526301 00
220-230V~50Hz 2200 W 10 A
Ser.No.
geprüfte
Sicherheit
IPX4
Page 81

Technische gegevens
Probeer bovendien zo nauwkeurig mogelijk:
- De symptomen van de storing aan te geven
- Wanneer de storing optreedt
- Welke foutcode er wordt weergegeven
Wanneer moet er voor een servicebezoek tijdens de
garantieperiode worden betaald?
- als u het probleem zelf had kunen oplossen met hulp van de tabel
Problemen oplossen (zie paragraaf “Wat te doen als...?”)
- als de monteur diverse keren op bezoek is geweest omdat hij niet
alle relevante informatie heeft gekregen die hij nodig had, hij moest
bijvoorbeeld weer terugrijden om reserveonderdelen te halen.
Herhaalde bezoeken kunnen voorkomen worden als u uw gesprek
naar het servicecentrum voorbereidt zoals hierboven is beschreven.
Voor België: U kan onderdelen, toebehoren en verbruiksprodukten online
bestellen op adres http://www.aeg.be
81
Page 82

Instructies met betrekking tot de installatie
en de elektrische
Veiligheidsinstructies voor de installateur
• Het appararaat is zwaar. Hiermee dient rekening gehouden te worden
tijdens het verplaatsen.
• Controleer bij het uitpakken van het apparaat of het apparaat niet is
beschadigd. Als u hierover twijfelt, gebruik het apparaat dan niet, en
neem contact op met de winkelier.
• Al het interne verpakkingsmateriaal moet worden verwijderd, voordat
u het apparaat in gebruik kunt nemen. Er kan ernstige schade aan de
machine ontstaan of aan de meubels in de buurt als de
transportbeveiligingen niet volledig zijn verwijderd. Zie de relevante
paragraaf.
• Alle elektrische werkzaamheden die vereist zijn om dit apparaat te
installeren, moeten worden uitgevoerd door een gekwalificeerde
elektricien.
• Alle loodgieterswerkzaamheden die vereist zijn om dit apparaat te
installeren, moeten worden uitgevoerd door een gekwalificeerde
loodgieter.
• Nadat de machine is geïnstalleerd, dient u te controleren dat de
machine niet op de voedingskabel is geplaatst.
• Als het apparaat op vloerbedekking is geplaatst, dient u er voor te
zorgen dat de lucht vrij kan circuleren tussen de verstelbare voetjes
en de vloer.
• De installatie moet voldoen aan de plaatselijke bouwverordeningen.
• Moet de voedingskabel van het apparaat worden vervangen, moet dit
worden uitgevoerd door ons servicecentrum.
82
Page 83

Installatie
Uitpakken
Vóór het eerste gebruik moet u de beschermingsvoorzieningen die voor
het transport aangebracht werden, verwijderen. Volg de onderstaande
aanwijzingen. Bewaar deze beschermingsvoorzieningen: ze zullen
opnieuw gebruikt moeten worden bij
toekomstige verplaatsingen van het toestel
(bijvoorbeeld bij verhuis).
Na de beschermingen te hebben verwijderd
laat u het toestel voorzichtig op de
achterkant steunen om het blok polystyreen
te verwijderen dat de sokkel van de
verpakking vormt.
Zet het toestel terug recht en verwijder de
bevestiging van
de voedingskabel
en van de
afvoerleiding aan
hun steun aan de
achterzijde van
het toestel.
HEC0008
A
Met de
HEC0001
meegeleverde
sleutel schroeft u
de middelste
schroef A
achteraan boven
los en verwijdert
u ze. Verwijder de
overeenkomstige
HEC0003S
C
B
plastic pen
zorgvuldig.
Schroef de twee grote schroeven B achteraan
en de zes kleine schroeven C, onderaan, los en
verwijder ze.
Verwijder de transportrail D en schroef de zes
kleine schroeven C terug vast
HEC0002S
C
D
B
HEC0011S
C
C
HEC0014
83
Page 84

Installatie
P0002
Open de deur en
verwijder het blok
polystyreen dat
met kleefband aan
de deurdichting
bevestigd is.
Stop de centrale
HEC0010
HEC0005
opening en de
twee openingen (onderaan) dicht met de
plastieken afdekkingen die zich in de
enveloppe met de gebruiksaanwijzing
bevinden.
Sluit de toevoerleiding aan volgens de
aanwijzingen in de paragraaf
"Wateraansluiting".
Een onbeschermd toestel vervoeren kan de
inwendige onderdelen schade toebrengen en lekken en storingen veroorzaken,
en kan ook aanleiding geven tot vervormingen door schokken.
Plaatsing
Zet de machine op een vlake harde vloer neer.
Zorg er voor dat de luchtcirculatie rondom de machine niet belemmerd
wordt door vloerkleden, tapijten enz.
• Voordat u de machine op kleine tegels
neerzet dient u een rubberen mat onder
de machine te leggen.
• Probeer oneffenheden in de vloer nooit te
compenseren d.m.v. hout, karton of iets
dergelijks onder de machine te leggen.
• Als het niet mogelijk is om te voorkomen
dat de machine naast een gasfornuis of
een andere warmtebron wordt geplaatst, moet er een isolerende plaat
(85x57 cm) worden geplaatst tussen de twee apparaten, waarbij aan
de kant van de warmtebron (fornuis, kachel) een aluminiumfolie is
aangebracht.
• Plaats de machine niet in ruimtes waar de temperatuur onder de 0°C
kan zaken.
• De toevoer- en afvoerslang mogen niet geknikt of platgedrukt
worden.
• Zorg er voor dat als het apparaat wordt geïnstalleerd, dat deze
84
gemakkelijk toegankelijk is voor de monteur in geval van een storing.
Page 85

Horizontaal afstellen
Stel de machine voorzichtig horizontaal af met behulp van de
verstelbare voetjes. Plaats nooit geen karton, hout of iets dergelijks
onder de machine om oneffenheden in de vloer te compenseren.
Wateraansluiting
De toevoerleiding, die samen met het
toestel geleverd wordt, bevindt zich in de
trommel.
Gebruik hiervoor nooit een gebruikte
leiding.
Open de deur en neem de toevoerleiding
eruit.
Sluit het gebogen koppelstuk van de leiding
aan op de machine.
Richt de toevoerleiding niet naar beneden. Laat de leiding naar links
of rechts buigen naargelang de plaats van de watertoevoerkraan.
Plaats de leiding op de juiste wijze door de klemring los te schroeven.
Na het plaatsen van de toevoerleiding schroeft u de klemring opnieuw
goed vast om lekken te vermijden.
Schroef het koppelstuk van de toevoerleiding op de getapte uitloop van
de waterkraan. Gebruik altijd de leiding die met het toestel geleverd
werd.
HEC0006
Installatie
Waterblokkeersysteem
De toevoerleiding is voorzien van een bescherming tegen waterschade.
Indien de binnenleiding beschadigd zou
raken door natuurlijke slijtage, dan zal deze
voorziening de watertoevoer naar het
toestel blokkeren.
Het defect wordt gemeld door een rode
zone in het kleine venster "A". In dit geval
moet u de waterkraan dichtdraaien en
contact opnemen met de technische dienst.
Gebruik geen verlengstuk voor de
toevoerleiding. Indien ze te kort is en u de kraan niet wilt verplaatsen,
moet u een nieuwe, langere leiding kopen die speciaal daarvoor
geschikt is.
83
Page 86

Installatie
Waterafvoer
Het uiteinde van de afvoerslang kan op drie manieren worden
aangesloten:
Over de rand van een wasbak met hulp van een kunststof
slangenhouder die samen bij de machine
is geleverd. In dit geval dient u er voor te
zorgen dat de houder waarin de slang over
de rand van de wasbak is bevestigd niet kan
losschieten, als de machine aan het pompen
is.
Om het wegglijden van de slang te
voorkomen kunt u hem het beste met een
stuk touw vastmaken aan de waterkraan of
aan een haak in de muur bevestigen.
Op een afvoerpijp van de wasbak. De hoogte van de afvoerpijp moet
zich minstens 60 cm boven de grond bevinden.
Rechtstreeks op een afvoerpijp op een hoogte van minimaal 60 cm
en maximaal
90 cm.
Het uiteinde van
de afvoerslang
moet altijd zijn
belucht, d.w.z. de
binnendiameter
van de afvoerpijp moet groter zijn dan de buitendiameter van de
afvoerslang.
In de afvoerslang mag geen knik zitten.
84
Belangrijk:
De afvoerleiding mag in geen geval verlengd worden.
Het niet naleven van deze regels zou tot een abnormale werking van uw
toestel kunnen leiden.
Page 87

Elektrische aansluiting
Deze machine is ontwikkeld om te kunnen werken op 220-230 V, enkele
fase, 50 Hz.
Controleer of de zekering bij u deze maximale vereiste belasting (2,2
KW) aankan. Houd hierbij ook rekening met andere apparaten die u in
gebruik heeft.
Sluit de machine aan op een stopcontact met randaarde.
De fabrikant accepteert geen enkele verantwoordelijkheid voor
schade of verwondingen die veroorzaakt zijn door het niet naleven
van de hierboven genoemde veiligheidsvoorzorgsmaatregelen.
Het vervangen van de voedingskabel mag enkel door de technische
dienst worden uitgevoerd.
Vaste aansluiting
In het geval van een vaste aansluiting is het noodzakelijk dat u een
dubbelpolige schakelaar installeert tussen het apparaat en de
stroomtoevoer (stopcontact). Hierbij moet u een minimale opening van
3 mm aanhouden tussen de schakelcontacten en een type gebruiken
dat geschikt is voor de vereiste belasting en aan de huidige elektrische
voorschriften voldoet.
De schakelaar mag op geen enkele plaats de gele en groene aarddraad
onderbreken.
Deze handeling mag alleen worden uitgevoerd door een
gekwalificeerde elektricien.
Belangrijk!
Als het apparaat is geïnstalleerd moet de voedingskabel gemakkelijk
toegankelijk zijn.
85
Page 88

AEG/Electrolux Hausgeräte GmbH
Postfach 1036
D-90327 Nürnberg
http://www.aeg.hausgeraete.be/fr
© Copyright by AEG/ELECTROLUX
132976190-01-38206 Subject to change without notice
Wijzigingen voorbehouden
From the Electrolux Group. The world’s No. 1 choice.
The Electrolux Group is the world's largest producer of powered appliances for kitchen, cleaning and
outdoor use. More than 55 million Electrolux Group products (such as refrigerators, cookers, washing
machines, vacuum cleaners, chain saws and lawn mowers) are sold each year to a value of
approx. USD 14 billion in more than 150 countries around the world.
 Loading...