

Page 1

L61470WDBI
User Manual 2
EN
Manual de instrucciones 37
ES
Page 2

www.aeg.com
2
CONTENTS
1. SAFETY INFORMATION...........................................................................................3
2. SAFETY INSTRUCTIONS.......................................................................................... 5
3. PRODUCT DESCRIPTION........................................................................................ 7
4. CONTROL PANEL.....................................................................................................8
5. PROGRAMMES ...................................................................................................... 10
6. CONSUMPTION VALUES.......................................................................................12
7. OPTIONS................................................................................................................. 13
8. SETTINGS................................................................................................................ 14
9. BEFORE FIRST USE.................................................................................................14
10. DAILY USE............................................................................................................. 14
11. DAILY USE - DRYING............................................................................................17
12. DAILY USE - WASHING & DRYING.....................................................................18
13. HINTS AND TIPS...................................................................................................19
14. CARE AND CLEANING........................................................................................ 21
15. TROUBLESHOOTING...........................................................................................24
16. INSTALLATION..................................................................................................... 27
17. TECHNICAL DATA............................................................................................... 35
FOR PERFECT RESULTS
Thank you for choosing this AEG product. We have created it to give you
impeccable performance for many years, with innovative technologies that help
make life simpler features you might not find on ordinary appliances. Please
spend a few minutes reading to get the very best from it.
Visit our website for:
Get usage advice, brochures, trouble shooter, service information:
www.aeg.com
Register your product for better service:
www.registeraeg.com
Buy Accessories, Consumables and Original spare parts for your appliance:
www.aeg.com/shop
CUSTOMER CARE AND SERVICE
Always use original spare parts.
When contacting our Authorised Service Centre, ensure that you have the
following data available: Model, PNC, Serial Number.
The information can be found on the rating plate.
Warning / Caution-Safety information
General information and tips
Environmental information
Subject to change without notice.
Page 3

1. SAFETY INFORMATION
Before the installation and use of the appliance,
carefully read the supplied instructions. The
manufacturer is not responsible if an incorrect
installation and use causes injuries and damages. Always
keep the instructions with the appliance for future
reference.
1.1 Children and vulnerable people safety
WARNING!
Risk of suffocation, injury or permanent
disability.
• This appliance can be used by children aged from 8
years and above and persons with reduced physical,
sensory or mental capabilities or lack of experience
and knowledge if they have been given supervision or
instruction concerning use of the appliance in a safe
way and understand the hazards involved.
• Do not let children play with the appliance.
• Children of less than 3 years should be kept away
unless continuously supervised.
• Keep all packaging away from children.
• Keep all detergents away from children.
• Keep children and pets away from the appliance door
when it is open.
• If the appliance has a child safety device, we
recommend you activate it.
• Cleaning and user maintenance shall not be made by
children without supervision.
ENGLISH
3
General Safety
1.2
• Do not change the specification of this appliance.
• The appliance can be installed as freestanding or
below the kitchen counter with correct space.
• Do not install the appliance behind a lockable door, a
sliding door or a door with a hinge on the opposite
Page 4

4
www.aeg.com
side, where the appliance door can not be fully
opened.
• Connect the mains plug to the mains socket only at
the end of the installation. Make sure that there is
access to the mains plug after the installation.
• The ventilation openings in the base (if applicable)
must not be obstructed by a carpet.
• Ensure you have good ventilation in the installation
room to avoid the back flow of gases into the room
from appliances burning other fuels, including open
fires.
• Exhaust air must not be discharged into a flue which is
used for exhausting fumes from appliances burning
gas or other fuels (if applicable).
• The operating water pressure (minimum and
maximum) must be between 0,5 bar (0,05 MPa) and 8
bar (0,8 MPa).
• Obey the maximum load volume of 7 kg (refer to the
“Programme chart” chapter).
• The appliance is to be connected to the water mains
using the new supplied hose-sets. Old hose sets must
not be reused.
• If the supply cord is damaged, it must be replaced by
the manufacturer, its Authorised Service Centre or
similarly qualified persons in order to avoid a hazard.
• Wipe away lint that has accumulated around the
appliance.
• Items that have been soiled with substances such as
cooking oil, acetone, alcohol, petrol, kerosene, spot
removers, turpentine, waxes and wax removers should
be washed in hot water with an extra amount of
detergent before being dried in the wash dryer.
• Do not use the appliance if industrial chemicals have
been used for cleaning.
• Do not dry unwashed items in the wash dryer.
• Items such as foam rubber (latex foam), shower caps,
waterproof textiles, rubber backed articles and clothes
Page 5

ENGLISH
or pillows fitted with foam rubber pads should not be
dried in the wash dryer.
• Fabric softeners, or similar products, should be used
as specified by the fabric softener instructions.
• Remove all objects from pockets such as lighters and
matches.
• Never stop the wash dryer before the end of the
drying cycle unless all items are quickly removed and
spread out so that the heat is dissipated.
• The final part of a wash dryer cycle occurs without
heat (cool down cycle) to ensure that the items are left
at a temperature that ensures that the items will not
be damaged.
• Do not use water spray and steam to clean the
appliance.
• Clean the appliance with a moist soft cloth. Only use
neutral detergents. Do not use abrasive products,
abrasive cleaning pads, solvents or metal objects.
• Before maintenance, deactivate the appliance and
disconnect the mains plug from the mains socket.
5
2.
SAFETY INSTRUCTIONS
2.1 Installation
• Remove all the packaging and the
transit bolts.
• Keep the transit bolts. When you
move the appliance again you must
block the drum.
• Always be careful when you move the
appliance because it is heavy. Always
wear safety gloves.
• Do not install or use a damaged
appliance.
• Obey the installation instruction
supplied with the appliance.
• Do not install or use the appliance
where the temperature is less than 0
°C or where it is exposed to the
weather.
• Make sure that the floor where you
install the appliance is flat, stable,
heat resistant and clean.
• Do not install the appliance where the
appliance door can not be fully
opened.
• Always move the appliance vertically.
• The rear surface of the appliance
must be put against the wall.
• Make sure that there is air circulation
between the appliance and the floor.
• Adjust the feet to have the necessary
space between the appliance and the
carpet.
• When the appliance is put in its
permanent position, check if it is fully
level with the aid of a spirit level. If it
is not, adjust the feet until it is.
2.2 Electrical Connection
WARNING!
Risk of fire and electrical
shock.
• The appliance must be earthed.
Page 6

6
www.aeg.com
• Always use a correctly installed
shockproof socket.
• Do not use multi-plug adapters and
extension cables.
• Do not pull the mains cable to
disconnect the appliance. Always pull
the mains plug.
• Do not touch the mains cable or the
mains plug with wet hands.
• Only for UK and Ireland: The
appliance has a 13 amp mains plug. If
it is necessary to change the fuse in
the mains plug, use a 13 amp ASTA
(BS 1362) fuse.
• This appliance complies with the
E.E.C. Directives.
2.3 Water Connection
• Make sure not to cause damage to
the water hoses.
• Before you connect the appliance to
new pipes or pipes not used for a
long time, let the water flow until it is
clean.
• The first time you use the appliance,
make sure that there is no leakage.
2.4 Use
WARNING!
Risk of injury, electrical
shock, fire, burns or damage
to the appliance.
• Use this appliance in a household
only.
• Do not change the specification of
this appliance.
• Do not put flammable products or
items that are wet with flammable
products in, near or on the appliance.
• Do not touch the glass of the door
while a programme operates. The
glass can be hot.
• Do not dry the damaged items which
contain padding or fillings.
• If you have washed your laundry with
a stain remover start an extra rinse
cycle before you start the dryer.
• Make sure that you remove all metal
objects from the laundry.
• Only dry fabrics which are applicable
to dry in the tumble dryer. Follow the
instructions on the fabric label.
• Plastic items are not heat resistant.
– If you use a detergent ball,
remove it before you set the
drying programme.
– Do not use a detergent ball when
you set a non-stop programme.
WARNING!
Risk of injury or damage to
the appliance.
• Do not sit or stand on the open door.
• Do not dry dripping wet clothes in the
appliance.
2.5 Disposal
• Disconnect the appliance from the
mains supply.
• Cut off the mains cable and discard it.
• Remove the door catch to prevent
children and pets to get closed in the
appliance.
Page 7

3. PRODUCT DESCRIPTION
7 8 9
10
1 2
3
4
5
6
1 2
34
3.1 Appliance overview
ENGLISH
7
Detergent dispenser
1
Control panel
2
Door handle
3
Rating plate
4
Drain pump filter
5
Feet for the appliance level
6
3.2 Accessories
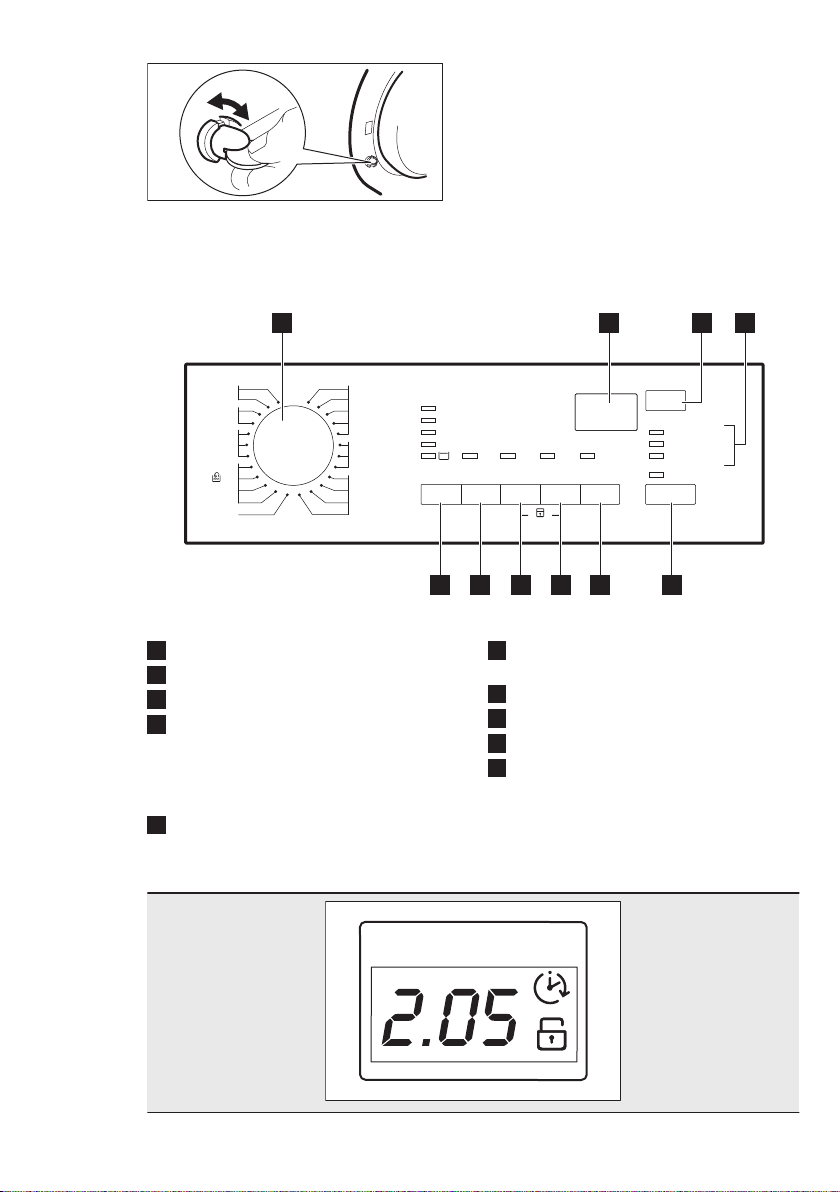
3.3 How to activate the child
safety device
This device prevents children or pets to
be closed in the drum.
Turn the device clockwise, until the
groove is horizontal.
Water drain hose
7
Mains cable
8
Water inlet hose
9
Feet for the appliance level
10
1 Spanner
To remove the transit bolts.
2 Plastic caps
To close the holes on the rear side of the
cabinet after the removal of the transit
bolts.
3 Anti-flood inlet hose
To prevent possible leakage
4 Plastic hose guide
To connect the drain hose on the edge of
a sink.
You cannot close the door.
Page 8
1400
1200
800
400
Off
Centrif.
Manchas
Aclarado
Extra
Tiempo
de secado
Ahorra
Tiempo
Inicio Diferido
Start/Pausa
Lavado
Puerta bloqueada
Secado
40
30
30
Frio
Aclarado
delicados
Centrifugado
Sintéticos
Algodón
Refrescar
Algodón Eco
Descarga
Plancha
Fácil
40
Delicados
Lana/
Seda
Secado
95
60
60
50
40
30
40
40
30
Sintéticos
+ Prelavado
95
60
40 Eco
Algodón
1 2 3 4
5678910
www.aeg.com8
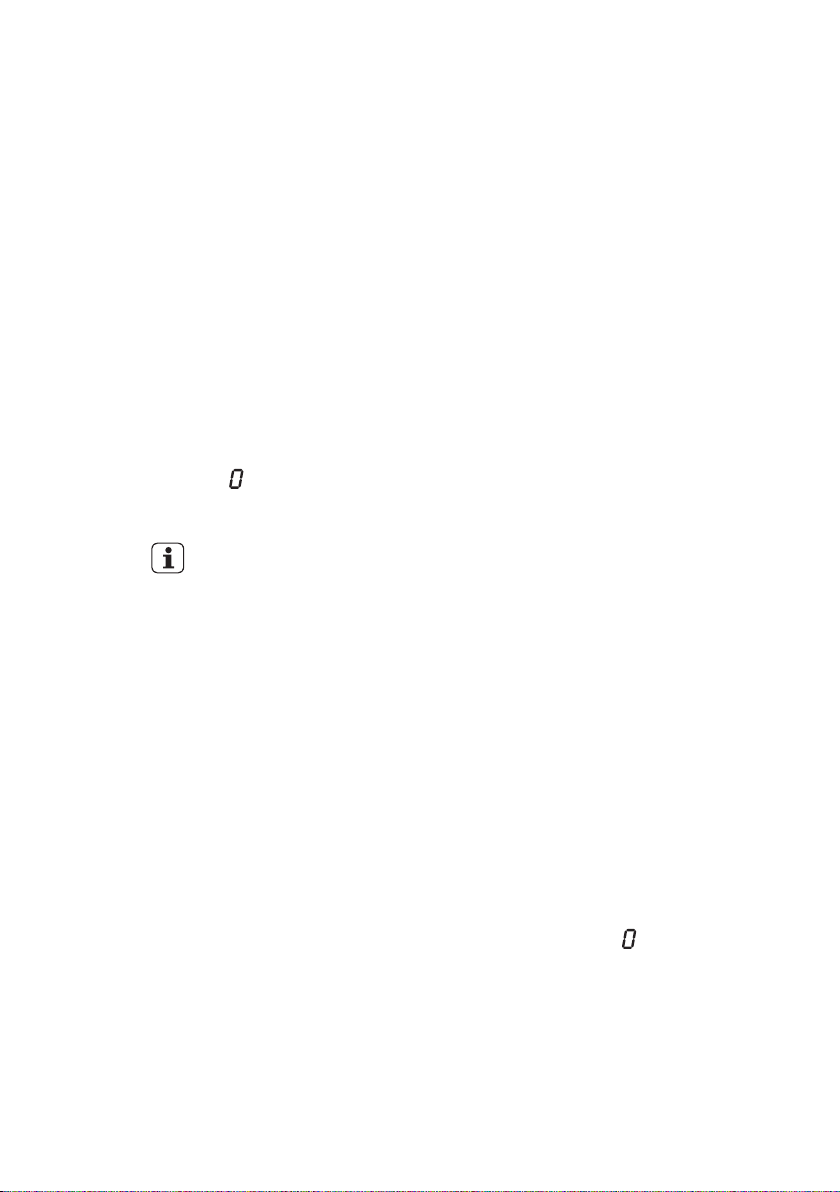
4. CONTROL PANEL
4.1 Control panel description
To close the door, turn the device
anticlockwise until the groove is vertical.
Programme knob
1
Display
2
Delay start button (Inicio Diferido)
3
Phase indicators:
4
• A - Washing phase (Lavado)
• B - Drying phase (Secado)
• C - Door locked (Puerta
bloqueada)
Start/Pause button (Start/Pausa)
5
4.2 Display
Drying time button (Tiempo de
6
secado)
Extra rinse button (Aclarado Extra )
7
Time saving button (Ahorra Tiempo)
8
Stain button (Manchas)
9
Spin button (Centrif.)
10
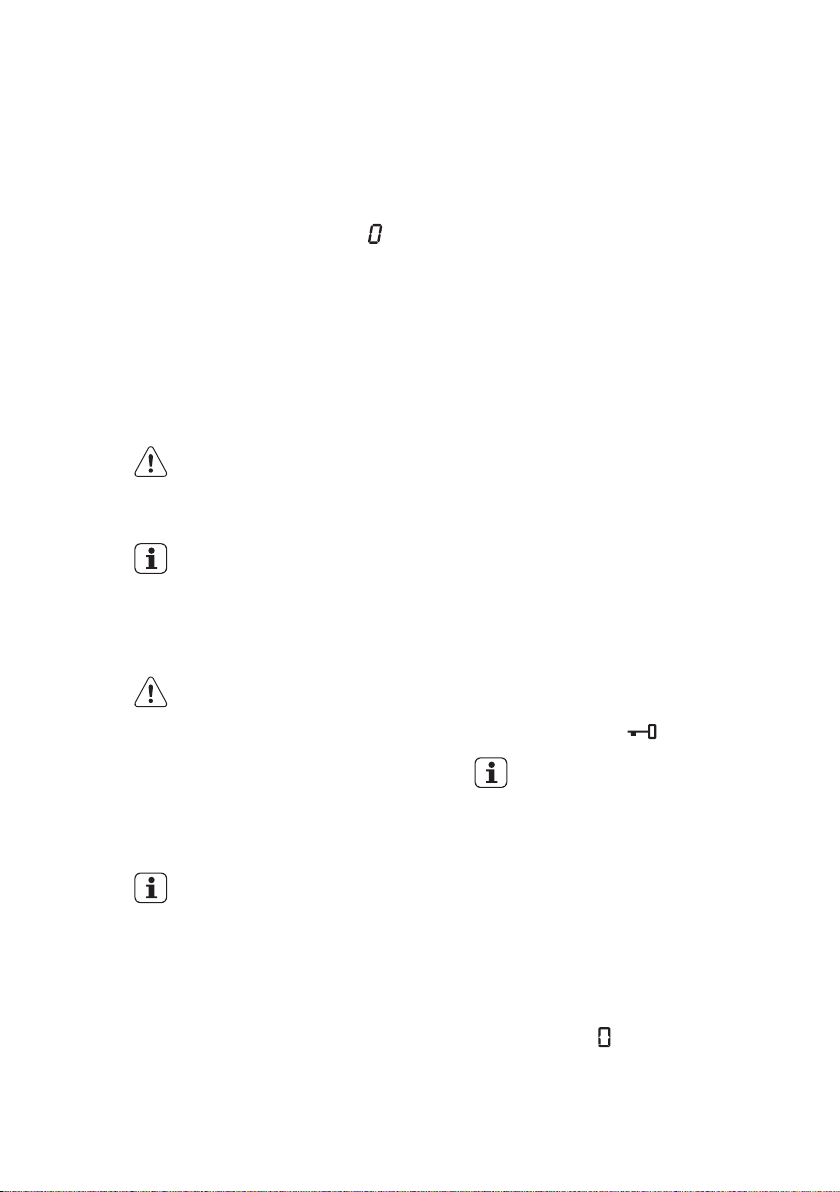
Page 9

The display shows the following information:
Duration of the set programme
When you set a programme, the display shows the duration in hours and
minutes (for example 2.05).
The duration is calculated automatically on the maximum load for each
type of fabric.
After the programme has started, the time remaining is updated every minute.
Set drying time
When you set a drying programme, the display shows the drying time in
minutes and/or hours (see paragraph «Programmes for timed drying »).
After the programme has started, the appliance updates the remaining
time every minute.
Alarm codes
In the event of operating problems, some alarm codes can be displayed,
for example (see chapter «Troubleshooting»).
End of programme
When the programme has finished, the display shows a blinking zero .
The Puerta bloqueada light C, the Lavado light A (or the Puerta bloqueada
light B) and the light of button Start/Pausa go out.
The door can be opened.
Incorrect option selection
If you set an option which is not compatible with the wash programme, the
display shows the message Err for some seconds.
The yellow pilot light of button Start/Pausa light starts blinking.
Delay Start
When you press the relevant button to set the delay (20 hours max), it appears for some seconds, then the display shows the duration of the set
programme.
The delay time value decreases by one unit every hour. When only 1 hour
remains, the time decreases every minute.
Delay Start symbol
This symbol comes on when you set the delay time.
Child safety lock
This symbol comes on when you activate the child lock function.
ENGLISH
9
Page 10

A
B
C
www.aeg.com10
4.3 Phase indicators
5. PROGRAMMES
5.1 Programme Chart
After you have pressed the button Start/
Pausa, the Lavado indicator comes on.
The appliance is operating.
When you set a drying programme, the
Secado indicator illuminates and stays on
during the drying phase.
The Puerta bloqueada indicator indicates
when the door can be opened:
• light on: the door cannot be opened.
• light blinking: the door is opening in some
minutes.
• light off: the door can be opened.
Programme
Temperature
range
Washing programmes
Algodón
95°C - 30°C
Algodón Eco
40°C
Algodón + Prelavado
95°C - 40°C
Sintéticos
60°C - 30°C
Plancha Fácil
40°C
Delicados
40°C - 30°C
Lana/Seda
30°C - Cold
Aclarado delicados
Descarga 7 kg To drain the water in the drum. All fabrics.
Maximum load
Maximum spin
speed
7 kg
1400 rpm
7 kg
1400 rpm
7 kg
1400 rpm
3.5 kg
1200 rpm
1 kg
800 rpm
3.5 kg
1200 rpm
2 kg
1200 rpm
7 kg
1200 rpm
Programme description
(Type of load and soil level)
White cotton and coloured cotton. Normal soil
and light soil.
Colour-fast cotton. Light soil. The energy consumption decreases and the time of the washing
programme is extended.
White cotton and coloured cotton. Heavy soil and
normal soil.
Synthetic items or mixed fabric items. Normal
soil.
Synthetic items to be gentle washed. Normal and
light soil.
1)
Delicate fabrics as acrylics, viscose, polyester
items. Normal soil.
Machine washable wool, hand washable wool
and delicate fabrics with «hand washing» care sym-
2)
bol.
To rinse and spin the laundry. All fabrics.
Page 11

ENGLISH
11
Programme
Temperature
range
Centrifugado 7 kg
Maximum load
Maximum spin
speed
1400 rpm
Programme description
(Type of load and soil level)
To spin the laundry and to drain the water in the
drum. All fabrics.
Secado sintéticos 2 kg Drying programme for synthetic items.
Secado algodón 4 kg Drying programme for cotton items.
Refrescar 3 kg
1200 rpm
7 kg
Algodón Eco
60°C
1)
To reduce the creases of the laundry, this cycle regulates the water temperature and performs a soft
wash and spin phase. The appliance adds some rinses.
2)
During this cycle the drum rotates slowly to ensure a gentle washing. It can seem that the drum
doesn't rotate or doesn't rotate properly. Consider this as a normal functioning of the appliance.
3)
Cottons energy saving programme. This programme at a 60ºC with a load of 7 is the reference programme for data entered in the energy label, in compliance with EEC 92/75 standards. Set this programme to have a good washing results and decrease the energy consumption. The time of the washing
programme is extended.
3)
1400 rpm
A very short cycle for cottons and synthetics items
with light soil level or worn only once.
White cotton and colour-fast cotton. Normal soil.
The energy consumption decreases and the time of
the washing programme is extended.
Programme options compatibility
Programme
Cen-
trif.
Man-
chas
1)
Ahorra
Tiempo
2)
Aclarado
Extra
Inicio Di-
ferido
Algodón ■ ■ ■ ■ ■ ■
Algodón Eco
■ ■ ■
3)
■
■ ■
Algodón + Prelavado ■ ■ ■ ■ ■ ■
Sintéticos ■ ■ ■ ■ ■ ■
Plancha Fácil ■ ■ ■ ■
Delicados ■ ■ ■ ■ ■ ■
Lana/Seda
■ ■ ■
Aclarado delicados ■ ■ ■ ■
Descarga
Centrifugado ■ ■
Refrescar ■ ■
Page 12

www.aeg.com12
Programme
Cen-
trif.
Algodón Eco
1)
The Stain option is not available with a temperature lower then 40°C.
2)
If you set a shorter duration, we recommend that you decrease the quantity of the load. It is possible
to load fully the appliance, however the washing results are reduced.
3)
With these programmes you can set only the shorter duration.
■ ■ ■
Man-
chas
1)
Ahorra
Tiempo
■
3)
Aclarado
2)
Extra
■ ■
Inicio Di-
ferido
5.2 Programmes for timed drying
Dryness Level Type of fabric Load
(kg)
Extra Dry
For towelling materials
Cupboard Dry
1)
For items to put away
Cupboard Dry
For items to put away
Cottons and Linen
(bathrobes, bath towels, etc)
Cottons and Linen
(bathrobes, bath towels, etc)
Synthetics and mixed fabrics
(jumpers, blouses, underwear, household linen)
Iron Dry
Suitable for ironing
Cottons and Linen
(sheets, tablecloths, shirts,
etc)
1)
In compliance with EC directive EN 50229, the cotton reference programme for the data entered in
the Energy Label must be tested dividing the maximum washing load by two equal parts and drying with
DRYING TIME each of them .
Spin
speed
(rpm)
Suggested
duration
(mins)
4 1400 160 - 180
3 1400 110 - 120
1.5 1400 75 - 85
4 1400 150 - 170
3 1400 100 - 110
1.5 1400 65 - 75
2 1200 90 - 100
1 1200 55 - 65
4 1400 120 - 140
3 1400 80 - 90
1.5 1400 50 - 60
6. CONSUMPTION VALUES
The data of this table are approximate. Different causes can change the
data: the quantity and type of laundry, the water and ambient temperature.
Page 13

ENGLISH
13
Programmes Load
Cottons 60 °C 7 1.35 67 150
Cotton Energy Saving Programme 60 °C
Cottons 40 °C 7 0.85 67 140
Synthetics 40 °C 3.5 0.55 42 90
Delicates 40 °C 3.5 0.55 63 65
Wool/Handwash 30 °C 2 0.25 55 60
1)
«Cotton Energy Saving programme » at 60°C with a load of 7 kg is the reference programme for the
data entered in the energy label, in compliance with EEC 92/75 standards.
7. OPTIONS
7.1 Centrifugado
With this option you can decrease the
default spin speed.
The indicator of the set speed comes on.
Additional spin options:
Rinse Hold
• Set this option to prevent the laundry
creases.
• The relevant indicator comes on.
• The washing programme stops with
the water in the drum. The drum turns
regularly to prevent the laundry
creases.
• The door stays locked. You must drain
the water to unlock the door.
7.2 Manchas
Set this option to add the stain phase to
a programme.
Use this option for laundry with hard
stains to remove.
When you set this option, put the stain
remover into compartment
(kg)
1)
To drain the water refer to
‘At the end of the
programme’.
.
Energy
consumption (kWh)
7 1.05 49 180
Water consumption (litre)
Approximate programme duration
(minutes)
This option increases the
programme duration. This
option is not available with a
temperature lower than 40
°C.
7.3 Ahorra Tiempo
With this option you can decrease the
programme duration.
• Press this button one time to set
'Shortened duration' for items with
daily soil.
• Press this button two times to set
'Extra Quick' for items with almost no
soil.
Some programmes accept
only one of the two options.
7.4 Aclarado Extra
With this option you can add some rinses
to a washing programme.
Use this option for persons allergic to
detergents and in areas where the water
is soft.
The related indicator comes on.
Page 14

14
www.aeg.com
7.5 Inicio Diferido
With this option you can delay the start
of a programme from 30 minutes to 20
hours.
8. SETTINGS
8.1 Acoustic signals
The acoustic signals operate when:
• You activate the appliance.
• You deactivate the appliance.
• You press the buttons.
• The programme is completed.
• The appliance has a malfunction.
To deactivate/activate the acoustic
signals, press Manchas and Ahorra
Tiempo at the same time for 6 seconds.
If you deactivate the
acoustic signals, they
continue operate when the
appliance has a malfunction.
9. BEFORE FIRST USE
1. Put a small quantity of detergent in
the compartment for washing phase.
2. Set and start a programme for cotton
at the highest temperature without
laundry.
The display shows the related indicator
and delay time.
8.2 Child Lock
With this option you can prevent that the
children play with the control panel.
• To activate/deactivate this option,
press Ahorra Tiempo and Aclarado
Extra at the same time until the
indicator
You can activate this option:
• After you press Start/Pausa : the
options and the programme knob are
locked.
• Before you press Start/Pausa : the
appliance cannot start.
This removes all possible dirt from the
drum and the tub.
comes on/goes off.
10. DAILY USE
10.1 Loading the laundry
1. Open the appliance door
2. Put the laundry in the drum, one item
at a time.
3. Shake the items before you put them
in the appliance.
Make sure not to put too much laundry
in the drum.
4. Close the door.
CAUTION!
Make sure that no laundry stays between
the seal and the door. There is a risk of
water leakage or damage to the laundry.
Page 15

MAX
ENGLISH
15
10.2 Filling the detergent and
additives
Compartment for prewash phase,
soak programme or stain remover.
Compartment for washing phase.
Compartment for liquid additives
(fabric conditioner, starch).
Maximum level for quantity of liquid
additives.
Flap for powder or liquid detergent.
Always obey the instructions
that you find on the
packaging of the detergent
products.
If you turn the programme
dial to another programme
when the appliance is
working, the yellow pilot
light of button Start/Pausa
blinks 3 times. The display
shows the message Err to
indicate a wrong selection.
The appliance does not
perform the new set
programme.
10.4 Starting the programme
Press button Start/Pausa to start the
programme. The corresponding red
indicator stops blinking.
The indicator Lavado is on to indicate
that the appliance starts operating.
The indicator Secado is on to indicate
the door is locked.
If you have chosen a delayed start with
button Inicio Diferido, the appliance will
begin the countdown.
If you set an incorrect option, the yellow
indicator of button Start/Pausa blinks for
3 times. The display shows the message
Err for some seconds.
10.3 Setting a programme
Turn the programme selector dial to the
required programme.
The programme dial determines the type
of washing cycle (e.g. water level, drum
movement, number of rinses) and the
washing temperature according to the
type of laundry.
The pilot light of button Start/Pausa
starts blinking.
The programme dial can be turned
either clockwise or anticlockwise.
Off = Reset programme/switching OFF
of the appliance
10.5 Starting a programme with the delay start
Set this option after you have set the
programme and before you press button
Start/Pausa.Before you start the
programme, if you wish to delay the
programme start, press button Inicio
Diferido repeatedly, to set the desired
delay.
The symbol
The wash programme can be delayed
from 30 min. - 60 min. - 90 min., 2 hours
and then by 1 hour up to a maximum of
20 hours.
The set delay time value appears on the
display for about 3 seconds, then the
duration of the programme appears
again.
You can modify or cancel the delay time
at any moment, before you press button
Start/Pausa.
appears on the display.
Page 16
16
www.aeg.com
The door will be locked throughout the
delay time. If you wish to add laundry in
the appliance during the delay time,
press the button Start/Pausa to set the
appliance to pause. When the indicator
Puerta bloqueada goes off , the door can
be opened. Add the laundry, close the
door and press button Start/Pausa again.
Setting the delayed start.
• Set the programme and the required
options.
• Set the delay start.
• Press button Start/Pausa: the
appliance starts its hourly countdown.
The programme starts after the
selected delay has expired.
Cancelling the delayed start
• Press button Start/Pausa to set the
appliance to PAUSE;
• Press button Inicio Diferido until the
symbol ’ is displayed;
• Press button Start/Pausa again to start
the programme.
The set delay can be
changed only after you have
set the washing programme
again.
The Delay Start cannot be set with Drain
programme.
10.6 Altering an option or a running programme
It is possible to change some options
before the programme carries it out.
Before you make any change, you must
press button Start/Pausa to pause the
appliance.
Changing a running programme is
possible only by resetting it.
Turn the programme dial to Off and then
to the new programme position.
Press Start/Pausa button again to start
the new programme. The washing water
in the tub will not emptied out.
10.7 Interrupting a programme
Press button Start/Pausa to interrupt a
programme which is running, the
corresponding indicator starts blinking.
Press button Start/Pausa again to restart
the programme.
10.8 Cancelling a programme
Turn the selector dial to Off to cancel a
programme which is running. Now you
can select a new programme.
10.9 Opening the door
When the appliance is working and
through the delay time, the door is
locked.
If, for any reason, it is necessary to open
it, firstly press button Start/Pausa to set
the machine to pause
If the indicator Puerta bloqueada after a
few minutes goes off, the door can be
opened.
If the indicator Puerta bloqueada stays
on and the door remains locked, this
means that the appliance is already
heating or that the water level is too
high. In this case the door cannot be
opened.
If you cannot open the door but you
need to open it, turn the programme dial
to Off to switch the appliance off. After a
few minutes the door can be opened
(pay attention to the water level and
temperature !) .
After closing the door, it is necessary to
set the programme and the options
again. Press button Start/Pausa to start
the programme again.
10.10 At the end of the programme
The appliance stops automatically. The
indicator of button Start/Pausa, the
indicators Lavado and Puerta bloqueada
go off. A blinking will appear on the
display.
If you have set a programme or an
option that ends with water in the tub,
the indicator Puerta bloqueada remains
on. The door is locked. The water must
be emptied out before opening the
door. During this time the drum
continues to turn at regular intervals until
water drain.
Page 17
ENGLISH
17
Follow the below instructions to empty
out the water:
• Turn the programme selector dial to
Off.
• Set the DRAIN or SPIN programme.
• Reduce the spin speed, if needed.
• Press button Start/Pausa.
• When the programme has finished
the display shows a blinking . The
indicator Puerta bloqueada goes off.
The door can be opened.
Turn the programme selector dial to Off
to switch the appliance off.
Remove the laundry from the drum and
carefully check that the drum is empty. If
11. DAILY USE - DRYING
WARNING!
Refer to Safety chapters.
11.1 Drying setting
The recommended load size
is 3 kg for cottons and linen,
and 2 kg for synthetic items.
You can also to dry up to 4
kg of cotton items (see the
«Drying Programme » table).
WARNING!
Open the water tap. Put
the drain hose in the sink
or connect to the drain
pipe.
1.
Load the laundry one item at a time.
2. Turn the programme dial to the
programme applicable for the items
to dry (cottons or synthetics).
To have a good drying
performance do not exceed
the maximum drying loads
recommended in the user
manual. Do not set a spin
speed lower than the
automatic speed of the set
programme.
11.2 Timed drying
1. Press the button Tiempo de secado
again and again to set the time value
you do not intend to carry out another
wash, close the water tap. Leave the
door open to prevent the formation of
mildew and unpleasant smells.
10.11 Stand by
Once the programme has finished, after
few minutes the energy saving system
will be enable. The brightness of the
display is reduced. By pressing any
button the appliance comes out from the
energy saving status.
(see the «Programmes for timed
drying» table).
• Each time you press this button
the time value increases by 5
minutes.
• As the appliance calculates also
the duration of the anti-crease
and the cooling phases, the
programme time will
automatically increase by some
minutes.
2. Press Start/Pausa button to start the
programme.
• The display shows regularly a new
time value.
• The indicator is on.
If you set only 10 minutes of
drying, the appliance
performs only a cooling
phase.
If the laundry is not sufficient dry, set
again a short drying time.
11.3 End of the drying programme
The appliance stops automatically.
• The acoustic signals operate (if they
are active).
• In the display comes on.
• The indicator of the Start/Pausa
button goes off.
Page 18

18
www.aeg.com
• The last minutes of the drying cycle
the appliance performs a cooling and
anti-crease phase. The door is still
locked. The display show a flashing .
When the door locked indicator
goes off, you can open the door.
1. Turn the programme knob to Off
position to deactivate the appliance.
After some minutes from the end of the
programme, the energy saving function
automatically deactivates the appliance.
2. Remove the laundry from the
appliance.
Make sure that the drum is empty.
3. Keep the door ajar, to prevent
mildew and odours.
4. Close the water tap.
12. DAILY USE - WASHING & DRYING
WARNING!
Refer to Safety chapters.
12.1 Non-Stop programme (Automatic washing & drying)
For NON-STOP programme the
recommended load size is 3 kg for
cotton and 2 kg for synthetic.
CAUTION!
Do not use a dosing
device/ball when carrying
out a washing and drying
programme.
1. Load the laundry one item at a time.
2. Put the detergent and the additives
in the appropriate compartment.
3. Turn the programme knob to the
required programme to switch the
machine on.
4. Set the available options.
To have a good drying
performance do not exceed
the maximum drying loads
recommended in the user
manual. Do not set a spin
speed lower than the
automatic speed of the set
programme.
12.2 Washing & Timed Drying
To have a good drying the appliance
does not let you set a too low spin speed
for the items to be washed and dried.
1. Press the button Tiempo de secado
to set the drying time value.
After some seconds the display shows
the final time value, that is the total
duration of the washing and drying
cycles (washing + drying + anti-crease +
cooling phases).
2. Press Start/Pausa button to start the
programme.
The indicator comes on. The door is
locked. The display shows regularly a
new time value.
12.3 End of the programme
The appliance stops automatically. The
acoustic signals operate (if they are
active).
For more information see 'At the end of
the drying programme " of the previous
chapter.
1. Turn the selector dial to the position
Off to switch the machine off.
2. Remove the laundry from the
appliance. Make sure that the drum
is empty.
3. Keep the door ajar, to prevent
mildew and odours.
4. Close the water tap.
12.4 Fluff in the fabrics
During the washing and/or drying phase,
some types of fabric, (sponge, sweatshirt)
could release fluff.
If you set only 10 minutes of
drying after washing, the
appliance calculates also the
duration of the anti-crease
and the cooling phases.
Page 19

ENGLISH
19
The released fluff could stick to the
fabrics during the next cycle.
This inconvenient increases with
technical fabrics.
To prevent the fluff in your laundry, we
recommend that you:
• To do not wash dark fabrics after you
washed and dried light coloured
13. HINTS AND TIPS
WARNING!
Refer to Safety chapters.
13.1 The laundry load
• Divide the laundry in: white, coloured,
synthetics, delicates and wool.
• Obey the washing instructions that
are on the laundry care labels.
• Do not wash together white and
coloured items.
• Some coloured items can discolour
with the first wash. We recommend
that you wash them separately for the
first times.
• Button up pillowcases, close zippers,
hooks and poppers. Tie up belts.
• Empty the pockets and unfold the
items.
• Turn inside out multilayered fabrics,
wool and items with painted
illustrations.
• Remove hard stains.
• Wash with a special detergent heavy
soil stains.
• Be careful with the curtains. Remove
the hooks or put the curtains in a
washing bag or pillowcase.
• Do not wash in the appliance laundry
without hems or with cuts. Use a
washing bag to wash small and/or
delicate items (e.g. underwired bras,
belts, tights, etc. ).
• A very small load can cause balance
problems with the spin phase. If this
occurs, adjust manually the items in
the tub and start the spin phase
again.
13.2 Stubborn stains
For some stains, water and detergent is
not sufficient.
fabrics (new sponge, sweatshirt ) and
the contrary.
• To dry this type of fabrics at open air
when they are washed the first time.
• To clean the drain filter.
• After the drying phase, clean the
empty drum, the gasket and the door
with a wet cloth.
We recommend that you remove these
stains before you put the items in the
appliance.
Special stain removers are available. Use
the special stain remover that is
applicable to the type of stain and fabric.
13.3 Detergents and additives
• Only use detergents and additives
specially made for washing machines:
– powder detergents for all types of
fabric,
– powder detergents for delicate
fabrics (40 °C max) and woollens,
– liquid detergents, preferably for
low temperature wash
programmes (60 °C max) for all
types of fabric, or special for
woollens only.
• Do not mix different types of
detergents.
• To help the environment, do not use
more than the correct quantity of
detergent.
• Obey the instructions that you find on
the on packaging of these products.
• Use the correct products for the type
and colour of the fabric, the
programme temperature and the
level of soil.
• If your appliance has not the
detergent dispenser with the flap
device, add the liquid detergents with
a dosing ball (supplied by the
detergent's manufacturer).
13.4 Ecological hints
• Set a programme without the
prewash phase to wash laundry with
normal soil.
Page 20
20
www.aeg.com
• Always start a washing programme
with the maximum load of laundry.
• If necessary, use a stain remover when
you set a programme with a low
temperature.
• To use the correct quantity of the
detergent, check the water hardness
of your domestic system
13.5 Water hardness
If the water hardness in your area is high
or moderate, we recommend that you
use a water softener for washing
machines. In areas where the water
hardness is soft it is not necessary to use
a water softener.
To know the water hardness in your area,
contact your local water authority.
Use the correct quantity of the water
softener. Obey the instructions that you
find on the packaging of the product.
13.6 Drying hints
Prepare the drying cycle
• Open the water tap.
• Do a check if the connection of the
drain hose is correct. Refer to
installation chapter for more
information.
• For the maximum laundry load of the
drying programmes, refer to the
drying programmes table.
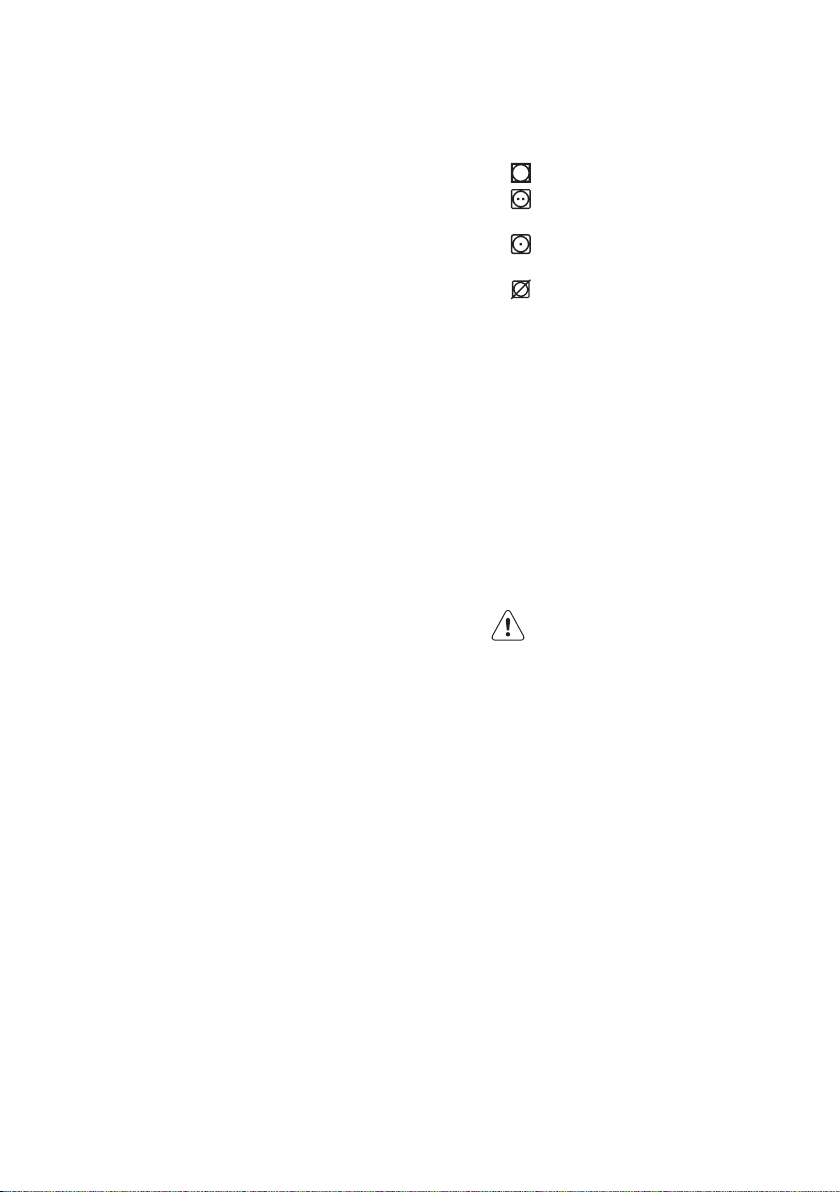
13.8 Garment labels
When you dry the laundry, obey the
indications on the labels of the
manufacturers:
= The item can be tumble dried
•
• = The drying cycle is at high
temperature
• = The drying cycle is at reduced
temperature
= The item can not be tumble
•
dried.
13.9 Drying cycle duration
The drying time can change depending
on:
• speed of the last spin
• dryness level
• type of laundry
• weight of the load size
13.10 Additional drying
If, at the end of the drying programme,
the laundry is still damp, set a short
drying cycle again.
WARNING!
To avoid creases of fabrics
or shrinks of the clothing
do not over dry the
laundry.
13.7 Items to do not dry
Do no not set a drying programme for
this laundry:
• Very delicate items.
• Synthetic curtains.
• Pieces of clothing with metal inserts.
• Nylon stockings.
• Quilts.
• Bed covers.
• Duvets.
• Anoraks.
• Sleeping bags
• Fabrics with residue of hair sprays, nail
solvents or similar.
• Garments with foam-rubber or
materials similar to foam-rubber.
13.11 General Tips
Refer to the «Drying programmes» table
to find the average drying times.
The experience will help you to dry the
laundry in a more correct way. Take note
of the duration drying time of the cycles
done before.
To avoid the static charge at the end of
the drying cycle:
1. Use fabric conditioner in the washing
cycle.
2. Use special fabric conditioner for
tumble dryers.
When the drying programme is
completed remove the laundry in a short
time.
Page 21

14. CARE AND CLEANING
MAX
1
2
MAX
ENGLISH
21
WARNING!
Refer to Safety chapters.
14.1 External cleaning
Clean the appliance only with soap and
warm water. Fully dry all the surfaces.
CAUTION!
Do not use alcohol, solvents
or chemical products.
14.3 Maintenance wash
With the low temperature programmes it
is possible that some detergent stays in
the drum. Make regularly a maintenance
wash. To do this:
• Remove the laundry from the drum.
• Set the cotton programme with the
highest temperature with a small
quantity of detergent.
14.4 Door seal
14.2 Descaling
If the water hardness in your area is high
or moderate, we recommend that you
use a water softener for washing
machines.
Regularly examine the drum to prevent
limescale and rust particles.
To remove rust particles use only special
products for washing machine. Do this
separately from the laundry wash.
Always obey the instructions
that you find on the
packaging of the product.
Regularly examine the seal and remove
all objects from the inner part.
14.5 Cleaning the detergent dispenser
1.
2.
Page 22

MAX
A B
www.aeg.com22
3. 4.
14.6 Cleaning the drain filter
The pump should be inspected regularly and particularly if:
• The appliance does not empty and/or spin.
• The appliance makes an unusual noise during draining due to objects such as safety
pins, coins etc. blocking the pump.
• A problem with water draining is detected (see chapter “Troubleshooting” for more
details).
WARNING!
Before unscrewing the pump cover, switch the appliance off and remove
the mains plug from the socket.
To clean the drain filter:
WARNING!
When the appliance is in use and depending on the programme selected
there can be hot water in the filter. Never remove the filter cover during a
wash cycle, always wait until the appliance has finished the cycle, and is
empty. When refitting the filter cover, ensure it is securely re-tightened so
as to stop leaks and young children being able to remove it.
1. Unplug the appliance.
2. If it is necessary, wait until the water has cooled down.
3. Place a container close to the pump to
collect any spillage.
A = Cover filter.
B = Emergency emptying hose.
Page 23

1
2
1
2
ENGLISH
4. Release the emergency emptying hose,
place it in the container and remove its cap
cover.
5. When no more water comes out, unscrew
the filter cover by turning it anti-clockwise
and remove the filter. Use pliers, if necessary.
Always keep a rag nearby to dry up any water
spillages when removing the cover. Clean the
filter under a tap, to remove any traces of
fluff.
6. Remove foreign bodies and fluff from the
filter seat and from the filter impeller.
23
7. Check carefully whether the pump impeller
rotates (it rotates jerkily). If it doesn’t rotate,
please contact your Service Centre.
8. Put the cap back on the emergency
emptying hose and place the latter back in its
seat. Replace the filter into the pump by
inserting it correctly into the special guides.
Screw the filter cover firmly by turning it
clockwise.
Page 24

1
2
3
45°
20°
www.aeg.com24
14.7 Cleaning the inlet hose and the valve filter
1.
3. 4.
14.8 Frost precautions
If the appliance is installed in an area
where the temperature can be less than
0° C, remove the remaining water from
the inlet hose and the drain pump.
1. Disconnect the mains plug from the
mains socket.
2. Close the water tap.
3. Place the end of the emergency
emptying hose and that of the inlet
hose in a bowl placed on the floor
and let water flow out of the hoses.
4. Set the Drain programme and let it
operate until the end of the cycle.
5. Turn the programme knob to Off to
disconnect the appliance from the
power supply.
2.
6. Screw the water inlet hose back on
and re-fit the emergency emptying
hose after having put the cap on
again.
WARNING!
Make sure that the
temperature is more than 0
°C before you use the
appliance again. The
manufacturer is not
responsible for damages
caused by low temperatures.
15. TROUBLESHOOTING
WARNING!
Refer to Safety chapters.
15.1 Introduction
The start of the appliance does not occur
or it stops during operation.
Page 25

ENGLISH
25
First try to find a solution to the problem
(refer to the table). If not, contact the
Authorised Service Centre.
With some problems, the acoustic
signals operate and the display shows
an alarm code:
• - The appliance does not fill with
water properly.
•
- The appliance does not drain
the water.
• - The appliance door is open or
not closed correctly. Please check the
door!
15.2 Possible failures
Problem Possible solution
The programme does
not start.
The appliance does not
fill with water properly.
The appliance does not
drain the water.
• Make sure that the mains plug is connected to the mains
socket.
• Make sure that the appliance door is closed.
• Make sure that there is not a damaged fuse in the fuse box.
• Make sure that the Start/Pause has been pressed.
• If the delay start is set, cancel the setting or wait for the end
of countdown.
• Deactivate the Child Lock function if it is on (if available).
• Make sure that the water tap is open.
• Make sure that the pressure of the water supply is not too
low. For this information, contact your local water authority.
• Make sure that the water tap is not clogged.
• Make sure that the filter of the inlet hose and the filter of
the valve are not clogged. Refer to “Care and cleaning”.
• Make sure that the inlet hose has no kinks or bends.
• Make sure that the connection of the water inlet hose is
correct.
• Make sure that the drain hose is in the correct position. The
hose may be too low.
• Make sure that the sink spigot is not clogged.
• Make sure that the drain hose has no kinks or bends.
• Make sure that the drain filter is not clogged. Clean the filter, if necessary. Refer to 'Care and cleaning'.
• Make sure that the connection of the drain hose is correct.
• Set the drain programme if you set a programme without
drain phase.
• Set the drain programme if you set an option which ends
with water in the tub.
• - The mains supply is unstable.
Wait until the mains supply is stable.
• - The anti-flood device is on.
Disconnect the appliance and close
the water tap. Contact the Authorised
Service Centre.
WARNING!
Deactivate the appliance
before you do the checks.
Page 26

www.aeg.com26
Problem Possible solution
The spin phase does not
operate or the washing
cycle lasts longer than
usually.
There is water on the
floor.
You cannot open the appliance door.
The appliance makes an
unusual noise.
The washing results are
not satisfactory.
You cannot set an option.
The machine does not
dry or does not dry properly:
• Set the spin programme.
• Make sure that the drain filter is not clogged. Clean the filter, if necessary. Refer to 'Care and cleaning'.
• Adjust manually the items in the tub and start the spin
phase again. This problem may be caused by balance problems.
• Make sure that the couplings of the water hoses are tight
and there is not water leakages.
• Make sure that the drain hose have no damages.
• Make sure you use the correct detergent and the correct
quantity of it.
• Make sure you have replaced the emergency emptying cap
into the filter
• Make sure you have properly screwed the filter in after
cleaning.
• Make sure that the washing programme is finished.
• Set the drain or the spin programme if there is water in the
drum.
• Make sure the levelling of the appliance is correct. Refer to
'Installation'.
• Make sure that the packaging and/or the transit bolts are
removed. Refer to 'Installation'.
• Add more laundry in the drum. The load may be too small.
• Increase the detergent quantity or use a different detergent.
• Use special products to remove the stubborn stains before
you wash the laundry.
• Make sure that you set the correct temperature.
• Decrease the laundry load.
• Make sure that you press only the wanted touch button(s).
• Make sure that you have set a suitable drying programme
for your laundry.
• Make sure that you set the correct the drying time or dryness degree.
• Make sure that the water tap is not turned on.
• the drain filter is not clogged.
• Make sure you have not overloaded the appliance.
Page 27

Problem Possible solution
The laundry is full of different coloured fluff:
The fabrics washed in the previous cycle released fluff of a different colour.
• Clean the clothes with a fluff remover
• The drying phase helps to eliminate some fluff.
In case of an excessive amount of fluff in the drum, refer to section «FLUFF IN THE FABRICS».
• Thoroughly clean the empty drum, the gasket and the door
with a wet rag.
• Perform a rinse cycle.
• Put a wool or piled fabric rag inside the drum.
• Perform a drying cycle of 10 minutes.
• Remove the old wool cloth.
Now you can wash other garments.
ENGLISH
27
After the check, activate the appliance.
The programme continues from the
point of interruption.
If the problem occurs again, contact the
Authorised Service Centre.
16. INSTALLATION
16.1 Unpacking
As you will put down the appliance on the rear side, wait about 6 hours before you use it.
This time is necessary to enable the compressor to work properly.
WARNING!
Remove all the packaging and the transit bolts before installing the
appliance.
If the display shows other alarm codes.
Deactivate and activate the appliance. If
the problem continues, contact the
Service.
Use the gloves. Remove the external film. If
necessary, use a cutter.
Page 28

www.aeg.com28
Remove the cardboard top. Remove the
polystyrene packaging materials.
Remove the internal film.
Open the door. Remove the polystyrene
piece from the door seal and all the items
from the drum.
Put one of the polystyrene packaging
elements on the floor behind the appliance.
Carefully put down the appliance with the
rear side on it. Make sure not to damage the
hoses.
Page 29

1
2
ENGLISH
Remove the polystyrene protection from the
bottom. Pull up the appliance in vertical
position.
Remove the polystyrene block fitted on the
door seal (if present). Pull out all items from
the drum.
Remove the power supply cable and the
drain hose from the hose holders.
29
Remove the three bolts. Use the key supplied
with the appliance. Pull out the plastic
spacers.
Page 30

www.aeg.com30
We recommend that you keep the packaging and the transit bolts for any
movements of the appliance.
16.2 Positioning and levelling
Put the plastic caps in the holes. You can find
these caps in the user manual bag.
• Install the appliance on a flat hard floor.
• Make sure that air circulation around the
appliance is not impeded by carpets, rugs
etc.
• Level the appliance by raising or lowering
the feet.
• The feet may be tight to adjust as they
incorporate a self locking nut, but the
appliance MUST be level and stable. If
necessary, check the setting with a spirit
level. Any necessary adjustment can be
made with a spanner. Accurate levelling
prevents vibration, noise and
displacement of the appliance during
operation.
• After having levelled the appliance,
tighten the lock nuts.
WARNING!
Never place cardboard, wood or similar materials under the appliance to
compensate for any unevenness in the floor.
Page 31

16.3 The inlet hose
20O20
O
45O45
O
ENGLISH
• Connect the hose to the back appliance.
Turn the inlet hose only left or right.
• Loose the ring nut to set it in the correct
position.
• Connect the water inlet hose to the cold
water tap with 3/4 thread.
CAUTION!
Make sure that there are no
leaks from the couplings.
31
Do not use an extension hose if the inlet hose is too short. Contact the
service centre for the replacement of the inlet hose.
Water drainage
There are different procedures to connect the drain hose:
With the plastic hose guide:
• Making an U form with the drain hose.
Page 32

www.aeg.com32
On the edge of a sink
• Make sure that the plastic guide cannot
move when the appliance drains. Attach
the guide to the water tap or the wall.
To a stand pipe with vent-hole
• Directly into a drain pipe at a height of not
less than 60 cm (23.6”) and not more than
100 cm (39.3”). Refer to the illustration.
• The end of the drain hose must always be
ventilated , i.e. the inner diameter of the
drain pipe (min. 38 mm - min. 1.5”) must
be larger than the external diameter of the
drain hose.
Drain hose end
• If the end of the drain hose looks like this
(see the picture), you can push it directly
into the stand pipe.
Without the plastic hose guide.
To a sink spigot
• Refer to the illustration. Put the drain hose
in the spigot and tighten it with a clip.
• Make sure that the drain hose makes a
loop to prevent that remaining particles
go in the appliance from the sink.
Page 33

You can extend the drain hose to maximum 400 cm. Contact the service
A
600 mm
555 mm
596 mm
170 mm
75 mm
100 mm
60 mm
min.
820 mm
min.
560 mm
818 mm
centre for the other drain hose and the extension.
16.4 Water-stop device
16.5 Buiding in
ENGLISH
33
To a wall-pipe
• Directly to a built-in drain pipe in the room
wall and tighten it with a clip.
The inlet hose has a water stop device. This
device prevents water leaks in the hose
because of its natural ageing.
The red sector in the window «A» shows this
fault.
If this occur, close the water tap and contact
the service centre to replace the hose.
This appliance has been designed to be built
into the kitchen furniture. The recess should
have the dimensions shown in this picture.
Page 34

16-22 mm
22±1,5 mm
416
mm
X
595-598 mm
Ø 35 mm
14 mm
1
2
B
A
www.aeg.com34
16.6 Preparation and assembly of the door
The appliance is originally pre-arranged for
the assembly of a door opening from right to
left.
Door
The dimensions of the door should be:
• width 595 - 598 mm
• thickness 16-22 mm
• the height X depends on the height of the
adjacent furniture's base.
Hinges
To mount the hinges it is necessary to drill
two holes (dia. 35 mm, depth12.5-14 mm
depending on the depth of door furniture) on
the inner side of the door.
The distance between the holes hobs fixing
centres must be 416 mm. The distance from
upper edge of the door to the centre of the
hole depends on the adjacent furniture's
dimensions.
The hinges will be fixed to the door by means
of screws for wood 1 and 2 supplied with the
appliance.
Mounting the door
WARNING!
Do not remove the screw B.
Fix the hinges to the appliance by means of
the M5x15 screws.
The hinges can be adjusted to compensate
for possible uneven thickness of the door.
To align the door perfectly it is necessary to
loosen the screw , adjust the door and
tighten the screw A again.
Page 35

A
B
C
A
B
C
E
D
ENGLISH
35
17. TECHNICAL DATA
Dimension Width/ Height/ Depth/
Electrical connection Voltage
Level of protection against ingress of solid particles
and moisture ensured by the protective cover, except where the low voltage equipment has no protection against moisture
Water supply pressure Minimum
Maximum wash load Cotton 7 kg
Maximum dry load Cotton
Spin Speed Maximum 1400 rpm
Total depth
Overall power
Fuse
Frequency
Maximum
Synthetics
Counter-magnet
WARNING!
Do not remove the screw B.
The appliance is prearranged for a magnetic
closure of the door. To enable a correct
operation of this device, it is necessary to
screw the counter-magnet A (steel disk +
rubber ring) in-to the inner side of the door.
Its position must correspond to the magnet B
on the appliance.
WARNING!
Do not remove the screw B.
If the door has to be opened from left to
right, invert the position of the plates E, the
magnet D and the plate C. Mount the
counter-magnet D and the hinges A as
previously described.
596 mm/ 820 mm/ 544 mm/ 544 mm
220-230 V
2000 W
10 A
50 Hz
IPX4
0,5 bar (0,05 MPa)
8 bar (0,8 MPa)
4 kg
2 kg
Page 36

www.aeg.com36
ENVIRONMENTAL CONCERNS
Recycle the materials with the symbol .
Put the packaging in applicable
containers to recycle it. Help protect the
environment and human health and to
recycle waste of electrical and electronic
appliances. Do not dispose appliances
marked with the symbol with the
household waste. Return the product to
your local recycling facility or contact
your municipal office.
Page 37

ESPAÑOL
CONTENIDO
1. INFORMACIÓN SOBRE SEGURIDAD...................................................................38
2. INSTRUCCIONES DE SEGURIDAD....................................................................... 40
3. DESCRIPCIÓN DEL PRODUCTO...........................................................................42
4. PANEL DE MANDOS..............................................................................................43
5. PROGRAMAS ......................................................................................................... 45
6. VALORES DE CONSUMO...................................................................................... 48
7. OPCIONES...............................................................................................................48
8. AJUSTES.................................................................................................................. 49
9. ANTES DEL PRIMER USO.......................................................................................49
10. USO DIARIO..........................................................................................................49
11. USO DIARIO - SECADO.......................................................................................52
12. USO DIARIO - LAVADO Y SECADO................................................................... 53
13. CONSEJOS........................................................................................................... 54
14. MANTENIMIENTO Y LIMPIEZA...........................................................................56
15. SOLUCIÓN DE PROBLEMAS...............................................................................60
16. INSTALACIÓN.......................................................................................................63
17. DATOS TÉCNICOS...............................................................................................71
PARA OFRECER UNOS RESULTADOS PERFECTOS
Gracias por escoger este producto AEG. Este artículo ha sido creado para ofrecer
un rendimiento impecable durante muchos años, con innovadoras tecnologías
que facilitarán su vida y prestaciones que probablemente no encuentre en
electrodomésticos corrientes. Por favor, dedique algunos minutos a la lectura
para disfrutar de todas sus ventajas.
Consulte en nuestro sitio web:
Obtener consejos, folletos, soluciones a problemas e información de servicio:
www.aeg.com
37
Registrar su producto para recibir un mejor servicio:
www.registeraeg.com
Adquirir accesorios, artículos de consumo y recambios originales para su
aparato:
www.aeg.com/shop
ATENCIÓN Y SERVICIO AL CLIENTE
Le recomendamos que utilice recambios originales.
Al contactar con nuestro centro autorizado de servicio técnico, cerciórese de
tener la siguiente información a mano: Modelo, PNC, Número de serie.
La información se puede encontrar en la placa de características.
Advertencia / Precaución-Información sobre seguridad
Información general y consejos
Información medioambiental
Salvo modificaciones.
Page 38

www.aeg.com
38
1. INFORMACIÓN SOBRE SEGURIDAD
Antes de instalar y utilizar el aparato, lea atentamente
las instrucciones facilitadas. El fabricante no se hace
responsable de los daños y lesiones causados por una
instalación y uso incorrectos. Guarde siempre las
instrucciones junto con el aparato para futuras
consultas.
1.1 Seguridad de niños y personas vulnerables
ADVERTENCIA!
Existe riesgo de sufrir asfixia, lesiones o
incapacidad permanente.
• Este electrodoméstico puede ser utilizado por niños
de 8 años en adelante y personas cuyas capacidades
físicas, sensoriales o mentales estén disminuidas o
que carezcan de la experiencia y conocimientos
suficientes para manejarlo, siempre que cuenten con
las instrucciones o la supervisión sobre el uso del
electrodoméstico de forma segura y comprendan los
riesgos.
• No deje que los niños jueguen con el aparato.
• Es necesario mantener alejados a los niños de menos
de 3 años salvo que estén bajo supervisión continua.
• Mantenga los materiales de embalaje fuera del
alcance de los niños.
• Mantenga todos los detergentes fuera del alcance de
los niños.
• Mantenga a los niños y mascotas alejados del aparato
cuando la puerta se encuentre abierta.
• Si el aparato dispone de dispositivo de seguridad
para niños, se recomienda activarlo.
• La limpieza y el mantenimiento no podrán realizarlas
niños sin supervisión.
Instrucciones generales de seguridad
1.2
• No cambie las especificaciones de este aparato.
Page 39

ESPAÑOL
• El aparato se puede instalar de forma independiente
o debajo de una encimera con el espacio adecuado.
• El aparato no se debe instalar detrás de puertas que
puedan bloquearse, de puertas correderas o de
puertas con bisagras por el lado contrario al del
aparato, donde su puerta no se pueda abrir
completamente.
• Conecte el enchufe a la toma de corriente únicamente
cuando haya terminado la instalación. Asegúrese de
tener acceso al enchufe del suministro de red una vez
finalizada la instalación.
• Vigile que ninguna alfombra obstruya las aberturas de
ventilación de la base (si existen).
• Asegúrese de que el recinto de instalación esté bien
ventilado para evitar el revoco de gases en el recinto
procedentes de aparatos que utilicen otros
combustibles, incluyendo llamas al aire libre
• El aire de extracción no debe descargarse en un tubo
de ventilación usado para evacuar humos de aparatos
que funcionen con gas u otros combustibles (en su
caso).
• La presión de trabajo del agua (mínima y máxima)
debe oscilar entre 0,5 bares (0,05 MPa) y 8 bares (0,8
MPa)
• Respete la carga máxima de 7 kg (consulte el capítulo
“Tabla de programas”).
• El aparato debe conectarse a la toma de agua
utilizando los nuevos juegos de tubos suministrados.
No se deben reutilizar los juegos de tubos antiguos.
• Si el cable eléctrico sufre algún daño, el fabricante, su
Servicio técnico autorizado o un profesional tendrán
que cambiarlo para evitar riesgos
• Limpie las pelusas que se hayan acumulado alrededor
del aparato.
• Las prendas que se hayan ensuciado con sustancias
como aceite de cocina, acetona, alcohol, gasolina,
queroseno, quitamanchas, aguarrás, ceras y
quitaceras se deben lavar en agua caliente con una
39
Page 40

www.aeg.com40
cantidad adicional de detergente antes de secarlas en
la lavadora-secadora.
• No utilice el aparato si se han utilizado productos
químicos industriales para la limpieza.
• No utilice la lavadora-secadora para secar prendas no
lavadas.
• Las prendas como gomaespuma (espuma de látex),
gorros de ducha, tejidos impermeables, prendas y
artículos forrados de goma o almohadas con rellenos
de gomaespuma no se deben secar en la lavadorasecadora.
• Los suavizantes o productos similares se deben utilizar
tal y como se especifica en las instrucciones del
fabricante.
• Retire todos los objetos, como encendedores y
cerillas, de los bolsillos.
• No detenga nunca una lavadora-secadora de tambor
antes de finalizar el ciclo de secado a menos que
todas las prendas se retiren rápidamente y se
extiendan para disipar el calor
• La parte final de un ciclo de secado se produce sin
calor (ciclo de enfriamiento) para garantizar que las
prendas queden a una temperatura que no las dañe.
• No utilice pulverizadores ni vapor de agua para
limpiar el aparato.
• Limpie el aparato con un paño suave humedecido.
Utilice solo detergentes neutros. No utilice productos
abrasivos, estropajos duros, disolventes ni objetos
metálicos.
• Antes de proceder con el mantenimiento, apague el
aparato y desconecte el enchufe de la red.
2.
INSTRUCCIONES DE SEGURIDAD
2.1 Instalación
• Retire todo el embalaje y los
pasadores de transporte.
• Guarde los pasadores de transporte.
Cuando vuelva a mover el aparato
debe bloquear el tambor.
• El aparato es pesado, tenga cuidado
siempre cuando lo mueva. Utilice
siempre guantes de protección.
• No instale ni utilice un aparato
dañado.
• Siga las instrucciones de instalación
suministradas con el aparato.
Page 41

ESPAÑOL
41
• No instale ni utilice el aparato si la
temperatura es inferior a 0 °C o si está
expuesto a la intemperie.
• Asegúrese de instalar el aparato en
un suelo plano, estable, resistente al
calor y limpio.
• No coloque el aparato donde la
puerta no se pueda abrir
completamente.
• Desplace siempre el aparato en
vertical.
• La superficie posterior del aparato se
debe colocar contra la pared.
• Compruebe que el aire circula
libremente entre el aparato y el suelo.
• Ajuste las patas para disponer del
espacio necesario entre el aparato y
la moqueta.
• Cuando el aparato esté colocado en
su posición permanente, compruebe
si está totalmente nivelado con ayuda
de un nivel. De no estarlo, ajuste las
patas hasta que lo esté.
2.2 Conexión eléctrica
ADVERTENCIA!
Riesgo de incendios y
descargas eléctricas.
• El aparato debe conectarse a tierra.
• Utilice siempre una toma con
aislamiento de conexión a tierra
correctamente instalada.
• No utilice adaptadores de enchufes
múltiples ni cables prolongadores.
• No desconecte el aparato tirando del
cable de conexión a la red. Tire
siempre del enchufe.
• No toque el cable de red ni el
enchufe con las manos mojadas.
• Solo para Reino Unido e Irlanda. El
aparato tiene un enchufe de
alimentación de 13 amperios. Si es
necesario cambiar el fusible del
enchufe de alimentación, utilice un
fusible ASTA de 13 amperios (BS
1362).
• Este aparato cumple las directivas
CEE.
2.3 Conexión de agua
• Asegúrese de no provocar daños en
los tubos de agua.
• Antes de conectar el aparato a las
nuevas tuberías o a tuberías que no
se hayan usado durante mucho
tiempo, deje correr el agua hasta que
esté limpia.
• La primera vez que utilice el aparato,
asegúrese de que no haya fugas.
2.4 Uso del aparato
ADVERTENCIA!
Podrían producirse lesiones,
descargas eléctricas,
incendios, quemaduras o
daños en el aparato.
• Utilice este aparato en entornos
domésticos solamente.
• No cambie las especificaciones de
este aparato.
• No coloque productos inflamables ni
objetos mojados con productos
inflamables dentro, cerca o encima
del aparato.
• No toque el cristal de la puerta
mientras esté en marcha un
programa. El cristal puede estar
caliente.
• No seque prendas dañadas que
tengan acolchados o rellenos.
• Si ha lavado la ropa con un
quitamanchas, deberá iniciar un ciclo
de aclarado adicional antes de iniciar
la secadora.
• Asegúrese de sacar todos los objetos
metálicos de la colada.
• Seque únicamente prendas aptas
para secadora de tambor. Siga las
instrucciones de la etiqueta de la
prenda.
• Los elementos de plástico no son
resistentes al calor.
– Si utiliza una bola dosificadora de
detergente, retírela antes de
seleccionar el programa de
secado.
– No utilice una bola dosificadora
de detergente si selecciona un
programa sin pausas.
ADVERTENCIA!
Podría sufrir lesiones o dañar
el aparato.
• No se siente ni se ponga de pie sobre
la puerta abierta.
• No utilice el aparato para secar
prendas que goteen.
Page 42

7 8 9
10
1 2
3
4
5
6
1 2
34
www.aeg.com42
2.5 Desecho
• Desconecte el aparato de la red.
• Corte el cable de conexión a la red y
deséchelo.
3. DESCRIPCIÓN DEL PRODUCTO
3.1 Descripción general del aparato
Dosificador de detergente
1
Panel de control
2
Tirador de la puerta
3
Placa de características
4
Filtro de la bomba de desagüe
5
Pata para nivelación del aparato
6
• Retire el pestillo de la puerta para
evitar que los niños y las mascotas
queden encerrados en el aparato.
Tubo de desagüe
7
Cable de alimentación
8
Conexión de agua
9
Pata para nivelación del aparato
10
3.2 Accesorios
1 Llave de tuercas
Para retirar los pasadores de transporte.
2 Tapones de plástico
Para cerrar los orificios de la parte
posterior del armario, después de extraer
los pasadores de transporte.
3 Tubo de entrada antiinundación
Para evitar posibles fugas.
4 Guía de plástico de la manguera
Para conectar el tubo de desagüe en el
borde de un fregadero.
Page 43

3.3 Cómo activar el dispositivo
1400
1200
800
400
Off
Centrif.
Manchas
Aclarado
Extra
Tiempo
de secado
Ahorra
Tiempo
Inicio Diferido
Start/Pausa
Lavado
Puerta bloqueada
Secado
40
30
30
Frio
Aclarado
delicados
Centrifugado
Sintéticos
Algodón
Refrescar
Algodón Eco
Descarga
Plancha
Fácil
40
Delicados
Lana/
Seda
Secado
95
60
60
50
40
30
40
40
30
Sintéticos
+ Prelavado
95
60
40 Eco
Algodón
1 2 3 4
5678910
de seguridad para niños
Este dispositivo evitará que los niños o
mascotas queden encerrados en el
tambor.
Gire el dispositivo hacia la derecha hasta
que la ranura esté en posición horizontal.
No se puede cerrar la puerta.
4. PANEL DE MANDOS
4.1 Descripción del panel de control
ESPAÑOL
Para cerrar la puerta, gire el dispositivo
hacia la izquierda hasta que la ranura
esté en posición vertical.
43
Selector de programas
1
Pantalla
2
Tecla de inicio diferido (Inicio
3
6
7
Diferido)
Indicadores de fase:
4
8
• A – Fase de lavado (Lavado)
• B – Fase de secado (Secado)
• C – Puerta bloqueada (Puerta
bloqueada)
Tecla Inicio/Pausa (Start/Pausa)
5
9
10
Tecla de tiempo de secado (Tiempo
de secado)
Botón de aclarado extra (Aclarado
Extra )
Tecla de ahorro de tiempo (Ahorra
Tiempo)
Tecla Manchas (Manchas)
Tecla Centrifugado (Centrif.)
Page 44

www.aeg.com44
4.2 Pantalla
En la pantalla se muestra la siguiente información:
Duración del programa seleccionado
Cuando se selecciona un programa, la pantalla muestra la duración en horas y minutos (por ejemplo, 2.05).
La duración se calcula automáticamente según la carga máxima para cada
tipo de tejido.
Una vez que se ha iniciado el programa, el tiempo restante se actualiza cada minuto.
Ajuste del tiempo de secado
Cuando se selecciona un programa de secado, la pantalla muestra el tiempo de secado en minutos y/u horas (consulte el apartado "Programas de
secado por tiempo").
Una vez que se ha iniciado el programa, el aparato actualiza el tiempo restante cada minuto
Códigos de alarma
En caso de problemas de funcionamiento pueden mostrase algunos códigos de alarma, por ejemplo (consulte el capítulo «Solución de prob-
lemas»).
Fin de programa
Cuando el programa finaliza, en la pantalla aparece un cero intermitente.
La Puerta bloqueada luz C, la Lavado luz A (o la Puerta bloqueada luz B) y
la luz de la tecla Start/Pausa se apagan.
Se puede abrir la puerta.
Selección de opción incorrecta
Si selecciona una opción que no es compatible con el programa de lavado, la pantalla muestra el mensaje Err durante unos segundos.
El piloto amarillo del botón Start/Pausa empezará a parpadear.
Inicio diferido
Cuando se pulsa la tecla para ajustar el inicio diferido (máx. 20 horas),
aparece durante unos segundos y, posteriormente, la pantalla muestra la
duración del programa seleccionado.
El valor del inicio diferido disminuye en una unidad cada hora. Cuando sólo queda una hora, el tiempo disminuye a cada minuto.
Page 45

4.3 Indicadores de fase
A
B
C
5. PROGRAMAS
5.1 Tabla de programas
ESPAÑOL
Símbolo de Inicio diferido
Este símbolo se ilumina cuando se ajusta el tiempo de inicio diferido.
Bloqueo de seguridad para niños
Este símbolo se ilumina cuando se activa la función de bloqueo de seguridad para niños.
Tras pulsar la tecla Start/Pausa, se ilumina el
indicador Lavado.
El aparato está funcionando.
Cuando se selecciona un programa de
secado, el idicador Secado permanece
iluminado durante la fase de secado.
El indicador Puerta bloqueada señala cuándo
puede abrirse la puerta:
• encendido: no se puede abrir la puerta.
• intermitente: la puerta se podrá abrir en
unos minutos.
• apagado: se puede abrir la puerta.
45
Programa
Margen de temperatura
Programas de lavado
Algodón
95°C - 30°C
Algodón Eco
40°C
Algodón + Prelavado
95°C - 40°C
Sintéticos
60°C - 30°C
Plancha Fácil
40°C
Delicados
40°C - 30°C
Carga máxima
Velocidad
máxima de
centrifugado
7 kg
1400 rpm
7 kg
1400 rpm
7 kg
1400 rpm
3.5 kg
1200 rpm
1 kg
800 rpm
3.5 kg
1200 rpm
Descripción del programa
(Tipo de carga y nivel de suciedad)
Algodón blanco y de color. Suciedad normal y li-
gera.
Algodón de colores resistentes. Suciedad ligera.
El consumo energético se reduce y se amplía la duración del programa de lavado.
Algodón blanco y de color. Suciedad extrema y
normal.
Prendas de tejidos sintéticos o mezclas. Suciedad
normal.
Prendas sintéticas para lavado suave. Suciedad
normal y ligera.
1)
Prendas de tejidos delicados, como acrílicos, viscosa o poliéster. Suciedad normal.
Page 46

www.aeg.com46
Programa
Margen de temperatura
Carga máxima
Velocidad
máxima de
Descripción del programa
(Tipo de carga y nivel de suciedad)
centrifugado
Lana/Seda
30°C - Frío
Aclarado delicados
2 kg
1200 rpm
7 kg
1200 rpm
Lana lavable a máquina, lana lavable a mano y
prendas delicadas con el símbolo «lavado a
2)
mano».
Para aclarar y centrifugar prendas. Todos los teji-
dos.
Descarga 7 kg Para drenar el agua del tambor. Todos los tejidos.
Centrifugado 7 kg
1400 rpm
Para centrifugar la colada y drenar el agua en el
tambor. Todos los tejidos.
Secado sintéticos 2 kg Programa de secado para prendas sintéticas.
Secado algodón 4 kg Programa de secado para prendas de algodón.
Refrescar 3 kg
1200 rpm
Un ciclo muy corto para prendas sintéticas y de al-
godón con poca suciedad o que se han llevado
una sola vez.
7 kg
Algodón Eco
60°C
1)
Para reducir las arrugas en la colada, este ciclo regula la temperatura del agua y realiza una fase de
lavado y centrifugado suaves. El aparato añade algunos aclarados.
2)
Durante este ciclo, el tambor gira lentamente para garantizar un lavado suave. Puede parecer que el
tambor no gira o que no lo hace adecuadamente. Es un comportamiento normal del aparato.
3)
Programa Algodón ECO. Este programa a una temperatura de 60°C con una carga de 7 es el programa de referencia de los datos incluidos en la etiqueta energética de conformidad con las normas CEE
92/75. Ajuste este programa para obtener unos buenos resultados de lavado y reducir el consumo de
energía. Se amplía la duración del programa de lavado.
3)
1400 rpm
Algodón blanco y de colores resistentes. Suciedad normal. El consumo energético se reduce y se
amplía la duración del programa de lavado.
Compatibilidad con opciones de
programa
Programa
Cen-
trif.
Man-
chas
1)
Ahorra
Tiempo
2)
Aclarado
Extra
Inicio Di-
Algodón ■ ■ ■ ■ ■ ■
Algodón Eco
■ ■ ■
3)
■
■ ■
Algodón + Prelavado ■ ■ ■ ■ ■ ■
Sintéticos ■ ■ ■ ■ ■ ■
Plancha Fácil ■ ■ ■ ■
ferido
Page 47

ESPAÑOL
47
Programa
Cen-
trif.
Man-
chas
1)
Ahorra
Tiempo
2)
Aclarado
Extra
Inicio Di-
ferido
Delicados ■ ■ ■ ■ ■ ■
Lana/Seda
■ ■ ■
Aclarado delicados ■ ■ ■ ■
Descarga
Centrifugado ■ ■
Refrescar ■ ■
Algodón Eco
1)
La opción Manchas no está disponible con temperaturas inferiores a 40°C.
2)
Si selecciona una duración más corta, se recomienda reducir la cantidad de la carga. Es posible cargar
completamente el aparato, pero los resultados de lavado no son tan óptimos.
3)
Con estos programas puede ajustar solo la duración corta.
■ ■ ■
■
3)
■ ■
5.2 Programas de secado por tiempo
Nivel de secado Tipo de tejido Carga
(kg)
Extra Seco
Para materiales de felpa
Seco Armario
1)
Para prendas que pueden guardarse
Seco Armario
Para prendas que pueden guardarse
Seco Plancha/ Engomar
Adecuado para pre-
Algodón y lino
(albornoces, toallas de baño,
etc.)
Algodón y lino
(albornoces, toallas de baño,
etc.)
Tejidos sintéticos y mezclas
(jerséis, blusas, ropa interior,
ropa de hogar)
Algodón y lino
(sábanas, manteles, camisas,
etc.)
ndas que deben plancharse
1)
De conformidad con la directiva EN 50229 de la CE el programa de referencia para algodón con
los datos introducidos en la etiqueta de energía debe comprobarse dividiendo la carga máxima en dos
partes iguales y secando cada una con el TIEMPO DE SECADO indicado. .
Velocidad de
centrifu-
Duración
sugerida
(min)
gado
(rpm)
4 1400 160 - 180
3 1400 110 - 120
1.5 1400 75 - 85
4 1400 150 - 170
3 1400 100 - 110
1.5 1400 65 - 75
2 1200 90 - 100
1 1200 55 - 65
4 1400 120 - 140
3 1400 80 - 90
1.5 1400 50 - 60
Page 48

48
www.aeg.com
6. VALORES DE CONSUMO
Los datos de esta tabla son aproximados. Los datos pueden cambiar
por varios motivos: la cantidad y tipo de colada, el agua y la temperatura ambiente.
Programas Carga
Algodón 60 °C 7 1.35 67 150
Programa Algodón ECO 60
1)
°C
Algodón 40 °C 7 0.85 67 140
Sintéticos 40 °C 3.5 0.55 42 90
Delicados 40 °C 3.5 0.55 63 65
Lana/ Lavado a mano 30 °C 2 0.25 55 60
1)
El "programa Algodón ECO" a 60 °C con una carga de 7 kg es el programa de referencia de los datos
incluidos en la etiqueta energética de conformidad con las normas CEE 92/75.
7. OPCIONES
7.1 Centrifugado
Con esta opción puede reducir la
velocidad de centrifugado
predeterminada.
Se enciende el indicador del ajuste de
velocidad.
Opciones adicionales de centrifugado:
Agua en la cuba
• Ajuste esta opción para evitar arrugas
en los tejidos.
• Se enciende el indicador
correspondiente.
• El programa de lavado se detiene con
el agua en el tambor. El tambor gira
regularmente para evitar arrugas en
las prendas.
• La puerta permanece bloqueada.
Debe drenar el agua para
desbloquear la puerta.
Para vaciar el agua, consulte
"Al finalizar el programa".
Consumo
(kg)
energético (KWh)
7 1.05 49 180
Consumo de
agua (litros)
Duración aproximada
del programa (minutos)
7.2 Manchas
Elija esta opción para añadir la fase de
manchas a un programa.
Utilice esta función para coladas con
manchas difíciles.
Cuando ajuste esta función, coloque el
quitamanchas en el compartimento .
Esta opción aumenta la
duración del programa. Esta
opción no está disponible
con temperaturas inferiores
a 40 °C.
7.3 Ahorra Tiempo
Con esta opción puede reducir la
duración de un programa.
• Pulse esta tecla una vez para ajustar la
"duración corta" para prendas poco
sucias.
• Pulse esta tecla dos veces para ajustar
"Extra rápido" para prendas
prácticamente sin suciedad.
Page 49

ESPAÑOL
49
7.4 Aclarado Extra
Con esta opción, puede añadir algunos
aclarados a un programa de lavado.
Utilice esta opción para personas
alérgicas al detergente y en zonas en las
que el agua sea blanda.
8. AJUSTES
8.1 Señales acústicas
Se activan las señales acústicas cuando:
• Se enciende el aparato.
• Se apaga el aparato.
• Se pulsan las teclas.
• El programa se termina.
• Se ha producido algún fallo en el
aparato.
Para desactivar/activar las señales
acústicas, pulse Manchas y Ahorra
Tiempo al mismo tiempo durante 6
segundos.
Algunos programas solo
admiten una de las dos
opciones.
Si se desactivan las señales
acústicas, siguen
funcionando cuando el
aparato presenta una avería.
Se enciende el indicador
correspondiente.
7.5 Inicio Diferido
Con esta opción puede retrasar el inicio
de un programa entre 30 minutos y 20
horas.
La pantalla muestra el retardo y el
indicador correspondiente.
8.2 Bloqueo de seguridad para niños
Con esta opción puede evitar que los
niños jueguen con el panel de control.
• Para activar/desactivar esta opción,
pulse Ahorra Tiempo y Aclarado Extra
al mismo tiempo hasta que se
ilumine/apague el indicador
Puede activar esta opción:
• Antes de pulsar Start/Pausa: se
bloquean las opciones y el selector
de programas.
• Antes de pulsar Start/Pausa: el
aparato no se puede iniciar.
.
9. ANTES DEL PRIMER USO
1. Ponga una pequeña cantidad de
detergente en el compartimento
para la fase de lavado.
2. Ajuste e inicie un programa para
algodón a la temperatura más alta
sin colada.
10. USO DIARIO
10.1 Cargar la colada
1. Abra la puerta del aparato
2. Introduzca las prendas en el tambor,
una por una.
3. Sacuda las prendas antes de
colocarlas en el aparato.
Asegúrese de no colocar demasiada
colada en el tambor.
4. Cierre la puerta.
De esta forma se elimina toda la posible
suciedad del tambor y de la cuba.
Page 50

MAX
50
www.aeg.com
PRECAUCIÓN!
Asegúrese de que no quedan prendas
enganchadas entre la puerta y el cierre.
Podría provocar fugas de agua y dañar la
colada.
10.2 Introducción del detergente y los aditivos
10.3 Ajuste de un programa
Gire el selector de programas hasta
dejarlo en el programa deseado.
El selector de programas determina el
tipo de ciclo de lavado (por ejemplo,
nivel de agua, movimiento del tambor,
número de aclarados) y la temperatura
de lavado en función del tipo de colada.
El piloto del botón Start/Pausa empezará
a parpadear.
El selector de programas puede girarse
hacia la derecha y hacia la izquierda.
Off = Reinicio del programa o apagado
del aparato
Si gira el selector hasta otro
programa mientras el
aparato está funcionando, el
piloto amarillo de la tecla
Start/Pausa parpadeará 3
veces. La pantalla muestra el
mensaje Err para indicar una
selección incorrecta. El
aparato no pondrá en
marcha el nuevo programa
seleccionado.
Compartimento de la fase de
prelavado, programa de remojo o
del quitamanchas
Compartimento para la fase de
lavado.
Compartimento para aditivos
líquidos (suavizante, almidón).
Nivel máximo para la cantidad de
aditivos líquidos.
Tapa abatible para detergente
líquido o en polvo.
Cumpla siempre las
instrucciones que se
encuentran en el envase de
los productos de
detergente.
10.4 Inicio del programa
Pulse la tecla Start/Pausa para iniciar el
programa. El indicador rojo
correspondiente dejará de parpadear.
El indicador Lavado se enciende para
indicar que el aparato se pone en
marcha.
El indicador Secado se enciende para
indicar que la puerta está bloqueada.
Si ha seleccionado un intervalo de inicio
diferido con la tecla Inicio Diferido, el
aparato comenzará la cuenta atrás.
Si se selecciona una opción incorrecta, el
indicador amarillo de la tecla Start/Pausa
parpadea 3 veces. La pantalla muestra el
mensaje Err durante unos segundos.
10.5 Inicio de un programa con el inicio diferido
Ajuste esta opción después de elegir el
programa y antes de pulsar la tecla Start/
Pausa.Antes de iniciar el programa, si
desea retrasar el inicio del programa,
Page 51

ESPAÑOL
51
pulse la tecla Inicio Diferido
repetidamente para ajustar el retardo
que desee.
El símbolo aparece en la pantalla.
Puede retrasar el programa de lavado 30
- 60 - 90 minutos, 2 horas y, a
continuación, en segmentos de 1 hora
hasta un máximo de 20 horas.
El valor del intervalo de retraso
seleccionado se muestra en la pantalla
durante unos 3 segundos; a
continuación, se visualiza de nuevo la
duración del programa.
Es posible cancelar o modificar el tiempo
de retardo en cualquier momento antes
pulsar la tecla Start/Pausa.
La puerta permanecerá bloqueada el
tiempo que dure el inicio diferido. Si
desea añadir prendas al aparato durante
el intervalo de retraso, pulse el botón
Start/Pausa para realizar una pausa en el
aparato. La puerta sólo se puede abrir
cuando el indicador Puerta bloqueada se
apaga. Introduzca la ropa, cierre la
puerta y vuelva a pulsar la tecla Start/
Pausa.
Ajuste del inicio diferido.
• Seleccione el programa y las
opciones necesarias.
• Ajuste el inicio diferido.
• Pulse la tecla Start/Pausa: el aparato
inicia la cuenta atrás horaria; El
programa se inicia una vez finalizado
el intervalo de inicio diferido
seleccionado.
Cancelación del inicio diferido
• Pulse la tecla Start/Pausa para poner
el aparato en PAUSA;
• Pulse la tecla Inicio Diferido hasta que
aparezca el símbolo .
• Vuelva a pulsar la tecla Start/Pausa
para iniciar el programa.
El inicio diferido
seleccionado sólo se podrá
modificar una vez se haya
vuelto a seleccionar el
programa de lavado.
El Inicio Diferido no puede seleccionarse
con el programa de descarga.
10.6 Cambio de una opción o de un programa en marcha
Es posible cambiar cualquier opción
antes de que el programa la ejecute.
Antes de realizar cambios, es necesario
pulsar la tecla Start/Pausa para poner el
aparato en pausa.
El cambio de un programa en marcha
sólo puede realizarse reajustándolo.
Gire el selector de programas hasta Off
y, seguidamente, hasta la posición del
nuevo programa.
Vuelva a pulsar la tecla Start/Pausa para
iniciar el nuevo programa. El agua de
lavado de la cuba no se vaciará.
10.7 Interrupción de un programa
Pulse la tecla Start/Pausa para
interrumpir el programa en marcha; el
indicador correspondiente empieza a
parpadear. Vuelva a pulsar la tecla Start/
Pausa para reiniciar el programa.
10.8 Cancelación de un programa
Gire el selector de programas hasta Off
para cancelar un programa una vez que
está en marcha. Después puede
seleccionar otro programa.
10.9 Apertura de la puerta
La puerta está bloqueada mientras el
aparato está funcionando o con el inicio
diferido activado.
Si necesita abrirla por cualquier motivo,
pulse primeramente la tecla Start/Pausa
para poner el aparato en pausa.
Si el indicador Puerta bloqueada se
apaga tras unos minutos, puede abrir la
puerta.
Si el indicador Puerta bloqueada sigue
encendido y la puerta permanece
bloqueada, el aparato ya está en fase de
calentamiento o el nivel de agua es
demasiado alto. En este caso no se
puede abrir la puerta.
Si no puede abrir la puerta pero es
indispensable hacerlo, gire el selector de
Page 52

52
www.aeg.com
programas hasta la posición Off para
apagar el aparato. La puerta podrá
abrirse pasados unos minutos (preste
atención al nivel del agua y a la
temperatura).
Cuando cierre la puerta, tendrá que
volver a ajustar el programa y las
opciones. Pulse la tecla Start/Pausa para
iniciar de nuevo el programa.
10.10 Al finalizar el programa
El aparato se para automáticamente. El
indicador de la tecla Start/Pausa, y los
indicadores Lavado y Puerta bloqueada
se apagan. En la pantalla parece un
intermitente.
Si se ha seleccionado un programa u
opción que finaliza dejando agua en la
cuba, el indicador Puerta bloqueada
permanecerá encendido. La puerta está
bloqueada. Es necesario vaciar el agua
antes de abrir la puerta. Durante este
periodo de tiempo, el tambor sigue
girando a intervalos regulares hasta que
se drena el agua.
Siga las instrucciones que se indican a
continuación para vaciar el agua:
• Gire el selector de programas hasta
Off.
• Seleccione el programa DESCARGA o
CENTRIFUGADO.
• Si es necesario, reduzca la velocidad
de centrifugado.
• Pulse la tecla Start/Pausa.
• Cuando el programa finaliza, en la
pantalla aparece un intermitente. El
indicador Puerta bloqueada se apaga.
Se puede abrir la puerta.
Gire el selector de programas hasta Off
para apagar el aparato.
Retire las prendas del tambor y
cerciórese de que el tambor queda
vacío. Si no va a realizar otro lavado,
cierre la llave de paso. Deje la puerta
abierta para evitar la aparición de moho
y olores desagradables.
10.11 Espera
Tras terminarse el programa y
trascurridos algunos minutos, se habilita
el sistema de ahorro energético. El brillo
de la pantalla disminuye. Presione
cualquier tecla para desactivar el sistema
de ahorro de energía del aparato.
11.
USO DIARIO - SECADO
ADVERTENCIA!
Consulte los capítulos sobre
seguridad.
11.1 Ajuste de secado
La carga máxima
recomendada es de 3 kg
para tejidos de algodón y
lino y de 2 kg para sintéticos.
También puede secar hasta
4 kg de tejidos de algodón
(consulte la tabla «Programa
de secado»).
ADVERTENCIA!
Abra el grifo. Coloque la
manguera de desagüe en
la pila o conéctela al tubo
de descarga.
1.
Cargue las prendas una a una.
2. Gire el selector de programas hasta
el programa adecuado para secar las
prendas (algodón o sintéticos).
Para obtener unos buenos
resultados de secado, no
supere las cargas de secado
máximas recomendadas en
el Manual de instrucciones.
No ajuste una velocidad de
centrifugado inferior a la
velocidad automática del
programa ajustado.
11.2 Tiempo de secado
1. Pulse la tecla Tiempo de secado
repetidamente para ajustar el valor
del tiempo (consulte la tabla
“Programa para secado
temporizado”).
Page 53

ESPAÑOL
53
• Cada pulsación de la tecla
aumenta el valor de tiempo en 5
minutos.
• Puesto que el aparato también
calcula la duración de las fases
antiarrugas y de enfriamiento, la
duración del programa se
incrementa automáticamente en
algunos minutos.
2. Pulse la tecla Start/Pausa para iniciar
el programa.
• La pantalla va mostrando
periódicamente un nuevo valor
de tiempo.
• Se enciende el indicador .
Si ajusta sólo 10 minutos de
secado, el aparato sólo
ejecuta una fase de
enfriamiento.
Si la colada no está suficientemente
seca, vuelva a ajustar un tiempo de
secado corto.
11.3 Final del programa de secado
El aparato se para automáticamente.
• Suenan las señales acústicas, si están
activadas.
• Se enciende en la pantalla.
• El indicador de la tecla Start/Pausa se
apaga.
• En los últimos minutos del ciclo de
secado, el aparato realiza una fase de
enfriamiento y antiarrugas. La puerta
sigue bloqueada. La pantalla muestra
intermitente.
Cuando el indicador de bloqueo de la
puerta
1. Gire el selector de programas hasta
la posición Off para desactivar el
aparato.
Unos minutos después de finalizar el
programa, la función de ahorro de
energía apaga automáticamente el
aparato.
2. Retire la colada del aparato.
Asegúrese de que el tambor está
totalmente vacío.
3. Deje la puerta entreabierta para
evitar la formación de moho y olores
desagradables.
4. Cierre la llave de paso.
12. USO DIARIO - LAVADO Y SECADO
desaparece, puede abrirla.
ADVERTENCIA!
Consulte los capítulos sobre
seguridad.
12.1 Programa Sin pausas (Lavado y secado automáticos)
Para el programa SIN PAUSAS se
recomienda no superar la carga máxima
de 3 kg para los tejidos de algodón y de
2 kg para los sintéticos.
PRECAUCIÓN!
No utilice dispositivos de
dosificación de detergente
para los programas de
lavado y secado.
1.
Cargue las prendas una a una.
2. Coloque el detergente y los aditivos
en el compartimento adecuado.
3. Gire el selector de programas hasta
el programa que desee para
encender la máquina.
4. Ajuste las opciones disponibles.
Para obtener unos buenos
resultados de secado, no
supere las cargas de secado
máximas recomendadas en
el Manual de instrucciones.
No ajuste una velocidad de
centrifugado inferior a la
velocidad automática del
programa ajustado.
12.2 Lavado y secado temporizados
Para obtener un buen secado, el aparato
no permite ajustar una baja velocidad de
centrifugado con las prendas que van a
lavarse y secarse.
Page 54

54
www.aeg.com
1. Pulse la tecla Tiempo de secado para
ajustar el tiempo de secado.
Tras unos segundos, la pantalla muestra
el valor final de tiempo; se trata de la
duración total de los ciclos de lavado y
secado (lavado + secado + antiarrugas +
enfriamiento).
Si ajusta solo 10 minutos de
secado tras el lavado, el
aparato también calcula la
duración de las fases
antiarrugas y de
enfriamiento.
2. Pulse la tecla Start/Pausa para iniciar
el programa.
Se enciende el indicador . La puerta
está bloqueada. La pantalla va
mostrando periódicamente un nuevo
valor de tiempo.
12.3 Final del programa
El aparato se para automáticamente.
Suenan las señales acústicas, si están
activadas.
Para obtener más información, consulte
"Al final del programa de secado“ en el
capítulo anterior.
1. Gire el selector hasta la posición Off
para apagar la máquina.
2. Retire la colada del aparato.
Asegúrese de que el tambor está
totalmente vacío.
3. Deje la puerta entreabierta para
evitar la formación de moho y olores
desagradables.
4. Cierre la llave de paso.
12.4 Pelusa en las prendas
Durante la fase de lavado y/o secado,
algunos tipos de tejidos, como esponjas
o sudaderas, pueden soltar pelusa.
La pelusa podría adherirse a los tejidos
en el siguiente ciclo.
Este inconveniente aumenta con los
tejidos técnicos.
Para evitar las pelusas en la colada, le
recomendamos:
• No lavar tejidos oscuros tras haber
lavado y secado tejidos claros (toallas,
sudaderas) y viceversa.
• Secar al aire este tipo de tejidos la
primera vez que los lave.
• Para limpiar el filtro de desagüe.
• Después de la fase de secado, limpie
el tambor vacío, la junta y la puerta
con un paño húmedo.
13.
CONSEJOS
ADVERTENCIA!
Consulte los capítulos sobre
seguridad.
13.1 Introducir colada
• Divida la colada en: ropa blanca, ropa
de color, ropa sintética, prendas
delicadas y prendas de lana.
• Siga las instrucciones de lavado que
se encuentran en las etiquetas de las
prendas.
• No lave juntas las prendas blancas y
de color.
• Algunas prendas de color pueden
desteñir en el primer lavado. Se
recomienda lavarlas por separado la
primera vez.
• Abotone las fundas de almohadas y
cierre las cremalleras, los ganchos y
los broches. Ate las correas.
• Vacíe los bolsillos y despliegue las
prendas.
• Dé la vuelta a las prendas de varias
capas, de lana y con motivos
pintados.
• Retire las manchas difíciles.
• Lave con detergente especial las
manchas difíciles.
• Tenga cuidado con las cortinas. Quite
los ganchos o coloque las cortinas en
una bolsa para lavadora o funda de
almohada.
• No lave en el aparato prendas sin
dobladillos o desgarradas. Use una
bolsa para lavadora para lavar las
prendas pequeñas y delicadas (p. ej.,
sujetadores con aros, cinturones,
medias, etc.).
Page 55

ESPAÑOL
55
• Una carga muy pequeña puede
provocar problemas de desequilibrio
en la fase de centrifugado. Si esto
ocurre, ajuste manualmente las
prendas en la cuba e inicie de nuevo
la fase de centrifugado.
13.2 Manchas difíciles
Para algunas manchas, el agua y el
detergente no son suficientes.
Se recomienda eliminar estas manchas
antes de colocar las prendas en el
aparato.
Existen quitamanchas especiales. Utilice
el quitamanchas especial adecuado al
tipo de mancha y tejido.
13.3 Detergentes y aditivos
• Utilice solo detergentes y aditivos
especialmente fabricados para
lavadoras:
– detergente en polvo para todo
tipo de prendas,
– detergente en polvo para
prendas delicadas (40 °C máx.) y
lana,
– detergente líquido para todo tipo
de tejidos o especial para lana,
preferiblemente para programas
de lavado a baja temperatura (60
°C máx.).
• No mezcle diferentes tipos de
detergentes.
• Para respetar el medio ambiente, no
ponga más detergente del necesario.
• Siga siempre las instrucciones que se
encuentran en el envase de estos
productos.
• Use los productos adecuados para el
tipo y color del tejido, la temperatura
del programa y el grado de suciedad.
• Si el aparato no tiene el dosificador
de detergente con dispositivo de
compuerta, añada los detergentes
líquidos con una bola dosificadora
(suministrada por el fabricante del
detergente).
13.4 Consejos ecológicos
• Ajuste un programa sin la fase de
prelavado para lavar ropa con
suciedad normal.
• Empiece siempre un programa de
lavado con la carga de colada
máxima.
• Si fuera necesario, utilice un
quitamanchas cuando ajuste un
programa a baja temperatura.
• Para utilizar la cantidad correcta de
detergente, compruebe la dureza del
agua de su sistema doméstico
13.5 Dureza del agua
Si la dureza del agua de su zona es alta o
moderada, se recomienda usar un
descalcificador de agua para lavadoras.
En las zonas en las que la dureza del
agua sea baja, no es necesario utilizar un
descalcificador.
Póngase en comunicación con las
autoridades correspondientes para
conocer la dureza del agua de su zona.
Utilice la cantidad correcta de
descalcificador. Siga las instrucciones
que encontrará en el envase del
producto.
13.6 Consejos de secado
Prepare el ciclo de secado
• Abra la llave de paso.
• Compruebe la correcta conexión de
la manguera de descarga. Para
obtener más información, consulte el
capítulo de instalación.
• Para conocer la carga máxima de los
programas de secado, consulte la
tabla de los programas de secado.
13.7 Las prendas no se secan
No seleccione un programa de secado
para los siguientes tipos de ropa:
• Prendas muy delicadas.
• Cortinas sintéticas.
• Ropa con adornos metálicos.
• Medias de nailon.
• Colchas.
• Mantas.
• Edredones.
• Anoraks.
• Sacos de dormir.
• Tejidos con restos de lociones o lacas
para el cabello, quitaesmaltes o
similares.
Page 56

56
www.aeg.com
• Artículos que contengan
gomaespuma o materiales similares a
ella.
13.8 Etiquetas de las prendas
Para el secado de la ropa, siga las
indicaciones de las etiquetas de los
fabricantes:
• = La prenda puede secarse en
secadora
• = El ciclo de secado es de alta
temperatura
= El ciclo de secado es de baja
•
temperatura
• = La prenda no puede secarse en
secadora
13.9 Duración del ciclo de
secado
El tiempo de secado puede variar
dependiendo de:
• la velocidad del último centrifugado
• el nivel de secado
• el tipo de prenda
• el peso de las prendas que se han
cargado en la máquina
13.10 Secado adicional
Si las prendas siguen húmedas al final
del programa, vuelva a seleccionar un
ciclo de secado corto.
ADVERTENCIA!
Para evitar la formación de
arrugas o que la ropa se
encoja, no la seque en
exceso.
13.11 Consejos generales
Consulte en la tabla «Programas de
secado» los tiempos de secado medios.
La experiencia le ayudará a secar la ropa
de forma más correcta. Anote la
duración de los ciclos de secado ya
finalizados.
Para evitar la carga estática al final del
ciclo de secado:
1. Utilice el suavizante en el ciclo de
lavado.
2. Utilice un suavizante especial para
secadoras de tambor.
Cuando haya finalizado el programa de
secado, retire la ropa lo antes posible.
14. MANTENIMIENTO Y LIMPIEZA
ADVERTENCIA!
Consulte los capítulos sobre
seguridad.
14.1 Limpieza del exterior
Limpie el aparato solo con agua
templada y jabón. Seque
completamente todas las superficies.
PRECAUCIÓN!
No utilice alcohol,
disolventes ni otros
productos químicos.
14.2 Descalcificación
Si la dureza del agua de su zona es alta o
moderada, se recomienda usar un
descalcificador de agua para lavadoras.
Examine periódicamente el tambor para
evitar la formación de cal y partículas de
óxido.
Para eliminar partículas de oxidación,
utilice productos especiales para
lavadoras. Hágalo de forma separada del
lavado de la colada.
14.3 Lavado de mantenimiento
Con los programas a baja temperatura,
es posible que quede algo de
detergente en el tambor. Realice
periódicamente un lavado de
mantenimiento. Para ello:
• Saque las prendas del tambor.
• Ajuste el programa de algodón con la
Siga siempre las
instrucciones que encontrará
en el envase del producto.
temperatura más alta y utilice una
pequeña cantidad de detergente.
Page 57

MAX
1
2
MAX
MAX
ESPAÑOL
57
14.4 Junta de estanqueidad de
la puerta
Examine periódicamente la junta y
extraiga todos los objetos de la pieza
interior.
14.5 Limpieza del dosificador de detergente
1.
3. 4.
2.
Page 58

A B
1
2
www.aeg.com58
14.6 Limpieza del filtro de desagüe
La bomba debe inspeccionarse con regularidad, especialmente en caso de que:
• El aparato no desagüe o centrifugue.
• El aparato presente un ruido extraño durante la descarga por la presencia de objetos
tales como imperdibles, monedas, etc., que obstruyen la bomba.
• Se detecte un problema con el desagüe del agua (consulte el capítulo “Solución de
problemas” para obtener más información).
ADVERTENCIA!
Antes de desatornillar la tapa de la bomba, apague el aparato y
desenchúfelo de la toma de corriente.
Para limpiar el filtro de desagüe:
ADVERTENCIA!
Cuando la lavadora está en marcha, dependiendo del programa
seleccionado, puede haber agua caliente en el filtro. Nunca extraiga la
tapa del filtro durante un ciclo de lavado; espere siempre a que la
lavadora haya terminado el ciclo y esté vacía. Al volver a colocar la tapa
del filtro, asegúrese de apretarla firmemente para impedir que se
produzcan fugas y que los niños puedan sacarla.
1. Desenchufe el aparato.
2. Si es necesario, espere hasta que el agua se enfríe.
3. Coloque un recipiente cerca de la bomba
para recoger el líquido que pueda
derramarse.
A = tapa del filtro.
B = manguera de descarga de emergencia.
4. Saque la manguera de descarga de
emergencia, colóquela en el recipiente y
retire el tapón
5. Cuando deje de salir agua, desenrosque la
tapa del filtro girándola hacia la izquierda y
retire el filtro. Utilice alicates si fuera
necesario. Tenga siempre a mano un trapo
para secar el agua que se derrame al extraer
la tapa. Limpie el filtro bajo el grifo para
eliminar los restos de pelusas.
Page 59

1
2
1
2
3
ESPAÑOL
6. Retire los cuerpos extraños y limpie las
pelusas del filtro y del rotor del filtro.
7. Asegúrese de que el rotor de la bomba
gira (gira con sacudidas). Si no gira, póngase
en contacto con el servicio técnico.
8. Tapone de nuevo la manguera de desagüe
de emergencia y coloque la manguera en su
sitio. Vuelva a colocar el filtro en la bomba
insertándolo correctamente en las guías
especiales. Enrosque la tapa del filtro
firmemente girándola hacia la derecha.
59
14.7 Limpieza del tubo de entrada y el filtro de la válvula
1.
2.
Page 60

45°
20°
www.aeg.com60
3. 4.
14.8 Medidas anticongelación
Si el aparato está instalado en una zona
donde la temperatura puede llegar a ser
inferior a 0°, retire el agua restante del
tubo de entrada y la bomba de desagüe.
1. Desenchufe el aparato de la toma de
red.
2. Cierre la llave de paso.
3. Coloque el extremo de la manguera
de descarga de emergencia y el
extremo de la manguera de entrada
de agua en un recipiente depositado
en el suelo y deje que salga el agua
de los tubos.
4. Seleccione el programa Descarga y
déjelo funcionar hasta el final del
ciclo.
15. SOLUCIÓN DE PROBLEMAS
ADVERTENCIA!
Consulte los capítulos sobre
seguridad.
15.1 Introducción
El aparato no se pone en marcha o se
detiene durante el funcionamiento.
Primero, intente buscar una solución al
problema (consulte la tabla). Si no la
encuentra, póngase en contacto con el
servicio técnico.
Con algunos problemas, las señales
acústicas funcionan y la pantalla
muestra un código de alarma:
5. Gire el selector de programas a Off
para desconectar el aparato de la
fuente de alimentación.
6. Vuelva a acoplar la manguera de
entrada de agua y vuelva a colocar la
manguera de descarga de
emergencia en su lugar después de
taponarla
ADVERTENCIA!
Asegúrese de que la
temperatura es superior a 0
°C antes de usar de nuevo el
aparato. El fabricante no se
hace responsable de los
daños derivados de las bajas
temperaturas.
• - El aparato no desagua.
• - La puerta del aparato está
abierta o no está bien cerrada. Revise
la puerta.
•
• - El dispositivo anti inundación
- La corriente eléctrica es
inestable. Espere hasta que la
corriente eléctrica se estabilice.
se ha puesto en marcha. Desconecte
el aparato y cierre el grifo. Póngase
en contacto con el servicio técnico.
ADVERTENCIA!
Apague el aparato antes de
realizar las comprobaciones.
• - El aparato no carga agua
correctamente.
Page 61

15.2 Posibles fallos
Problema Posible solución
El programa no se pone
en marcha.
El aparato no carga agua
correctamente.
El aparato no desagua. • Compruebe que el desagüe no esté obstruido.
La fase de centrifugado
no funciona o el ciclo de
lavado dura más de lo
normal.
• Asegúrese de que el enchufe está conectado a la toma de
corriente.
• Asegúrese de que la puerta del aparato está cerrada.
• Asegúrese de que no hay ningún fusible dañado en la caja
de fusibles.
• Asegúrese de que se ha pulsado Inicio/Pausa.
• Si se ha ajustado el inicio diferido, cancele el ajuste o espere hasta el final de la cuenta atrás.
• Desactive la función de bloqueo de seguridad para niños si
está activada (en su caso).
• Compruebe que el grifo está abierto.
• Asegúrese de que la presión del agua no sea demasiado
baja. Solicite información a la compañía local de suministro
de agua.
• Compruebe que el grifo no esté obstruido.
• Asegúrese de que el filtro de la manguera de entrada y el
filtro de la válvula no están obstruidos. Consulte el capítulo
"Mantenimiento y limpieza".
• Asegúrese de que la manguera de entrada no esté doblada
ni retorcida.
• Compruebe que la manguera de entrada de agua está conectada correctamente.
• Asegúrese de que el tubo de desagüe se encuentra en la
posición correcta. Es posible que la manguera esté demasiado baja.
• Asegúrese de que el tubo de desagüe no esté doblado ni
retorcido.
• Compruebe que el filtro de desagüe no está obstruido.
Limpie el filtro si fuera necesario. Consulte el capítulo
"Mantenimiento y limpieza".
• Compruebe que la manguera de desagüe está conectada
correctamente.
• Ajuste el programa de descarga si selecciona un programa
sin la fase de descarga.
• Ajuste el programa de descarga si selecciona una opción
que termina con agua en la cuba.
• Seleccione el programa de centrifugado.
• Compruebe que el filtro de desagüe no está obstruido.
Limpie el filtro si fuera necesario. Consulte el capítulo
"Mantenimiento y limpieza".
• Ajuste manualmente las prendas en la cuba e inicie de nuevo la fase de centrifugado. Este problema puede deberse a
problemas de equilibrio.
ESPAÑOL
61
Page 62

www.aeg.com62
Problema Posible solución
Hay agua en el suelo. • Cerciórese de que los acoplamientos de los tubos de agua
están bien apretados y de que no hay pérdidas de agua.
• Compruebe que la manguera de desagüe no está dañada.
• Asegúrese de que usa el detergente adecuado y la cantidad correcta.
• Asegúrese de que ha cambiado el tapón de desagüe de
emergencia del filtro
• Asegúrese de que ha enroscado correctamente el filtro después de limpiar.
No se puede abrir la puerta del aparato.
• Asegúrese de que el programa de lavado ha terminado.
• Ajuste el programa de centrifugado o descarga si hay agua
en el tambor.
El aparato produce un
ruido extraño.
• Compruebe que el aparato está correctamente nivelado.
Consulte el apartado "Instalación".
• Asegúrese de que se ha quitado el material de embalaje y
los pasadores de transporte. Consulte el apartado "Instalación".
• Añada más colada en el tambor. Es posible que la carga
sea demasiado pequeña.
Los resultados del lavado
no son satisfactorios.
• Aumente la cantidad de detergente o utilice otro diferente.
• Use productos especiales para eliminar las manchas difíciles antes de lavar las prendas.
• Asegúrese de ajustar la temperatura correcta.
• Reduzca la carga.
No es posible seleccio-
• Asegúrese de pulsar solo las teclas táctiles apropiadas.
nar opciones.
La máquina no seca o no
lo hace adecuadamente:
• Asegúrese de que ha ajustado un programa de secado
adecuado para su colada.
• Asegúrese de que ha seleccionado la duración o el grado
de secado adecuados.
• Compruebe que el grifo no esté abierto.
• el filtro de descarga no está obstruido.
• Asegúrese de que no ha sobrecargado el aparato.
Page 63

Problema Posible solución
La colada está llena de
pelusas de diferente color:
Las prendas que lavó en el ciclo anterior dejaron pelusas de un
color diferente.
• Limpie las prendas con un quitapelusas
• La fase de secado ayuda a eliminar algo de pelusa.
En caso de que haya una cantidad excesiva de pelusa en el
tambor, consulte el apartado “PELUSA EN LAS PRENDAS”.
• Limpie a fondo el tambor vacío, la junta y la puerta con un
paño húmedo.
• Realice un ciclo de aclarado.
• Coloque un paño de lana o terciopelo en el interior del
tambor.
• Realice un ciclo de secado de 10 minutos.
• Saque el paño de lana.
Ahora ya puede lavar otras prendas.
ESPAÑOL
63
Una vez finalizada la revisión, conecte el
aparato. El programa continuará a partir
del punto en que se haya interrumpido.
Si el problema se vuelve a producir,
póngase en contacto con el Centro de
servicio técnico.
16. INSTALACIÓN
16.1 Desembalaje
Cuando coloque el aparato sobre el lado trasero, espere unas 6 horas para volverlo a
usar. Esta espera es necesaria para que el compresor funcione correctamente.
ADVERTENCIA!
Retire todo el embalaje y los pasadores de transporte antes de instalar el
aparato.
Si la pantalla muestra otros códigos de
alarma. Encienda y apague el aparato. Si
el problema persiste, póngase en
contacto con el servicio técnico.
Utilice los guantes. Retire la película externa.
Si es necesario, utilice un cúter.
Page 64

www.aeg.com64
Retire la cubierta de cartón. Retire los
materiales del embalaje de poliestireno.
Retire la película interna.
Abra la puerta. Retire la pieza de poliestireno
de la junta de la puerta y todos los elementos
del tambor.
Extienda uno de los materiales de embalaje
de poliestireno en el suelo detrás del
aparato. Baje con cuidado el aparato sobre el
lado posterior. Tenga cuidado para no dañar
los tubos.
Page 65

1
2
ESPAÑOL
65
Retire la protección de poliestireno de la
base. Levante el aparato hasta la posición
vertical.
Extraiga el bloque de poliestireno fijado en la
junta de estanqueidad de la puerta (en su
caso). Saque todos los elementos del tambor.
Retire el cable de alimentación y el tubo de
desagüe de los soportes de los tubos.
Suelte los tres pernos. Utilice la llave
suministrada con el aparato. Extraiga los
separadores de plástico.
Page 66

www.aeg.com66
Se recomienda guardar el embalaje y los pasadores de transporte para
cualquier movimiento del aparato.
16.2 Colocación y nivelado
Coloque los tapones de plástico en los
orificios. Encontrará los tapones en la bolsa
del manual de instrucciones.
• Instale el aparato en el suelo sobre una
superficie plana y rígida.
• Asegúrese de que el aire circula
correctamente alrededor del aparato
aunque haya moqueta, alfombras, etc.
• Nivele el aparato subiendo o bajando las
patas.
• Puede que resulte difícil ajustar las patas,
ya que incorporan una tuerca de
seguridad, pero DEBEN estar niveladas y
estables. Si es necesario, compruebe el
ajuste con un nivel de burbuja. Los ajustes
necesarios pueden realizarse con una
llave. Un nivelado correcto evita las
vibraciones, el ruido y el desplazamiento
del aparato durante el funcionamiento.
• Apriete las tuercas de seguridad cuando
haya terminado de nivelar el aparato.
ADVERTENCIA!
No coloque cartón, madera ni otros materiales similares bajo el aparato
para compensar los desniveles del suelo.
Page 67

16.3 El tubo de entrada
20O20
O
45O45
O
ESPAÑOL
• Conecte el tubo a la parte trasera del
aparato. Gire el tubo de entrada solo a la
derecha o a la izquierda.
• Suelte la tuerca anular para ajustarla en la
posición correcta.
• Conecte el tubo de entrada de agua fría a
una toma de agua fría con rosca de 3/4.
PRECAUCIÓN!
Asegúrese de que no haya
fugas de los acoplamientos.
67
No utilice ningún tubo de extensión si el tubo de entrada es demasiado
corto. Póngase en contacto con el servicio técnico para cambiar el tubo.
Desagüe
Hay distintos procedimientos para conectar el tubo de desagüe:
Con la guía de plástico:
• Formando una U con el tubo de desagüe.
Page 68

www.aeg.com68
En el borde de un fregadero
• Asegúrese de que la guía de plástico no
se mueva cuando el aparato desagua.
Acople la guía al grifo de agua o a la
pared.
A un tubo vertical con orificio de
ventilación
• Directamente en un tubo de desagüe a
una altura mínima de 60 cm (23,6”) y
máxima de 100 cm (39,3”). Consulte la
ilustración.
• El extremo del tubo de descarga siempre
debe estar ventilado; es decir, el diámetro
interno del tubo de desagüe (mín. 38 mm
- mín. 1,5”) debe ser mayor que el
diámetro externo del tubo.
Extremo del tubo de desagüe
• Si el extremo del tubo de descarga es
este (véase el dibujo), podrá introducirlo
directamente en el tubo vertical.
Sin la guía de plástico.
A un desagüe
• Consulte la ilustración. Coloque el tubo
de desagüe en el sumidero y asegúrela
con una brida.
• Asegúrese de que el tubo de desagüe
realiza un bucle para evitar que las
partículas restantes entren en el aparato
desde el fregadero.
Page 69

Puede extender el tubo de desagüe hasta un máximo de 400 cm.
A
600 mm
555 mm
596 mm
170 mm
75 mm
100 mm
60 mm
min.
820 mm
min.
560 mm
818 mm
Póngase en contacto con el servicio técnico para el otro tubo de desagüe
y la extensión.
16.4 Dispositivo antifuga
16.5 Empotrado
ESPAÑOL
A un tubo de pared
• Directamente a un tubo de desagüe
integrado en la pared de la habitación y
apretando con una brida.
El tubo de entrada tiene un dispositivo
antifuga. Este dispositivo evita las fugas de
agua del tubo por el desgaste normal.
El sector rojo de la ventana «A» muestra este
fallo.
Si esto ocurre, cierre el grifo de agua y
póngase en contacto con el servicio técnico
para cambiar el tubo.
69
Este aparato está diseñado para integrarse
en los muebles de cocina. El hueco de
instalación debe tener las dimensiones que
se indican en esta figura.
Page 70

16-22 mm
22±1,5 mm
416
mm
X
595-598 mm
Ø 35 mm
14 mm
1
2
B
A
www.aeg.com70
16.6 Preparación y montaje de la puerta
El aparato viene preparado para que la
puerta pueda abrirse de derecha a izquierda.
Puerta
La puerta debe tener las siguientes medidas:
• anchura 595 - 598 mm
• grosor 16 - 22 mm
• la altura X depende de la distancia vertical
de la base del mueble adyacente.
Bisagras
Para poner las bisagras es preciso taladrar
dos orificios (diámetro de 35 mm, fondo 12,5
- 14 mm dependiendo del fondo del mueble)
por el lado interno de la puerta.
La distancia entre centros de ambos orificios
debe ser de 416 mm. La distancia entre el
borde superior de la puerta y el centro del
orificio depende de las medidas del mueble
adyacente.
Las bisagras se fijan a la puerta con los
tornillos para madera 1 y 2 que se
suministran con el aparato.
Montaje de la puerta
ADVERTENCIA!
No quite el tornillo B.
Fije las bisagras al aparato con los tornillos
M5x15.
Las bisagras se pueden ajustar para
compensar cualquier posible variación de
grosor de la puerta.
Para alinear bien la puerta es preciso aflojar
el tornillo, ajustar la puerta y apretar de
nuevo el tornillo A.
Page 71

A
B
C
A
B
C
E
D
ESPAÑOL
71
17. DATOS TÉCNICOS
Medidas Ancho / Alto / Fondo /
Conexión eléctrica Voltaje
El nivel de protección contra la entrada de partículas sólidas y humedad está garantizado por la tapa
protectora, excepto si el equipo de baja tensión no
tiene protección contra la humedad.
Presión del suministro
de agua
Carga máxima de lava-doAlgodón 7 kg
Carga máxima para secado
Velocidad de centrifugado
Contraimán
ADVERTENCIA!
No quite el tornillo B.
El aparato está preparado para llevar un
cierre magnético instalado en la puerta. Para
que este dispositivo funcione correctamente
hay que atornillar el contraimán A (disco de
acero con anillo de goma) por el lado interno
de la puerta.
Su posición debe coincidir con el imán B del
aparato.
ADVERTENCIA!
No quite el tornillo B.
Si la puerta se va a abrir de izquierda a
derecha, invierta la posición de las placas E,
el imán D y la placa C. Monte el contraimán D
y las bisagras A según se ha descrito
previamente.
596 mm / 820 mm / 544 mm / 544
Fondo total
Potencia total
Fusible
Frecuencia
Mínima
Máxima
Algodón
Sintéticos
Máxima 1400 rpm
mm
220-230 V
2000 W
10 A
50 Hz
IPX4
0,5 bares (0,05 MPa)
8 bares (0,8 MPa)
4 kg
2 kg
Page 72

www.aeg.com
72
ASPECTOS MEDIOAMBIENTALES
Recicle los materiales con el símbolo .
Coloque el material de embalaje en los
contenedores adecuados para reciclarlo.
Ayude a proteger el medio ambiente y la
salud pública, así como a reciclar
residuos de aparatos eléctricos y
electrónicos. No deseche los aparatos
marcados con el símbolo junto con los
residuos domésticos. Lleve el producto a
su centro de reciclaje local o póngase en
contacto con su oficina municipal.
*
Page 73

ESPAÑOL
73
Page 74

www.aeg.com74
Page 75

ESPAÑOL
75
Page 76

www.aeg.com/shop
132908890-A-082014
 Loading...