

Page 1
EW 549 F
EW 551 F
147 120 900
Page 2
Dear customer,
Please read these operating instructions carefully
and pay particular attention to the safety notes
indicated in the first pages. We recommend that you
keep this instruction booklet for future reference and
pass it on to any future owners.
The symbols you will see on some paragraphs of this booklet have the following meaning:
The warning triangle and/or the key words (Warning!, Caution!) emphasize information that is particularly
important for your safety or correct functioning of the appliance.
The information marked with this symbol provides additional instructions and practical tips on the use of
the appliance.
Tips and information about economical and ecological use of the machine are marked with this symbol.
Our contribution to the protection of the
environment: we use environmentally
friendly paper.
Transport damages
When unpacking the appliance, check that it is not
damaged. If in doubt, do not use it and contact the
Service Centre.
Contents
Warnings 3
Disposal 4
Tips for environmental protection 4
Technical specifications 4
Installation 5
Unpacking 5
Positioning 5
Water inlet 5
Water drainage 6
Electrical connection 6
Your new washing machine 7
Description of the appliance 7
Detergent dispenser drawer 7
Use 8
Control panel 8
Controls 8
Washing hints 9
Sorting the laundry 9
Temperatures 9
Before loading the laundry 9
Maximum loads 9
Laundry weights 9
Removing stains 9
Detergents and additives 10
Operating sequence 11-12
International wash code symbols 13
Washing programmes 14-15
Maintenance 16
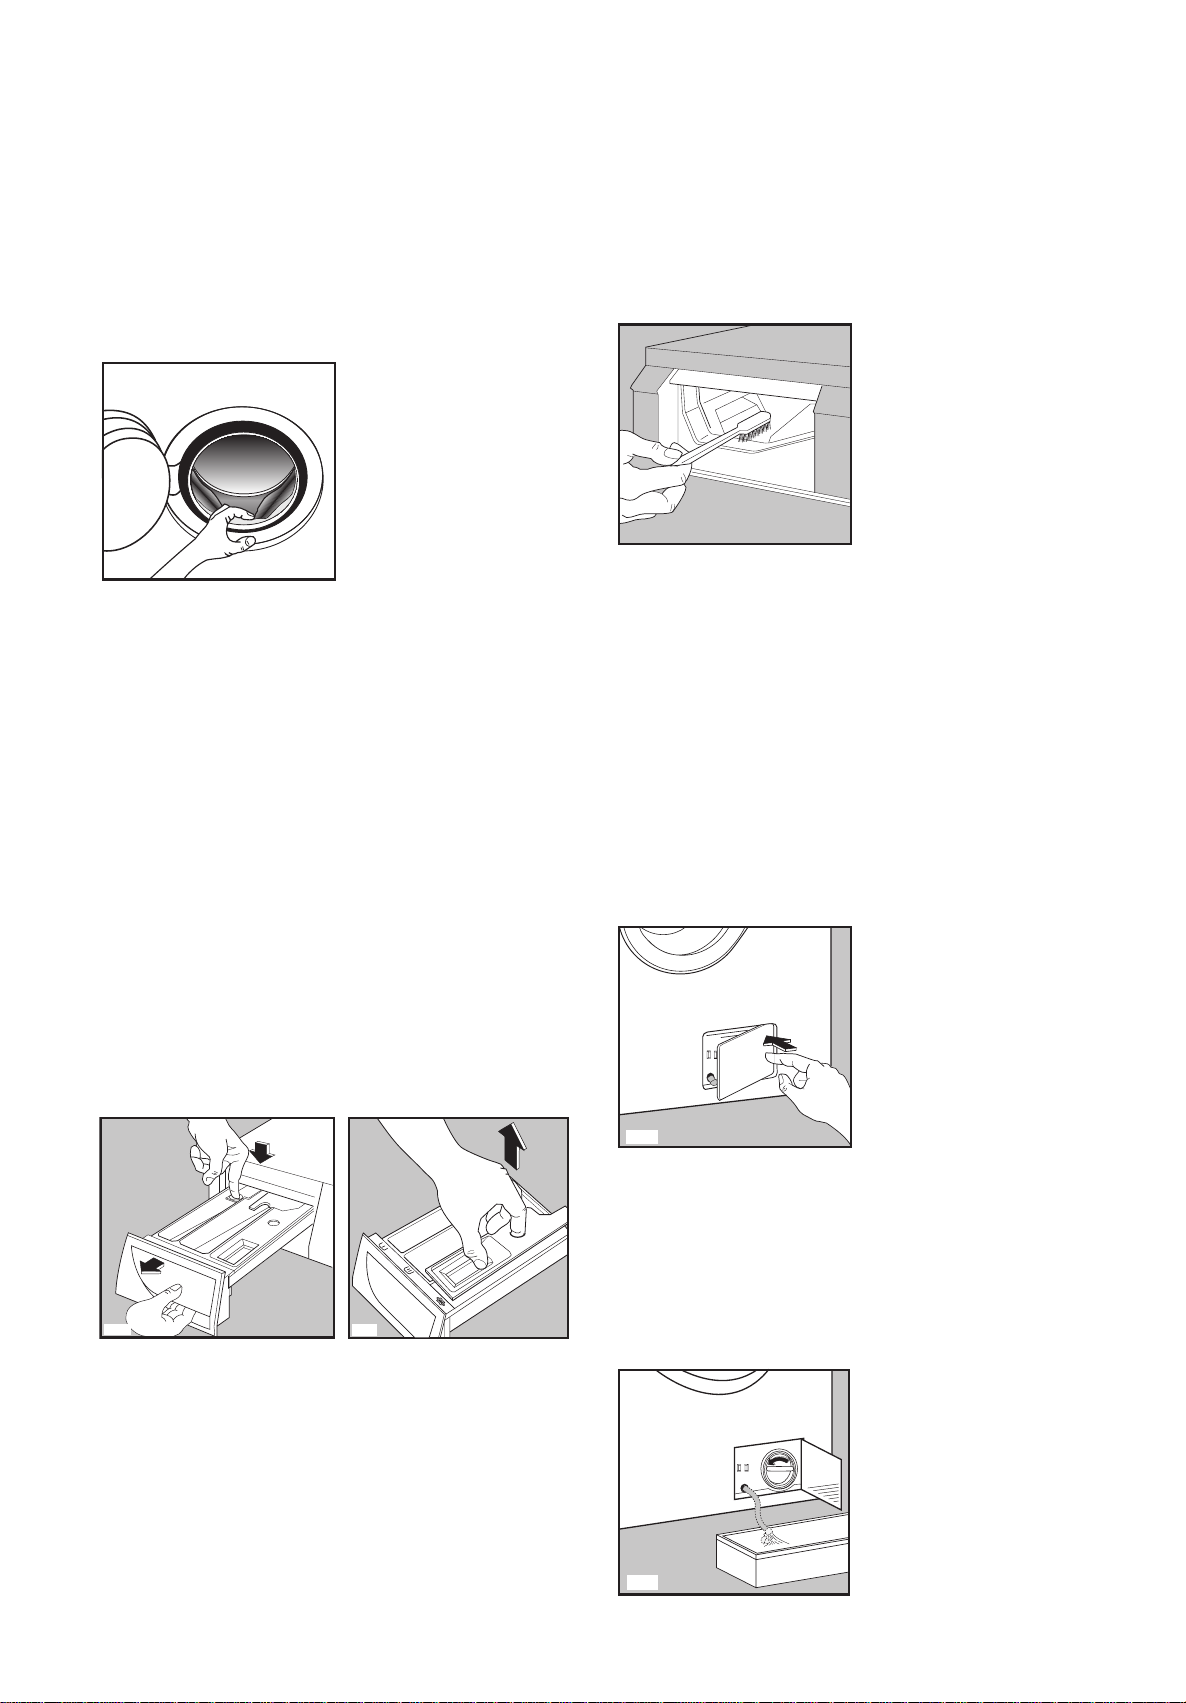
Door seal 16
Bodywork 16
Detergent dispenser drawer 16
Drain pump 16-17
Water inlet filter 17
Emergency emptying out 17
Frost precautions 17
Something not working? 18-19
2
Page 3

Warnings
The following warnings are provided in the interests of overall safety. You must read them carefully
before installing or using the appliance.
ENGLISH
Installation
• All internal packing must be removed before using
the appliance. Serious damage may be caused to
the machine or adjacent furniture if the protective
transit devices are not removed or are not
completely removed. Refer to the relevant
paragraph in the instruction book.
• Any electrical work required to install this
appliance must be carried out by a qualified
electrician.
• Any plumbing work required to install this
appliance must be carried out by a qualified
plumber.
• After having installed the machine, check that it is
not standing on its electrical supply cable.
• If the appliance is placed on a carpeted floor,
ensure that air can circulate freely between the
feet and the floor.
Use
• This appliance is designed for domestic use. It
must not be used for purposes other than those
for which it was designed.
• Only wash fabrics which are designed to be
machine washed. Follow the instructions on each
garment label.
• Do not overload the appliance. Follow the
instructions in the instruction book.
• Make sure that all pockets are empty. Objects
such as coins, safety pins, pins and screws can
cause extensive damage.
• Do not machine wash garments saturated with
petroleum, methylated spirits, trichlorethylene, etc.
If such fluids have been used to remove stains
prior to washing, wait until they have completely
evaporated from the fabric before placing
garments in the appliance.
• Place small items such as socks, belts, etc. in a
cloth bag or pillowcase to prevent them getting
trapped between the drum and the tub.
• Use only the recommended quantities of fabric
softener. An excessive amount could damage the
laundry.
• Leave the porthole door slightly ajar when the
appliance is not in use. This preserves the door
seal and prevents the formation of musty smells.
• Always check that water has emptied out before
opening the door. If not, drain the water following
the instructions in the instruction book.
• Always unplug the appliance and shut the water
tap after use.
General safety
• Repairs to the machine must be carried out only by
qualified personnel. Repairs carried out by
inexperienced persons could cause serious
danger. Contact your local Service Centre.
• Never pull the power supply cable to remove the
plug from the socket; always take hold of the plug
itself.
• During high temperature wash programmes the
door glass may get hot. Do not touch it!
Child safety
• Children are often not aware of how dangerous
electrical appliances can be. When the machine is
working, children should be carefully supervised
and not be allowed to play with the appliance.
• The packaging components (e.g. plastic film,
polystyrene) can be dangerous to children - danger
of suffocation! Keep them out of children’s reach.
• Keep all detergents in a safe place out of children’s
reach.
• Make sure that children or pets do not climb into
the drum.
• When the appliance is to be scrapped, cut off the
electrical supply cable and destroy the plug with
the remaining cable. Disable the door catch in
order to prevent children from becoming trapped
inside while playing.
3
Page 4
Disposal
Packaging materials
The materials marked with the symbol are
recyclable.
>PE<=polyethylene
>PS<=polystyrene
>PP<=polypropylene
This means that they can be recycled by disposing of
Tips for environmental protection
To save water, energy and to help protect the
environment, we recommend that you follow these
tips:
• Normally soiled laundry may be washed without
prewashing in order to save detergent, water and
time (the environment is protected too!).
• The machine works more economically if it is fully
loaded.
them properly in appropriate collection containers.
Machine
Use authorised disposal sites for your old appliance.
Help to keep your country tidy!
• With adequate pre-treatment, stains and limited
soiling can be removed; the laundry can then be
washed at a lower temperature.
• Measure out detergent according to the water
hardness, the degree of soiling and the quantity of
laundry being washed.
Technical specifications
DIMENSIONS Height 85 cm
Width 60 cm
Depth 59 cm
MAXIMUM LOAD Cotton 5,5 kg
Synthetics 2,5 kg
Delicates 2,5 kg
Woollens 1 kg
SPIN SPEED 550 rpm max.
POWER SUPPLY VOLTAGE/FREQUENCY 220-230 V/50 Hz
TOTAL POWER ABSORBED 2200 W (EWF 551) / 450W (EWF 549)
MINIMUM FUSE PROTECTION 10 A
WATER PRESSURE Minimum 500 kPa
Maximum 800 kPa
This appliance complies with the following EEC Directives:
73/23/EEC of 19/02/73 relating to low voltage
89/336/EEC of 03/05/89 relating to electromagnetic compatibility.
4
Page 5
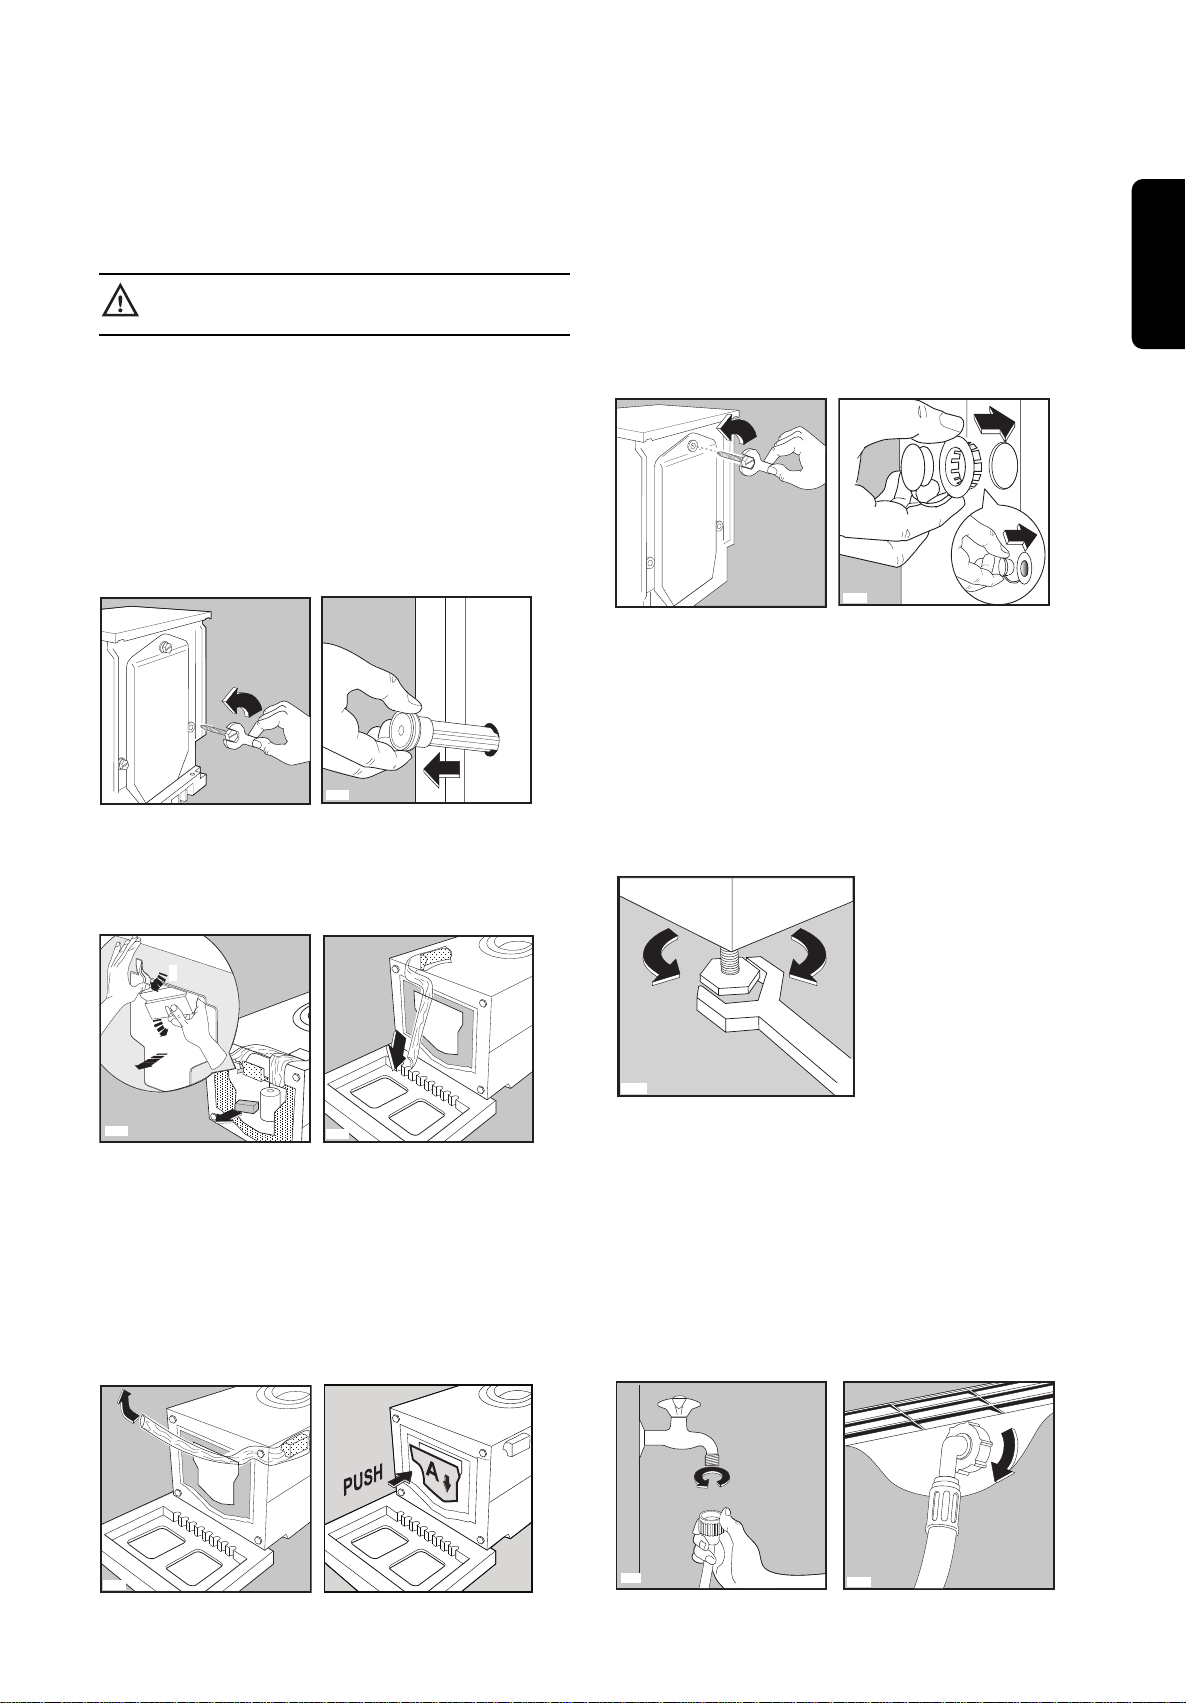
P1051
Installation
Unpacking
All transit bolts and packing must be
removed before using the appliance.
You are advised to keep all transit devices so that they
can be refitted if the machine ever has to be transported
again.
1. Using a spanner, unscrew and remove the two
rear bottom screws. Slide out the two plastic pins.
Lay the machine on its back, taking care not to
squash the hoses. This can be avoided by placing
one of the corner packing pieces between the
machine and the floor.
P0255
2. Remove the polystyrene block(s) from the bottom of
the machine and release the two plastic bags.
3. Very carefully slide out the left polythene bag,
removing it towards the right and then
downwards.
P0001
5. Set the machine upright and remove the
remaining rear screw. Slide out the relevant pin.
6. Plug all the holes with the plugs which you will
find in the envelope containing the instruction
manual.
P1128
P0002
Positioning
Install the machine on a flat hard floor.
Make sure that air circulation around the machine
is not impeded by carpets, rugs etc. Check that
the machine does not touch the wall or cupboard
units. Carefully level by screwing the adjustable
feet in or out. Never place cardboard, wood or
similar materials under the machine to
compensate for any unevenness in the floor.
ENGLISH
1
2
3
P1123
P1126
4. Very carefully slide out the right polythene bag,
removing it towards the left and then upwards.
Remove the bottom cover placed into the drum of
your appliance, lay it’s hook as the arrow ’A’
indicates and push the top of the cover to seal it
closed
Important: You can find more detailed instructions
regarding the bottom cover assembling in it’s relative
bag.
Water inlet
Connect the water inlet hose to a tap with 3/4” BSP
thread.
Use the hose supplied with the washing machine.
DO NOT USE OLD HOSES.
The other end of the inlet hose which connects to the
machine can be turned in any direction. Simply
loosen the fitting, rotate the hose and retighten the
fitting, making sure there are no water leaks.
P1127
P1088
P0021
5
Page 6
The inlet hose must not be lengthened. If it is too
P1118
P0022
short and you do not wish to move the tap, you will
have to purchase a new, longer hose specially
designed for this type of use.
Important!
Before connecting up the machine to new pipe work
or to pipe work that has not been used for some
time, run off a reasonable amount of water to flush
out any debris that may have collected in the pipes.
Water drainage
The end of the drain hose can be positioned in three
ways:
Hooked over the edge of a sink using the plastic
hose guide supplied with the machine. In this
case, make sure the end cannot come unhooked
when the machine is emptying.
This could be done by tying it to the tap with a piece
of string or attaching it to the wall.
Electrical connection
This machine is designed to operate on a 220-230 V,
single-phase, 50 Hz supply.
Check that your domestic electrical installation can
take the maximum load required (2.05 kW), also
taking into account any other appliances in use.
Connect the machine to an earth socket.
The manufacturer declines any responsibility
for damage or injury through failure to
comply with the above safety precautions.
Should the appliance power supply cable need
to be replaced, this should be carried out
by our service centre.
Please ensure that when the appliance is
installed the power supply cable is easily
accessible.
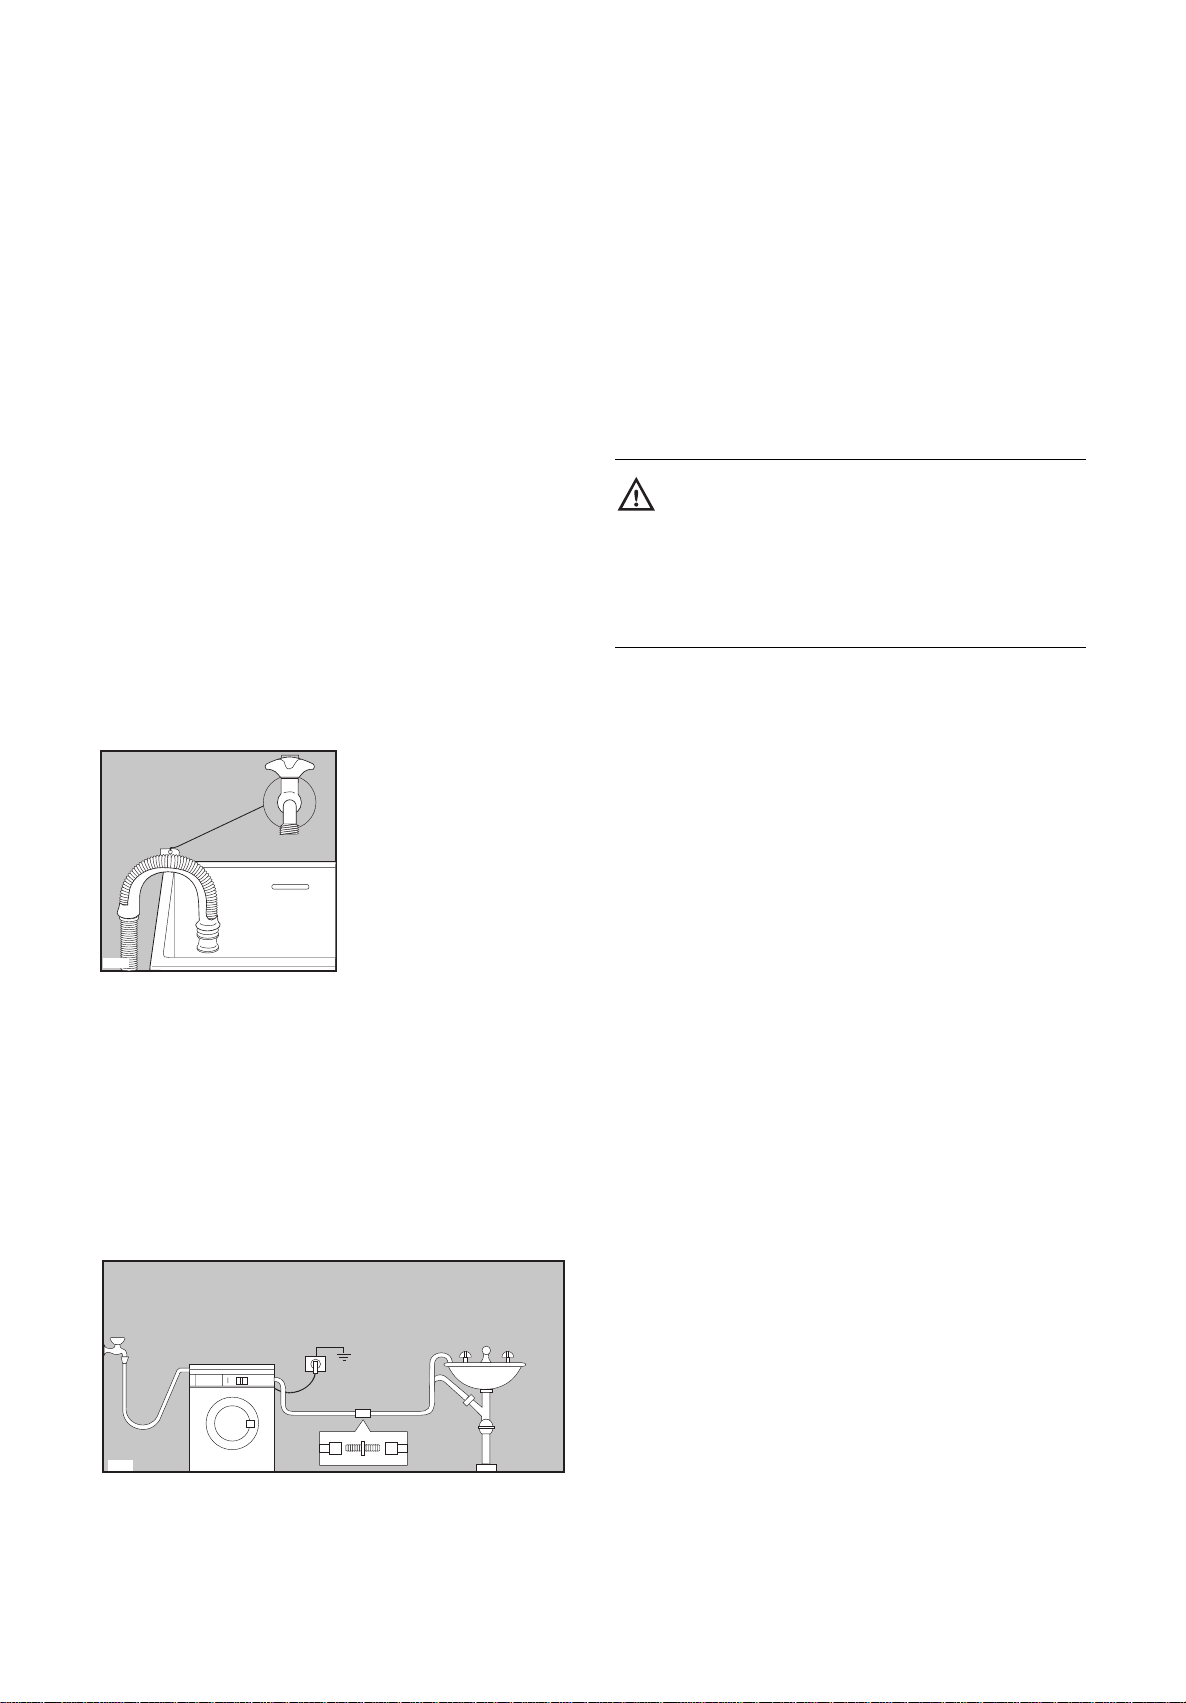
In a sink drain pipe branch. This branch must be
above the trap so that the bend is at least 60 cm
above the ground.
Directly into a drain pipe at a height of not less
than 60 cm and not more than 90 cm.
The end of the drain hose must always be
ventilated, i.e. the inside diameter of the drain pipe
must be larger than the outside diameter of the drain
hose.
The drain hose must not be kinked.
For a correct functioning of the machine the
drain hose must remain hooked on the proper
support piece situated on the top part of the back
side of the appliance.
6
Page 7

Your new washing machine
This new machine meets all modern needs for effective treatment of laundry with low water, energy and
detergent consumption.
• The temperature selector dial will allow you to choose the most suitable temperature for your laundry.
• The automatic cooling of the washing water from 95° to 60°C before draining will prevent old drain pipes
from being deformed and will reduce thermal shock to fabrics, helping to prevent creasing.
• The special wool programme with its new delicate wash system treats your woollens with extreme care.
• The unbalance control device ensures the machine is stable during the spin.
• The ECO valve allows total use of detergent and reduces water consumption so saving energy.
Description of the appliance
1. Detergent dispenser drawer
2. Programme chart
3. Control panel
4. Door handle
5. Drain pump
6. Adjustable feet
ENGLISH
Detergent dispenser drawer
Pre-wash
Main wash
Fabric softener, starch
C0063
7
Page 8
Use
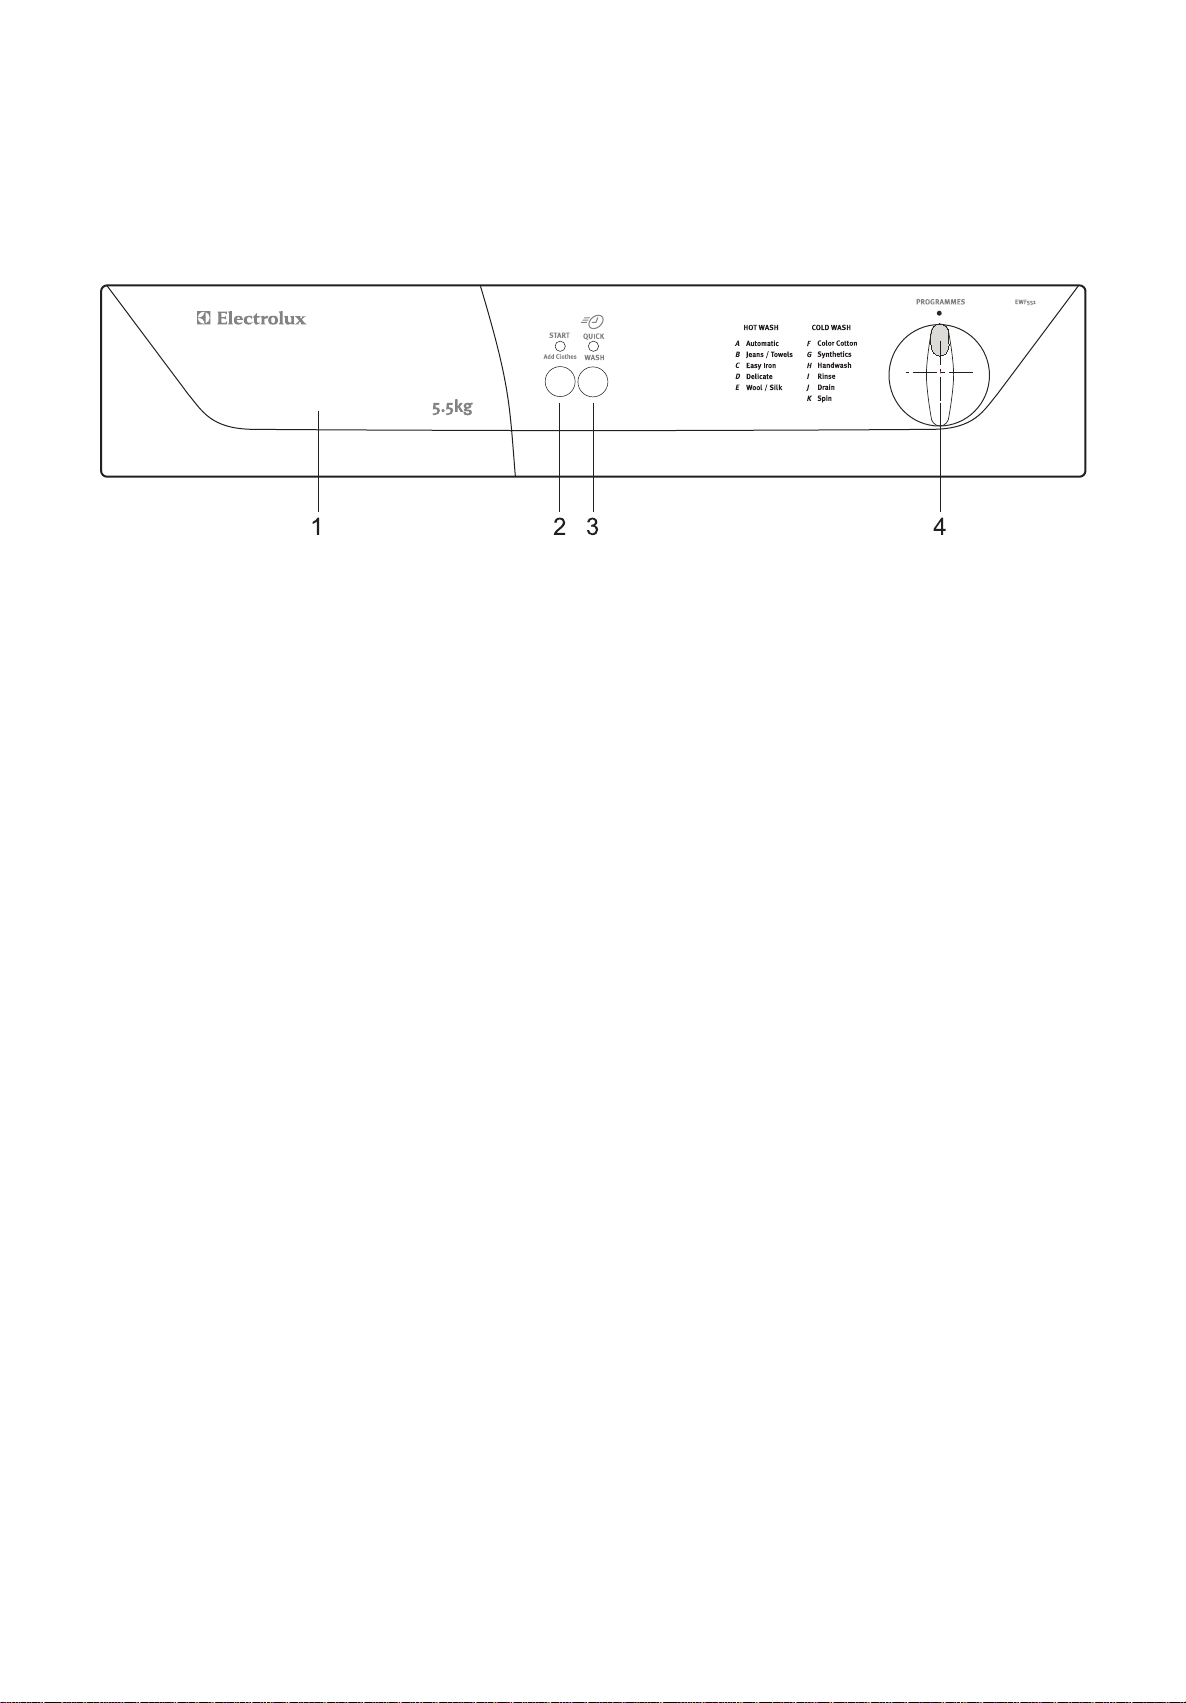
Control panel
1. Detergent Dispenser Drawer
2. ”Start /Add Clothes” Button
After having selected the programme and the required options, press this button to start the machine. The
corresponding LED stops flashing and remains lit. To interrupt a programme which is running,
depress the Start/Add Clothes button, the corresponding LED starts to flash.To restart the programme from the
point at which it was interrupted, press the Start/Add clothes button again.
3. ”Quick Wash”
Pressing this button, will shorten the selected wash program. As an example, if this button is pushed, the
LED will light up and the program ‘Automatic’ will be reduced to approx. 60 min from 110 min.
4. Programme Selector Dial
The selector is dived into three sections
OFF, COLD for EWF 549 and OFF, HOT and COLD for EWF 551
This can be rotated in clockwise and anti clockwise direction.
At the end of the programme the selector dialmust be turned to position “O” to switch the machine off.
Attention! If during a wash programme, the selector dial is turned to another programme, the machine will not
perform the new selected programme.
In the EWF 551 for HOT programs the temperature is preset (Refer page 14).
8
Page 9

Washing hints
Sorting the laundry
Follow the wash code symbols on each garment
label and the manufacturer’s washing instructions.
Sort the laundry as follows:
whites, coloured, synthetics, delicate, woollens.
Before loading the laundry
Never wash whites and coloured together. Whites
may lose their “whiteness” in the wash.
New coloured items may run in the first wash; they
should therefore be washed separately the first time.
Make sure that no metal objects are left in the
laundry (e.g. hair clips, safety pins).
Button up pillowcases, close zip fasteners, hooks
and poppers. Tie any belts or long tapes. Remove
persistent stains before washing. Rub
particularly soiled areas with a special detergent or
detergent paste.
Treat curtains with special care. Remove hooks or tie
them up in a bag or net.
Maximum loads
Recommended loads are indicated in the
programme charts.
General rules:
Cotton, linen: drum full but not too tightly packed;
Synthetics: drum no more than half full;
Delicate fabrics and woollens: drum no more than
one third full.
Washing a maximum load makes the most efficient
use of water and energy.
For heavily soiled laundry, reduce the load size.
Laundry weights
The following weights are indicative:
bathrobe 1200 g
napkin 100 g
quilt cover 700 g
sheet 500 g
pillow case 200 g
tablecloth 250 g
towel 200 g
tea cloth 100 g
night dress 200 g
ladies’ briefs 100 g
man’s work shirt 600 g
man’s shirt 200 g
man’s pyjamas 500 g
blouse 100 g
men’s underpants 100 g
Removing stains
Stubborn stains may not be removed by just water
and detergent. It is therefore advisable to treat them
prior to washing.
Blood: Treat fresh stains with cold water. For dried
stains, soak overnight in water with a special
detergent then rub in the soap and water.
Oil based paint: Moisten with benzine stain
remover, lay the garment on a soft cloth and dab the
stain; treat several times.
Dried grease stains: Moisten with turpentine, lay
the garment on a soft surface and dab the stain with
the fingertips and a cotton cloth.
Rust: Oxalic acid dissolved in hot water or a rust
removing product used cold. Be careful with rust
stains which are not recent since the cellulose
structure will already have been damaged and the
fabric tends to hole.
Mould stains: Treat with bleach, rinse well (whites
and fast coloureds only).
Grass: Soap lightly and treat with bleach (whites and
fast coloured only).
Ball point pen and glue: Moisten with acetone (*),
lay the garment on a soft cloth and dab the stain.
Lipstick: Moisten with acetone as above, then treat
stains with methylated spirits. Remove any residual
marks from white fabrics with bleach.
Red wine: Soak in water and detergent, rinse and
treat with acetic or citric acid, then rinse. Treat any
residual marks with bleach.
ENGLISH
9
Page 10

Ink: depending on the type of ink, moisten the fabric
first with acetone (*), then with acetic acid; treat any
residual marks on white fabrics with bleach and then
rinse thoroughly.
Tar stains: first treat with stain remover, methylated
spirits or benzine, then rub with detergent paste.
(*) do not use acetone on artificial silk.
Detergents and additives
Good washing results also depend on the choice of
detergent and use of the correct quantities to avoid
waste and protect the environment. Although
biodegradable, detergents contain substances
which, in large quantities, can upset the delicate
balance of nature.
The choice of detergent will depend on the type of
fabric (delicates, woollens, cottons, etc.), the colour,
washing temperature and degree of soiling.
All commonly available washing machine detergents
may be used in this appliance:
– powder detergents for all types of fabric,
– powder detergents for delicate fabrics (60°C max)
and woollens,
– liquid detergents, preferably for low temperature
wash programmes (60°C max) for all types of fabric,
or special for woollens only.
The detergent and any additives must be placed in
the appropriate compartments of the dispenser
drawer before starting the wash programme.
If using concentrated powder or liquid detergents, a
programme without prewash must be selected. The
washing machine incorporates a recirculation system
which allows an optimal use of the concentrated
detergent.
Pour liquid detergent into the dispenser drawer
compartment marked just before starting the
programme.
Any fabric softener or starching additives must be
poured into the compartment marked before
starting the wash programme.
Follow the product manufacturer’s recommendations
on quantities to use and do not exceed the «MAX»
mark in the detergent dispenser drawer.
Quantity of detergent to be used
The type and quantity of detergent will depend on
the type of fabric, load size, degree of soiling and
hardness of the water used.
Water hardness is classified in so-called “degrees” of
hardness. Information on hardness of the water in
your area can be obtained from the relevant water
supply company, or from your local authority.
Follow the product manufacturers’ instructions on
quantities to use.
Use less detergent if:
– you are washing a small load,
– the laundry is lightly soiled,
– large amounts of foam form during washing.
10
Page 11
Operating sequence
P0004
C0064
C0065
Before the first wash we recommend that you pour
2 litres of water into the main wash compartment
ECO valve. Then run the automatic cycle with the
machine empty, in order to remove any
manufacturing residue from the drum and tub.
Pour half a measure of detergent into the main
wash compartment and start up the machine.
1. Place the laundry in the drum
Open the door.
Place the laundry in the drum, one item at a time,
shaking them out as much as possible.
Close the door.
4. Select the desired programmes
Turn the programme selector dial to the desired
position.
The LED corresponding to the Start / Add clothes
button starts to flash.
5. Select the option “Quick Wash”
if required
The LED corresponding to the Quick Wash button
illuminates
ENGLISH
2. Measure out the detergent
Pull out the dispenser drawer until it stops. Measure
out the amount of detergent recommended by the
manufacturer in a graduated cup and pour it into the
main wash compartment .
If you wish to carry out the pre-wash, pour detergent
into the appropriate compartment marked .
3. Measure out the additive
If required, pour fabric softener into the compartment
marked , without exceeding the «MAX» mark.
6. Start the machine
Push the Start / Add clothes button and the
programme starts
The LED corresponding to the Start/ Add clothes
button illuminates
11
Page 12

7. At the end of the programme
The machine stops automatically and the
Start/Add clothes button LED goes off.
If you have selected the Quick Wash button,
LED for the button will also go off.
Wait one or two minutes before opening the door
to give the electric locking mechanism time to
release it.
Remove the laundry.
Turn the drum by hand to make sure it is
completely empty, so as to avoid any forgotten
items being damaged in a subsequent wash
(e.g. shrinking) or their colour running into
a load of whites.
Turn the water tap off and unplug the
machineLeave the door open for the tub to dry.
12
Page 13

International wash code symbol
These symbols appear on fabric labels, in order to help you choose the best way to treat your laundry.
Energetic wash
ENGLISH
Max. wash
temperature
95°C
Delicate wash
Bleaching
Ironing Hot iron
max 200°C
Max. wash
temperature
60°C
Bleach in cold water Delicate wash
Max. wash
temperature
40°C
Warm iron
max 150°C
Max. wash
temperature
30°C
Hand wash Do not
Lukewarm iron
max 110°C
wash
at all
Do not iron
Dry cleaning
Drying Flat On the line On clothes
Dry cleaning
in all solvents
Dry cleaning in
perchlorethylene,
petrol, pure alcohol,
R 111 & R 113
hanger
13
Dry cleaning
in petrol,
pure alcohol
and R 113
high
temperature
low
temperature
Tumble dry Do not
Do not dry clean
tumble dry
Page 14
Programme table
EWF 551 - Hot Programmes
The temperature of each programme is pre defined and is set automatically
Depending upon the type of laundry and is as per the se
Programme Type of laundry
and degree of soil
A
B
C
D
E
Houselhold, linens,
sheets, shirts, under
garments
Jeans, hand towels,
sheets, table clothe
Shirts, blouses,
easy to iron
Delicate,
for. e.g. curtains
Clothes labelled
“ Pure new wool,
non-shrink machine
washable”
& silk fabrics
Programme Programme
description
Automatic
Jeans / Towels
Easy Iron
Delicate
Wool and silk
Wash 40°, 3 rinses,
normal spin
Pre-Wash 40°,
Wash 60°, 5 rinses,
maximum spin
Wash 40°, 3 rinses,
gentle spin
Wash 30°, 3 rinses,
gentle spin
Wash 30°, 3 rinses,
normal spin
Possible
option
Quick Wash
Quick Wash
Quick Wash
Quick Wash
Quick Wash
EWF 551 - Cold Programmes
F
G
H
I
J
K
Fast coloured cottons
like towels, Non fast
colured clothes like
under garments, shirts.
Acrilic, viscose,
polyester, curtains
Shirt, blouses,
undergarments,
mixed fabrics
Colour cottons
Synthetics
Hand Wash
Rinse
Drain
Spin
Wash, 3 rinses,
normal spin
Wash, 3 rinses,
gentle spin
Wash, 3 rinses,
gentle spin
3 rinses, drain
normal spin
Drain
Normal spin
Quick Wash
Quick Wash
Quick Wash
Note: Normal spin is 500 rpm. , gentle spin is 450 rpm. and max spin is 550 rpm.
14
Page 15

Programme table
EWF 549
ENGLISH
Programme Type of laundry
and degree of soil
A
B
C
D
E
Houselhold , linens,
sheets, shirts,
under garments
Shirts, table clothes,
undergarments
Delicates like
pillow covers,
curtains
Easy to iron,shirts,
blouses
Acrylic,viscose,
polyester,curtains
Programme Programme
description
Automatic
Daily cotton
Delicate colour
Easy iron
Synthetics
Pre-Wash, wash,
5 rinses, normal spin
Wash , 3 rinses,
normal spin
Wash , 3 rinses,
normal spin
Wash , 3 rinses,
normal spin
Wash , 3 rinses,
gentle spin
Possible
option
Quick Wash
Quick Wash
Quick Wash
Quick Wash
Quick Wash
F
G
H
I
J
K
Clothes labelled
“ Pure new wool, non
shrink machine
washble”
Shirt, blouses,
undergarments,
mixed fabrics
& silk fabrics
Wool and silk
Hand Wash
Softner
Rinse
Drain
Spin
Wash , 3 rinses,
normal spin
Wash , 3 rinses,
gentle spin
1 rinse, normal spin
3 rinses, drain normal
spin
Drain
Normal spin
Note: Normal spin is 500 rpm. and gentle spin is 450 rpm.
15
Page 16
P1115
P1114
P0038
P1050
Maintenance
C0066
C0067
1.Cleaning the Door Seal
Check from time to time the door seal and eliminate
eventual possible objects that could be trapped in
the fold.
2.External Cleaning
Clean the outside of the machine with warm water
znd a detergent used to handwash dishes. Rinse
with clean water and dry with a soft cloth.
Important: do not use methylated spirits, solvents or
similar products to clean the bodywork.
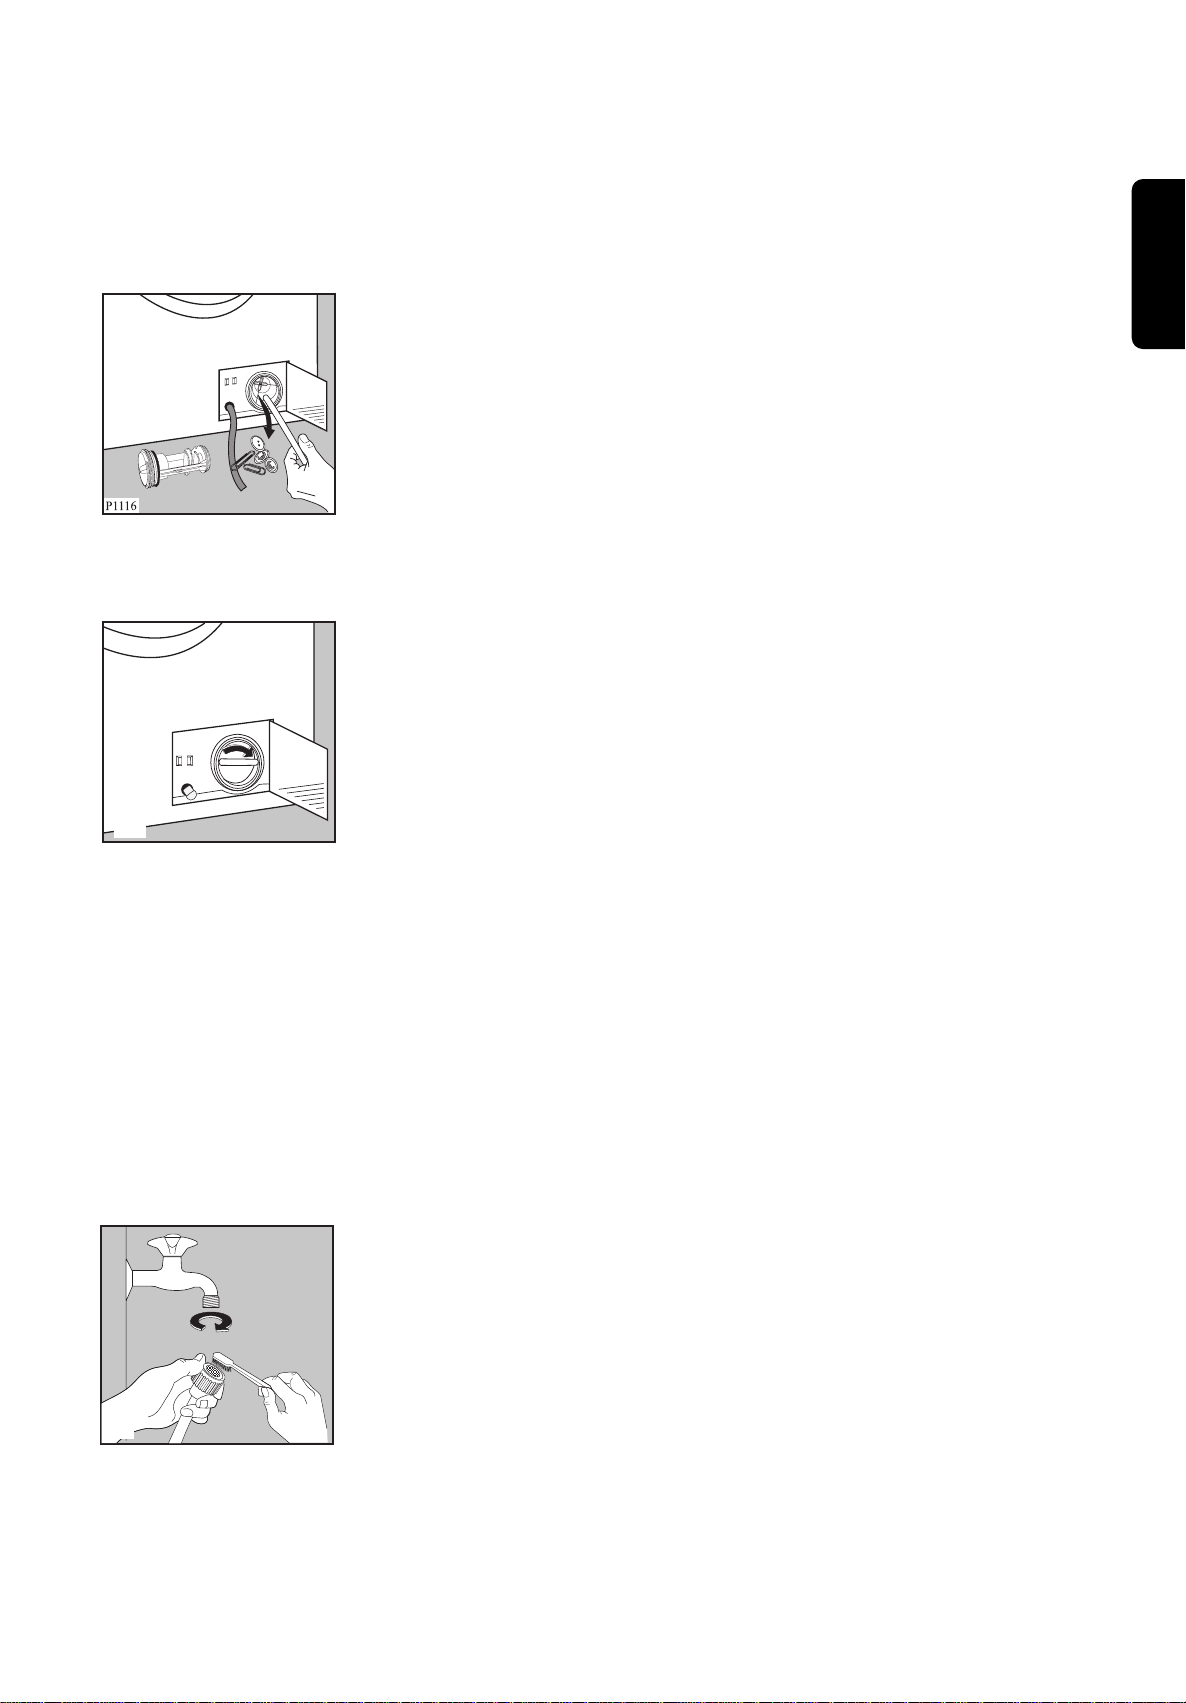
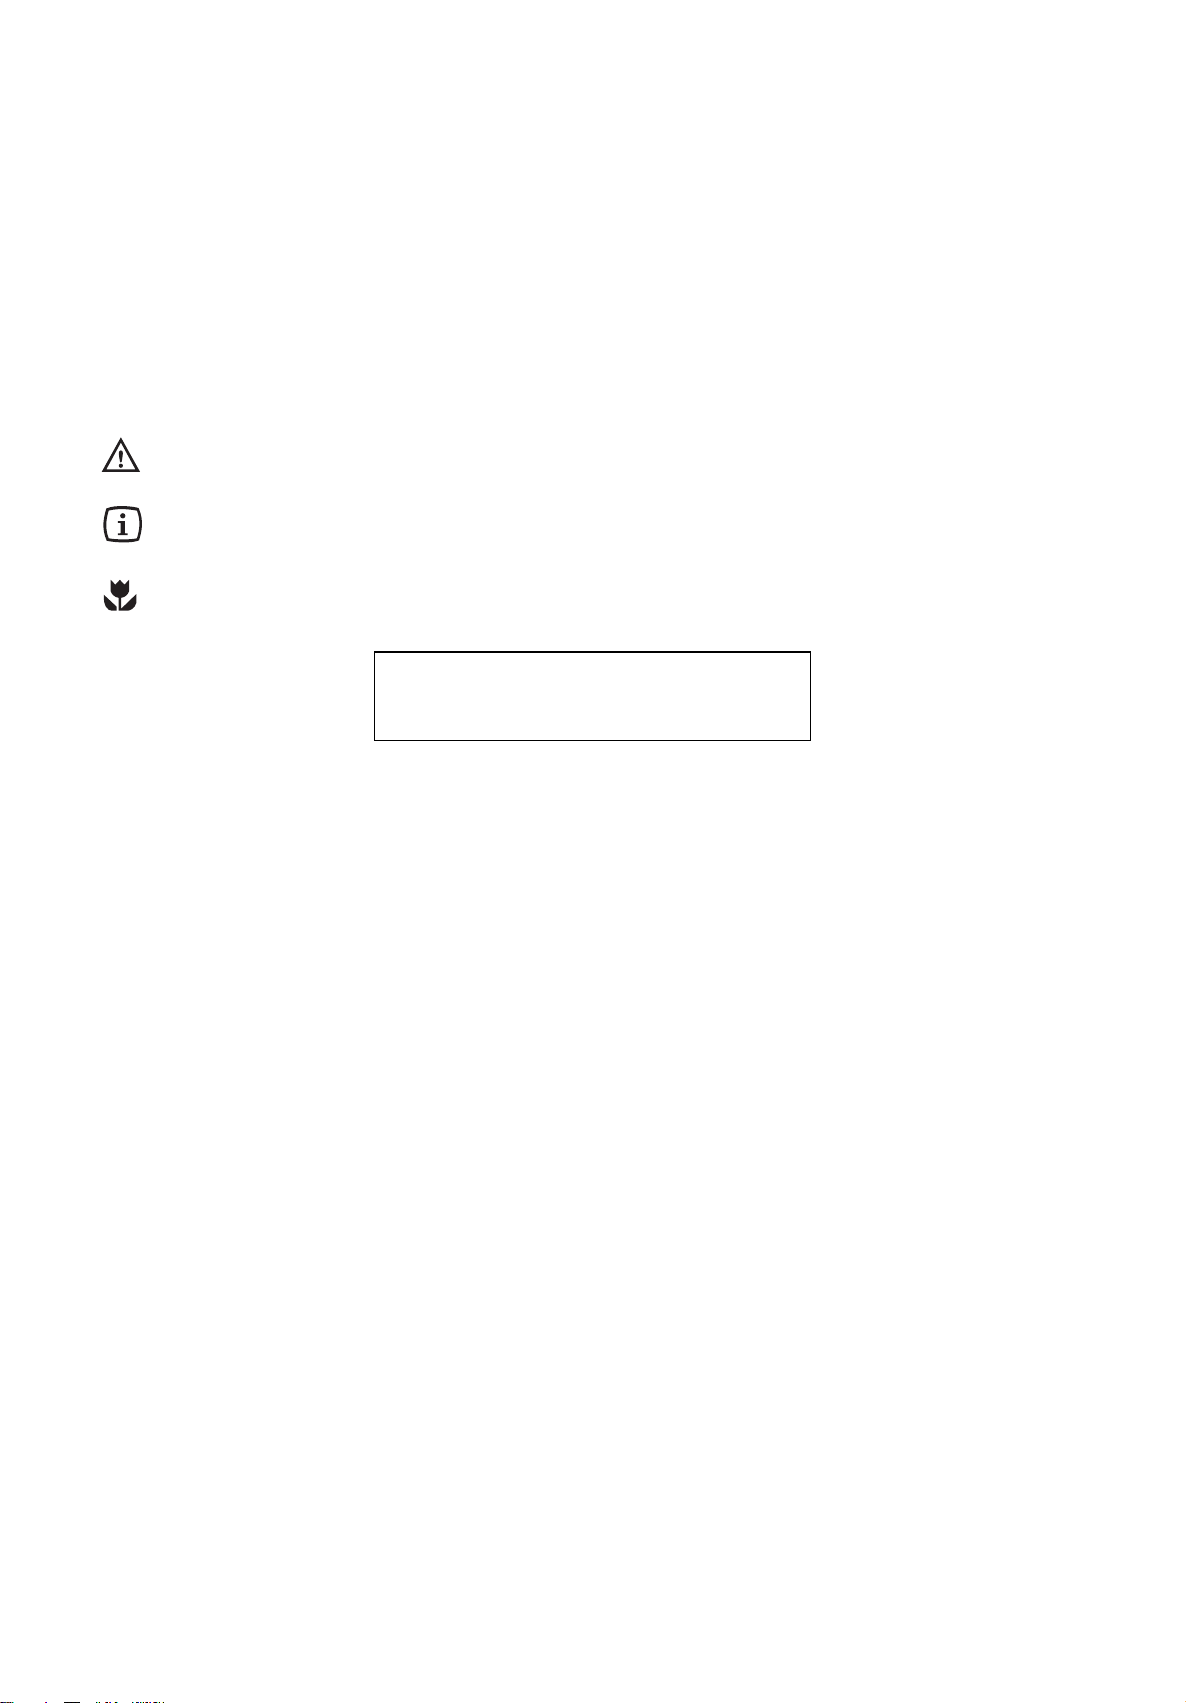
3. Cleaning the Detergent Drawer
After a while, detergents and fabric softeners leave
deposits in the drawer.
Clean the drawer from time to time by rinsing it under
a running tap. To remove the drawer from the
machine, press the button in the rear left-hand
corner.
To facilitate cleaning, the top part of the additive
compartments can be removed.
Detergent can also accumulate inside the drawer
recess: clean it with an old toothbrush. Refit the
drawer after cleaning.
4. Cleaing Drain Pump
The pump should be inspected regularly and
particularly if
• the machine does not empty and/or spin
• the machine makes an unusual noise during
draining due to objects such as safety pins, coins
etc. blocking the pump.
Proceed as follows:
• Disconnect the appliance.
• If necessary wait until the water has cooled down.
• Open the pump door.
• Place a container close to the pump to collect any
spillage.
• Release the emergency emptying hose, place it in
the container and remove its cap.
• When no more water comes out, unscrew the
pump and remove it. Always keep a rag nearby to
dry up spillage of water when removing the pump.
16
Page 17
• Remove any objects from the pump impeller by
P1117
P1090
rotating it.
• Put the cap back on the emergency emptying hose
and place the latter back in its seat.
• Screw the pump fully in.
• Close the pump door.
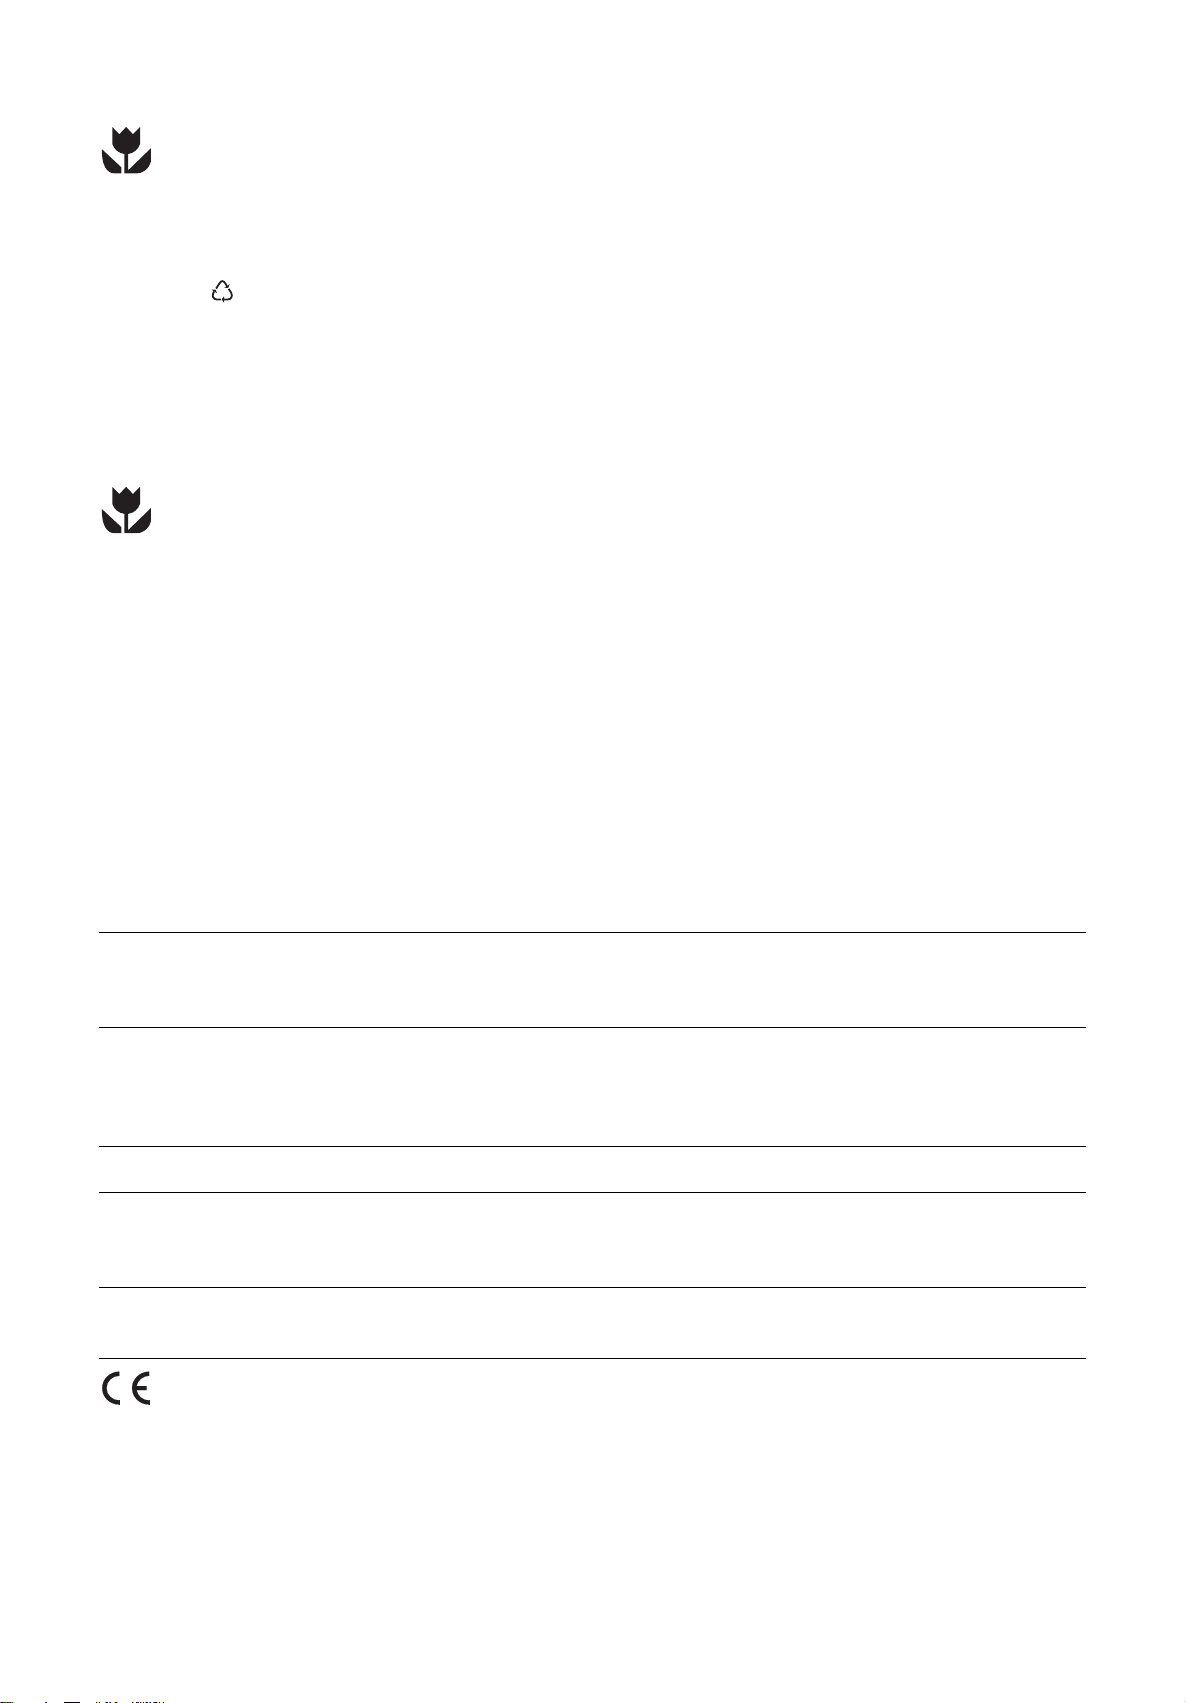
5. Water inlet filter
If you notice that the machine is taking longer to fill,
check that the filter in the water inlet hose is not
blocked.
Turn off the water tap.
Unscrew the hose from the tap. Clean the filter with a
stiff brush. Screw the hose back onto the tap.
6. Emergency emptying out
If the water is not discharged, proceed as follows to
empty out the machine:
• pull out the plug from the power socket;
• close the water tap;
• if necessary, wait until the water has cooled down;
• open the the pump door;
• place a bowl on the floor and place the end of the
emergency emptying hose into the bowl. Remove
its cap. The water should drain by gravity into the
bowl. When the bowl is full, put the cap back on
the hose. Empty the bowl. Repeat the procedure
until water stops flowing out;
• clean the pump if necessary as previously
described;
• replace the emergency emptying hose in its seat
after having plugged it;
• screw the pump again and close the door.
7. Frost precautions
If the machine is installed in a place where the
temperature could drop below 0°C, proceed as
follows:
• Remove the plug from the socket.
• Close the water tap and unscrew the water inlet
hose from the tap.
• Place the end of the emergency emptying hose
and that of the inlet hose in a bowl placed on the
floor and let water drain out.
• Screw the water inlet hose back on and reposition
the emergency emptying hose after having put the
cap on again.
By doing this, any water remaining in the machine is
removed, avoiding the formation of ice and,
consequently, breakage of the affected parts.
When you use the machine again, make sure that
the ambient temperature is above 0°C.
Important!
Every time you drain the water through the
emergency emptying hose you must pour 2 litres of
water into the main wash compartment of the
detergent drawer and then run the drain programme.
This will activate the ECO valve avoiding that part of
the detergent remains unused at next washing.
ENGLISH
17
Page 18

Something not working?
Problems which you can resolve yourself.
Problem Possible cause
• The machine does not start up:
• The machine does not fill:
• The machine fills then empties
immediately:
• The machine does not empty
and/or does not spin:
• There is water on the floor:
• The door is not firmly closed.
• The machine is not plugged in or there is no power
at the socket.
• The main fuse has blown.
• The programme selector dial is not positioned
correctly.
• The “Start / Add clothes” button has not been depressed.
• The water tap is closed.
• The inlet hose is squashed or kinked.
• The filter in the inlet hose is blocked.
• The door is not properly closed.
• The end of the drain hose is too low. Refer to relevant
paragraph in “water drainage” section.
• The drain hose is squashed or kinked.
• The drain pump is clogged.
• Too much detergent or unsuitable detergent
(creates too much foam) has been used.
• Check whether there are any leaks from one of the
inlet hose fittings. It is not always easy to see this as
the water runs down the hose; check to see if it is
damp.
• The drain hose is damaged.
• The cap on the emergency emptying hose has not
been replaced after cleaning the filter.
• Unsatisfactory washing results:
• The machine vibrates or is noisy:
• The door will not open:
18
• Too little detergent or unsuitable detergent has been
used.
• Stubborn stains have not been treated prior to
washing.
• The correct temperature was not selected.
• Excessive laundry load.
• The transit bolts and packing have not been removed.
• The support feet have not been adjusted.
• The laundry is not evenly distributed in the drum.
• Maybe there is very little laundry in the drum.
• The programme is still running.
• The door lock has not been released.
• There is water in the drum.
Page 19

Problem Possible cause
• Spinning starts late or the laundry
is not spun enough:
Water is not
visible in the machine. The machine,
which is the result of modern technology, runs
in a very economical way with low water
consumption. Performance is
nevertheless excellent
• The electronic unbalance detection device has cut
in because the laundry is not evenly distributed in
the drum. The laundry is redistributed by reverse
rotation of the drum. This may happen several
times before the unbalance disappears and normal
spinning can resume. If, after few minutes, the
laundry is still not evenly distributed in the drum,
the machine will not spin. If at the end of the
programme the laundry is not spun enough,
redistribute the load manually and select the spin
programme.
The machine makes an unusual
noise. The machine is fitted with
a commutator motor which improves
machineperformance.
ENGLISH
If you are unable to identify or solve the problem,
contact our service centre. Before telephoning, make
a note of the model, serial number and purchase
date of your machine: the Service Centre will require
this information.
19
Model No:................
Product No: ........................
Serial No: ........................
Page 20
аГХВ¹ ЕЩ¡¤йТ¼ЩйБХНШ»¡ТГ¤Ш³
в»Г´НиТ¹¤Уб¹Р¹Уг¹¡ТГгªй§Т¹¹ХйНВиТ§ЕРаНХВ´ бЕРв»Г´»¯ФºСµФµТБ¤Уб¹Р¹У´йТ¹
¤ЗТБ»ЕН´АСВ·ХиЛ¹йТбГ¡ аГТ¢Нб¹Р¹УгЛй¤Ш³а¡зº¤ЩиБЧН¤Уб¹Р¹У¹ХйдЗйа¾ЧиНгªй§Т¹г¹
Н¹Т¤µ бЕРа¡зºГС¡ЙТдЗйКУЛГСºа¨йТ¢Н§ГТВµиНд»
а¤ГЧиН§ЛБТВ¤УаµЧН¹ГЩ»КТБаЛЕХиВБЛГЧН¤УаµЧН¹НЧи¹ (¤УаµЧН¹!¢йН¤ЗГГРЗС§!) а¹й¹¶Ц§¢йНБЩЕ·ХиБХ¤ЗТБКУ¤Са»з¹¾ФаИЙµиН¤ЗТБ»ЕН´АСВ¢Н§¤Ш³ бЕР¡ТГ·У§Т¹·Хи¶Щ¡µйН§¢Н§а¤ГЧиН§
а¤ГЧиН§ЛБТВ¤УаµЧН¹ГЩ»КТБаЛЕХиВБЛГЧН¤УаµЧН¹НЧи¹ (¤УаµЧН¹!¢йН¤ЗГГРЗС§!) а¹й¹¶Ц§¢йНБЩЕ·ХиБХ¤ЗТБКУ¤Са»з¹¾ФаИЙµиН¤ЗТБ»ЕН´АСВ¢Н§¤Ш³ бЕР¡ТГ·У§Т¹·Хи¶Щ¡µйН§¢Н§а¤ГЧиН§
¢йНБЩЕ·ХиБХа¤ГЧиН§ЛБТВ¹ХйбК´§¶Ц§¤Уб¹Р¹Уа¾ФиБаµФБ бЕРа¤Ез´ЕСºг¹¡ТГгªй§Т¹НШ»¡Г³м
¤Уб¹Р¹УбЕР¢йНБЩЕа¡ХиВЗ¡Сº¤ЗТБ»ГРЛВС´бЕРКФи§бЗ´ЕйНБ¨РбК´§´йЗВа¤ГЧиН§ЛБТВ¹Хй
¤ЗТБ¾ВТВТБ¢Н§аГТг¹¡ТГ»¡»йН§КФи§бЗ´ЕйНБ аГТгªй¡ГР´ТЙ·Хи¹У¡ЕСºБТгªйгЛБи
¤ЗТБаКХВЛТВа¹ЧиН§¨Т¡¡ТГ¢¹Ки§
ЛЕС§¨Т¡·Хи¹Уа¤ГЧиН§НН¡¨Т¡ºГГ¨ШАС³±м в»Г´µГЗ¨КНºЗиТНШ»¡Г³м·Ш¡НВиТ§НВЩиг¹КАТ¾´Х
ЛТ¡БХ¢йНК§КСВ в»Г´НВиТа»Ф´а¤ГЧиН§ бЕРµФ´µиНИЩ¹ВмºГФ¡ТГ·ХиНВЩиг¡ЕйºйТ¹¤Ш³·С¹·Х
ÊÒúÑ
¤Óàµ×͹ 21-22
¡Ò÷Ô駻¯Ô¡ÙÅ22
¤Уб¹Р¹УКУЛГСº¡ТГ»¡»йН§КФи§бЗ´ЕйНБ 22
ГТВЕРаНХВ´´йТ¹а·¤¹Ф¤22
¡ÒõԴµÑé§23
¡ÒùÓÍÍ¡¨Ò¡ºÃèØÀѳ±ì 23
¡ÒèѴÇÒ§ 23
ªèͧ¹éÓà¢éÒ23
ÊèǹÃкÒ¹éÓ24
¡ТГµиНКТВд¿ 24
à¤Ã×èͧ«Ñ¡¼éÒà¤Ã×èͧãËÁè¢Í§¤Ø³25
¤УН¸ФºТВКУЛГСºНШ»¡Г³м 25
ªиН§гКиКТГ«С¡¿Н¡ 25
¡ÒÃãªé§Ò¹ 26
ἧ¤Çº¤ØÁ26
¡ÒäǺ¤ØÁ26
¤Óá¹Ð¹Ó㹡Òëѡ27
¡ÒÃᡪ¹Ô´¢Í§¼éÒ27
НШ³ЛАЩБФ 27
¡è͹ãÊè¼éÒŧã¹à¤Ã×èͧ«Ñ¡27
¤ÇÒÁ¨ØÊÙ§ÊØ´27
¹éÓ˹ѡ¢Í§¼éÒ27
¡Òâ¨Ñ´ÃÍÂà»×é͹ 27
КТГ«С¡¿Н¡бЕРКТГа¾ФиБаµФБ28
ÅӴѺ¡Ò÷ӧҹ 29-30
КСЕС¡Й³мКТ¡ЕКУЛГСº¡ТГ«С¡¼йТ31
â»Ãá¡ÃÁ¡Òëѡ 32-33
¡ТГ´ЩбЕГС¡ЙТ 34
ÂÒ§¡Ñ¹ÃÑèǢͧ½Ò»Ô´34
ÀÒ¹͡¢Í§à¤Ã×èͧ«Ñ¡¼éÒ34
ªиН§гКиКТГ«С¡¿Н¡ 34
»СкБГРºТВ¹йУ 34-35
µÑÇ¡Ãͧªèͧ¹éÓà¢éÒ35
¡ÒöèÒ¹éÓ·Ô駩ءà©Ô¹35
¢йН¤ЗГГРЗС§г¹¡Г³Х·Хи¹йУ¨СºµСЗа»з¹¹йУб¢з§ 35
à¤Ã×èͧäÁè·Ó§Ò¹? 36-37
20
Page 21

¤Óàµ×͹
¤УаµЧН¹µиНд»¹ХйБХгЛйа¾ЧиН¤ЗТБ»ЕН´АСВ¢Н§¼Щйгªй в»Г´НиТ¹¤УаµЧН¹НВиТ§¶Хи¶йЗ¹¡иН¹·Хи¨РµФ´µСй§ЛГЧНгªйНШ»¡Г³м
¡ÒõԴµÑé§
в»Г´¹УЗСК´Ш·Хиа»з¹ºГГ¨ШАС³±мАТВг¹НН¡¨Т¡НШ»¡Г³м¡иН¹·Хи¨Ргªй§Т¹ БФ©Р¹Сй¹НТ¨
¡иНгЛйа¡Ф´¤ЗТБаКХВЛТВµиНа¤ГЧиН§ ЛГЧНа¤ГЧиН§гªйг¹¤ГСЗаГЧН¹·ХиНВЩи¢йТ§а¤ХВ§ в»Г´НиТ¹
¢йНБЩЕ·Хиа¡ХиВЗ¢йН§г¹¤ЩиБЧН¤Уб¹Р¹У¡ТГгªй§Т¹
в»Г´гЛйªиТ§д¿¿йТ¼ЩйБХ¤ЗТБªУ¹Та»з¹¼ЩйµФ´µСй§§Т¹д¿¿йТ¢Н§НШ»¡Г³м¹Хй
в»Г´гЛйªиТ§»ГР»Т¼ЩйБХ¤ЗТБªУ¹Та»з¹¼ЩйµФ´µСй§§Т¹ЗТ§·иНКУЛГСºНШ»¡Г³м¹Хй
ЛЕС§¨Т¡·ХиµФ´µСй§а¤ГЧиН§бЕйЗ в»Г´µГЗ¨КНºЗиТа¤ГЧиН§дБид´йЗТ§НВЩиº¹КТВд¿г´ж
ЛТ¡¤Ш³ЗТ§а¤ГЧиН§«С¡¼йТдЗйº¹¾Чй¹·Хи»Щ¾ГБ в»Г´µГЗ¨КНºЗиТБХªиН§ЗиТ§а¾ХВ§¾НКУЛГСº
¡ТГГРºТВНТ¡ТИГРЛЗиТ§¢ТµСй§бЕР¾Чй¹
¡ÒÃãªé§Ò¹
НШ»¡Г³м¹Хйд´йГСº¡ТГНН¡бººКУЛГСº¡ТГгªй§Т¹г¹ºйТ¹а·иТ¹Сй¹ в»Г´НВиТгªйНШ»¡Г³м¹Хй
¼Ф´д»¨Т¡ЗСµ¶Ш»ГРК§¤м¢Н§¡ТГНН¡бºº
в»Г´«С¡а©¾ТР¼йТ·Хид´йГСº¡ТГНН¡бººКУЛГСº¡ТГ«С¡´йЗВа¤ГЧиН§ бЕРв»Г´»¯ФºСµФµТБ
¤Уб¹Р¹Уг¹¡ТГ´ЩбЕ¼йТбµиЕРªФй¹
в»Г´НВиТгКи¼йТ¨¹а¡Ф¹¤ЗТБ¨Ш¢Н§а¤ГЧиН§ бЕРв»Г´»¯ФºСµФµТБ¤Уб¹Р¹Уг¹¤ЩиБЧНб¹Р¹У
¡ТГгªй§Т¹
в»Г´µГЗ¨КНºЗиТдБиБХЗСµ¶Шг´ЛЕ§аЛЕЧННВЩиг¹¡ГРа»лТ¢Н§аКЧйН¼йТ аЛГХВ а¢зБ¡ЕС´
а¢зБЛБШ´ бЕел٤ǧНТ¨·УгЛйа¡Ф´¤ЗТБаКХВЛТВНВиТ§ГШ¹бГ§
в»Г´НВиТ«С¡¼йТ·Хиа»ХВ¡¹йУБС¹аªЧйНа¾ЕФ§ аБ¸ФЕбНЕ¡НОНЕм дµГ¤ЕНГХд¸ЕХ¹ ПЕП ЛТ¡
БХ¡ТГгªйКТГаЛЕиТ¹Хйа¾ЧиН¢¨С´ГНВа»ЧйН¹¡иН¹·Хи¨Р«С¡ в»Г´ГНгЛйКТГГРаЛВ¨¹ЛБ´ ¡иН¹
·Õè¨Ð¹Ó¼éÒŧã¹à¤Ã×èͧ«Ñ¡
в»Г´гКи¼йТªФй¹аЕз¡ аªи¹ ¶Ш§а·йТ а¢зБ¢С´¼йТ ПЕП г¹¶Ш§¼йТЛГЧН»ЕН¡ЛБН¹ а¾ЧиН»йН§¡С¹
дБигЛй¼йТµФ´АТВг¹¶С§«С¡
в»Г´гªй¹йУВТ»ГСº¼йТ¹ШиБг¹»ГФБТ³·Хиб¹Р¹Уа·иТ¹Сй¹ БФ©Р¹Сй¹ НТ¨·УгЛйа¡Ф´¤ЗТБаКХВ
ËÒÂá¡è¼éÒ
б§йБ½Т»Ф´гЛйа»Ф´дЗйаЕз¡¹йНВаБЧиНдБигªй§Т¹а¤ГЧиН§«С¡¼йТ а¾ЧиНГС¡ЙТКАТ¾ВТ§¡С¹ГСиЗ
¢Í§½ÒáÅлéͧ¡Ñ¹¡ÒÃà¡Ô´¡ÅÔè¹ÍѺ
â»Ã´µÃǨÊͺÇèÒä´é¶èÒ¹éÓ·Ô駡è͹¨Ðà»Ô´½Òà¤Ã×èͧ ÁԩйÑé¹ ãËé¶èÒ¹éÓ·Ô駵ÒÁ
¤Уб¹Р¹Уг¹¤ЩиБЧНб¹Р¹У¡ТГгªй§Т¹
â»Ã´¶Í´»ÅÑê¡à¤Ã×èͧáÅлԴ¡êÍ¡¹éÓ·Ø¡¤ÃÑé§ËÅѧãªé§Ò¹
¤ÇÒÁ»ÅÍ´ÀÑ·ÑèÇä»
¡ТГ«иНБб«БНШ»¡Г³м¨РµйН§¡ГР·Ув´В¼Щй·ХиБХ¤ЗТБªУ¹Т БФ©Р¹Сй¹ НТ¨¡иНгЛйа¡Ф´
НС¹µГТВГйТВбГ§ЛГЧН·УгЛйНШ»¡Г³маКХВЛТВНВиТ§ГШ¹бГ§ в»Г´µФ´µиНИЩ¹ВмºГФ¡ТГг¡Ей
ºйТ¹¤Ш³
НВиТ´Ц§КТВд¿¿йТв´В¨Сº·ХиКТВд¿ в»Г´¨Сº·ХиµСЗ»ЕСк¡·Ш¡¤ГСй§·Хи´Ц§
½Т»Ф´КиЗ¹·Хиа»з¹¡ГР¨¡НТ¨БХ¤ЗТБГйН¹КЩ§ГРЛЗиТ§в»Гб¡ГБ«С¡·ХигªйНШ³ЛАЩБФКЩ§ в»Г´
НВиТКСБ¼СККиЗ¹´С§¡ЕиТЗ¢³Р«С¡!
¤ЗТБ»ЕН´АСВКУЛГСºа´з¡
а´з¡ж НТ¨дБи·ГТºЗиТа¤ГЧиН§гªйд¿¿йТБХНС¹µГТВНВиТ§дГ г¹¢³Р·Хиа¤ГЧиН§·У§Т¹ в»Г´
´ЩбЕа´з¡НВиТ§ГРБС´ГРЗС§ бЕРЛйТБдБигЛйа´з¡аЕи¹¡Сºа¤ГЧиН§гªйд¿¿йТ¹Хй
ЗСК´Ш·Хиа»з¹ºГГ¨ШАС³±м (аªи¹ б¼и¹¾ЕТКµФ¤ в¿Бв¾ЕХКдµГХ¹) НТ¨а»з¹НС¹µГТВµиНа´з¡
д´й в´Ва©¾ТРНС¹µГТВ¨Т¡¡ТГНШ´µС¹ГРºº·Т§а´Ф¹ЛТВг¨! в»Г´а¡зºгЛй¾й¹БЧНа´з¡
в»Г´а¡зºКТГ«С¡¿Н¡·Сй§ЛБ´г¹·Хи»ЕН´АСВбЕР¾й¹¨Т¡БЧНа´з¡
в»Г´НВиТгЛйа´з¡ЛГЧНКСµЗмаЕХйВ§»Х¹а¢йТд»г¹¶С§«С¡
аБЧиНбВ¡КиЗ¹»ГР¡Нº¢Н§а¤ГЧиН§ в»Г´µС´КТВд¿ бЕР·УЕТВ»ЕСк¡бЕРКиЗ¹¢Н§КТВд¿
·ХиµиННВЩи µС´¡ТГ·У§Т¹¢Н§ЕзН¤½Т»Ф´ а¾ЧиНдБигЛйа´з¡µФ´НВЩиАТВг¹ЛТ¡а¢йТд»аЕи¹
АТЙТд·В
21
Page 22
¡Ò÷Ô駻¯Ô¡ÙÅ
ЗСК´ШКУЛГСºЛХºЛиН
ЗСК´Ш·ХиБХа¤ГЧиН§ЛБТВ а»з¹ЗСК´Ш·ХиКТБТГ¶¹У¡ЕСºд»гªйгЛБид´й
>PE<=â¾ÅÕà͸ÕÅÕ¹
>PS<=â¾ÅÕÊäµÃÕ¹
>PP<=в¾ЕХв¾Г¾ФЕХ¹ «Ци§ЛБТВ¶Ц§КТБТГ¶¹У¡ЕСºд»гªйгЛБи ЛТ¡¤Ш³·Фй§г¹¶С§·ХиаЛБТРКБ
¤Уб¹Р¹УКУЛГСº¡ТГ»¡»йН§КФи§бЗ´ЕйНБ
г¹¡ТГ»ГРЛВС´¾ЕС§§Т¹д¿¿йТ ¹йУбЕРа¾ЧиН¤ШйБ¤ГН§КФи§бЗ´ЕйНБ аГТ¢Нб¹Р¹Уа¤Ез´ЕСºµиН
д»¹Хй:
¤Ш³КТБТГ¶«С¡¼йТ·Хиа»ЧйН¹µТБ»¡µФв´ВдБиµйН§БХ¡ТГ«С¡¤ГСй§бГ¡ а¾ЧиН»ГРЛВС´¼§«С¡¿Н¡
¹йУ бЕРаЗЕТ (бЕРа¾ЧиНГС¡ЙТКФи§бЗ´ЕйНБ´йЗВ)
à¤Ã×èͧ«Ñ¡¼éҨзӧҹ¤ØéÁ¤èÒÁÒ¡¢Öé¹ËÒ¡¤Ø³ãÊè¼éÒ¨¹àµçÁ¤ÇÒÁ¨Ø
à¤Ã×èͧ
гªйºГФ¡ТГ¢Н§К¶Т¹¡У¨С´¢ВР·Хид´йГСºН¹ШТµа¾ЧиН·Фй§НШ»¡Г³ма¡иТ
в»Г´ГС¡ЙТ¤ЗТБКРНТ´¢Н§ºйТ¹аБЧН§!
¤Ш³КТБТГ¶¢¨С´ГНВа»ЧйН¹µиТ§ж ¡иН¹¡ТГ«С¡г¹а¤ГЧиН§ а¾ЧиНгЛйКТБТГ¶«С¡¼йТд´йв´Вгªй
НШ³ЛАЩБФµиУЕ§д´й
ЗС´»ГФБТ³¢Н§¼§«С¡¿Н¡µТБ¤ЗТБ¡ГР´йТ§¢Н§¹йУ ¤ЗТБК¡»Г¡ бЕР¨У¹З¹¼йТ·Хи
¨Ð«Ñ¡
ГТВЕРаНХВ´´йТ¹а·¤¹Ф¤
¢¹Ò´: ¤ЗТБКЩ§ 85 «Á.
¤ÇÒÁ¡ÇéÒ§ 60 «Б.
¤ЗТБЕЦ¡ 59 «Á.
¤ÇÒÁ¨ØÊÙ§ÊØ´¼éÒ½éÒ 5.5 ¡¡.
¼йТгВКС§а¤ГТРЛм 2.5 ¡¡.
¼éÒºÒ§ 2.5 ¡¡.
¼éÒ¢¹ÊѵÇì 1.0 ¡¡.
¤ЗТБаГзЗг¹¡ТГ»Си¹ЛБТ´ 550 rpm max.
áç´Ñ¹áÅФÇÒÁ¶Õè¢Í§ä¿¿éÒ 220-230 V/50 Hz
¾Åѧ§Ò¹ä¿¿éÒ·Õèãªé 2200 W (EWF 551) / 450W (EWF 549)
¡Òûéͧ¡Ñ¹¿ÔÇÊìµèÓÊØ´ 10 A
áç´Ñ¹¹éÓµèÓÊØ´500 kPa
ÊÙ§ÊØ´ 800 kPa
НШ»¡Г³м¹Хйа»з¹д»µТБ¢йН¡УЛ¹´¢Н§ E.E.C. ´С§µиНд»¹Хй:
73/23/EEC ³ ЗС¹·Хи 19/02/73 г¹аГЧиН§а¡ХиВЗ¡СºбГ§´С¹д¿¿йТ
89/336/EEC ³ ЗС¹·Хи 03/05/89 г¹аГЧиН§а¡ХиВЗ¡СºК¹ТБбБиаЛЕз¡д¿¿йТ
22
Page 23

¡ÒõԴµÑé§
¡ÒùÓÍÍ¡¨Ò¡ºÃèØÀѳ±ì
¹Уб·и§»йН§¡С¹¢³Р¢¹Ки§бЕРºГГ¨ШАС³±м·Сй§ЛБ´НН¡¨Т¡а¤ГЧиН§¡иН¹·Хи¨Р
аГФиБµй¹гªй§Т¹а¤ГЧиН§«С¡¼йТ
¤ÇÃà¡çºá·è§»éͧ¡Ñ¹¢³Ð¢¹Êè§áÅкÃèØÀѳ±ì·Ñé§ËÁ´äÇéà¾×èÍãªé㹡óշÕèµéͧ¡Òâ¹Êè§
à¤Ã×èͧ«Ñ¡¼éÒÍÕ¡
1. гªй»ГРб¨д¢К¡ГЩ·Хи´йТ¹ЛЕС§·Т§¢ЗТ¢Н§а¤ГЧиН§НН¡ ¨Т¡¹Сй¹ аН¹а¤ГЧиН§д»´йТ¹ЛЕС§
ГРЗС§НВиТгЛй·СºКТВ·иН¹йУ гªйб·и§в¿БГН§ГРЛЗиТ§а¤ГЧиН§«С¡¼йТбЕР¾Чй¹
2. ¹Уб·и§в¾ЕХНХКаµНГмНН¡¨Т¡гµйµСЗа¤ГЧиН§ бЕР»Е´¶Ш§¾ЕТКµФ¡КН§гºНН¡¨Т¡´йТ¹г¹
3. ¤иНВж ´Ц§¶Ш§¾ЕТКµФ¡·Хи´йТ¹«йТВ НН¡·Т§¢ЗТбЕйЗ´Ц§Е§
5. гКиµРб¡Г§ (A) ·Хи´йТ¹ЕиТ§а¤ГЧиН§ в´ВгªйК¡ГЩВЦ´КХиµСЗ (B) ·ХиНВЩиг¹¶Ш§ºГГ¨Ш¤ЩиБЧНб¹Р¹У
¡ТГгªй§Т¹
гКи¢ТµСй§¡ЕСºа¢йТ·Хи
6. ЗТ§а¤ГЧиН§«С¡¼йТгЛйµС駵çбЕР¶Н´¹зНµ·ХиаЛЕЧННН¡¨Т¡´йТ¹ЛЕС§а¤ГЧиН§
АТЙТд·В
¡ÒèѴÇÒ§
µФ´µСй§а¤ГЧиН§Е§º¹¾Чй¹·Хиб¢з§бЕРаГХВº ГРЗС§гЛйБХ¾Чй¹·ХиГРºТВНТ¡ТИГНºж а¤ГЧиН§г¹¡Г³Х·Хи
µФ´µСй§º¹¾ГБ ПЕП µГЗ¨КНºЗиТдБид´йµСй§а¤ГЧиН§µФ´¡Сº¼¹С§ЛГЧНа¤ГЧиН§¤ГСЗНЧи¹ж ¤иНВж
»ГСºГР´Сºв´В¡ТГ¢С¹КГЩЛГЧН¢ТµСй§бºº»ГСºд´йа¢йТЛГЧННН¡ ЛйТБ¹Уб¼и¹¡ГР´Т¹ дБй
ЛГЧНЗСК´Ш·Хи¤ЕйТВ¡С¹¹ХйБТЗТ§гµйа¤ГЧиН§а¾ЧиН»ГСº¾Чй¹·ХиЗТ§гЛйаГХВº
4. ¤иНВж ´Ц§¶Ш§¾ЕТКµФ¡·Хи´йТ¹¢ЗТ НН¡·Т§«йТВбЕйЗ´Ц§¢Цй¹
¶Н´½Т¤ГНº´йТ¹ЕиТ§«Ци§НВЩи·Хи¶С§«С¡º¹µСЗа¤ГЧиН§
в´ВЗТ§¢На¡ХиВЗгЛйНВЩиг¹µУбЛ¹и§µТБ·ХиЕЩ¡ИГ «A» ГРºШ
бЕйЗ´С¹КиЗ¹º¹¢Н§½Т¤ГНºа¾ЧиН»Ф´гЛйК¹Ф·
¢йНКУ¤С:
¤Ш³КТБТГ¶´ЩГТВЕРаНХВ´а¾ФиБаµФБа¡ХиВЗ¡Сº¢йНб¹Р¹Уг¹¡ТГ»ГР¡Нº½Т¤ГНº´йТ¹ЕиТ§д´йг¹¶Ш§
·è͹éÓà¢éÒ
µиНКТВВТ§·иН¹йУа¢йТ¡Сº¡кН¡¹йУв´Вгªйа¡ЕХВЗа¡ЕХВЗ·иНµиН¢¹Т´ 3/4"
а¡ЕХВЗ
гªйКТВВТ§·ХигЛйБТ¡Сºа¤ГЧиН§«С¡¼йТ
НВиТгªйКТВВТ§а¡иТЛЕС§¨Т¡µФ´µСй§а¤ГЧиН§бЕйЗ
ЛйТБµиНКТВВТ§гЛйВТЗНН¡д» ЛТ¡¾ºЗиТКТВВТ§КСй¹д» бЕР¤Ш³дБиНВТ¡ВйТВ¡кН¡¹йУ
23
Page 24

¡ГШ³Т«ЧйНКТВгЛБи·ХиВТЗ¡ЗиТа´ФБКУЛГСºгªй¡Сºа¤ГЧиН§«С¡¼йТв´Ва©¾ТР
P1118
P0022
¢éÍÊÓ¤Ñ!
¡иН¹·Хи¨РµиНа¤ГЧиН§а¢йТ¡Сº·иН¹йУЛГЧН·иН¹йУ·ХидБид´йгªй§Т¹а»з¹аЗЕТ¹Т¹ гЛйа»Ф´¹йУ·Фй§¡иН¹
«С¡ГРВРа¾ЧиН¢¨С´½Ши¹¼§·ХиНТ¨µ¡¤йТ§НВЩиг¹·иННН¡
ªèͧãªèÊÒëѡ¿Í¡
»ШиБ "аГФиБ¡ТГ·У§Т¹/а¾ФиБ¼йТ"
ЛЕС§¨Т¡аЕЧН¡в»Гб¡ГБбЕРµСЗаЕЧН¡·ХиµйН§¡ТГбЕйЗ
гЛй¡´»ШиБ¹Хйа¾ЧиНаГФиБ¡ТГ·У§Т¹¢Н§а¤ГЧиН§ д¿КСТ³ LED
¨РЛВШ´¡ГР¾ГФºбЕРКЗиТ§¤йТ§дЗй г¹¡ТГЛВШ´в»Гб¡ГБ·Хи·У§Т¹НВЩи
¡´»ШиБаГФиБ¡ТГ·У§Т¹/а¾ФиБ¼йТ д¿КСТ³ LED ¨РаГФиБ¡ГР¾ГФº
ЛТ¡µйН§¡ТГгЛйв»Гб¡ГБаГФиБ·У§Т¹гЛБи¨Т¡¨Ш´·ХиЛВШ´дЗйªСиЗ¤ГТЗ
гЛй¡´»ШиБаГФиБ¡ТГ·У§Т¹/а¾ФиБ¼йТгЛБиНХ¡¤ГСй§
¡ТГµиНКТВд¿
НШ»¡Г³м¹Хйд´йГСº¡ТГНН¡бººгЛй·У§Т¹¡Сº¡ГРбКд¿¿йТ 220 - 230 вЗЕµм бººа¿Ка´ХВЗ
50 аОФГµ«м
µГЗ¨КНºЗиТГРººд¿¿йТАТВг¹ºйТ¹¢Н§¤Ш³КТБТГ¶ГН§ГСºвЛЕ´КЩ§КШ´¢Н§а¤ГЧиН§
(2.2 kW) бЕРв»Г´¾Ф¨ТГ³Т¡ТГгªйа¤ГЧиН§д¿¿йТª¹Ф´НЧи¹ж ГиЗБ´йЗВ
ãËéµèÍà¤Ã×èͧà¢éҡѺªèͧàÊÕº»ÅÑê¡ä¿áººÅ§¡ÃÒǹ´ì
¼Щй¼ЕФµдБиГСº¼Ф´ªНºµиН¤ЗТБаКХВЛТВбЕР¡ТГºТ´а¨зº г¹¡Г³Х·ХидБи»¯ФºСµФµТБ
¤УаµЧН¹а¾ЧиН¤ЗТБ»ЕН´АСВ¢йТ§µй¹
ЛТ¡µйН§¡ТГа»ЕХиВ¹КТВд¿ ¤ЗГб¨й§гЛйИЩ¹ВмºГФ¡ТГа»з¹¼Щй´Уа¹Ф¹¡ТГгЛйа·иТ¹Сй¹
¤ЗГгЛйКТВд¿НВЩиг¹µУбЛ¹и§·ХиЛВФºгªй§Т¹д´й§иТВ
µèÍà¢éҡѺÊèǹ·Õèá¡ÍÍ¡¨Ò¡·èÍÃкÒ¹éӢͧÍèÒ§ÅéÒ§¨Ò¹ ·иНКиЗ¹·Хи¨РµиНµйН§НВЩиаЛ¹ЧН
ªиН§ГРºТВ·Хи¾Чй¹ а¾ЧиНгЛйБХГРВРв¤й§§НаЛ¹ЧН¾Чй¹´Ф¹НВиТ§¹йНВ 60 «Б.
µиНа¢йТ¡Сº·иНГРºТВ¹йУв´ВµГ§гЛйНВЩиг¹КиЗ¹·ХиКЩ§¾Н»ГРБТ³ ГРЛЗиТ§ 60-90 «Б. »ÅÒÂ
КТВВТ§¹йУ·Фй§¨РµйН§БХ·ХиКУЛГСº гЛйНТ¡ТИ¶иТВа· аªи¹ аКй¹ГНºЗ§´йТ¹г¹¢Н§·иН¨Р
µйН§гЛи¡ЗиТаКй¹ГНºЗ§´йТ¹¹Н¡¢Н§КТВВТ§
КТВВТ§¹йУ·Фй§¨РµйН§дБиЛС¡§Н
а¾ЧиНгЛйа¤ГЧиН§«С¡¼йТКТБТГ¶·У§Т¹д´йНВиТ§¶Щ¡µйН§ ¨РµйН§а¡ХиВЗКТВВТ§¹йУ·Фй§а¢йТ¡Сº¢Н
·ХиНВЩи·Т§´йТ¹º¹·Хи´йТ¹ЛЕС§¢Н§µСЗа¤ГЧиН§НВиТ§¶Щ¡µйН§
24
Page 25

à¤Ã×èͧ«Ñ¡¼éÒà¤Ã×èͧãËÁè¢Í§¤Ø³
а¤ГЧиН§«С¡¼йТа¤ГЧиН§гЛБи¹ХйКТБТГ¶µНºК¹Н§¤ЗТБµйН§¡ТГ¢Н§ªХЗФµКБСВгЛБид´йНВиТ§КБºЩГ³мбºº ´йЗВ»ГРКФ·¸ФАТ¾г¹¡ТГ«С¡¼йТв´Вгªй¹йУ ¾ЕС§§Т¹ бЕРКТГ«С¡¿Н¡¹йНВ
»ШиБаЕЧН¡НШ³ЛАЩБФ гªйКУЛГСºаЕЧН¡НШ³ЛАЩБФ·ХиаЛБТРКБ·ХиКШ´КУЛГСº¼йТ·Хи¤Ш³µйН§¡ТГ«С¡
ГРºº·У¤ЗТБаВз¹¹йУНСµв¹БСµФ ¨РЕ´НШ³ЛАЩБФ¢Н§¹йУ·Хигªйг¹¡ТГ«С¡¨Т¡ 95° à»ç¹ 60°C ¡иН¹·Хи¨РГРºТВ¹йУНН¡¨Т¡а¤ГЧиН§ ·Сй§¹Хйа¾ЧиН»йН§¡С¹дБигЛйКТВВТ§¹йУ·Фй§·Хи¼иТ¹¡ТГгªй§Т¹БТ¹Т¹аКХВ
ГЩ»·Г§ бЕРªиЗВ»йН§¡С¹дБигЛй¼йТВСºВи¹а¹ЧиН§¨Т¡КАТ¾НШ³ЛАЩБФ·Хибµ¡µиТ§¡С¹БТ¡¨¹а¡Ф¹д»
в»Гб¡ГБ«С¡¾ФаИЙКУЛГСº¼йТ¢¹КСµЗм гªйГРºº¡ТГ«С¡¼йТ·ХиºНººТ§а»з¹¾ФаИЙ а¾ЧиН·У¤ЗТБКРНТ´¼йТ¢¹КСµЗм¢Н§¤Ш³НВиТ§НиН¹вВ¹
ÍØ»¡Ã³ì¤Çº¤ØÁÊÁ´ØÅ а¾ЧиНгЛйа¤ГЧиН§«С¡¼йТБХаК¶ХВГАТ¾µЕН´¡ГРºЗ¹¡ТГ»Си¹ЛБТ´
ЗТЕмЗ ECO ¨РªиЗВгЛйа¤ГЧиН§«С¡¼йТКТБТГ¶гªйКТГ«С¡¿Н¡д´й¨¹ЛБ´ бЕРªиЗВЕ´»ГФБТ³¹йУ·Хигªйг¹¡ТГ«С¡«Ци§ªиЗВ»ГРЛВС´¾ЕС§§Т¹д´й
¤УН¸ФºТВКУЛГСºНШ»¡Г³м
1ªиН§гКиКТГ«С¡¿Н¡
2¼С§в»Гб¡ГБ
3 б¼§¤Зº¤ШБ
4´йТБ¨Сº¢Н§½Т»Ф´¶С§«С¡
5»СкБГРºТВ¹йУ
6 ¢ТµСй§·Хи»ГСºд´й
АТЙТд·В
ªиН§гКиКТГ«С¡¿Н¡
«Ñ¡¤ÃÑé§áá
«Ñ¡»¡µÔ
¹éÓÂÒ»ÃѺ¼éÒ¹ØèÁ, ŧá»é§
25
Page 26

¡ÒÃãªé§Ò¹
ἧ¤Çº¤ØÁ
1. ªèͧãªèÊÒëѡ¿Í¡
2. "«Ñ¡ÍÂèÒ§ÃÇ´àÃçÇ"
¡´»ШиБ¹Хйа¾ЧиНВи¹ГРВРаЗЕТ¢Н§в»Гб¡ГБ«С¡·ХиаЕЧН¡ µСЗНВиТ§аªи¹ ¶йТ¡´»ШиБ¹Хй
д¿КСТ³ LED ¨РµФ´КЗиТ§ бЕРв»Гб¡ГБ 'НСµв¹БСµФ' ¨РЕ´аЗЕТ«С¡Е§»ГРБТ³ 60 ¹Т·Х ¨Т¡а´ФБ 110 ¹Т·Х
3. ¡´»ШиБ¹Хйа¾ЧиНВи¹ГРВРаЗЕТ¢Н§в»Гб¡ГБ«С¡·ХиаЕЧН¡ µСЗНВиТ§аªи¹ ¶йТ¡´»ШиБ¹Хй
ä¿ÊÑÒ³ LED ¨ÐµÔ´ÊÇèÒ§ áÅÐâ»Ãá¡ÃÁ 'Íѵâ¹ÁѵÔ' ¨ÐÅ´àÇÅҫѡŧ»ÃÐÁÒ³ 60 ¹Ò·Õ ¨Ò¡à´ÔÁ 110 ¹Ò·Õ
4. ÅÙ¡ºÔ´àÅ×Í¡â»Ãá¡ÃÁ
ÅÙ¡ºÔ´àÅ×Í¡â»Ãá¡ÃÁ¨Ðáºè§ÍÍ¡à»ç¹ 3 Êèǹ
»Ф´, ¹йУаВз¹ КУЛГСº EWF 549 бЕР »Ф´, ¹йУГйН¹ бЕР¹йУаВз¹ КУЛГСº EWF 551
ЕЩ¡ºФ´КТБТГ¶ЛБШ¹д´й·Сй§г¹·ФИ·Т§µТБа¢зБ¹ТМФ¡Т бЕР·З¹а¢зБ¹ТМФ¡Т
аБЧиНКФй¹КШ´в»Гб¡ГБ¡ТГ·У§Т¹ ЕЩ¡ºФ´аЕЧН¡в»Гб¡ГБ¨РµйН§ЛБШ¹¡ЕСºБТ·ХиµУбЛ¹и§ "0" а¾ЧиН»Ф´а¤ГЧиН§ ¢йН¤ЗГГРЗС§!
ЛТ¡ЛБШ¹ЕЩ¡ºФ´аЕЧН¡в»Гб¡ГБд»ВС§в»Гб¡ГБНЧи¹ГРЛЗиТ§а¤ГЧиН§¡УЕС§·У§Т¹ а¤ГЧиН§¨РдБи·У§Т¹µТБв»Гб¡ГБ·ХиаЕЧН¡гЛБи
г¹ГШи¹ EWF 551 КУЛГСºв»Гб¡ГБ¡ТГ«С¡¹йУГйН¹а¤ГЧиН§¨Р¡УЛ¹´НШ³ЛАЩБФдЗйЕиЗ§Л¹йТ (´ЩЛ¹йТ 14)
26
Page 27

¤Óá¹Ð¹Ó㹡Òëѡ
¡ÒÃᡪ¹Ô´¢Í§¼éÒ
в»Г´»¯ФºСµФµТБ¤Уб¹Р¹Уº¹КСЕС¡Й³мКУЛГСº¡ТГ«С¡¼йТ¢Н§¼йТбµиЕРªФй¹ ГЗБ·Сй§
¤Уб¹Р¹Уг¹¡ТГ«С¡¨Т¡¼Щй¼ЕФµ´йЗВ ¤Ш³¤ЗГбВ¡ª¹Ф´¢Н§¼йТ´С§µиНд»¹Хй: ¼йТ¢ТЗ, ¼йТКХ, ¼йТ
гВКС§а¤ГТРЛм, ¼йТºТ§, ¼йТ¢¹КСµЗм
¡è͹ãÊè¼éÒŧã¹à¤Ã×èͧ«Ñ¡
НВиТ«С¡¼йТ¢ТЗГЗБ¡Сº¼йТКХ а¹ЧиН§¨Т¡¼йТ¢ТЗНТ¨КЩаКХВ ¤ЗТБ¢ТЗ ¨Т¡¡ТГ«С¡
¼йТКХ·Хи«С¡¤ГСй§бГ¡НТ¨БХКХµ¡ºйТ§аЕз¡¹йНВ ¨Ц§¤ЗГ«С¡¼йТаЛЕиТ¹ХйбВ¡µиТ§ЛТ¡г¹¤ГСй§бГ¡
µГЗ¨КНºЗиТдБиБХЗСµ¶ШвЕЛРЛЕ§НВЩиг¹¼йТ (аªи¹ ¡ФкºµФ´¼Б а¢зБ¡ЕС´ а¢зБЛБШ´)
µФ´¡ГР´ШБ»ЕН¡ЛБН¹ ГЩ´«Ф» µР¢Н ЛГЧН¡ГР´ШБб»к¡ ГС ´а¢зБ¢С´¼йТЛГЧ НКТВГС´
¢¨С´ГНВа»ЧйН¹·Хи«С¡НН¡ВТ¡¡иН¹¨Р«С¡ гªйКТГ«С¡¿Н¡¾ФаИЙ·ТºГФаЗ³·Хиа»ЧйН¹БТ¡
«С¡¼йТБиТ¹´йЗВ¤ЗТБГРБС´ГРЗС§а»з¹¾ФаИЙ ¶Н´¢На¡ХиВЗЛГЧН¼Щ¡дЗйг¹¶Ш§ЛГЧН¶Ш§µТ¢иТВ
¹éÓ˹ѡ¢Í§¼éÒ
µиНд»¹Хйа»з¹¹йУЛ¹С¡в´В»ГРБТ³¢Н§¼йТª¹Ф´µиТ§ж:
аКЧйН¤ЕШБНТº¹йУ 1200 ¡ÃÑÁ
¼éÒàªç´»Ò¡ 100 ¡ÃÑÁ
»ÅÍ¡·Õè¹Í¹ 700 ¡ÃÑÁ
¼éÒ»Ù·Õè¹Í¹ 500 ¡ÃÑÁ
»ÅÍ¡ËÁ͹ 200 ¡ÃÑÁ
¼éÒ»ÙâµêÐ 250 ¡ÃÑÁ
¼éÒàªç´µÑÇ 200 ¡ÃÑÁ
¼éÒÃͧº¹âµêÐ 100 ¡ÃÑÁ
ªØ´¡ÅÒ§¤×¹ 200 ¡ÃÑÁ
ªØ´´éҹ㹢ͧʵÃÕ 100 ¡ÃÑÁ
àªÔéµ·Ó§Ò¹ºØÃØÉ 600 ¡ÃÑÁ
àªÔ鵺ØÃØÉ 200 ¡ÃÑÁ
ªØ´¹Í¹ºØÃØÉ 500 ¡ГСБ
аКЧйНКµГХ 100 ¡ÃÑÁ
¡Ò§à¡§ªÑé¹ã¹ºØÃØÉ 100 ¡ÃÑÁ
¡Òâ¨Ñ´ÃÍÂà»×é͹
АТЙТд·В
¤ÇÒÁ¨ØÊÙ§ÊØ´
¤ЗТБ¨ШКЩ§КШ´·Хиб¹Р¹У¨РбК´§НВЩиг¹¼С§в»Гб¡ГБ
ЛЕС¡а¡³±м·СиЗд»
¼йТ½йТВбЕРЕФ¹Ф¹: аµзБ¶С§бµиНВиТгЛйб¹и¹¨¹а¡Ф¹д»
¼йТгВКС§а¤ГТРЛм: гКи¼йТдБиа¡Ф¹¤ГЦи§Л¹Ци§¢Н§¶С§«С¡
¼éÒºÒ§áÅмéÒ¢¹ÊѵÇì: гКи¼йТдБиа¡Ф¹Л¹Ци§г¹КТБ¢Н§¶С§«С¡ ¡ТГ«С¡¼йТаµзБ¤ЗТБ¨ШКЩ§КШ´¢Н§
¶С§¨РªиЗВ»ГРЛВС´¾ЕС§§Т¹бЕР¹йУ КУЛГСº¼йТ·ХиК¡»Г¡БТ¡ в»Г´Е´»ГФБТ³¢Н§¼йТЕ§
¤Ш³НТ¨дБиКТБТГ¶¢¨С´ГНВа»ЧйН¹·Хи«С¡НН¡ВТ¡´йЗВ¹йУбЕРКТГ«С¡¿Н¡а·иТ¹Сй¹ гЛй»¯ФºСµФ
´С§µиНд»¹Хй¡иН¹·Хи¨Р«С¡
ГНВаЕЧН´: «С¡¼йТ·Хиа»ЧйН¹аЕЧН´гЛБиж ´йЗВ¹йУаВз¹ КУЛГСºаЕЧН´·ХибЛй§бЕйЗ гЛйбªиг¹¹йУВТ«С¡
¼йТ·Фй§дЗйЛ¹Ци§¤Ч¹ бЕР¢ВХйг¹¹йУКºЩи
ÊÕ¹éÓÁѹ: »йТВ´йЗВ¹йУВТ¢¨С´¤ГТº·Хи·У¨Т¡аº¹«Ф¹ ЗТ§¼йТа»ЧйН¹º¹¼йТ¹ШиБ бЕРаªз´ГНВа»ЧйН¹
ЛЕТВж ¤ГСй§
ÃÍÂà»×é͹¨ÒúÕ: »йТВ´йЗВа·НГма¾¹·Х¹ ЗТ§¼йТа»ЧйН¹дЗйº¹¾Чй¹¼ФЗ·Хи¹ШиБ аªз´ГНВа»ЧйН¹´йЗВ
»ЕТВ¹ФйЗбЕР¼йТ½йТВ
ʹÔÁ: гªй¡Г´НзН¡«ТЕФ¤ЕРЕТВг¹¹йУГйН¹ ЛГЧНгªй¼ЕФµАС³±м¢¨С´¤ГТºК¹ФБ в»Г´гªй
¤ЗТБГРБС´ГРЗС§¡СºГНВа»ЧйН¹К¹ФБ·Хиа¡иТбЕйЗ а¹ЧиН§¨Т¡в¤Г§КГйТ§¢Н§а«ЕЕЩвЕК¨РБХ
¤ЗТБаКХВЛТВНВЩибЕйЗ бЕРа¹ЧйН¼йТНТ¨а»з¹ГЩ
ГНВаªЧйНГТ: ·У¤ЗТБКРНТ´´йЗВКТГ¿Н¡КХ бЕРЕйТ§гЛйКРНТ´ (КУЛГСº¼йТ¢ТЗбЕР¼йТ·Хи
КХдБиµ¡а·иТ¹Сй¹)
ÃÍÂà»×é͹ËéÒ: гªйКºЩиНиН¹ж бЕРКТГ¿Н¡КХ (КУЛГСº¼йТ¢ТЗбЕР¼йТ·ХиКХдБиµ¡а·иТ¹Сй¹)
»Ò¡¡¡ÒÅÙ¡Å×è¹áÅСÒÇ: аªз´´йЗВНР«Хв·¹ (*) в´ВЗТ§¼йТа»ЧйН¹º¹¼йТ¹ШиБ бЕРаªз´ГНВа»ЧйН¹
ÍÍ¡
ÅԻʵԡ: аªз´´йЗВНР«Хв·¹аЛБЧН¹ЗФ¸Х¢йТ§µй¹¹Хй ¨Т¡¹Сй¹·У¤ЗТБКРНТ´ГНВа»ЧйН¹´йЗВ
бНЕ¡НОНЕм бЕР¢¨С´¤ГТº·ХиЛЕ§аЛЕЧН´йЗВКТГ¿Н¡КХ
äǹìá´§: бªиг¹¹йУбЕР¼§«С¡¿Н¡ ¨Т¡¹Сй¹ ЕйТ§¹йУ бЕРгªй¡Г´НР«ХµФ¤ЛГЧН«ФµГФ¤ бЕйЗ
ЕйТ§НН¡ бЕР¢¨С´¤ГТº·ХиЛЕ§аЛЕЧН´йЗВКТГ¿Н¡КХ
27
Page 28

ËÁÖ¡: ¢Цй¹НВЩи¡Сº»ГРаА·¢Н§ЛБЦ¡ ¤Ш³КТБТГ¶аªз´´йЗВНР«Хв·¹ (*) ¡иН¹ ¨Т¡¹Сй¹гªй
¡Г´НР«ХµФ¤ бЕР¢¨С´¤ГТº·ХиЛЕ§аЛЕЧНг¹¼йТ¢ТЗ´йЗВКТГ¿Н¡КХ бЕРЕйТ§¹йУгЛйКРНТ´
ÃÍÂà»×é͹¹éÓÁѹ: гªйКТГ¢¨С´¤ГТº ¨Т¡¹Сй¹гªйбНЕ¡НОНЕмЛГЧНаº¹«Ф¹ бЕйЗ¢ВХй´йЗВ
КТГ«С¡¿Н¡
(*) ЛйТБгªйНР«Хв·¹¡Сº¼йТдЛБа·ХВБ
КТГ«С¡¿Н¡бЕРКТГа¾ФиБаµФБ
¡ТГ«С¡·Хид´й¼Е´ХБТ¨Т¡¡ТГаЕЧН¡КТГ«С¡¿Н¡·Хи¶Щ¡µйН§бЕРаЕЧН¡гªйг¹»ГФБТ³·ХиаЛБТРКБ
а¾ЧиНЛЕХ¡аЕХиВ§¡ТГаКХВа»ЕиТ бЕР»¡»йН§КФи§бЗ´ЕйНБ бБйЗиТКТГ«С¡¿Н¡¨РВиНВКЕТВд´й¡зµТБ
бµи¡зВС§БХКТГ»ГР¡Нº·Хи·УгЛйаКХВКБ´ШЕ¸ГГБªТµФд´й
¡ТГаЕЧН¡гªйКТГ«С¡¿Н¡¢Цй¹НВЩи¡Сº»ГРаА·¢Н§¼йТ·Хи«С¡ (¼йТºТ§ ¢¹КСµЗм ¼йТ½йТВ ПЕП) КХ
НШ³ЛАЩБФ¡ТГ«С¡ бЕР¤ЗТБК¡»Г¡¢Н§¼йТ ¤Ш³КТБТГ¶гªйКТГ«С¡¿Н¡КУЛГСºа¤ГЧиН§·ХиБХ
¨УЛ¹иТВ·СиЗд»КУЛГСºа¤ГЧиН§«С¡¼йТ¹Хй
- ¼§«С¡¿Н¡КУЛГСº¼йТ·Ш¡ª¹Ф´
- ¼§«С¡¿Н¡КУЛГСº¼йТºТ§ (НШ³ЛАЩБФКЩ§КШ´ 60°C) áÅмéÒ¢¹ÊѵÇì
-¹йУВТ«С¡¼йТ аЛБТРКУЛГСºв»Гб¡ГБ«С¡НШ³ЛАЩБФµиУ (НШ³ЛАЩБФКЩ§КШ´ 60°C) КУЛГСº
¼йТ·Ш¡ª¹Ф´ ЛГЧНа©¾ТР¼йТ¢¹КСµЗм
в»Г´гКиКТГ«С¡¿Н¡бЕРКТГа¾ФиБаµФБНЧи¹ж Е§г¹ªиН§гКиКТГ«С¡¿Н¡¡иН¹·Хи¨РаГФиБµй¹
в»Гб¡ГБ«С¡ ЛТ¡¤Ш³гªйКТГ«С¡¿Н¡ª¹Ф´а¢йБ¢С¹ ¤Ш³¨РµйН§аЕЧН¡в»Гб¡ГБ«С¡·Хи дБиБХ
¡ТГ«С¡¤ГСй§бГ¡ а¤ГЧиН§«С¡¼йТ¨РБХГРºº¡ГР¨ТВКТГ«С¡¿Н¡а¾ЧиНгЛйКТБТГ¶гªй§Т¹д´й
НВиТ§БХ»ГРКФ·¸ФАТ¾КЩ§КШ´ в»Г´а·¹йУВТ«С¡¼йТЕ§г¹ªиН§·ХиБХа¤ГЧиН§ЛБТВ ¡è͹
·Хи¨РаГФиБµй¹в»Гб¡ГБ«С¡·С¹·Х бЕРв»Г´а·¹йУВТ»ГСº¼йТ¹ШиБЛГЧНКТГКУЛГСºЕ§б»й§
НЧи¹ж Е§г¹ªиН§·ХиБХа¤ГЧиН§ЛБТВ ¡иН¹аГФиБв»Гб¡ГБ¡ТГ«С¡
в»Г´»¯ФºСµФµТБ¤Уб¹Р¹У¢Н§¼Щй¼ЕФµКТГ«С¡¿Н¡ бЕРв»Г´НВиТгКиКТГ«С¡¿Н¡а¡Ф¹¢Х´
MAX ¢Н§ªиН§гКиКТГ«С¡¿Н¡¢Н§а¤ГЧиН§
»ÃÔÁÒ³¢Í§ÊÒëѡ¿Í¡·Õèãªé
»ÃÐàÀ·áÅлÃÔÁÒ³¢Í§ÊÒëѡ¿Í¡¨Ð¢Öé¹ÍÂÙè¡Ñºà¹×éͼéÒ »ÃÔÁÒ³¢Í§¼éÒ·Õè«Ñ¡ ÃдѺ
¤ÇÒÁÊ¡»Ã¡ áÅФÇÒÁ¡ÃдéÒ§¢Í§¹éÓ
¤ЗТБ¡ГР´йТ§¢Н§¹йУ¨Р¶Щ¡бºи§НН¡а»з¹ ГР´Сº µиТ§ж «Ци§¤Ш³КТБТГ¶ЛТ¢йНБЩЕ´С§¡ЕиТЗ
д´й¨Т¡ºГФЙС·¼ЩйгЛйºГФ¡ТГ¹йУ»ГР»Т ЛГЧНЛ¹иЗВ§Т¹·йН§¶Фи¹г¹¾Чй¹·Хи¢Н§¤Ш³
в»Г´»¯ФºСµФµТБ¤Уб¹Р¹У¢Н§¼Щй¼ЕФµКТГ«С¡¿Н¡г¹аГЧиН§»ГФБТ³¡ТГгªй гªйКТГ«С¡¿Н¡
гЛй¹йНВЕ§ г¹¡Г³ХµиНд»¹Хй:
-¤Ш³¡УЕС§«С¡¼йТ»ГФБТ³дБиБТ¡
-¼éÒ·Õè«Ñ¡äÁèÊ¡»Ã¡ÁÒ¡
-а¡Ф´¿Н§¨У¹З¹БТ¡ГРЛЗиТ§¡ТГ«С¡
28
Page 29

ÅӴѺ¡Ò÷ӧҹ
¡иН¹аГФиБ¡ТГ«С¡¼йТа»з¹¤ГСй§бГ¡ ¢Нб¹Р¹УгЛй¤Ш³а·¹йУ 2 ЕФµГ Е§г¹ЗТЕмЗ
ECO ·ÕèªèͧãÊ輧«Ñ¡¿Í¡
¨Т¡¹Сй¹а»Ф´а¤ГЧиН§гЛй·У§Т¹´йЗВв»Гб¡ГБНСµв¹БСµФв´ВдБиµйН§ºГГ¨Ш¼йТ
а¾ЧиН·У¤ЗТБКРНТ´КФи§К¡»Г¡·ХиµФ´НВЩиАТВг¹¶С§«С¡г¹¢Сй¹µН¹¡ТГ¼ЕФµ
а·¼§«С¡¿Н¡¤ГЦи§Л¹Ци§Е§г¹ªиН§гКи¼§«С¡¿Н¡ бЕРаГФиБ¡ТГ·У§Т¹¢Н§а¤ГЧиН§
1. ãÊè¼éÒŧ㹶ѧ«Ñ¡
а»Ф´½Т¢Н§¶С§«С¡
гКи¼йТЕ§г¹¶С§«С¡·ХЕРªФй¹ КРºС´¼йТЛЕТВж ¤ГСй§¡иН¹гКи »Ф´½Та¤ГЧиН§
4. àÅ×Í¡â»Ãá¡ÃÁ·Õèµéͧ¡ÒÃ
ЛБШ¹ЕЩ¡ºФ´аЕЧН¡в»Гб¡ГБд»ВС§µУбЛ¹и§·ХиµйН§¡ТГ
д¿КСТ³ LED ¡У¡Сº»ШиБаГФиБ¡ТГ·У§Т¹/а¾ФиБ¼йТ ¨РаГФиБ¡ГР¾ГФº
АТЙТд·В
5. аЕЧН¡µСЗаЕЧН¡ "«С¡НВиТ§ГЗ´аГзЗ" ЛТ¡µйН§¡ТГ
ä¿ÊÑÒ³ LED ¢Í§»ØèÁ«Ñ¡ÍÂèÒ§ÃÇ´àÃçǨеԴÊÇèÒ§
2. ¤Ó¹Ç³»ÃÔÁÒ³ÊÒëѡ¿Í¡·Õè¤ÇÃãªé
´Ц§ªиН§гКиКТГ«С¡¿Н¡НН¡БТ¨¹КШ´ µЗ§КТГ«С¡¿Н¡µТБ»ГФБТ³·Хи ¼Щй¼ЕФµб¹Р¹У
бЕРа·Е§г¹ªиН§гКиКТГ«С¡¿Н¡
ËÒ¡¤Ø³µéͧ¡Òëѡâ´Âãªéâ»Ãá¡ÃÁ«Ñ¡¤ÃÑé§áá´éÇ ãËéà·ÊÒëѡ¿Í¡Å§ã¹ªèͧ·ÕèÁÕ
à¤Ã×èͧËÁÒÂ
3. ¤Ó¹Ç³»ÃÔÁÒ³ÊÒÃà¾ÔèÁàµÔÁ·Õè¤ÇÃãªé
ЛТ¡µйН§¡ТГгªй¹йУВТ»ГСº¼йТ¹ШиБ гЛйа·Е§г¹ªиН§·ХиБХа¤ГЧиН§ЛБТВ в´ВдБигЛйа¡Ф¹¢Х´
Max
6. аГФиБ¡ТГ·У§Т¹¢Н§а¤ГЧиН§
¡´»ШиБаГФиБ¡ТГ·У§Т¹/а¾ФиБ¼йТ в»Гб¡ГБ¨РаГФиБ·У§Т¹д¿КСТ³
LEd¢Н§»ШиБаГФиБ¡ТГ·У§Т¹/а¾ФиБ¼йТ¨РµФ´КЗиТ§аБЧиНКФй¹КШ´¡ТГ·У§Т¹¢Н§в»Гб¡ГБ
29
Page 30

7. аБЧиНКФй¹КШ´в»Гб¡ГБ¡ТГ«С¡
¤ГЧиН§¨РЛВШ´аН§в´ВНСµв¹БСµФ бЕРд¿КСТ³ LED
¢Н§»ШиБаГФиБ¡ТГ·У§Т¹/а¾ФиБ¼йТ¨Р´СºЕ§
ЛТ¡аЕЧН¡»ШиБ«С¡НВиТ§ГЗ´аГзЗ д¿КСТ³ LED ¢Н§»ШиБ¹Хй¨Р´СºµТБд
»Ф´а¤ГЧиН§в´В¡´»ШиБ а»Ф´-»Ф´ НХ¡¤ГСй§ д¿К¶Т¹РЛЕС¡¢Н§а¤ГЧиН§¨Р´Сºд»
ГН»ГРБТ³Л¹Ци§ЛГЧНКН§¹Т·Х¡иН¹·Хи¨Ра»Ф´½Т¢Н§¶С§«С¡ а¾ЧиНгЛй¡Ед¡ЕзН¤¢Н§½Т¶С§
¤ЕТВµСЗ¡иН¹
¹У¼йТНН¡¨Т¡¶С§«С¡
ЛБШ¹¶С§«С¡´йЗВБЧН а¾ЧиНгЛйБСи¹г¨ЗиТдБиБХ¼йТЛЕ§аЛЕЧННВЩиг¹¶С§ а»з¹¡ТГ»йН§¡С¹¡ТГЕЧБ¼йТдЗй
бЕР·УгЛй¼йТаКХВЛТВг¹¡ТГ«С¡¤ГСй§¶С´д» (аªи¹ ¼йТЛ´µСЗ) ЛГЧНБХКХµ¡гКи¼йТ¢ТЗ
¤ЕТВ»ШиБ·Хи¡´дЗй¡иН¹Л¹йТ¹Хй
»Ф´¡кН¡¹йУбЕР¶Н´»ЕСк¡¢Н§а¤ГЧиН§«С¡¼йТ
б§йБ½Т¢Н§¶С§«С¡дЗйаЕз¡¹йНВ а¾ЧиН·Фй§гЛйбЛй§
30
Page 31

АТЙТд·В
Page 32

¼Ñ§â»Ãá¡ÃÁ
EWF 551 - в»Гб¡ГБ¡ТГ«С¡¹йУГйН¹
НШ³ЛАЩБФ¢Н§бµиЕРв»Гб¡ГБ¨Р¡УЛ¹´дЗйЕиЗ§Л¹йТ бЕРµСй§аН§в´ВНСµв¹БСµФ
µТБª¹Ф´¢Н§¼йТбЕРµТБв»Гб¡ГБ·ХиаЕЧН¡
â»Ãá¡ÃÁ â»Ãá¡ÃÁ »ГРаА·¼йТбЕРГР´Сº¤ЗТБК¡»Г¡ â»Ãá¡ÃÁ ГТВЕРаНХВ´¢Н§в»Гб¡ГБ
»ШиБаЕЧН¡а¾ФиБаµФБ
A
B
C
D
E
EWF 551 - в»Гб¡ГБ¡ТГ«С¡¹йУаВз¹
F
¼йТЕФ¹Ф¹ ¼йТ»Щ·Хи¹Н¹ аКЧйНаªФйµ ªШ´ªСй¹г¹
ªØ´ÂÕ¹Êì ¼éÒàªç´Á×Í ¼éÒ»Ù·Õè¹Í¹ ¼éÒ»ÙâµêÐ
аКЧйНаªФйµ аКЧйНКµГХ
¼йТГХ´§иТВ
¼éÒà¹×éͺҧ
àªè¹ ÁèÒ¹
аКЧйН¼йТ·ХиБХ»йТВ¡У¡СºЗиТ
"¼йТ¢¹КСµЗмб·й
¼йТ«С¡а¤ГЧиН§
·ХидБиЛ´" бЕР¼йТдЛБ
¼йТ½йТВКХдБиµ¡
аªи¹ ¼йТаªз´µСЗ ¼йТ
КХµ¡ аªи¹
ªШ´ªСй¹г¹ аКЧйНаªФйµ
Íѵâ¹ÁѵÔ
ªØ´ÂÕ¹Êì / ¼éÒàªç´µÑÇ
¼éÒÃÕ´§èÒÂ
¼éÒà¹×éͺҧ
¼йТ¢¹КСµЗмбЕР¼йТдЛБ
¼йТ½йТВКХ
«С¡»¡µФ·ХиНШ³ЛАЩБФ 40° ЕйТ§¹йУ 3 ¤ГСй§
»Си¹ЛБТ´»¡µФ
«С¡¤ГСй§бГ¡·ХиНШ³ЛАЩБФ 40°
«С¡»¡µФ·ХиНШ³ЛАЩБФ 60° ЕйТ§¹йУ 5 ¤ГСй§
»Си¹ЛБТ´´йЗВ¤ЗТБаГзЗКЩ§КШ´
«С¡»¡µФ·ХиНШ³ЛАЩБФ 40° ЕйТ§¹йУ 3 ¤ГСй§
»Си¹ЛБТ´НВиТ§¹ШиБ¹ЗЕ
«С¡»¡µФ·ХиНШ³ЛАЩБФ 30° ЕйТ§¹йУ 3 ¤ГСй§
»Си¹ЛБТ´НВиТ§¹ШиБ¹ЗЕ
«С¡»¡µФ·ХиНШ³ЛАЩБФ 30° ЕйТ§¹йУ 3 ¤ГСй§
»Си¹ЛБТ´»¡µФ
«Ñ¡»¡µÔ ÅéÒ§¹éÓ 3 ¤ÃÑé§
»Ñè¹ËÁÒ´»¡µÔ
«Ñ¡ÍÂèÒ§ÃÇ´àÃçÇ
«Ñ¡ÍÂèÒ§ÃÇ´àÃçÇ
«Ñ¡ÍÂèÒ§ÃÇ´àÃçÇ
«Ñ¡ÍÂèÒ§ÃÇ´àÃçÇ
«Ñ¡ÍÂèÒ§ÃÇ´àÃçÇ
«Ñ¡ÍÂèÒ§ÃÇ´àÃçÇ
G
H
I
J
K
ЛБТВаЛµШ: »Си¹ЛБТ´»¡µФ 500 ГНºµиН¹Т·Х »Си¹ЛБТ´бºº¹ШиБ¹ЗЕ 450 ГНºµиН¹Т·Х бЕР»Си¹ЛБТ´·Хи¤ЗТБаГзЗКЩ§КШ´ 550 ГНºµиН¹Т·Х
¼йТНТ¤ЕФЕФ¡ ЗФК¤НК
в¾ЕХНХКаµНГм БиТ¹
аКЧйНаªФйµ аКЧйНКµГХ
ªШ´ªСй¹г¹
¼йТа¹ЧйН¼КБ
¼йТгВКС§а¤ГТРЛм
«Ñ¡Á×Í
ÅéÒ§¹éÓ
ÃкÒ¹éÓ·Ôé§
»Ñè¹ËÁÒ´
«Ñ¡»¡µÔ ÅéÒ§¹éÓ 3 ¤ÃÑé§
»Ñè¹ËÁҴẺ¹ØèÁ¹ÇÅ
«Ñ¡»¡µÔ ÅéÒ§¹éÓ 3 ¤ÃÑé§
»Ñè¹ËÁҴẺ¹ØèÁ¹ÇÅ
ÅéÒ§¹éÓ 3 ¤ÃÑé§ ÃкÒ¹éÓ·Ôé§
»Ñè¹ËÁÒ´»¡µÔ
ÃкÒ¹éÓ·Ôé§
»Ñè¹ËÁÒ´»¡µÔ
32
«Ñ¡ÍÂèÒ§ÃÇ´àÃçÇ
«Ñ¡ÍÂèÒ§ÃÇ´àÃçÇ
Page 33

¼Ñ§â»Ãá¡ÃÁ
EWF 549
â»Ãá¡ÃÁ â»Ãá¡ÃÁ »ГРаА·¼йТбЕРГР´Сº¤ЗТБК¡»Г¡ â»Ãá¡ÃÁ ГТВЕРаНХВ´¢Н§в»Гб¡ГБ
»ШиБаЕЧН¡а¾ФиБаµФБ
A
¼йТЕФ¹Ф¹ ¼йТ»Щ·Хи¹Н¹ аКЧйНаªФйµ
ªШ´ªСй¹г¹
Íѵâ¹ÁѵÔ
«Ñ¡¤ÃÑé§áá «Ñ¡»¡µÔ
ÅéÒ§¹éÓ 5 ¤ÃÑé§ »Ñè¹ËÁÒ´»¡µÔ
«Ñ¡ÍÂèÒ§ÃÇ´àÃçÇ
АТЙТд·В
B
C
D
E
F
G
аКЧйНаªФйµ ¼йТ»ЩвµкР ªШ´ªСй¹г¹
¼éÒà¹×éͺҧ àªè¹
»ÅÍ¡ËÁ͹
ÁèÒ¹
¼йТГХ´§иТВ аКЧйНаªФйµ аКЧйНКµГХ
¼йТНТ¤ЕФЕФ¡ ЗФК¤НК в¾ЕХНХКаµНГм
БиТ¹
аКЧйН¼йТ·ХиБХ»йТВ¡У¡СºЗиТ
"¼йТ¢¹КСµЗмб·й ¼йТ«С¡а¤ГЧиН§
·ХидБиЛ´" бЕР¼йТдЛБ
аКЧйНаªФйµ аКЧйНКµГХ
ªШ´ªСй¹г¹
¼йТа¹ЧйН¼КБ НСµв¹БСµФ
¼éÒ½éÒ·Õèãªé»ÃШÓÇѹ
¼йТКХа¹ЧйНºТ§
¼éÒÃÕ´§èÒÂ
¼йТгВКС§а¤ГТРЛм
¼йТ¢¹КСµЗмбЕР¼йТдЛБ
«Ñ¡Á×Í
«Ñ¡»¡µÔ ÅéÒ§¹éÓ 3 ¤ÃÑé§ »Ñè¹ËÁÒ´»¡µÔ
«Ñ¡»¡µÔ ÅéÒ§¹éÓ 3 ¤ÃÑé§ »Ñè¹ËÁÒ´»¡µÔ
«Ñ¡»¡µÔ ÅéÒ§¹éÓ 3 ¤ÃÑé§ »Ñè¹ËÁÒ´»¡µÔ
«Ñ¡»¡µÔ ÅéÒ§¹éÓ 3 ¤ÃÑé§
»Ñè¹ËÁҴẺ¹ØèÁ¹ÇÅ
«Ñ¡»¡µÔ ÅéÒ§¹éÓ 3 ¤ÃÑé§ »Ñè¹ËÁÒ´»¡µÔ
«Ñ¡»¡µÔ ÅéÒ§¹éÓ 3 ¤ÃÑé§
»Ñè¹ËÁҴẺ¹ØèÁ¹ÇÅ
«Ñ¡ÍÂèÒ§ÃÇ´àÃçÇ
«Ñ¡ÍÂèÒ§ÃÇ´àÃçÇ
«Ñ¡ÍÂèÒ§ÃÇ´àÃçÇ
«Ñ¡ÍÂèÒ§ÃÇ´àÃçÇ
H
I
J
K
ЛБТВаЛµШ: »Си¹ЛБТ´»¡µФ 500 ГНºµиН¹Т·Х бЕР»Си¹ЛБТ´НВиТ§¹ШиБ¹ЗЕ 450 ГНºµиН¹Т·Х
¹éÓÂÒ»ÃѺ¼éÒ¹ØèÁ
ÅéÒ§¹éÓ
ÃкÒ¹éÓ·Ôé§
»Ñè¹ËÁÒ´
ÅéÒ§¹éÓ 1 ¤ÃÑé§ »Ñè¹ËÁÒ´»¡µÔ
ÅéÒ§¹éÓ 3 ¤ÃÑé§ ÃкÒ¹éÓ·Ôé§
»Ñè¹ËÁÒ´»¡µÔ
ÃкÒ¹éÓ·Ôé§
»Ñè¹ËÁÒ´»¡µÔ
33
Page 34

P0038
P1050
¡ТГ´ЩбЕГС¡ЙТ
C0066
1. ¡ТГ·У¤ЗТБКРНТ´¢НºВТ§»ГРµ
ЛБСи¹µГЗ¨КНºВТ§¡С¹ГСиЗ¢Н§½Т»Ф´¶С§«С¡ бЕР¹УЗСµ¶ШµиТ§ж ·ХиНТ¨¤йТ§НВЩиАТВг¹НН¡
2. ¡ТГ·У¤ЗТБКРНТ´АТВ¹Н¡
·У¤ЗТБКРНТ´АТВ¹Н¡¢Н§а¤ГЧиН§´йЗВ¹йУНШи¹бЕР¹йУВТЕйТ§¨Т¹ ЕйТ§¹йУ´йЗВКРНТ´ бЕРаªз´
гЛйбЛй§´йЗВ¼йТ¹ШиБ
¢éÍÊÓ¤Ñ: ЛйТБгªйбНЕ¡НОНЕм КТГ·УЕРЕТВЛГЧНКТГНЧи¹·ХиБХ¤Ш³КБºСµФ¤ЕйТВ¡С¹¹Хйг¹¡ТГ
·У¤ЗТБКРНТ´АТВ¹Н¡µСЗа¤ГЧиН§
3 ¡ТГ·У¤ЗТБКРНТ´ªиН§гКиКТГ«С¡¿Н¡
ЛЕС§¨Т¡гªй§Т¹д»д´йГРВРЛ¹Ци§ КТГ«С¡¿Н¡бЕР¹йУВТ»ГСº¼йТ¹ШиБ¨Рµ¡¤йТ§НВЩиг¹ªиН§
ЛБСи¹·У¤ЗТБКРНТ´ªиН§´С§¡ЕиТЗв´Ва»Ф´¹йУ¡кН¡гЛйдЛЕ¼иТ¹ г¹¡ТГ¹УªиН§´С§¡ЕиТЗНН¡
¨Т¡µСЗа¤ГЧиН§ гЛй¡´»ШиБ·ХиБШБ«йТВ´йТ¹ЛЕС§а¤ГЧиН§ ¤Ш³НТ¨¶Н´КиЗ¹º¹¢Н§ªиН§гКи¹йУВТ
»ГСº¼йТ¹ШиБНН¡ а¾ЧиНгЛй·У¤ЗТБКРНТ´д´й§иТВ¢Цй¹
КТГ«С¡¿Н¡НТ¨КРКБНВЩи´йТ¹г¹¢Н§ªиН§: гЛй·У¤ЗТБКРНТ´´йЗВб»Г§КХ¿С¹а¡иТ бЕР
гКиªиН§¹Хй¡ЕСºа¢йТ·Хиа´ФБЛЕС§¨Т¡·У¤ЗТБКРНТ´бЕйЗ
4. ¡ТГ·У¤ЗТБКРНТ´»СкБГРºТВ¹йУ
¤ЗГµГЗ¨КНº»СкБГРºТВ¹йУа»з¹ГРВРж бЕРµйН§µГЗ¨´Щ»СкБГРºТВ¹йУаБЧиН
а¤ГЧиН§дБи¶иТВ¹йУ·Фй§ бЕР/ЛГЧН дБи»Си¹ЛБТ´
БХаКХВ§´С§¼Ф´»¡µФ¨Т¡µСЗа¤ГЧиН§г¹ГРЛЗиТ§·Хиа¤ГЧиН§¡УЕС§¶иТВ¹йУ·Фй§ а¹ЧиН§¨Т¡БХКФи§б»Е¡
»ЕНБ аªи¹ а¢зБ¡ЕС´ аЛГХВ, ПЕП НШ´µС¹·Хи»СкБГРºТВ¹йУ
г¹¡ТГµГЗ¨КНº гЛй»¯ФºСµФ´С§¹Хй
¶Н´»ЕСк¡д¿а¤ГЧиН§«С¡¼йТНН¡¨Т¡аµйТаКХВº
ЛТ¡¨Уа»з¹ гЛйГН¨¹¡ГР·Си§¹йУ·Хи¢С§НВЩиг¹а¤ГЧиН§аВз¹Е§¡иН¹
а»Ф´½Т»Ф´»СкБГРºТВ¹йУ
C0067
P1114
ЗТ§АТª¹РГН§ГСºдЗйг¡Ей¡Сº»СкБГРºТВ¹йУа¾ЧиНГН§¹йУ·ХиНТ¨Л¡аЕНР
»Е´·иНГРºТВ¹йУг¹¡Г³Х©Ш¡а©Ф¹НН¡ ЗТ§·иНдЗйг¹АТª¹РГН§ГСº бЕР¶Н´½Т»Ф´·иН
НН¡
аБЧиНГРºТВ¹йУНН¡¨¹ЛБ´бЕйЗ гЛй¤ЕТВа¡ЕХВЗ»СкБГРºТВ¹йУ бЕР¶Н´»СкБГРºТВ¹йУНН¡
г¹ГРЛЗиТ§·Хи¶Н´»СкБГРºТВ¹йУ гЛйаµГХВБ¼йТ¢ХйГФйЗдЗйг¡ЕйБЧН а¾ЧиНаªз´¹йУ·ХиНТ¨Л¡аЕНР
P1115
34
Page 35

·У¤ЗТБКРНТ´гº¾С´¢Н§»СкБГРºТВ¹йУв´В¡ТГЛБШ¹гº¾С´ а¾ЧиНгЛйЗСК´Ш·ХиНШ´µС¹ЛЕШ´
ÍÍ¡ÁÒ
гКи½Т»Ф´·иНГРºТВ¹йУг¹¡Г³Х©Ш¡а©Ф¹¡ЕСºа¢йТ·Хи бЕРгКиКиЗ¹»ЕТВ¢Н§·иН¡ЕСºа¢йТ·Хи
¢С¹а¡ЕХВЗ»СкБГРºТВ¹йУа¢йТ¨¹КШ´
»Ф´½Т»Ф´»СкБГРºТВ¹йУ
5. µÑÇ¡Ãͧ¹éÓà¢éÒ
ЛТ¡·иТ¹КС§а¡µаЛз¹ЗиТа¤ГЧиН§гªйаЗЕТг¹¡ТГаµФБ¹йУ¹Т¹¡ЗиТ»¡µФ гЛйµГЗ¨КНºµСЗ¡ГН§
г¹·иН¹йУа¢йТЗиТНШ´µС¹ЛГЧНдБи
»Ф´¡кН¡¹йУ
д¢К¡ГЩ·Хи·иННН¡¨Т¡¡кН¡¹йУбЕР¶Н´µСЗ¡ГН§НН¡
·У¤ЗТБКРНТ´´йЗВб»Г§б¢з§
гКиµСЗ¡ГН§¡ЕСºа¢йТд»бЕР¢С¹К¡ГЩа¢йТ¡Сº¡кН¡¹йУµТБа´ФБ
6. ¡ÒÃÃкÒ¹éÓÍÍ¡¨Ò¡à¤Ã×èͧ㹡óթءà©Ô¹
ЛТ¡а¤ГЧиН§«С¡¼йТдБиГРºТВ¹йУ·Фй§НН¡ гЛй»¯ФºСµФµТБ¢Сй¹µН¹µиНд»¹Хй а¾ЧиНГРºТВ¹йУНН¡
¨Т¡а¤ГЧиН§:
¶Н´»ЕСк¡д¿а¤ГЧиН§«С¡¼йТНН¡¨Т¡аµйТаКХВº
»Ф´¡кН¡¹йУ
ЛТ¡¨Уа»з¹ гЛйГН¨¹¡ГР·Си§¹йУ·Хи¢С§НВЩиг¹а¤ГЧиН§аВз¹Е§¡иН¹
а»Ф´½Т»Ф´»СкБГРºТВ¹йУ
ЗТ§НиТ§¹йУЕ§º¹¾Чй¹ ЗТ§»ЕТВ·иНГРºТВ¹йУг¹¡Г³Х©Ш¡а©Ф¹Е§г¹НиТ§¹йУ бЕР¶Н´½Т
»Ф´·иННН¡ ¹йУ¤ЗГГРºТВНН¡¨Т¡а¤ГЧиН§бЕРдЛЕЕ§КЩиªТБНиТ§ аБЧиНªТБНиТ§аµзБ гЛй
»Ф´½Т»Ф´·иН¡ЕСºа¢йТ·Хи а·¹йУг¹ªТБНиТ§·Фй§ бЕйЗ·У«йУ¢Сй¹µН¹¹Хй¨¹¡ЗиТ¹йУ¨РГРºТВ
НН¡¨Т¡а¤ГЧиН§¨¹ЛБ´
ЛТ¡¨Уа»з¹ гЛй·У¤ЗТБКРНТ´»СкБГРºТВ¹йУµТБ¢Сй¹µН¹·ХиГРºШ¢йТ§µй¹
ЛЕС§¨Т¡»Ф´½Т»Ф´·иНГРºТВ¹йУг¹¡Г³Х©Ш¡а©Ф¹¡ЕСºа¢йТ·ХибЕйЗ гЛйгКиКиЗ¹»ЕТВ¢Н§·иН
¡ЕСºа¢йТ·Хи
¢С¹а¡ЕХВЗ»СкБГРºТВ¹йУа¢йТ¨¹КШ´ бЕР»Ф´½Т»Ф´»СкБГРºТВ¹йУ
7. ÍѹµÃÒ¨ҡ¹éӨѺµÑÇà»ç¹¹éÓá¢ç§
¶йТа¤ГЧиН§µСй§НВЩиг¹ºГФаЗ³·ХиБХНШ³ЛАЩБФµиУ¡ЗиТ 0 Н§ИТа«Еа«ХВК гЛй»¯ФºСµФµТБ¢Сй¹µН¹
µиНд»¹Хй:
¶Н´»ЕСк¡д¿а¤ГЧиН§«С¡¼йТНН¡¨Т¡аµйТаКХВº
»Ф´¡кН¡¹йУбЕР¤ЕТВа¡ЕХВЗ·иН¹йУа¢йТНН¡¨Т¡¡кН¡
ЗТ§»ЕТВ·иНГРºТВ¹йУг¹¡Г³Х©Ш¡а©Ф¹бЕР»ЕТВ·иН¹йУа¢йТдЗйг¹ªТБНиТ§·ХиЗТ§º¹¾Чй¹
бЕйЗ»ЕиНВгЛй¹йУГРºТВНН¡¨Т¡а¤ГЧиН§
¢С¹а¡ЕХВЗ·иН¹йУа¢йТ¡ЕСºа¢йТ·Хи бЕРЛЕС§¨Т¡»Ф´½Т»Ф´·иНГРºТВ¹йУг¹¡Г³Х©Ш¡а©Ф¹
¡ЕСºа¢йТ·ХибЕйЗ гЛйгКи·иН¡ЕСºа¢йТ·Хи
¡ТГ·Уаªи¹¹Хй ¨РªиЗВгЛй¹йУ·ХиВС§¤йТ§НВЩиг¹а¤ГЧиН§ГРºТВНН¡ «Ци§¨РЕ´¡ТГб¢з§µСЗ¢Н§¹йУ
а»з¹¹йУб¢з§ ·ХиНТ¨¡иНгЛйа¡Ф´¡ТГбµ¡ЛС¡¢Н§ªФй¹КиЗ¹г¹µСЗа¤ГЧиН§
аБЧиНµйН§¡ТГ¨Ргªй§Т¹а¤ГЧиН§НХ¡¤ГСй§ ¤ЗГµГЗ¨КНºгЛйб¹иг¨ЗиТНШ³ЛАЩБФЛйН§КЩ§¡ЗиТ 0
Н§ИТа«Еа«ХВК
АТЙТд·В
¢éÍÊÓ¤Ñ!
·Ø¡¤ÃÑ駷Õè·èÒ¹ÃкÒ¹éÓÍÍ¡¨Ò¡à¤Ã×èͧ¼èÒ¹·Ò§·èÍÃкÒ¹éÓ㹡óթءà©Ô¹ µéͧ෹éÓ
»ÃÐÁÒ³ 2 ÅԵà ŧ㹪èͧãÊ輧«Ñ¡¿Í¡ áÅÐà´Ô¹à¤Ã×èͧ´éÇÂâ»Ãá¡ÃÁÃкÒ¹éÓ·Ôé§ ¡ÒÃ
·Уаªи¹¹Хй¨РªиЗВ¡ГРµШй¹¡ТГ·У§Т¹¢Н§ЗТЕмЗ ECO а¾ЧиН»йН§¡С¹дБигЛйБХ¼§«С¡¿Н¡·ХиВС§дБи
д´йгªйЛЕ§аЛЕЧННВЩиг¹ГНº¡ТГ«С¡¤ГС駵иНд»
35
Page 36

à¤Ã×èͧäÁè·Ó§Ò¹?
»СЛТ·Хи¤Ш³КТБТГ¶б¡йд¢д´й´йЗВµ¹аН§
»ÑËÒ ÊÒà˵طÕèà»ç¹ä»ä´é
à¤ÃЧиН§«С¡¼йТдБиаГФиБ·У§Т¹:
а¤ГЧиН§дБиБХ¹йУа¢йТ:
à¤ÃЧиН§»ЕиНВ¹йУ¨¹аµзБбЕРГРºТВ·Фй§·С¹·Х:
а¤ГЧиН§дБиГРºТВ¹йУНН¡бЕР/ЛГЧНдБи»Си¹ЛБТ´:
ÁÕ¹éӹͧº¹¾×é¹:
»Ф´»ГРµЩдБиК¹Ф·
дБид´йаКХВº»ЕСк¡а¤ГЧиН§«С¡¼йТ ЛГЧНдБиБХ¡ГРбКд¿¿йТг¹аµйТаКХВº
¿ФЗКмЛЕС¡¢Т´
ЛБШ¹ЕЩ¡ºФ´аЕЧН¡в»Гб¡ГБдБиµГ§µУбЛ¹и§
ВС§дБид´й¡´»ШиБ "аГФиБ¡ТГ·У§Т¹/а¾ФиБ¼йТ"
¡кН¡¹йУ»Ф´НВЩи
КТВВТ§·иН¹йУа¢йТбº¹ЛГЧНЛС¡§Н
µСЗ¡ГН§·ХиКТВВТ§·иН¹йУа¢йТНШ´µС¹
»Ф´½Т¶С§«С¡дБиК¹Ф·
»ЕТВ·иНГРºТВ¹йУНВЩиµиУа¡Ф¹д» в»Г´НиТ¹¢йНБЩЕ·Хиа¡ХиВЗ¢йН§г¹ЛСЗ¢йН ¡ТГ¶иТВ¹йУ·Фй§
·иНГРºТВ¹йУµС¹ЛГЧН¢´§Н
аЕЧН¡µСЗаЕЧН¡ Rinse Hold (бªи¼йТ) дЗй
аЕЧН¡µСЗаЕЧН¡ Spin Suppress (дБи»Си¹ЛБТ´) дЗй
»СкБГРºТВ¹йУНШ´µС¹
гКи¼§«С¡¿Н¡БТ¡а¡Ф¹д» ЛГЧНгªй¼§«С¡¿Н¡дБиаЛБТРКБ (а¡Ф´¿Н§БТ¡а¡Ф¹д»)
µГЗ¨КНºЗиТБХГНВГСиЗ·Хи¨Ш´г´г¹¡ТГµиН·иН¹йУа¢йТЛГЧНдБи НТ¨КС§а¡µаЛз¹¹йУЛВ´¨Т¡
·иНдБид´й§иТВж гЛйµГЗ¨КНºЗиТБХГНВа»ХВ¡ªЧй¹·ХидЛ¹ЛГЧНдБи
·иНГРºТВ¹йУªУГШ´аКХВЛТВ
ЛЕС§¨Т¡·У¤ЗТБКРНТ´µСЗ¡ГН§ ·иТ¹дБид´й»Ф´½Т»Ф´·иНГРºТВ¹йУг¹¡Г³Х©Ш¡а©Ф¹
ЛЕС§¨Т¡·У¤ЗТБКРНТ´»СкБГРºТВ¹йУ ·иТ¹дБид´й¢С¹а¡ЕХВЗ»СкБа¢йТ¨¹КШ´
¼Е¡ТГ«С¡дБиКРНТ´а·иТ·Хи¤ЗГ:
а¤ГЧиН§КСи¹ЛГЧНКи§аКХВ§´С§::
à»Ô´½Ò¶Ñ§«Ñ¡äÁèä´é:
гªйКТГ«С¡¿Н¡дБиаЛБТРКБЛГЧНгªй¹йНВа¡Ф¹д»
дБид´й¢¨С´ГНВа»ЧйН¹·Хи«С¡НН¡ВТ¡¡иН¹¡ТГ«С¡а¤ГЧиН§
аЕЧН¡НШ³ЛАЩБФКУЛГСº¡ТГ«С¡дБи¶Щ¡µйН§
»ГФБТ³¼йТБТ¡а¡Ф¹д»
дБид´й¹Уб·и§»йН§¡С¹¢³Р¢¹Ки§бЕРºГГ¨ШАС³±мНН¡
дБид´й»ГСº¢ТµСй§
¼йТг¹¶С§дБи¡ГР¨ТВНВиТ§КБиУаКБН
¼йТг¹¶С§НТ¨¹йНВа¡Ф¹д»
в»Гб¡ГБВС§·У§Т¹НВЩи
ЕзН¤¢Н§½Т»Ф´¶С§«С¡ВС§дБи»Е´НН¡
БХ¹йУ¤йТ§НВЩиг¹¶С§«С¡
36
Page 37

»ÑËÒ ÊÒà˵طÕèà»ç¹ä»ä´é
¡ТГ»Си¹ЛБТ´аГФиБ·У§Т¹ªйТ ЛГЧН¼йТ»Си¹ЛБТ´бЕйЗбЛй§дБи¾Н
· НШ»¡Г³мНФаЕз¡·ГН¹Ф¡КмµГЗ¨КНº¤ЗТБКБ´ШЕаГФиБ·У§Т¹
а¹ЧиН§¨Т¡¼йТдБид´й¡ГР¨ТВµСЗНВЩиг¹¶С§«С¡НВиТ§·СиЗ¶Ц§ ¼йТ¨Р¡ГР¨ТВµСЗг¹¶С§«С¡НХ¡¤ГСй§
аБЧиН¶С§«С¡ЛБШ¹¡ЕСºд»НХ¡·Т§ ¢Сй¹µН¹аªи¹¹ХйНТ¨·У§Т¹ЛЕТВ¤ГСй§
¨¹¡ЗиТ¼йТ¨Р¡ГР¨ТВµСЗНВЩиг¹¶С§«С¡НВиТ§·СиЗ¶Ц§
¨Т¡¹Сй¹¨Ц§¨Ра¢йТКЩи¢Сй¹µН¹¡ТГ»Си¹ЛБТ´µТБ»¡µФ
ЛЕС¡¨Т¡·ХиНШ»¡Г³мµГЗ¨КНº·У§Т¹бЕйЗа»з¹аЗЕТ 10 ¹Т·Х¼иТ¹д»
ЛТ¡¼йТВС§¡ГР¨ТВµСЗНВЩиг¹¶С§«С¡дБи·СиЗ¶Ц§ а¤ГЧиН§¨РдБи»Си¹ЛБТ´
ЛТ¡КФй¹КШ´¡ТГ·У§Т¹¢Н§в»Гб¡ГБбЕйЗ ¼йТВС§»Си¹бЛй§дБи¾Н
гЛйгªйБЧН¡ГР¨ТВ¼йТбЕйЗаЕЧН¡в»Гб¡ГБ
АТЙТд·В
ЛТ¡¤Ш³дБиКТБТГ¶ГРºШЛГЧНб¡йд¢»СЛТд´й ¡ГШ³ТµФ´µиНИЩ¹ВмºГФ¡ТГ¢Н§аГТ ¡иН¹¨Рв·Г
б¨й§ИЩ¹Вм ¡ГШ³Т¨´ªЧиНГШи¹ «ХаГХВЕ¹СБаºНГм бЕРЗС¹·Хи¤Ш³«ЧйНа¤ГЧиН§БТ: а¹ЧиН§¨Т¡ИЩ¹ВмºГФ¡ТГ¨Р
КНº¶ТБ¢йНБЩЕаЛЕиТ¹Хй
37
Page 38

Pelanggan yang terhormat,
Bacalah petunjuk penggunaan ini dengan saksama
dan mohon perhatikan keterangan-keterangan
mengenai keselamatan yang tercantum di beberapa
halaman pertama. Kami sarankan Anda menyimpan
buklet petunjuk ini untuk digunakan dan disampaikan
ke pemilik berikutnya kelak.
Simbol-simbol yang terdapat pada beberapa paragraf buklet ini memiliki arti berikut:
Segitiga peringatan dan/atau kata kunci (Peringatan!, Awas!) menekankan informasi yang khususnya
penting bagi keselamatan Anda atau agar mesin berfungsi dengan benar.
Informasi yang ditandai simbol ini berisi petunjuk tambahan dan saran praktis mengenai penggunaan
mesin.
Saran dan informasi mengenai penggunaan mesin secara ekonomis dan dengan memperhatikan
ekologi ditandai dengan simbol ini.
Kontribusi kami terhadap perlindungan
lingkungan: kami menggunakan
kertas daur-ulang.
Kerusakan akibat pengangkutan
Setelah membuka kemasan, periksalah apakah
mesin rusak. Jika ragu-ragu, jangan menggunakan
mesin, namun hubungi Pusat Servis setempat.
Daftar Isi
Peringatan 38
Pembuangan 39
Saran bagi perlindungan
lingkungan 40
Spesifikasi teknis 40
Pemasangan 41
Membuka kemasan 41
Menempatkan mesin 41
Saluran air masuk 41
Pembuangan air 42
Koneksi listrik 42
Mesin cuci Anda yang baru 43
Deskripsi mesin cuci 43
Laci penyaluran deterjen 43
Penggunaan 44
Panel kontrol 44
Tombol kontrol 44
Petunjuk mencuci 45
Memilah cucian 45
Suhu 45
Sebelum memasukkan cucian 45
Beban maksimum 45
Berat cucian 45
Menghilangkan noda 45
Deterjen dan bahan aditif 46
Urutan operasi 47-48
Simbol kode cuci internasional 49
Program cuci 50-51
Perawatan 52
Membersihkan Penyekat Pintu 52
Pembersihan di Bagian Luar 52
Membersihkan Laci Deterjen 52
Membersihkan Pompa Kuras 52-53
Filter saluran air masuk 53
Pengurasan darurat 53
Pencegahan bunga es 53
Ada yang tidak berfungsi? 54-55
38
Page 39

Peringatan
Peringatan berikut diberikan demi keselamatan secara keseluruhan. Anda harus membacanya dengan
saksama sebelum memasang atau menggunakan mesin ini.
Pemasangan
Semua kemasan internal harus dikeluarkan
sebelum mesin ini digunakan. Kerusakan serius
dapat terjadi pada mesin atau perabotan sekitar
jika perangkat pelindung pengangkutan tidak
dilepaskan atau jika dilepaskan sebagian saja.
Lihat bagian yang sesuai dalam buku petunjuk.
Setiap pekerjaan kelistrikan yang perlu untuk
memasang mesin ini harus dilakukan oleh tukang
listrik yang kompeten.
Setiap pekerjaan saluran air yang perlu untuk
memasang mesin ini harus dilakukan oleh tukang
ledeng yang kompeten.
Setelah dipasang, periksa dan pastikan mesin
tidak menginjak kabel listriknya.
Jika mesin diletakkan pada lantai berkarpet,
pastikan udara dapat mengalir bebas antara kaki
mesin dan lantai.
Penggunaan
Perangkat ini dirancang hanya untuk penggunaan
rumah tangga. Mesin ini tidak boleh digunakan
untuk tujuan lain.
Cucilah hanya bahan yang dirancang untuk dicuci
dengan mesin. Patuhi selalu petunjuk pada label
pakaian.
Jangan membebani mesin secara berlebihan. Ikuti
petunjuk pada buku petunjuk.
Pastikan semua saku pakaian sudah kosong.
Benda-benda seperti koin, peniti, jarum dan sekrup
dapat mengakibatkan kerusakan yang luas.
Jangan menggunakan mesin untuk mencuci
pakaian yang penuh dengan minyak tanah, spirtus
alkohol, trikloretilen, dll. Jika cairan semacam itu
digunakan untuk menghilangkan noda pada
pakaian, tunggulah sampai seluruh cairan tersebut
menguap sebelum memasukkan pakaian ke dalam
mesin.
Masukkan cucian berukuran kecil seperti kaos
kaki, ikat pinggang, dll. ke dalam kantung kain atau
sarung bantal agar tidak terjepit di antara tabung
dan bak.
Gunakan pelembut cucian sebanyak yang
disarankan saja. Jumlah yang berlebih dapat
merusak cucian.
Biarkan pintu sedikit terbuka jika mesin sedang
tidak digunakan. Ini untuk memperpanjang usia
penyekat pintu dan mencegah bau tak sedap.
Selalu periksa apakah air sudah keluar semua
sebelum membuka pintu. Jika belum, keluarkan air
sesuai dengan petunjuk pada buku petunjuk.
Setelah menggunakan mesin, selalu cabut steker
dan tutup keran air.
Keselamatan umum
Perbaikan terhadap mesin hanya boleh dilakukan
oleh petugas yang kompeten. Perbaikan oleh
orang tak berpengalaman dapat mengakibatkan
cedera atau kerusakan serius. Hubungi Pusat
Servis setempat.
Jangan sekali-kali menarik kabel listrik untuk
melepaskan steker dari stopkontak; melainkan
peganglah stekernya.
Selama program cuci dengan suhu tinggi, pintu
kaca dapat menjadi panas. Jangan menyentuh
pintu!
Keselamatan anak-anak
Anak-anak sering kali tidak menyadari bahwa
perangkat listrik dapat sangat berbahaya. Ketika
mesin sedang bekerja, awasi anak-anak dengan
saksama dan jangan biarkan mereka bermain
dengan mesin.
Komponen-komponen pengemas (misalnya
lapisan platik, polistiren) dapat berbahaya bagi
anak-anak bahaya tercekik karena kurang
oksigen! Jauhkan benda-benda tersebut dari
jangkauan anak-anak.
Simpanlah semua deterjen di tempat aman dan
jauh dari jangkauan anak-anak.
Pastikan tidak ada anak-anak atau binatang
peliharaan yang masuk ke dalam tabung.
Jika mesin akan dibuang, potong kabel listrik dan
hancurkan steker beserta sisa kabelnya. Rusakkan
kunci pintu agar anak-anak tidak terperangkap di
dalam mesin ketika bermain.
BAHASA
INDONESIA
39
Page 40

Pembuangan
Bahan pengemas
Bahan yang ditandai dengan simbol dapat
didaur-ulang.
>PE<=polietilen
>PS<=polistiren
>PP<=polipropilen
Berarti, bahan tersebut dapat didaur-ulang dengan
cara dibuang ke tempat pengumpulan limbah daurulang yang sesuai.
Saran bagi perlindungan lingkungan
Untuk menghemat air, energi dan melindungi
lingkungan, ikutilah saran-saran berikut:
Cucian yang kotornya normal dapat dicuci tanpa
pra-cuci untuk menghemat deterjen, air dan waktu
(juga untuk melindungi lingkungan!).
Mesin akan bekerja lebih ekonomis jika diberi
beban penuh.
Mesin
Gunakan lokasi pembuangan yang diizinkan untuk
mesin lama Anda. Bantulah untuk menjaga
kebersihan negara Anda!
Dengan perlakuan awal yang cukup, noda dan
sebagian kotoran dapat dihilangkan; sehingga
cucian dapat dicuci pada suhu lebih rendah.
Takar jumlah deterjen sesuai dengan tingkat
kesadahan air, tingkat kekotoran cucian serta
jumlah cucian.
Spesifikasi Teknis
DIMENSI Tinggi 85 cm
Lebar 60 cm
Kedalaman 59 cm
BEBAN MAKSIMUM Katun 5,5.kg
Sintetis 2,5,kg
Bahan halus 2,5 kg
Wol 1,0 kg
KECEPATAN PEMERASAN 550 rpm maks.
TEGANGAN/FREKUENSI DAYA LISTRIK 220-230 V/50 Hz
PEMAKAIAN DAYA LISTRIK TOTAL 2200 W (EWF 551) / 450W (EWF 549)
UKURAN SEKRING MINIMUM: 10 A
TEKANAN AIR Minimum 500 kPa
Maksimum 800 kPa
Mesin ini memenuhi ketentuan EEC berikut:
73/23/EEC tanggal 19/02/73 mengenai tegangan rendah
89/336/EEC tanggal 03/05/89 mengenai kompatibilitas elektromagnetik.
40
Page 41

Pemasangan
Membuka kemasan
Semua baut dan pengemas pengiriman harus
dilepaskan sebelum mesin digunakan.
Anda disarankan untuk menyimpan semua
perangkat pengiriman agar dapat digunakan lagi jika
mesin akan dipindahkan.
Dengan menggunakan obeng, buka dan lepaskan
1.
baut di sebelah kanan-belakang, kemudian baringkan
mesin pada bagian belakangnya, dan berhati-hatilah
agar selang tidak terhimpit. Ini dapat dihindarkan
dengan menyisipkan salah satu perangkat pengemas
sudut di antara mesin dan lantai.
2. Lepaskan blok polistiren dari bagian bawah
mesin dan keluarkan kedua kantung plastik.
3. Dengan sangat hati-hati, geser dan tarik kantung
plastik di sebelah kiri, lepaskan ke arah kanan
kemudian ke bawah.
5. Keluarkan ketiga plastik pengisi dari lubang
tempat baut.
6.
Sumbat semua lubang dengan sumbat yang
terdapat dalam amplop yang berisi buku petunjuk.
Menempatkan mesin
Pasang mesin pada lantai yang datar dan kuat.
Pastikan sirkulasi udara di sekitar mesin tidak
terhalang oleh karpet, permadani dll. Periksa dan
pastikan mesin tidak menyentuh dinding atau
perangkat dapur lainnya. Dengan hati-hati, datarkan
posisi mesin dengan memutar kaki mesin ke dalam
atau ke luar. Jangan sekali-sekali menempatkan
kardus, kayu atau semacamnya di bawah mesin
untuk mengkompensasi ketidakrataan di lantai.
BAHASA
INDONESIA
4. Dengan sangat hati-hati, geser dan tarik kantung
plastik di sebelah kanan, lepaskan ke arah kiri
kemudian ke atas.
Ambil penutup alas yang dipasang ke dalam drum
mesin cuci Anda, sangkutkan pengaitnya seperti
yang ditunjukkan panah «A», lalu dorong bagian
atas penutup untuk menutupnya rapat-rapat.
Penting: Anda bisa mendapatkan rincian petunjuk
selengkapnya mengenai perakitan penutup bagian
bawah di dalam kantung yang berisi panduan yang
sesuai.
Saluran air masuk
Hubungkan selang air masuk ke keran air dengan
ulir BSP berukuran ¾.
Gunakan selang yang disertakan dengan mesin cuci.
JANGAN MENGGUNAKAN SELANG YANG LAMA.
Pastikan, bahwa ketika memasang mesin cuci,
kabel listriknya mudah dijangkau.
41
Page 42

Selang air masuk tidak boleh diperpanjang. Jika
P0022
P1118
selang terlalu pendek dan Anda tidak ingin
memindahkan keran air, Anda harus membeli selang
baru yang lebih panjang dan yang khusus dirancang
untuk penggunaan ini.
Penting!
Sebelum menyambungkan mesin dengan selang
atau pipa yang sudah lama tidak digunakan, alirkan
air secukupnya untuk mengeluarkan kotoran yang
mungkin terkumpul dalam pipa.
Pembuangan air
Ujung selang pembuangan dapat diletakkan dalam
tiga cara:
Dipasang pada sisi bak cuci dengan
menggunakan pemandu selang plastik yang
disertakan bersama mesin. Dalam hal ini, pastikan
ujungnya tidak dapat terlepas ketika mesin sedang
mengeluarkan air.
Ini dapat dilakukan dengan mengikat selang ke
keran air dengan tali atau menempelkannya ke
dinding.
Agar mesin berfungsi baik, selang pembuangan
air harus tetap tersangkut pada bilah
penopangnya dengan benar, yang terletak di
bagian atas di samping belakang mesin cuci.
Koneksi listrik
Mesin ini dirancang untuk digunakan pada daya
listrik 220-230 V, fasa-tunggal, 50 Hz.
Periksa apakah daya listrik Anda cukup untuk
menjalankan mesin dengan beban maksimum
(2,2 kW), jangan lupa perhitungkan pula peralatan
listrik lain.
Hubungkan mesin ke stopkontak yang
dibumikan.
Pada cabang pipa pembuangan bak cuci. Cabang
ini harus berada di atas perangkap/saringan kotoran
sedemikian sehingga lekukan berada sedikitnya
60 cm di atas lantai.
Langsung pada pipa pembuangan dengan
ketinggian tidak kurang dari 60 cm dan tidak lebih
dari 90 cm.
Ujung selang pembuangan harus selalu
berventilasi, yaitu diameter-dalam pipa
pembuangan harus lebih besar dari diameter-luar
selang pembuangan.
Selang pembuangan tidak boleh ditekuk.
Produsen mesin ini tidak bertanggung jawab
atas kerusakan atau cedera yang diakibatkan
kelalaian untuk mematuhi aturan keselamatan
di atas.
Jika kabel listrik mesin harus diganti,
penggantian ini harus dilakukan oleh
Pusat Servis setempat.
Kabel listrik harus mudah diakses setelah mesin
dipasang.
42
Page 43

Mesin cuci Anda yang baru
Mesin baru ini memenuhi semua kebutuhan moderen dalam hal penanganan cucian yang efektif dengan
pemakaian air, energi dan deterjen yang rendah.
Tombol pemilih suhu berfungsi untuk memilih suhu yang tepat untuk cucian Anda.
Pendinginan air cucian secara otomatis dari 95°C sampai 60°C sebelum pengurasan akan mencegah
kerusakan pada pipa pembuangan yang sudah tua dan akan mengurangi kejutan akibat perbedaan suhu
pada kain, sehingga membantu mencegah kusut.
Program wol khusus dengan sistem baru pencucian halus akan menangani pakaian wol Anda dengan hati-
hati.
Alat kontrol keseimbangan memastikan mesin tetap stabil selama pemerasan.
Katup ECO berfungsi untuk memastikan agar deterjen dipakai seluruhnya dan mengurangi penggunaan air
sehingga menghemat energi.
Deskripsi mesin cuci
1 Laci penyaluran deterjen
2 Diagram program
3 Panel kontrol
4 Pegangan pintu
5 Pompa pembuangan
6 Kaki yang dapat diubah ketinggiannya
BAHASA
INDONESIA
Laci penyaluran deterjen
Pra-cuci
Pencucian utama
Pelembut cucian, kanji
43
Page 44

Penggunaan
Panel kontrol
1. Laci Penyaluran Deterjen
2. Tombol “Start /Add Clothes” [Mulai / Masukkan Baju]
Setelah memilih program dan opsi yang diperlukan, tekan tombol ini untuk menjalankan mesin. LED yang
bersangkutan akan berhenti berkedip dan tetap menyala. Untuk menyela program yang sedang berjalan.
lepaskan tekanan tombol Start/Add Clothes, LED yang bersangkutan akan mulai berkedip-kedip. Untuk
memulaikan kembali program dari saat program tersebut disela, tekan lagi tombol Start/Add Clothes
[Mulai/Masukkan baju].
3. “Quick Wash” [Cuci Cepat]
Menekan tombol ini akan mempersingkat program pencucian yang dipilih. Contohnya, jika tombol ini ditekan,
LED akan menyala dan program Automatic [Otomatis] akan dikurangi hingga sekitar 60 menit dari 110 menit.
4. Tombol Pemilih Program
Pemilih program dibagi ke dalam tiga bagian
OFF, COLD [MATI, DINGIN] untuk EWF 549 dan OFF, HOT [MATI, PANAS] dan COLD [DINGIN]
untuk EWF 551
Ini dapat dirotasi searah jarum jam dan kebalikan arah jarum jam.
Pada akhir program, tombol pemilih program harus disetel ke posisi O untuk mematikan mesin. Perhatian!
Jika, tombol pemilih dialihkan ke program yang lain sewaktu program mencuci sedang berlangsung, mesin
tidak akan melakukan program yang baru dipilih itu.
Pada EWF 551 untuk program HOT [PANAS], suhunya sudah diprasetel (Rujuk halaman 50).
44
Page 45

Petunjuk mencuci
Memilah cucian
Ikuti simbol kode cuci pada setiap label pakaian dan
petunjuk cuci dari produsen. Pilah cucian seperti
berikut: cucian berwarna putih, berwarna, sintetis,
bahan halus, wol.
Sebelum memasukkan cucian
Jangan sekali-kali menyatukan cucian putih dan
berwarna. Cucian putih dapat menjadi kusam.
Pakaian berwarna yang masih baru dapat luntur
ketika pertama kali dicuci; karena itu, harus dicuci
terpisah ketika pertama kali dicuci.
Pastikan tak ada benda logam yang tertinggal
dalam cucian (misalnya jepit rambut, peniti,
jarum).
Kancingkan sarung bantal, tutup ritsleting, kancing
kait dan kancing tekan. Ikatlah ikat pinggang atau
pita panjang. Hilangkan noda membandel sebelum
dicuci. Gosok bagian yang sangat kotor dengan
deterjen khusus atau pasta deterjen. Perlakukan tirai
dengan hati-hati. Lepaskan kaitan atau masukkan ke
dalam kantung atau jaring.
Beban maksimum
Beban yang disarankan tercantum dalam diagram
program.
Aturan umum:
Katun, linen: penuhi tabung tapi jangan terlalu
padat;
Sintetis: jangan penuhi tabung lebih dari
setengahnya;
Bahan halus dan wol: jangan penuhi tabung lebih
dari sepertiganya. Mencuci dengan beban
maksimum adalah yang paling efisien dalam
penggunaan air dan energi. Untuk cucian yang
sangat kotor, kurangi jumlah beban.
Berat cucian
Berat berikut hanyalah patokan saja:
baju mandi 1200 g
serbet 100 g
selimut quilt 700 g
seprai 500 g
sarung bantal 200 g
taplak meja 250 g
handuk kecil 200 g
taplak kecil 100 g
baju tidur wanita 200 g
celana dalam wanita 100 g
kemeja kerja pria 600 g
kemeja pria 200 g
piyama pria 500 g
blus 100 g
celana dalam pria 100 g
Menghilangkan noda
Noda membandel mungkin tidak dapat dihilangkan
hanya dengan air dan deterjen. Karena itu,
disarankan untuk memberikan perlakuan awal
sebelum mencuci.
Darah: hilangkan noda yang masih baru dengan air
dingin. Untuk noda yang sudah mengering, rendam
semalam dalam air dengan deterjen khusus,
kemudian gosok dengan air dan sabun.
Cat minyak: lembabkan dengan penghilang noda
benzin, letakkan pakaian di atas kain lembut,
kemudian tekan-tekan noda; lakukan beberapa kali.
Noda gemuk yang mengering: lembabkan dengan
terpentin, letakkan pakaian pada permukaan yang
lembut dan tekan-tekan noda dengan ujung jari yang
dibungkus lap katun.
Karat: asam oksalat yang dilarutkan dalam air panas
atau produk penghilang karat digunakan dalam
keadaan dingin. Berhati-hatilah dengan noda karat
yang sudah lama karena struktur selulosa bahan
sudah rusak dan bahan cenderung sobek.
Noda jamur: bersihkan dengan pemutih, bilas
dengan baik (hanya cucian putih dan cucian
berwarna yang tak luntur saja).
Rumput: beri sedikit sabun dan hilangkan dengan
pemutih (hanya cucian putih dan cucian berwarna
yang tak luntur saja).
Tinta bolpoin dan lem: lembabkan dengan aseton
(*), letakkan cucian pada kain halus kemudian tekantekan noda.
BAHASA
INDONESIA
45
Page 46

Lipstik: lembabkan dengan aseton seperti di atas,
kemudian hilangkan noda dengan spirtus alkohol.
Hilangkan sisa noda dari bahan putih dengan
pemutih.
Anggur merah: rendam dalam air dan deterjen,
bilas dan hilangkan dengan asam asetat atau asam
sitrat, kemudian bilas. Hilangkan sisa noda dengan
pemutih.
Tinta: bergantung pada jenis tinta, lembabkan bahan
dengan aseton (*) terlebih dahulu, kemudian dengan
asam asetat; hilangkan sisa noda dari bahan putih
dengan pemutih, lalu bilas dengan saksama.
Noda aspal: terlebih dahulu gunakan penghilang
noda, spirtus alkohol atau benzin, kemudian gosok
dengan pasta deterjen.
(*) jangan gunakan aseton pada sutra buatan.
Deterjen dan aditif
Hasil cuci yang baik juga bergantung pada pilihan
deterjen dan penggunaannya dalam jumlah yang
tepat agar tidak banyak yang terbuang percuma dan
untuk melindungi lingkungan. Walaupun dapat diurai
secara alami, deterjen mengandung zat yang, dalam
jumlah besar, dapat merusak keseimbangan alam.
Pemilihan deterjen tergantung pada jenis bahan
(halus, wol, katun, dll.), warna, suhu pencucian dan
tingkat kekotoran. Semua deterjen mesin cuci yang
umum tersedia dapat digunakan untuk mesin ini:
deterjen bubuk untuk semua jenis bahan,
deterjen bubuk untuk bahan halus (60°C maks.)
dan wol,
deterjen cair, lebih baik untuk program cuci suhu
rendah (60°C maks.) untuk semua jenis bahan,
atau yang khusus untuk wol saja.
Deterjen dan bahan aditif harus ditempatkan dalam
kompartemen yang sesuai dalam laci penyaluran
deterjen sebelum program cuci dimulai. Jika
menggunakan konsentrat deterjen bubuk atau cair,
harus dipilih program tanpa pra-cuci. Mesin cuci ini
dilengkapi sistem resirkulasi yang memungkinkan
penggunaan deterjen konsentrat secara optimal.
Tuangkan deterjen cair ke dalam kompartemen laci
penyaluran deterjen bertanda tepat sebelum
memulai program. Aditif pelembut cucian atau kanji
harus dituangkan ke kompartemen bertanda
sebelum program cuci dimulai. Ikuti saran produsen
dalam hal jumlah yang harus digunakan dan jangan
melampaui tanda «MAX» pada laci penyaluran
deterjen.
Jumlah deterjen yang digunakan
Jenis dan jumlah deterjen akan tergantung pada
jenis bahan, jumlah beban, tingkat kekotoran dan
kesadahan air yang digunakan.
Kesadahan air digolongkan berdasarkan ukuran
yang disebut derajat kesadahan. Informasi
mengenai kesadahan air di wilayah Anda dapat
diperoleh dari perusahaan pemasok air setempat,
atau dari pihak yang berwenang. Ikuti petunjuk
produsen mengenai jumlah yang harus digunakan.
Kurangi jumlah deterjen jika:
beban yang dicuci hanya sedikit,
cucian hanya kotor sedikit,
terbentuk banyak busa ketika pencucian
berlangsung.
46
Page 47

Urutan operasi
Sebelum melakukan pencucian yang pertama kali,
kami sarankan agar Anda menuangkan 2 liter air ke
dalam katup ECO wadah cucian utama.
Kemudian jalankan siklus otomatis dengan mesin
dalam keadaan kosong untuk membuang sisa
kotoran apa pun yang berasal dari pabrik dari drum
dan bak.
Tuangkan setengah takaran deterjen ke dalam
wadah cuci utama kemudian jalankan mesin.
1. Masukkan cucian ke dalam tabung
Buka pintu.
Masukkan cucian, satu per satu, sambil
digoyang-goyangkan sebanyak mungkin.
Tutup pintu.
4. Pilih program yang dikehendaki
Setel tombol pemilih program ke posisi yang
dikehendaki.
The LED yang terkait ke tombol Start / Add clothes
mulai berkedip-kedip.
5. Pilih opsi “Quick Wash”
jika diperlukan
LED yang terkait ke tombol Quick Wash akan
menyala
BAHASA
INDONESIA
2. Takar deterjen
Tarik keluar laci deterjen sampai berhenti. Takar
jumlah deterjen sesuai dengan saran produsen dengan
menggunakan gelas penakar, kemudian tuangkan ke
dalam kompartemen pencucian utama .
Jika Anda ingin menjalankan tahap pra-cuci, tuang
deterjen ke dalam kompartemen bertanda .
3. Takar bahan aditif
Jika perlu, tuang pelembut pakaian ke dalam
kompartemen bertanda , tanpa melampaui
tanda «MAX».
6. Jalankan mesin
Tekan tombol Start / Add clothes dan program akan
mulai berjalan
LED yang terkait ke tombol Start / Add clothes akan
bersinar.
47
Page 48

7. Di akhir program
Mesin berhenti secara otomatis dan LED tombol
Start/Add clothes akan padam.
Jika Anda sudah memilih tombol Quick Wash, LED
untuk itu pun akan padam.
Tunggu satu atau dua menit sebelum membuka
pintu untuk memberi waktu pada mekanisme kunci
elektrik untuk melepaskan kunci pintu.
Keluarkan cucian.
Putar tabung dengan tangan untuk memeriksa
apakah ada yang tertinggal. Ini untuk menghindari
rusaknya cucian yang tertinggal (misalnya
menyusut) pada pencucian berikutnya atau
warnanya melunturi cucian putih.
Lepaskan semua tombol yang sebelumnya ditekan.
Tutup keran air dan lepaskan steker dari stopkontak.
Biarkan pintu terbuka agar mesin mendapat aliran
udara.
48
Page 49

BAHASA
INDONESIA
49
Page 50

Tabel program
EWF 551 - Program Panas
Suhu setiap program sudah ditentukan sebelumnya dan disetel secara otomatis
tergantung pada jenis cucian dan sesuai dengan program yang dipilih
Program Jenis cucian
dan kadar kotoran
A
B
C
D
E
Cucian rumahtangga,
linen, seprai, kemeja,
pakaian dalam
Jeans, handuk tangan,
seprei, taplak meja
Kemeja, blus,
yang mudah disetrika
Bahan halus,
mis., tirai
Baju yang berlabel
"Pure new wool,
non-shrink machine
washable" [Wool baru dan
murni, anti kusut dapat dicuci
mesin] & bahan sutra.
Program Deskripsi
program
Otomatis
Jeans / Handuk
Mudah Disetrika
Bahan halus,
Wol dan sutra
Cuci pada 40°, 3 bilasan,
pemerasan normal
Pra-cuci pada 40°,
Cuci pada 60°, 5 bilasan
pemerasan maksimum
Cuci pada 40°, 3 bilasan,
pemerasan lembut
Cuci pada 30°, 3 bilasan,
pemerasan lembut
Cuci pada 30°, 3 bilasan,
pemerasan normal
Opsi yang
memungkinkan
Quick Wash
[Cuci Cepat]
Quick Wash
[Cuci Cepat]
Quick Wash
[Cuci Cepat]
Quick Wash
[Cuci Cepat]
Quick Wash
[Cuci Cepat]
EWF 551 - Program Dingin
F
G
H
I
J
K
Katun berwarna yang
tidak mudah luntur
seperti handuk, baju
berwarna yang bisa
luntur, seperti
baju dalam, kemeja.
Akrilik, viscos,
poliester, tirai
Kemeja, blus,
baju dalam,
bahan campuran
Katun
berwarna
Sintetis
Cuci dengan
Tangan
Bilas
Kuras
Peras
Cuci, 3 bilasan,
pemerasan
normal
Cuci, 3 bilasan,
pemerasan lembut
Cuci, 3 bilasan,
pemerasan lembut
3 bilasan, kuras
pemerasan normal
Kuras
Pemerasan normal
Quick Wash
[Cuci Cepat]
Quick Wash
[Cuci Cepat]
Quick Wash
[Cuci Cepat]
Catatan: Pemerasan normal yaitu 500 rpm, pemerasan lembut 450 rpm dan pemerasan maksimum 550 rpm.
50
Page 51

Tabel program
EWF 549
Program Jenis cucian
dan kadar kotoran
A
B
C
D
E
F
Cucian rumahtangga,
linen, seprai, kemeja,
pakaian dalam
Kemeja, taplak meja,
pakaian dalam
Bahan halus seperti
sarung bantal,
tirai
Kemeja, blus yang
mudah disetrika
Akrilik, viscos,
poliester, tirai
Baju yang berlabel
"Pure new wool, non shrink
machine washable" [Wool
baru dan murni, anti kusut
dapat dicuci mesin] &
bahan sutra.
Program Deskripsi
Otomatis
Katun sehari-hari
Warna halus
Mudah disetrika
Sintetis
Wol dan sutra
Pra-cuci, cuci,
5 bilasan, pemerasan
normal
Cuci, 3 bilasan,
pemerasan normal
Cuci, 3 bilasan,
pemerasan normal
Cuci, 3 bilasan,
pemerasan normal
Cuci, 3 bilasan,
pemerasan lembut
Cuci, 3 bilasan,
pemerasan normal
program
Opsi yang
memungkinkan
Quick Wash
[Cuci Cepat]
Quick Wash
[Cuci Cepat]
Quick Wash
[Cuci Cepat]
Quick Wash
[Cuci Cepat]
Quick Wash
[Cuci Cepat]
BAHASA
INDONESIA
G
H
I
J
K
Catatan: Pemerasan normal yaitu 500rpm, dan pemerasan lembut 450 rpm.
Kemeja, blus,
baju dalam,
bahan campuran
Cuci dengan
Tangan
Pelembut cucian
Bilas
Kuras
Peras
51
Cuci, 3 bilasan,
pemerasan lembut
1 bilasan, pemerasan
normal
3 bilasan, pemerasan
normal
Kuras
Pemerasan normal
Page 52

P1115
P1114
P0038
C0066
P1050
Perawatan
1. Membersihkan Penyekat Pintu
Secara berkala periksalah penyekat pintu dan
singkirkan benda-benda yang mungkin terperangkap
dalam lipatan pada penyekat.
2. Pembersihan di Bagian Luar
Bersihkan bagian luar mesin dengan air hangat dan
sabun pencuci piring. Bilas dengan air bersih dan
keringkan dengan lap halus.
Penting: jangan gunakan spirtus alkohol, pelarut
atau produk sejenis untuk membersihkan badan
mesin.
3. Membersihkan Laci Deterjen
Lama-kelamaan, deterjen dan pelembut cucian akan
meninggalkan endapan dalam laci.
Bersihkan laci dari waktu ke waktu dengan
membilasnya dalam air mengalir. Untuk melepaskan
laci dari mesin, tekan tombol di sudut kiri belakang.
Agar lebih mudah dicuci, bagian atas kompartemen
aditif dapat dilepaskan.
Deterjen juga dapat mengumpul di dalam cerukan
laci: bersihkan dengan sikat gigi bekas. Pasang
kembali laci setelah dibersihkan.
4. Membersihkan Pompa Kuras
Pompa harus diperiksa secara teratur, terutama jika
mesin tidak mau menguras air dan/atau memeras
mesin mengeluarkan bunyi yang tidak biasa ketika
memeras akibat adanya benda-benda seperti
peniti, uang logam dll. yang menyumbat pompa.
Lakukan sebagai berikut:
Cabut steker dari stopkontak.
Jika perlu, tunggu sampai air menjadi dingin.
Buka pintu pompa
C0067
Tempatkan sebuah wadah di dekat pompa untuk
menampung tumpahan.
Lepaskan selang pembuangan darurat, tempatkan
dalam wadah, kemudian lepaskan tutup selang.
Ketika sudah tidak ada lagi air yang keluar, putar
penutup pompa dan lepaskan. Selalu sediakan lap
untuk menyeka tumpahan ketika melepaskan
pompa.
52
Page 53

Jika anda benda yang terperangkap dalam baling-
baling pompa, lepaskan dengan memutar balingbaling.
Pasang kembali tutup selang pembuangan
darurat, kemudian kembalikan selang ke
tempatnya.
6. Pengurasan darurat
Jika air tidak bisa keluar, lakukan sebagai berikut
untuk menguras mesin:
Cabut steker dari stopkontak.
Tutup keran air.
Jika perlu, tunggu sampai air menjadi dingin.
Buka keran air.
Tempatkan sebuah wadah pada lantai kemudian
tempatkan ujung selang pengurasan darurat pada
wadah. Lepaskan tutup selang. Air akan keluar
karena gaya berat ke wadah. Jika wadah sudah
penuh, tutup kembali selang. Kosongkan wadah.
Ulangi prosedur ini sampai air tidak keluar lagi.
Bersihkan pompa jika perlu sebagaimana telah
dijelaskan sebelumnya.
Kembalikan selang pengurasan darurat pada
tempatnya setelah tutupnya dipasang.
Putar pompa sampai kencang, kemudian tutup
pintu pompa.
7. Pencegahan bunga es
Putar pompa sampai kencang.
Tutup pintu pompa.
5. Filter saluran masuk air
Jika Anda merasa bahwa mesin perlu waktu lebih
lama untuk mengisi air, periksa apakah selang air
masuk tidak terhalang.
Tutup keran air.
Lepaskan selang dari keran.
Bersihkan filter dengan sikat yang kaku.
Pasang kembali selang pada keran.
Jika mesin dipasang di tempat yang suhunya dapat
turun sampai di bawah 0°C, lakukan sebagai berikut:
Lepaskan sumbat dari soketnya.
Tutup keran air dan putar selang air masuk sampai
terlepas dari keran.
Tempatkan ujung selang pengurasan darurat dan
ujung selang air masuk pada sebuah wadah di
lantai, kemudian biarkan air keluar.
Pasang kembali selang air masuk dan kembalikan
selang pengurasan darurat ke tempatnya setelah
tutupnya dipasang lagi.
Dengan melakukan hal ini, air yang tersisa dalam
mesin akan keluar sehingga pembentukan es dapat
dicegah dan bagian-bagian mesin terhindar dari
kerusakan.
Ketika mesin kembali digunakan, pastikan suhu
sekitar mesin di atas 0°C.
Penting!
Setiap kali Anda menguras air melalui selang
pengurasan darurat, Anda harus menuangkan 2 liter
air ke dalam kompartemen pencucian utama,
kemudian menjalankan program pengurasan. Ini
akan mengaktifkan katup ECO, sehingga
menghindari tidak terpakainya deterjen pada
pencucian berikutnya.
BAHASA
INDONESIA
53
Page 54

Ada yang tidak berfungsi?
Masalah yang dapat Anda selesaikan sendiri.
Problem
• Mesin tidak mau jalan:
• Mesin tidak mau mengisi air:
• Mesin mengisi air kemudian
langsung membuangnya:
• Mesin tidak dapat dikosongkan
dan/atau tidak melakukan
pemerasan:
• Ada air di lantai:
Kemungkinan penyebabnya
Pintu tidak ditutup rapat.
Mesin tidak tersambung ke sumber listrik atau tidak
ada aliran listrik pada soket.
Sekering utama putus
Tombol pemilih program tidak pada posisi yang benar.
Tombol "Start / Add clothes" belum ditekan.
Keran air tertutup.
Selang air masuk terjepit atau tertekuk.
Filter dalam selang air masuk tersumbat.
Pintu tidak tertutup dengan baik.
Ujung selang pembuangan terlalu rendah. Lihat
paragraf yang sesuai di bagian pembuangan air.
Selang pembuangan terjepit atau tertekuk.
Opsi Pembilasan Ditahan dipilih.
Anda telah memilih opsi Tanpa Pemerasan.
Pompa pembuangan tersumbat.
Deterjen terlalu banyak atau jenisnya tidak tepat
(menimbulkan terlalu banyak busa).
Periksa apakah ada kebocoran pada sambungan
selang air masuk. Hal ini tidak selamanya mudah
diketahui karena air akan mengalir ke bagian bawah
selang; periksa apakah selang basah.
Selang pembuangan rusak.
Tutup selang pengurasan darurat belum dipasang
kembali setelah filter dibersihkan.
• Hasil cuci tidak memuaskan:
• Mesin bergetar atau bising
• Pintu tak dapat dibuka:
Deterjen yang digunakan terlalu sedikit atau jenisnya
tidak tepat.
Noda membandel belum mendapat perlakuan apa-
apa sebelum dicuci.
Suhu yang dipilih tidak benar.
Beban terlalu berat.
Baut-baut dan pengemas pengiriman belum
dilepaskan.
Kaki penyangga belum disesuaikan.
Cucian tidak terbagi rata dalam tabung.
Mungkin cucian dalam tabung terlalu sedikit.
Program masih berjalan.
Kunci pintu belum dilepaskan.
Ada air dalam tabung.
54
Page 55

Problem
Kemungkinan penyebabnya
• Pemerasan lambat memulai atau
cucian tidak cukup diperas:
Perangkat elektronik pendeteksi ketidak-seimbangan
diaktifkan karena cucian tidak terbagi rata di dalam
drum. Cucian akan didistribusikan ulang dengan
memutar drum ke arah yang berlawanan. Ini dapat
terjadi beberapa kali sebelum ketidak-seimbangan
dapat dihilangkan dan pemerasan normal dapat
dilanjutkan. Jika, setelah beberapa menit, cucian
tetap tidak terdistribusi secara rata di dalam drum,
mesin tidak akan memeras. Jika di akhir program,
cucian belum cukup diperas, distribusikan cucian
dengan tangan, kemudian pilih program pemerasan.
Jika Anda tidak dapat mengenali atau memecahkan
masalah, hubungi pusat servis kami. Sebelum
menelepon, catatlah model, nomor seri dan tanggal
pembelian mesin Anda: informasi ini diperlukan oleh
Pusat Servis.
BAHASA
INDONESIA
55
Page 56

KKhh¸¸cchh hhµµnngg tthh©©nn mmÕÕnn,,
HH- hháánngg kkhhii vvËËnn cchhuuyyÓÓnn
Xin h·y ®äc kü nh÷ng híng dÉn sö dông vµ lu ý
®Æc biÖt nh÷ng lêi chó gi¶i vÒ an toµn ë trang ®Çu.
Chóng t«i khuyªn b¹n nªn gi÷ cuèn s¸ch híng dÉn
sö dông ®Ó tham kh¶o sau nµy vµ ®Ó l¹i cho nh÷ng
ngêi dïng sau.
Sau ®©y lµ nghÜa cña nh÷ng ký hiÖu b¹n sÏ thÊy trong mét vµi ®o¹n cña cuèn s¸ch nµy:
H×nh tam gi¸c hay nh÷ng tõ kho¸ (C¶nh b¸o!, Chó ý!) chØ ra r»ng th«ng tin ®ã lµ ®Æc biÖt quan träng cho
sù an toµn cña b¹n hoÆc hiÖu chØnh chøc n¨ng cña m¸y.
Th«ng tin ®îc ®¸nh dÊu b»ng ký hiÖu nµy cung cÊp thªm vÒ c¸ch dïng vµ nh÷ng mÑo thùc hµnh khi
sö dông
Ký hiÖu nµy chØ ra nh÷ng bÝ quyÕt vµ th«ng tin vÒ kinh tÕ vµ sinh th¸i häc cña sù sö dông m¸y.
CChhóónngg tt««ii ®®ããnngg ggããpp vvµµoo cc««nngg ccuuéécc bb¶¶oo vvÖÖ mm««ii
ttrrêênngg:: cchhóónngg tt««ii ddïïnngg ggiiÊÊyy tt¸¸ii ssiinnhh
Sau khi më bäc m¸y xin h·y kiÓm tra ®Ó biÕt m¸y
kh«ng bÞ h háng. NÕu cã nghi ngê, ®õng khëi ®éng
m¸y mµ h·y liªn l¹c víi Trung t©m DÞch vô ®ia
ph¬ng.
NNééii dduunngg
CC¶¶nnhh bb¸¸oo!! 5577
SSùù tthh¶¶ii lloo¹¹ii 5588
NNhh÷÷nngg bbÝÝ qquuyyÕÕtt ®®ÓÓ bb¶¶oo vvÖÖ mm««ii ttrr- êênngg
NNhh÷÷nngg tthh««nngg ssèè ttiiªªuu cchhuuÈÈnn kküü tthhuuËËtt 5588
LL¾¾pp ®®ÆÆtt 5599
Th¸o bá bao gãi 59
Chän vÞ trÝ ®Æt m¸y 60
C¸ch cho níc vµo 60
Bé phËn th¸o níc 60
Nèi r¸p ®iÖn 60
MM¸¸yy ggiiÆÆtt mmííii ccññaa bb¹¹nn 6611
MM«« tt¶¶ mm¸¸yy 6611
Ng¨n pha chÕ bét giÆt 61
5588
Nh÷ng gîi ý khi giÆt 63
Ph©n lo¹i ®å giÆt 63
Tríc khi bá ®å giÆt vµo 63
MÎ giÆt tèi ®a 63
Khèi lîng ®å giÆt 63
TÈy c¸c vÕt bÈn 63
Bét giÆt vµ c¸c phô gia 64
Chuçi ho¹t ®éng 65
B¶ng ký hiÖu 65
B¶ng ch¬ng tr×nh 65
BB¶¶oo qquu¶¶nn 6688
Lµm s¹ch gio¨ng cöa 68
Lµm s¹ch bªn ngoµi m¸y 68
Lµm s¹ch ng¨n chøa bét giÆt 68
Lµm s¹ch b¬m th¸o níc 68
Bé phËn läc níc vµo 71
Th¸o níc khi khÈn cÊp 71
Phßng ngõa khi thêi tiÕt ®«ng gi¸ 71
SSöö ddôônngg 6622
B¶ng ®iÒu khiÓn 62
C¸c nót ®iÒu khiÓn 62
KKhhii bbéé pphhËËnn nnµµoo ®®ãã kkhh««nngg
hhoo¹¹tt ®®éénngg?? 7722--7733
56
Page 57

CC¶¶nnhh bb¸¸oo!!
Nh÷ng c¶nh b¸o sau ®©y ®îc cung cÊp v× môc ®Ých an toµn. B¹n nªn ®äc kü híng dÉn tríc khi l¾p ®Æt vµ sö
dông.
LL¾¾pp ®®ÆÆtt
• TÊt c¶ nh÷ng bao gãi bªn trong ph¶i ®îc th¸o bá
tríc khi sö dông m¸y. H háng nÆng cã thÓ x¶y ra
cho m¸y hoÆc nh÷ng ®å ®¹c xung quoanh nÕu nh
nh÷ng thiÕt bÞ b¶o vÖ khi vËn chuyÓn kh«ng ®îc
th¸o bá hoÆc cha th¸o bá hoµn toµn. Tham kh¶o
phÇn liªn quan trong s¸ch híng dÉn sö dông.
• Mäi viÖc l¾p ®Æt thiÕt bÞ nµy liªn quan ®Õn ®iÖn cÇn
®îc thùc hiÖn bëi thî ®iÖn hoÆc ngêi cã tr×nh ®é.
• Mäi viÖc l¾p ®Æt thiÕt bÞ nµy liªn quan ®Õn l¾p níc
cÇn ®îc thùc hiÖn bëi thî l¾p níc cã tr×nh ®é.
• Sau khi l¾p ®Æt m¸y, kiÓm tra ®Ó m¸y kh«ng ®Æt
trªn ®êng d©y cung cÊp ®iÖn.
• NÕu m¸y ®îc ®Æt trªn sµn tr¶i th¶m ph¶i ch¾c
ch¾n kh«ng khÝ cã thÓ lu th«ng tù do gi÷a ch©n
m¸y vµ sµn.
SSöö ddôônngg
• ThiÕt bÞ nµy ®îc thiÕt kÕ ®Ó sö dông trong nhµ.
Kh«ng nªn dïng m¸y cho nh÷ng môc ®Ých kh¸c
víi thiÕt kÕ cña m¸y ®Ò ra.
• ChØ giÆt nh÷ng lo¹i v¶i cã thÓ giÆt m¸y ®îc. Lu«n
lu«n tu©n theo chØ dÉn trªn m¸c quÇn ¸o:
• Kh«ng ®îc lµm m¸y qu¸ t¶i. Tu©n theo nh÷ng chØ
dÉn trong s¸ch híng dÉn sö dông.
• KiÓm tra ®Ó ch¾c ch¾n c¸c tói quÇn ¸o kh«ng cã
g×. Nh÷ng vËt nh tiÒn xu, kim b¨ng vµ èc vÝt cã thÓ
g©y h háng lín cho m¸y.
• Kh«ng ®îc giÆt nh÷ng quÇn ¸o bÞ ngÊm x¨ng,
cån, dung m«i chøa c-lo, v.v. NÕu nh÷ng dung dÞch
nµy ®îc dïng ®Ó tÈy vÕt bÈn tríc khi giÆt th× ph¶i
chê chóng bay h¬i hoµn toµn tríc khi bá quÇn ¸o
vµo m¸y.
• XÕp nh÷ng ®å nhá nh tÊt, d©y lng,v.v. vµo tói
giÆt hay bao giÆt ®Ó tr¸nh chóng bÞ kÑt gi÷a thïng
giÆt vµ bån níc.
• ChØ nªn dïng sè lîng chÊt lµm mÒm v¶i võa ph¶i
nh ®îc gîi ý. Dïng nhiÒu qu¸ cã thÓ lµm h
háng quÇn ¸o.
• §Ó cöa ra cña m¸y h¬i hÐ khi kh«ng dïng m¸y.
Nh vËy sÏ b¶o qu¶n ®îc gio¨ng cöa vµ tr¸nh sù
h×nh thµnh mïi mèc trong m¸y.
• Lu«n lu«n kiÓm tra kh«ng cßn níc trong m¸y
tríc khi më cöa m¸y. NÕu kh«ng ph¶i th¸o níc
theo chØ dÉn trong s¸ch híng dÉn sö dông.
• Lu«n lu«n rót æ c¾m ®iÖn vµ t¾t níc sau khi dïng
m¸y.
AAnn ttooµµnn cchhuunngg
• Söa ch÷a m¸y ph¶i ®îc thùc hiÖn bëi ngêi cã
tr×nh ®é. TiÕn hµnh s÷a ch÷a bëi ngêi kh«ng cã
kinh nghiÖm cã thÓ g©y nguy hiÓm nghiªm träng.
H·y liªn l¹c víi Trung t©m DÞch vô ë ®i¹ ph¬ng
b¹n.
• Kh«ng bao giê kÐo d©y cung cÊp ®iÖn ®Ó rót ®iÖn
tõ æ c¾m; lu«n ph¶i cÇm phÝch c¾m ®Ó rót.
• Trong khi giÆt ë ch¬ng tr×nh nhiÖt ®é cao cöa kÝnh
cña m¸y cã thÓ bÞ nãng. Kh«ng nªn sê vµo!
AAnn ttooµµnn cchhoo ttrrÎÎ eemm
• TrÎ em thêng kh«ng biÕt nh÷ng thiÕt bÞ ®iÖn cã
thÓ nguy hiÓm nh thÕ nµo. Khi m¸y ®ang ho¹t
®éng, trÎ em cÇn ®îc gi¸m s¸t cÈn thËn vµ kh«ng
®îc ch¬i nghÞch m¸y.
• Nh÷ng thµnh phÇn dïng bao gãi (vÝ dô tói nilon,
nhùa polystyrene) cã thÓ nguy hiÓm cho trÎ emg©y ng¹t thë. §Ó chóng xa tÇm tay víi cña trÎ.
• §Ó bét giÆt n¬i an toµn xa tÇm tay víi cña trÎ.
• Ph¶i ®¶m b¶o trÎ em vµ vËt nu«i kh«ng trÌo vµo
thïng m¸y.
• Khi m¸y bÞ ®Ëp, c¾t ®êng d©y c¸p cung cÊp ®iÖn
vµ rót phÝch c¾m víi ®êng d©y c¸p cßn l¹i. Lµm
v« hiÖu ho¸ chèt cöa ®Ó ng¨n ngõa trÎ em khái bÞ
kÑt bªn trong trong khi ch¬i nghÞch.
TTiiÕÕnngg VViiÖÖtt
57
Page 58

SSùù tthh¶¶ii lloo¹¹ii
NNhh÷÷nngg vvËËtt lliiÖÖuu bbaaoo ggããii
Nh÷ng vËt liÖu ®îc ®¸nh dÊu b»ng ký hiÖu sau
cã thÓ t¸i sinh.
>>PPEE<<
=polyethylene
>>PPSS<<
=polystyrene
>>PPPP<<
=polypropylene
NNhh÷÷nngg bbÝÝ qquuyyÕÕtt ®®ÓÓ bb¶¶oo vvÖÖ mm««ii ttrr- êênngg
§Ó tiÕt kiÖm n¨ng lîng vµ b¶o vÖ m«i trêng, chóng
t«i mong b¹n lµm theo nh÷ng gîi ý sau:
• Nh÷ng ®å giÆt bÈn th«ng thêng cã thÓ giÆt kh«ng
cÇn xö ký tríc ®Ó tiÕt kiÖm bét giÆt, níc vµ thêi
gian (®ång thêi m«i trêng còng ®îc b¶o vÖ).
• M¸y lµm viÖc kinh tÕ h¬n nÕu ®îc t¶i ®Çy mÎ.
NghÜa lµ chóng cã thÓ ®îc t¸i sinh nÕu vøt bá chóng
vµo nh÷ng thïng chøa phï hîp.
MM¸¸yy mmããcc
Vøt bá nh÷ng thiÕt bÞ cò cña b¹n vµo nh÷ng vÞ trÝ ®·
®îc cho phÐp. Gi÷ g×n ®Êt níc cña b¹n s¹ch sÏ
gän gµng.
• Nªó ®îc xö lý tríc phï hîp, c¸c vÕt bÈn cã thÓ
®îc tÈy; ®å giÆt sau ®ã cã thÓ ®îc giÆt ë nhiÖt ®é
thÊp.
• §Þnh lîng bét giÆt dïng tuú theo ®é cøng cña
níc, ®é bÈn vµ sè lîng ®å ®Þnh giÆt.
NNhh÷÷nngg tthh««nngg ssèè ttiiªªuu cchhuuÈÈnn kküü tthhuuËËtt
KÝCH THíc ChiÒu cao 85 cm
ChiÒu réng 60 cm
ChiÒu s©u 59 cm
MÎ GIÆT TèI ®A V¶i b«ng 5.5. kg
V¶i sîi tæng hîp 2.5 kg
V¶i mÒm máng 2.5 kg
Hµng len 1.0 kg
Tèc ®é v¾t tèi ®a 550 vßng phót.
dßng ®iÖn cung cÊp ®iÖn thÕ/ tÇn sè 220-230 V/50 Hz
Tæng ®iÖn n¨ng hÊp thu 2200 W (EWF 551) / 450W (EWF 549)
cÇu ch× b¶o vÖ tèi thiÓu 10 A
¸p suÊt níc Tèi thiÓu 500 kPa
Tèi ®a 800 kPa
M¸y giÆt nµy tu©n theo nh÷ng chØ dÉn EEC nh sau:
73/23/EEC ngµy 19/02/73 liªn quan tíi ®iÖn thÕ thÊp
89/336/EEC ngµy 03/05/89 liªn quan tíi sù t¬ng hîp ®iÖn tõ.
58
Page 59

LL¾¾pp ®®ÆÆtt
TThh¸¸oo bbáá bbaaoo ggããii
TÊt c¶ nh÷ng bao gãi vµ chèt b¶o vÖ khi vËn
chuyÓn ph¶i ®îc th¸o bá tríc khi sö dông
m¸y.
B¹n nªn gi÷ tÊt c¶ c¸c thiÕt bÞ vËn chuyÓn ®Ó cã thÓ
l¾p trë l¹i nÕu cÇn vËn chuyÓn m¸y lÇn sau.
1. Dïng ch×a vÆn ®ai èc, vÆn ra vµ th¸o bá chèt bªn
ph¶i phÝa sau vµ ®Ó m¸y n»m ngöa xuèng, cÈn
thËn kh«ng ®Ì lªn c¸c èng. §Ó tr¸nh ®Ì lªn c¸c
èng cã thÓ dïng mét miÕng xèp b¶o vÖ gãc m¸y
®Æt gi÷a m¸y vµ sµn.
2. Th¸o bá c¸c khèi xèp polystyrene tõ díi ®¸y m¸y
ra vµ lÊy ra hai tói nhùa.
3. CÈn thËn kÐo ra tói nhùa phÝa bªn tr¸i b»ng c¸ch
dêi nã vÒ phÝa ph¶i vµ sau ®ã xuèng phÝa díi.
5. L¾p tÊm líi (A) vµo ®¸y cña m¸y dïng bèn ®inh
vÝt (B) mµ b¹n cã thÓ thÊy trong tói ®ùng s¸ch
híng dÉn sö dông. L¾p l¹i c¸c ch©n m¸y.
6. Dùng m¸y th¼ng trë l¹i vµ th¸o hai chèt cßn l¹i ë
phÝa sau.
CChhäänn vvÞÞ ttrrÝÝ ®®ÆÆtt mm¸¸yy
L¾p ®Æt m¸y trªn sµn b»ng ph¼ng vµ ch¾c. §¶m b¶o
kh«ng khÝ lu th«ng quoanh m¸y kh«ng bÞ c¶n trë bëi
th¶m, r¸c, v.v. KiÓm tra xem m¸y kh«ng ch¹m vµo
têng hay nh÷ng bé phËn cña bÕp ¨n. ChØnh cho
m¸y ®îc th¨ng b»ng mét c¸ch cÈn thËn b¨fng c¸ch
vÆn c¸c ch©n linh ®éng cña m¸y Kh«ng bao giê ®Æt
b×a giÊy, gç hay nh÷ng vËt liÖu t¬ng tù ë díi m¸y
®Ó cè chØnh nh÷ng vÞ trÝ kh«ng th¨ng b»ng trªn sµn.
TTiiÕÕnngg VViiÖÖtt
4. CÈn thËn kÐo ra tói nhùa phÝa bªn ph¶i b»ng c¸ch
dêi nã vÒ phÝa tr¸i vµ sau ®ã lªn phÝa trªn..
LÊy n¾p ®¸y cña m¸y tõ trong thïng m¸y ra, ®Æt
b¶n lÒ cña nã theo mòi tªn A chØ trªn h×nh vµ ®Èy
phÇn trªn cña n¾p ®Ó g¾n chÆt nã l¹i.
§§iiÒÒuu qquuaann ttrräänngg
chi tiÕt h¬n cho viÖc l¾p r¸p n¾p ®¸y cña m¸y trong
tói ®ùng cña nã.
: Quý vÞ cã thÓ t×m thÊy híng dÉn
CC¸¸cchh cchhoo nn- íícc vvµµoo
Nèi ®êng èng dÉn níc vµo m¸y tíi vêi níc b»ng
d©y 3/4 BSP.
Dïng ®êng èng dÉn níc ®îc cung cÊp cïng víi
m¸y.
Kh«ng ®îc dïng nh÷ng èng dÉn níc cò.
Kh«ng ®îc dïng nh÷ng èng dÉn cò ®· qua sö
dông. §Çu mót cuèi cßn l¹i cña èng dÉn níc vµo
nèi víi m¸y cã thÓ quay theo mäi phÝa. ChØ cÇn níi
láng chç r¸p nèi, quay èng vµ l¹i vÆn chÆt chç nèi l¹i
®Ó ®¶m b¶o kh«ng cã níc rß rØ.
59
Page 60

Kh«ng ®îc lµm kÐo dµi èng dÉn níc vµo. NÕu èng
P1118
P0022
qu¸ ng¾n vµ b¹n kh«ng muèn di chuyÓn vßi níc,
b¹n sÏ ph¶i mua èng míi dµi h¬n ®îc thiÕt kÕ ®Æc
biÖt cho kiÓu dïng nµy.
§§iiÒÒuu qquuaann ttrräänngg!!
Tríc khi nèi m¸y víi ®êng èng míi hoÆc ®êng
èng cha qua sö dông, ph¶i cho mét lîng níc hîp
lý ch¶y qua ®Ó röa s¹ch mäi cÆn b¸m cã kh¶ n¨ng
tÝch tô trong ®êng èng.
BBéé pphhËËnn tthh¸¸oo nn- íícc
§Çu mót cuèi cña èng dÉn níc ra cã thÓ ®Æt theo
ba c¸ch:
MMããcc ttrrªªnn rr××aa ccññaa cchhËËuu tthhoo¸¸tt nn- íícc ddïïnngg èènngg ddÉÉnn nnhhùùaa
®®- îîcc ccuunngg ccÊÊpp ccïïnngg mm¸¸yy..
®¶m b¶o ®Çu mót cuèi kh«ng thÓ tuét ra khi m¸y
trèng.
§iÒu nµy cã thÓ lµm ®îc b»ng c¸ch buéc nã vµo vßi
níc b»ng mét sîi d©y hoÆc ®Ýnh chÆt nã vµo têng
Trong trêng hîp nµy ph¶i
NNèèii rr¸¸pp ®®iiÖÖnn
M¸y nµy ®îc thiÕt kÕ ®Ó ho¹t ®éng víi dßng ®iÖn
mét chiÒu 220-230 V, 50 Hz.
KiÓm tra ®Ó ®¶m b¶o ®êng ®iÖn trong nhµ b¹n cã
thÓ chÞu t¶i träng lín nhÊt ®ßi hái (2.2 kW), ®ång thêi
chÞu t¶i mäi thiÕt bÞ kh¸c ®ang sö dông.
NNèèii mm¸¸yy vvííii ææ ttiiÕÕpp ®®ÊÊtt..
Nhµ s¶n xuÊt kh«ng chÞu bÊt cø tr¸ch nhiÖm
nµo vÒ h háng m¸y hay bÞ tæn h¹i do kh«ng
lµm theo nh÷ng chØ dÉn vÒ an toµn ë trªn.
NÕu ®êng d©y cung cÊp ®iÖn cho m¸y cÇn
thay thÕ, viÖc nµy nªn tiÕn hµnh bëi Trung
t©m DÞch vô cña chóng t«i.
PPhh¶¶ii ®®¶¶mm bb¶¶oo rr»»nngg ®®- êênngg dd©©yy cc¸¸pp ccuunngg ccÊÊpp ®®iiÖÖnn ccãã
tthhÓÓ ttiiÕÕpp ccËËnn ddÔÔ ddµµnngg ssaauu kkhhii ll¾¾pp ®®ÆÆtt mm¸¸yy..
NNèèii vvµµoo nnhh¸¸nnhh tthhoo¸¸tt nn- íícc ccññaa cchhËËuu
. Nh¸nh nµy ph¶i
ë phÝa trªn cña xi-f«ng cho nªn chç rÏ ph¶i ë trªn
mÆt ®¸t Ýt nhÊt 60 cm.
NNèèii tthh¼¼nngg vvµµoo ®®- êênngg èènngg tthhoo¸¸tt nn- íícc
ë ®é cao trªn
60 cm vµ díi 90 cm.
§Çu mót cuèi cña èng dÉn níc ra ph¶i lu« n ®îc
tthh««nngg hh¬¬ii,,
nghÜa lµ ®êng kÝnh bªn trong cña ®êng
èng tho¸t níc ph¶i lín h¬n ®êng kÝnh ngoµi cña
èng dÉn níc ra.
èng dÉn níc ra kh«ng ®îc ®Ó bÞ xo¾n.
§§ÓÓ ®®¶¶mm bb¶¶oo cchhøøcc nn¨¨nngg ®®óónngg cchhoo mm¸¸yy èènngg ddÉÉnn nn- íícc
tthh¶¶ii pphh¶¶ii lluu««nn ®®- îîcc mmããcc ggii÷÷ ttrrªªnn mmiiÕÕnngg ®®ÖÖmm tthhÝÝcchh
hhîîpp ®®- îîcc ®®ÆÆtt ëë ttrrªªnn ccññaa pphhÝÝaa ssaauu tthh©©nn mm¸¸yy..
60
Page 61

MM¸¸yy ggiiÆÆtt mmííii ccññaa bb¹¹nn
M¸y giÆt míi nµy ®¸p øng mäi nhu cÇu tiªn tiÕn xö lý ®å giÆt hiÖu qu¶ ®ång thêi tiÕt kiªm níc, n¨ng lîng vµ
bét giÆt.
§§åånngg hhåå cchhäänn nnhhiiÖÖtt ®®éé
•
CC¬¬ cchhÕÕ ttùù ®®éénngg llµµmm nngguuééii nn- íícc ggiiÆÆtt
•
kh«ng bÞ biÕn d¹ng vµ gi¶m sù sèc nhiÖt cho v¶i vµ nh vËy sÏ gi¶m nhµu.
CChh- ¬¬nngg ttrr××nnhh ggiiÆÆtt lleenn ®®ÆÆcc bbiiÖÖtt
•
TThhiiÕÕtt bbÞÞ kkiiÓÓmm ssoo¸¸tt tthh¨¨nngg bb»»nngg
•
VVaann EECCOO
•
cho phÐp sö dông hoµn toµn bét giÆt vµ gi¶m lîng níc tiªu thô nªn tiÕt kiÖm n¨ng lîng.
cho phÐp b¹n chän nhiÖt ®é thÝch hîp nhÊt cho ®å giÆt cña b¹n.
tõ 95° xuèng 60°C tríc khi th¸o níc sÏ b¶o vÖ nh÷ng ®êng èng cò
víi hÖ thèng giÆt nhÑ míi xö lý hµng len cña b¹n ®Æc biÖt cÈn träng.
®¶m b¶o cho m¸y ®îc æn ®Þnh khi v¾t.
MM«« tt¶¶ mm¸¸yy
1 Ng¨n pha chÕ bét giÆt
2 BiÓu ®å ch¬ng tr×nh giÆt
3 B¶ng ®iÒu khiÓn
4 Tay n¾m cöa
5 B¬m th¸o níc
6 Ch©n linh ®éng
TTiiÕÕnngg VViiÖÖtt
NNgg¨¨nn pphhaa cchhÕÕ bbéétt ggiiÆÆtt
Xö lý tríc
GiÆt
ChÊt lµm mÒm v¶i, bét lµm mÒm v¶i
61
Page 62

SSöö ddôônngg
BB¶¶nngg ®®iiÒÒuu kkhhiiÓÓnn
11.. NNgg¨¨nn pphhaa cchhÕÕ bbéétt ggiiÆÆtt
22.. NNóótt KKhhëëii ®®éénngg//TThhªªmm ®®åå ggiiÆÆtt ((SSttaarrtt//AAdddd CCllootthheess))
Sau khi ®· lùa chän ch¬ng tr×nh giÆt vµ c¸c ®Æc ®iÓm cÇn thiÕt, nhÊn nót nµy ®Ó khëi ®éng m¸y. §Ìn t¬ng
øng LED ngõng nh¸y vµ gi÷ s¸ng.
§Ó lµm gi¸n ®o¹n ch¬ng tr×nh ®ang ch¹y, nhÊn nót Khëi ®éng/Thªm ®å giÆt, ®Ìn t¬ng øng LED b¾t ®Çu
nh¸y. §Ó khëi ®éng l¹i ch¬ng tr×nh tõ ®iÓm nã bÞ gi¸n ®o¹n, nhÊn nót Khëi ®éng/Thªm ®å giÆt lÇn n÷a.
33.. GGiiÆÆtt NNhhaannhh ((QQuuiicckk WWaasshh))
NhÊn nót nµy sÏ lµm gi¶m thêi gian cho ch¬ng tr×nh ®· chän. VÝ dô, nÕu nhÊn nót nµy, ®Ìn LED sÏ s¸ng lªn
vµ ch¬ng tr×nh giÆt Tù ®éng sÏ gi¶m tõ 110 phót xuèng cßn 60 phót.
44.. §§åånngg hhåå llùùaa cchhäänn cchh- ¬¬nngg ttrr××nnhh
§ång hå nµy ®îc ph©n lµm ba phÇn.
TT¾¾tt,, ggiiÆÆtt ll¹¹nnhh cchhoo EEWWFF 554499 vvµµ tt¾¾tt,, ggiiÆÆtt nnããnngg vvµµ ggiiÆÆtt ll¹¹nnhh cchhoo EEWWFF 555511
§ång hå nµy cã thÓ quay theo chiÒu kim ®ång hå vµ ngîc chiÕu kim ®ång hå.
T¹i ®iÓm kÕt thóc cña ch¬ng tr×nh ®ång hå chän lùa ph¶i trë vÒ vÞ trÝ O ®Ó t¾t m¸y. Chó ý! NÕu trong qu¸ tr×nh
giÆt, mµ ®ång hå lùa chän bÞ quay sang mét ch¬ng tr×nh kh¸c th× m¸y sÏ kh«ng thùc hiÖn ch¬ng tr×nh míi
chän.
§èi víi EWF 551 ch¬ng tr×nh giÆt nãng, nhiÖt ®é cho ch¬ng tr×nh ph¶i ®îc ®Æt tríc ( xem trang 14).
62
Page 63

NNhh÷÷nngg ggîîii ýý kkhhii ggiiÆÆtt
PPhh©©nn lloo¹¹ii ®®åå ggiiÆÆtt
Tu©n theo nh÷ng ký hiÖu m· ho¸ vÒ giÆt trªn quÇn
¸o vµ híng dÉn giÆt cña nhµ s¶n xuÊt. Ph©n lo¹i ®å
giÆt theo: hµng tr¾ng, hµng mµu, v¶i sîi tæng hîp,
hµng mÒm, hµng len.
TTrr- íícc kkhhii bbáá ®®åå ggiiÆÆtt vvµµoo
Kh«ng bao giê giÆt chung ®å tr¾ng vµ ®å mµu. §å
tr¾ng sÏ bÞ gi¶m ®é tr¾ng khi giÆt
§å mµu míi cã thÓ phai khi giÆt lÇn ®Çu; v× vËy lÇn
®Çu nªn giÆt riªng.
PPhh¶¶ii ®®¶¶mm bb¶¶oo kkhh««nngg ccãã vvËËtt gg×× bb»»nngg kkiimm llooaaii bbáá qquuªªnn
ttrroonngg ®®åå ggiiÆÆtt ((vvÝÝ ddôô ccÆÆpp ttããcc,, kkiimm bb¨¨nngg,, gghhiimm ccµµii))..
Cµi nót bao gèi, ®ãng c¸c kho¸, mãc. Buéc c¸c d©y
lng ho¨c d©y b¨ng dµi.
TÈy nh÷ng vÕt bÈn l©u ngµy tríc khi giÆt. Chµ x¸t
lo¹i bá nh÷ng ®¸m bÈn ®Æc biÖt b»ng chÊt tÈy ®Æc
biÖt hoÆc kem tÈy.
Xö lý rÌm cöa cÈn thËn. Th¸o c¸c mãc hoÆc buéc
chóng l¹i trong tói hoÆc líi.
MMÎÎ ggiiÆÆtt ttèèii ®®aa
T¶i cho mÎ giÆt ®îc gîi ý trong biÓu ®å ch¬ng
tr×nh giÆt.
An toµn chung
VV¶¶ii bb««nngg
VV¶¶ii ttæænngg hhîîpp
HHµµnngg vv¶¶ii mmÒÒmm mmáánngg vvµµ lleenn
phÇn ba thïng.
GiÆt mÎ giÆt tèi ®a lµ tËn dông níc vµ n¨ng lîng
hiÖu qu¶ nhÊt.
§èi víi nh÷ng ®å giÆt qu¸ bÈn ph¶i gi¶m lîng mÎ giÆt.
, lanh t¶i ®µy thïng nhng kh«ng qu¸ chËt;
: t¶i kh«ng ®îc qu¸ nöa thïng
: t¶i kh«ng ®îc qu¸ mét
KKhhèèii ll- îînngg ®®åå ggiiÆÆtt
Nh÷ng khèi lîng ®îc chØ ®Þnh nh sau:
kh¨n choµng t¾m 1200 g
kh¨n nhá 100 g
vá ch¨n 700 g
v¶i tÊm 500 g
vá gèi 200 g
kh¨n tr¶i bµn 250 g
kh¨n b«ng 200 g
kh¨n bµn trµ 100 g
¸o ngñ 200 g
®å lãt n÷ 100 g
¸o lao ®éng nam 600 g
¸o s¬ mi nam 200 g
bé ®å ngñ nam 500 g
¸o choµng 100 g
quÇn lãt nam 100 g
TTÈÈyy cc¸¸cc vvÕÕtt bbÈÈnn
Nh÷ng vÕt bÈn l©u bÒn cã thÓ kh«ng tÈy ®îc b»ng
níc vµ bét giÆt. V× vËy nªn xö lý chóng tríc khi
giÆt.
MM¸¸uu
: xö lý vÕt m¸u t¬i b»ng níc l¹nh. §èi víi vÕt
m¸u kh«, ng©m qua ®ªm trong níc víi chÊt tÈy ®Æc
biÖt sau ®ã ch¶i xµ phßng vµ níc.
VVÕÕtt ss¬¬nn ddÇÇuu
quÇn ¸o lªn mét tÊm v¶i mÒm vµ chÊm nhÑ vÕt bÈn ;
lµm vµi lÇn.
VVÕÕtt ddÇÇuu mmìì kkhh««
quÇn ¸o lªn mét tÊm v¶i mÒm vµ chÊm vÕt bÈn b»ng
®Çu ngãn tay vµ mét miÕng v¶i b«ng.
VVÕÕtt ggØØ ss¾¾tt
nãng hoÆc chÊt tÈy gØ trong níc l¹nh. CÈn thËn víi
vÕt gØ s¾t l©u ngµy v× cÊu tróc xen lu l« cñav¶i sÏ bÞ
lµm h háng vµ v¶i cã thÓ bÞ thñng.
VVÕÕtt mmèècc
cho hµng tr¾ng vµ hµng bÒn mµu)
VVÕÕtt mmµµuu ddoo cc©©yy ccáá
b»ng chÊt tÈy tr¾ng (chØ dïng cho hµng tr¾ng vµ
hµng bÒn mµu)
VVÕÕtt mmùùcc bbóótt bbii vvµµ hhåå dd¸¸nn
®Æt quÇn ¸o lªn mét tÊm v¶i mÒm vµ chÊm nhÑ vÕt
bÈn.
VVÕÕtt ssoonn
b»ng cån. TÈy s¹ch mäi dÊu vÕt cßn l¹i trªn v¶i tr¾ng
b»ng chÊt tÈy tr¾ng.
: lµm Èm b»ng chÊt tÈy benzine, ®Æt
: lµm Èm b»ng nhùa th«ng, ®Æt
: tÈy b»ng a xit oxalic hoµ tan trong níc
: xö lý b»ng chÊt tÈy tr¾ng, x¶ kü (chØ dïng
: vß nhÑ b»ng xµ phßng vµ xö lý
: lµm Èm b»ng aceton (*),
: lµm Èm b»ng aceton nh trªn, sau ®ã xö lý
TTiiÕÕnngg VViiÖÖtt
63
Page 64

RR- îîuu vvaanngg ®®áá
xö lý b»ng a xit acetic hay a xit citric, sau ®ã x¶ s¹ch.
Xö lý mäi dÊu vÕt cßn l¹i b»ng chÊt tÈy tr¾ng.
VVÕÕtt mmùùcc
b»ng acetone(*), sau ®ã b»ng a xit acetic; xö lý mäi
dÊu vÕt cßn l¹i trªn v¶i tr¾ng b»ng chÊt tÈy tr¾ng vµ
x¶ kü.
VVÕÕtt nnhhùùaa ®®- êênngg
bÈn, cån methyl hoÆc benzine, sau ®ã chµ b»ng kem
giÆt.
((**)) kkhh««nngg ddïïnngg aacceettoonn cchhoo tt¬¬ nnhh©©nn tt¹¹oo..
: ng©m trong níc hoµ bét giÆt, x¶ vµ
: tuú theo lo¹i mùc, tríc hÕt lµm Èm v¶i
: tríc tiªn xö lý b»ng chÊt tÈy vÕt
BBéétt ggiiÆÆtt vvµµ cc¸¸cc pphhôô ggiiaa
HiÖu qu¶ giÆt tèt còng phô thuéc vµo sù lùa chän bét
giÆt vµ dïng ®óng lîng bét giÆt ®Ó tr¸nh l·ng phÝ vµ
b¶o vÖ m«i trêng. MÆc dï lµ cã thÓ ph©n r· sinh
häc, bét giÆt chøa nh÷ng chÊt mµ víi sè lîng lín cã
thÓ g©y ¶nh hëng tíi sù c©n b»ng tinh tÕ cña tù
nhiªn.
Sù lùa chän bét giÆt phô thuéc vµo lo¹i v¶i (v¶i mÒm,
len, v¶i b«ng, v.v.), mµu, nhiÖt ®é giÆt vµ møc ®é
bÈn.
Nh÷ng lo¹i bét giÆt m¸y th«ng thêng cã thÓ dïng
cho m¸y nµy gåm cã:
– bét giÆt cho tÊt c¶ c¸c lo¹i v¶i,
– bét giÆt cho v¶i mÒm máng (tèi ®a ë 60°C) vµ len,
– dung dÞch giÆt, nªn dïng ë ch¬ng tr×nh giÆt nhiÖt
®é thÊp (tèi ®a 60°C ) cho mäi lo¹i v¶i, hoÆc ®¨c
biÖt chØ dïng cho len.
Bét giÆt vµ mäi phô gia ph¶i ®îc ®Ó vµo ng¨n phï
hîp trong « pha chÕ tríc khi b¾t ®Çu ch¬ng tr×nh
giÆt.
NÕu dïng bét giÆt c« ®Æc hay dung dÞch giÆt ph¶i
chän ch¬ng tr×nh giÆt
M¸y giÆt nµy kÕt hîp chÆt chÏ víi hÖ thèng lu th«ng
l¹i cho phÐp sö dông tèi u chÊt giÆt c« ®Æc.
Rãt dung dÞch giÆt vµo ng¨n ®îc ®¸nh dÊu trong «
pha chÕ
Mäi ch©t lµm mÒm v¶i hay chÊt phô gia hå ph¶i ®îc
rãt vµo ng¨n ®îc ®¸nh dÊu tríc khi b¾t ®Çu
ch¬ng tr×nh giÆt.
Tu©n theo gîi ý cña nhµ s¶n xuÊt vÒ sè lîng vµ
c¸ch dïng, kh« ng ®îc
((MMAAXX)) ®®¸¸nnhh ddÊÊuu ttrrªªnn «« pphhaa cchhÕÕ bbéétt ggiiÆÆtt..
nnggaayy ttrr- íícc
kkhh««nngg
xö lý tríc.
khi b¾t ®Çu ch¬ng tr×nh.
ddïïnngg qquu¸¸ vv¹¹cchh TTèèii ®®aa
SSèè ll- îînngg bbéétt ggiiÆÆtt ®®- îîcc ddïïnngg
Lo¹i bét giÆt vµ sè lîng dïng phô thuéc vµo lo¹i
v¶i, kÝch cì mÎ giÆt, møc ®é bÈn vµ ®é cøng cña
níc sö dông.
Møc ®é cøng cña níc ®îc ph©n lo¹i theo “®é”
cøng. Th«ng tin vÒ ®é cøng cña níc trong khu vc
b¹n ë cã thÓ tham kh¶o tõ c«ng ty cung cÊp níc,
hoÆc tõ nhµ chøc tr¸ch ë ®ia ph¬ng b¹n.
Tu©n theo híng dÉn cña nhµ s¶n xuÊt vÒ sè lîng
sö dông.
Dïng Ýt bét gi¨t h¬n nÕu nh:
– b¹n giÆt mÎ nhá,
– ®å giÆt Ýt bÈn,
– lîng bät h×nh thµnh nhiÒu trong khi giÆt.
64
Page 65

CChhuuççii hhoo¹¹tt ®®éénngg
Tríc khi quý vÞ giÆt lÇn ®Çu tiªn chóng t«i ®Ò nghÞ
quý vÞ ®æ 2 lit níc vµo ng¨n giÆt chÝnh cã van
ECO. Sau ®ã ch¹y ch¬ng tr×nh giÆt tù ®éng víim¸y
kh«ng t¶i ®Ó lo¹i bá c¸c cÆn b¸m c«ng nghiÖp khái
thïng m¸y vµ bån.
§æ mét nöa lîng bét giÆt cÇn thiÕt vµo ng¨n giÆt
chÝnh vµ khëi ®éng m¸y.
44.. CChhäänn cchh- ¬¬nngg ttrr××nnhh tthhÝÝcchh hhîîpp
Quay ®ång hå lùa chän tíi ch¬ng tr×nh thÝch hîp
11.. XXÕÕpp ®®åå ggiiÆÆtt vvµµoo tthhïïnngg mm¸¸yy
Më cöa m¸y.
XÕp ®å giÆt vµo thïng m¸y tõng c¸i mét, giò cho
cµng t¬i cµng tèt.
§ãng cöa l¹i.
22.. §§ÞÞnnhh ll- îînngg bbéétt ggiiÆÆtt
KÐo ng¨n chøa bét giÆt tíi khi nã dõng l¹i. §Þnh
lîng bét giÆt (®îc gîi ý bëi nhµ s¶n xuÊt) b»ng cèc
chia ®é vµ ®æ vµo ng¨n giÆt chÝnh
NÕu b¹n muèn xö lý tríc, ®æ bét giÆt vµo ng¨n phï
hîp ®· ®îc ®¸nh dÊu .
.
EWF 551 EWF 549
§Ìn t¬ng øng víi nót
®Çu nh¸y.
KKhhëëii ®®éénngg//TThhªªmm ®®åå ggiiÆÆtt
b¾t
55.. CChhäänn ®®ÆÆcc ®®iiÓÓmm GGiiÆÆtt nnhhaannhh nnÕÕuu
ccÇÇnn
§Ìn t¬ng øng víi nót
QQuuiicckk WWaasshh
s¸ng lªn
66.. KKhhííii ®®éénngg mm¸¸yy
TTiiÕÕnngg VViiÖÖtt
33.. §§ÞÞnnhh ll- îînngg cchhÊÊtt pphhôô ggiiaa
NÕu cÇn, ®æ chÊt lµm mÒm v¶i vµo ng¨n ®îc ®¸nh
dÊu ,
cchhóó ýý kkhh««nngg vv- îîtt qquu¸¸ vv¹¹cchh ttèèii ®®aa..
NhÊn nót
§Ìn t¬ng øng víi nót
65
SSttaarrtt // AAdddd ccllootthheess
vµ ch¬ng tr×nh b¾t ®µu
SSttaarrtt// AAdddd ccllootthheess
s¸ng lªn
Page 66

TT¹¹ii ®®iiÓÓmm kkÕÕtt tthhóócc cchh- ¬¬nngg ttrr××nnhh
M¸y tù ®éng ngõng, ®Ìn cña nót
t¾t.
NÕu quý vÞ ®· chän ®Æc ®iÓm
nót Quick Wash còng t¾t.
T¾t m¸y b»ng c¸ch nhÊn nót bËt-t¾t lÇn n÷a. C¸c
®Ìn chÝnh t¾t.
Chê mét vµi phót tríc khi më cöa m¸y ®Ó c¬ chÕ
kho¸ ®iÖn cã thêi gian gi¶i tho¸t.
LÊy ®å giÆt ra.
Quay thïng m¸y b»ng tay ®Ó ®¶m b¶o kh«ng cßn gØ
ë trong, nh vËy ®Ó tr¸nh ®å bá quªn bÞ h trong lÇn
giÆt sau (vÝ dô bÞ co) hoÆc loang mµu sang c¸c mÎ
giÆt tr¾ng.
Gi¶i phãng tÊt c¶ c¸c nót ®· ®îc nhÊn.
T¾t vßi níc vµ rót phÝch c¾m ®iÖn cho m¸y.
§Ó hÐ cöa m¸y th«ng víi kh«ng khÝ
SSttaarrtt//AAdddd ccllootthheess
QQuuiicckk WWaasshh
®Ìn cña
66
Page 67

TTiiÕÕnngg VViiÖÖtt
67
Page 68

BB¶¶nngg cchh- ¬¬nngg ttrr××nnhh
EEWWFF 555511 CC¸¸cc cchh- ¬¬nngg ttrr××nnhh ggiiÆÆtt NNããnngg
NhiÖt ®é cho mçi ch¬ng tr×nh ®îc ®Þnh tríc vµ ®Æt tù ®éng.
Tïy theo ph©n lo¹i cña ®å giÆt vµ cho ch¬ng tr×nh ®· chän.
CChh- ¬¬nngg ttrr××nnhh
A
B
C
D
E
LLoo¹¹ii ®®åå ggiiÆÆtt vvµµ
mmøøcc ®®éé bbÈÈnn
V¶i gia dông, lanh,
tÊm ga, ¸o s¬ mi,
®å lãt
§å Jean, kh¨n b«ng,
tÊm ga, kh¨n bµn
S¬ mi, ¸o choµng,
®å dÔ lµ
V¶i mÒm máng,
vÝ dô rÌm cöa
Hµng cã nh·n
Len míi nguyªn chÊt, giÆt
m¸y kh«ng bÞ co & c¸c hµng
t¬ lôa Tù ®éng
CChh- ¬¬nngg ttrr××nnhh
thêng
Jeans / Kh¨n t¾m
DÔ Lµ ñi
MÒm máng
Len vµ Lôa
MM«« tt¶¶ cchh- ¬¬nngg
ttrr××nnhh
GiÆt ë 40 ,
x¶ 3 lÇn,
v¾t thêng
GiÆt tríc 40°,
GiÆt 60°, x¶ 5 lÇn,
v¾t tèc ®én tèi ®a
GiÆt 40°, x¶ 3 lÇn,
v¾t nhÑ
GiÆt 30°, x¶ 3
lÇn, v¾t nhÑ
GiÆt 30°, x¶ 3 lÇn,
v¾t thêng
CC¸¸cc ®®ÆÆcc ®®iiÓÓmm
ccãã tthhÓÓ
GiÆt nhanh
GiÆt nhanh
GiÆt nhanh
GiÆt nhanh
GiÆt nhanh
F
G
H
I
J
K
GGhhii cchhóó:: VV¾¾tt tthh- êênngg llµµ 550000 vvßßnngg//pphhóótt;; vv¾¾tt nnhhÑÑ llµµ 445500 vvßßnngg//pphhóótt;; vv¾¾tt ttèèii ®®aa llµµ 555500 vvßßnngg//pphhóótt..
V¶i cotton bÒn mµu
nh kh¨n t¾m.
Hµng kh«ng bÒn mµu
nh ®å lãt, s¬ mi.
Acrilic, viscose,
polyester, rÌm cöa
S¬ mi, ¸o choµng,
®å lãt, v¶i hçn hîp
Cotton mµu
V¶i tæng hîp
GiÆt tay
X¶
Th¸o níc
V¾t
GiÆt, x¶ 3 lÇn,
v¾t thêng
GiÆt , x¶ 3 lÇn,
v¾t nhÑ
GiÆt, x¶ 3 lÇn,
v¾t nhÑ
X¶ 3 lÇn, th¸o níc
v¾t thêng
Th¸o níc
V¾t thêng
GiÆt nhanh
GiÆt nhanh
GiÆt nhanh
68
Page 69

BB¶¶nngg cchh- ¬¬nngg ttrr××nnhh
EEWWFF 554499
CChh- ¬¬nngg ttrr××nnhh
A
B
C
D
E
LLoo¹¹ii ®®åå ggiiÆÆtt vvµµ
mmøøcc ®®éé bbÈÈnn
V¶i gia dông,
lanh, tÊm ga,
¸o s¬ mi, ®å lãt
S¬ mi, kh¨n ¨n,
®å lãt
V¶i mÒm mánh
nh vá gèi,
rÌm cöa
V¶i dÔ lµ ñi, s¬ mi,
¸o choµng
Acrylic,viscose,
polyester, rÌm cö
CChh- ¬¬nngg ttrr××nnhh
Tù ®éng
Cotton
thêng ngµy
V¶i mµu
mÒm máng
DÔ lµ ñi
V¶i tæng hîp
MM«« tt¶¶ cchh- ¬¬nngg
ttrr××nnhh
GiÆt tríc, giÆt,
x¶ 5 lÇn, v¾t thêng
GiÆt, x¶ 3 lÇn,
v¾t thêng
GiÆt, x¶ 3 lÇn,
v¾t thêng
GiÆt, x¶ 3 lÇn,
v¾t thêng
GiÆt, x¶ 3 lÇn,
v¾t nhÑ
CC¸¸cc ®®ÆÆcc ®®iiÓÓmm
ccãã tthhÓÓ
GiÆt nhanh
GiÆt nhanh
GiÆt nhanh
TTiiÕÕnngg VViiÖÖtt
GiÆt nhanh
GiÆt nhanh
F
G
H
I
J
K
Hµng cã nh·n
Len míi nguyªn chÊt,
giÆt m¸y kh«ng bÞ
co & c¸c hµng t¬ lôa
S¬ mi, ¸o choµng,
®å lãt, v¶i hçn hîp
Len vµ Lôa
GiÆt tay
Lµm mÒm v¶i
X¶
Th¸o níc
V¾t
GiÆt, x¶ 3 lÇn,
v¾t thêng
GiÆt, x¶ 3 lÇn,
v¾t nhÑ
X¶ 1 lÇn,
v¾t thêng
X¶ 3 lÇn, th¸o níc
v¾t thêng
Th¸o níc
V¾t thêng
GGhhii cchhóó:: VV¾¾tt tthh- êênngg llµµ 550000 vvßßnngg//pphhóótt;; vv¾¾tt nnhhÑÑ llµµ 445500 vvßßnngg//pphhóótt
69
Page 70

P1115
P1114
P0038
P1050
BB¶¶oo qquu¶¶nn
C0066
C0067
LLµµmm ss¹¹cchh ggiioo¨¨nngg ccööaa
1.
KiÓm tra gio¨ng cöa thêng xuyªn ®Ó tr¸nh nh÷ng
®å vËt cuèi cïng cã thÓ bÞ kÑt trong khe gio¨ng cöa.
LLµµmm ss¹¹cchh bbªªnn nnggooµµii mm¸¸yy
2.
Lµm s¹ch bªn ngoµi m¸y b¨ng níc Êm vµ níc röa
chÐn. Röa b»ng níc s¹ch vµ lau kh« b»ng kh¨n
mÒm.
QQuuaann ttrräänngg::
nh÷ng chÊt t¬ng tù ®Ó lµm s¹ch th©n m¸y.
LLµµmm ss¹¹cchh nngg¨¨nn cchhøøaa bbéétt ggiiÆÆtt
3.
Sau mét thêi gian, bét giÆt vµ chÊt lµm mÒm v¶i ®Ó
l¹i cÆn b¸m trong ng¨n.
Lµm s¹ch ng¨n tõ tõ b»ng c¸ch röa díi vßi níc
ch¶y. §Ó lÊy « pha chÕ tõ trong m¸y ra, nhÊn nót ë
phÝa sau gãc bªn tay tr¸i.
§Ó thuËn tiÖn cho viÖc lµm s¹ch, phÇn trªn cña ng¨n
chøa phô gia cã thÓ th¸o ra ®îc.
kh«ng dïng cån methyl, dung m«i hoÆc
Bét giÆt còng cã thÓ tÝch luü s©u bªn trong cña ng¨n:
lµm s¹ch b»ng bµn ch¶i r¨ng cò. L¾p l¹i ng¨n vµo
chç cò sau khi lµm s¹ch.
LLµµmm ss¹¹cchh bb¬¬mm tthh¸¸oo nn- íícc
4.
B¬m th¸o níc cÇn ®îc kiÓm tra thêng xuyªn vµ
nhÊt lµ khi
• M¸y kh«ng th¸o níc vµ/hoÆc kh«ng v¾t
• M¸y g©y tiÕng ®éng bÊt thêng trong khi v¾t do
nh÷ng ®å vËt nh kim b¨ng, tiÒn xu, v.v. lµm nghÑt
b¬m.
Thao t¸c nh sau:
• Rót æ c¾m ®iÖn cho m¸y.
• Chê cho níc nguéi bít nÕu cÇn.
• Më cöa b¬m.
• §Æt chËu høng gÇn víi b¬m ®Ó høng níc trµn.
• Th¸o èng tho¸t níc khÈn cÊp, ®Æt nã vµo chËu
høng vµ më n¾p ra.
• Khi níc ®· ch¶y ra hÕt, vÆn th¸o n¾p cña b¬m ra.
Lu«n lu«n ®Ó s½n giÎ lau ®Ó lau níc trµn khi th¸o
b¬m.
70
Page 71

• Gì bá tÊt c¶ nh÷ng vËt b¸m tõ trong b¬m b»ng
c¸ch quay nã.
• §Ëy l¹i n¾p cho èng dÉn níc khÈn cÊp vµ l¾p l¹i
èng nµy vµo vÞ trÝ cña nã.
66.. TThh¸¸oo nn- íícc kkhhii kkhhÈÈnn ccÊÊpp
NÕu níc kh«ng ®îc th¶i, thao t¸c nh sau ®Ó th¸o
níc cho m¸y:
• rót phÝch c¾m ra khái æ;
• ®ãng vßi níc l¹i;
• chê cho níc nguéi bít nÕu cÇn;
• më cöa b¬m;
• ®¨t chËu høng trªn sµn vµ ®Æt èng th¸o níc khÈn
cÊp vµo chËu. Th¸o n¾p cña nã ra. Níc sÏ ®îc
th¸o hÕt ra chËu do träng lùc. Khi ®Çy chËu ®Ëy
nÆp èng l¹i. §æ hÕt níc trong chËu. LÆp l¹i nh
vËy cho ®Õn khi kh«ng cßn níc ch¶y ra n÷a;
• lµm s¹ch b¬m nÕu cÇn thao t¸c nh ®· m« t¶ ë
trªn;
• ®Æt l¹i èng dÉn níc khÈn cÊp vµo vÞ trÝ cña nã sau
khi èng ®· nót.;
• vÆn b¬m trë l¹i vµ ®ãng cöa b¬m.
• VÆn l¹i b¬m vµo cho ch¨c ch¾n.
• §ãng cöa b¬m l¹i.
55.. BBéé pphhËËnn llääcc nn- íícc vvµµoo
NÕu b¹n nhËn thÊy thêi gian m¸y lÊy níc vµo l©u
h¬n, h·y kiÓm tra xem èng dÉn níc vµo kh«ng bÞ
chÆn.
T¾t vßi níc.
VÆn lÊy èng khái vßi níc.
Lµm s¹ch c¸i läc b»ng bµn ch¶i cøng.
VÆn l¹i èng vµo vßi níc.
77.. PPhhßßnngg nnggõõaa kkhhii tthhêêii ttiiÕÕtt ®®««nngg
ggii¸¸
NÕu m¸y l¾p ®Æt t¹i n¬i nhiÖt ®én cã thÓ gi¶m xuèng
díi 0°C, thùc hiÖn c¸c bíc nh sau:
• Rót phÝch c¾m ra khái æ.
• §ãng vßi níc l¹i vµ vÆn th¸o èng dÉn níc vµo ra
khái vßi níc.
• §Æt ®Çu mót cuèi cña èng th¸o níc khÈn cÊp vµ
èng dÉn níc vµo vµo chËu høng ®Æt trªn sµn ®Ó
cho níc th¸o ra hÕt.
• L¾p l¹i èng dÉn níc vµo vßi níc vµ èng th¸o
níc khÈn cÊp vÒ vÞ trÝ cò sau khi ®· ®Ëy n¾p èng
trë l¹i.
Khi lµm nh vËy níc cßn l¹i trong m¸y ®îc th¸o
hÕt tr¸nh ®«ng thµnh ®¸ vµ hËu qu¶ lµ lµm vì c¸c bé
phËn liªn quan.
Khi b¹n dïng m¸y trë l¹i ph¶i ®¶m b¶o r»ng nhiÖt ®é
xung quoanh ph¶i trªn 0°C.
§§iiÒÒuu qquuaann ttrräänngg!!
Mçi khi b¹n th¸o níc b»ng èng th¸o níc khÈn cÊp
b¹n ph¶i ®æ 2 lÝt níc vµo ng¨n giÆt chÝnh cña «
cha bét giÆt vµ ch¹y ch¬ng tr×nh th¸o níc M.
Nh vËy van ECO sÏ ®îc kÝch ho¹t tr¸nh khái phÇn
bét giÆt d tån ®äng ë lÇn giÆt sau.
TTiiÕÕnngg VViiÖÖtt
71
Page 72

KKhhii bbéé pphhËËnn nnµµoo ®®ãã kkhh««nngg hhoo¹¹tt ®®éénngg??
Nh÷ng trôc trÆc b¹n cã thÓ tù gi¶i quyÕt.
VVÊÊnn ®®ÒÒ NNgguuyyªªnn nnhh©©nn ccãã tthhÓÓ
MM¸¸yy cchh- aa ®®- îîcc kkhhëëii ®®éénngg::
•
MM¸¸yy cchh- aa ccãã nn- íícc vvµµoo::
•
MM¸¸yy ®®ææ ®®©©úú nn- íícc ssaauu ®®ãã nn- íícc bbÞÞ tthh¸¸oo
•
hhÕÕtt nnggaayy::
MM¸¸yy kkhh««nngg tthh¶¶ii nn- íícc vvµµ// hhooÆÆcc
•
kkhh««nngg vv¾¾tt::
NN- íícc ttrrµµnn rraa ssµµnn nnhhµµ::
•
• Cöa m¸y kh«ng ®îc ®ãng chÆt.
• M¸y cha ®îc c¾m ®iÖn hoÆc trong æ c¾m kh«ng
cã ®iÖn.
• CÇu ch× chÝnh bÞ næ.
• §ång hå lùa chän ch¬ng tr×nh kh«ng ®îc ®Æt ®óng
vÞ trÝ.
• Cha nhÊn nót Khëi ®éng/ Thªm ®å giÆt.
• Vßi cung cÊp níc bÞ kho¸.
• èng dÉn níc vµo bÞ Ðp hoÆc bÞ xo¾n.
• C¸i läc trong èng dÉn níc vµo bÞ chÆn.
• Cöa m¸y kh«ng ®¬c ®ãng ®óng c¸ch.
• PhÇn cuèi cña èng tho¸t níc qu¸ thÊp. Tham kh¶o
phÇn liªn quan trong ch¬ng “th¸o níc”
• èng dÉn níc th¶i bÞ Ðp hoÆc bÞ xo¾n.
• §Æc ®iÓm H·m x¶ ®· ®îc chän.
• Chøc n¨ng ChÆn V¾t ®· ®îc chän.
• B¬m th¸o níc bÞ nghÑt.
• Dïng qóa nhiÒu bét giÆt hoÆc dïng bét giÆt kh«ng
thÝch hîp (t¹o nªn qu¸ nhiÒu bät).
• KiÓm tra xem cã rß rØ nµo tõ mét trong nh÷ng chç nèi
cña èng dÉn níc vµo. Kh«ng ph¶i lu«n dÔ dµng thÊy
®iÒu nµy v× cã níc ch¶y trong èng; kiÓm tra xem nã
cã bÞ ít kh«ng.
• èng tho¸t níc bÞ h háng.
• N¾p cña èng th¸o níc khÈn cÊp kh«ng ®îc ®Ëy l¹i
sau khi lµm s¹ch c¸i läc.
KKÕÕtt qquu¶¶ ggiiÆÆtt kkhh««nngg ®®- îîcc nnhh- ýý::
•
MM¸¸yy bbÞÞ rruunngg hhooÆÆcc gg©©yy åånn::
•
CCööaa mm¸¸yy ssÏÏ kkhh««nngg mmëë ®®- îîcc::
•
• Dïng qóa Ýt bét giÆt hoÆc dïng bét giÆt kh« ng thÝch
hîp.
•
Nh÷ng vÕt bÈn l©u ngµy kh«ng ®îc xö lý tríc khi giÆt.
• Ch¬ng tr×nh vµ nhiÖt ®é giÆt ®óng kh«ng ®îc chän.
• §å giÆt ®îc t¶i vµo qu¸ nhiÒu.
• Chèt b¶o vÖ khi vËn chuyÓn vµ bao gãi m¸y cha
®îc th¸o ra.
• Ch©n hç trî cña m¸y kh«ng ®îc ®iÒu chØnh.
• QuÇn ¸o xÕp kh«ng ®Òu kh«ng c©n ®èi trong thïng.
• Cã thÓ qu¸ Ýt ®å giÆt trong thïng.
• Ch¬ng tr×nh giÆt cßn ®ang ch¹y.
• Kho¸ cöa cha ®îc rót.
• Cã níc trong thïng m¸y.
72
Page 73

VVÊÊnn ®®ÒÒ NNgguuyyªªnn nnhh©©nn ccãã tthhÓÓ
CChhuu ttrr××nnhh vv¾¾tt bb¾¾tt ®®ÇÇuu mmuuéénn hhooÆÆcc ®®åå
•
ggiiÆÆtt kkhh««nngg ®®- îîcc vv¾¾tt kküü::
• ThiÕt bÞ ®iÖn tö kiÓm tra ®é th¨ng b»ng can
thiÖp vµo bëi v× ®å giÆt kh«ng ®îc ph©n bè
c©n b»ng trong thïng m¸y. §å giÆt ®îc ph©n
bè l¹i b»ng c¸ch quay ngîc thïng. §iÒu nµy
x¶y ra vµi lÇn tríc khi sù mÊt c©n b»ng mÊt ®i
vµ viÖc v¾t trë l¹i b×nh thêng. NÕu sau vµi
phót, ®å giÆt vÉn kh«ng ®¬ck ph©n bè ®Òu
trong thïng, m¸y sÏ kh«ng v¾t. NÕu nh t¹i
®iÓm kÕt thóc cña ch¬ng tr×nh ®å giÆt kh«ng
®îc v¾t ®ñ kü, ph©n bè l¹i ®å giÆt b»ng tay vµ
chän ch¬ng tr×nh v¾t.
TTiiÕÕnngg VViiÖÖtt
NÕu b¹n kh«ng thÓ nhËn biÕt vµ gi¶i quyÕt vÊn ®Ò,
liªn l¹c trung t©m dÞch vô cña chóng t«i. Tríc khi
gäi ®iÖn, ghi chÐp kiÓu m¸y, sè sª ri, ngµy mua m¸y
cña b¹n Trung t©m DÞch vô sÏ hái b¹n nh÷ng th«ng
tin ®ã.
73
Page 74

From the Electrolux Group.
The Electrolux Group is the world’s largest producer of powered appliances for kitchen, cleaning and outdoor
use. More than 55 million Electrolux Group products (such as refrigerators, cookers, washing
machines, vacuum cleaners, chain saws and lawn mowers) are sold each year to a value of approx. USD 14
billion in more than 150 countries around the world.
The world’s No. 1 choice
.
 Loading...