

Page 1

Washing machine
User manual
822 943 710-00 - 13.06.03-01
EW 1477 F
g
Page 2

Dear Customer,
Please read this user manual carefully. Above all,
please observe the “Safety” section on the first few
pages. Please retain this user manual for future reference. Please pass it on to any future owner of the
appliance.
1
1. The numbers will lead you step-by-step through
2. ...
3
2
In the event that a malfunction occurs, this user
manual contains instructions on how to remedy the
problem yourself. See section: “What to do if...”.
Next to the warning triangle and/or exclamatory words (Warning, Attention, Impor-
tant) you will find information that is
important for your safety or the efficiency of
the appliance. Please be sure to take note of
such information.
the operation of the appliance.
Next to this symbol you will find additional
information on the operation and practical
use of the appliance.
This symbol highlights tips and information
on how to use your appliance economically
and ecologically.
2
Page 3

Contents
Operating Instructions . . . . . . . . . . . . . . . . . . . . . . . . . . . . . . . . . . . . . . . . . . . . . . . . . . . . . . . . . . . . . 5
Safety . . . . . . . . . . . . . . . . . . . . . . . . . . . . . . . . . . . . . . . . . . . . . . . . . . . . . . . . . . . . . . . . . . . . . . . . . . . . . . 5
Disposal . . . . . . . . . . . . . . . . . . . . . . . . . . . . . . . . . . . . . . . . . . . . . . . . . . . . . . . . . . . . . . . . . . . . . . . . . . . . 6
Ecological tips . . . . . . . . . . . . . . . . . . . . . . . . . . . . . . . . . . . . . . . . . . . . . . . . . . . . . . . . . . . . . . . . . . . . . . . 6
Description of the appliance . . . . . . . . . . . . . . . . . . . . . . . . . . . . . . . . . . . . . . . . . . . . . . . . . . . . . . . . . . . . 7
Front view . . . . . . . . . . . . . . . . . . . . . . . . . . . . . . . . . . . . . . . . . . . . . . . . . . . . . . . . . . . . . . . . . . . . . . . . . . . 7
Drawer for detergent and conditioner . . . . . . . . . . . . . . . . . . . . . . . . . . . . . . . . . . . . . . . . . . . . . . . . . . . . . . 7
Control panel . . . . . . . . . . . . . . . . . . . . . . . . . . . . . . . . . . . . . . . . . . . . . . . . . . . . . . . . . . . . . . . . . . . . . . . . . 8
Control knob . . . . . . . . . . . . . . . . . . . . . . . . . . . . . . . . . . . . . . . . . . . . . . . . . . . . . . . . . . . . . . . . . . . . . . . . 8
Programme option buttons . . . . . . . . . . . . . . . . . . . . . . . . . . . . . . . . . . . . . . . . . . . . . . . . . . . . . . . . . . . . . 10
Consumption values . . . . . . . . . . . . . . . . . . . . . . . . . . . . . . . . . . . . . . . . . . . . . . . . . . . . . . . . . . . . . . . . . . 11
Before the first wash . . . . . . . . . . . . . . . . . . . . . . . . . . . . . . . . . . . . . . . . . . . . . . . . . . . . . . . . . . . . . . . . . . 11
Preparing for a wash cycle . . . . . . . . . . . . . . . . . . . . . . . . . . . . . . . . . . . . . . . . . . . . . . . . . . . . . . . . . . . . . 12
Sorting and preparing the washing . . . . . . . . . . . . . . . . . . . . . . . . . . . . . . . . . . . . . . . . . . . . . . . . . . . . . . . . 12
Types of washing and care symbols . . . . . . . . . . . . . . . . . . . . . . . . . . . . . . . . . . . . . . . . . . . . . . . . . . . . . . . 12
Detergents and conditioners . . . . . . . . . . . . . . . . . . . . . . . . . . . . . . . . . . . . . . . . . . . . . . . . . . . . . . . . . . . . . 13
Which detergent and conditioner? . . . . . . . . . . . . . . . . . . . . . . . . . . . . . . . . . . . . . . . . . . . . . . . . . . . . . . . 13
How much detergent and conditioner? . . . . . . . . . . . . . . . . . . . . . . . . . . . . . . . . . . . . . . . . . . . . . . . . . . . 13
Water softener . . . . . . . . . . . . . . . . . . . . . . . . . . . . . . . . . . . . . . . . . . . . . . . . . . . . . . . . . . . . . . . . . . . . . . . . 13
Performing a wash cycle . . . . . . . . . . . . . . . . . . . . . . . . . . . . . . . . . . . . . . . . . . . . . . . . . . . . . . . . . . . . . . . 14
Brief guide . . . . . . . . . . . . . . . . . . . . . . . . . . . . . . . . . . . . . . . . . . . . . . . . . . . . . . . . . . . . . . . . . . . . . . . . . . . 14
Switching on the appliance . . . . . . . . . . . . . . . . . . . . . . . . . . . . . . . . . . . . . . . . . . . . . . . . . . . . . . . . . . . . . . 15
Setting a wash programme . . . . . . . . . . . . . . . . . . . . . . . . . . . . . . . . . . . . . . . . . . . . . . . . . . . . . . . . . . . . . . 15
Changing the spin speed/selecting rinse hold . . . . . . . . . . . . . . . . . . . . . . . . . . . . . . . . . . . . . . . . . . . . . . . . 16
Setting the delay timer . . . . . . . . . . . . . . . . . . . . . . . . . . . . . . . . . . . . . . . . . . . . . . . . . . . . . . . . . . . . . . . . . . 16
Opening and closing the loading door . . . . . . . . . . . . . . . . . . . . . . . . . . . . . . . . . . . . . . . . . . . . . . . . . . . . . . 17
Loading the washing . . . . . . . . . . . . . . . . . . . . . . . . . . . . . . . . . . . . . . . . . . . . . . . . . . . . . . . . . . . . . . . . . . . 17
Adding detergent/ additives . . . . . . . . . . . . . . . . . . . . . . . . . . . . . . . . . . . . . . . . . . . . . . . . . . . . . . . . . . . . . . 18
. . . . . . . . . . . . . . . . . . . . . . . . . . . . . . . . . . . . . . . . . . . . . . . . . . . . . . . . . . . . . . . . . . . . . . . . . . . . . . . . . . . . 18
Starting a wash programme . . . . . . . . . . . . . . . . . . . . . . . . . . . . . . . . . . . . . . . . . . . . . . . . . . . . . . . . . . . . . . 19
Wash programme progress . . . . . . . . . . . . . . . . . . . . . . . . . . . . . . . . . . . . . . . . . . . . . . . . . . . . . . . . . . . . . . 19
Changing a wash programme . . . . . . . . . . . . . . . . . . . . . . . . . . . . . . . . . . . . . . . . . . . . . . . . . . . . . . . . . . . . 20
Wash cycle complete/removing the washing . . . . . . . . . . . . . . . . . . . . . . . . . . . . . . . . . . . . . . . . . . . . . . . . 20
Programme tables . . . . . . . . . . . . . . . . . . . . . . . . . . . . . . . . . . . . . . . . . . . . . . . . . . . . . . . . . . . . . . . . . . . . 21
Washing . . . . . . . . . . . . . . . . . . . . . . . . . . . . . . . . . . . . . . . . . . . . . . . . . . . . . . . . . . . . . . . . . . . . . . . . . . . . . 21
Separate soaking . . . . . . . . . . . . . . . . . . . . . . . . . . . . . . . . . . . . . . . . . . . . . . . . . . . . . . . . . . . . . . . . . . . . . . 22
Separate rinse cycle . . . . . . . . . . . . . . . . . . . . . . . . . . . . . . . . . . . . . . . . . . . . . . . . . . . . . . . . . . . . . . . . . . . 22
Separate conditioning/starching/impregnating . . . . . . . . . . . . . . . . . . . . . . . . . . . . . . . . . . . . . . . . . . . . . . 22
Separate spinning . . . . . . . . . . . . . . . . . . . . . . . . . . . . . . . . . . . . . . . . . . . . . . . . . . . . . . . . . . . . . . . . . . . . . 22
Cleaning and care . . . . . . . . . . . . . . . . . . . . . . . . . . . . . . . . . . . . . . . . . . . . . . . . . . . . . . . . . . . . . . . . . . . . 23
Cleaning the control panel . . . . . . . . . . . . . . . . . . . . . . . . . . . . . . . . . . . . . . . . . . . . . . . . . . . . . . . . . . . . . . . 23
Cleaning the detergent drawer . . . . . . . . . . . . . . . . . . . . . . . . . . . . . . . . . . . . . . . . . . . . . . . . . . . . . . . . . . . 23
Cleaning the wash drum . . . . . . . . . . . . . . . . . . . . . . . . . . . . . . . . . . . . . . . . . . . . . . . . . . . . . . . . . . . . . . . . 24
Cleaning the loading door/rubber collar . . . . . . . . . . . . . . . . . . . . . . . . . . . . . . . . . . . . . . . . . . . . . . . . . . . . 24
What to do if... . . . . . . . . . . . . . . . . . . . . . . . . . . . . . . . . . . . . . . . . . . . . . . . . . . . . . . . . . . . . . . . . . . . . . . . 25
Remedying a malfunction . . . . . . . . . . . . . . . . . . . . . . . . . . . . . . . . . . . . . . . . . . . . . . . . . . . . . . . . . . . . . . . 25
If the wash result is not satisfactory . . . . . . . . . . . . . . . . . . . . . . . . . . . . . . . . . . . . . . . . . . . . . . . . . . . . . . . 28
Performing an emergency emptying procedure . . . . . . . . . . . . . . . . . . . . . . . . . . . . . . . . . . . . . . . . . . . . . . 29
Cleaning the drain pump . . . . . . . . . . . . . . . . . . . . . . . . . . . . . . . . . . . . . . . . . . . . . . . . . . . . . . . . . . . . . . . . 30
3
Page 4

Child safety device . . . . . . . . . . . . . . . . . . . . . . . . . . . . . . . . . . . . . . . . . . . . . . . . . . . . . . . . . . . . . . . . . . . . 31
Installation and connection instructions. . . . . . . . . . . . . . . . . . . . . . . . . . . . . . . . . . . . . . . . . . . . 32
Technical data /dimensions . . . . . . . . . . . . . . . . . . . . . . . . . . . . . . . . . . . . . . . . . . . . . . . . . . . . . . . . . . . . 32
Safety information concerning installation . . . . . . . . . . . . . . . . . . . . . . . . . . . . . . . . . . . . . . . . . . . . . . . . 32
Installing the washing machine . . . . . . . . . . . . . . . . . . . . . . . . . . . . . . . . . . . . . . . . . . . . . . . . . . . . . . . . . 33
Transporting the appliance . . . . . . . . . . . . . . . . . . . . . . . . . . . . . . . . . . . . . . . . . . . . . . . . . . . . . . . . . . . . . . 33
Removing the transportation lock . . . . . . . . . . . . . . . . . . . . . . . . . . . . . . . . . . . . . . . . . . . . . . . . . . . . . . . . . 33
Preparing the location where the washing machine is to be installed . . . . . . . . . . . . . . . . . . . . . . . . . . . . . . 34
Installing the appliance on a concrete base . . . . . . . . . . . . . . . . . . . . . . . . . . . . . . . . . . . . . . . . . . . . . . . . 35
Installing the appliance on floors which oscillate . . . . . . . . . . . . . . . . . . . . . . . . . . . . . . . . . . . . . . . . . . . . 35
Compensating for floor unevenness . . . . . . . . . . . . . . . . . . . . . . . . . . . . . . . . . . . . . . . . . . . . . . . . . . . . . . . 35
Connecting the appliance to the electricity supply . . . . . . . . . . . . . . . . . . . . . . . . . . . . . . . . . . . . . . . . . 36
Connecting the appliance to the water suppy . . . . . . . . . . . . . . . . . . . . . . . . . . . . . . . . . . . . . . . . . . . . . 36
Permitted water pressure . . . . . . . . . . . . . . . . . . . . . . . . . . . . . . . . . . . . . . . . . . . . . . . . . . . . . . . . . . . . . . . . 36
Water inflow . . . . . . . . . . . . . . . . . . . . . . . . . . . . . . . . . . . . . . . . . . . . . . . . . . . . . . . . . . . . . . . . . . . . . . . . . . 37
Water drainage . . . . . . . . . . . . . . . . . . . . . . . . . . . . . . . . . . . . . . . . . . . . . . . . . . . . . . . . . . . . . . . . . . . . . . . . 38
Pump lifts of over 1m . . . . . . . . . . . . . . . . . . . . . . . . . . . . . . . . . . . . . . . . . . . . . . . . . . . . . . . . . . . . . . . . . . . 38
Installing the appliance underneath kitchen worktops . . . . . . . . . . . . . . . . . . . . . . . . . . . . . . . . . . . . . . 39
Kitchens with a worktop height of 85 cm . . . . . . . . . . . . . . . . . . . . . . . . . . . . . . . . . . . . . . . . . . . . . . . . . . . 39
Kitchens with a worktop height of 90 cm or higher . . . . . . . . . . . . . . . . . . . . . . . . . . . . . . . . . . . . . . . . . . . . 39
Index. . . . . . . . . . . . . . . . . . . . . . . . . . . . . . . . . . . . . . . . . . . . . . . . . . . . . . . . . . . . . . . . . . . . . . . . . . . . . . . 42
Service. . . . . . . . . . . . . . . . . . . . . . . . . . . . . . . . . . . . . . . . . . . . . . . . . . . . . . . . . . . . . . . . . . . . . . . . . . . . . 43
4
Page 5

Operating Instructions
1 Safety
The safety aspects of our electrical appliances comply with accepted technical standards and the German Appliance Safety Law. Nevertheless, as a
manufacturer we consider it our obligation to make
you aware of the following safety instructions.
Prior to using the appliance for the
first time
• Follow the “Installation and connection instruc-
tions” further on in this user manual.
• In the event that the appliance is delivered in the
winter months with below-zero temperatures:
Store the washing machine at room temperature
for 24 hours prior to using it for the first time.
Correct use
• The washing machine is intended for household
use in washing normal household items. If the
appliance is used for other purposes, or is used
incorrectly, the manufacturer cannot accept any
liability for any damage caused.
• Additions or modifications to the dishwasher are
not permitted for safety reasons.
• Use only detergents that are suitable for washing
machines. Follow the instructions provided by the
manufacturer.
• The washing must not contain any flammable solvent. Ensure this is the case even when washing
pre-cleaned items.
• The washing machine must not be used for
chemical cleaning.
• Dying and stripping agents may only be used in
the washing machine if the manufacturer of these
products expressly allows it. We cannot accept
liability for possible damages.
• Use only water from the water supply. Use rainwater or processing water only if it fulfils the
requirements of DIN1986 and DIN 1988.
• Frost damage is not covered under the warranty.
If the washing machine is placed in a room which
is at risk of frosting up, in the event that there is a
risk of frost an emergency emptying procedure
must be performed (see section “Carrying out an
emergency emptying procedure”).
Child safety
• Packaging materials (e.g. film, styrofoam) can be
dangerous to children. A risk of suffocation exists.
Keep packaging away from children.
• Children often do not recognise the hazards
associated with the use of electrical appliances. It
is therefore important you ensure that children are
adequately supervised while the washing
machine is operating and that you do not allow
children to play with the washing machine, as
there is a risk that children can shut themselves
inside the appliance.
• Ensure that children and small animals do not
climb into the washing machine drum.
• When disposing of the washing machine: Disconnect the power plug from the mains, break the
door lock, cut off the mains cable and dispose of
the plug and remainder of the cable. This will prevent children playing with the appliance from
shutting themselves inside and putting their lives
at risk.
General safety
• Repairs to the washing machine may only be carried out by technicians. Considerable dangers
can arise as the result of improper repairs being
carried out. Should the appliance be in need of
repair, contact our Customer Service or your specialist dealer.
• Never use the appliance when the electricity cord
is damaged or the control panel, worktop or base
area are damaged to such an extent that the
inside of the appliance is openly accessible.
• Switch off the washing machine prior to cleaning
it and carrying out maintenance. In addition,
remove the power plug from the power point or –
if the appliance has been hard-wired – switch off
the LS switch in the fuse box or completely
unscrew the screw-retaining device.
• If you do not intend to use the appliance for a
period of time, disconnect the appliance from the
mains supply and turn off the tap.
• Never remove the power plug from the power
point by pulling on the cord; pull the power plug
itself.
• Manifold-plugs, connectors and extension cords
must not be used. Resulting overheating may
constitute a fire hazard.
5
Page 6

• Do not spray the washing machine with a stream
of water. A risk of electrocution exists.
• When using wash programmes with high temperatures the glass in the loading door will become
hot. Do not touch it!
2 Disposal
Dispose of the packaging material.
Dispose of your washing machine’s packaging properly. All the packaging materials used are harmless to
the environment and can be recycled.
• Plastic parts are marked with standard international abbreviations:
>PE< for polyethylene, e.g. sheet wrapping
material
>PS< PS for polystyrene, e.g. padding material
(always CFC-free)
>POM< POM for polyoxymethylene, e.g. plastic
clips
• Cardboard packaging is manufactured from recycled paper and should be deposited in the waste
paper collection for recycling.
• Prior to carrying out an emergency emptying procedure or cleaning the drain pump, allow the
wash water to cool down.
• Small animals can nibble on electrical cables and
waterhoses. This can constitute a risk of electrocution and water damage. Keep small animals
away from the washing machine.
Dispose of the old appliance.
When you finally cease to use your washing
machine, please take it to the nearest recycling centre or to your dealer.
2 Ecological tips
• For items that are soiled to an average degree, it
is possible to get by without a pre-wash cycle.
This will save you detergent, water, and time (and
protect the environment as well!).
• The washing machine can be particularly economical if you make full use of the loads allowed.
• With small loads, use half to two thirds the recommended quantity of detergent.
• Stains and certain amount of soiling can be
removed prior to washing with suitable treatment.
Then you can use a lower temperature when
washing.
• Wash lightly to normally soiled whites using the
energy saver programme.
• It is often possible to do without conditioner. Give
it a try! Using a dryer can make your washing just
as soft and fluffy without the use of conditioner.
• With medium to very hard water (for hardness
range II or higher, see “Detergents and conditioners”), you should add a water softener. The
amount of detergent used can then always be
that as for hardness range I ( soft).
6
Page 7

Description of the appliance
Front view
Programme menu
Drawer for detergent
and conditioner
Rating plate
(behind loading
door)
Screw feet
(height adjustable)
Drawer for detergent and conditioner
Control panel
Loading door
Door indicator
Drain pump cover
l Main wash
detergent (powder)
and water softener if
required
k Pre-wash
detergent/Soaking
agent
æ Liquid conditioner
(Softeners, stiffeners,
starch)
Programme knob
7
Page 8

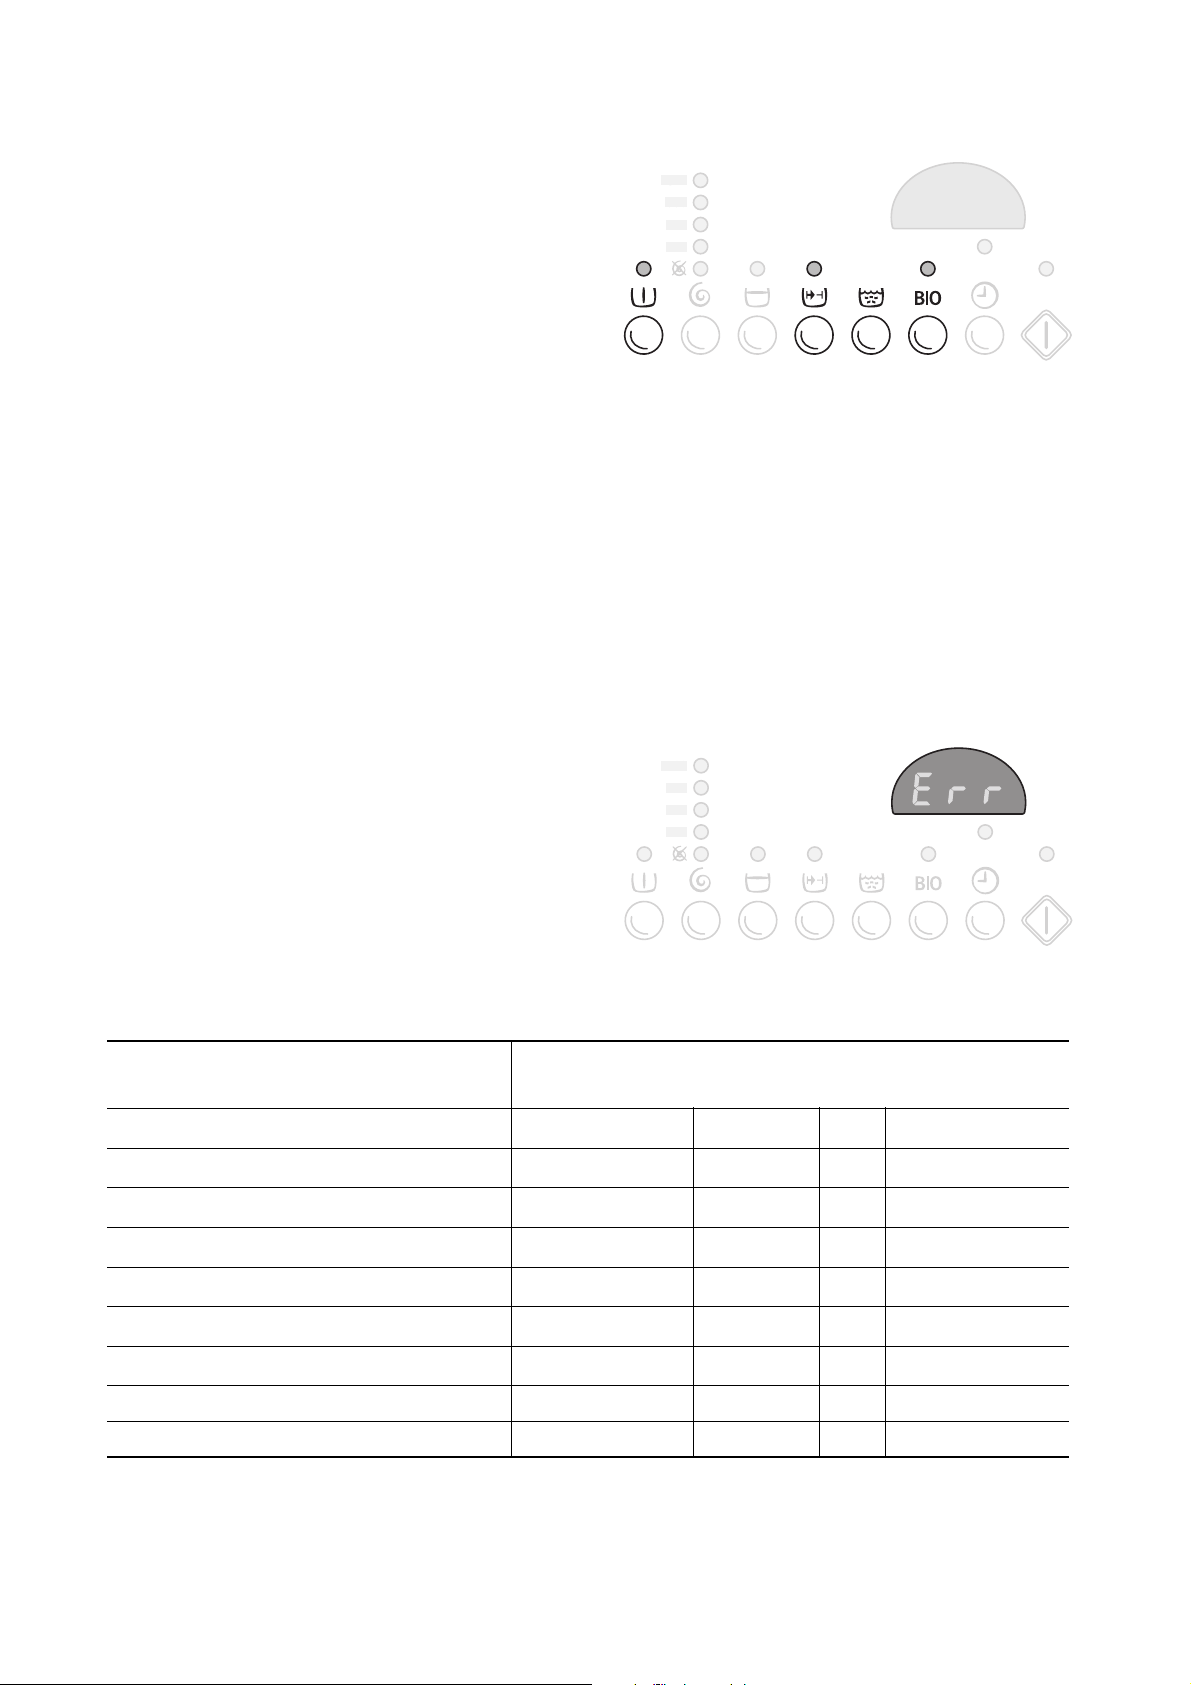
Control panel
Operating
light
ON/OFF button
Control
knob
Spin button with revolu-
tion speed indicator
Control knob
The control knob selects the type of wash cycle (e. g.
water level, drum movement, number of rinses, spin
speed) to suit the type of washing, and the wash
water temperature.
Button
RINSE HOLD
Programme option buttons
Multi-display
Programme
Progress Display
START/PAUSE
DELAY TIMERButton
Ï (Cancel programme)
• Cancels a programme that has already started.
Now another programme can be selected.
The appliance has 5 different programme fields.
• Cottons/linen (light blue)
• Easy-cares (yellow)
• Delicates (black)
• Woollens (black)
• Special functions (blue)
COTTONS/LINEN (light blue)
Main wash cycle for COTTONS/LINEN (cottons/
linen) at 30 °C to 95 °C.
2
Position E: Energy saving programme at
40 °C or 60 °C for lightly to normally soiled
cottons, with increased washing time. Not
able to be combined with B (SHORT).
8
Page 9
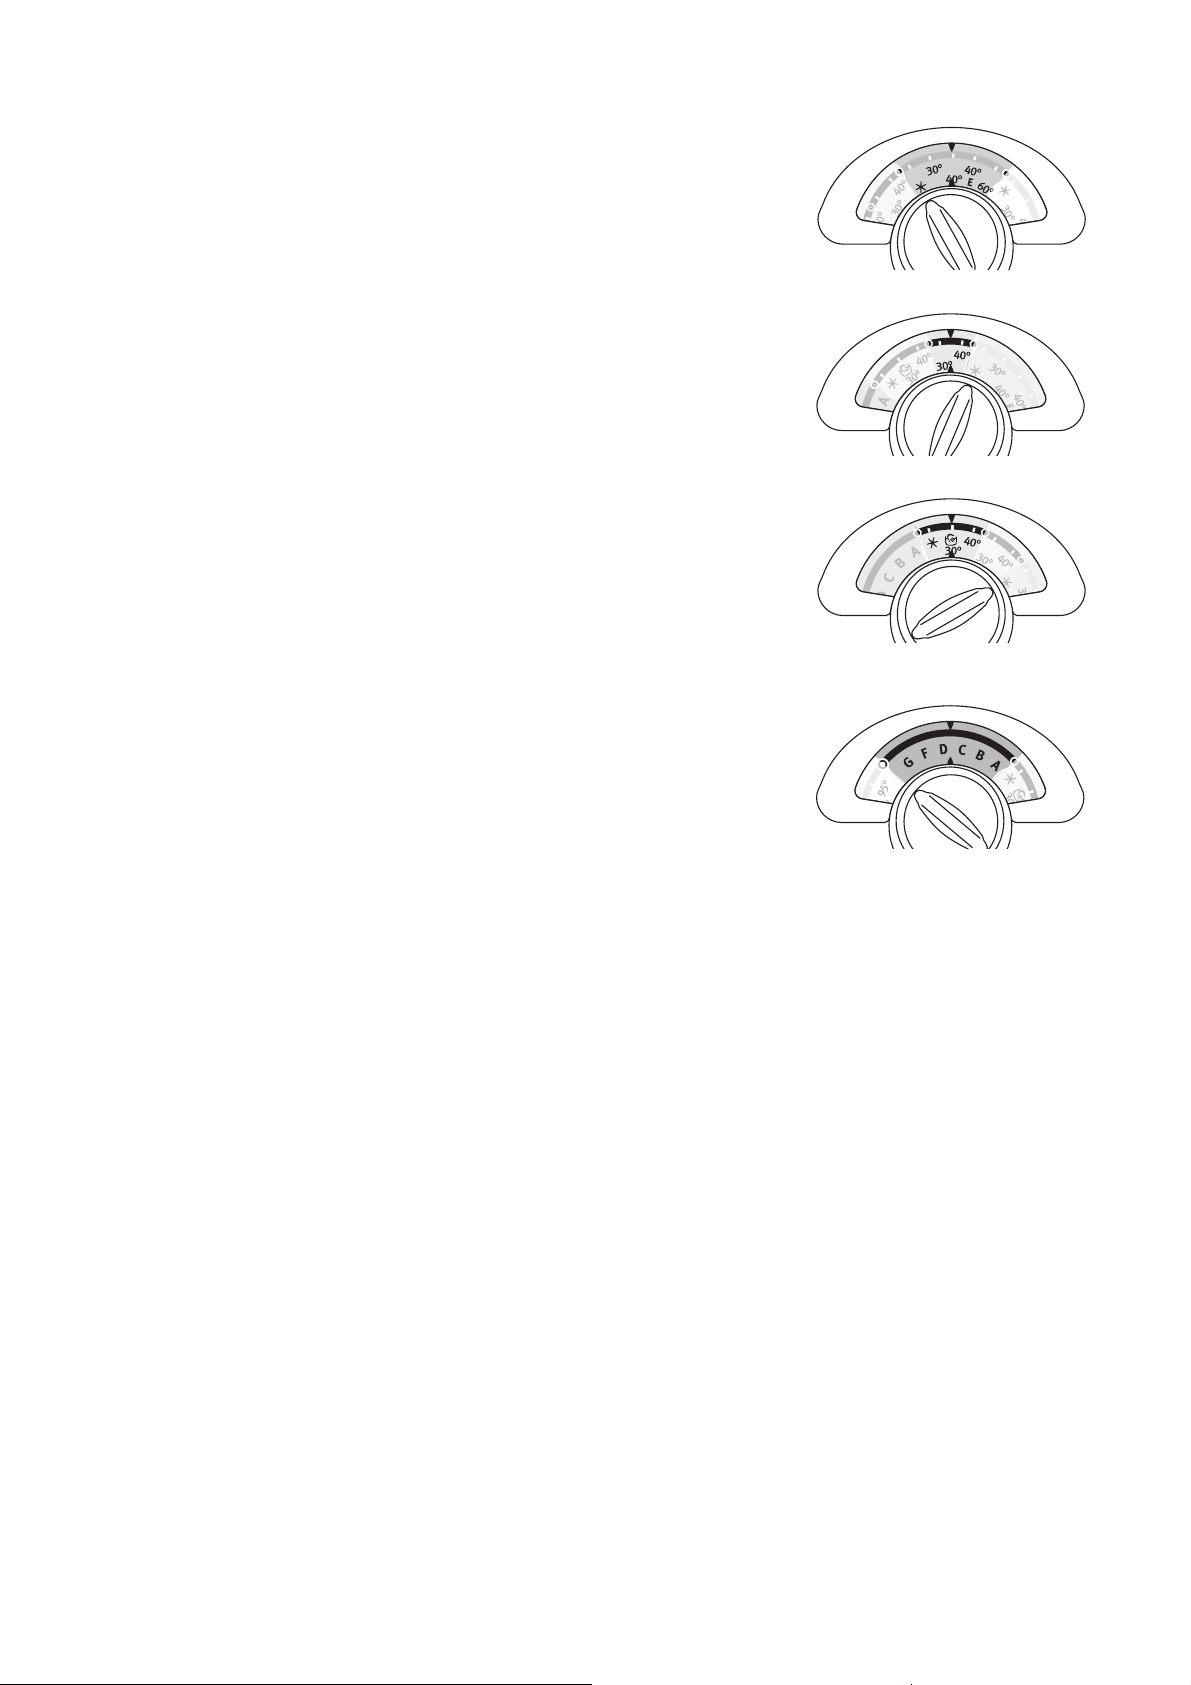
EASY-CARES (yellow)
Main wash cycle for easy-care textiles (mixed
weaves) from G (cold) to 60 °C.
DELICATES (black)
Main wash programme for delicates at 30 °C or
40 °C.
Í WOOLLENS (black)
Main wash cycle from r (cold) to 40 °C for machinewashable wool with the note “does not ball” and for
handwashable wool and other delicate textiles with
the care symbol ï (handwash).
Special functions (blue)
A (SOAKING)
Separate soaking for approx. 20 minutes at 30 °C.
The washing is left to soak in the final rinse water
(rinse hold). Before the actual wash programme can
be set, the water must first be drained.
B (RINSING)
Separate rinsing e. g. for rinsing handwashed textiles
(3 rinse cycles and spinning).
C (STARCHING/CONDITIONING)
Separate starching, separate conditioning, separate
treatment of damp clothes (1 rinse cycle, liquid additive rinsed in from the additive compartment, æ,
spin).
D (DRAINING)
Draining the final water rinse water following a rinse
hold (without spinning).
3
o (Rinse hold) means: The washing is left
to soak in the final rinse water; it is not spun.
F (SPINNING)
Final spin at max. spin speed, which can be reduced
by pressing the K button.
G (MINI-PROGRAMME)
A short programme of approximately 30 minutes in
length at 30 °C to briefly wash out lightly soiled textiles, e. g. sports clothing which was worn once.
9
Page 10
Programme option buttons
The programme option buttons are used to adapt the
programme to the degree of soiling of the washing.
The additional programme options are not necessary
for normally soiled washing.
k (PRE WASH)
Pre wash at approx. 30 °C prior to the main wash
cycle that follows automatically; a short spin cycle
follows COTTONS/LINEN and EASY-CARES, and
the water is drained after DELICATES.
If o (RINSE HOLD) has been selected, no spinning
will take place at all.
B (SHORT)
Shortened main wash cycle for lightly soiled washing.
È (EXTRA RINSE)
An additional rinse cycle can be set using this button. Instead of 3 rinse cycles, 4 are carried out.
BIO
Programme for temperatures of 40 °C and higher to
treat heavily soiled washing which has an extended
wash time.
3
The possible combinations of programme options
with the various wash programmes are listed in the
following chart:
COTTONS/LINEN 95, 60, 40 (light blue)
E (Energy saving) 60, 40
COTTONS/LINEN 30, r (COLD)
EASY-CARES 60, 40 (yellow)
E (Energy saving) 40
EASY-CARES 30, r (COLD)
If you press a button for a programme option
and “Err” flashes in the multi-display, the
selected function is not able to be combined
with the programme that has been set.
Wash programmes
Temperature (in °C)
k (PRE WASH) B (SHORT)
k (PRE WASH)
k (PRE WASH) B (SHORT)
k (PRE WASH) B (SHORT)
k (PRE WASH)
k (PRE WASH) B (SHORT)
possible programme options
BIO
-BIO
BIO
-BIO
È (EXTRA RINSE)
È (EXTRA RINSE)
-
È (EXTRA RINSE)
È (EXTRA RINSE)
È (EXTRA RINSE)
-
È (EXTRA RINSE)
DELICATES 40, 30 (black)
Í (WOOL) 40, 30, r (COLD) (black) - - - -
G (MINI-PROGRAMME) 30 - - - -
10
k (PRE WASH) B (SHORT)
-
È (EXTRA RINSE)
Page 11

Consumption values
The values for selected programmes provided in the following table were determined under standard conditions.
However, they provide helpful orientation for household use of the washing machine.
Programme selector/temperature
COTTONS/LINEN 95 (light blue) 5 45 1,70
1)
COTTONS/LINEN 60
COTTONS/LINEN 40 (light blue) 5 49 0,60
EASY-CARES 40 (yellow) 2,5 54 0,50
DELICATES 30 (black) 2,5 50 0,30
Í WOOLLENS 30 (black) 2 48 0,20
1) Note: Programme setting for testing in accordance with EN 60 456. Consumption values will vary from those
quoted depending on the water pressure, water hardness, water temperature as it enters the machine, room
temperature, type and quantity of items to be washed, detergent used, fluctuations in the mains voltage and
additional options selected.
(light blue)
Load size
in kg
5420,94
Water
in kWh
Energy
in kWh
Before the first wash
Perform a wash cycle without loading any washing:
COTTONS 95 (light blue), with half of the normal
amount of detergent.
This is to remove any residual substances remaining
in the drum and water tank due to manufacturing
processes.
11
Page 12

Preparing for a wash cycle
Sorting and preparing the washing
• Sort the washing according to care symbols and
type (see “Types of washing and care symbols”).
• Empty out the pockets.
• Remove metal objects (such as paper clips,
safety pins, etc).
• To prevent damage to items and stop the washing
from balling up: Close zips, button up bed and
cushion covers, tie together loose strings for
example from aprons.
• Turn items with double-layered fabrics inside-out
(sleeping bags, anoraks, etc.).
• For treated coloured textiles and textiles with
attached decorations: Turn items inside out.
• Wash small delicate items (baby’s socks, stockings, bras etc.) in a washing bag, in a cushion
cover which has a zip or in larger socks.
• Special care must be taken with curtains.
Remove metal or burred plastic rollers or tie them
up in a net or bag. We cannot accept liability for
any damage.
• Coloured and white items should not be washed
together in the same cycle. White items will otherwise discolour or become grey.
• New coloured items often contain excess dye. It
is better to wash these items separately the first
time.
• Mix larger items with smaller ones. This will
improve the effectiveness of the wash and distribute items more evenly during the spin cycle.
• Shake out the items before loading them into the
washing machine.
• Separate items from one another before placing
them inside the drum.
• Pay attention to care instructions such as “Wash
separately” and “Wash separately several times”.
Types of washing and care symbols
The care symbols will help you to choose the correct
wash programme. The washing should be sorted
according to type and care symbol. The temperatures indicated on the care symbols are the maximum wash temperatures.
Delicates ì
Materials such as layered fibres, micro-fibres, synthetics and curtains with this care symbol require particularly careful treatment. The DELICATES (black)
programme is suitable for such items.
Cottons ç
Cotton and linen items with this care symbol are not
sensitive to machine washing or high temperatures.
The COTTONS/LINEN (light blue) programme is suitable for such items.
Linen èë
Cotton and linen items with this care symbol are not
sensitive to machine washing. The COTTONS/LINEN
(light blue) programme is suitable for this type of
washing.
Easy-care items êí
Materials such as fine cotton, cotton-blend fabrics
and synthetics with these care symbols require a
gentler machine wash. The EASY-CARES (yellow)
programme is suitable for such items.
Wool, silk and especially sensitive items
9ìï
Fabrics such as wool, wool blends and silk with
these care symbols are particularly sensitive to
machine washing. The Í WOOL (black) programme
is suitable for such fabrics.
Important: Items with the care symbol ñ (Do not
wash!) must not be washed in washing machines.
12
Page 13
Detergents and conditioners
Which detergent and conditioner?
Only use detergents and conditioners that are suitable for use in washing machines. Always follow the
manufacturer’s recommendations.
How much detergent and
conditioner?
The amount of detergent or conditioner to be used is
dependent on:
• the degree of soiling of the washing
• the hardness of the tap water
• the load size.
Water softener
Water softener should be used if the water hardess is
medium to hard (from hardness range II). Please take
note of the manufacturer’s instructions. Then use the
Water hardness specifications
Hardness range
Water hardness in °dH
(German degree of hardness)
2
same amount of detergent as for hardness range I
(= soft). Your competent water works will provide you
with information about local water hardness.
If the detergent manufacturer makes no recommendations concerning the amount of
detergent or conditioner to be used for a
minimum load, for a half-load use a third
less, and for a very small load use only the
half of the amount of detergent that is recommended for a full load.
Please follow the instructions for use and
dosage provided by the detergent and conditioner manufacturer.
Water hardness in mmol / l
(millimol per litre)
I – soft 0 - 7 up to 1.3
II – medium 7 - 14 1,3 - 2,5
III – hard 14 - 21 2,5 - 3,8
IV – very hard over 21 over 3.8
13
Page 14

Performing a wash cycle
Brief guide
A wash cycle consists of the following steps:
1. Switch on the appliance by pressing the Q (ON/
OFF) button.
2. Set the desired wash programme:
– Set the programme and temperature using the
programme selector
– Select additional programme option(s) if
required
3. Change the spin speed/ opress RINSE HOLD as
necessary.
4. Set the
5. Open the loading door and load the washing.
6. Close the loading door.
7. Add detergent/additives.
8. Start the wash programme by pressing the
(START/PAUSE) button.
After the wash programme has finished:
Important: If the wash cycle finishes with o (Rinse
hold), perform a D (PUMP) or F (SPIN) cycle before
opening the loading door.
9. Open the door and remove the washing.
10.Turn the programme selector to Ï.
11.Switch off the appliance by pressing the Q (ON/
OFF) button.
X (DELAY TIMER) as required.
U
14
Page 15

Switching on the appliance
Switch on the appliance by pressing the Q (ON/OFF)
button.
Setting a wash programme
1. Turn the programme selector to the desired wash
programme with the desired temperature.
The expected length of the programme which has
been set is shown in the multi-display in hours
and minutes.
3
For the appropriate programme, correct
temperature and possible additional programme options for each type of item, see
“Programme tables”.
2. Select additional programme option(s) if required:
The indicator for the additional programme option
selected will illuminate.
– To change the selection, press another button.
– Press the button again to de-select.
15
Page 16

Changing the spin speed/selecting rinse hold
If required, change the spin speed for the final spin/
o select (RINSE HOLD):
Continue pressing the
play for the desired spin speed illuminates.
When this is set J the final rinse water will be
drained at the end of the programme but the washing will not be spun.
If the o (RINSE HOLD) button is pressed, the washing remains in the final rinse water and is not spun.
If you do not change the spin speed, the final spin is
automatically adjusted according to the wash programme:
– COTTONS/LINEN (light blue) 1400 rev/min
– EASY CARES (yellow) 900 rev/min
– DELICATES (black) 700 rev/min
– Í WOOL (black) 900 rev/min
– G (MINI-PROGRAMME) 700 rev/min
3
Note: The laundry remains lying in the water until you
drain or spin (see section “Ending a wash cycle”).
After 18 hours however, it is automatically drained
and pumped.
The spin speed for the intermediate spin is
dependent on the programme selected. The
intermediate spin can be totally switched off
during the programme using the
button (except in the COTTONS/LINEN (light
blue) programme). The J display will illuminate.
K (SPIN) button until the dis-
K (SPIN)
Setting the delay timer
The X (DELAY TIMER) button lets you delay the start
of a wash programme by 1 to a maximum of 24
hours.
To do this, continue pressing the X (START DELAY)
button until the desired start delay is shown in the
multi-display, approximately in the form 12h to delay
the start of the programme by 12 hours.
Press the U (START/PAUSE) button; the time
entered will be counted down by the hour.
Cancelling the delay timer
If the display is showing 24h and you press the button again, the time delay will be cancelled. 0h will
appear followed by the length of the wash programme that has been set (display in hours and minutes, e. g. 2.06).
The delay timer that has been set is also cancelled if
you turn the programme selector to Ï.
16
Page 17

Opening and closing the loading door
To open: pull the handle on the loading door.
To close: firmly push the loading door shut.
When the appliance is switched on, the loading door
indicator shows whether the loading door can be
opened:
Door indicator
illuminated no
off yes
If
– the E40 error code is flashing in the multi-display,
– and the l (MAIN WASH) and C (END) indicators
are flashing, you have attempted to start a wash
programme without properly shutting the loading
door. Should this happen, press the loading door
firmly and restart the wash programme.
Can the door be
opened?
Loading the washing
3
1. Sort and prepare the washing according to type.
2. Open the door: pull the handle on the loading
3. Load the washing.
4. Close the door firmly.
For maximum load amounts, see “Programme Tables”. For instructions on how to
correctly prepare the washing, see the
"Sorting and preparing the washing”.
door.
Important: When shutting the door, be sure that
no items are caught in it. This could result in damage to both machine and clothes.
17
Page 18

Adding detergent/ additives
3
1. Pull out the detergent drawer as far as it will go.
2. Add the detergent/conditioner.
For instructions on the use of detergents
and conditioners, please see the section
“Detergents and conditioners”.
–
Compartment for powder
detergent for main wash
(If you are using a water softener, place the
water softener in the left-hand compartment
with the main wash detergent.)
Compartment for liquid additives
–
(softeners, stiffeners, starch)
Important: Fill the compartment to no more
than the MAX indicator. Viscous liquid can be
diluted up to the MAX indicator; dissolve
starch in powder form.
Note: It is normal for a small amount of water
to remain in the liquid additives compartment,
and this does not detract from the final rinse
result.
–
Compartment for prewashdetergent/soaking agent
(only for
k/PRE WASH and A/SOAKING)
Main wash
detergent (powder
type)/water
softener
Liquid
Soaking agent
Pre-wash detergent
Soaking agent
3. Push the detergent drawer in completely.
3
If using liquid detergents/tablets:
Add the liquid detergent or tablets using the
measuring container provided by the
detergent manufacturer. Follow the
instructions on the detergent packaging.
18
Page 19

Starting a wash programme
1. Check that the tap is turned on.
2. Start a wash programme: Press the
PAUSE) button. The wash programme will start,
or will start automatically following a countdown
by the delay timer.
3
The loading door is not shut properly if after
having pressed the
ton
–the E40 error code is flashing in the multi-
display,
–
and the l (MAIN WASH) and
indicators are flashing.
In such an event, firmly press the loading
door shut and press the
button again.
U (START/PAUSE) but-
U (START/PAUSE)
if the delay timer has been set:
The time delay that has been set begins to countdown and the time remaining until the programme is
due to start (always in complete hours) is indicated in
the multi-display. During this time you can add more
washing and change or cancel the delay timer.
• Adding washing:
Press the
door will be able to be opened. Then close the
door and press the
again.
• Changing or cancelling the delay timer:
Press the
pressing the
desired time is shown; when showing the programme length (display in hours and minutes, e.g.
2.06) will start the wash programme without delay.
U (START/PAUSE) button; the loading
U (START/PAUSE) button
U (START/PAUSE) button. Continue
X (DELAY TIMER) button until the
U (START/
C (END)
Wash programme progress
Programme progress display
Before the programme starts, the steps of the programme which will be carried out are indicated in the
programme progress display. During the wash programme the current stage of the programme is
shown.
Multi-display
The expected remaining programme time is shown
(in hours and minutes) in the multi-display until the
programme is completed.
3
The remaining programme time may
increase or remain constant during the wash
programme as the programme adjusts to
various conditions while washing (e. g. type
of washing, amount of washing, recognising
out-of-balance when spinning, special rinse
cycle etc.).
19
Page 20

Changing a wash programme
Changing or cancelling a programme
1. Press the U (START/PAUSE) button.
2. Turn the programme selector to Ï. The wash pro-
gramme has been cancelled.
3. If required, set a new wash programme and press
the
U (START/PAUSE) button again.
Otherwise, turn the programme selector to D
(PUMP) or F (SPIN) and press the
PAUSE) button. (The water will be drained, or the
washing will be spun.)
3
The wash programme can be temporarily
interrupted at any time by pressing the
(START/PAUSE) button, and then re-started
by pressing the button again. The wash programme is only able to be changed after
having turned the programme selector to Ï.
U (START/
U
Selecting an additional programme
option
The additional programme options B (SHORT) or
BIO or
the programme has started if they are able to be
combined with the wash programme selected.
1. Press the
2. Press the
3. Press the
È (EXTRA RINSE) can still be selected after
U (START/PAUSE) button.
B (SHORT) or BIO or È (EXTRA
RINSE) button.
U (START/PAUSE) button again. The
wash programme will commence.
Changing the spin speed
The spin speed can be changed and o (RINSE
HOLD) can be set during the wash programme.
1. Press the
2. Change the spin speed by pressing the K (SPIN)
button, or press the
3. Press the
wash programme will commence.
U (START/PAUSE) button.
o (RINSE HOLD) button.
U (START/PAUSE) button again. The
Wash cycle complete/removing the washing
Once a wash programme has come to an end, C
(END) will illuminate in the programme progress display.
If
o (RINSE HOLD) was selected, the display above
U (START/PAUSE) button will flash.
the
1. After a rinse hold the water must first be drained:
– Either press the
(water will be drained and the washing spun in
accordance with the programme that has finished; after pressing the
button again the spin speed can be changed
even during the spin cycle),
or
– first turn the programme selector to Ï
Then turn the programme selector to D
(PUMP). Press the
(water will be drained without the spin cycle),
or
– first turn the programme selector to Ï
Then turn the programme selector to F (SPIN)
and select the desired spin speed. Press the
U (START/PAUSE) button
U (START/PAUSE)
.
U (START/PAUSE) button
.
U (START/PAUSE) button (water will be
drained and the washing spun).
After this step of the programme has come to an
end,
C (END) will illuminate in the programme
progress display.
2. Open the loading door.
As soon as the door indicator has gone out, the
loading door can be opened.
3. Remove the washing.
4. Turn the programme selector to Ï
5. Switch off the appliance by pressing the Q (ON/
OFF) button.
6. Turn off the tap.
7. After the wash, slightly pull out the detergent
drawer to allow it to dry. Leave the loading door
slightly open to allow the inside of the washing
machine to air.
Important: If the washing machine will not be used
for a longer period of time: Turn off the tap and disconnect the washing machine from the mains.
.
20
Page 21

Programme tables
Washing
The tables do not show all the possible settings, only those most likely to be selected for everyday purposes.
1
Type of washing,
(dry weight)
max. load
(dry weight)
)
2
)
Control knob
Temperature [in °C]
possible
programmeoptions
Energy saving programme:
Cottons çè
Energy saving programme:
Easy-cares í
Cottons/linen
èë
Easy-cares
êí
5kg
2.5kg
5kg
2,5kg
2,5kg
2.5kg
COTTONS/LINEN (light blue)
E 60, E 40
EASY-CARES (yellow)
E 40
COTTONS/LINEN (light blue)
95, 60, 40
COTTONS/LINEN (light blue)
30, r (COLD)
G MINI-PROGRAMME (blue)
30
EASY-CARES (yellow)
60, 40
EASY-CARES (yellow)
30, r (COLD)
k (PRE WASH)
BIO
È (EXTRA RINSE)
k (PRE WASH)
BIO
È (EXTRA RINSE)
k (PRE WASH)
BIO
B (SHORT)
È (EXTRA RINSE)
k (PRE WASH)
B (SHORT)
È (EXTRA RINSE)
k (PRE WASH)
BIO
B (SHORT)
È (EXTRA RINSE)
k (PRE WASH)
B (SHORT)
È (EXTRA RINSE)
2,5kg
Delicates
ì
Wool/handwash
9ìï
1) The load amount inquiry operates in accordance with the EN 60456 standard load.
2) A 10 litre bucket holds around 2.5 kg of dry clothes (cotton).
2,5in kg
(or 15-20m
curtains)
2kg
G MINI-PROGRAMME (blue)
30
DELICATES (black)
2
40, 30
Í WOOL (black)
40, 30, r (COLD)
k (PRE WASH)
B (SHORT)
È (EXTRA RINSE)
21
Page 22

Separate soaking
Type of washi n g
Cottons/linen 5kg
Delicates 2,5kg
max. load
(dry weight)
Control knob
A (SOAKING)Easy-cares 2,5kg
Separate rinse cycle
Type of washi n g
Cottons/linen 5kg
1)
Delicates
1) Reduce the spin speed to 700 rev/min or less.
1)
max. load
(dry weight)
2,5in kg
2,5kg
Control knob
B (RINSING)Easy-cares
Separate conditioning/ starching/impregnating
Type of washi n g
Cottons/linen 5kg
1)
Delicates
1) Reduce the spin speed to 700 rev/min or less.
1)
max. load
(Dryweight)
2,5in kg
2,5kg
Separate spinning
Type of washi n g
Cottons/linen 5kg
Easy-cares
Delicates
Wool/handwashing
1) Reduce the spin speed to 700 rev/min or less
1)
1)
1)
max. load
(dry weight)
2,5in kg
2,5kg
2kg
Control knob
C (STARCHING)Easy-cares
Programmwähler
F (SPINNING)
22
Page 23

Cleaning and care
Cleaning the control panel
Important: Do not use furniture cleaner or aggres-
sive cleaning agents to clean the panels and control
elements.
Wipe control panels with a damp cloth. Use warm
water to do this.
Cleaning the detergent drawer
From time to time the detergent drawer should be
cleaned.
1. Pull out the detergent drawer as far as it will go.
2. Remove the detergent drawer by giving it a strong
tug.
3. Remove the softener insert from the centre compartment.
4. Wash the softener insert under running water.
5. Clean the additives compartments with warm
water from the back to the front. For best results
use a bottle brush.
6. Place the softener insert in as far as it will go, so
that it is firmly in position.
7. Clean the washing machine’s entire additives
compartment, including in particular the nozzles
on the upper side of the additives chamber, with a
brush.
8. Place the detergent drawer in its guide rails and
push it in.
23
Page 24

Cleaning the wash drum
The wash drum is made of stainless steel. Oxidising
foreign substances in the wash or in the tap water
can cause rust to accumulate in the drum.
Important: Do not use acidic decalcifiers, chloric or
ferrous scrubbing agent or steel wool to clean the
stainless steel drum. Our Customer Service has suitable cleaning agents in store.
Remove any rust which has accumulated in the drum
using a stainless steel cleaning agent.
Cleaning the loading door/rubber collar
Regularly check whether there are deposits or foreign substances in the rubber collar behind the loading door or on the door’s glass window, and if so,
remove them.
24
Page 25

What to do if...
Remedying a malfunction
In the event of a malfunction, try to rectify the problem yourself with the aid of the instructions provided
here. If you request a visit from Customer Service to
remedy one of the malfunctions listed here, or to rectify an error made when using the appliance, the
Customer Service engineer’s visit will not be free of
charge, even during the warranty period.
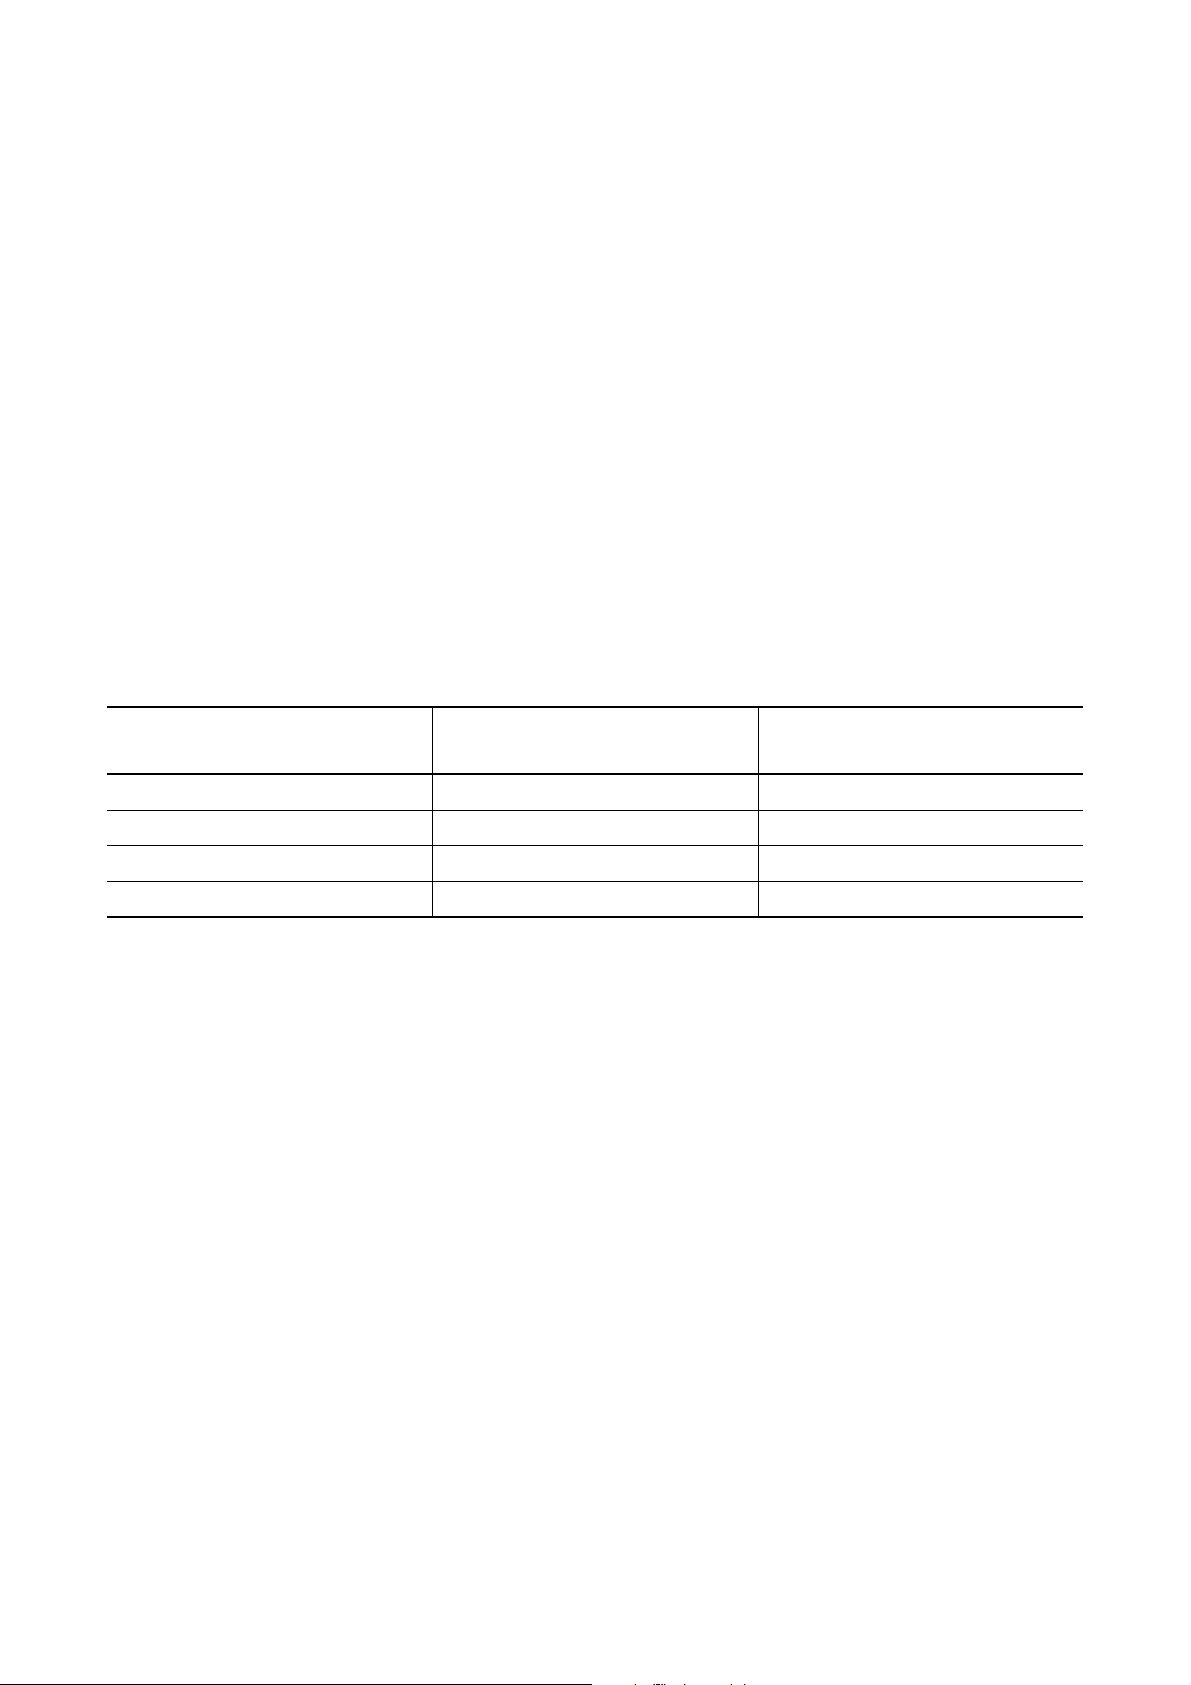
• If you press a button and “
multi-display, the selected function is not able to
be combined with the programme that has been
set.
• If the error code E10, E20 or E40 is shown in the
multi-display, you may be able to remedy the
error yourself (see the following malfunction
chart). After remedying the error, press the
(START/PAUSE) button.
• With all other displayed faults (E plus number or
letter): switch appliance off and on again. Reset
the wash programme and press the START/
PAUSE button.
If the fault code is displayed again, please contact
the Customer Service department quoting the fault
code.
Err” flashes in the
U
Problem Possible cause Remedy
The washing machine does
not work.
The loading door cannot be
closed.
E40 error code is flash-
The
ing in the multi-display. The
l (MAIN WASH),
and
U (START/PAUSE) indi-
cators are flashing.
The
E10 error code is flash-
ing in the multi-display. The
C (END)
o (RINSE HOLD), C (END)
U (START/PAUSE) indi-
and
cators are flashing. Water is
not entering the appliance.
The power plug is not connected. Connect the plug to a power outlet.
A domestic fuse has tripped. Replace the fuse.
The loading door is not closed properly.
U (START/PAUSE) was not
The
pressed for long enough.
The child safety device is engaged.
The loading door is not closed properly.
The tap is turned off. Turn on the tap. Restart the programme.
The filter in the threaded inlet hose fitting is clogged.
Tap is furred with limescale or faulty.
Close the loading door; the catch must
audibly latch.
Press and hold the U (START/ PAUSE)
button until the programme starts.
Disengage the child safety device (see
section “Child safety device”).
Close the loading door properly; there
should be an audible click.
Restart the programme.
Switch off the appliance. Turn off the
tap. Disconnect the power plug.
Unscrew the hose from the tap, remove
the filter and clean it under running
water.
Check the tap and have it repaired if
necessary.
25
Page 26

Problem Possible cause Remedy
When a button is pressed
“
Err” flashes in the multi-
display.
The washing machine
vibrates when operating or
is not stable.
The main wash water is producing considerable foam.
The selected function cannot be
combined with the programme that
has been set.
The height-adjustable feet have not
been set correctly.
The transportation lock has not been
removed.
There is very little washing in the
drum (e.g. only one bathrobe).
Water was not able to be drained
completely before spinning, because
the outlet hose is kinked
or
the drain pump is clogged.
Too much detergent has probably
been used
The threaded inlet hose fitting is leaking.
The outlet hose is leaking.
Select another function.
Adjust the feet as described in the installation and connection instructions.
Remove the transportation lock as
described in the installation and connection instructions.
Operation is not affected by this.
Check the positioning of the outlet hose
and even out any kinks if necessary or
clean the drain pump and remove any
foreign matter that may be located in the
drain pump housing.
Follow the manufacturer’s instructions
when adding detergent.
Screw the inlet hose on tightly.
Check the outlet hose and replace if
necessary.
Water is running out from
under the washing machine.
Softener is not being rinsed
in, and the æ compartment
for additives is full of water.
The washing has not been
spun as dry as usual.
The
E20 error code is flash-
ing in the multi-display
Á (RINSE) and C (END) indi-
cators are flashing.
The water is not being
drained out.
. The
The drain pump cover is not closed
properly.
Washing is caught in the loading
door.
The emergency emptying hose is not
closed properly or is leaking.
The softener insert has not been correctly set into the additive compartment or is clogged.
The washing was not able to be distributed evenly in the drum prior to
spinning.
The outlet hose is kinked. Straighten the hose.
The maximum pump height (outlet
height 1m from the surface on which
the washing machine has been
installed) has been exceeded.
The drain pump is clogged.
Close the cover properly.
Cancel the programme and free the
washing from the loading door. Re-start
the programme.
Cap the emergency emptying hose
properly (see section “Carrying out an
emergency emptying procedure”). If the
emergency emptying hose is leaking,
call Customer Service.
Clean the detergent drawer, set the softener insert firmly in place (see section
“Cleaning and care”).
Always load the drum as full as possible
with a combination of large and small
items.
Contact Customer Service, who will be
able to provide an adapter kit for pump
lifts greater than 1m as a special accessory.
Switch off the appliance and disconnect
the power plug, clean the drain pump
(see section “Cleaning the drain pump”).
26
For siphon connections: The siphon
is blocked.
Clean the siphon.
Page 27

Problem Possible cause Remedy
The Î (ALARM) indicator is
flashing.
The loading door cannot be
opened when the washing
machine is switched on.
Power failure during a wash
programme. (All indicators
have gone out).
The wash water cannot be drained
completely because the outlet hose is
kinked or clogged or the water outlet
is blocked.
The loading door has been barred
due to a high water level or high temperature (the loading door indicator is
illuminated).
Could be due to a power cut-out by
the energy supplier.
(For reasons related to safety, the
loading door remains blocked for
approx. 4 to 10 minutes.)
Switch off the washing machine and disconnect the power plug. Check the
water outlet and clean if necessary.
Wait until the loading door indicator has
gone out.
If you still need to open the loading door:
Turn the programme knob to Ï.
Turn the programme knob to D
(PUMP).Press the
button.
After the water has been drained, the
door can be opened.
The programme will continue when the
power failure has ended.
If you would like to remove the washing
during the power failure:
Turn the programme knob to Ï.
Carry out an emergency emptying procedure (see section “Carrying out emergency emptying”).
After approx. 4 to 10 minutes the loading
door can be opened by pulling on the
handle.
U (START/PAUSE)
Detergent residue is accumulating in the detergent
drawer.
The rinse water is cloudy.
The tap is not fully turned on. Turn the tap on fully.
The filter in the threaded inlet hose fitting is clogged at the tap or at the
appliance.
The probable cause is a detergent
with a high silicate content.
Turn off the tap. Unscrew the inflow hose
from the tap and the appliance and clean
the filter.
This has no negative influence on the
wash result; perhaps use a liquid detergent.
27
Page 28

If the wash result is not satisfactory
If the washing is grey and lime has accumulated in the drum
• Too little detergent was used.
• An incorrect detergent was used.
• Individual stains were not pre-treated.
• The programme or temperature were not set
properly.
• When using multi-part a detergent the individual
components were not used in the right ratio.
If there are grey marks on the washing
after it has been washed
• Items that were soiled with ointments, fats or oils
were washed using too little detergent.
• The wash temperature used was too low.
• A common cause is that conditioner – in particu-
lar the type in concentrated form - has come in
contact with the washing. Wash out such marks
as soon as possible and exercise care when
using the said conditioner.
If foam can still be seen following the
final rinse
• Modern detergents can cause foam to be created
even during the final rinse. In spite of this, the
washing has been sufficiently rinsed.
If there is white residue on the washing
• What can be seen here are insoluble substances
which modern detergents contain. They are not
the result of insufficient rinsing.
Shake or brush off the washing. Perhaps you
could turn the items inside-out prior to washing
them. Check your selection of detergent and perhaps use liquid detergent instead.
28
Page 29

Performing an emergency emptying procedure
• If the washing machine is not draining the wash
water, an emergency emptying procedure must
be carried out.
• If the washing machine is located in a room that is
at risk of frost, in the event that a risk of frost
exists an emergency emptying procedure must
not be carried out. In addition: Unscrew the inflow
hose from the tap and lay it on the floor; empty
the outlet hose.
1
1. Place a flat collecting vessel at the ready to catch
2. Open the flap located on the right of the base
Warning: Prior to performing an emergency
emptying procedure, switch off the washing
machine and disconnect the power plug.
Caution: The wash water which flows out of
the emergency emptying hose can be hot.
The risk of scalding exists. Before carrying
out an emergency emptying procedure, first
allow the wash water to cool down.
the outflowing wash water.
panel downwards and remove it.
3. Remove the emergency emptying hose from its
retainer.
4. Place the collecting vessel underneath.
5. Detach the emergency emptying hose’s plug by
turning it in an anti-clockwise direction and
remove it.
The wash water will flow out. Depending on the
amount of wash water it may be necessary to
empty the collecting vessel a number of times. To
do this, cap the emergency emptying hose again
at intervals using the plug.
When the wash water has completely
flowed out:
6. Insert the plug into the emergency emptying hose
and turn it in a clockwise direction until it is firmly
in place.
7. Replace the emergency emptying hose into the
retainer.
8. Place the flap into the base panel and close it.
29
Page 30

Cleaning the drain pump
The drain pump is maintenance-free. Opening the
cover of the drain pump is required only in the event
of a malfunction when no more water is being
pumped out, e.g. if the pump wheel is blocked.
Before loading the machine, please always ensure
that there are no foreign objects present in the pockets or in between the items to be washed. Paper
clips, nails etc. which may find their way into the
washing machine along with the washing will remain
in the drain pump housing (foreign objects remain in
the pump wheel as protection).
To restart the drain pump when it is blocked, please
proceed as follows:
1
1. First carry out an emergency emptying procedure
2. Place a cloth on the floor in front of the cover of
3. Screw off the lid of the drain pump in an anti-
Warning: Prior to cleaning the drain pump,
switch off the washing machine and disconnect the power plug.
(see section “What to do if .../performing an
emergency emptying procedure”).
the drain pump. Residual water may run out.
clockwise direction and remove it.
4. Remove any foreign objects from the drain pump
housing.
5. Replace the cover. Laterally insert the webs on
the cover into the guide slots and screw on the
cover in a clockwise direction.
6. Cap the emergency emptying hose and place it in
the retainer.
7. Close the flap.
30
Page 31

Child safety device
If the child safety device has been activated the
loading door cannot be shut and no wash programme can be started.
Activating the child safety device:
Using a coin, turn the knob (on the inside of the loading door) clockwise as far as it will go.
1
Warning: After being activated the knob
must not be countersunk, otherwise the
child safety device has not been activated
properly. The knob must stick up as in the
illustration.
Deactivating the child safety device:
Using a coin, turn the knob anti-clockwise as far as it
will go.
31
Page 32

Installation and connection instructions
Technical data /dimensions
Height adjustability about +10/-6 mm
Load (depending on programme) max. 5 kg
Area of use Household
Drum spin speed see Rating Plate
Water pressure 1-10bar
(=10–100N/cm
=0.1–1.0MPa)
2
(Measurements in mm)
Safety information concerning installation
• Do not tip the washing machine onto its front nor
onto its right side (looking at it front-on). Electrical
components could become wet as a result.
• Check the washing machine for damages that
may have occurred during transit. Under no circumstances can you connect a damaged appliance to the mains. In the event of damage to the
appliance contact your supplier.
• Ensure that all parts of the transportation lock
have been removed and that the appliance’s
splash guard has been fixed; see “Removing the
transportation lock”. Otherwise damage my be
sustained by the appliance or adjoining units during spinning.
• Always insert the power plug into shock-proof
power points that have been installed according
to regulations.
• In the case of hard-wiring: Hard-wiring to the
mains may only be carried out by an authorised
technician.
• Prior to using the appliance ensure that the mains
voltage and current rating at the site of installation
match the nominal voltage and current rating
stated on the rating plate. The required fuse protection is also to be found on the rating plate.
• If work needs to be carried out on the water
installations so that the washing machine can be
properly connected to the water supply, this work
must be carried out by an authorised installation
technician.
• If work needs to be carried out on the electricity
network so that the washing machine can be
properly connected to the electricity supply, this
work must be carried out by an authorised electrician.
• The mains supply line may only be replaced by
Customer Service or by an authorised technician.
32
Page 33

Installing the washing machine
Transporting the appliance
• Do not lay the washing machine on its front nor
on its right side (looking at it front-on). Otherwise
electrical components could become wet.
• Never transport the appliance without using
transportation locks. Do not remove the transportation locks prior to arrival at the site at which the
appliance is to be installed. Transporting the
appliance without the use of transportation locks
can cause damage to the appliance.
• Never lift the appliance by the open loading door
nor by the base.
• When transporting the washing machine using a
handcart: place the handcart on the side of the
appliance only.
Removing the transportation lock
Important: Be sure to remove the transportation
lock before using the appliance. Carefully store all
the parts belonging to the transportation lock for
possible future use when transporting the appliance
(such as moving house).
1. Open the two hose retainers located at the rear of
the appliance and remove the hoses and electrical cord.
2. Pull the two hose retainers off the appliance by
giving them a strong tug.
33
Page 34

3
3. Remove the D screw incl. pressure spring using
4. Cap the hole using the C sealing cap.
5. Unscrew two E screws using the special key A.
6. Unscrew four F screws using the special key A.
7. Remove the G transport bars.
8. Screw the four F screws in again.
9. Cap the two large holes using the B sealing caps.
A special key A and sealing caps B
(2 pieces) and C (1 piece) are included with
the washing machine.
the special key A.
Important: Press the sealing cap in strongly
enough so that it clicks into the rear wall (protects
the appliance interior from sprayed water).
Important: Press the sealing caps in strongly
enough so that they click into the rear wall (protects the appliance interior from sprayed water).
Preparing the location where the washing machine is to
be installed
• The surface on which the washing machine is to
be installed must be clean and dry and free from
floor polish residue and other greasy coatings so
that the appliance does not slip. Do not use lubricants to assist you in sliding the appliance.
• Installing the appliance on deep pile carpeting or
floor coverings with a soft foam backing is not
recommended as the stability of the appliance
cannot be guaranteed as a result.
• If the surface on which the appliance is to be
installed is covered with small tiles, place commercially available small rubber mats under the
stands.
• Never place wood, cardboard or similar materials
to compensate for small unevennesses in the
floor; always adjust the screw feet instead.
• If installing the washing machine right next to a
gas or coal cooker is unavoidable due to space
restrictions: Insert a heat-insulating plate (85 x 57
cm) between the range and the washing machine;
the side of the plate that is facing the range is to
be covered with aluminium foil.
• The washing machine must not be installed in a
room which is at risk of frosting up. Frost damage
may result.
• The water inlet and outlet hose must not be
kinked or crushed.
34
Page 35

Installing the appliance on a concrete base
When installing the appliance on a concrete base,
mounting plates in which the washing machine is
positioned must be fitted for reasons related to
safety. The mounting plates are available from Customer Service.
Installing the appliance on floors
which oscillate
When installing the appliance on oscillating floors, in
particular wooden beam floors with deal boards,
screw a water-resistant wooden slab of at least 15
mm thickness onto at least two of the floor beams. If
possible, place the appliance in a corner of the room
as it is here that the wooden floor is clamped tautest
and where therefore the tendency that resonance
vibrations will occur is lowest.
Compensating for floor unevenness
The four screw feet can be used to compensate for
unevenness in the floor and adjust the height. The
height can be adjusted within a range of +10 ... -6
mm.
To do this, use the accompanying special key that
was used to remove the transportation lock.
1. Slide the special key firmly onto the screw foot’s
Allen screw as far as it will go.
2. Adjust the screw feet such that the appliance is
standing level and is stable. The appliance must
not wobble when a load is placed on one of its
corners.
3. Check the positioning of the appliance using a
spirit level if required.
Important: Never place wood, cardboard or similar materials to compensate for small unevenness
in the floor; always adjust the screw feet instead.
35
Page 36

Connecting the appliance to the electricity
supply
Specifications relating to the mains voltage, type of
electricity and the required fuse protection can be
found on the rating plate. The rating plate is located
behind the loading door.
;
This appliance complies with the following
EU directives:
– the “Low vlotage directive”
73/23/EEC with amendments
– the “EMC Directive”
73/23/EEC with amendments
Connecting the appliance to the water
suppy
3
Important:
– Appliances meant to be connected to the cold
– When connecting the appliance use only new
The washing machine has been fitted with
safety devices that prevent drinking water
from being fouled by a reflow of dirty water
and which comply with the national legal
regulations of the water boards (e.g. for Germany: DVGW Directives). Additional protection measures are therefore not necessary
when installing the appliance.
water supply must not be connected to the hot
water supply!
hose kits!
Permitted water pressure
The water pressure must be 1 bar (= 10N/cm2 =
0,1 MPa), or a maximum of 10 bar (= 100N/cm
=1MPa).
• For water pressure greater than 10 bar: Use pressure reduction valve.
• For water pressure less than 1 bar: Unscrew the
inflow valve from magnetic inlet valve (appliance
end) and remove the flow regulator (in order to do
this, remove the filter using needle-nosed pliers
and remove the rubber disk that is located behind
it). Replace the filter.
36
2
Page 37

Water inflow
A pressure hose of 1.35m in length is supplied.
If a longer inlet hose is required, only the complete
hose kit with attached threaded hose fitting which is
supplied by our Customer Service and which has
been approved by the German Electricians Association may be used.
– For washing machines which do not have Aqua
Control, hose kits of 2.2m, 3.5m and 5m in length
are available.
– For washing machines which have Aqua Control,
hose kits of 2.0m, 2.9m and 3.9m in length are
available.
Important: Never add extra units in order to increase
the length of a hose.
3
1. Connect the hose to the machine using the 90°
Important:
– Do not place the inlet hose such that it is running
– Tighten the threaded hose fitting by hand only.
2. Connect the hose with the straight connection to
3. Check that the connection is leak-proof by slowly
Gaskets are located either inside the
threaded hose fitting’s plastic nuts or in the
accompanying package. Do not use any
other type of gasket.
offset connection.
vertically downwards; turn it left or right as in the
illustration.
a tap with a screw thread of R 3/4 (inches).
Important: Tighten the threaded hose fitting by
hand only.
turning on the tap prior to using the washing
machine.
37
Page 38

Water drainage
The drain hose can be either connected to a siphon
or hung in a basin, sink or bathtub.
Only original hoses may be used to extend the hose
(max. 3 m laid on the ground and then up to 80 cm
high). Customer Service provides drain hoses of 2.7
m and 4m in length.
Important: Lay the drain hose so that it is absolutely
free of kinks.
Draining water through a siphon
The spout at the end of the drain hose is suitable for
all the usual types of siphon.
Secure the spout/siphon connection point with a
hose clip.
Draining water into a basin
Important:
– Small basins are not suitable for draining water.
Water could overflow if a small basin is used.
– The end of the drain hose must not dip into the
water which has been pumped out. Water may
otherwise be sucked back into the appliance.
– To hang the drain hose into a wash basin or a
bath tub, the drain hose must be secured to avoid
slipping by using the accompanying attachable
elbow. The rebound strength of the out-flowing
water can otherwise push the hose out of the
basin.
Use a cord to secure the elbow to the tap or the wall.
Pump lifts of over 1m
Each washing machine has a drain pump which is
used to pump out wash/rinse water; this drain pump
conveys liquids through the drain hose up to a height
of 1m, calculated from the surface on which the
machine is placed.
For pump lifts of over 1m, please contact Customer
Service.
38
Page 39

Installing the appliance underneath kitchen
worktops
Important:
• The tap and power plug must remain accessible
even after the appliance is in place.
• If the appliance is hard-wired to the mains supply,
then it must be safely isolated from the mains at
the time of installation with an all-pole (N,L1)
bearing separator (e.g. supply terminal circuit
breaker), which has a contact separation of at
least >3 mm.
• The connections to electricity and water must be
located to the side of the appliance. There is no
room for this at the rear.
Kitchens with a worktop height of 85 cm
After removing the washing machine’s worktop, the
appliance can be installed underneath completely
closed and end-to-end kitchen worktops with a
worktop height of 85 cm. This reduces the height of
the appliance by approx. 82cm.
An installation kit is required to install the washing
machine under a worktop. The installation kit can be
obtained from Customer Service.
1
Warning: When installing the washing
machine under a worktop after having
removed the appliance’s own worktop, the
appliance must be protected from spraying
water by the following measures:
– a cover plate is to be attached to the top
of the appliance and earthed using special
screws, and
– a joint sealing strip is to be affixed to the
upper front edge of the appliance.
Only then may the appliance be connected
to the electricity supply and operated.
The cover plate, special screws and joint
sealing strip are contained in the installation
kit.
Required dimensions of recess (minimum measurements in mm)
600min
820min
600min
Kitchens with a worktop height of 90 cm or higher
1
Warning: When installing the washing
machine in kitchens with a worktop height of
90 cm or higher, the appliance’s own worktop must remain on in order to protect the
washing machine from spraying water. Otherwise sufficient protection from spraying
water cannot be guaranteed.
When installing the washing machine in kitchens with
a worktop height of 90 cm or higher, insert the washing machine in the recess without removing the
appliance’s own worktop.
39
Page 40

404142
Page 41

Page 42

Index
A
Additives . . . . . . . . . . . . . . . . . . . . . . . . . . . . . . . 18
Alarm . . . . . . . . . . . . . . . . . . . . . . . . . . . . . . . . . . 27
B
Bio . . . . . . . . . . . . . . . . . . . . . . . . . . . 10, 15, 20, 21
C
Cancelling a programme . . . . . . . . . . . . . . . . . . . 20
Changing a programme . . . . . . . . . . . . . . . . . . . . 20
Child safety device . . . . . . . . . . . . . . . . . . . . . 25, 31
Conditioner . . . . . . . . . . . . . . . . . . . . . . . . . . . . . . 6
Conditioners . . . . . . . . . . . . . . . . . . . . . 7, 13, 14, 18
Conditioning . . . . . . . . . . . . . . . . . . . . . . . . . . . 9, 22
Cotton . . . . . . . . . . . . . . . . . . . . . . . . . . . . . . . . . 12
Cottons . . . . . . . . . . . . . . . . . . . . . 8, 10, 12, 21, 22
Curtains . . . . . . . . . . . . . . . . . . . . . . . . . . . . . 12, 21
Customer Service . . . . . . . . . . . . . . . . . . 24, 25, 43
D
Delay timer . . . . . . . . . . . . . . . . . . . . . . . . . . . 16, 19
Delicates . . . . . . . . . . . . . . . . . . . . 9, 10, 12, 21, 22
Detergent . . . . . . . . . . . . . . . . . . . . . . . 7, 13, 14, 18
Detergent drawer . . . . . . . . . . . . . . . . . . . . . . . 7, 18
Drain pump . . . . . . . . . . . . . . . . . . . . . . . . . . . 7, 30
Draining . . . . . . . . . . . . . . . . . . . . . . . . . . . . . . 9, 20
Draining the water . . . . . . . . . . . . . . . . . . . . . . 9, 20
. . . . . . . . . . . . . . . . . . . . . . . . . . . . . . . . . . . . . 20
E
E (Energy saving) . . . . . . . . . . . . . . . . . . . . 8, 10, 21
Easy-cares . . . . . . . . . . . . . . . . . . . 9, 10, 12, 21, 22
Emergency emptying procedure . . . . . . . . . . . . . 29
Err (Error message) . . . . . . . . . . . . . . . . . . . . 10, 26
Extra rinse . . . . . . . . . . . . . . . . . . . . . . . . 10, 15, 21
F
Fabric softener . . . . . . . . . . . . . . . . . . . . . . . . . . . 18
H
Handwashing . . . . . . . . . . . . . . . . . . . . . . . 9, 21, 22
I
Installation kit . . . . . . . . . . . . . . . . . . . . . . . . . . . . 39
L
Linen . . . . . . . . . . . . . . . . . . . . . . . 8, 10, 12, 21, 22
Load . . . . . . . . . . . . . . . . . . . . . . . . . . . . . . . . . . . 22
Load size . . . . . . . . . . . . . . . . . . . . . . . . . . . . 11, 21
M
Mini-programme . . . . . . . . . . . . . . . . . . . . 9, 10, 21
Multi-display . . . . . . . . . . . . . . . . . . . . 8, 19, 25, 43
O
Open the door . . . . . . . . . . . . . . . . . . . . . 17, 20, 27
P
Pre wash . . . . . . . . . . . . . . . . . . . . . . . . . 10, 15, 21
Pre-wash detergent . . . . . . . . . . . . . . . . . . . . . 7, 18
Programme length . . . . . . . . . . . . . . . . . . . . . . . . 19
Programme menu . . . . . . . . . . . . . . . . . . . . . . . . . 7
Programme Progress Display . . . . . . . . . . . . . 8, 19
R
Rating plate . . . . . . . . . . . . . . . . . . . . . . . . . . 36, 43
Rinse hold . . . . . . . . . . . . . . . . . . . . . . . . . 9, 16, 20
Rinsing . . . . . . . . . . . . . . . . . . . . . . . . . . . . . . 9, 22
Risk of frost . . . . . . . . . . . . . . . . . . . . . . . . . . . 5, 29
S
Short . . . . . . . . . . . . . . . . . . . . . . . . . 10, 15, 20, 21
Silk . . . . . . . . . . . . . . . . . . . . . . . . . . . . . . . . . . . . 12
Soaking . . . . . . . . . . . . . . . . . . . . . . . . . . . . . . . . . 9
Soaking agent . . . . . . . . . . . . . . . . . . . . . . . . . 7, 18
Softener . . . . . . . . . . . . . . . . . . . . . . . . . . . . . . . . . 7
Spin . . . . . . . . . . . . . . . . . . . . . . . . . . . . . . . . 14, 16
Spinning . . . . . . . . . . . . . . . . . . . . . . . 9, 17, 20, 22
Stains . . . . . . . . . . . . . . . . . . . . . . . . . . . . . . . 6, 28
Starch . . . . . . . . . . . . . . . . . . . . . . . . . . . . . . . . . 22
Starching . . . . . . . . . . . . . . . . . . . . . . . . . . . . . . . . 9
Start delay . . . . . . . . . . . . . . . . . . . . . . . . . . . . . . . 8
W
Warranty . . . . . . . . . . . . . . . . . . . . . . . . . . . . . 5, 25
Water
hardness . . . . . . . . . . . . . . . . . . . . . . . . . . . 6, 13
softener . . . . . . . . . . . . . . . . . . . . . . . . . . . . 6, 13
Wool . . . . . . . . . . . . . . . . . . . . . . . . . . 9, 10, 12, 21
hand washable . . . . . . . . . . . . . . . . . . . 9, 21, 22
Page 43

Service
In the chapter "What to do if...“ , some faults are
listed which you can remedy yourself. Look there
first if a fault occurs. If you do not find any information there, please consult your Customer Service.
Always prepare in advance for the discussion. By
doing so you will simplify the diagnosis and the decision on whether customer service is necessary.
Note the PNC number and S. number. You will find
both on the rating plate on the inside of the door of
your washing machine.
PNC: ......................................................................
S-No.: ......................................................................
Answer as precisely as possible:
• What form does the fault take?
• Under what circumstances does the fault occur?
• Does the multi display show an error message?
When do you incur costs even during the
warranty period?
– If you could have remedied the fault yourself with
the aid of the fault table (see the section "What to
do if..."),
– If several journeys by the customer service tech-
nician are necessary because for example he did
not receive all the important information before
his visit and must collect spare parts. These multiple trips can be avoided if you prepare your
phone call as described above.
43
Page 44

822 943 710-00-130603-01 Subject to change without notice
The Electrolux Group. The world´s No.1 choice.
The Electrolux Group is the world´s largest producer of powered appliances for kitchen, cleaning and outdoor use. More than 55 million Electrolux Group products
(such as refrigerators, cookers, washing machines, vacuum cleaners, chain saws and lawn mowers) are sold each year to a value of approx. USD 14 billion in more
than 150 countries around the world.
 Loading...