

Page 1

HıtŒ / Chladniãka / Refrigerator /
Frigorífico
MÙKÖDÉSI ÉS HASZNÁLATI UTASÍTÁS
NÁVOD NA INSTALACI A POUÎITÍ
INSTALLATION AND INSTRUCTION MANUAL
LIBRO DE INSTRUCCIONES
ERC 2521
2223 266-11
CZ
GB
PT
HU
Page 2

13
OBSAH
DÛleÏitá upozornûní
. . . . . . . . . . . . . . . . . . . . . . . . . . . . . . . . . . . . . . . . . . . . . . . . . . . . . . . . . . . . . . . . . 12
Obsluha /
Kontrolní panel - âi‰tûní vnitfiku pfiístroje - POUÎITæ CHLADNIâKY - Uvedení do provozu - .
Regulace teploty - Chlazení ãerstv˘ch potravin . . . . . . . . . . . . . . . . . . . . . . . . . . . . . . . . . . . . . . . . . . . . 14
Obsluha /
Nastavitelnû poliãky - Rozmístûní poliãek vestavûn˘ch do dvefií / . . . . . . . . . . . . . . . . . . . . . .
Rady /
Rady pro pouÏití chladniãky . . . . . . . . . . . . . . . . . . . . . . . . . . . . . . . . . . . . . . . . . . . . . . . . . . . . . 15
ÚdrÏba /
Upozornûní - Odstavení pfiístroje - Pravidelné ãi‰tûní - Svûtlo . . . . . . . . . . . . . . . . . . . . . . . . . . 16
ÚdrÏba /
Odledování /
Hluãnost /
Snadno odstranitelné zdroje moÏné hluãnosti . . . . . . . . . . . . . . . . . . . 17
SluÏba zákazníkÛm a náhradní díly/ Technické vlastnosti
. . . . . . . . . . . . . . . . . . . . . . . . . . . . . . . . . . . . 18
Instalace /
Umístûní – ZaráÏky pfiepáÏek - Distanãní rozpûrky . . . . . . . . . . . . . . . . . . . . . . . . . . . . . . . . . 19
Instalace /
Zapojení do elektrické sítû . . . . . . . . . . . . . . . . . . . . . . . . . . . . . . . . . . . . . . . . . . . . . . . . . . . . 20
Instalace /
Obrácení dvefií . . . . . . . . . . . . . . . . . . . . . . . . . . . . . . . . . . . . . . . . . . . . . . . . . . . . . . . . . . . . . 21
Záruãní podnínky
. . . . . . . . . . . . . . . . . . . . . . . . . . . . . . . . . . . . . . . . . . . . . . . . . . . . . . . . . . . . . . . . . . . 22
NepouÏívejte Ïádné mechanické nástroje ani jiné
pfiedmûty ãi pfiístroje k urychlení odmraÏení,
kromû nástrojÛ doporuãen˘ch v˘robcem.
NepouÏívejte zásadnû pfii ãi‰tûní va‰eho
elektrospotfiebiãe kovové pfiedmûty, neboÈ by
mohly zpÛsobit jeho po‰kození.
Instalace
• Bûhem normální ãinnosti elektrospotfiebiãe se
kondenzátor a kompresor umístûné na zadní
stûnû silnû zahfiívají.
Z bezpeãnostních dÛvodÛ proto minimální
ventilace musí b˘t zaji‰tûna podle pfiíslu‰ného
obrázku.
Upozornûní: ventilaãní otvory je zapotfiebí
udrÏovat volnû prÛchodné.
• Je-li zafiízení pfiepravováno ve vodorovné poloze,
mÛÏe se stát, Ïe olej obsaÏen˘ v kompresoru
vyteãe do mrazícího okruhu. Pfied nov˘m
zapojením zafiízení je nutno poãkat alespoÀ dvû
hodiny, neÏ olej pfieteãe zpût do kompresoru.
DÛleÏité:
v pfiípadû, Ïe dojde k po‰kození
pfiívodové ‰ÀÛry, je nuté ji nahradit speciální
‰ÀÛrou (nebo její ãástí), kterou si mÛÏete vyÏádat
u v˘robce, nebo u jeho servisní sluÏby.
• Zafiízení obsahuje souãásti, které se zahfiívají.
VÏdy zajistûte odpovídající ventilaci kolem
pfiístroje, neboÈ následkem jejího nedostatku
mÛÏe dojít k poru‰e pfiístroje a ztrátû
uchovávan˘ch potravin. Seznamte se s
pfiíslu‰n˘mi instrukcemi.
• Zahfiívající se souãásti by nemûly b˘t zakryty. Jeli to moÏné, mûla b˘ b˘t zadní stûna zafiízení
otoãena ke stûnû.
• JestliÏe se elektrospotfiebiã pfiepravuje ve
vodorovné poloze, mÛÏe se stát, Ïe olej
obsaÏen˘ v kompresoru vyteãe do mrazícího
okruhu. Pfied uvedením elektrospotfiebiãe do
chodu je nutno poãkat alespoÀ dvû hodiny, neÏ
olej pfieteãe zpût do kompresoru.
Ochrana prostfiedí
Tento pfiístroj neobsahuje v okruhu chlazení ani v
izolaci plyny, které jsou ‰kodlivé pro ozón.
Elektrospotfiebiã se nesmí odhazovat spolu s
bûÏn˘m odpadem. Musí b˘t zaji‰tûno, Ïe nedojde k
po‰kození chladícího okruhu, hlavnû v jeho zadní
ãásti v blízkosti v˘mûníku. Potfiebné informace o
sbûrn˘ch stfiedisích poskytne odpovûdn˘ pracovník
obecní zprávy. Materiály opatfiené znaãkou se
dají recyklovat.
32
Changing the opening direction of
the door
Before carrying out any operations, remove the plug
from the power socket.
To change the opening direction of the door,
proceed as follows:
1. Remove the ventilation grill (D).
2. Unscrew the bottom hinge (E).
3. Remove the door by releasing it from the top
hinge pin (G).
4. Remove the pin then mount these on the
opposite side.
5. Remove the two plugs, to reveal the holes for the
hinge pivots, and remount them on the other
side.
6. Replace the door.
7. using a 10 mm spanner, unscrew the hinge pin
(E) and reassemble it on the opposite side of the
hinge;
8. Screw down the bottom hinge (E) on the opposite
side by using the screws previously removed.
9. Remove the plug (F) from the ventilation grill (D)
and replace it on the opposite side.
10.Re-assemble the ventilation grill (D).
11.Unscrew the handle. Refit it on the opposite side
after having pierced the plugs with a punch.
Cover the holes left open with the plugs
contained in the documentation pack.
Warning:
After having reversed the opening direction of the
doors check that all the screws are properly
tightened and that the magnetic seal adheres to the
cabinet. If the ambient temperature is cold (i.e. in
Winter), the gasket may not fit perfectly to the
cabinet. In that case, wait for the natural fitting of the
gasket or accelerate this process by heating up the
part involved with a normal hairdrier.
F
E
D
F
E
F
F
G
Page 3
14
PPOOUÎITæ CHLADNIâKY
Uvedení do provozu
ZasuÀte zástrãku do zásuvky ve zdi.
Otoãte koleãkem termostatu (B) smûrem doprava do
stfiední polohy.
Rozsvítí se kontrolka (A).
Pfieru‰ení provozu chladniãky dosáhnete otoãením
koleãka termostatu na pozici oznaãenou symbolem
«».
Regulace teploty
Teplota se nastavuje automaticky a mÛÏe b˘t
zv˘‰ena, tj. nastavena na vy‰‰í hodnoty (chladí
ménû), otoãením koleãka termostatu na niωí ãísla,
anebo sníÏena (chladí více), otoãením koleãka na
vy‰‰í ãísla.
Správná pozice v‰ak musí b˘t zvolena po zváÏení
faktorÛ, které vnitfiní teplotu v chladniãce ovlivÀují:
• teplota místnosti;
• frekvence otvírání dvefií;
• mnoÏství uchovávan˘ch potravin;
• umístûní spotfiebiãe.
Vût‰inou nejlépe vyhovuje nastavení volby na
stfiední hodnoty.
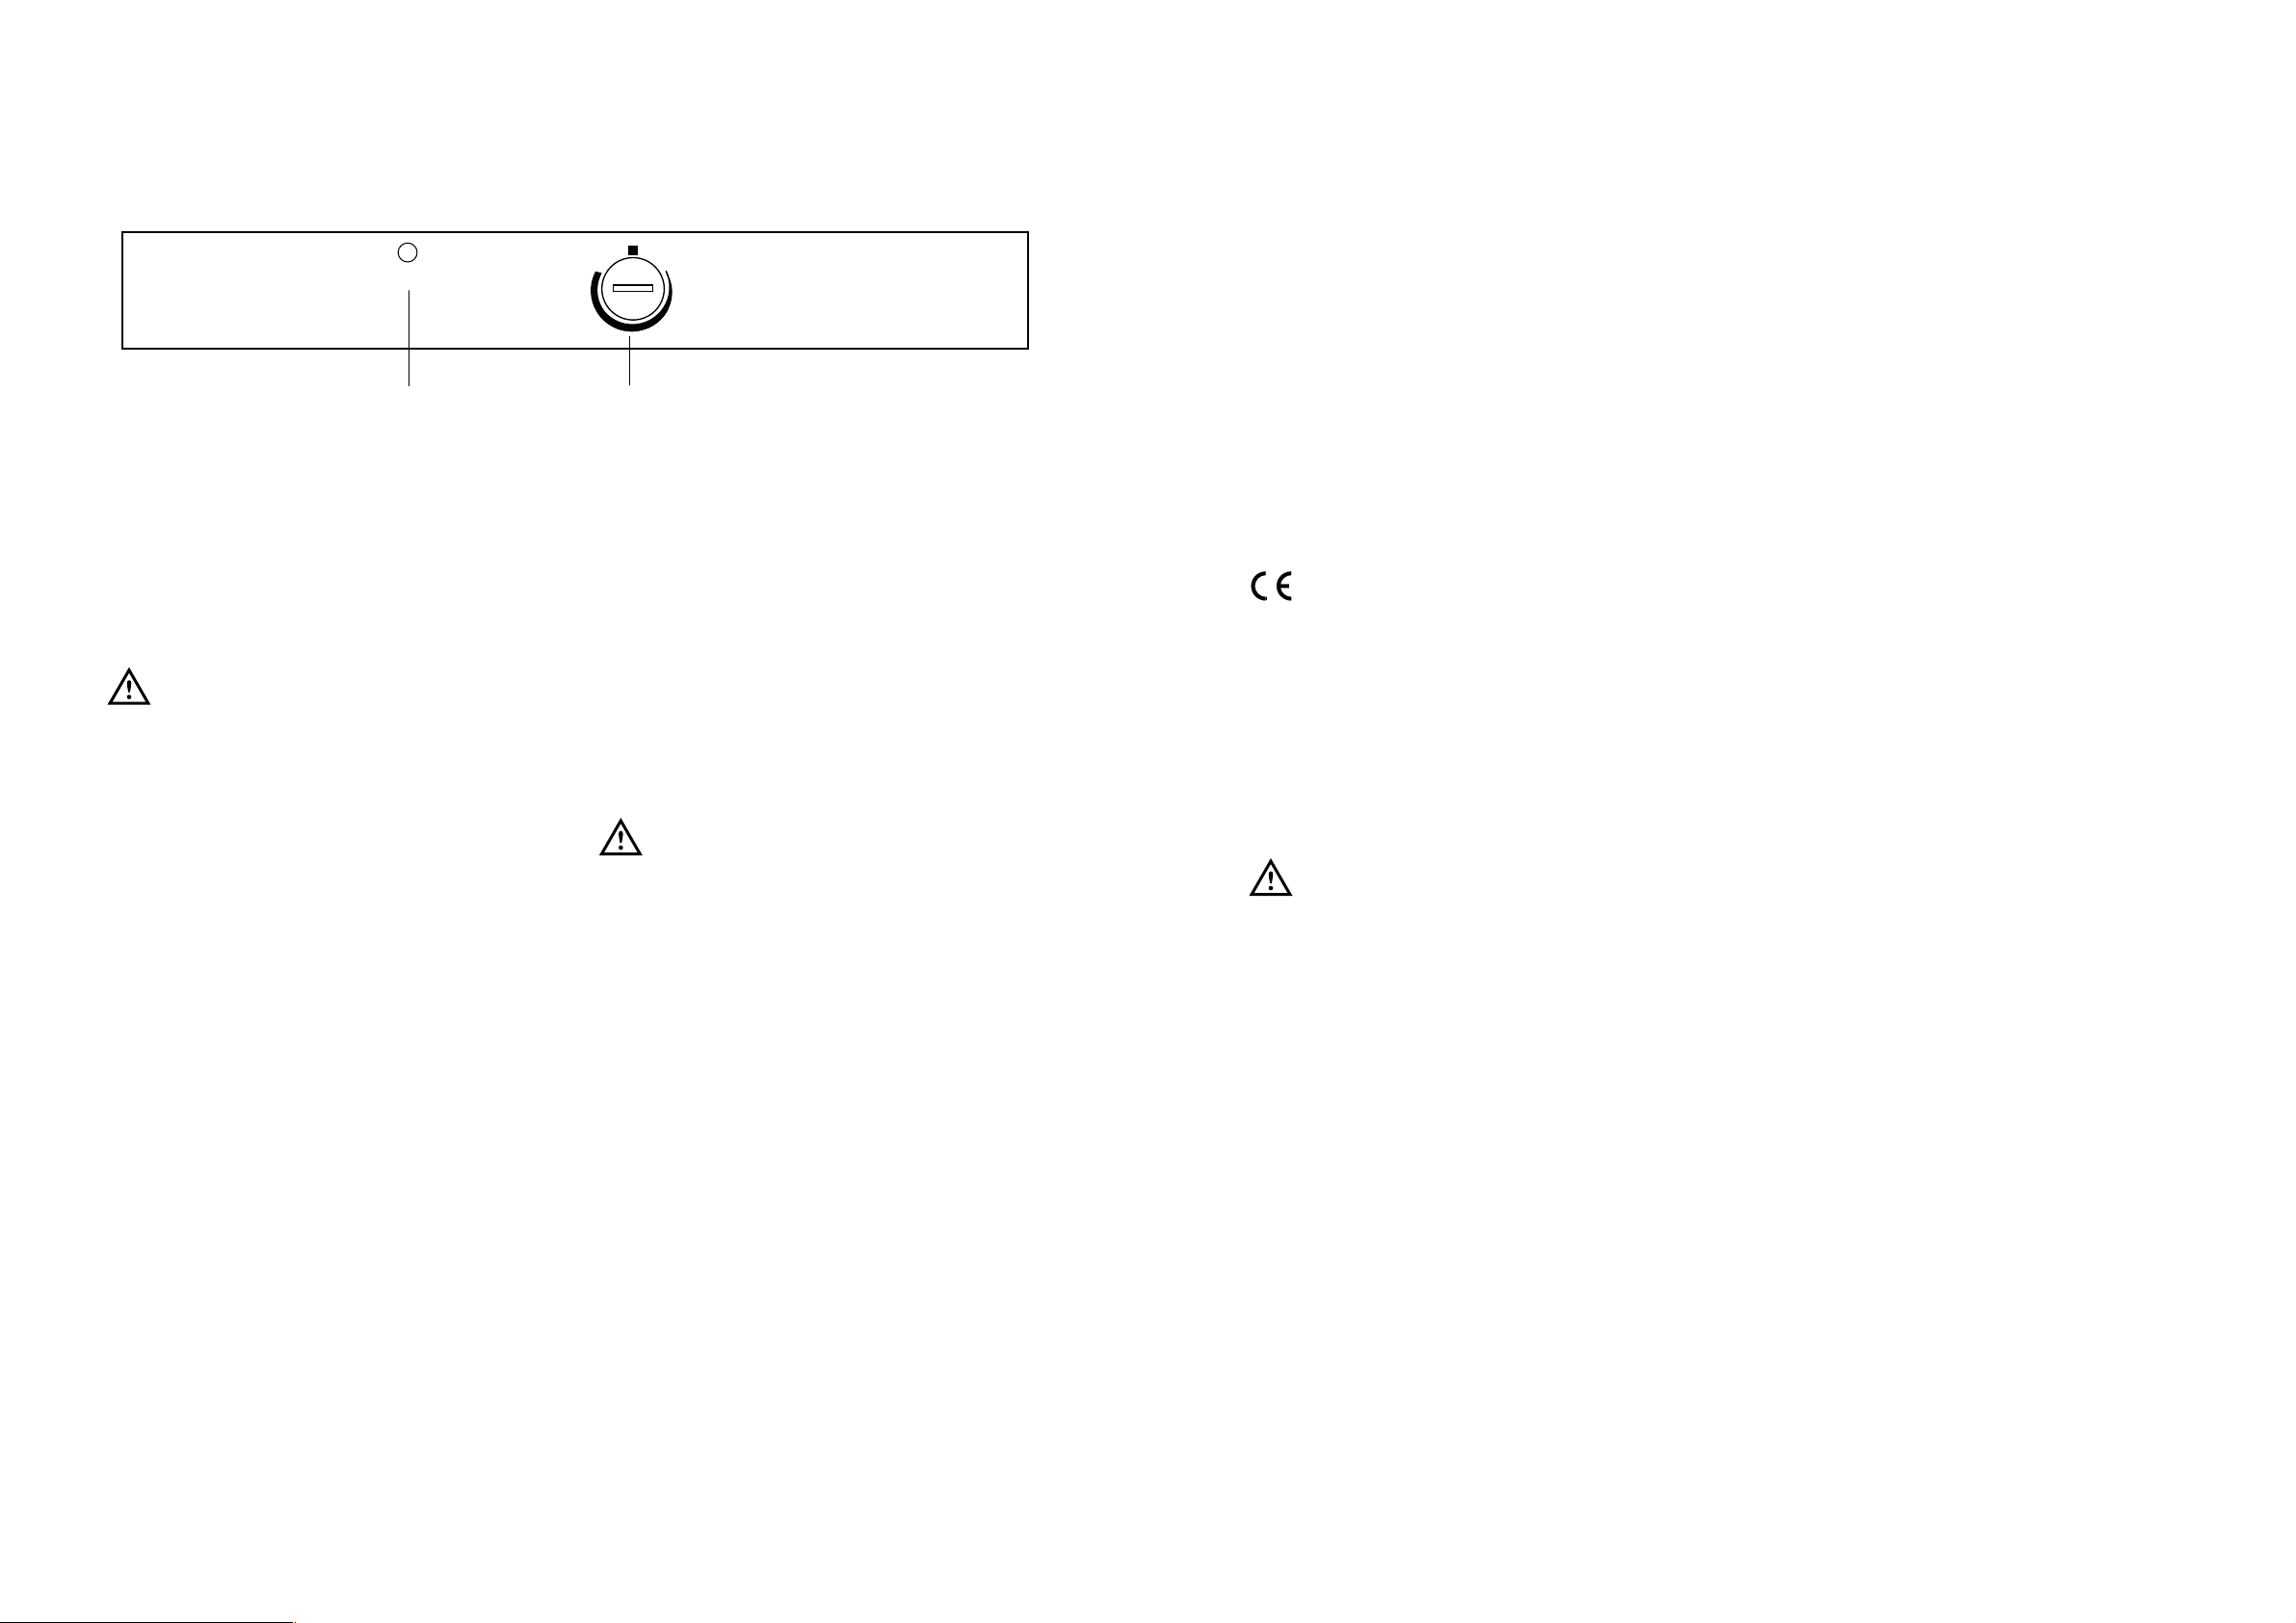
OBSLUHA
Kontrolní panel
AA.
Funkãní svûtelná kontrolka
B.
Knoflík termostatu
âi‰tûní vnitfiku pfiístroje
Pfied prvním pouÏitím vyãistûte v‰echny vnitfiní ãásti
teplou vodou s neutrálním saponátem, ãímÏ
spotfiebiã zbavíte typického zápachu nového
v˘robku. Peãlivû jej cel˘ vysu‰te.
NepouÏívejte rozpou‰tûdla nebo brusné
prá‰ky, neboÈ mohou po‰kodit nátûr.
DDÛleÏité
Je-li pokojová teplota dosti vysoká nebo je-li
spotfiebiã zcela zaplnûn a zároveÀ je nastaven na
nejniωí teploty, mÛÏe se stát, Ïe chladniãka pobûÏí
nepfietrÏitû a na zadní stûnû se vytvofií námraza. V
takovém pfiípadû bude tfieba nastavit teplotu na
ponûkud vy‰‰í hodnotu, ãímÏ umoÏníte automatické
odmraÏení námrazy a sníÏíte spotfiebu energie.
Chlazení ãerstv˘ch potravin
Zásady pro dosaÏení dobr˘ch v˘sledkÛ:
• neukládejte do chladniãky teplá jídla nebo
odpafiující se tekutiny;
• potraviny pfiikryjte nebo zabalte, zvlá‰tû jestliÏe
mají silné aroma;
• potraviny rozmisÈujte tak, aby vzduch mohl
kolem volnû proudit.
31
Electrical connection
Before plugging in, ensure that the voltage and
frequency shown on the serial number plate
correspond to your domestic power supply. Voltage
can vary by ±6% of the rated voltage.
For operation with different voltages, a suitably sized
auto-transformer must be used.
The appliance must be earthed.
The power supply cable plug is provided with a
contact for this purpose.
If the domestic power supply socket is not earthed,
connect the appliance to a separate earth in
compliance with current regulations, consulting a
specialist technician.
The Manufacturer declines all responsibility if
the above safety precautions are not observed.
This appliance complies with the following
E.E.C. Directives:
- 87/308 EEC of 2/6/87 relative to radio interference
suppression.
- 73/23 EEC of 19.2.73 (Low Voltage Directive) and
subsequent modifications;
- 89/336 EEC of 3.5.89 (Electromagnetic
Compatibility Directive) and subsequent
modifications.
Attention
It must be possible to disconnect the appliance from
the mains power supply; the plug must therefore be
easily accessible after installation.
ON
minMAX
A
B
Page 4
15
D338
Nastavitelné poliãky
Na bocích chladniãky se nachází nûkolik pfiíchytek,
na nûÏ se umistují ro‰ty do rÛzn˘ch poloh.
Rozmístûní poliãek vestavûn˘ch do dvefií
Aby bylo moÏné skladovat balené potraviny rÛzn˘ch
rozmûrÛ, mÛÏete poliãky vestavûné do dvefií
rozmístit do rÛzn˘ch v˘‰kov˘ch poloh.
Pfii tûchto úpravách postupujte takto: postupnû
vysunujte poliãku ve smûru oznaãeném ‰ipkou,
dokud se celkem neuvolní a pak ji umístûte do
poÏadované pozice.
RRAADY
Rady pro pouÏití chladniãky
UÏiteãné rady:
Masa (v‰ech druhÛ):
zabalte do polyetylénov˘ch
sáãkÛ a umístûte na sklenûnou polici nad zásuvkou
na ovoce a zeleninu.
Pro jistotu maso skladujte tímto zpÛsobem pouze
jeden aÏ dva dny.
Vafiené potraviny, studená jídla atd.:
tyto potraviny
by mûly b˘t pfiikryty a umístûny na jednotlivé ro‰ty.
Ovoce a zelenina:
tyto potraviny by mûly b˘t
oãi‰tûny a uskladnûny do pfiíslu‰né zásuvky.
Máslo a s˘ry:
by mûly b˘t umístûny do zvlá‰tních
hermetick˘ch nádob nebo zabaleny do alobalu nebo
polyethylénov˘ch sáãkÛ, aby se k nim vzduch dostal
co nejménû.
Láhve s mlékem:
mûly by b˘t uzavfieny víãkem a
uloÏeny v poliãce pro lahve ve dvefiích.
Banány, brambory, cibule a ãesnek: pokud nejsou
zabaleny, nelze je skladovat v chladniãce.
30
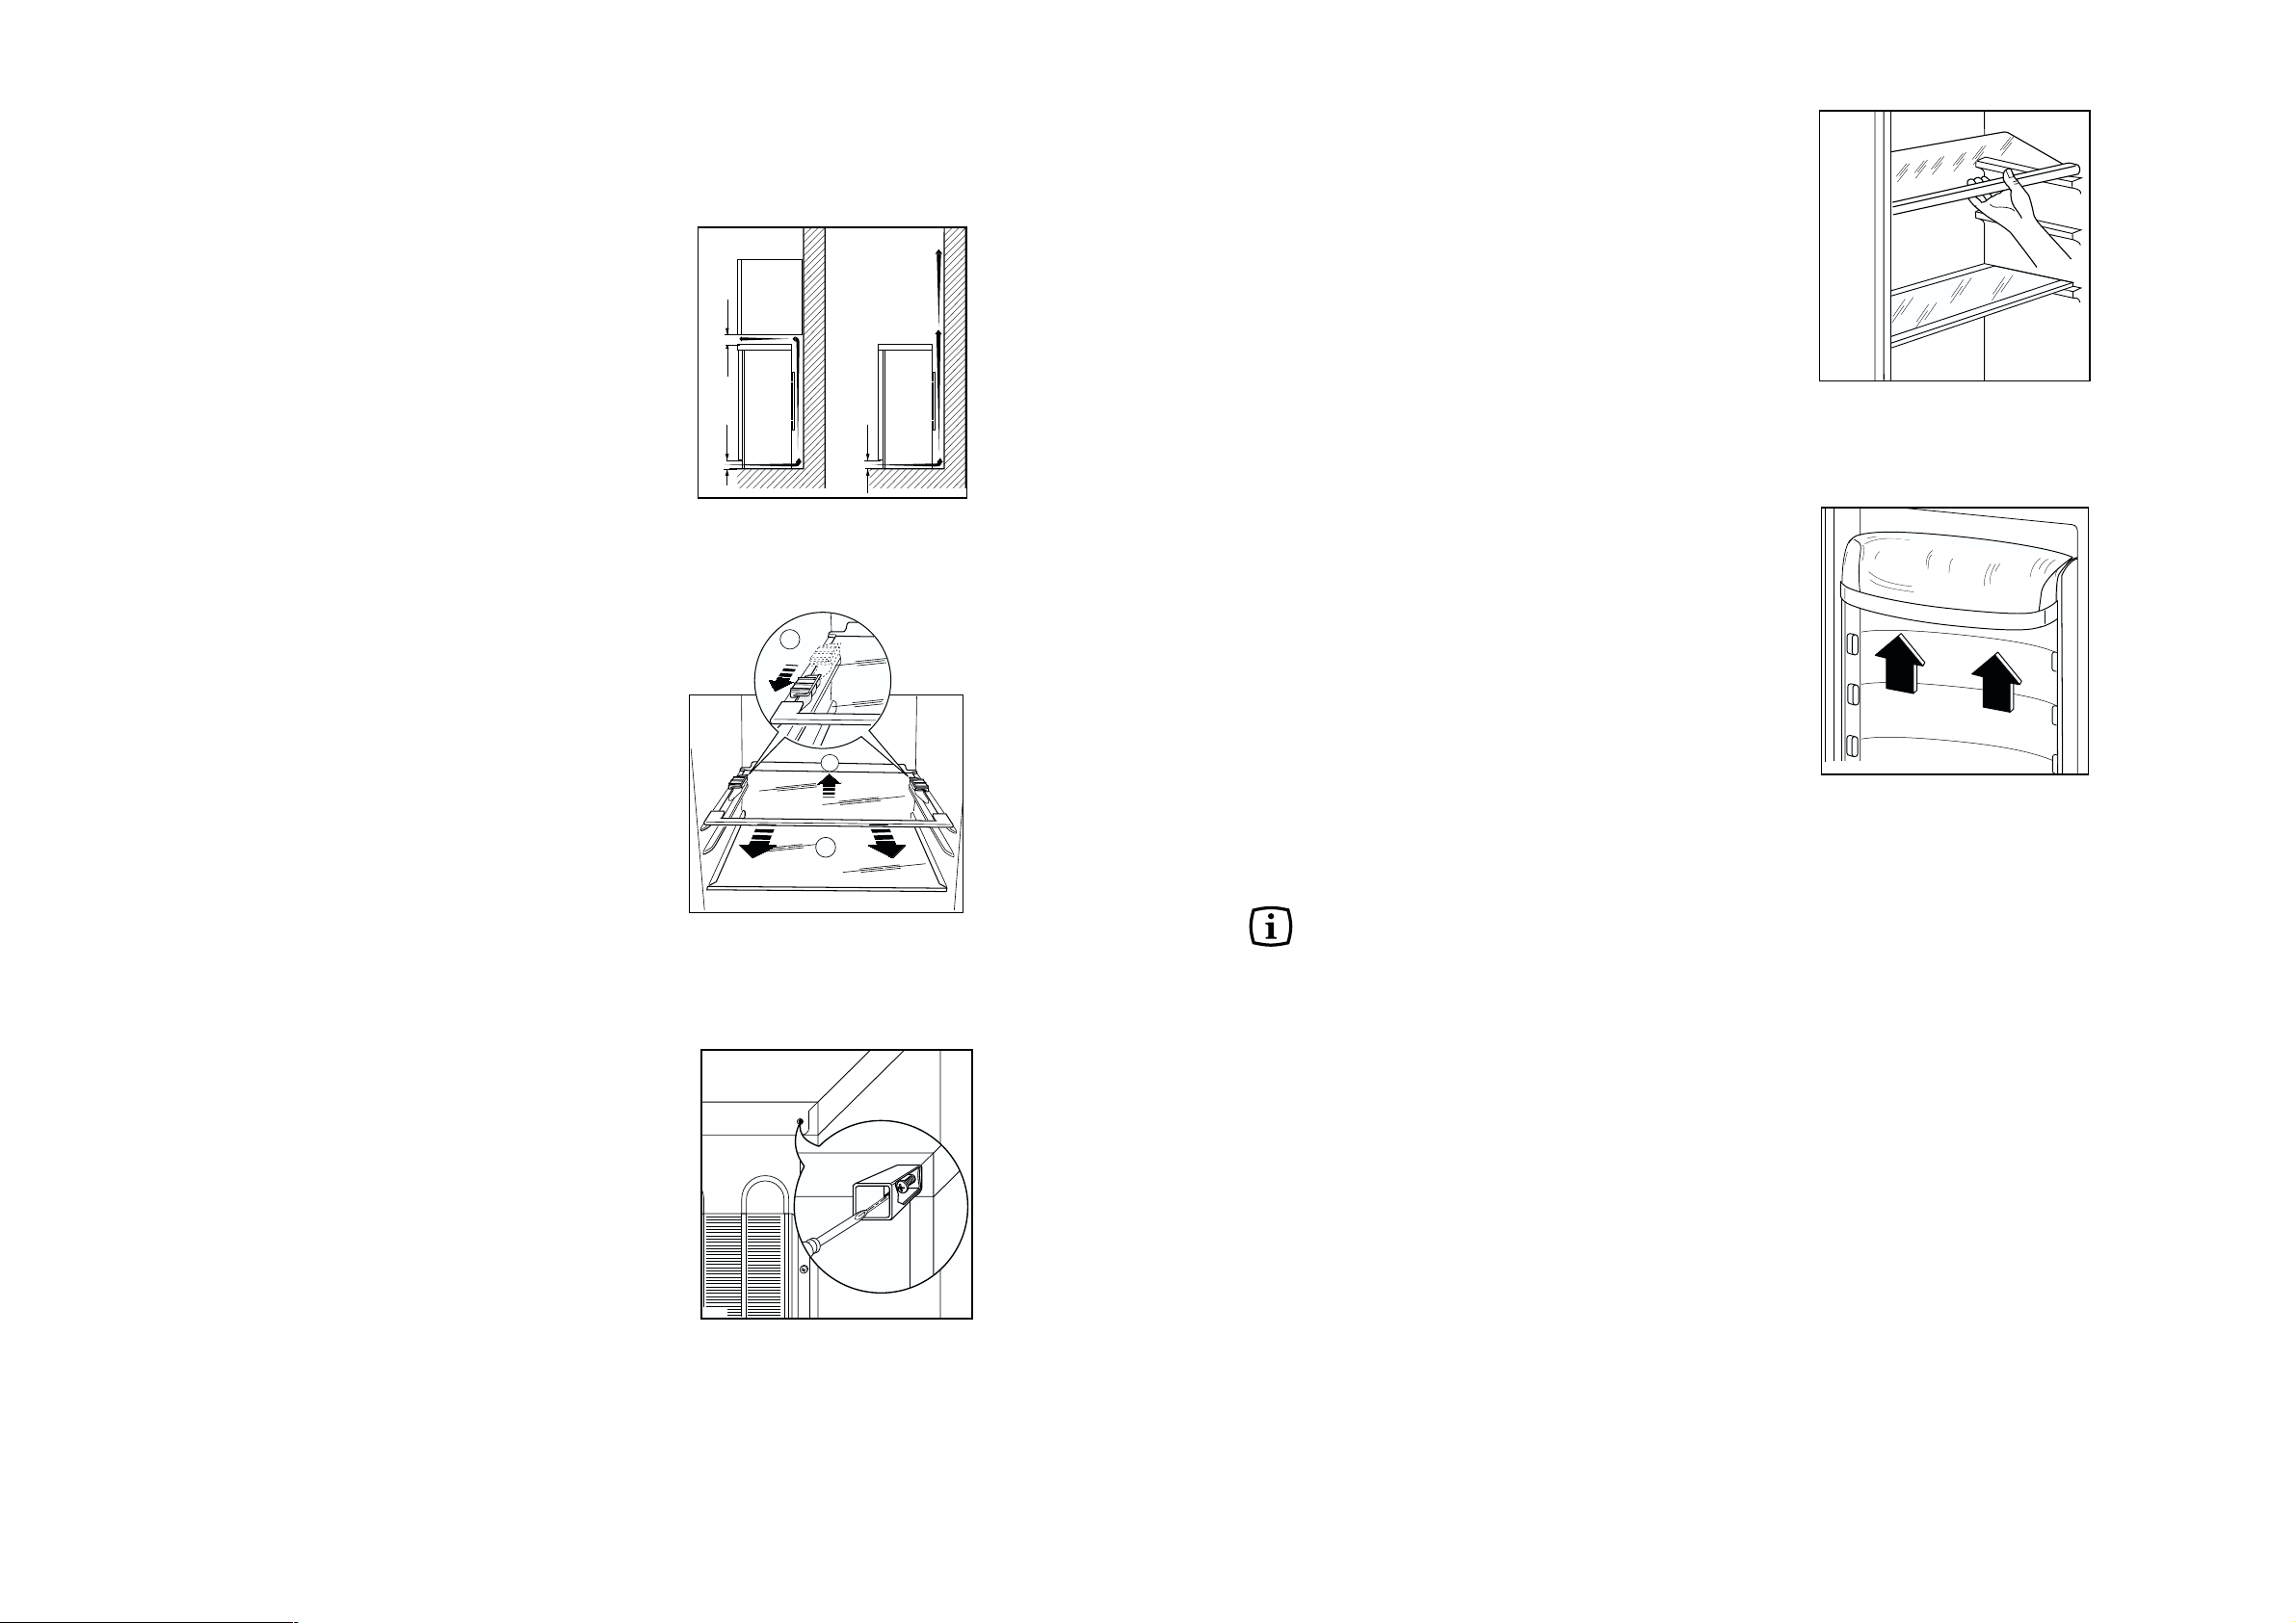
INSTALLATION
Location
The appliance should be installed well away from
sources of heat such as radiators, boilers, direct
sunlight etc. For safety reasons, minimum ventilation
must be as shown in Fig.
Appliance positioned under overhanging kitchen wall
units (see Fig. A).
Appliance positioned without overhanging kitchen
wall units (see Fig. B).
Attention: keep ventilation openings clear of
obstruction.
Two adjustable feet at the cabinet base allow
accurate levelling of the appliance.
Shelf holders
Your appliance is equipped with shelf retainers that
make it possible to secure the shelves during
transportation.
To remove them proceed as follows:
Move the shelf retainers in the direction of the arrow,
raise the shelf from the rear and push it forward until
it is freed and remove the retainers.
Rear spacers
In the bag with the documentation, there are two
spacers which must be fitted in the two top
corners.
Slacken the screws and insert the spacer under the
screw head, then re-tighten the screws.
A
NP00
100 mm10 mm
B
10 mm
A
B
C
D594
Page 5

16 16
ÚDRÎBA
Pfied kaÏdou operací je zapotfiebí nejprve
odpojit zástrãku ze zásuvky.
Upozornûní
Tento elektrospotfiebiã obsahuje uhlovodíky uvnitfi
chladící jednotky; z tohoto dÛvodu údrÏba a
doplÀování musí b˘t provádûna pouze povûfien˘mi
odborn˘mi pracovníky.
Pravidelné ãi‰tûní
Vyãistûte vnitfiek chladniãky teplou vodou a
bikarbonátem sodn˘m.
Pfiístroj otfiete a peãlivû osu‰te.
Oãistûte v˘parník (ãerná mfiíÏ), kompresor a celou
zadní stranu spotfiebiãe kartáãem nebo vysavaãem.
Zlep‰íte tak ãinnost chladniãky a u‰etfiíte spotfiebu
elektrické energie.
Mnoho ãistících prostfiedkÛ urãen˘ch pro povrch
kuchyÀsk˘ch linek obsahuje chemické sloÏky, které
mohou ohrozit/po‰kodit umûlohmotné ãásti tohoto
spotfiebiãe. Z tohoto dÛvodu proto doporuãujeme
ãistit povrch spotfiebiãe pouze horkou vodou s
mal˘m mnoÏstvím tekutého ãistícího prostfiedku na
nádobí.
Odstavení pfiístroje
JestliÏe nebude spotfiebiã dlouhodobû pouÏíván,
vykonejte následující opatfiení:
vytáhnûte zástrãku ze zásuvky ve zdi;
vyberte potraviny z chladniãky;
odledujte a vyãistûte vnitfiek spotfiebiãe a v‰echny
pfiídavné prvky;
nechejte dvefie chladniãky otevfiené, aby vzduch
mohl proudit a netvofiil se nepfiíjemn˘ zápach.
Svûtlo
Pro pfiípadnou v˘mûnu Ïárovky stisknûte zadní
úchytku a souãasnû sejmûte kryt ve smûru ‰ipek.
Pozor:
Nová Ïárovka musí mít stejn˘ v˘kon jako pÛvodní
Ïárovka (maximální v˘kon je uveden na difuzéru
svûtla).
29
TECHNICAL INFORMATION
The technical infomation are situated in the rating plate on the internal left side of the appliance .
Noise (db/A)
Model
ERC 2521
248
243
140x60x62,5
220-240/50
0,43
37
SN-ST
Gross Fridge Capacity lt.
Dimensions (width*height*depth, cm)
Tension (V/Hz)
Energy Consumption (kWh/24h)
Net Fridge Capacity lt.
Climatic Class
CUSTOMER SERVICE AND SPARE PARTS
If the appliance is not functioning properly, check that:
• the plug is firmly in the wall socket and the mains
power switch is on;
• there is an electricity supply (find out by plugging
in another appliance);
• the thermostat knob is in the correct position.
• If there are water drops on the bottom of the
cabinet, check that the defrost water drain
opening is not obstructed (see “Defrosting”
section).
• If your appliance is still not working properly after
making the above checks, contact the nearest
service centre.
To obtain fast service, it is essential that when you
apply for it you specify the model and serial number
of your appliance which can be found on the
guarantee certificate or on the rating plate located
inside the appliance, on the bottom left-hand side.
Page 6

17
Odledování
Námraza je odstraÀována automaticky z v˘parníku
chladniãky pokaÏdé, kdyÏ se motor kompresoru
zastaví v prÛbûhu normálního provozu. Rozmrazená
voda vytéká do speciální nádrÏky na zadní stranû
spotfiebiãe nad motorem kompresoru a odtud se
volnû vypafiuje.
Je dÛleÏité pravidelnû ãistit otvor pro odvod
rozpu‰tûné námrazy, kter˘ se nachází ve stfiedu
kanálku na zadní stûnû prostoru chladniãky, ãímÏ
zabráníte, aby voda pfietekla a zaãala kapat na uvnitfi
uloÏené potraviny. PouÏívejte k tomu speciální ãistící
nástroj, kter˘ vsunete dovnitfi odtokového otvoru.
DÛleÏité:
Nikdy nepouÏívejte ostré kovové pfiedmûty k
o‰krabávání námrazy na v˘parníku, neboÈ jej takto
mÛÏete po‰kodit. NepouÏívejte mechanická zafiízení
nebo jakékoliv jiné umûlé postupy k urychlení
procesu rozmrazování, neÏ ty, které byly
doporuãeny v˘robcem. Zv˘‰ení teploty zmrazen˘ch
balíãkÛ potravin bûhem odmrazování mÛÏe zpÛsobit
krácení jejich trvanlivosti.
D037
Na následujících fiádcích jsou uvedeny nûkteré
pfiirozené zdroje hluku, které v‰ak nenaru‰ují normální
provoz spotfiebiãe.
ZpÛsobeno motorem kompresoru.
ZpÛsobeno plynem proudícím v chladícím systému.
Blubb
Blubb
Brrrr
ZpÛsobeno usazováním struktury v nábytkové skfiíni.
Snadno odstranitelné zdroje moÏné
hluãnosti
Spotfiebiã není dobfie vyrovnan˘ do vodorovné polohy.
Nastavte pomocí pohyblivé noÏiãky.
Spotfiebiã se dot˘ká okolního nábytku:
Odstavte nábytek.
·patnû umístûné vnitfiní vybavení:
Vyndejte pfiihrádky a/anebo poliãky a znovu je
pfiimontujte na místo.
Lahve a/anebo nádoby, které se dot˘kají navzájem:
Oddûlte uvnitfi spotfiebiãe nádoby jednu od druhé.
Tic
Tic
Hluãnost
28
Defrosting
Frost is automatically eliminated from the evaporator
of the refrigerator compartment every time the motor
compressor stops, during normal use. The defrost
water drains out through a trough into a special
container at the back of the appliance, over the
motor compressor, where it evaporates.
It is important to periodically clean the defrost
water drain hole in the middle of the refrigerator
compartment channel to prevent the water
overflowing and dripping onto the food inside.
Use the special cleaner provided, which you will
find already inserted into the drain hole.
Important:
Never use sharp metal tools to scrape off frost
from the evaporator as you could damage it.
Do not use a maechanical device or any artificial
means to speed up the thawing process other than
those recommended by the manufacturer.
A temperature rise of the frozen food packs, during
defrosting, may shorten their safe storage life.
Noise due to the adjustment of the unit’s structure
Possible noise sources that are
easy to eliminate:
The appliance is not well levelled:
Simply adjust the levelling foot.
The appliance touches adjacent units:
Move the units away
Interior accessories are not fixed securely:
Remove the accessories and put them back properly
Bottles and/or receptacles touch each other
inside the appliance:
Separate them.
Tic
Tic
Hereunder you will find some normal causes of noise
that do not jeopardise normal functioning of the
product.
Compressor motor noise
Noise caused by the gas circulating in the
refrigerating circuit pipes
Blubb
Blubb
Noisiness
D037
Brrrr
Page 7

18
TECHNICKÉ VLASTNOSTI
Technické informace se nacházejí na v˘robním ‰títku, kter˘ je umístûn˘ nalevo uvnitfi spotfiebiãe.
Hluãnost (dB/A)
Model
ERC 2521
248
243
140x60x62,5
220-240/50
0,43
37
SN-ST
Objem chladniãky - brutto (l)
Rozmûry (v˘‰ka x ‰ífika x hloubka, cm)
Napûtí (V/HZ)
Spotfieba energie (kW/24 h)
Objem chladniãky - netto (l)
Klimatická tfiída
SLUÎBA ZÁKAZNÍKÒM A NÁHRADNÍ DÍLY
JesliÏe spotfiebiã správnû nefunguje, zkontrolujte, zda:
• zástrãka je pevnû zasunuta do zásuvky ve stûnû
a hlavní spínaã je zapnut˘;
• síÈ je pod napûtím (vyzkou‰ejte zapojením jiného
spotfiebiãe do zásuvky);
• koleãko termostatu je nastaveno do správné
polohy;
• pokud se na dnû chladniãky nachází voda,
zkontrolujte, zda nedo‰lo k ucpání odtokového
otvoru rozmrazené vody (viz. ãást
“Odmrazování”)
• jestliÏe po vykonání v‰ech pfiede‰l˘ch kontrol
spotfiebiã stále správnû nefunguje, spojte se s
nejbliωím servisním stfiediskem.
Chcete-li obdrÏet co nejrychlej‰í servisní sluÏbu, je
tfieba pfii Ïádosti uvést model a sériové ãíslo
spotfiebiãe, které jsou uvedeny na záruãním listû
nebo na v˘robním ‰títku uvnitfi spotfiebiãe, na levé
spodní stranû.
27
MAINTENANCE
Unplug the appliance before carrying out
any maintenance operation.
Warning
This appliance contains hydrocarbons in its cooling
unit; maintenance and recharging must therfore only
be carried out by authorized technicians.
Periods of non-operation
When the appliance is not in use for long periods,
take the following precautions:
remove the plug from the wall socket;
remove all food;
defrost and clean the interior and all accessories;
leave the door ajar to allow air to circulate to prevent
unpleasant smells.
Periodic cleaning
Clean the inside with warm water and bicarbonate of
soda. Rinse and dry thoroughly.
Many proprietary kitchen surface cleaners
contain chemicals that can attack/damage the
plastics used in this appliance. For this reason it
is recommended that the outer casing of this
appliance is only cleaned with warm water with a
little washing-up liquid added. Clean the
condenser (black grill) and the compressor at the
back of the appliance with a brush or a vacuum
cleaner.This operstion will improve the performance
of the appliance and save electricity consumption.
Illumination lamp
If it becomes necessary to replace the lamp, press
on the rear hook and at the same time
slide the cover in the direction indicated by the arrow.
Attention:
Replace the lamp with one of the same power (the
maximum power is shown on the light diffuser).
Page 8

19
INSTALACE
Umístûní
Spotfiebiã musí b˘t nainstalován daleko od zdrojÛ
tepla jako jsou radiátory, bojlery, pfiímé sluneãní
paprsky atd.
Z bezpeãnostních dÛvodÛ musí b˘t zaji‰tûno
minimální proudûní vzduchu, jak je to zobrazeno na
ilustraci.
Umístûní spotfiebiãe pod zavû‰ené skfiíÀky
kuchyÀské linky (viz obr. A).
Umístûní spotfiebiãe bez zhora zavû‰en˘ch skfiínûk
kuchyÀské linky (viz obr. B).
Pozor: udrÏujte ventilaãní otvory stále volné.
Dvû nastavitelné noÏky na základnû spotfiebiãe
umoÏÀují jeho pfiesné nastavení do vodorovné
polohy.
100 mm10 mm
10 mm
A
B
NP00
ZZaaráÏky pfiepáÏek
Vበspotfiebiã je vybaven˘ zaráÏkami pfiepáÏek,
které umoÏÀují zajistit pfiepáÏky v prÛbûhu dopravy.
Pfii jejich odstranûní postupujte následovnû:
posuÀte zaráÏky ve smûru ‰ipek, zvednûte zezadu
sklenûnou polici a tlaãte kupfiedu, dokud se
neuvolní; pak odeberte zaráÏky.
A
C
B
D594
DDiissttaannããní rozpûrky
V sáãku s dokumentací jsou pfiiloÏeny 2 rozpûrky,
slouÏící k upravení vzdálenosti pfiístroje od stûny,
které je tfieba pfiipevnit do horních rohÛ na zadní
stranû pfiístroje.
Uvolnûte ‰roubek, zasaìte rozpûrky pod hlaviãku
‰roubku a ‰roubek utáhnûte.
26
Positioning the door shelves
To permit storage of food packages of various sizes,
the door shelves can be placed at different heights.
To make these adjustments proceed as follows:
Gradually pull the shelf in the direction of the arrows
until it comes free, then reposition as required.
Movable shelves
The walls of the refrigerator are equipped with a
series of runners so that the shelves can be
positioned as desired.
HINTS
Hints for refrigeration
Useful hints:
Meat (all types): wrap in polythene bags and place
on the glass shelf above the vegetable drawer.
For safety, store in this way only one or two days
at the most.
Cooked foods, cold dishes, etc..: these should be
covered and may be placed on any shelf.
Fruit and vegetables: these should be thoroughly
cleaned and placed in the special drawer(s) provided.
Butter and cheese: these should be placed in
special airtight containers or wrapped in aluminium
foil or polythene bags to exclude as much air as
possible.
Milk bottles: these should have a cap and should
be stored in the bottle rack on the door.
Bananas, potatoes, onions and garlic, if not
packed, must not be kept in the refrigerator.
D338
Page 9

20
Zapojení do elektrické sítû
Pfied zapojením do sítû se pfiesvûdãte, zda hodnoty
napûtí a frekvence uvedené na v˘robním ‰títku
pfiístroje odpovídají vlastnostem va‰í elektrické sítû.
Napûtí se mÛÏe od stanovené hodnoty odchylovat o
+/- 6%.
Pfii provozu s jin˘mi hodnotami napûtí je tfieba
pouÏívat transformátor.
Spotfiebiã musí b˘t uzemûn˘.
Pro tento úãel je zástrãka spotfiebiãe vybavena
pfiíslu‰n˘m kontaktním kolíkem.
JestliÏe va‰e elektrická zásuvka není uzemûna,
zapojte pfiístroj do oddûleného uzemûní v souladu s
platn˘mi pfiedpisy a za tímto úãelem se poraìte s
odborníkem.
V˘robce odmítá jakoukoliv zodpovûdnost v pfiípadû,
Ïe nejsou dodrÏovány v˘‰e uvedené bezpeãnostní
zásady,
Tento pfiístroj odpovídá následujícím
pfiedpisÛm Evropského spoleãenství:
- 87/308 EEC
z 2.6. 1987 vztahující se k
radiovému odru‰ení.
- 73/23/CEE
z 19.2.1973 (Pfiedpis pro nízké
napûtí) a následující úpravy.
- 89/336/CEE
z 3.5. 1989 (Pfiedpis o
elektromagnetické shodnosti) a následující
úpravy.
PPoozor!
Je nutné umoÏnit vypnutí spotfiebiãe z hlavního
napájení. Proto i po ukonãení instalace musí b˘t
zásuvka dobfie pfiístupná.
25
USE OF THE FRIDGE
Operation
Insert the power supply plug into the nearest wall
socket.
Turn the thermostat knob (B) to the right to a
medium setting.
The pilot light (A) will light up.
To turn off the refrigerator, turn the thermostat knob
to the «O» position.
Temperature regulation
The temperature is automatically regulated and can
be increased to achieve a higher temperature
(warmer) by rotating the thermostat knob toward
min. settings or reduced (colder) rotating the knob
towards max. settings.
However, the exact setting should be chosen
keeping in mind that the temperature inside the
refrigerator depends on:
• room temperature;
• how often the door is opened;
• the quantity of food stored;
• location of appliance.
A medium setting is generally the most suitable.
Important
If the ambient temperature is high or the
appliance is fully loaded, and the appliance is
set to the lowest temperatures, it may run
continuously causing frost to form on the rear
wall. In this case the dial must be set to a higher
temperature to allow automatic defrosting and
therefore reduced energy consumption.
Fresh food refrigeration
To obtain the best performance:
• do not store warm food or evaporating liquids in
the refrigerator;
• do cover or wrap the food, particularly if it has a
strong flavour.
• Position food so that air can circulate freely round it.
Cleaning the interior
Before using the appliance for the first time, wash
the interior and all internal accessories with lukewarm water and some neutral soap so as to remove
the typical smell of a brand-new product, then dry
thoroughly.
USE
Control panel
A. Pilot light (refrigerator)
B. Thermostat knob (refrigerator)
Do not use detergents or abrasive
powders, as these will damage the finish.
B
ON
minMAX
A
Page 10

21
OObrácení dvefií
Pfied zaãátkem následující ãinnosti nejprve odpojte
spotfiebiã od pfiívodu elektrické energie.
1. Vytáhnûte vûtrací mfiíÏku (D), která je zasazena
tlakem tak, aby zaskoãila;
2. odmontujte ktyr otvoru (G) a spodní závûs (E)
tak, Ïe od‰roubujete tfii ‰rouby, které jej blokují;
3. vysuÀte dvefie z ãepu (G), vytáhnûte ãep a
na‰roubujte na protilehlou stranu;
4. odebetre dva kryty ze dvefií (je-li jimi spotfiebiã
vybaven) a uvolnûte tak dva otvory pro závûs.
Kryty namontujte na opaãnou stranu;
5. smontujte zpût dvefie;
6. klíãem o prÛmûru 10 mm od‰roubujte ãep ze
závûsu (E) a namontujte na opaãnou stranu
samotného závûsu;
7. namontujte spodní závûs (E) na opaãnou stranu
a pouÏijte ‰rouby, které jste prve od‰roubovali.
Vytáhnûte kryt otvoru (F) z vûtrací mfiíÏky (D),
otáãejte ve smûru, kter˘ oznaãuje ‰ipka a
namontujte na opaãné stranû;
8. pfiimontujte vûtrací mfiíÏku (D) tak, Ïe jí zatlaãíte,
dokud nezaskoãí;
9. odmontujte kliku a pfiimontujte ji na protilehlou
stranu. NepouÏité otvory musí b˘t pfiikryty
plastov˘mi kryty, které se nacházejí v saãku s
pfiíslu‰enstvím.
Pozor
Po obrácení smûru otvírání dvefií zkontrolujte, zda
jsou v‰echny ‰rouby dobfie utaÏeny a zda tûsnûní
dvefií dobfie pfiiléhá ke skfiíni chladniãky.
Pfii nízké okolní teplotû (napfi. v zimû) se mÛÏe stát,
Ïe dvefie zcela netûsní. V takovém pfiípadû vyãkejte,
dokud tûsnûní samo nepfiilne, nebo cel˘ proces
urychlete nahfiíváním pfiíslu‰né ãásti bûÏn˘m
vlasov˘m fénem.
F
F
D
F
F
E
E
G
24
CONTENTS
Warnings ...................................................................................................................................................... 23
Use - Control panel - Cleaning the interior - Use of the fridge / Operation - Temperature regulation - .........
Fresh food refrigeration.................................................................................................................................. 25
Use - Movable shelves - Positioning the door shelves / Hints - Hints for refrigeration ................................. 26
Maintenance - Periodic cleaning - Periods of non-operation - Illumination lamp ......................................... 27
Maintenance - Defrosting / Noisinnes ......................................................................................................... 28
Customer service and spare parts / Technical information..................................................................... 29
Installation - Location - Shelf holders - Rear spacers .................................................................................. 30
Installation - Electrical connection................................................................................................................ 31
Installation - Changing the opening direction of the door............................................................................. 32
• Do not place carbonated or fizzy drinks in the
freezer as it creates pressure on the container,
which may cause it to explode, resulting in
damage to the appliance. Do not use a
mechanical device or any artificial means to
speed up the thawing process other than those
recommended by the manufacturer. Never use
metal objects for cleaning your appliance as it
may get damaged.
Installation
• During normal operation, the condenser and
compressor at the back of the appliance heat up
considerably. For safety reasons, minimum
ventilation must be as shown in the instructions.
Attention: keep ventilation openings clear of
obstruction.
• Care must be taken to ensure that the appliance
does not stand on the electrical supply cable.
Important: if the supply cord is damaged, it must
be replaced by a special cord or assembly available from the manufacturer or its service agent.
• If the appliance is transported horizontally, it is
possible that the oil contained in the compressor
flows in the refrigerant circuit. It is advisable to
wait at least two hours before connecting the
appliance to allow the oil to flow back in the
compressor.
• There are working parts in this product which
heat up. Always ensure that there is adequate
ventilation as a failure to do this will result in
component failure and possible food loss. See
installation instructions.
• Parts which heat up should not be exposed.
Wherever possible the back of the product should
be against a wall.
Environment Protection
This appliance does not contain gasses which
could damage the ozone layer, in either its
refrigerant circuit or insulation materials.The
appliance shall not be discarded together with
the urban refuse and rubbish. Avoid damaging
the cooling unit, especially at the rear near the
heat exchanger. Information on your local
disposal sites may be obtained from municipal
authorities.The materials used on this appliance
marked by the symbol are recyclable.
Page 11

22
Z·ruËnÌ podmÌnky
23
WARNINGS
It is most important that this instruction book should be retained with the appliance for future
reference. Should the appliance be sold or transferred to another owner, or should you move house
and leave the appliance, always ensure that the book is supplied with the appliance in order that the
new owner can be acquainted with the functioning of the appliance and the relevant warnings.
If this appliance featuring magnetic door seals is to replace an older appliance having a spring lock
(latch) on the door or lid, be sure to make that spring lock unusable before you discard the old
appliance. This will prevent it from becoming a death-trap for a child.
These warnings are provided in the interest of safety.You must read them carefully before installing or
using the appliance.
General Safety
• This appliance is designed to be operated by
adults. Children should not be allowed to tamper
with the controls or play with the product.
• It is dangerous to alter the specifications or
modify this product in any way.
• Before any cleaning or maintenance work is carried
out, be sure to switch off and unplug the appliance.
• This appliance is heavy. Care should be taken
when moving it
• Ice lollies can cause frost burns if consumed
straight from the appliance.
• Take utmost care when handling your
appliance so as not to cause any damages to
the cooling unit with consequent possible
fluid leakages.
• The appliance must not be located close to
radiators or gas cookers.
• Avoid prolonged exposure of the appliance to
direct sunlight.
• There must be adequate ventilation round the
back of the appliance and any damage to the
refrigerant circuit must be avoided.
• For freezers only (except built-in models): an
ideal location is the cellar or basement.
• Do not use other electrical appliances (such
as ice cream makers) inside of refrigerating
appliances.
Service/Repair
• Any electrical work required to install this
appliance should be carried out by a qualified
electrician or competent person
• This product should be serviced by an authorized
Service Centre, and only genuine spare parts
should be used.
• Under no circumstances should you attempt to
repair the appliance yourself. Repairs carried out
by inexperienced persons may cause injury or
more serious malfunctioning. Refer to your local
Service Centre, and always insist on genuine
spare parts.
• This appliance contains hydrocarbons in its
cooling unit; maintenance and recharging must
therefore only be carried out by authorized
technicians.
Use
• The domestic refrigerators and freezers are
designed to be used specifically for the storage
of edible foodstuffs only.
• Best performance is obtained with ambient
temperature between +18°C and +43°C (class T);
+18°C and +38°C (class ST); +16°C and +32°C
(class N); +10°C and +32°C (class SN).The
class of your appliance is shown on its rating
plate.
Warning: when the ambient temperature is not
included within the range indicated for the class
of this appliance, the following instructions must
be observed: when the ambient temperature
drops below the minimum level, the storage
temperature in the freezer compartment cannot
be guaranteed; therefore it is advisable to use the
food stored as soon as possible.
• Frozen food must not be re-frozen once it has
been thawed out.
• Manufacturers’ storage recommendations should
be strictly adhered to. Refer to relevant
instructions.
• The inner lining of the appliance consists of
channels through which the refrigerant passes. If
these should be punctured this would damage the
appliance beyond repair and cause food loss. DO
NOT USE SHARP INSTRUMENTS to scrape off
frost or ice. Frost may be removed by using the
scraper provided. Under no circumstances should
solid ice be forced off the liner. Solid ice should be
allowed to thaw when defrosting the appliance.
Z·ruka vypl˝vajÌcÌ z tÏchto z·ruËnÌch podmÌnek je
poskytov·na pouze kupujÌcÌmu spot¯ebiteli (d·le takÈ
jen "KupujÌcÌ") a jen na v˝robek slouûÌcÌ k bÏûnÈmu
pouûÌv·nÌ v dom·cnosti.
Prod·vajÌcÌ poskytuje KupujÌcÌmu spot¯ebiteli Z·ruku
v trv·nÌ dvaceti Ëty¯ mÏsÌc˘, a to od data p¯evzetÌ
prodanÈho v˝robku KupujÌcÌm.
KupujÌcÌ m· v r·mci Z·ruky pr·vo na bezplatnÈ, vËasnÈ
a ¯·dnÈ odstranÏnÌ vady, pop¯ÌpadÏ - nenÌ-li to
vzhledem k povaze (tzn. p¯ÌËinÏ i projevu) vady
ne˙mÏrnÈ - pr·vo na v˝mÏnu v˝robku. Pokud nenÌ
takov˝ postup moûn˝, je KupujÌcÌ opr·vnÏn û·dat
p¯imϯenou slevu z ceny v˝robku. Pr·vo na v˝mÏnu
v˝robku nebo odstoupenÌ od kupnÌ smlouvy lze uplatnit
jen p¯i splnÏnÌ vöech z·konn˝ch p¯edpoklad˘, a to
pouze tehdy, nebyl-li v˝robek nadmÏrnÏ opot¯eben
nebo poökozen. PodmÌnkou pro uplatnÏnÌ kaûdÈho
pr·va ze Z·ruky p¯itom je, ûe:
a) v˝robek byl instalov·n a uveden do provozu i vûdy
provozov·n v souladu s n·vodem k obsluze,
b) veökerÈ z·ruËnÌ nebo jinÈ opravy Ëi ˙pravy v˝robku
byly vûdy prov·dÏny v AutorizovanÈm servisnÌm
st¯edisku,
c) KupujÌcÌ p¯i reklamaci v˝robku p¯edloûÌ platn˝
doklad o koupi.
Pr·vo na odstranÏnÌ vady v˝robku (i vöechna p¯Ìpadn·
dalöÌ pr·va ze Z·ruky) je kupujÌcÌ povinen uplatnit v
nejbliûöÌm AutorizovanÈm servisnÌm st¯edisku. Z·roveÚ
musÌ AutorizovanÈmu servisnÌmu st¯edisku umoûnit
ovϯenÌ existence reklamovanÈ vady, vËetnÏ
odpovÌdajÌcÌho vyzkouöenÌ (pop¯. demont·ûe) v˝robku,
v provoznÌ dobÏ tohoto st¯ediska.
KaûdÈ pr·vo ze Z·ruky je nutno uplatnit v p¯ÌsluönÈm
AutorizovanÈm servisnÌm st¯edisku bez zbyteËnÈho
odkladu, nejpozdÏji vöak do konce z·ruËnÌ doby, jinak
zanik·.
AutorizovanÈ servisnÌ st¯edisko posoudÌ opr·vnÏnost
reklamace a podle povahy vady v˝robku rozhodne o
zp˘sobu opravy. KupujÌcÌ je povinen poskytnout
AutorizovanÈmu servisnÌmu st¯edisku souËinnost
pot¯ebnou k prok·z·nÌ uplatnÏnÈho pr·va na
odstranÏnÌ vady, k ovϯenÌ existence reklamovanÈ
vady i k z·ruËnÌ opravÏ v˝robku.
BÏh z·ruËnÌ doby se stavÌ po dobu od ¯·dnÈho uplatnÏnÌ
pr·va na odstranÏnÌ vady do provedenÌ z·ruËnÌ opravy
Autorizovan˝m servisnÌm st¯ediskem, avöak jen p¯i
splnÏnÌ podmÌnky uvedenÈ v p¯edchozÌm bodu.
Po provedenÌ z·ruËnÌ opravy je AutorizovanÈ servisnÌ
st¯edisko povinno vydat KupujÌcÌmu Ëitelnou kopii
OpravnÌho listu. OpravnÌ list slouûÌ k prokazov·nÌ pr·v
KupujÌcÌho, proto ve vlastnÌm z·jmu p¯ed podpisem
OpravnÌho listu zkontrolujte jeho obsah a kopii
OpravnÌho listu peËlivÏ uschovejte.
Jestliûe nebude reklamovan· vada zjiötÏna nebo
nejde-li o z·ruËnÌ vadu, za kterou odpovÌd· Prod·vajÌcÌ,
Ëi neposkytne-li KupujÌcÌ AutorizovanÈmu servisnÌmu
st¯edisku shora uvedenou souËinnost, je KupujÌcÌ
povinen nahradit Prod·vajÌcÌmu i AutorizovanÈmu
servisnÌmu st¯edisku veökerÈ p¯ÌpadnÈ n·klady, kterÈ
jim v souvislosti s tÌm vzniknou.
Z·ruka vypl˝vajÌcÌ z tÏchto z·ruËnÌch podmÌnek platÌ
pouze na ˙zemÌ »eskÈ republiky. Nevztahuje se na
opot¯ebenÌ nebo poökozenÌ v˝robku (vËetnÏ poökozenÌ
zp˘sobenÈho poruchami v elektrickÈ sÌti, pouûitÌm
nevhodn˝ch n·plnÌ, nevhodn˝mi provoznÌmi
podmÌnkami aj.), p¯Ìpadn˝ nedostatek jakosti nebo
uûitnÈ vlastnosti ( kter˝ nenÌ z·vadou) ani na v˝robek
pouûit˝ nad r·mec bÏûnÈho pouûÌv·ni v dom·cnosti
(nap¯. k podnikatelsk˝m ˙Ëel˘m aj.).
PoskytnutÌm z·ruky nejsou dotËena pr·va KupujÌcÌho,
kter· se ke koupi v˝robku v·ûÌ podle kogentnÌch
ustanovenÌ zvl·ötnÌch pr·vnÌch p¯edpis˘.
Prod·vajÌcÌ je povinen p¯edat KupujÌcÌmu p¯i prodeji
v˝robku a na poû·d·nÌ KupujÌcÌho poskytnout mu
i kdykoli potÈ aktu·lnÌ seznam Autorizovan˝ch
servisnÌch st¯edisek v »eskÈ republice, vËetnÏ jejich
telefonnÌch ËÌsel.
JakÈkoli bliûöÌ informace o Z·ruce a Autorizovan˝ch
servisnÌch st¯ediscÌch poskytnou:
- prod·vajÌcÌ,
- Electrolux Service, a to buÔ na telefonu: 261126112,
nebo na adrese ELECTROLUX s.r.o., Electrolux
Service, Hanusova ul., 140 21 Praha 4,
- Bezplatn· telefonnÌ INFOLINKA: 800-160016.
 Loading...