

Page 1
user manual
Інструкція
kullanma kılavuzu
manual de instruções
Fridge-Freezer
Холодильник-морозильник
Buzdolabı
Combinado
END42395X
Page 2
2 electrolux
Electrolux. Thinking of you.
Share more of our thinking at www.electrolux.com
Contents
Safety information 2
Control panel 4
First use 5
Daily use 5
Helpful hints and tips 7
How to use the water dispenser with BRITA
MAXTRA filter cartridge 8
Subject to change without notice
Care and cleaning 13
What to do if… 15
Technical data 16
Installation 17
Environmental concerns 20
Safety information
In the interest of your safety and to ensure
the correct use, before installing and first using the appliance, read this user manual
carefully, including its hints and warnings. To
avoid unnecessary mistakes and accidents,
it is important to ensure that all people using
the appliance are thoroughly familiar with its
operation and safety features. Save these instructions and make sure that they remain
with the appliance if it is moved or sold, so
that everyone using it through its life will be
properly informed on appliance use and safety.
For the safety of life and property keep the
precautions of these user's instructions as
the manufacturer is not responsible for damages caused by omission.
Children and vulnerable people safety
• This appliance is not intended for use by
persons (including children) with reduced
physical, sensory or mental capabilities, or
lack of experience and knowledge, unless
they have been given supervision or instruction concerning use of the appliance
by a person responsible for their safety.
Children should be supervised to ensure
that they do not play with the appliance.
• Keep all packaging well away from children. There is risk of suffocation.
• If you are discarding the appliance pull the
plug out of the socket, cut the connection
cable (as close to the appliance as you
can) and remove the door to prevent playing children to suffer electric shock or to
close themselves into it.
• If this appliance featuring magnetic door
seals is to replace an older appliance having a spring lock (latch) on the door or lid,
be sure to make that spring lock unusable
before you discard the old appliance. This
will prevent it from becoming a death trap
for a child.
General safety
Caution! Keep ventilation openings
clear of obstruction.
• The appliance is intended for keeping
foodstuff and/or beverages in a normal
household as explained in this instruction
booklet.
• Do not use a mechanical device or any artificial means to speed up the thawing
process.
• Do not use other electrical appliances
(such as ice cream makers) inside of refrigerating appliances, unless they are approved for this purpose by the manufacturer.
• Do not damage the refrigerant circuit.
Page 3
electrolux 3
• The refrigerant isobutane (R600a) is contained within the refrigerant circuit of the
appliance, a natural gas with a high level of
environmental compatibility, which is nevertheless flammable.
During transportation and installation of
the appliance, be certain that none of the
components of the refrigerant circuit become damaged.
If the refrigerant circuit should become
damaged:
– avoid open flames and sources of igni-
tion
– thoroughly ventilate the room in which
the appliance is situated
• It is dangerous to alter the specifications or
modify this product in any way. Any damage to the cord may cause a short-circuit,
fire and/or electric shock.
Warning! Any electrical component
(power cord, plug, compressor) must be
replaced by a certified service agent or
qualified service personnel.
1. Power cord must not be lengthened.
2. Make sure that the power plug is not
squashed or damaged by the back of
the appliance. A squashed or damaged power plug may overheat and
cause a fire.
3. Make sure that you can come to the
mains plug of the appliance.
4. Do not pull the mains cable.
5. If the power plug socket is loose, do
not insert the power plug. There is a
risk of electric shock or fire.
6. You must not operate the appliance
without the lamp cover
1)
of interior
lighting.
• This appliance is heavy. Care should be
taken when moving it.
• Do not remove nor touch items from the
freezer compartment if your hands are
damp/wet, as this could cause skin abrasions or frost/freezer burns.
• Avoid prolonged exposure of the appliance to direct sunlight.
Daily Use
• Do not put hot pot on the plastic parts in
the appliance.
• Do not store flammable gas and liquid in
the appliance, because they may explode.
• Do not place food products directly
against the air outlet on the rear wall.
2)
• Frozen food must not be re-frozen once it
has been thawed out.
• Store pre-packed frozen food in accordance with the frozen food manufacturer's
instructions.
• Appliance's manufacturers storage recommendations should be strictly adhered
to. Refer to relevant instructions.
• Do not place carbonated or fizzy drinks in
the freezer compartment as it creates
pressure on the container, which may
cause it to explode, resulting in damage to
the appliance.
• Ice lollies can cause frost burns if consumed straight from the appliance.
Care and cleaning
• Before maintenance, switch off the appliance and disconnect the mains plug from
the mains socket. If you cannot come to
the mains socket, interrupt the power supply.
• Do not clean the appliance with metal objects.
• Do not use sharp objects to remove frost
from the appliance. Use a plastic scraper.
• Regularly examine the drain in the refrigerator for defrosted water. If necessary,
clean the drain. If the drain is blocked, water will collect in the bottom of the appliance.
Installation
Important! For electrical connection
carefully follow the instructions given in
specific paragraphs.
• Unpack the appliance and check if there
are damages on it. Do not connect the appliance if it is damaged. Report possible
damages immediately to the place you
bought it. In that case retain packing.
• It is advisable to wait at least four hours
before connecting the appliance to allow
the oil to flow back in the compressor.
1) If the lamp cover is foreseen
2) If the appliance is Frost Free
Page 4
4 electrolux
• Adequate air circulation should be around
the appliance, lacking this leads to overheating. To achieve sufficient ventilation
follow the instructions relevant to installation.
• Wherever possible the back of the product
should be against a wall to avoid touching
or catching warm parts (compressor, condenser) to prevent possible burn.
• The appliance must not be located close
to radiators or cookers.
• Make sure that the mains plug is accessible after the installation of the appliance.
•
Connect to potable water supply only.
3)
Service
• Any electrical work required to do the servicing of the appliance should be carried out
by a qualified electrician or competent person.
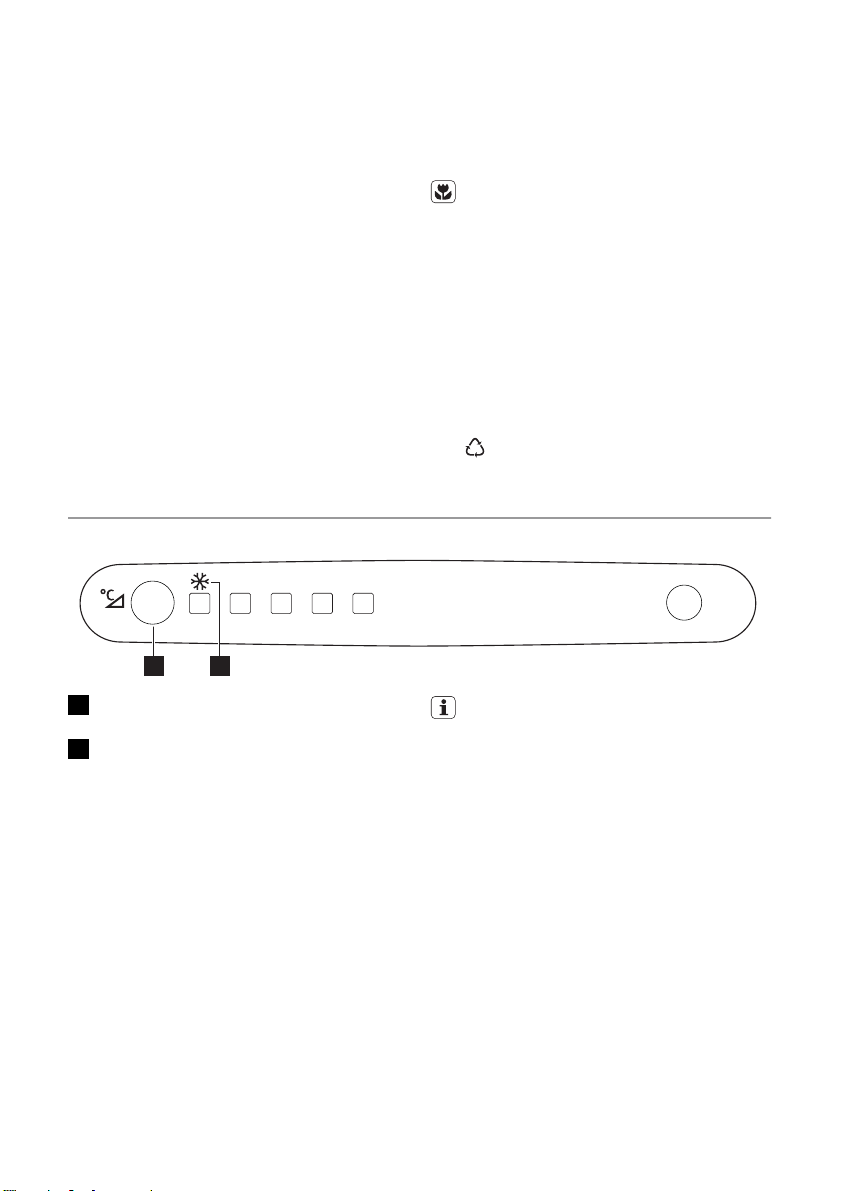
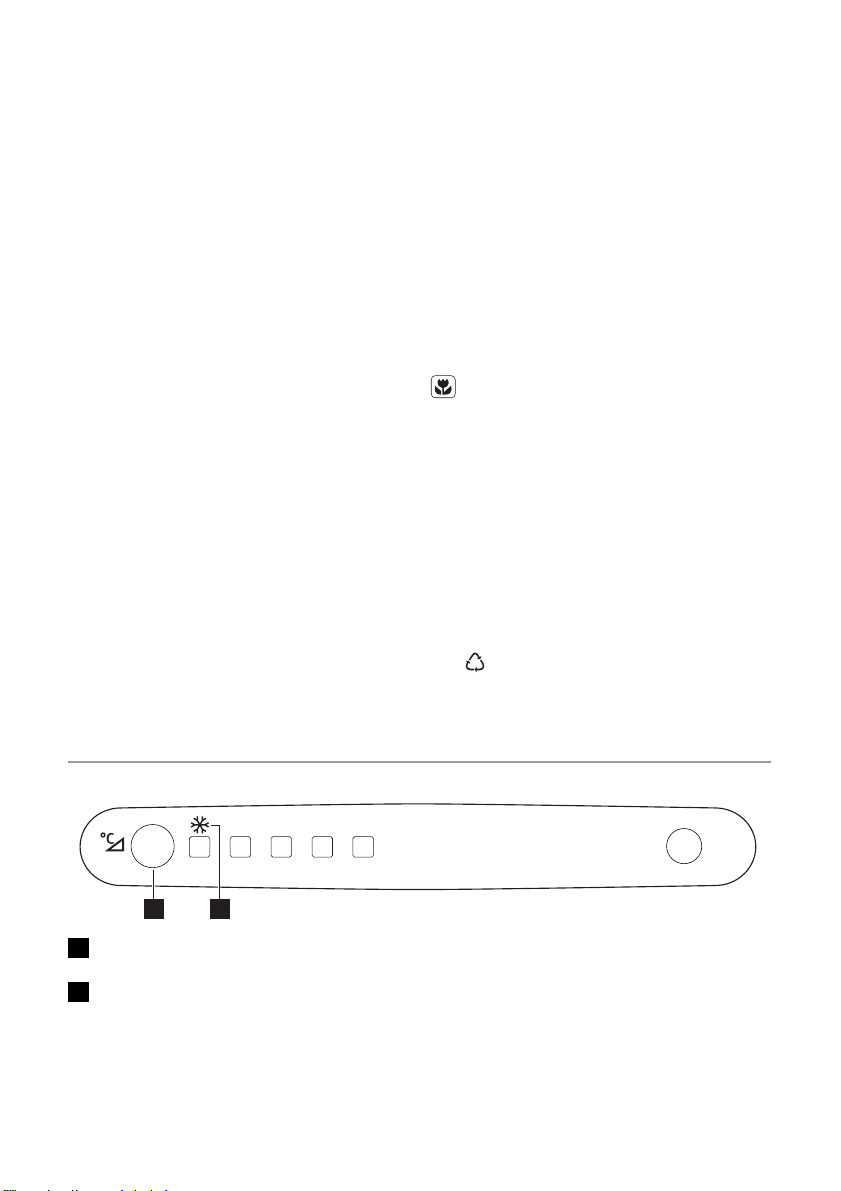
Control panel
+2 +4 +5 +6 +8
1 2
• This product must be serviced by an authorized Service Centre, and only genuine
spare parts must be used.
Environment Protection
This appliance does not contain gasses
which could damage the ozone layer, in
either its refrigerant circuit or insulation
materials. The appliance shall not be discarded together with the urban refuse
and rubbish. The insulation foam contains flammable gases: the appliance
shall be disposed according to the applicable regulations to obtain from your
local authorities. Avoid damaging the
cooling unit, especially at the rear near
the heat exchanger. The materials used
on this appliance marked by the symbol
are recyclable.
1 Temperature regulator
Action Freeze button
2 Action Freeze indicator
Switching on
Remove, if present, the remove label stuck
on the inside of the freezer compartment.
Insert the plug into the wall socket.
Switching off
To switch off the appliance remove the mains
plug.
Temperature regulation
The temperature is automatically regulated.
To operate the appliance, proceed as follows:
• Keep the temperature regulator pressed
until the LED corresponding to the required temperature lights up. Selection is
progressive, varying from +2°C to +8°C.
The temperature indicated by the LED is
selected each time the button is pressed.
3) If a water connection is foreseen
A medium setting is generally the most
suitable.
However, the exact setting should be chosen
keeping in mind that the temperature inside
the appliance depends on:
• room temperature
• how often the door is opened
• the quantity of food stored
• the location of the appliance.
Important! If the ambient temperature is
lower than 16°C press the temperature
regulator until the LED corresponding to the
lowest temperature lights up.
Action Freeze function
You can activate the Action Freeze function
by pressing the Action Freeze button until the
LED corresponding to the symbol Action
Freeze indicator lights up.
Page 5
To deactivate the Action Freeze function,
keep pressing the Action Freeze button until
the required temperature is selected.
First use
Cleaning the interior
Before using the appliance for the first time,
wash the interior and all internal accessories
with lukewarm water and some neutral soap
so as to remove the typical smell of a brandnew product, then dry thoroughly.
Daily use
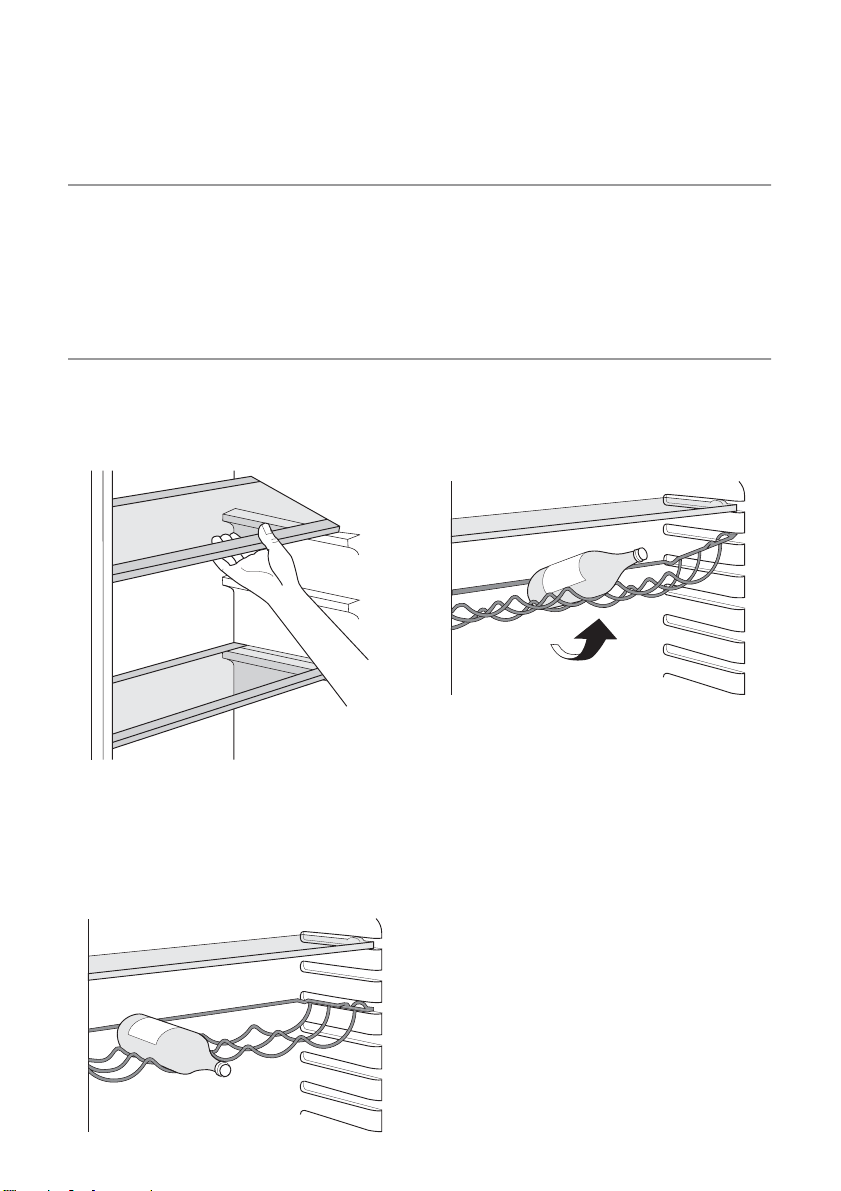
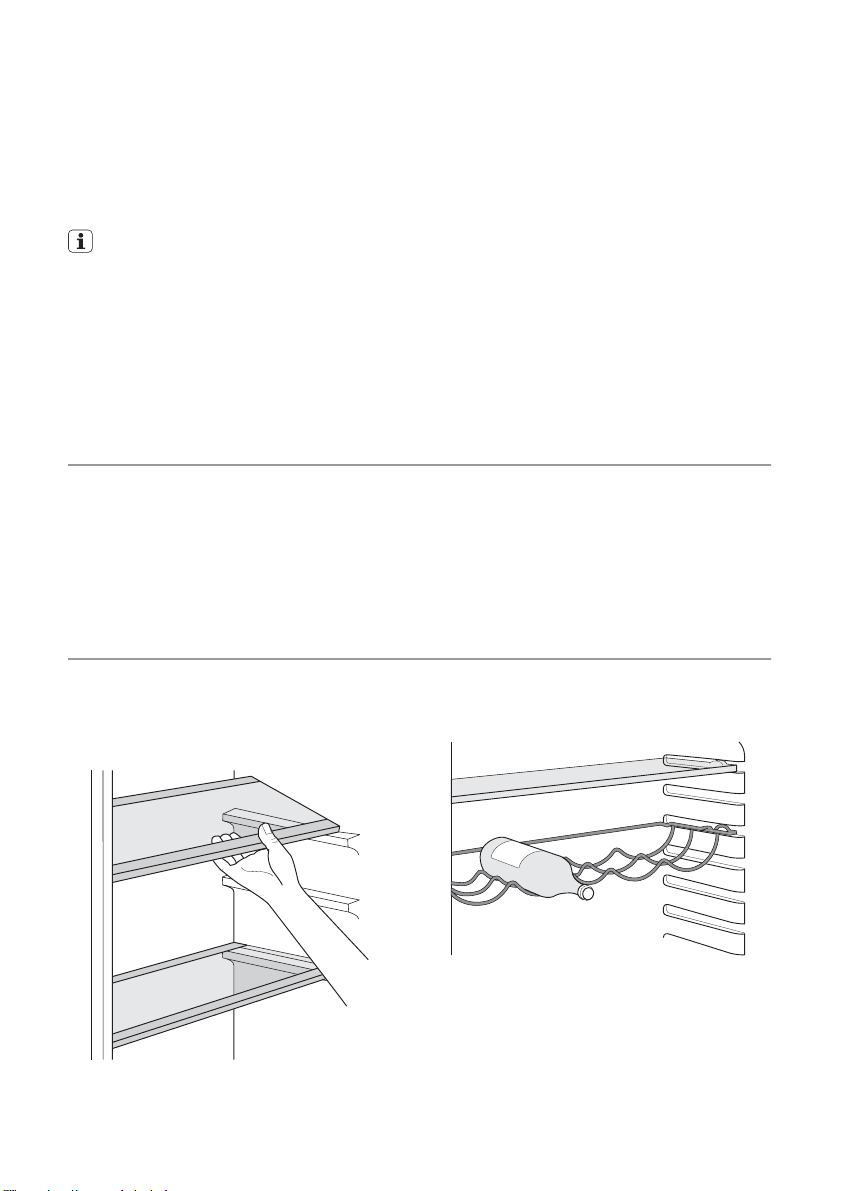
Movable shelves
The walls of the refrigerator are equipped
with a series of runners so that the shelves
can be positioned as desired.
electrolux 5
Important! Do not use detergents or abrasive powders, as these will damage the finish.
This bottle holder shelf can be tilted in order
to store previously opened bottles. To obtain
this result, pull the shelf up so it can rotate
upwards and be placed on the next higher
level.
Bottle rack
Place the bottles (with the opening facing
front) in the pre-positioned shelf.
Important! If the shelf is positioned
horizontally, place only closed bottles.
Positioning the door shelves
To permit storage of food packages of various sizes, the door shelves can be placed at
different heights.
To make these adjustments proceed as follows:
gradually pull the shelf in the direction of the
arrows until it comes free, then reposition as
required.
Page 6
6 electrolux
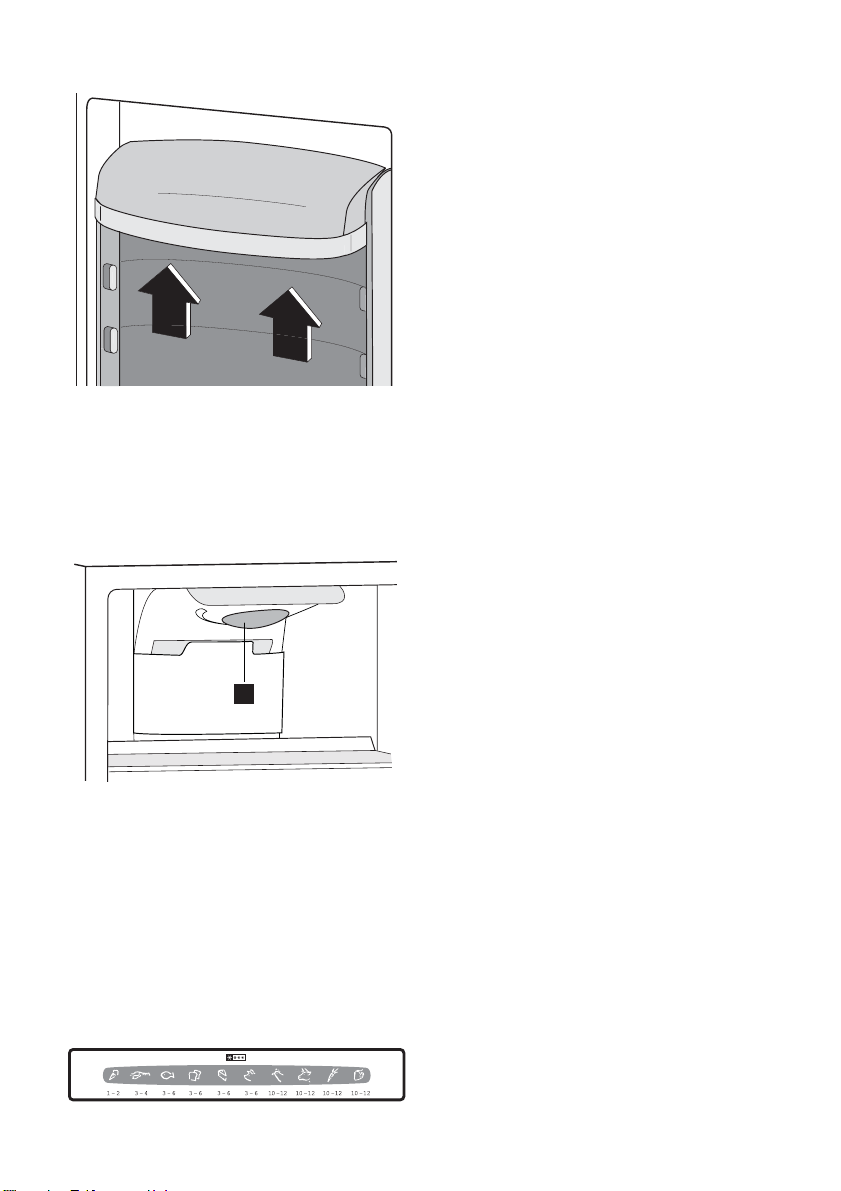
Air cooling
The Dynamic Air Cooling (DAC) fan let food
cool quickly and a more uniform temperature
in the compartment.
You can switch on the fan by pressing the
switch shown in the picture. The green light
comes on.
B
Important! Switch on the fan when the
ambient temperature exceeds 25°C.
Ice-cube production
This appliance is equipped with one or more
trays for the production of ice-cubes. Fill
these trays with water, then put them in the
freezer compartment.
Important! Do not use metallic instruments
to remove the trays from the freezer.
Freezing Calendar
The symbols show different types of frozen
goods.
The numbers indicate storage times in
months for the appropriate types of frozen
goods. Whether the upper or lower value of
the indicated storage time is valid depends
on the quality of the foods and treating before
freezing.
Freezing fresh food
The freezer compartment is suitable for
freezing fresh food and storing frozen and
deep-frozen food for a long time.
To freeze fresh food activate the Action
Freeze function at least 24 hours before placing the food to be frozen in the freezer compartment.
Move the shelf present in the freezer compartment to the middle seat, keeping it horizontal.
Place the fresh food to be frozen on that
shelf.
The maximum amount of food that can be
frozen in 24 hours is specified on the rating
plate, a label located on the inside of the appliance.
The freezing process lasts 24 hours: during
this period do not add other food to be frozen.
After 24 hours, when the freezing process is
completed, return to the required temperature (refer to "Temperature regulation").
Storage of frozen food
When first starting-up or after a period out of
use, before putting the products in the compartment let the appliance run at least 2
hours on the higher settings.
Important! In the event of accidental
defrosting, for example due to a power
failure, if the power has been off for longer
than the value shown in the technical
characteristics chart under "rising time", the
defrosted food must be consumed quickly or
cooked immediately and then re-frozen (after
cooling).
Thawing
Deep-frozen or frozen food, prior to being
used, can be thawed in the refrigerator compartment or at room temperature, depending
on the time available for this operation.
Small pieces may even be cooked still frozen,
directly from the freezer: in this case, cooking
will take longer.
Page 7

Helpful hints and tips
Hints for energy saving
• Do not open the door frequently or leave it
open longer than absolutely necessary.
• If the ambient temperature is high, the
Temperature Regulator is on the higher
setting and the appliance is fully loaded,
the compressor may run continuously,
causing frost or ice on the evaporator. If
this happens, turn the Temperature Regulator toward lower settings to allow automatic defrosting and so a saving in electricity consumption.
Hints for fresh food refrigeration
To obtain the best performance:
• do not store warm food or evaporating liquids in the refrigerator
• do cover or wrap the food, particularly if it
has a strong flavour
• p osit ion f ood s o tha t air can circulate freely
around it
Hints for refrigeration
Useful hints:
Meat (all types) : wrap in polythene bags and
place on the glass shelf above the vegetable
drawer.
For safety, store in this way only one or two
days at the most.
Cooked foods, cold dishes, etc..: these
should be covered and may be placed on any
shelf.
Fruit and vegetables: these should be thoroughly cleaned and placed in the special
drawer(s) provided.
Butter and cheese: these should be placed
in special airtight containers or wrapped in
aluminium foil or polythene bags to exclude
as much air as possible.
Milk bottles: these should have a cap and
should be stored in the bottle rack on the
door.
Bananas, potatoes, onions and garlic, if not
packed, must not be kept in the refrigerator.
Hints for freezing
To help you make the most of the freezing
process, here are some important hints:
electrolux 7
• the maximum quantity of food which can
be frozen in 24 hrs. is shown on the rating
plate;
• the freezing process takes 24 hours. No
further food to be frozen should be added
during this period;
• only freeze top quality, fresh and thoroughly cleaned, foodstuffs;
• prepare food in small portions to enable it
to be rapidly and completely frozen and to
make it possible subsequently to thaw only
the quantity required;
• wrap up the food in aluminium foil or polythene and make sure that the packages
are airtight;
• do not allow fresh, unfrozen food to touch
food which is already frozen, thus avoiding
a rise in temperature of the latter;
• lean foods store better and longer than
fatty ones; salt reduces the storage life of
food;
• water ices, if consumed immediately after
removal from the freezer compartment,
can possibly cause the skin to be freeze
burnt;
• it is advisable to show the freezing in date
on each individual pack to enable you to
keep tab of the storage time.
Hints for storage of frozen food
To obtain the best performance from this appliance, you should:
• make sure that the commercially frozen
foodstuffs were adequately stored by the
retailer;
• be sure that frozen foodstuffs are transferred from the foodstore to the freezer in the
shortest possible time;
• not open the door frequently or leave it
open longer than absolutely necessary.
• Once defrosted, food deteriorates rapidly
and cannot be refrozen.
• Do not exceed the storage period indicated by the food manufacturer.
Page 8

8 electrolux
How to use the water dispenser with BRITA MAXTRA filter cartridge
BRITA water filter unit
Internal components:
6
3
5
2
1
4
1 Water tank
2 Funnel
3 Tank lid
4Valve + gasket
5 Including BRITA MAXTRA filter
6 BRITA Memo - the electronic cartridge
exchange indicator
External components:
1Dispenser
2 Water lever
3 Water drop tray
Initial operations to use your water
dispenser
1. Remove every tape and other protection
system from the tank assembly
2. clean the components, as described into
"Water dispenser cleaning procedure", in
order to remove eventual residue.
Water dispenser cleaning procedure
1. Unblock the two stopping elements on
the sides of the tank as shown in the pictures:
– take out the BRITA MAXTRA cartridge
from the water filter unit
– press the stopping elements in the
middle and move it up
– move the stopper into direction of the
central tank.
2. Push up the tank along the direction of
the valve.
3. Remove the lid and the funnel.
1
2
3
Page 9
electrolux 9
8. Put the assembled tank on the door
along the valve direction.
9. Block the stopping elements in the in-
verse order of unblock.
10. Insert again the BRITA MAXTRA car-
tridge in the funnel .
How to use the BRITA MAXTRA filter
cartridge
Step 1: Preparing the cartridge
To prepare your BRITA filter cartridge, please
remove the protective wrapper (note: cartridge and inside wrapper may appear moist,
A
this is simply condensation).
Immerse the cartridge in cold water and
shake it gently to remove any air bubbles.
The filter now is ready to use.
As required for some other water filter cartridges, there is no need to pre-soak the new
Maxtra Cartridge.
4. Unscrew the valve in counter clockwise
(pay particular attention not to lose the
Valve Gasket because is necessary to a
correct functioning of the features ).
5. Clean the tank lid, the valve and the gasket with a solution of warm water and
neutral soap. Rinse it and put it inside the
door hole during the cleaning of the other
components (in order to avoid cold air
leakage from the fridge).
6. Clean the tank and the funnel into the
dishwasher or with a solution of warm
water and neutral soap and rinse them.
7. After the tank components cleaning take
back the valve from the fridge door and
assembly the tank in the inverse order
(4;3;2;1) of disassembly (pay attention at
the valve gasket positioning ).
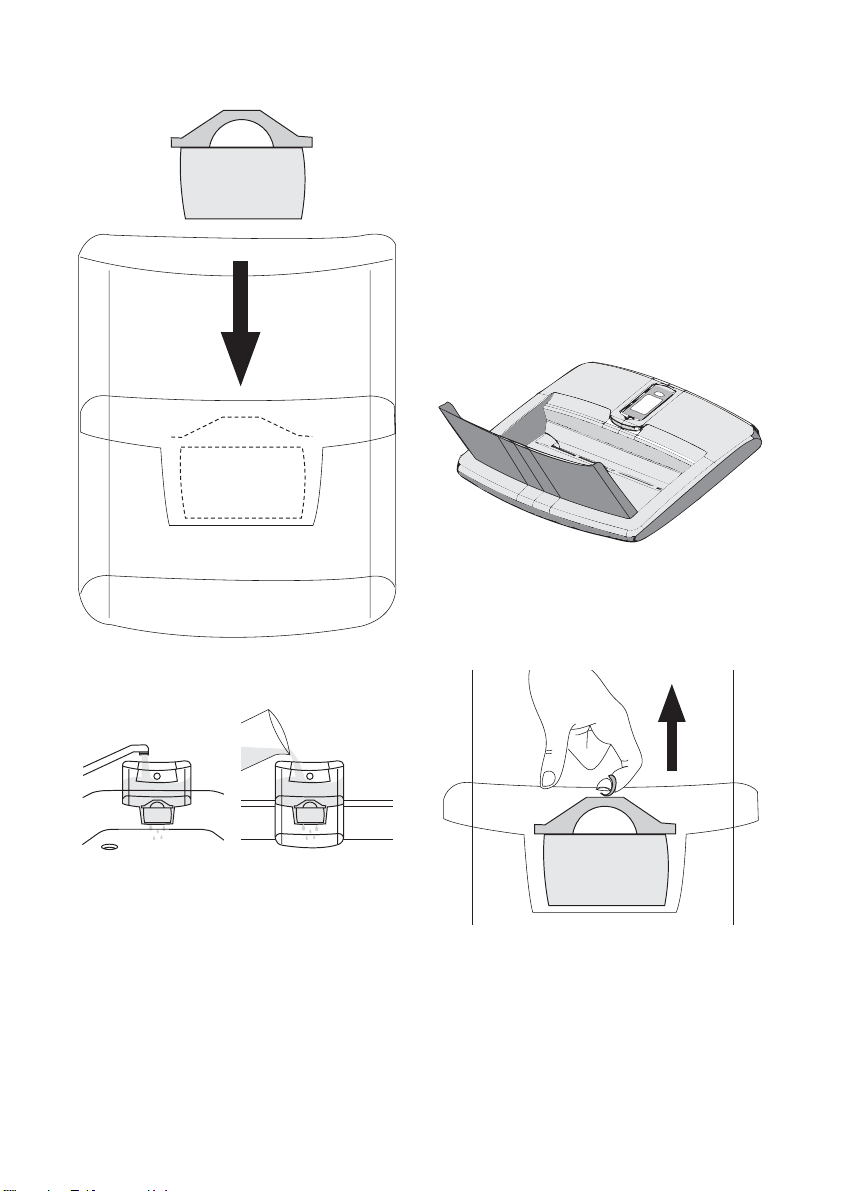
Step 2: Insert in the water tank
Remove the tank lid. Before inserting the cartridge, remove the funnel and clean it thoroughly by rising it and wiping it dry.
Then, thoroughly clean the inside of the water
tank with a dump cloth and wipe it dry as
well.
Place the cartridge into the filter tank and
push downwards until it 'clicks' firmly into
place.
The cartridge should stay in place if the funnel
is turned upside down.
Page 10
10 electrolux
pour it inside the tank through the cover as
shown into the picture (use the lid every time
that you want to fill your water).
Important! In order to avoid risk of spillage
of water during closing and opening of the
refrigerator door, we recommend to not fill
completely the water tank but leave a head
space of air.
If you have not used all filtered water in the
water tank within 1-2 days, please discard
any water left inside the BRITA water filter unit
before refilling it.
Allow the water to filter through and repeat
"Step 4" as many times as you want until the
BRITA water filter unit is filled up.
Remove cartridge with ring pull handle
Step 3: Rinse the cartridge
2x 3x=ok
Take the funnel out of the BRITA water filter
unit, fill it under the tap with cold tap water
and allow it to filter through.
Discard the first two fillings into the sink.
These first two fillings are used to flush the
filter cartridge.
Then, place the funnel back into BRITA water
filter unit.
Place the cover back onto the jug and press
it carefully downwards to ensure it fits correctly into place.
Step 4: Refill the water tank
To fill the tank with cold water, simply open
the flip top lid, take a jug of tap water and
To exchange the cartridge after four weeks,
simply use the ring pull handle on the top of
the cartridge to remove it from the funnel,
and repeat steps 1 - 3 above.
The BRITA Memo
For maximum filter performance and optimum taste, it is important to change your
BRITA cartridge regularly. BRITA recommends that you replace the cartridge in the
BRITA unit of your fridge every four weeks.
Page 11
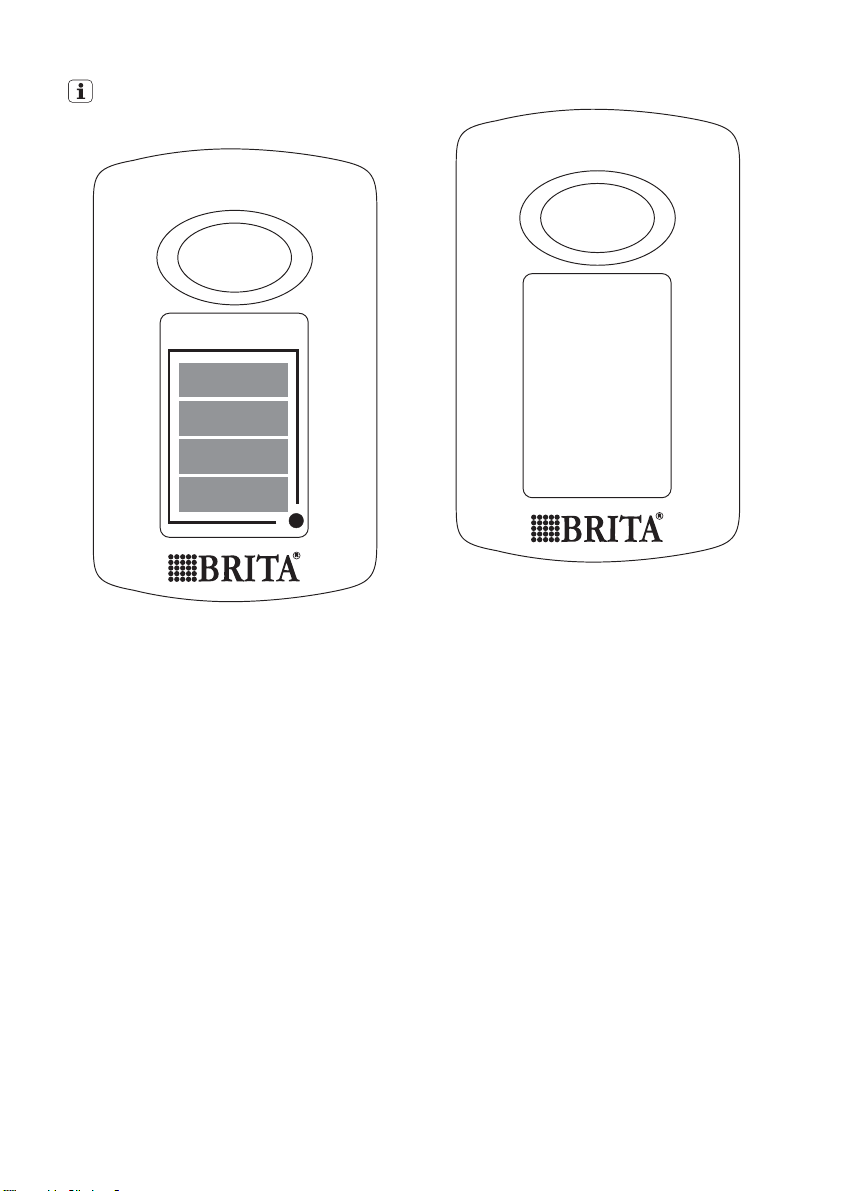
BRITA Memo automatically reminds you
when to change the cartridge.
START
electrolux 11
START
%
%
100
75
50
25
The unique BRITA Memo measures the recommended time of use of your cartridge.
Memo is easy to use and automatically reminds your when to change your cartridge.
The BRITA Memo is located on the lid of the
water tank. Operation is really simple.
Start the Memo display
To start Memo please press and hold down
the start button on the lid until all four bars
appear in the display and flash twice. The
Memo is now set.
100
75
50
25
Functional control
The flashing dot in the bottom right corner of
the Memo indicates that the Memo is working.
Page 12
12 electrolux
START
%
100
75
50
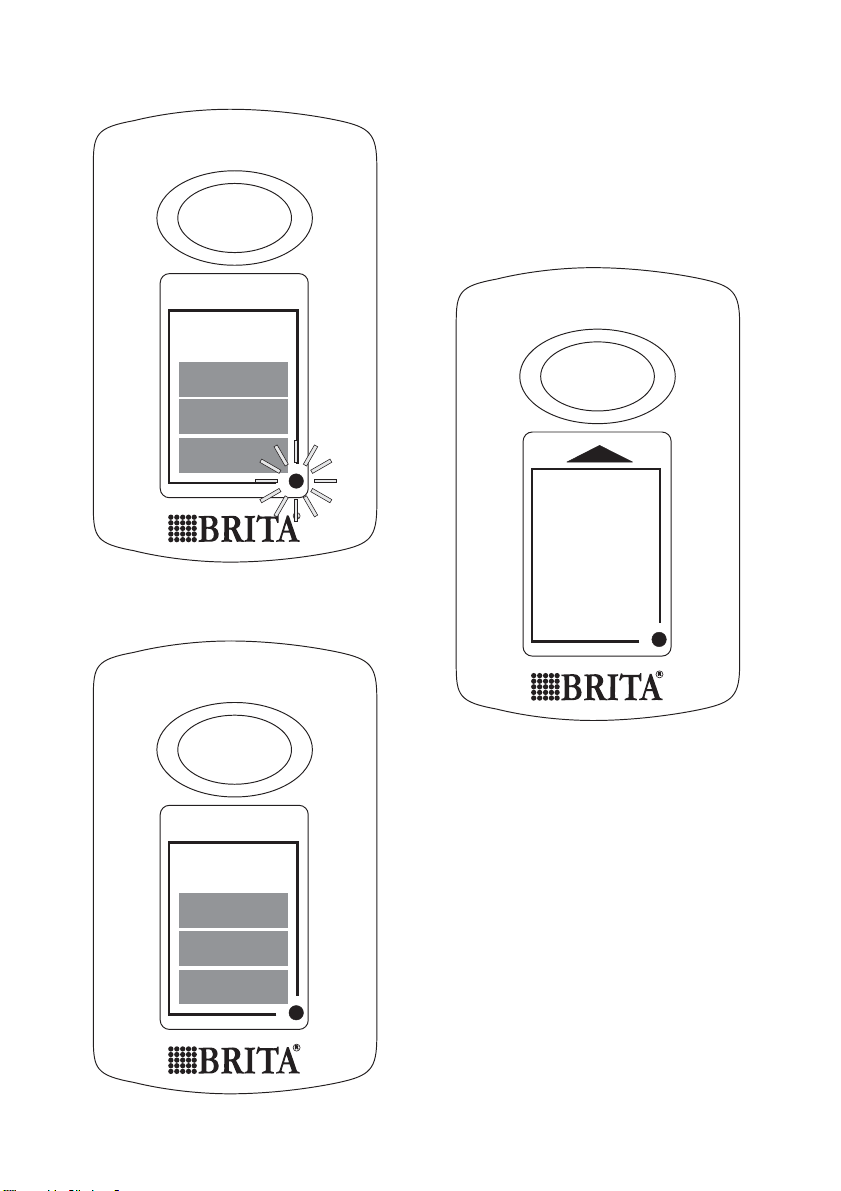
Every week one bar will disappear to show
the remaining cartridge life. After four weeks
all four bars will disappear. This, and a flashing arrow, indicate that the cartridge should
now be changed.
Insert a new cartridge according to the instructions and reactivate the Memo as described above.
START
Change display
START
25
%
100
75
50
25
%
100
75
50
25
When only one bar is showing, you should
just check whether you have a new BRITA
MAXTRA filter cartridge to hand.
Important! The Memo is only designed to be
used with BRITA filter cartridges.
BRITA Memo: the electronic cartridge exchange indicator has a life of approximately
5 years. At the end of the Memo's life, please
remember that it is an electronic device and
to dispose on the Memo according to all applicable provisions and regulations.
To remove the exhausted Memo place a
screwdriver in the notch next to the Memo
and push it out.
Please note that Memo should not be removed for any other reason than to dispose
of it.
Page 13
Important information
• The fridge door valve hole must be closed
with the Water Valve during the regular
functioning of the appliance.
• Use only drinking water. The use of any
other drink type can leave residues, taste
or odor in the reservoir and in the tap.
• It is possible to hear some noises caused
by air entering when the water left the reservoir.
• In case the water does not flow well, press
the driving lever once again. Keep the
glass below the tap for some instants, in
order to assure that all the water is collected by the glass.
• Do not use gasified drinks, such as soft
drinks. The drink can leak due to the gas
pressure.
• Remember that water is a foodstuff.
Please consume filtered water within one
to two days.
electrolux 13
• Should your BRITA water filter unit not be
in use for a prolonged period (e.g. vacation), we recommend that you discard any
water left inside the system and leave the
cartridge inside the filter tank.
Before using the system again take out the
cartridge and repeat steps 1 to 4 of "How
to use the BRITA MAXTRA filter cartridge".
• The BRITA water filter unit is designed for
use only with municipally treated tap water
(note: this water is constantly controlled
and according to legal regulations safe to
drink) or with water from private supplies
which has been tested safe to drink.
If an instruction is received from the authorities that mains water must be boiled,
the BRITA filtered water has also to be
boiled. When the instruction to boil water
is no longer in force, the entire filter system
must be cleaned and a new cartridge inserted.
More information on the use of BRITA filter
cartridges and the Memo can be found in the
BRITA information guide.
You can purchase new BRITA filter cartridges and Memo through consumer
service network of Electrolux or BRITA.
Care and cleaning
Caution! Unplug the appliance before
carrying out any maintenance operation.
This appliance contains hydrocarbons in
its cooling unit; maintenance and recharging must therefore only be carried
out by authorized technicians.
Periodic cleaning
The equipment has to be cleaned regularly:
• clean the inside and accessories with lukewarm water and some neutral soap.
• regularly check the door seals and wipe
clean to ensure they are clean and free
from debris.
• rinse and dry thoroughly.
Important! Do no t p ul l, m ov e o r d ama ge an y
pipes and/or cables inside the cabinet.
Never use detergents, abrasive powders,
highly perfumed cleaning products or wax
polishes to clean the interior as this will damage the surface and leave a strong odour.
Clean the condenser (black grill) and the
compressor at the back of the appliance with
a brush or a vacuum cleaner. This operation
will improve the performance of the appliance and save electricity consumption.
Important! Take care of not to damage the
cooling system.
Many proprietary kitchen surface cleaners
contain chemicals that can attack/damage
the plastics used in this appliance. For this
reason it is recommended that the outer casing of this appliance is only cleaned with
warm water with a little washing-up liquid
added.
After cleaning, reconnect the equipment to
the mains supply.
Defrosting of the refrigerator
Frost is automatically eliminated from the
evaporator of the refrigerator compartment
every time the motor compressor stops, dur-
Page 14
14 electrolux
ing normal use. The defrost water drains out
through a trough into a special container at
the back of the appliance, over the motor
compressor, where it evaporates.
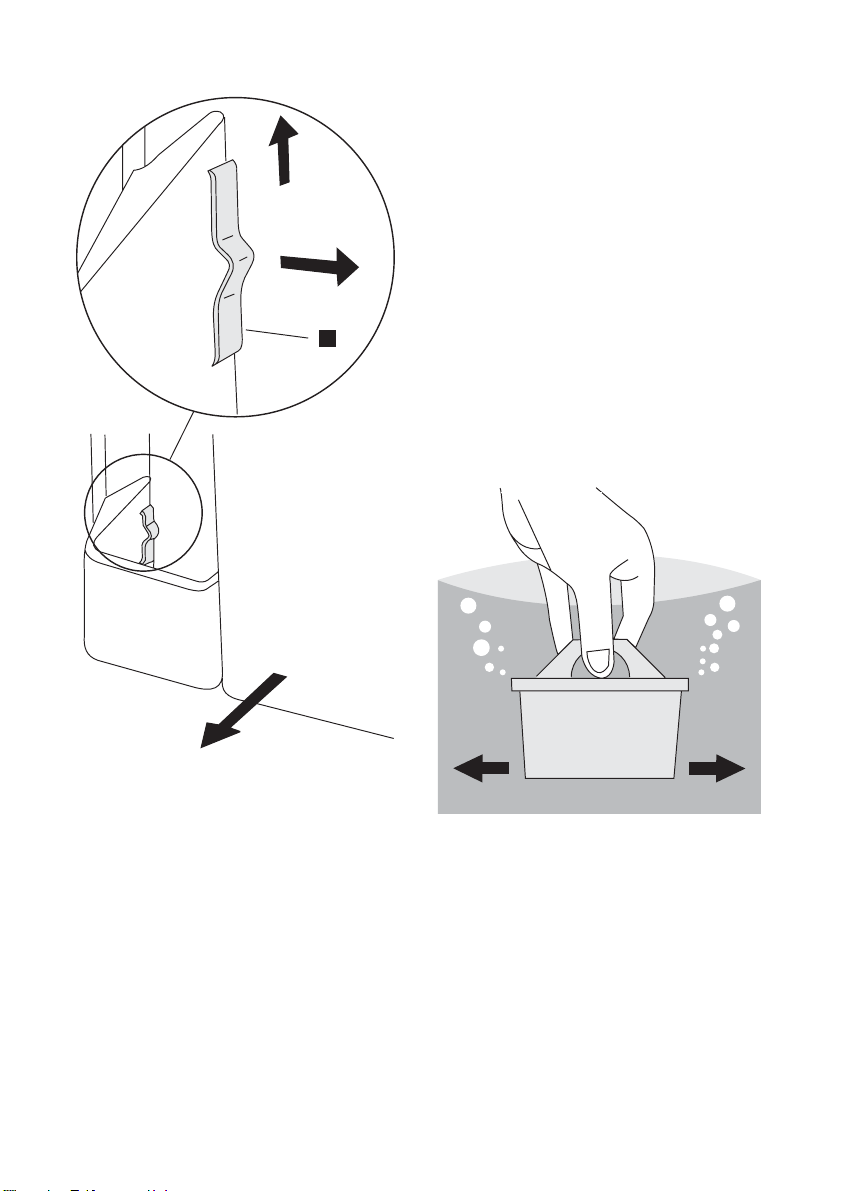
It is important to periodically clean the defrost
water drain hole in the middle of the refrigerator compartment channel to prevent the
water overflowing and dripping onto the food
inside. Use the special cleaner provided,
which you will find already inserted into the
drain hole.
Defrosting of the freezer
The freezer compartment of this model, on
the other hand, is a "no frost" type. This
means that there is no buildup of frost when
it is in operation, neither on the internal walls
nor on the foods.
The absence of frost is due to the continuous
circulation of cold air inside the compartment, driven by an automatically controlled
fan.
Periods of non-operation
When the appliance is not in use for long periods, take the following precautions:
• disconnect the appliance from elec-
tricity supply
• remove all food
•
• leave the door/doors ajar to prevent un-
If the cabinet will be kept on, ask somebody
to check it once in a while to prevent the food
inside from spoiling in case of a power failure.
4) If foreseen.
4)
defrost
accessories
pleasant smells.
and clean the appliance and all
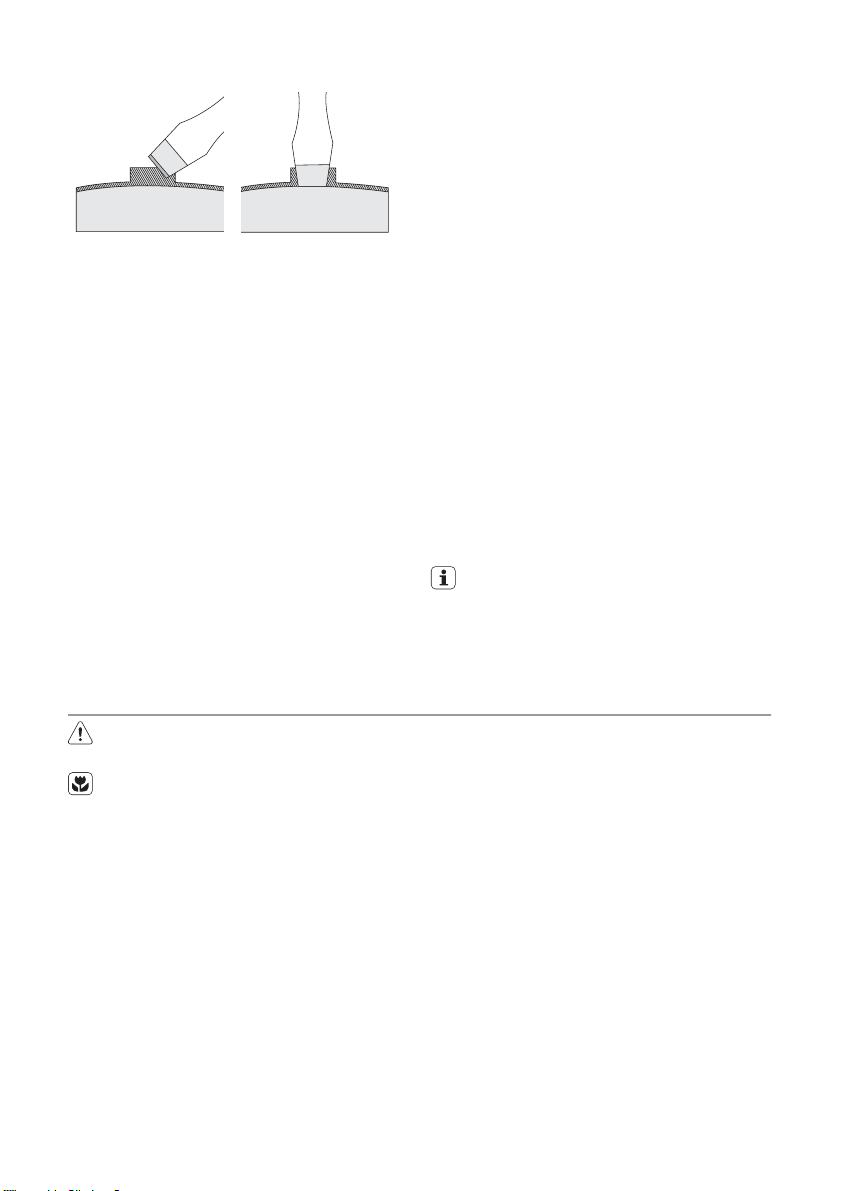
Replacing the Taste Guard filter
The Taste Guard filter helps to reduce the
odours inside the fridge limiting the risk of
unwanted aroma in sensitive food
To get the best performance the Taste Guard
filter should be changed once every year.
New active air filters can be purchased from
your local dealer.
• The air filter is placed behind the flap and
can be reached by pulling the flap outward
(1)
• pull out of the slot the exhausted air filter.
• insert the new air filter in the slot (2)
• close the flap.
The air filter is a consumable accessory and
as such is not covered by the guarantee.
2
1
Important! During the operation, always
keep the air ventilation flap closed.
The air filter should be handled carefully to
prevent its surface from being scratched.
Page 15
electrolux 15
What to do if…
Warning! Before troubleshooting,
disconnect the mains plug from the
mains socket.
Only a qualified electrician or competent
person must do the troubleshooting that
is not in this manual.
Problem Possible cause Solution
The appliance does not
operate. The lamp does
not operate.
The mains plug is not connected
The appliance has no power.
The lamp does not work. The lamp is defective. Refer to "Replacing the lamp".
The compressor operates
continually.
The door is not closed correctly. Refer to "Closing the door".
The door has been opened too
The product temperature is too
The room temperature is too
Water flows on the rear
plate of the refrigerator.
Water flows into the refrigerator.
Products prevent that water flows
Water flows on the
ground.
The temperature in the
appliance is too low.
The temperature in the
appliance is too high.
The door is not closed correctly. Refer to "Closing the door".
The product temperature is too
Many products are stored at the
The appliance is switched off. Switch on the appliance.
to the mains socket correctly.
There is no voltage in the mains
socket.
The temperature is not set correctly.
frequently.
high.
high.
During the automatic defrosting
process, frost defrosts on the rear
plate.
The water outlet is clogged. Clean the water outlet.
into the water collector.
The melting water outlet does not
flow in the evaporative tray above
the compressor.
The temperature regulator is not
set correctly.
The temperature regulator is not
set correctly.
high.
same time.
Important! There are some sounds during
normal use (compressor, refrigerant
circulation).
Connect the mains plug to the
mains socket correctly.
Connect a different electrical appliance to the mains socket.
Contact a qualified electrician.
Set a higher temperature.
Do not keep the door open longer
than necessary.
Let the product temperature decrease to room temperature before
storage.
Decrease the room temperature.
This is correct.
Make sure that products do not
touch the rear plate.
Attach the melting water outlet to
the evaporative tray.
Set a higher temperature.
Set a lower temperature.
Let the product temperature decrease to room temperature before
storage.
Store less products at the same
time.
Page 16
16 electrolux
Problem Possible cause Solution
The temperature in the refrigerator is too high.
The temperature in the
freezer is too high.
There is too much frost.
The door is not closed correctly. Refer to "Closing the door".
The temperature regulator is not
Replacing the lamp
1. Disconnect the plug from the mains
socket.
2. Press on the rear hook of the lamp cover
by a screwdriver and at the same time pull
and rotate the cover in the direction of the
arrow.
There is no cold air circulation in
the appliance.
Products are too near to each
other.
Food is not wrapped correctly. Wrap the food correctly.
set correctly.
Closing the door
1. Clean the door gaskets.
2. If necessary, adjust the door. Refer to "Installation".
3. If necessary, replace the defective door
gaskets. Contact the Service Force Center.
Make sure that there is cold air circulation in the appliance.
Store products so that there is cold
air circulation.
Set a higher temperature.
3. Replace the lamp with one of the same
power (the maximum power is shown on
the lamp cover).
4. Install the lamp cover by fixing it into its
original position.
5. Connect the plug to the mains socket.
6. Open the door. Make sure that the light
comes on.
A
max 25 W
B
Technical data
Dimension of the recess
Height 1800 mm
Width 695 mm
Depth 669 mm
Rising Time 20 h
The technical information are situated in the
rating plate on the internal left side of the appliance and in the energy label.
Page 17
Installation
Read the "Safety Information" carefully
for your safety and correct operation of
the appliance before installing the
appliance.
Positioning
Install this appliance at a location where the
ambient temperature corresponds to the climate class indicated on the rating plate of the
appliance:
Climate
class
SN +10°C to + 32°C
N +16°C to + 32°C
ST +16°C to + 38°C
T +16°C to + 43°C
Location
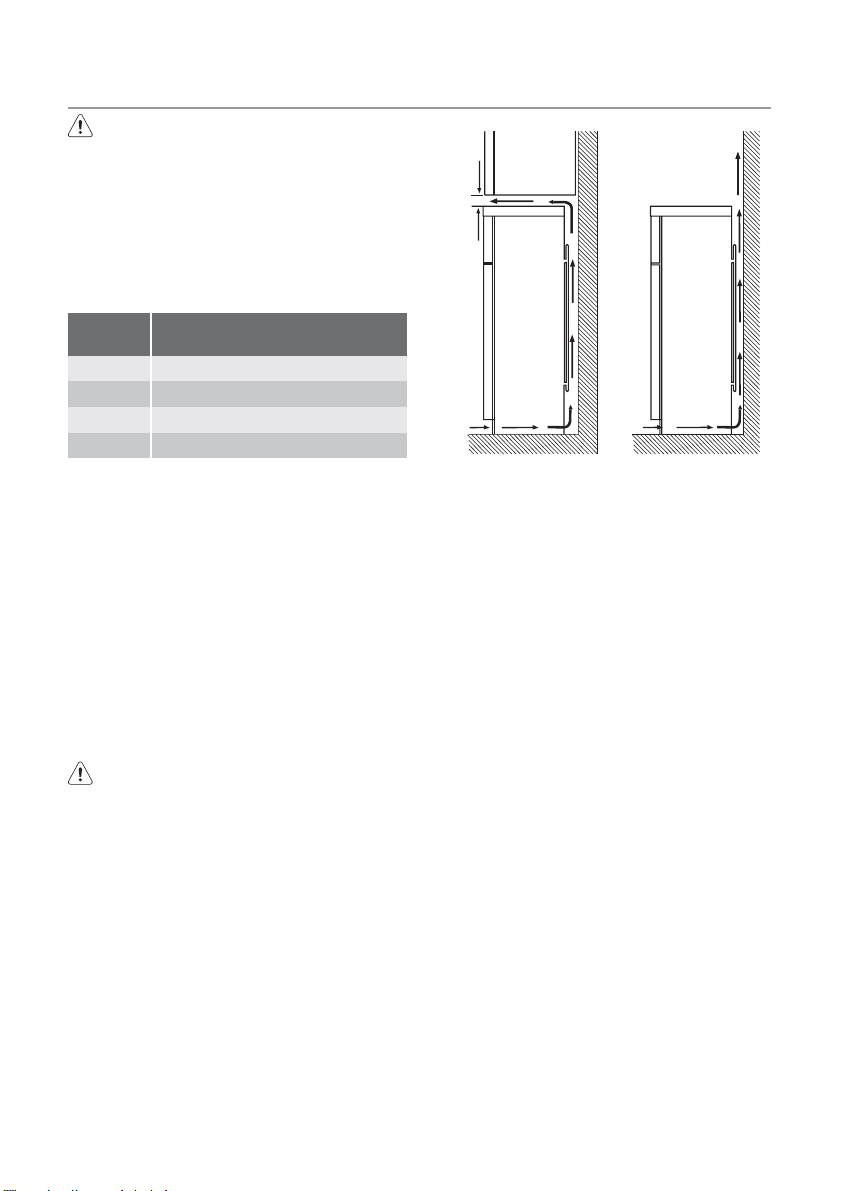
The appliance should be installed well away
from sources of heat such as radiators, boilers, direct sunlight etc. Ensure that air can
circulate freely around the back of the cabinet. To ensure best performance, if the appliance is positioned below an overhanging
wall unit, the minimum distance between the
top of the cabinet and the wall unit must be
at least 100 mm . Ideally, however, the appliance should not be positioned below overhanging wall units. Accurate levelling is ensured by one or more adjustable feet at the
base of the cabinet.
Warning! It must be possible to
disconnect the appliance from the mains
power supply; the plug must therefore
be easily accessible after installation.
Ambient temperature
electrolux 17
100 mm
AB
10 mm
Electrical connection
Before plugging in, ensure that the voltage
and frequency shown on the rating plate correspond to your domestic power supply.
The appliance must be earthed. The power
supply cable plug is provided with a contact
for this purpose. If the domestic power supply socket is not earthed, connect the appliance to a separate earth in compliance with
current regulations, consulting a qualified
electrician.
The manufacturer declines all responsibility if
the above safety precautions are not observed.
This appliance complies with the E.E.C. Directives.
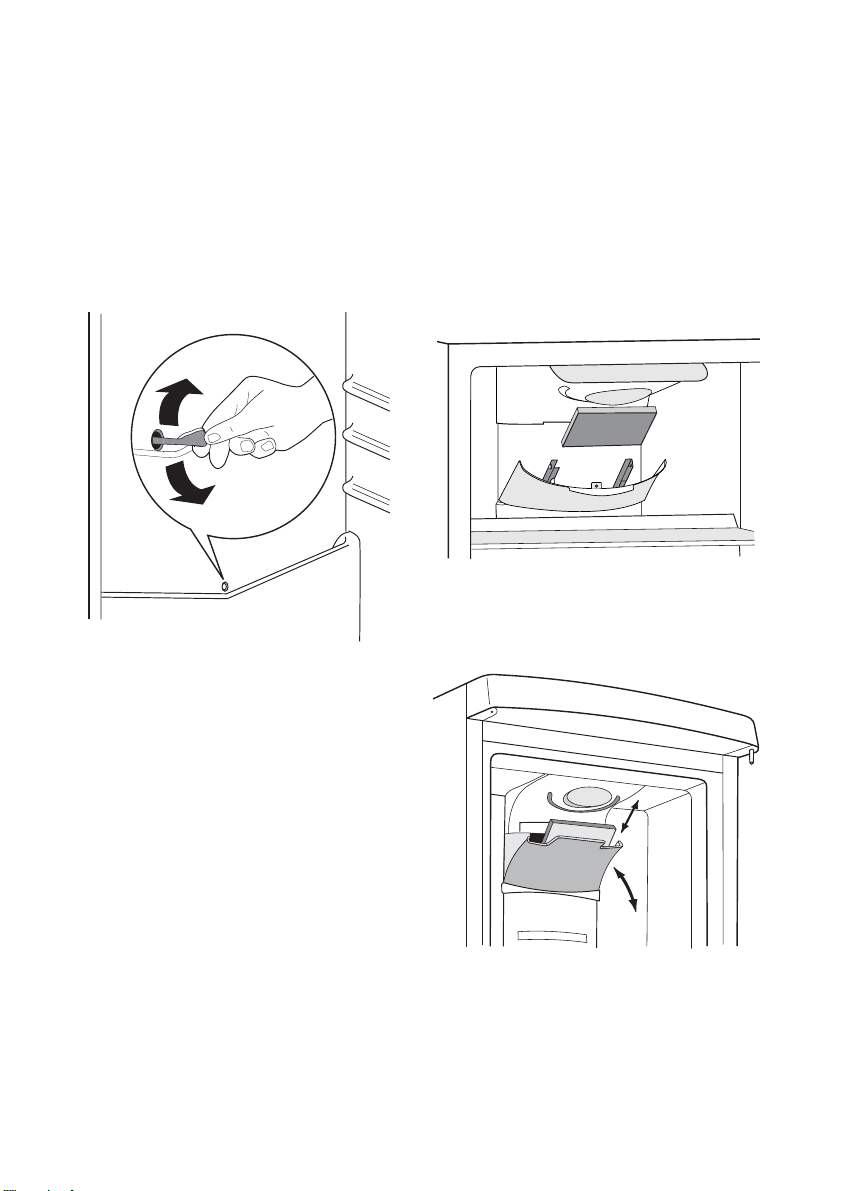
Rear spacers
Inside the appliance you find two
spacers which must be fitted as shown
in the figure.
Slacken the screws and insert the spacer
under the screw head, then retighten the
screws.
10 mm
Page 18
18 electrolux
Installation of the Taste Guard Filter
The Taste Guard Filter is an active carbon filter which absorbs bad odours and permits
to maintain the best flavour and aroma for all
foodstuffs without risk of odour cross contamination.
On delivery the carbon filter is in a plastic bag
to maintain it’s duration and characteristics.
The filter should be placed behind the flap
before the appliance is turned on.
1. Pull the flap outwards (1)
2. Remove the filter from the plastic bag
3. Insert the filter in the slot found in the back
of the flap cover (2)
4. Close the flap cover
2
1
Important! During operation, always keep
the air ventilation flap closed.
The filter should be handled carefully so fragments do not loosen from the surface.
Door reversibility
Warning! Before carrying out any
operations, remove the plug from the
power socket.
Important! To carry out the following
operations, we suggest that this be made
with another person that will keep a firm hold
on the doors of the appliance during the
operations.
To change the opening direction of the door,
do these steps:
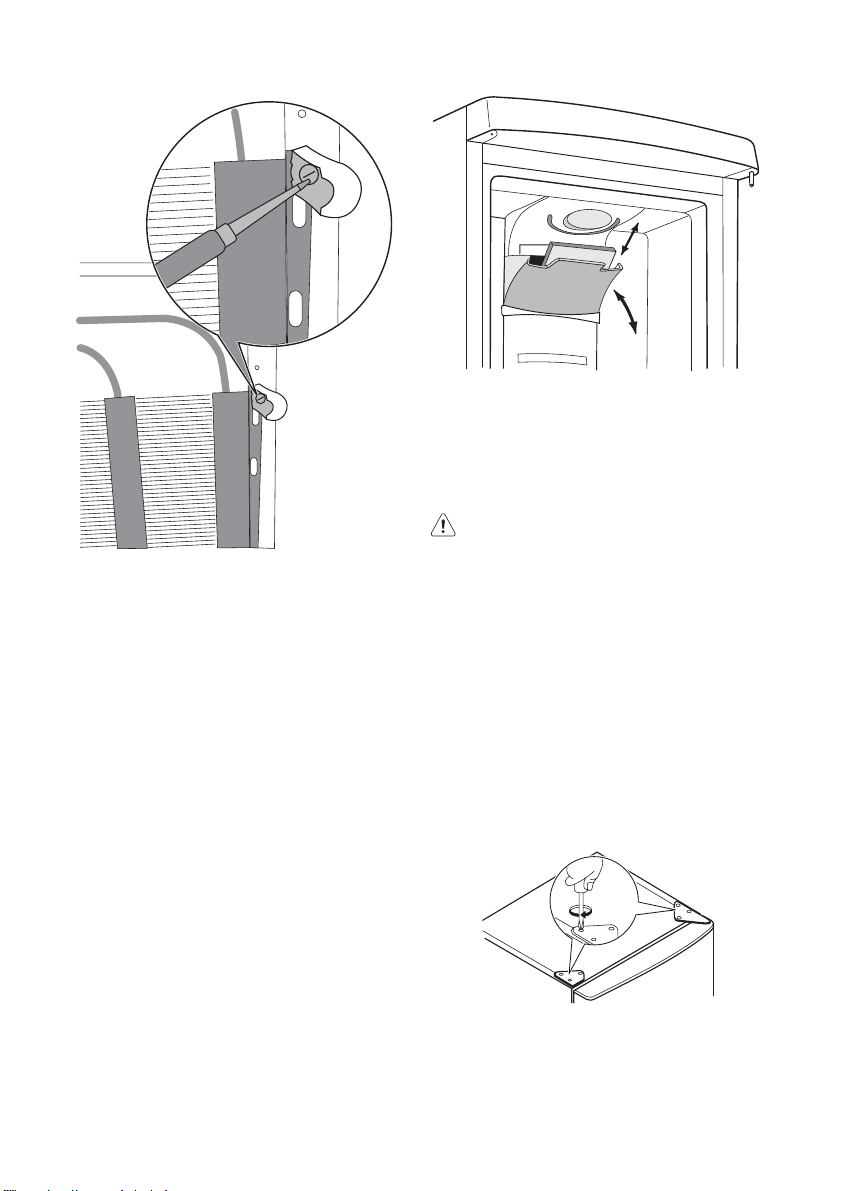
1. Remove the upper hinge taking care for
the upper door not to fall off and keep it
for future actions.
2. Remove the upper door.
3. Remove the upper support and mount it
in the opposite side.
4. Unscrew the middle hinge(H). Unscrew
the plastic plugs located on the opposite
Page 19
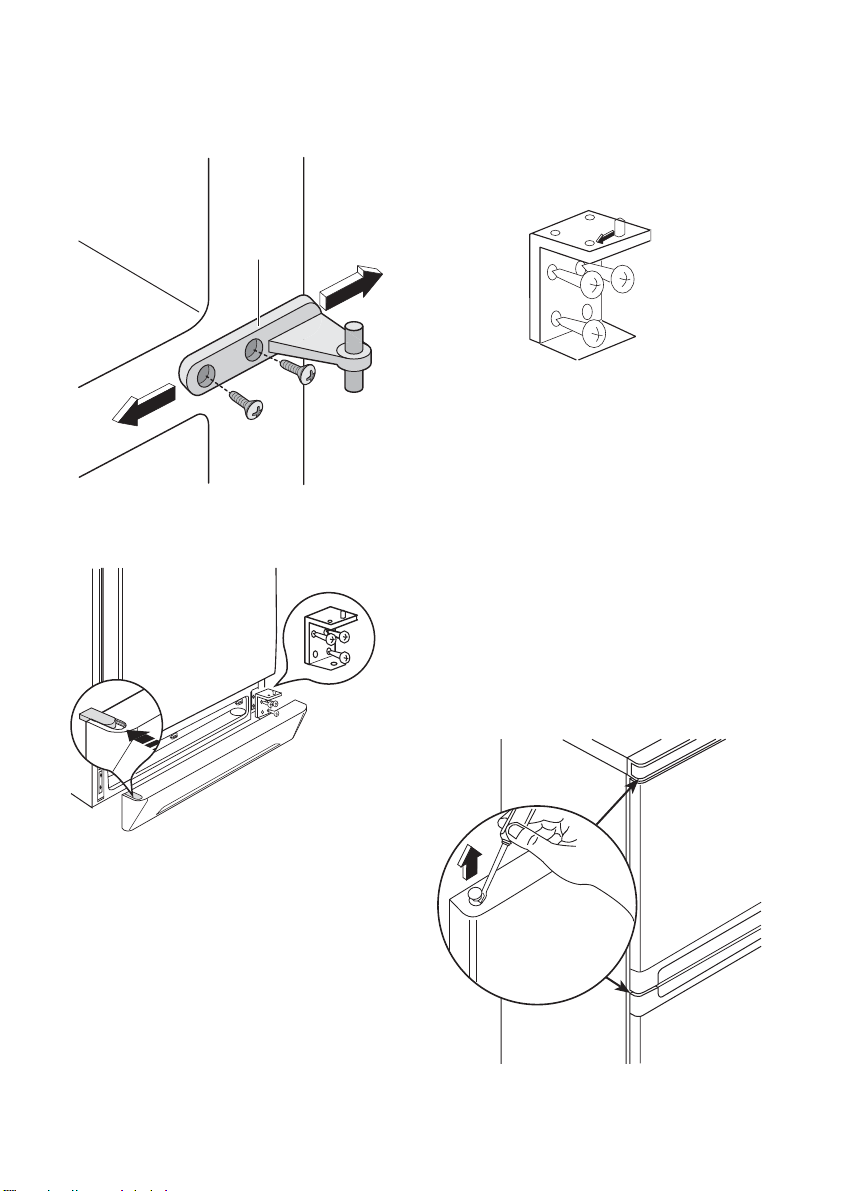
electrolux 19
side of the central hinge and introduce
them in the holes occupied before by the
hinge.
H
5. Remove the lower door.
6. Pull off the ventilation grille which is fixed
by two screws.
the adjustable feet at the bottom of the
cabinet using your fingers or a tool.
12. Slide the hole cover out of the ventilation
grille by pushing it in the direction of the
arrow and reassemble it on the opposite
side.
13. Refit the ventilation grille, fixing the
screws.
14. Reassemble the lower door.
15. Reassemble the middle hinge (H) in the
opposite side.
16. Reassemble the upper door.
17. In your documentation bag you will find
the upper hinge necessary to make the
reversibility. Please screw it in place.
7. Carefully place the appliance on its back,
totally unscrew the adjustable foot and
screw it in the opposite side.
8. Remove the bottom hinge by unscrewing its fixing screws.
9. Using a 12 mm spanner, unscrew the
hinge pin and reassemble it on the opposite side of the hinge.
10. Reassemble the lower hinge in the opposite side, using the screws previously
removed.
11. Carefully replace the appliance in its
working position and adjust the level of
the appliance by screwing / unscrewing
Do a final check to make sure that:
• All screws are tightened.
• The magnetic seal adheres to the cabinet.
Page 20
20 electrolux
• The door opens and closes correctly.
If the ambient temperature is cold (i.e. in Winter), the gasket may not fit perfectly to the
cabinet. In that case, wait for the natural fitting of the gasket or accelerate this process
by heating up the part involved with a normal
hair drier.
Environmental concerns
The symbol on the product or on its
packaging indicates that this product may
not be treated as household waste. Instead
it should be taken to the appropriate
collection point for the recycling of electrical
and electronic equipment. By ensuring this
product is disposed of correctly, you will help
prevent potential negative consequences for
the environment and human health, which
could otherwise be caused by inappropriate
waste handling of this product. For more
detailed information about recycling of this
product, please contact your local council,
your household waste disposal service or the
shop where you purchased the product.
In case you do not want to carry out the
above mentioned operations, contact the
nearest After Sales Service Force. The After
Sales Service specialist will carry out the reversibility of the doors at your cost.
Page 21
Electrolux. Thinking of you.
Дізнайтеся більше про нас на сайті www.electrolux.com
Зміст
Інформація з техніки безпеки 21
Панель керування 23
Перше користування 24
Щоденне користування 24
Корисні поради 26
Як користуватися дозатором води з
фільтрувальним патроном BRITA
MAXTRA 27
Може змінитися без оповіщення
Догляд та чистка 33
Що робити, коли ... 35
Технічні дані 37
Установка 37
Екологічні міркування 40
Інформація з техніки безпеки
В інтересах вашої безпеки та для належ‐
ного використання приладу уважно про‐
читайте цю інструкцію, включаючи під‐
казки та застереження, перш ніж встано‐
вл ювати його і роз почи нат и ним к орист у‐
ватися. Аби уникнути помилкових дій і
нещасних випадків необхідно, щоб усі,
хто користується приладом, ретельно оз‐
найомилися з правилами експлуатації і
техніки безпеки. Збережіть цю інструкцію
і в разі продажу або передачі приладу ін‐
шим особам обов'язково передайте її ра‐
зом із приладом, щоб усі користувачі
змогли в будь-який час ознайомитися з
правилами експлуатації і технікою без‐
пеки.
Задля безпеки життя та майна дотримуй‐
теся викладених у цій інструкції рекомен‐
дацій з техніки безпеки, оскільки компа‐
нія-виробник не несе відповідальності за
шкоду, що сталася через недотримання
цих рекомендацій.
Безпека дітей і вразливих осіб
• Прилад не призначений для користу‐
вання ним людьми (в т.ч. дітьми) з об‐
меженими фізичними, сенсорними чи
розумовими здібностями чи недостат‐
нім досвідом та знаннями, якщо їм не
було проведено відповідного інструк‐
тажу з користування приладом осо‐
бою, відповідальною за їх безпеку.
Щоб діти не гралися з приладом, вони
мають користуватися ним під нагля‐
дом дорослих.
• Не дозволяйте дітям гратися з паку‐
вальними матеріалами. Порушення
цієї вимоги може призвести до того, що
вони можуть задихнутися.
• Перш ніж утилізувати прилад, вийміть
вилку з розетки, відріжте кабель (у міс‐
ці, яке знаходиться якомога ближче до
корпусу) і зніміть дверцята, щоб запо‐
бігти випадкам, коли діти, граючись,
отримають електрошок або замкнуть‐
ся всередині.
• Якщо цей прилад, оснащений магніт‐
ним замком, має замінити старий при‐
лад із замком на пружині (клямкою),
подбайте про те, щоб вивести з ладу
пружину, перш ніж утилізувати старий
прилад. У такий спосіб ви попередите
ситуацію, коли він може стати смер‐
тельною пасткою для дитини.
Загальна безпека
Обережно! Забезпечте вентиляцію,
тримаючи відкритими вентиляційні
отвори.
• Цей прилад призначений для зберіган‐
ня харчових продуктів і/або напоїв у
звичайній родині, як пояснюється в цій
інструкції.
• Не застосовуйте механічні пристрої чи
інші штучні засоби для прискорення
процесу розморожування.
electrolux 21
Page 22
22 electrolux
• Не застосовуйте електричні пристрої
(такі як прилад для виготовлення мо‐
розива) усередині холодильника, якщо
вони не передбачені для цієї мети ви‐
робником.
• Не пошкодьте охолоджувальну систе‐
му холодильника.
• В охолоджувальній системі приладу
знаходиться холодоагент ізобутан
(R600a) - природний газ, який є зна‐
чною мірою сумісним з умовами до‐
вкілля, але, попри це, він може зайня‐
тися.
Подбайте про те, щоб під час транс‐
портування та встановлення приладу
жоден з компонентів охолоджувальної
системи не був пошкоджений.
У разі пошкодження контуру циркуляції
холодоагенту охолоджувача:
– уникайте контакту з відкритим во‐
гнем або джерелами займання
– ретельно провітріть приміщення, в
якому він перебуває прилад
• З міркувань безпеки не слід змінювати
технічні характеристики приладу або
модифікувати його будь-яким чином.
Будь-яке пошкодження кабелю може
викликати коротке замикання, пожежу
і/або електрошок.
Попередження! Заміну всіх елек‐
тричних частин (кабелю, вилки, ком‐
пресора) має виконувати сертифіко‐
ваний майстер або персонал сервіс‐
ного центру.
1. Кабель нарощувати не можна.
2. Подбайте про те, щоб кабель не
був здавлений або пошкоджений
задньою частиною приладу. Зда‐
влений або пошкоджений кабель
може перегріватися, що може стати
причиною пожежі.
3. Подбайте про наявність доступу до
вилки на кінці кабелю, яким осна‐
щений прилад.
4. Не тягніть за кабель.
5. Якщо розетка хитається, не вста‐
вляйте в неї вилку. Існує ризик
електричного удару або займання.
6. Користуватися приладом з лампою
без захисного ковпачка не можна
5)
.
5) Якщо передбачений захисний ковпачок
6) Якщо прилад Frost Free (без намерзання)
• Цей прилад важкий. Пересувати його
слід обережно.
• Не можна братися або торкатися реч‐
ей у морозильному відділенні вологи‐
ми або мокрими руками, бо це може
призвести до поранення або холодо‐
вого опіку.
• Уникайте тривалого перебування при‐
ладу під прямим сонячним промінням.
Щоденне використання
• Не ставте гарячий посуд на пластикові
частини приладу.
• Не зберігайте в приладі займистий газ
або рідини, бо вони можуть вибухнути.
• Не кладіть харчові продукти безпосе‐
редньо проти отворів для повітря в за‐
дній стінці приладу.
6)
• Заморожені продукти після розморо‐
жування не можна заморожувати зно‐
ву.
• Фасовані заморожені продукти збері‐
гайте у відповідності з інструкціями ви‐
робника.
• Необхідно чітко дотримуватися реко‐
мендацій виробника приладу щодо
зберігання продуктів. Зверніться до
відповідних інструкцій.
• Не розміщуйте газовані або шипучі на‐
пої в морозильному відділенні, бо че‐
рез підвищення тиску на пляшку вони
можуть вибухнути, що пошкодить при‐
лад.
• Морозиво на паличці спроможне ви‐
кликати холодові опіки, якщо його їсти
прямо з морозильника.
Догляд і чищення
• Перш ніж виконувати технічне обслу‐
говування, вимкніть прилад і вийміть
вилку з розетки. Якщо у вас немає мож‐
ливості вийняти вилку з розетки, від‐
ключіть постачання електроенергії.
• При чищенні не можна користуватися
металевими предметами.
• Не використовуйте гострі предметид‐
ля чищення приладу від льоду. Кори‐
стуйтеся пластиковим шкребком.
• Регулярно перевіряйте злив води з хо‐
лодильника. За потреби прочищайте
його. Якщо злив буде заблокований,
вода збиратиметься на дні приладу.
Page 23
electrolux 23
Установка
Важливо! Під час підключення до
електромережі ретельно дотримуйтеся
інструкцій, наведених у відповідних
параграфах.
• Розпакуйте прилад і огляньте на пред‐
мет пошкоджень. Не користуйтеся
приладом, якщо він пошкоджений. У
разі виявлення пошкоджень негайно
повідомте про це торговельний за‐
клад, де ви придбали прилад. У цьому
разі збережіть пакування.
• Рекомендується зачекати щонаймен‐
ше дві години, перш ніж вмикати при‐
лад, з тим щоб масло повернулося до
компресора.
• Повітря має нормально циркулювати
довкола приладу; недотримання цієї
рекомендації призводить до перегрі‐
вання. Щоб досягти достатньої венти‐
ляції, дотримуйтеся відповідних ін‐
струкцій щодо встановлення.
• По можливості, встановлюйте прилад
так, щоб його задня стінка була повер‐
нута до стіни. Це дозволить уникнути
торкання гарячих частин (компресора,
конденсора) і відповідно опіків.
• Прилад не можна ставити біля батареї
опалення або плити.
• Подбайте про те, щоб до розетки був
доступ після встановлення приладу.
• Під'єднуйте лише до джерела питної
7)
води.
Технічне обслуговування
• Електричні роботи, необхідні для об‐
слуговування приладу, мають викону‐
ватися кваліфікованим електриком
або компетентною особою.
• Технічне обслуговування цього прила‐
ду має здійснюватися лише кваліфіко‐
ваним персоналом. Для ремонту необ‐
хідно використовувати лише оригі‐
нальні запасні частини.
Захист довкілля
Ні в охолоджувальній системі, ні в
ізоляційних матеріалах цього прила‐
ду не міститься газів, які могли б на‐
нести шкоду озоновому шару. При‐
лад не можна утилізувати разом з
міськими відходами та сміттям. Ізо‐
ляційна піна містить займисті гази:
прилад необхідно утилізувати згідно
з відповідними нормативними акта‐
ми, виданими місцевими органами
влади. Уникайте пошкодження холо‐
дильного агрегату, особливо в за‐
дній частині, поблизу теплообмінни‐
ка. Матеріали, позначені символом
, підлягають вторинній переробці.
Панель керування
+2 +4 +5 +6 +8
1 2
1 Регулятор температури
Кнопка Action Freeze
2 Індикатор Action Freeze
Вмикання
Видаліть всередині морозильного відді‐
лення наклейку, якщо вона там є.
Вставте вилку в розетку в стіні.
7) Якщо передбачене під'єднання до джерела водопостачання
Вимикання
Щоб вимкнути прилад, витягніть вилку з
електричної розетки.
Регулювання температури
Температура регулюється автоматично.
Щоб відрегулювати роботу приладу, зро‐
біть так:
Page 24
24 electrolux
• Натисніть і тримайте регулятор темпе‐
ратури, поки не загориться індикатор,
що відповідає потрібній температурі.
Вибір здійснюється у порядку зростан‐
ня від +2°C до +8°C. При кожному на‐
тисканні кнопки вибирається інша тем‐
пература, на яку вказує індикатор.
У більшості випадків найбільше під‐
ходить середнє значення.
Однак, встановлюючи певну температу‐
ру, необхідно пам'ятати, що температура
всередині приладу залежить від:
• кімнатної температури
• частоти відкриття дверцят
• кількості продуктів усередині відділен‐
ня
Перше користування
Миття камери
Перш ніж почати користуватися прила‐
дом, помийте його камеру і всі внутрішні
аксесуари за допомогою теплої води з
нейтральним милом, щоб усунути типо‐
вий запах нового приладу, а потім ре‐
тельно витріть його.
Щоденне користування
Зйомні полички
Стінки холодильника мають значну кіль‐
кість напрямних, тому висоту поличок
можна змінювати за бажанням.
• місцезнаходження приладу.
Важливо! Якщо температура
навколишнього середовища нижча 16°C,
натискайте регулятор температури, поки
не засвітиться індикатор найнижчої
температури.
Функція Action Freeze
Функція Action Freeze вмикається нати‐
сканням кнопки Action Freeze до того ча‐
су, поки не засвітиться індикатор симво‐
лу Action Freeze .
Щоб вимкнути функцію Action Freeze,
тримайте натиснутою кнопку Action
Freeze, поки не виберете потрібну тем‐
пературу.
Важливо! Не застосовуйте детергенти
або абразивні порошки, бо вони можуть
пошкодити поверхню.
Важливо! Якщо полиця розташована
горизонтально, кладіть на неї лише
закриті пляшки.
Підставка для пляшок
Покладіть пляшки (отворами наперед)
на полицю вигнутої форми.
Цю полицю для пляшок можна нахиляти,
щоб зберігати на ній відкриті раніше
пляшки. Для цього потягніть полицю вго‐
ру, щоб її можна було повернути догори
і поставити на наступний вищий рівень.
Page 25

electrolux 25
B
Встановлення поличок на дверцятах
Щоб уможливити зберігання упаковок з
продуктами різного розміру, полички на
дверцятах можна встановити на різній
висоті.
Щоб здійснити такі пристосування, зро‐
біть так:
поступово потягніть поличку у напрямку,
вказаному стрілками, доки вона не ви‐
вільниться, а потім знову встановіть по‐
личку у потрібному місці.
Охолодження повітря
Вентилятор системи "динамічного охо‐
лодження повітря" (Dynamic Air Cooling DAC) забезпечує швидке охолодження
продуктів і стабільнішу температуру у
всьому відділенні.
Вентилятор вмикається натисканням пе‐
ремикача, показаного на малюнку. Засві‐
титься зелений індикатор.
Важливо! Вмикайте вентилятор, коли
температура навколишнього
середовища перевищує 25°C.
Приготування кубиків льоду
Цей прилад оснащений одним або кіль‐
кома лотками для приготування кубиків
льоду. Наповніть ці лотки водою, а потім
покладіть їх у морозильне відділення.
Важливо! Виймаючи лотки з
морозильника, не користуйтеся
металевими інструментами.
Календар заморозки
Символи показують різні типи замороже‐
них продуктів.
Номери вказують тривалість зберігання
відповідних типів заморожених продук‐
тів. Яке із вказаних значень тривалості
зберігання застосовувати (верхнє чи
нижнє), залежить від кількості продукту
або характеру обробки перед заморожу‐
ванням.
Заморожування свіжих продуктів
Морозильне відділення підходить для
заморожування свіжих продуктів та для
тривалого зберігання заморожених про‐
дуктів і продуктів глибокої заморозки.
Щоб заморозити свіжі продукти, активуй‐
те функцію Action Freeze принаймні за 24
години до того, як покласти до морозиль‐
ного відділення продукти для заморожу‐
вання.
Перемістіть полицю морозильного відді‐
лення в середнє, горизонтальне поло‐
ження.
Page 26

26 electrolux
Покладіть на цю полицю продукти, які по‐
трібно заморозити.
Максимальна кількість продуктів, які
можна заморозити за 24 години, вказана
на табличці з техн ічними даним и, прикрі‐
пленій на внутрішній стороні приладу.
Процес заморожування триває 24 годи‐
ни: упродовж цього періоду не додавай‐
те нові продукти для заморожування.
Через 24 години, коли процес заморожу‐
вання завершиться, поверніться до по‐
трібної температури (див. "Регулювання
температури").
Зберігання заморожених продуктів
При вмиканні після тривалого періоду
простою (коли прилад не використовува‐
вся), перш ніж ставити продукти у відді‐
лення, дайте йому попрацювати щонай‐
менше впродовж 2 годин при налашту‐
ванні на більш високу температуру.
Важливо! У разі випадкового
розморожування, наприклад, через
Корисні поради
Поради про те, як заощаджувати
електроенергію
• Не відкривати часто дверцята і не за‐
лишати їх відкритими довше, ніж це аб‐
солютно необхідно.
• Коли температура навколишнього по‐
вітря висока, регулятор температури
встановлений на більшу потужність, а
прилад повністю завантажений, ком‐
пресор може працювати безперервно,
що призводить до появи інею або льо‐
ду на випарнику. Якщо це трапляється,
поверніть регулятор температури вбік
нижчого значення, щоб унеможливити
автоматичне розмерзання і, таким чи‐
ном, заощадити електроенергію.
Рекомендації щодо зберігання в
холодильнику необроблених продуктів
Щоб отримати найкращі результати:
• не зберігайте в холодильнику страви,
коли вони теплі; не зберігайте рідини,
що випаровуються
• накривайте або загортайте продукти,
особливо ті, що сильно пахнуть
• розміщуйте продукти так, щоб повітря
могло вільно циркулювати довкола них
перебої в постачанні електроенергії,
якщо електропостачання переривалося
на довший час, ніж зазначено на
табличці технічних характеристик у
графі "rising time", продукти, що
розморозилися, необхідно якнайшвидше
спожити або негайно приготувати, а
потім знову заморозити (попередньо
охолодивши).
Розморожування
Перш ніж споживати продукти глибокої
заморозки, їх можна розморозити у хо‐
лодильному відділенні або при кімнатній
температурі, залежно від того, скільки
часу у вас є на це.
Невеликі шматки можна готувати навіть
замороженими, прямо з морозильника: У
цьому випадку на готування піде більше
часу.
Рекомендації щодо заморожування
Корисні поради:
М'ясо (будь-якого типу): покладіть у по‐
ліетиленові кульки і поставте на скляну
поличку над шухлядою для овочів.
Задля безпеки зберігайте продукт таким
чином не довше ніж один або два дні.
Готові страви, холодні страви тощо..: не‐
обхідно накривати і можна ставити на
будь-яку поличку.
Фрукти та овочі: слід ретельно помити і
покласти і спеціальну шухляду, яка вхо‐
дить у комплект постачання.
Масло і сир: слід покласти у спеціальні
герметичні контейнери або загорнути в
алюмінієву фольгу чи покласти поліети‐
ленові кульки, щоб максимально захи‐
стити від обвітрювання.
Пляшки з молоком: слід закрити кришка‐
ми і зберігати в підставці для пляшок на
дверцятах.
Банани, картопля, цибуля та часник (як‐
що вони не упаковані): не слід зберігати
в холодильнику.
Page 27

electrolux 27
Поради щодо заморожування
Ось кілька важливих підказок, які допо‐
можуть вам одержати найкращі резуль‐
тати заморожування:
• максимальна кількість продуктів, яку
можна заморозити за 24 год. вказана
на табличці з технічними даними;
• процес заморожування триває 24 го‐
дини. Упродовж цього періоду не мож‐
на додавати продукти до тих, які вже
заморожуються;
• заморожуйте лише продукти найвищої
якості, свіжі і ретельно вимиті;
• готуйте продукти невеликими партія‐
ми , щ об мо жна бу ло їх шви дк о і по вн ою
мірою заморозити, а потім розморози‐
ти стільки, скільки потрібно;
• загортайте продукти в алюмінієву
фольгу або складайте в поліетиленові
кульки; пакування має бути герметич‐
ним;
• не давайте незамороженим продуктам
контактувати з уже замороженими; в
іншому разі температура останніх під‐
вищиться;
• пласкі продукти зберігаються краще і
довше, ніж товсті; сіль зменшує термін
зберігання продуктів;
• шматочки льоду, якщо їх проковтнути
відразу після того, як продукт був вий‐
нятий з морозильника, можуть викли‐
кати холодовий опік;
• рекомендується вказувати на кожній
окремій упаковці дату заморожування,
щоб не перевищувати тривалість збе‐
рігання;
Поради щодо зберігання заморожених
продуктів
Щоб отримати найкращі результати, не‐
обхідно:
• переконатися, що продукти, які прода‐
ються замороженими, адекватно збе‐
рігалися в магазині;
• подбати про те, щоб заморожені про‐
дукти якнайшвидше були перенесені з
продуктового магазину до морозиль‐
ника;
• не відкривати часто дверцята і не за‐
лиш ати їх ві дк ри ти ми до вш е, ніж це аб ‐
солютно необхідно.
• Після розморожування продукти
швидко псуються, і їх не можна замо‐
рожувати знову.
• Не можна зберігати продукти довше,
ніж вказано компанією-виробником
продуктів.
Як користуватися дозатором води з фільтрувальним патроном
BRITA MAXTRA
Водоочисний пристрій BRITA
Внутрішні деталі:
Page 28

28 electrolux
6
3
5
2
1
4
1 Водяний бак
2Лійка
3 Кришка бака
4 Кран + прокладка
5Фільтрувальний патрон BRITA
MAXTRA
6 BRITA Memo - електронний індика‐
тор необхідності заміни патрона
Зовнішні деталі:
2 Водовипускний важіль
3 Піддон для крапель води
Перш ніж почати користуватися
дозатором води
1. Зн ім іт ь з б ак а в сі плі вк и т а і нш і з ах ис ні
елементи
2. почистіть деталі, як описано в розділі
"Процедура чищення дозатора води",
щоб видалити можливі залишки.
Процедура чищення дозатора води
1. Розблокуйте два бокові фіксатори
бака, як показано на малюнках:
– вийміть патрон BRITA MAXTRA з
водоочисного пристрою
– натисніть на фіксатори посередині
та підніміть їх вгору
– перемістіть стопор у напрямку до
центру бака.
2. Підштовхніть бак у напрямку вздовж
крана.
3. Зніміть кришку і лійку.
1 Дозатор
1
2
3
Page 29

electrolux 29
8. Вставте зібраний бак у дверцята у
напрямку вздовж крана.
9. Закріпіть фіксатори у послідовності,
протилежній розблокуванню.
10. Знову вставте патрон BRITA
MAXTRA у лійку.
Як користуватися фільтрувальним
патроном BRITA MAXTRA
Крок 1: Підготовка патрона
Щоб підготувати фільтрувальний пат‐
рон BRITA до використання, зніміть за‐
хисну упаковку (примітка: патрон і уп‐
A
аковка можуть виглядати вогкими - це
просто конденсація).
Занурте патрон у холодну воду і злегка
потрусіть, щоб вийшли повітряні буль‐
башки. Тепер фільтр готовий до викори‐
стання.
На відміну від деяких інших патронів для
фільтрування води, патрон Maxtra не по‐
трібно попередньо замочувати.
4. Відкрутіть кран у напрямку проти го‐
динникової стрілки (не загубіть про‐
кладку крана, бо вона потрібна для
правильної роботи пристрою).
5. Почистіть кришку бака, кран і про‐
кладку розчином теплої води з нейт‐
ральним милом. Сполосніть їх і
вставте в отвір дверцят, поки будете
чистити інші деталі (щоб з холодиль‐
ника не виходило холодне повітря).
6. Помийте бак і лійку в посудомийній
машині або розчином теплої води з
нейтральним милом і сполосніть їх.
7. Після того, як почистите деталі бака,
вийміть кран з дверцят холодильни‐
ка і зберіт ь бак у зв орот ному пор ядку
(4;3;2;1) розбирання (зверніть увагу
на положення прокладки крана).
Крок 2: Вставлення у водяний бак
Зніміть кришку бака. Перш ніж вставити
патрон, зніміть лійку і ретельно почистіть
її, сполоснувши і протерши насухо.
Після цього ретельно почистіть бак все‐
редині вологою ганчіркою і також про‐
тріть насухо.
Вставте патрон у фільтрувальний бак і
натисніть зверху, поки він не "клацне",
міцно закріпившись.
Патрон повинен залишатися на місці при
перевертанні лійки.
Page 30

30 electrolux
Щоб заправити бак холодною водою,
просто відкрийте верхню відкидну криш‐
ку, наберіть глечиком води з-під крану і
залийте її в бак через отвори в кришці, як
показано на малюнку (користуйтеся кри‐
шкою при кожному доливанні води).
Важливо! Щоб вода не розливалася при
відкриванні і закриванні дверцят
холодильника, рекомендується
заповнювати бак водою не повністю, а
залишати трохи вільного місця зверху.
Якщо ви не використали всю профільт‐
ровану воду за 1-2 дні, вилийте воду, що
залишилася у водоочисному пристрої
BRITA, перш ніж доливати свіжу.
Крок 3: Споліскування патрона
2x 3x=ok
Вийміть лійку з водоочисного пристрою
BRITA, наповніть її під краном холодною
водою і пропустіть воду через фільтр.
Перші дві порції фільтрату злийте в ра‐
ковину. Ці два перші фільтрування при‐
значені для промивання фільтрувально‐
го патрона.
Після цього поверніть лійку назад у во‐
доочисний пристрій BRITA.
Накрийте бак кришкою і обережно при‐
тисніть її, щоб вона правильно стала на
місце.
Крок 4: Заправте бак водою
Пропустіть воду через фільтр і повторіть
"Крок 4" стільки разів, скільки потрібно,
поки водоочисний пристрій BRITA не на‐
повниться водою.
Виймання патрона за кільце
Щоб замінити патрон через чотири тижні,
просто потягніть його за кільце, що зна‐
ходиться у верхній частині патрона, аби
вийняти його з лійки, і повторіть кроки
1-3, описані вище.
Page 31

Індикатор BRITA Memo
Для забезпечення максимальної ефек‐
тивності фільтра і оптимального смаку
води, важливо регулярно міняти патрон
BRITA. BRITA рекомендує замінювати
патрон в пристрої BRITA вашого холо‐
дильника кожні чотири тижні.
Індикатор BRITA Memo автоматично
нагадує, коли потрібно замінити пат‐
рон.
electrolux 31
START
%
100
75
START
%
100
75
50
25
Унікальний індикатор BRITA Memo виз‐
начає, коли закінчується рекомендова‐
ний час користування патроном.
Індикатором BRITA Memo легко користу‐
ватися, і він автоматичного нагадує, коли
потрібно замінити патрон.
Індикатор BRITA Memo знаходиться на
кришці водяного бака. Користуватися
ним дійсно просто.
Запуск індикації Memo
Щоб запустити індикацію Memo, натис‐
ніть і утримуйте кнопку старту на кришці,
поки в зоні індикації не з'являться і двічі
блимнуть всі чотири поділки. Тепер інди‐
кацію Memo встановлено.
50
25
Функціональний контроль
Миготлива крапка в нижньому правому
кутку індикатора Memo вказує на те, що
Memo працює.
Page 32

32 electrolux
START
Кожного тижня зникає одна поділка, вка‐
зуючи на зменшення строку служби пат‐
рона. Через чотири тижні зникнуть всі чо‐
тири поділки. Це, а також миготлива
стрілка, вказують на необхідність заміни
патрона.
Вставте новий патрон згідно інструкцій
та знову увімкніть індикатор Memo, як
описано вище.
%
100
Зміна індикації
START
75
50
25
%
100
75
50
START
%
100
75
50
25
Коли залишиться лише одна поділка,
слід перевірити, чи є у вас запасний
фільтрувальний патрон BRITA MAXTRA.
25
Page 33

electrolux 33
Важливо! Індикатор Memo призначений
для використання лише з
фільтрувальними патронами BRITA.
Індикатор BRITA Memo: термін служби
електронного індикатора необхідності
заміни патрона становить приблизно 5
років. Пам'ятайте, що індикатор Memo це електронний пристрій, який після за‐
вершення терміну служби підлягає ути‐
лізації згідно всіх чинних положень і пра‐
вил.
Щоб зняти спрацьований індикатор
Memo, вставте викрутку в проріз біля ін‐
дикатора Memo і виштовхніть його на‐
зовні.
Зауважте, що знімати індикатор Memo
можна лише з метою подальшої утиліза‐
ції.
Важлива інформація
• От вір дл я к ран а у дв ер цят ах хо ло дил ь‐
ника потрібно закривати водяним кра‐
ном на час звичайної експлуатації при‐
строю.
• Використовуйте лише питну воду. Ви‐
користання будь-якого іншого типу на‐
поїв може призвести до утворення від‐
кладень, присмаку або запаху в резер‐
вуарі та крані.
• Можна почути деякі шуми, викликані
повітрям, що заходить в резервуар при
спусканні води.
• Якщо вода погано тече, натисніть ви‐
пускний важіль ще раз. Після відпу‐
скання важеля потримайте склянку під
краном ще якусь мить, щоб у неї стекла
вся випущена вода.
• Не використовуйте газованих напоїв,
наприклад, безалкогольних. Такий на‐
пій може витікати під тиском газу.
• Пам'ятайте, що вода - це харчовий
продукт. Профільтровану воду потріб‐
но спожити за один-два дні.
• Якщо ви не будете користуватися во‐
доочисним пристроєм BRITA протягом
тривалого часу (наприклад, під час від‐
пустки), рекомендується злити зали‐
шок води із системи і залишити фільт‐
рувальний патрон в бакові.
Перш ніж знову почати користуватися
системою, вийміть патрон і повторіть
кроки 1-4, описані в розділі "Як кори‐
стуватися фільтрувальним патроном
BRITA MAXTRA"
• Водоочисний пристрій BRITA призна‐
чений для використання лише з водою
з мережі комунального водозабезпе‐
чення (примітка: ця вода підлягає по‐
стійному контролю і згідно правових
но рм є без печно ю для в живан ня) аб о з
водою приватного постачання, без‐
печність якої для вживання підтверд‐
жена перевіркою.
Якщо від органів влади надійшла вка‐
зівка кип'ятити водопровідну воду,
кип'ятити потрібно також і воду, очи‐
щену фільтром BRITA. Коли вказівка
кип'ятити воду втратить свою чинність,
необхідно почистити всю фільтруваль‐
ну систему і вставити новий патрон.
Більш докладну інформацію про користу‐
вання фільтрувальними патронами
BRITA та індикатором Memo можна зна‐
йти в інформаційному посібнику BRITA.
Придбати нові фільтрувальні патро‐
ни BRI TA та інд икатори Memo можна
в мережі обслуговування клієнтів
Electrolux або BRITA.
Догляд та чистка
Обережно! Перш ніж виконувати
операції з технічного
обслуговування, завжди виймайте
вилку з розетки.
У холодильному агрегаті цього при‐
ладу містяться вуглеводні; тому тех‐
нічне обслуговування та перезаряд‐
ку його має виконувати лише квалі‐
фікований майстер.
Періодичне миття
Прилад необхідно регулярно мити:
Page 34

34 electrolux
• камеру та аксесуари мийте теплою во‐
дою з нейтральним милом.
• регулярно перевіряйте ізоляцію
дверцят, щоб переконатися, що вона
чиста і на ній немає решток продуктів.
• протріть чистою водою і ретельно вит‐
ріть.
Важливо! Не тягніть, не пересувайте і не
пошкоджуйте трубки та/або кабелі
всередині камери.
Ніколи не застосовуйте детергенти,
абразивні порошки, чистильні засоби з
сильним запахом або поліролі, щоб по‐
чистити камеру зсередини, бо вони мо‐
жуть пошкодити поверхню або залишити
сильний запах.
Конденсатор (чорну решітку) і компресор
у задній частині приладу необхідно чи‐
стити за допомогою щітки або пилососа.
Це покращить роботу приладу і дозво‐
лить заощадити електроенергію.
Важливо! Дбайте про те, щоб не
пошкодити систему охолодження.
Багато комерційних засобів для чищення
поверхонь містять хімікати, які можуть
пошкодити пластик у цьому приладі. То‐
му рекомендується мити корпус ззовні
виключно теплою водою з додаванням
невеликої кількості рідкого миючого за‐
собу.
Завершивши миття, знову підключіть
прилад до електромережі.
Розморожування холодильника
Крига автоматично усувається з випарю‐
вача холодильного відділення щоразу,
коли припиняється робота компресора
під час звичайної експлуатації. Тала во‐
да витікає через жолоб у спеціальний
контейнер в задній частині приладу, над
двигуном компресора, де вона випаро‐
вується.
Важливо періодично чистити зливний от‐
вір для талої води по центру холодиль‐
ного відділення, щоб запобігти перели‐
ванню води через край та осіданню її на
продуктах усередині холодильника. Ко‐
ристуйтеся спеціальним очищувачем,
що входить у комплект поставки. Ви зна‐
йдете його вже вставленим у зливний от‐
вір.
8) Якщо це передбачено.
Розморожування морозильника
Морозильна камера цієї моделі працює
за принципом "no frost" (без наморожу‐
вання). Це означає, що під час роботи
приладу поклади криги не утворюються
ні на внутрішніх стінках, ні на продуктах.
Відсутність криги досягається завдяки
постійній циркуляції холодного повітря
всередині камери, яке нагнітає вентиля‐
тор, робота якого регулюється автома‐
тично.
Періоди простою
Коли прилад тривалий час не експлуа‐
тується, виконайте такі запобіжні дії:
• відключіть прилад від джерела елек‐
тричного струму
• вийміть з нього всі продукти
•
розморозьте
8)
і помийте прилад і всі
аксесуари
• залишіть дверцята прочиненими, щоб
запобігти утворенню неприємних запа‐
хів.
Якщо ви не виключатимете прилад, то
попросіть кого-небудь періодично пере‐
віряти продукти, які в ньому знаходяться,
на предмет псування через відключення
електроенергії.
Заміна фільтра Taste Guard
Фільтр Taste Guard допомагає зменшити
запахи в холодильнику, обмежуючи
вплив небажаних ароматів на чутливі
продукти.
Page 35

electrolux 35
Для забезпечення найвищої ефективно‐
сті роботи фільтра Taste Guard його по‐
трібно міняти щороку.
Нові активні повітряні фільтри можна
• закрийте відкидну кришку.
Повітряний фільтр належить до витрат‐
них матеріалів, тому на нього не пош‐
ирюється гарантія.
придбати у місцевого дилера.
• Повітряний фільтр знаходиться за від‐
кидною кришкою, звідки його можна ді‐
стати, потягнувши відкидну кришку на‐
зовні (1)
• витягніть спрацьований повітряний
фільтр із пазів.
2
1
Важливо! Під час експлуатації відкидна
кришка вентиляційної системи повинна
бути завжди зачиненою.
З повітряним фільтром слід поводитися
• вставте в пази новий повітряний
фільтр (2)
обережно, щоб не пошкрябати його по‐
верхні.
Що робити, коли ...
Попередження! Перш ніж
намагатися ліквідувати
несправність, відключіть прилад від
розетки.
Усунення проблем, які не передба‐
чені в цій інструкції, має виконувати‐
Проблема Можлива причина Спосіб усунення
Прилад не працює. Лам‐
почка не працює.
Кабель живлення не підключе‐
На прилад не подається елек‐
Лампочка не працює. Лампочка перегоріла. Зверніться до розділу "Заміна
Компресор працює без зу‐
пинок.
Дверцята не закриті належним
Прилад вимкнено. Увімкніть прилад.
ний належним чином до елек‐
тромережі.
троживлення. Відсутній струм
у розетці.
Неправильно встановлено
температурний режим.
чином.
ся кваліфікованим електриком або
компетентною особою.
Важливо! Під час нормальної роботи
пр илад у чут и пе вні зв уки ( зву к від робо ти
компресора, циркуляції холодоагента).
Вставте вилку кабелю живлен‐
ня в розетку належним чином.
Підключіть до розетки інший
електроприлад.
Викличте кваліфікованого
електрика.
лампочки".
Встановіть вищу температуру.
Зверніться до розділу "Закри‐
вання дверцят".
Page 36

36 electrolux
Проблема Можлива причина Спосіб усунення
Дверцята відкривалися надто
Продукти мають надто високу
Температура у приміщенні
По задній панелі холо‐
дильника тече вода.
Вода тече всередину хо‐
лодильника.
Продукти не дають воді стіка‐
Вода тече на підлогу. Злив для талої води не має
Температура в приладі
надто низька.
Температура в приладі
надто висока.
Дверцята не закриті належним
Продукти мають надто високу
Багато продуктів були покла‐
Температура в холодиль‐
нику надто висока.
Температура у морозиль‐
нику надто висока.
Утворюється забагато
криги.
Дверцята не закриті належним
Регулятор температури вста‐
Заміна лампочки
1. Витягніть вилку з електричної розет‐
ки.
2. Натисніть викруткою на гачок позаду
плафона та одночасно потягніть і по‐
верніть плафон у напрямку, вказано‐
му стрілкою.
часто.
температуру.
надто висока.
У ході процесу автоматичного
розморожування крига розмо‐
рожується на задній панелі.
Забився отвір для зливу води. Прочистіть отвір.
ти в колектор.
контакту з піддоном для випа‐
ровування, який розташова‐
ний над компресором.
Регулятор температури вста‐
новлений неправильно.
Регулятор температури вста‐
новлений неправильно.
чином.
температуру.
дені в холодильник одночас‐
но.
У приладі відсутня циркуляція
повітря.
Продукти розташовані надто
близько один від одного.
Продукти упаковані не належ‐
ним чином.
чином.
новлений неправильно.
3. Замініть лампочку іншою з такою са‐
мою потужністю (максимальна потуж‐
ність зазначена на плафоні).
4. Встановіть плафон, зафіксувавши йо‐
го у вихідному положенні.
5. Включіть прилад у розетку.
6. Відкрийте дверцята. Переконайтеся,
що лампочка горить.
Не тримайте дверцята відкри‐
тими довше, ніж необхідно.
Дайте продуктам охолонути до
кімнатної температури, перш
ніж ставити їх у холодильник.
Охолодіть приміщення.
Це цілком нормально.
Подбайте про те, щоб продукти
не торкалися задньої панелі.
Під'єднайте злив для талої води
до піддону для випаровування.
Встановіть вищу температуру.
Встановіть нижчу температуру.
Зверніться до розділу "Закри‐
вання дверцят".
Дайте продуктам охолонути до
кімнатної температури, перш
ніж класти їх у холодильник.
Кладіть в холодильник не так
багато продуктів одночасно.
Подбайте про те, щоб повітря
могло вільно циркулювати у
приладі.
Зберігайте продукти так, щоб
холодне повітря могло цирку‐
лювати.
Правильно упаковуйте продук‐
ти.
Зверніться до розділу "Закри‐
вання дверцят".
Встановіть вищу температуру.
Page 37

Закривання дверцят
1. Прочистіть прокладки дверцят.
2. У разі потреби відкоригуйте дверця‐
та. Зверніться до розділу "Встано‐
влення".
A
max 25 W
B
3. У разі потреби замініть прокладки
дверцят, що вийшли з ладу. Зв'яжіть‐
ся з Центром технічного обслугову‐
вання.
Технічні дані
Розміри ніші
Висота 1800 мм
Ширина 695 мм
Глибина 669 mm
Тривалість виходу в робочий
режим
Технічна інформація знаходиться на та‐
бличці, розташованій на внутрішньому
20 год.
лівому боці приладу, та на табличці елек‐
тричних параметрів.
electrolux 37
Установка
Перед встановленням приладу
уважно прочитайте розділ
"Інформація з техніки безпеки", щоб
ознайомитися з правилами безпеки і
правильної експлуатації.
Встановлення
Встановіть прилад у місці, де температу‐
ра навколишнього середовища відпові‐
дає кліматичному класу, вказаному на
табличці з технічними даними приладу:
Кліма‐
тичний
клас
SN +10°C - + 32°C
N +16°C - + 32°C
ST +16°C - + 38°C
T +16°C - + 43°C
Розташування
Прилад потрібно встановлювати на від‐
далі від джерел тепла, такого як батареї,
бойлери, пряме сонячне світло і т.п. За‐
безпечте вільну циркуляцію повітря до‐
Температура навколишнього се‐
редовища
вкола задньої панелі приладу. Для за‐
безпечення найвищої ефективності ро‐
боти, якщо прилад встановлюється під
навісною шафою, мінімальна відстань
від верхнього краю приладу до навісної
шафи повинна становити не менше 100
мм. Проте в ідеальному випадку, прилад
кр ащ е н е с та ви ти пі д на ві сн им и ш аф ам и.
Точне вирівнювання виконується однією
або кількома ніжками регульованої висо‐
ти, розташованими під приладом.
Попередження! Необхідно
забезпечити можливість відключити
прилад від електричної розетки;
тому вилка повинна бути легко
доступною після установки.
Page 38

38 electrolux
100 mm
AB
10 mm
10 mm
Підключення до електромережі
Перш ніж підключати прилад до електро‐
мережі, переконайтеся, що показники
напруги і частоти, вказані на табличці з
паспортними даними, відповідають по‐
казникам мережі у вашому регіоні.
Прилад має бути заземлений. З цією ме‐
торю вилка приладу оснащена спеціаль‐
ним контактом. Якщо у розетці заземлен‐
ня немає, заземліть прилад окремо у від‐
повідності до чинних нормативних вимог,
проконсультувавшись із кваліфікованим
електриком.
Виробник не несе відповідальності у разі
недотримання цих правил техніки безпе‐
ки.
Цей прилад відповідає Директивам ЄС .
Задні розпірки
Всередині приладу знаходяться дві роз‐
пірки, які потрібно встановити так, як по‐
казано на малюнку.
Ослабте гвинти і вставте розпірки під го‐
лівки гвинтів, після цього затягніть гвин‐
ти.
Установка фільтра Taste Guard
Фільтр Taste Guard містить активоване
вугілля, яке вбирає неприємні запахи та
дозволяє підтримувати свіжий смак та
аромат усіх продуктів без ризику змішу‐
вання запахів.
Вугільний фільтр постачається запако‐
ваним у поліетиленовий пакет для збе‐
реження терміну його придатності та
властивостей. Фільтр необхідно встано‐
вити за відкидною кришкою до вмикання
приладу.
1. Потягніть відкидну кришку назовні (1)
2. Вийміть фільтр з поліетиленового па‐
кета.
3. Вставте фільтр у пази, розташовані з
тильної сторони відкидної кришки (2)
4. Закрийте відкидну кришку.
Page 39

2
1
Важливо! Під час експлуатації відкидна
кришка вентиляційної системи повинна
бути завжди зачиненою.
Поводитися з фільтром слід обережно,
щоб з його поверхні не відламувалися
шматочки.
Переустановлення дверцят на інший бік
Попередження! Перед виконанням
будь-яких операцій, витягніть вилку з
електричної розетки.
Важливо! Виконувати наступні операції
рекомендується з помічником, який
повинен міцно тримала дверцята
приладу під час виконання операцій.
Для переустановлення дверцят на інший
бік приладу, виконайте наступні кроки:
1. Зніміть верхню завісу, тримаючи
верхні дверцята, щоб вони не впали,
і збережіть - вона знадобиться пізні‐
ше.
electrolux 39
4. Відкрутіть середню завісу (Н). Від‐
крутіть пластикові заглушки на про‐
тилежному боці на рівні середньої
завіси і вставте їх у утвори, де раніше
стояла ця завіса.
H
5. Зніміть нижні дверцята.
6. Потягніть за вентиляційну решітку,
яка кріпиться двома гвинтами.
2. Зніміть верхні дверцята.
3. Зніміть верхню опору і переставте її
на протилежний бік.
7. Обережно покладіть прилад на за‐
дню панель, повністю викрутіть ніжки
регульованої висоти і вкрутіть їх з
протилежного боку.
8. Зніміть нижню завісу, відкрутивши
кріпильні гвинти.
9. За допомогою 12-мм гайкового клю‐
ча викрутіть палець завіси і встано‐
віть його на протилежному боці заві‐
си.
10. Встановіть нижню завісу на проти‐
лежному боці, використовуючи зняті
раніше гвинти.
Page 40

40 electrolux
11. Обережно поставте прилад назад у
його робоче положення і відрегулюй‐
те рівень, закручуючи або відкручую‐
чи пальцями або інструментом ніжки
регульованої висоти під приладом.
12. Витягніть заглушку з вентиляційної
решітки, штовхаючи її у напрямку,
вказаному стрілкою, і вставте з про‐
тилежного боку.
13. Поставте вентиляційну решітку на
місце і закріпіть гвинтами.
14. Переставте нижні дверцята.
15. Переставте середню завісу (Н) на
протилежний бік.
16. Переставте верхні дверцята.
17. У пакеті з документацією знаходить‐
ся верхня завіса, необхідна для пе‐
реустановлення дверцят на інший
бік. Вставте гвинти на місце.
Проведіть остаточну перевірку, щоб пе‐
реконатися в тому, що:
• Всі гвинти міцно загвинчені.
• Магнітний ущільнювач прилягає до
корпусу.
• Дверцята правильно відкриваються і
закриваються.
Якщо температура навколишнього сере‐
довища низька (наприклад, взимку),
ущільнювач може не повністю прилягати
до корпусу. У такому випадку дочекайте‐
ся природної підгонки ущільнювача, або
прискорте цей процес, нагрівши відпо‐
відні частини звичайним феном для вол‐
осся.
Якщо ви не хочете самостійно виконува‐
ти вищенаведені операції, зверніться до
найближчого сервісного центру. Спеціа‐
ліст сервісного центру переустановить
дверцята на інший бік за ваш рахунок.
Екологічні міркування
Цей символ на виробі або на його
упаковці позначає, що з ним не можна
поводитися, як із побутовим сміттям.
Замість цього його необхідно повернути
до відповідного пункту збору для
переробки електричного та
електронного обладнання.
Забезпечуючи належну переробку цього
виробу, Ви допомагаєте попередити
потенційні негативні наслідки для
навколишнього середовища та здоров’я
людини, які могли би виникнути за умов
неналежного позбавлення від цього
виробу. Щоб отримати детальнішу
інформацію стосовно переробки цього
виробу, зверніться до свого місцевого
офісу, Вашої служби утилізації або до
магазина, де Ви придбали цей виріб.
Page 41

Electrolux. Thinking of you.
Düşüncelerinizi www.electrolux.com.tr adresinden bizimle
daha fazla paylaşın
İçindekiler
Güvenlik Bilgileri 41
Kontrol Paneli 43
İlk Kullanım 44
Günlük Kullanım 44
Yararlı İpuçları Ve Bilgiler 46
Su pınarının BRITA MAXTRA filtre kartuşuyla
birlikte kullanımı 47
Önceden haber verilmeksizin değişiklik yapma hakkı saklıdır.
Bakım Ve Temizlik 52
Servisi Aramadan Önce 54
Teknik Veriler 56
Montaj 56
Çevreyle ilgili bilgiler 59
Güvenlik Bilgileri
Kendi güvenliğiniz ve cihazın doğru kullanımı
için cihazı monte etmeden ve ilk kez kullanmadan önce, bu kullanma kılavuzunu, ipuçları ve uyarı bilgileri de dahil olmak üzere, dikkatle okuyun. Gereksiz hatalardan ve kazalardan kaçınmak için, cihazı kullanan tüm kişilerin cihazın kullanımıyla ve güvenlik özellik-
leriyle ilgili bilgiye sahip olması önemlidir. Bu
kılavuzu saklayın ve cihaz başka bir yere taşındığında veya satıldığında beraberinde ve-
rin, böylece cihazı kullanacak diğer kişilerin
de cihazın kullanımı ve güvenlik için yapılması
gerekenler hakkında bilgi sahibi olması
sağlanmış olur.
Üretici firma ihmallerden kaynaklanan zararlardan sorumlu olmadığından, kendi can ve
mal güvenliğiniz için bu kullanıcı talimatların-
daki uyarı
Çocuklar ve savunmasız kişilerin
güvenliği
• Bu cihaz, kullanımıyla ilgili talimat veya gö-
• Tüm ambalaj malzemelerini çocuklardan
•Eğer cihazı elden çıkarıyorsanız, oyun oy-
ları dikkate alın.
zetim güvenliklerinden sorumlu kişi tarafın-
dan sağlanmadıkça, fiziksel, duyusal veya
zihinsel yeterlilikleri az kişilerce (çocuklar
dahil) veya deneyimi ve bilgisi olmayanlarca kullanılmamalıdır.
Küçük çocuklar, cihazla oynamayacaklarından emin olunması için gözetim altında
tutulmalıdır.
uzak tutun. Boğulma riski söz konusudur.
nayan çocukları elektrik çarpmaması ve cihazda kilitli kalmamaları için fişini prizden
çekin, elektrik kablosunu kesin (mümkün
olduğunca cihaza yakın kısmından) ve kapağını çıkartın.
•Eğer mıknatı
kapısında veya kapağında yaylı bir kilit (dil)
mekanizması olan eski bir cihazın yerine
alınmış ise, eski cihazınızı elden çıkarmadan önce kilit mekanizmasını kullanılmaz
hale getirin. Bu şekilde, çocukların cihazın
içinde kilitli kalarak kendilerine zarar vermelerini önlemiş olursunuz.
Genel güvenlik
Dikkat Havalandırma açıklıklarını,
tıkanmasını önleyerek temiz halde tutun.
• Bu cihaz, kullanma kılavuzunda açıklandığı
gibi bir evde kullanılan yiyecek ve/veya içecekleri muhafaza etmek amacıyla üretilmiştir.
• Buz çözme sürecini hızlandırmak için mekanik bir cihaz veya başka bir yapay yöntem kullanmayın.
• Üretici firma tarafından onaylanmadığı sürece, diğer elektrikli cihazları (dondurma
yapma makineleri gibi) soğutucu cihazların
içinde kullanmayın.
•Soğutucu devresine zarar vermeyin.
slı kapı contaları olan bu cihaz,
electrolux 41
Page 42

42 electrolux
•Cihazın soğutucu devresinde, çevreyle ol-
dukça dost doğal bir gaz olan ve bununla
birlikte yanıcı özelliği olan soğutucu izobütan (R600a) bulunmaktadır.
Cihazın nakliyesi ve montajı süresince,
soğutucu devre bileşenlerinin hiçbirinin hasar görmediğinden emin olun.
Eğer soğutucu devresi hasar görmüşse:
–açık ateş ve ateşleme kaynaklarını uzak
tutun
–cihazın yerleştirildiği odayı iyice havalan-
dırın
• Bu ürünün özelliklerini değiştirmek veya
ürünü herhangi bir şekilde modifiye etmek
tehlikelidir. Kablodaki herhangi bir hasar,
bir kısadevreye ve/veya elektrik çarpması-
na neden olabilir.
Uyarı Herhangi elektrikli bir parça (elek-
trik kablosu, fiş, kompresör) sertifikalı bir
servis yetkilisi veya kalifiye bir servis personeli tarafından değiştirilmelidir.
1. Elektrik kablosu uzatılmamalıdır.
2. Elektrik fişinin cihazın arkasında sıkışıp
ezilmediğinden emin olun. Sıkışıp ezilmiş veya hasar görmüş bir elektrik fişi
aşırı ısınabilir ve bir yangına neden olabilir.
3. Cihazın elektrik fişine erişebildiğinizden
emin olun.
4. Elektrik kablosunu çekmeyin.
5. Eğer elektrik prizi gevşek ise, fişi tak-
mayın. Elektrik çarpması veya yangın
riski söz konusudur.
6. Cihazı, dahili aydınlatma lambasının ka-
pağ
ı 9) olmadan çalıştırmayın.
• Bu cihaz ağırdır. Taşırken dikkatli olunmalıdır.
•Eğer elleriniz nemli/ıslak ise, dondurucu-
dan bir şey çıkartmayın veya dokunmayın.
Aksi halde cildiniz tahriş olabilir veya donma/soğuk yanığına neden olabilir.
•Cihazın uzun süre güneş ışığına maruz kal-
masını önleyin.
Günlük Kullanım
•Sıcak kapları cihazın içindeki plastik par-
çaların üzerine koymayın.
•Yanıcı gaz ve sıvıları cihaza koymayın, çün-
kü bunlar patlayabilir.
•Gıda ürünlerini doğrudan arka paneldeki
hava çıkış
9) Eğer lamba kapağı varsa
10) Eğer cihaz No-Frost ise
ına dayamayın.
10)
•Donmuş yiyecekler, buzu çözüldükten
sonra tekrar dondurulmamalıdır.
•Hazır donmuş yiyecekleri, donmuş gıda
üreticisinin talimatlarına göre muhafaza
edin.
• Cihaz üreticisinin muhafaza önerilerine tümüyle uyulmalıdır. İlgili talimatlara bakın.
• Dondurucuya karbonatlı veya gazlı içecekler koymayın, çünkü bu sıvılar bulundukları
kabın içinde basınç oluşturur ve patlayarak
cihazın hasar görmesine neden olabilirler.
• Buz tanecikleri, eğer cihazdan çıkarıldığı
anda hemen tüketilirse, don yanıklarına ne-
den olabilir.
Bakım ve temizlik
•Bakım işleminden önce, cihazı kapatın ve
elektrik fişini prizden çekin. Eğer elektrik
prizine erişemiyorsanız, elektrik beslemesini kesin.
•Cihazı metal nesneler kullanarak temizle-
meyin.
•Cihazın buzunu temizlemek için keskin ci-
simler kullanmayın. Plastik bir raspa kullanın.
•Buzdolabındaki tahliye kısmında donmuş
su olup olmadığını düzenli olarak kontrol
edin. Gerekirse tahliye kısmını temizleyin.
Eğer tahliye kısmı tıkalı ise, su cihazın alt
kısmında toplanacaktır.
Montaj
Önemli Elektrik bağlantısı için ilgili
paragraflarda verilen talimatlara uyun.
•Cihazı ambalajından çıkartın ve hasar olup
olmadığını kontrol edin. Eğer hasar varsa
cihazın fişini prize takmayın. Olası hasarları
derhal satın aldığınız yere bildirin. Böyle bir
durumda ambalajı atmayın.
•Ya
ğın geri kompresöre akmasını sağlamak
için, cihazın fişini takmadan önce en az iki
saat beklemeniz önerilir.
•Cihazın etrafında yeterli hava dolaşımı ol-
malıdır, aksi halde cihaz aşırı ısınabilir. Yeterli havalandırma sağlamak için, montajla
ilgili talimatlara uyun.
•Olası yanmaları önlemek için cihazın sıcak
parçalarına (kompresör, yoğuşturucu) dokunulmasını engellemek amacıyla cihazın
arka kısmı mümkünse bir duvara yaslanmalıdır.
Page 43

electrolux 43
• Cihaz, kalorifer veya pişirme cihazlarının
yakınına yerleştirilmemelidir.
• Cihaz monte edildikten sonra elektrik prizinin erişilebilir konumda kaldığından emin
olun.
• Sadece içilebilir kalitedeki su kaynaklarına
bağlayın.
11)
Servis
•Cihazın servisi için elektrikle ilgili her türlü
iş, kalifiye bir elektrikçi veya uzman bir kişi
tarafından yapılmalıdır.
• Bu ürünün servis işlemleri bir yetkili servis
tarafından yapılmalı ve sadece orijinal yedek parçalar kullanılmalıdır.
Çevre Koruması
Bu cihazın soğutucu devresinde ve yalı-
tım malzemelerinde ozon tabakasına za-
Kontrol Paneli
+2 +4 +5 +6 +8
1 2
rar veren gazlar bulunmaz. Bu cihaz,
kentsel atıklar ve çöplerle birlikte atılma-
malıdır. Yalıtım köpüğü yanıcı gazlar içerir: cihaz, yerel yetkili makamlarınızdan
bilgi edinebileceğiniz yürürlükteki kanunlara uygun olarak elden çıkartılmalıdır.
Soğutma ünitesine, özellikle ısı eşanjörü
yakınındaki kısma zarar gelmesini önleyin. Bu cihazda kullanılan ve
simgesiyle işaretli olan malzemeler geri dönüşümlüdür.
1 Sıcaklık ayar düğmesi
Action Freeze düğmesi
2 Action Freeze göstergesi
Açma
Eğer varsa, buzdolabının iç kısmındaki etiketi
çıkarın.
Fişi prize takın.
Kapatma
Cihazı kapatmak için, fişini prizden çekin.
Sıcaklık ayarlaması
Sıcaklık otomatik olarak ayarlanır.
Cihazı çalıştırmak için aşağıdaki işlemleri yapın:
•Sıcaklık ayarlama düğmesine, istediğiniz
sıcaklığın LED ışığı yanıncaya kadar basmaya devam edin. Seçim ilerleyen bir şe-
kilde, +2°C'den +8°C'ye kadar artar. LED
ışıklı lamba ile belirtilen sıcaklık derecesi,
düğmeye her bas
11) Eğer bir su bağlantısı varsa
ıldığında değişir.
Orta düzeyde bir ayar, genelde en uygun
olanıdır.
Ancak tam ayar, cihazın içindeki sıcaklığın
aşağıdaki unsurlara bağlı olduğu dikkate alınarak seçilmelidir:
•Oda sıcaklığı
•Cihaz kapısını açma sıklığı
• Cihaza konan yiyecek miktarı
•Cihazın konumu.
Önemli Eğer ortam sıcaklığı 16°C'den
düşükse, en düşük sıcaklığın LED ışığı
yanıncaya kadar sıcaklık ayar düğmesine
basın.
Action Freeze fonksiyonu
Action Freeze fonksiyonunu etkinleştirmek
için, Action Freeze düğmesine Action Freeze
simgesinin LED ışı
ğı yanıncaya kadar basın.
Action Freeze fonksiyonunu kapatmak için,
Action Freeze düğmesine, gereken sıcaklık
seçilinceye kadar basın.
Page 44

44 electrolux
İlk Kullanım
İç kısmın temizliği
Cihazı ilk kez kullanmadan önce, yeni bir ürünün sahip olduğu tipik kokuyu gidermek için
cihazın iç kısmını ve dahili aksesuarlarını ılık su
ve biraz nötr sabun kullanarak yıkayın ve daha sonra iyice kurulayın.
Günlük Kullanım
Portatif raflar
Buzdolabının yan panellerinde, rafları istediğiniz gibi yerleştirmenize olanak veren bir
dizi ray bulunmaktadır.
Şişe rafı
Şişeleri (ağzı öne bakacak şekilde) hazır ko-
numlandırılmış rafa yerleştirin.
Önemli Eğer raf yatay konumlandırılmışsa,
sadece ağzı kapalı olan şişeleri koyun.
Önemli Deterjan veya aşındırıcı toz temizlik
ürünleri kullanmayın, bunlar cihazın kaplamasına zarar verir.
karı çekerek, yukarı doğru dönebilmesini
sağlayın ve rafı bir üst seviyeye yerleştirin.
Kapı raflarının konumlandırılması
Farklı ebatlardaki yiyecek paketlerini yerleştirebilmek için, kapak rafları farklı yüksekliklere
ayarlanabilir.
Bu ayarlamaları yapmak için şu işlemleri uygulayınız;
raf yerinden çıkıncaya kadar okların yönünde
kademe kademe çekiniz, daha sonra istediğiniz şekilde konumlandırınız.
Bu şişe rafı istenirse eğilerek, ağzı açılmış
olan şişeler de konulabilir. Bunun için rafı yu-
Page 45

electrolux 45
Hava soğutması
Dinamik Hava Soğutması (DAC) fanı, yemekleri hızla soğutur ve buzdolabının her noktasında daha eşit bir sıcaklık sağlar.
Fanı açmak için şekilde gösterilen düğmeye
basın. Yeşil ışık yanar.
B
Önemli Ortam sıcaklığı 25°C'yi aşınca fanı
çalıştırın.
Buz küpü yapma
Bu cihaz, buz küpleri yapmada kullanılan bir
veya daha fazla sayıda kap içermektedir. Bu
kaplara su doldurun, daha sonra bunları dondurucu bölmesine koyun.
Önemli Bu kapları dondurucudan çıkarmak
için metal aletler kullanmayın.
Dondurma Takvimi
Semboller, farklı donmuş yiyecek tiplerini
göstermektedir.
Numaralar, uygun olan dondurulmuş yiyecek
tipleri için ay cinsinden muhafaza sürelerini
belirtmektedir. Belirtilen muhafaza süresinin
üst değerinin mi yoksa alt değerinin mi geçerli
olduğu, yiyeceklerin kalitesine ve dondurma
işleminden önce gördükleri muameleye
bağlıdır.
Taze yiyeceklerin dondurulması
Dondurucu bölmesi, taze yiyeceklerin dondurulması, dondurulmuş ve derin dondurul-
muş yiyeceklerin uzun süreli muhafazası için
uygundur.
Taze yiyecekleri dondurmak için, dondurulacak olan yiyecekleri dondurucu bölmesine
yerleştirmeden önce Action Freeze fonksiyonunu en az 24 saat boyunca çalıştırın.
Dondurucu bölmesindeki rafı, yatay bir şekil-
de orta raya yerleştirin.
Dondurulacak olan taze yiyeceği bu rafa yerleştirin.
24 saatte dondurulabilecek maksimum yiyecek miktarı, cihazın içinde bulunan bilgi etiketinde yazılıdır.
Dondurma işlemi 24 saat sürer: bu süre boyunca, dondurulmak üzere başka bir yiyecek
koymayın.
24 Saat sonra, dondurma işlemi tamamlandığı zaman, istemiş oldu
ğunuz sıcaklığa geri
ayarlayın ("Sıcaklık ayarlaması" bölümüne
bakın).
Donmuş yiyeceklerin muhafazası
Cihazı ilk kez çalıştırdığınızda veya belirli bir
süre kullanım dışı bıraktıktan sonra, yiyecekleri dondurucuya yerleştirmeden önce cihazı
en az 2 saat en soğuk ayarda çalışmaya bı-
rakın.
Önemli Örneğin bir elektrik kesintisi
yüzünden istenmeden buz çözülürse, eğer
elektrik kesintisi, teknik özellikler bölümünde
"başlatma süresi" kısmında belirtilen süreden
daha uzun sürerse, buzu çözülen yiyecek
hemen tüketilmeli, veya derhal pişirilerek
yeniden dondurulmalıdır (soğuduktan sonra).
Buz eritme
Derin dondurulmuş veya normal donmuş gı-
dalar kullanılmadan önce, soğutucu bölmesinde veya oda sıcaklığında (bu işlem için gereken süreye bağlı olarak) buzu eritilebilir.
Küçük parçalar, dondurucudan çıkartıldığı
anda donmuş haldeyken bile pişirilebilir: böyle bir durumda pişirme işlemi daha uzun sürecektir.
Page 46

46 electrolux
Yararlı İpuçları Ve Bilgiler
Enerji tasarrufuyla ilgili ipuçları
•Cihazın kapısını çok sık açmayın veya ge-
rektiğinden daha uzun süre açık bırakmayın.
•Eğer ortam sıcaklığı yüksekse, Isı Ayar
Düğmesi yüksek bir ayardadır ve cihaz tam
doludur, kompresör devamlı çalışabilir ve
bu da buharlaştırıcı devresinde karlanmaya
veya buzlanmaya neden olabilir. Böyle bir
durumda, otomatik buz çözme işleminin
devreye girerek elektrik tüketiminden tasarruf sağlanması için Isı Ayar düğmesini
daha düşük bir ayara getirin.
Taze yiyeceklerin soğutulmasıyla ilgili
tavsiyeler
En iyi performansı elde etmek için:
•Sıcak yiyecekleri veya buharlaşan sıvıları
buzdolabına koymayın
• Yiyecekleri kapatın veya sarı
keskin bir kokusu varsa)
• yiyecekleri, etrafında hava rahatça dolaşa-
cak şekilde yerleştirin
Soğutma tavsiyeleri
Faydalı tavsiyeler:
Et (her türlü): polietilen torbalara koyun ve
sebze çekmecesinin üstündeki cam rafa yerleştirin.
Güvenlik açısından, bu şekilde sadece bir veya iki gün muhafaza edin.
Hazır pişmiş yiyecekler, soğuk yemekler, vb:
Bunlar, ağzı kapalı olmak suretiyle herhangi
bir rafa yerleştirilebilir.
Meyve ve sebzeler: Bunlar iyice temizlenmeli
ve temin edilmiş özel çekmecelere yerleştiril-
melidir.
Tereyağı ve peynir: Bunlar, içine havanın
mümkün olduğunca girmemesi için özel hava
geçirmeyen kaplara konulmalı veya alüminyum folyoya sarılmalı ya da polietilen torbalara konulmalıdır.
Süt şişeleri: Bunlar, ağızları kapaklı şekilde
kapıdaki şişe raflarına yerle
Muzlar, patatesler, soğanlar ve sarımsaklar
(paketli değilse), buzdolabına konulmamalı-
dır.
Dondurma tavsiyeleri
Birçok dondurma işleminde size yardımcı
olacak bazı önemli tavsiyeler aşağıda verilmektedir:
n (özellikle
ştirilmelidir.
• 24 saat içinde dondurulabilecek maksimum yiyecek miktarı. veri etiketinde belirtilmektedir;
•dondurma işlemi 24 saat sürer. Bu süre
boyunca, dondurulmak üzere başka bir yiyecek konulmamalıdır;
• sadece birinci kalite, taze ve iyi temizlenmiş
yiyecekleri dondurun;
•hızlı ve tamamen donmasını ve buzu eri-
dikten sonra sadece tüketilecek miktarda
tüketilebilmesini sağlamak için yiyecekleri
küçük porsiyonlara bölün;
• yiyecekleri alüminyum folyoya veya polietilene sarın ve bu yaptığınız paketin hava geçirmez olduğundan emin olun;
•cihazın içindeki sıcaklığın yükselmesini ön-
lemek için taze veya donmamış yiyeceklerin önceden donmuş yiyeceklere temas etmesine izin vermeyin;
•yağsız yiyecekler ya
ha iyi ve daha uzun süre muhafaza edilir;
tuz, yiyeceğin muhafaza ömrünü kısaltır;
•eğer su buzları dondurucu bölmesinden
çıkarıldıktan hemen sonra tüketilirse, ciltte
soğuk yanıklarına neden olabilir;
• yiyeceklerin muhafaza sürelerini kontrol
edebilmek amacıyla, her bir yiyecek paketinin üzerine dondurucuya konulma tarihini
yazmanız tavsiye edilir;
Donmuş yiyeceklerin muhafazasıyla ilgili
tavsiyeler
Bu cihazdan en iyi performansı elde etmek
için, aşağıdaki noktalara dikkat etmelisiniz:
• piyasada donmuş halde satılan yiyeceklerin satıcı tarafından uygun şekilde muhafaza edilmiş olduğundan emin olun;
•donmuş yiyeceklerin, yiyecek mağazasın-
dan dondurucunuza mümkün olan en kısa
sürede aktarılmasını sağlayın;
•cihazın kapısını çok s
sinlikle gerekmedikçe açık bırakmayın.
•Buz çözme işlemi uygulandığında, yiye-
cekler çabuk çözülür ve tekrar dondurulamaz.
• Yiyecek üreticisinin belirttiği muhafaza sürelerini aşmayın.
ğlı yiyeceklere göre da-
ık açmayın veya ke-
Page 47

Su pınarının BRITA MAXTRA filtre kartuşuyla birlikte kullanımı
BRITA su filtre ünitesi
Dahili bileşenler:
6
3
5
2
1
1Sebil
4
1Su haznesi
2 Huni
3Hazne kapağı
4 Vana + conta
5 BRITA MAXTRA filtre dahil
6 BRITA Hatırlatma Göstergesi - elektro-
nik kartuş değiştirme göstergesi
Harici bileşenler:
2Su kolu
3Su damlalık tablası
Su sebilinizin ilk kez çalıştırılması
1. Her türlü bandı ve diğer koruma sistem-
lerini tank tertibatından çıkartın.
2. Muhtemel kalıntıları çıkarmak amacıyla,
bileşenleri "Su sebili temizlik prosedürü"
bölümünde açıklandığı gibi temizleyin.
Su sebili temizlik prosedürü
1. Tankın yanlarındaki iki durdurma elema-
nını resimlerde gösterildiği gibi kilitli durumdan kurtarın:
– BRITA MAXTRA kartuşunu su filtre
ünitesinden çıkartın
– Tutma elemanlarının ortasına bastırın
ve yukarıya doğru kaldırın
– Tutucuyu merkezi tank doğrultusunda
kaydırın.
2. Tank
3. Kapağı açın ve huniyi çıkartın.
ı valf doğrultusunda yukarıya doğru
itin.
electrolux 47
1
2
3
Page 48

48 electrolux
kın (valf contasının konumuna dikkat
edin).
8. Tank tertibatını kapıya, valf doğrultusun-
da takın.
9. Tutma elemanlarını kilit açma işleminin
tersine uygulayarak kilitleyin.
10. BRITA MAXTRA kartuşu tekrar huninin
içine yerleştirin.
BRITA MAXTRA filtre kartuşunun
kullanımı
1. Adım: Kartuşu hazırlama
BRITA filtre kartuşunuzu hazırlamak için lüt-
A
fen koruyucu ambalajını çıkarın (not: kartuş ve
ambalajın içi nemli görünebilir ama bu sadece
yoğuşmadır).
Kartuşu soğuk suyun içine koyun ve olası hava kabarcıklarını çıkartmak için hafifçe sallayın. Filtre artık kullanıma hazırdır.
Diğer bazı su filtresi kartuşlarının aksine, yeni
Maxtra Kartuşunun önceden ıslatılması gerekmez.
4. Valfı saatin tersi yönde döndürerek çıkartın (cihaz özelliklerinin doğru çalışması
için gerekli olduğundan, Valf Contasını
gevşetmemeye dikkat edin).
5. Tank kapağını, valfı ve contayı ılık su ve
nötr sabunlu bir solüsyon ile temizleyin.
Daha sonra durulayın ve diğer parçaları
temizlerken kapaktaki yuvasına koyun
(soğuk havanın buzdolabından kaçak
yapmasını önlemek için).
6. Tank ve huniyi bulaşık makinesinde yıka-
yın veya ılık su ve nötr sabunlu bir solüsyon ile temizleyin ve daha sonra durulayın.
7. Tank parçalarını temizledikten sonra, valfı buzdolabı kapağından tekrar çıkarın ve
tankı çıkartı
rken yaptığınız işlemleri tersi-
ne uygulayarak (4;3;2;1) tekrar yerine ta-
2. Adım: Su tankının içine yerleştirme
Tank kapağını çıkartın. Kartuşu takmadan
önce, huniyi çıkartın ve durulamak suretiyle
iyice temizleyin ve sonra kurulayın.
Daha sonra, su tankının içerisini de nemli bir
bezle iyice temizleyin ve kurulayın.
Kartuşu filtre tankına yerleştirin ve yerine tam
oturduğu anlamına gelen bir "klik" sesi işitene
kadar aşağı doğru bastırın.
Huni başaşağı dönse bile kartuş yerine kalmalıdır.
Page 49

electrolux 49
ve bunu kapağın üzerinden resimde gösterildiği gibi tanka boşaltın (su doldurmanız gerektiğinde, her defasında kapağı kullanı
Önemli Buzdolabının kapısını açarken ve
kapatırken suyun dökülmesini önlemek için,
su tankını ağzına kadar doldurmayıp, üst
kısmında biraz boşluk bırakmanızı öneririz.
Eğer su tankında bulunan filtrelenmiş suyu
1-2 gün içinde kullanmadıysanız, tankı tekrar
doldurmadan önce lütfen BRITA su filtresi
ünitesinin içinde kalan suyu boşaltınız.
Suyun tamamen filtrelenmesini bekleyin ve
BRITA su filtre ünitesi doluncaya kadar 4.
Adımı tekrarlayın.
Halkalı çekme kulpunu kullanarak
kartuşun çıkarılması
n).
3. Adım: Kartuşu durulama
2x 3x=ok
Huniyi BRITA su filtresi ünitesinden çıkartın,
musluğun altına tutarak soğuk suyla doldurun ve filtreleme tamamlanıncaya kadar bekleyin.
İlk iki dolumu lavaboya boşaltın. Bu ilk iki do-
lum, filtre kartuşunu tazyikle temizleme amacını taşımaktadır.
Daha sonra, huniyi tekrar BRITA su filtresi
ünitesine takın.
Kapağı sürahiye geri takın ve yerine tam olarak oturana kadar aşağıya doğru bastırın.
4. Adım: Su tankını yeniden doldurma
Tankı soğuk su ile doldurmak için, sürgülü üst
kapağını basitçe açın, bir sürahi soğuk su alın
Dört haftalık kullanımdan sonra kartuşu
değiştirmek için, kartuşu huniden çıkarmak
amacıyla üstündeki halkalı çekme kulpundan
tutarak çıkartın ve yukarıdaki 1'den 3'e kadar
olan işlemleri tekrarlayın.
BRITA hatırlatma göstergesi
Filtreden maksimum performans ve en uygun
lezzette su elde etmek için, BRITA kartuşu-
nuzu düzenli olarak değiştirmeniz önemlidir.
Page 50

50 electrolux
Buzdolabınızın BRITA ünitesindeki kartuşu,
her dört haftada bir değiştirmenizi öneririz.
BRITA Hatırlatma Göstergesi, kartuşun
değiştirilmesi gerektiğini size otomatik
olarak hatırlatır.
START
START
%
100
75
50
25
Özel tasarımlı BRITA Hatırlatma Göstergesi,
kartuşunuz için önerilen kullanım süresini ölçer.
Hatırlatma göstergesinin kullanımı kolaydır ve
kartuşunuzun değiştirilmesi gerektiğinde sizi
otomatik olarak uyarır.
BRITA Hatırlatma göstergesi, su tankı kapağının üzerine yerleştirilmiştir. Kullanımı oldukça basittir.
Hatırlatma göstergesini çalıştırma
Hatırlatma göstergesini çalıştırmak için, kapak üzerindeki başlatma düğmesine basın ve
göstergede dört çubuğun hepsi görüntülenene ve iki kez yanıp sönene kadar basılı tutun. Böylece hatırlatma göstergesi ayarlanmış olur.
%
100
75
50
25
Fonksiyon kontrolü
Hatırlatma göstergesinin alt sağ köşesindeki
yanıp sönen nokta işareti, Hatırlatma göstergesinin çalıştığını belirtir.
Page 51

START
%
100
75
50
electrolux 51
Her hafta, kalan kartuş ömrünü göstermek
üzere göstergedeki bir çubuk kaybolur. Dört
hafta sonra, dört çubuğun hepsi kaybolacaktır. Bu ve yanıp sönen bir ok işareti, kartuşun
değiştirilmesi gerektiğini belirtir.
Talimatlara uygun olarak yeni bir kartuş takın
ve yukarıda anlatıldığı gibi Hatırlatma göstergesini yeniden çalıştırın.
START
Göstergenin değişmesi
START
25
%
100
75
50
25
%
100
75
50
25
Sadece tek bir çubuk kaldığında, elinizde hazırda yeni bir BRITA MAXTRA filtre kartuşu
olup olmadığını kontrol edin.
Page 52

52 electrolux
Önemli Hatırlatma Göstergesi, sadece
BRITA filtre kartuşlarıyla birlikte kullanım için
tasarlanmıştır.
BRITA Hatırlatma Göstergesi: elektronik kartuş değiştirme göstergesinin kullanım ömrü
yaklaşık 5 yıldır. Hatırlatma göstergesinin kullanım ömrü sona erdiğinde, bunun bir elektronik cihaz olduğunu ve yürürlükteki tüzük ve
yönetmeliklere uygun şekilde imha edilmesi
gerektiğini unutmayın.
Kullanım ömrü bitmiş olan hatırlatma cihazını
çıkartmak için, bitişiğindeki yarık kısmına bir
tornavida sokun ve dışarıya doğru çekip çı-
kartın.
Hatırlatma göstergesinin imha amacı dışında
asla yerinden ç
mayın.
Önemli bilgiler
•Buzdolabı kapağının valf deliği, cihazın nor-
mal çalışması esnasında su valfı ile kapatılmalıdır.
• Sadece içme suyu kullanın. Herhangi baş-
ka tip bir içeceğin kullanılması, haznenin
içinde ve musluk kısmında artıkların, kötü
tat veya kokuların kalmasına neden olabilir.
• Haznenin içinden su çıkışı esnasında giren
havanın neden olduğu bazı seslerin işitilmesi normaldir.
•Eğer su iyi bir şekilde akmıyorsa, su dol-
durma koluna bir kez daha basın. Gelen
ıkartılmaması gerektiğini unut-
tüm suyun bardakta toplanması için, bardağı hemen çekmeden önce musluğun altında birkaç saniye bekletin.
• Gazoz gibi gazlı içecekler kullanmayı
basıncından ötürü, bu tür içecekler sızıntı
yapabilir.
• Suyun bir gıda maddesi olduğunu unutmayın. Filtrelenmiş suyu lütfen bir veya iki
gün içinde tüketin.
•Eğer BRITA su filtresi ünitenizi uzunca bir
süre kullanmayacaksanız (örneğin tatile çı-
karken), sistemin içinde kalan suyu tahliye
etmenizi ve kartuşu filtre tankının içinde bı-
rakmanızı öneririz.
Sistemi tekrar kullanmadan önce, kartuşu
çıkartın ve "BRITA MAXTRA su filtresi kartuşunun kullanımı" bölümündeki 1'den 4'e
kadar olan aşamaları tekrarlayın.
• BRITA su filtre ünitesi, belediyenin işlem-
den geçirdiği musluk suyu ile (not: bu su
devamlı kontrol edilmektedir ve içilmesinin
güvenli olduğu kanunlarda belirtilmiştir) veya içilmesinin güvenli olduğu test edilmiş
olan özel su tedarikçilerinin temin ettiği sularla kullanılmak üzere tasarlanmıştır.
Eğer yerel su tedarik yetkilileri tarafından
şebeke suyunun kaynatılması gerektiği belirtilirse, BRITA ile filtrelenmiş suyun da kaynatılması gerekir. Suyun kaynatılmasını
şart koşan talimat yürürlükten kalktığında,
filtre sisteminin tamamı temizlenmeli ve yeni bir kartuş takılmalıdır.
BRITA filtre kartuşlarının ve Hatırlatma Gös-
tergesinin kullanımı ile ilgili daha fazla bilgi
BRITA bilgi kılavuzunda verilmiştir.
Yeni BRITA filtre kartuşlarını ve Hatırlat-
ma Göstergesini, Electrolux veya BRITA
tüketici hizmet ağından satın alabilirsiniz.
n. Gaz
Bakım Ve Temizlik
Dikkat Herhangi bir bakım işlemi
yapmadan önce, cihazın fişini prizden
çekin.
Bu cihaz, soğutma devrelerinde hidrokarbonlar içermektedir; dolayısıyla bakım ve şarj işlemleri sadece yetkili teknisyenler tarafından yapılmalıdır.
Periyodik temizlik
Cihaz düzenli olarak temizlenmelidir:
•Cihazın iç kısmını ve aksesuarlarını ılık su ve
biraz nötr sabun kullanarak temizleyin.
• Temiz ve kirden arınmış kalmalarını sağla-
mak için kapı contalarını düzenli olarak
kontrol edip silerek temizleyin.
• İyice durulayın ve kurulayın.
Önemli Kabinin içerisindeki boruları ve/veya
kabloları çekmeyin, oynatmayın veya zarar
vermeyin.
Cihazın iç kısmını temizlemek için asla deterjanlar, aşındırıcı toz temizlik ürünleri, yüksek
derecede kokulu deterjan veya cilalar kullanmayın, aksi halde yüzey zarar görebilir ve
güçlü kötü bir koku oluşabilir.
Page 53

electrolux 53
Cihazın arka tarafındaki yoğuşturucuyu (siyah
ızgara) ve kompresörü bir fırça veya bir vakumlu temizlik cihazı ile temizleyin. Bu işlem,
cihazın performansını artırır ve elektrik tüketimini azaltır.
Önemli Soğutma sistemine zarar
vermemeye dikkat edin.
Birçok tescilli mutfak yüzeyi temizleyicisi, bu
cihazda kullanılan plastik aksamlara zarar verici kimyasal maddeler içermektedir. Bu yüzden, cihazın dış kasasını sadece içine biraz
deterjan eklenmiş ılık su ile temizlemenizi tav-
siye ederiz.
Temizlikten sonra, cihazın fişini tekrar takın.
Buzdolabı buzunun çözülmesi
Soğutucu bölmesinin buharlaştırıcı devresin-
deki buzlar, normal çalışma esnasında motor
kompresörü her durduğunda otomatik olarak
giderilir. Buz çözme suyu bir kanal vasıtasıyla
motor kompresörü üzerinden geçerek buharlaştırı
ldığı yer olan cihazın arka tarafındaki
özel bir kaba boşaltılır.
Suyun taşmasını ve içerdeki yiyeceklerin üzerine damlamasını önlemek için, soğutucu bölmesi kanalının ortasındaki buz çözme suyu
tahliye deliğinin periyodik olarak temizlenmesi önemlidir. Tahliye deliğine takılı halde bulunan özel temizleyiciyi kullanın.
Buzun oluşmamasının nedeni, soğuk havanın bölme içerisinde otomatik kontrollü bir fan
sayesinde devamlı devir-daim ettirilmesidir.
Kulanım-dışı kalma süreleri
Cihaz uzunca bir süre kullanılmayacaksa,
aşağıdaki önlemleri alınız:
• Cihazın elektrik beslemesini kesiniz,
• İçindeki tüm yiyecekleri çıkarınız,
•
Buzunu çözünüz
12)
ve cihazı ve tüm akse-
suarlarını temizleyiniz,
• Kötü kokuların oluşmasını önlemek için kapısını/kapılarını hafif aralık bırakınız.
Eğer buzdolabı kapalı tutulacaksa, bir elektrik
kesintisi durumunda içindeki yiyeceklerin bozulmasını önlemek için birilerinden ara sıra
kontrol etmesini isteyiniz.
Taste Guard filtresinin değiştirilmesi
Taste Guard filtresi, buzdolabının içindeki kötü kokuların azaltılmasını sağlayarak, hassas
yiyeceklerde istenmeyen aromaların oluşma
riskini önler.
En iyi performansı elde etmek için, Taste
Guard filtresi yılda bir kez değiştirilmelidir.
Yeni karbon filtreleri, yerel satıcınızdan satın
alabilirsiniz.
• Hava filtresi, filtre kapağının arkasına yerleştirilmiştir ve kapak dışarıya doğru (1) çekerek erişilebilir.
•Bitmiş olan hava filtresini yuvasından çekip
çıkartın.
Dondurucunun buzunun çözülmesi
Öte yandan, bu modelin dondurucu bölmesi
"no-frost" tiptir. Yani, çalışırken ne panellerinde ne de yiyeceklerin üzerinde buzlanma
ve karlanma yapmaz.
12) Eğer bu özellik varsa.
• Yeni hava filtresini yarığa (2) yerleştirin.
•Kapağı kapatın.
Hava filtresi bir sarf malzemesidir ve bu tür bir
aksesuar garanti kapsamında değildir.
Page 54

54 electrolux
Önemli Çalışma esnasında, hava giriş çıkış
kapağını daima kapalı tutun.
Filtre, yüzeyinin çizilmesini önlemek için dikkatli bir şekilde muamele görmelidir.
2
1
Servisi Aramadan Önce
Uyarı Arıza teşhis işleminden önce,
cihazın fişini prizden çekiniz.
Bu kılavuzda yazılı olmayan bir arıza teş-
his işlemi sadece kalifiye bir elektrikçi veya uzman bir kişi tarafından yapılmalıdır.
Sorun Olası sebep Çözüm
Cihaz çalışmıyor. Lamba
çalışmıyor.
Cihazın fişi prize doğru bir şekilde
Cihaza elektrik gelmiyordur. Priz-
Lamba çalışmıyor.
Kompresör devamlı çalı-
şıyor.
Kapı doğru kapatılmamıştır. "Kapının kapatılması" bölümüne
Kapı çok sık açılıyordur. Kapıyı gerektiğinden daha uzun sü-
Cihazın sıcaklığı çok yüksektir. Yiyecekleri koymadan önce cihazın
Oda sıcaklığı çok yüksektir. Oda sıcaklığını düşürünüz.
Buzdolabının arka panelinden su akıyor.
Buzdolabının içine su akı-
yor.
Cihazın içindeki nesneler/yiye-
Cihaz kapalıdır. Cihazı açınız.
takılı değildir.
de elektrik yoktur.
Lamba arızalıdır. "Lambanın değiştirilmesi" bölümü-
Sıcaklık doğru ayarlanmamıştır. Daha yüksek bir sıcaklık ayarlayı-
Otomatik buz çözme işlemi esnasında, buzlar arka panelde erir.
Su çıkışı tıkalıdır. Su çıkışını temizleyiniz.
cekler suyun su toplayıcısına akmasını engelliyordur.
Önemli Normal kullanım esnasında bazı
sesler (kompresörden, soğutucu
devresinden) gelebilir.
Fişi prize doğru bir şekilde takınız.
Prize başka bir cihazı takınız.
Kalifiye bir elektrikçi çağırınız.
ne bakınız.
nız.
bakınız.
re açık bırakmayınız.
sıcaklığının oda sıcaklığına düşmesini bekleyiniz.
Bu normaldir.
Cihazın içindeki nesnelerin arka panele temas etmediğinden emin olunuz.
Page 55

electrolux 55
Sorun Olası sebep Çözüm
Tabana su akıyor.
Cihazın içindeki sıcaklık
çok düşük.
Cihazın içindeki sıcaklık
çok yüksek.
Kapı doğru kapatılmamıştır. "Kapının kapatılması" bölümüne
Cihazın sıcaklığı çok yüksektir. Yiyecekleri koymadan önce cihazın
Cihaza aynı anda birçok ürün ko-
Buzdolabının sıcaklığı
çok yüksek.
Dondurucunun sıcaklığı
çok yüksek.
Çok fazla karlanma/buz
var.
Kapı doğru kapatılmamıştır. "Kapının kapatılması" bölümüne
Sıcaklık düğmesi doğru ayarlan-
Lambanın değiştirilmesi
1. Fişini prizden çekin.
2. Bir tornavidayla lamba kapağının arka
kancasına bastırın ve aynı anda kapağı ok
ile belirtilen yönde çekip döndürün.
3. Lambayı, aynı güçteki bir yenisi ile değiş-
Eriyen su, kompresörün üstündeki buharlaşma tablasına akmıyor-
dur.
Sıcaklık düğmesi doğru ayarlanmamıştır.
Sıcaklık düğmesi doğru ayarlanmamıştır.
nulmuştur.
Cihazda soğuk hava devridaimi
yoktur.
Yiyecekler birbirine çok yakındır. Yiyecekleri, soğuk hava devridai-
Yiyecekler doğru paketlenmemiş-
tir.
mamıştır.
Kapının kapatılması
1. Kapı contalarını temizleyin.
2. Gerekirse kapıyı ayarlayın. "Montaj" bölümüne bakın.
3. Gerekirse sorunlu kapı contalarını değiş-
tirin. Yetkili servisle temasa geçin.
Buharlaşma tablasına eriyen su çı-
kışını takınız.
Daha yüksek bir sıcaklık ayarlayı-
nız.
Daha düşük bir sıcaklık ayarlayınız.
bakınız.
sıcaklığının oda sıcaklığına düşmesini bekleyiniz.
Aynı anda daha az ürün koyunuz.
Cihazda soğuk hava devridaimi olduğundan emin olunuz.
mine izin verecek şekilde yerleştiri-
niz.
Yiyecekleri doğru şekilde paketleyiniz.
bakınız.
Daha yüksek bir sıcaklık ayarlayı-
nız.
tirin (maksimum güç, ışık difüzörü üzerinde gösterilmektedir).
4. Lamba kapağını yerleştirin ve ilk baştaki
pozisyonuna sabitleyin.
5. Fişi prize takın.
6. Kapıyı açın. Lambanın yandığından emin
olun.
A
max 25 W
B
Page 56

56 electrolux
Teknik Veriler
Kabin boyutları
Yükseklik 1800 mm.
Genişlik 695 mm.
Derinlik 669 mm.
Başlatma süresi 20 s
Teknik bilgiler, cihazın iç sol tarafındaki bilgi
etiketinde ve enerji etiketinde belirtilmektedir.
Montaj
Güvenliğiniz ve cihazın doğru çalışması
için, cihazı monte etmeden önce
"Güvenlik bilgileri" bölümünü okuyun.
Konumlandırma
Bu cihazı, ortam sıcaklığının cihazın bilgi etiketinde belirtilen iklim sınıfına uygun olduğu
bir yere monte ediniz:
İklim sı-
nıfı
SN +10°C ile + 32°C arası
N +16°C ile + 32°C arası
ST +16°C ile + 38°C arası
T +16°C ile + 43°C arası
Ortam sıcaklığı
Yer
Cihaz, kalorifer, ısıtıcı kazan, doğrudan güneş
ışığı gibi ısı kaynaklarından yeterince uzağa
monte edilmelidir. Havanın, kabinin arka tarafında rahatça devirdaim yapabildiğinden
emin olun. En iyi performansı elde etmek için,
eğer cihaz bir asma tavan altına monte edilmişse, cihaz kabininin üstü ile duvar arasındaki boşluk en az 100 mm olmalıdır. Bununla
birlikte, ideal olarak cihaz asma tavanlar altına
yerleştirilmemelidir. Kabinin altındaki ayarlanabilir ayakların biri veya daha fazlası kullanı-
larak doğru düzlemsellik elde edilir.
Uyarı Cihazın fişini elektrik prizinden
çekebilmek mümkün olmalıdır;
dolayısıyla fiş, cihaz kurulumundan
sonra kolay erişilebilir olmalıdır.
100 mm
AB
10 mm
Elektrik bağlantısı
Cihazın fişini prize takmadan önce, bilgi etiketinde yazılı voltaj ve frekans değerlerinin
evinizin elektrik beslemesi ile aynı olduğun-
dan emin olun.
Cihaz topraklanmalıdır. Elektrik kablosunun
fişi bu amaca yönelik olarak bir kontak ile donatılmıştır. Eğer evin elektrik prizi topraklı
değilse, yürürlükteki kanunlara uygun olarak
ve bir uzman teknisyene danışarak cihazı ayrı
bir toprak hattına bağlayın.
Üretici firma, yukarıda belirtilen güvenlik önlemlerine uyulmaması halinde sorumluluk kabul etmez.
Bu cihaz, E.E.C. yönergeleri ile uyumludur.
Arka aralayıcılar
Cihazın içerisinde, şekilde gösterildiği
gibi takılması gereken iki aralayıcı tampon bulunmaktadır.
10 mm
Page 57

Vidaları gevşetin ve aralayıcıyı vida başının altına takın, daha sonra vidaları geri sıkın.
Tat Koruma Filtresinin takılması
Tat Koruma Filtresi, kötü kokuları emen ve
kokuların birbirine karışma riskini önleyerek
tüm yiyeceklerin tat ve aromalarını korumasını
sağlayan aktif bir karbon filtredir.
Karbon filtre, kullanım ömrünün ve özelliklerinin muhafaza edilmesi amacıyla plastik bir
torba içerisinde teslim edilir. Filtre, cihaz çalıştırılmadan önce kapağının arkasına yerleştirilmelidir.
1. Kapağı dışarıya doğru (1) çekiniz
2. Filtreyi plastik torbasından çıkartınız
3. Filtreyi kapağın (2) arka kısmındaki yarığa
yerleştiriniz
4. Kapağı kapatınız
electrolux 57
2
1
Önemli Çalışma esnasında, hava giriş-çıkış
kapağını/ızgarasını kapalı tutunuz.
Filtre, yüzeyinde parçacıklar zarar görmeyecek şekilde dikkatli muamele görmelidir.
Kapı açılma yönünün değiştirilmesi
Uyarı Herhangi bir işlem yapmadan
önce, cihazın fişini prizden çekin.
Önemli Aşağıdaki işlemleri yaparken, cihazın
kapılarını sağlam bir şekilde tutacak bir kişi ile
birlikte çalışmanızı tavsiye ederiz.
Kapının açılma yönünü değiştirmek için,
aşağıdaki işlemleri yapın:
1. Üst kapının düşmemesine dikkat ederek
üst menteşeyi sökün ve ileride kullanmak
üzere saklayın.
2. Üst kapıyı sökün.
3. Üst desteği çıkartın ve bunu karşı tarafa
takın.
4. Orta menteşeyi (H) sökün. Orta menteşenin karşı tarafında bulunan plastik tı-
paları çıkarın ve bunları çıkarttığınız menteşenin boş kalan deliklerine takın.
Page 58

58 electrolux
H
5. Alt kapıyı sökün.
6. İki vida ile sabitlenmiş olan havalandırma
ızgarasını çıkarın.
7. Cihazı dikkatle sırt üstü koyun, ayarlanabilir ayağını çevirerek çıkartın ve karşı tarafa çevirerek takın.
8. Sabitleme vidalarını sökmek suretiyle, alt
menteşeyi çıkarın.
9. Bir 12 mm somun anahtarı kullanarak
menteşe pimini sökün ve bunu menteşenin karşı tarafına takın.
10. Daha önceden çıkardığınız vidaları kullanarak alt menteşeyi karşı (ters) tarafa takın.
11. Cihazı dikkatle çalışır pozisyonuna geri
yerleştirin ve cihazın yüksekliğini, kabinin
alt kısmındaki ayarlanabilir ayakları parmaklarınızla veya bir alet kullanarak vidalamak/sökmek suretiyle ayarlayın.
12. Ok yönünde itmek suretiyle delik kapağını havalandırma ızgarasının dışına
doğru kaydırıp çıkartın ve bunu ters (karşı) tarafa takın.
13. Vidaları kullanarak havalandırma ızgarasını geri takın.
14. Alt kapıyı geri takın.
15. Orta menteşeyi (H) karşı tarafa geri takın.
16. Üst kapıyı geri takın.
17. Evrak poşetinizde, kapı yönünün değiş-
tirilmesi için gerekli üst menteşe bulunmaktadır. Bunu lütfen vidalayarak yerine
takın.
Aşağıdakilerden emin olmak için son bir kontrol yapın:
•Tüm vidalar sıkılmış olmalıdır.
•Mıknatıslı conta, kabine yapışık olmalıdır.
•Kapı düzgün bir şekilde açılmalı ve kapan-
malıdır.
Page 59

electrolux 59
Eğer ortam sıcaklığı soğuk ise (kış mevsimi
gibi), conta kabine tam olarak oturmayabilir.
Böyle bir durumda, contaların doğal olarak
oturmasını bekleyin veya ilgili kısmı normal bir
saç kurutucu makinesi ile ısıtarak bu süreci
hızlandırın.
Çevreyle ilgili bilgiler
Ürünün ya da ambalajının üzerindeki
simgesi, bu ürünün normal ev çöpü gibi
atılmayıp, elektrik ve elektronik cihazların geri
dönüşüm için verildiği özel toplama
noktalarından birine verilmesi gerektiğini
belirtir. Bu ürünün doğru şekilde imha
edilmesine katkıda bulunmakla hem çevreyi,
hem de çevrenizdekilerin sağlığını korumuş
olursunuz. Yanlış şekilde imha ise hem
çevreye hem sağlığa zararlıdır. Bu ürünün
geri dönüşümüne ilişkin daha ayrıntılı bilgileri
belediyenizden, çöp dairenizden veya ürünü
satın almış olduğunuz bayiden edinebilirsiniz.
Yukarıda belirtilen işlemleri kendiniz yapmak
istemiyorsanız, size en yakın Yetkili Servise
başvurun. Yetkili Servis uzmanı, masrafı size
ait olmak üzere kapı açılma yönünü değiştir-
me işlemini yapacaktır.
Page 60

60 electrolux
Electrolux. Thinking of you.
Saiba mais sobre a nossa filosofia em www.electrolux.com
Índice
Informações de segurança 60
Painel de controlo 62
Primeira utilização 63
Utilização diária 63
Sugestões e conselhos úteis 65
Como usar o dispensador de água com o
cartucho filtrante BRITA MAXTRA 66
Sujeito a alterações sem aviso prévio
Manutenção e limpeza 72
O que fazer se… 74
Dados técnicos 75
Instalação 76
Preocupações ambientais 79
Informações de segurança
Para a sua própria segurança e para garantir
uma utilização correcta, antes de instalar e
usar o aparelho pela primeira vez, leia atentamente este manual do utilizador, incluindo
as suas sugestões e advertências. Para evitar erros e acidentes desnecessários, é importante que todas as pessoas que utilizam
o aparelho conheçam o seu funcionamento
e as características de segurança. Guarde
estas instruções e certifique-se de que elas
acompanham o aparelho em caso de transferência ou venda, para que todos os que
venham a usá-lo estejam devidamente informados quanto à sua utilização e segurança.
Para sua segurança e da propriedade, guarde as precauções destas instruções de utilização, uma vez que o fabricante não é responsável pelos danos causados por omissão.
Segurança para crianças e pessoas
vulneráveis
• Este aparelho não se destina a ser utilizado por pessoas (incluindo crianças) com
capacidades físicas, sensoriais ou mentais
reduzidas ou sem experiência e conhecimento, excepto se lhes tiver sido dada supervisão ou instrução relativa à utilização
do aparelho por uma pessoa responsável
pela sua segurança.
As crianças devem ser vigiadas para assegurar que não brincam com o aparelho.
• Mantenha todas as embalagens fora do
alcance das crianças. Existe o risco de asfixia.
• Se eliminar o aparelho retire a ficha da tomada, corte o cabo eléctrico (o mais perto
do aparelho possível) e retire a porta para
evitar que crianças a brincar sofram choques eléctricos ou se fechem dentro do
aparelho.
• Se este aparelho, com vedantes de porta
magnéticos for substituir um aparelho
mais velho com fecho de mola (lingueta)
na porta ou tampa, certifique-se de que o
fecho de mola está desactivado antes de
eliminar o velho aparelho. Tal irá evitar que
se torne numa armadilha fatal para uma
criança.
Segurança geral
Cuidado Mantenha as aberturas de
ventilação sem obstruções.
• O aparelho tem como objectivo guardar
alimentos e/ou bebidas numa casa normal, como explicado neste manual de instruções.
• Não utilize um dispositivo mecânico ou
qualquer meio artificial para acelerar o processo de descongelação.
• Não utilize outros aparelhos eléctricos (tais
como máquinas de fazer gelados) dentro
dos aparelhos de refrigeração, a não ser
que sejam aprovados para este fim pelo
fabricante.
• Não danifique o circuito refrigerante.
Page 61

electrolux 61
• O refrigerante isobutano (R600a) está contido no circuito refrigerante do aparelho,
um gás natural com um alto nível de compatibilidade ambiental, que é, no entanto,
inflamável.
Durante o transporte e a instalação do
aparelho, certifique-se de nenhum dos
componentes do circuito refrigerante está
danificado.
Se o circuito refrigerante se danificar:
– evite chamas livres e fontes de ignição
– ventile totalmente a divisão onde o apa-
relho se encontra
• É perigoso alterar as especificações ou
efectuar qualquer tipo de alteração neste
produto. Quaisquer danos no cabo poderão provocar um curto-circuito, incêndio
e/ou choque eléctrico.
Advertência Qualquer componente
eléctrico (cabo de alimentação, ficha,
compressor) tem de ser substituído por
um técnico certificado ou um técnico
qualificado.
1. Não deve colocar extensões no cabo
de alimentação.
2. Certifique-se de que a ficha não está
esmagada ou danificada pela parte
traseira do aparelho. Uma ficha esmagada ou danificada pode sobreaquecer e causar um incêndio.
3. Certifique-se de que consegue alcan-
çar a ficha do aparelho.
4. Não puxe o cabo de alimentação.
5. Se a tomada da ficha de alimentação
estiver solta, não introduza a ficha de
alimentação. Existe um risco de choque eléctrico ou incêndio.
6. Não deve utilizar o aparelho sem a
tampa da lâmpada
13)
iluminação inte-
rior.
• Este aparelho é pesado. Tenha cuidado
quando o deslocar.
• Não retire nem toque nos itens do compartimento do congelador se estiver com
as mãos molhadas, pois pode causar
abrasões na pele ou queimaduras de gelo.
• Evite a exposição prolongada do aparelho
à luz solar directa.
Utilização diária
• Não coloque panelas quentes nas partes
de plástico do aparelho.
• Não guarde gases ou líquidos inflamáveis
no aparelho, porque podem explodir.
• Não coloque alimentos directamente contra a saída de ar na ventilação traseira.
14)
• Depois de descongelados, os alimentos
não devem ser recongelados.
• Guarde alimentos congelados pré-embalados de acordo com as instruções do fabricante do alimento congelado.
• As recomendações de armazenamento
dos fabricantes do aparelho devem ser
estritamente cumpridas. Consulte as respectivas instruções.
• Não coloque bebidas gaseificadas dentro
do congelador, uma vez que cria pressão
no recipiente, podendo fazer com que expluda, provocando danos no aparelho.
• Os gelados de gelo podem provocar queimaduras de gelos se forem consumidos
imediatamente depois de retirados do
aparelho.
Limpeza e manutenção
• Antes da manutenção, desligue o aparelho e retire a ficha da tomada. Se não conseguir alcançar a tomada, corte a fonte de
alimentação.
• Não limpe o aparelho com objectos de
metal.
• Não utilize objectos afiados para remover
o gelo do aparelho. Utilize um raspador de
plástico.
• Inspeccione regularmente o orifício de
descarga do frigorífico para presença de
água descongelada. Se necessário, limpe
o orifício de descarga. Se o orifício estiver
bloqueado, a água irá acumular na parte
inferior do aparelho.
Instalação
Importante Para efectuar a ligação
eléctrica, siga atentamente as instruções
fornecidas nos parágrafos específicos.
• Desembale o aparelho e verifique se existem danos. Não ligue o aparelho se estiver
danificado. Em caso de danos, informe
imediatamente o local onde o adquiriu.
Nese caso, guarde a embalagem.
13) Se a tampa da lâmpada tiver
14) Se o aparelho não criar gelo
Page 62

62 electrolux
• É recomendável aguardar pelo menos duas horas antes de ligar o aparelho, para
permitir que o óleo regresse ao compressor.
• Assegure uma circulação de ar adequada
à volta do aparelho, caso contrário pode
provocar sobreaquecimento. Para garantir
uma ventilação suficiente, siga as instruções relevantes para a instalação.
• Sempre que possível, a traseira do aparelho deve ficar virada para uma parede para
evitar toques nas partes quentes (compressor, condensador) e possíveis queimaduras.
• Não coloque o aparelho perto de radiadores ou fogões.
• Certifique-se de que a ficha de alimentação fica acessível após a instalação do
aparelho.
• Ligue apenas a uma fonte de água potá-
15)
vel.
Assistência
• Quaisquer trabalhos eléctricos necessários para a assistência da máquina devem
Painel de controlo
ser efectuados por um electricista qualificado ou pessoa competente.
• Este aparelho deve ser reparado por um
Centro de assistência autorizado, o qual
deverá utilizar apenas peças originais.
Protecção ambiental
Este aparelho não contém gases que
possam danificar a camada de ozono,
tanto no circuito refrigerante como nos
materiais de isolamento. O aparelho não
deverá ser eliminado juntamente com o
lixo doméstico. A espuma de isolamento
contém gases inflamáveis: o aparelho
deverá ser eliminado de acordo com as
normas aplicáveis que pode obter junto
das autoridades locais. Evite danificar a
unidade de arrefecimento, especialmente na parte traseira, perto do permutador de calor. Os materiais utilizado neste
aparelho marcados pelo símbolo
são
recicláveis.
+2 +4 +5 +6 +8
1 2
1 Regulador da temperatura
Botão Action Freeze
2 Indicador Action Freeze
Ligar
Se presente, remova a etiqueta colada no
interior do compartimento do congelador.
Introduza a ficha na tomada.
Desligar
Para desligar o aparelho, retire a ficha da tomada.
Regulação da temperatura
A temperatura é regulada automaticamente.
Para utilizar o aparelho, proceda do seguinte
modo:
15) Se estiver prevista uma ligação hídrica
• Mantenha o regulador da temperatura
pressionado até que o LED correspondente à temperatura pretendida se acenda. A selecção é gradual, variando entre
+2°C e +8°C. Sempre que premir a tecla,
é seleccionada a temperatura indicada pelo led.
Normalmente, uma definição média é a
mais adequada.
No entanto, a definição exacta deve ser escolhida tendo em conta que a temperatura
dentro do aparelho depende da:
• temperatura ambiente
• frequência de abertura da porta
• quantidade de alimentos conservados
• localização do aparelho.
Page 63

electrolux 63
Importante Se a temperatura ambiente for
inferior a 16 °C, prima o regulador da
temperatura, até que se acenda o LED
correspondente à temperatura inferior.
Action Freeze Função
Pode activar a função Action Freeze pressionando o botão Action Freeze até que o
Primeira utilização
Limpeza do interior
Antes de utilizar o aparelho pela primeira vez,
limpe o interior e todos os acessórios internos com água morna e sabão neutro de modo a remover o cheiro típico de um produto
novo, de seguida seque minuciosamente.
Utilização diária
Prateleiras móveis
As paredes do frigorífico estão equipadas
com uma série de guias de modo a que as
prateleiras possam ser posicionadas como
quiser.
LED correspondente ao indicador com o
símbolo Action Freeze se acenda.
Para desactivar a função Action Freeze,
mantenha o botão Action Freeze pressionado até que a temperatura pretendida esteja
seleccionada.
Importante Não utilize detergentes ou pós
abrasivos, pois estes danificam o acabamento.
Prateleira para garrafas
Coloque as garrafas (com a abertura para a
frente) na prateleira pré-posicionada.
Importante Se a prateleira estiver colocada
na horizontal coloque apenas garrafas
fechadas.
Esta prateleira suporte para garrafas pode
ser inclinada para poder armazenar garrafas
que já tenham sido abertas. Para tal, puxe a
prateleira para cima para que possa rodar
para cima e ser colocada no nível seguinte
em cima.
Posicionar as prateleiras da porta
Para permitir o armazenamento de embalagens de alimentos de vários tamanhos, as
Page 64

64 electrolux
prateleiras da porta podem ser colocadas a
diferentes alturas.
Para fazer estes ajustes, proceda do seguinte modo:
puxe gradualmente a prateleira na direcção
das setas até se soltar, de seguida, reposicione como quiser.
Arrefecimento por ar
A ventoinha Dynamic Air Cooling (DAC) permite que os alimentos arrefeçam rapidamente e proporciona uma temperatura mais uniforme no compartimento.
Pode ligar a ventoinha pressionando o interruptor indicado na figura. A luz verde acende-se.
B
Importante Ligue a ventoinha quando a
temperatura ambiente exceder os 25°C.
Produção de cubos de gelo
Este aparelho possui um ou mais tabuleiros
para a produção de cubos de gelo. Encha
estes tabuleiros com água, de seguida coloque-os no compartimento do congelador.
Importante Não utilize instrumentos
metálicos para remover os tabuleiros do
congelador.
Calendário de congelação
Os símbolo indicam diferentes tipos de alimentos congelados.
Os números indicam os tempos de armazenamento em meses para os respectivos tipos de alimentos congelados. A validade do
valor superior ou inferior do tempo de armazenamento indicado depende da qualidade
dos alimentos e do tratamento antes da congelação.
Congelação de alimentos frescos
O compartimento congelador é adequado
para a congelação de alimentos frescos e
para a conservação a longo prazo de alimentos congelados e ultracongelados.
Para congelar alimentos frescos active a função Action Freeze, pelo menos, 24 horas antes de colocar os alimentos no compartimento congelador.
Desloque a prateleira que se encontra no
compartimento congelador, mantendo-a na
posição horizontal e colocando-a na posição
intermédia.
Volte a colocar nessa prateleira os alimentos
frescos a congelar.
A quantidade máxima de alimentos que podem ser congelados em 24 horas está indicada na "chapa de identificação", uma etiqueta presente nas paredes internas do aparelho.
O processo de congelação dura 24 horas:
durante este período, não introduza novos
alimentos a congelar.
Após 24 horas, quando o processo de congelação tiver terminado, regresse à temperatura desejada (consulte "Regulação da
temperatura").
Armazenamento de alimentos
congelados
Quando ligar pela primeira vez ou após um
período sem utilização, antes de colocar os
produtos no compartimento, deixe o aparelho em funcionamento durante no mínimo 2
horas nas definições mais elevadas.
Page 65

electrolux 65
Importante Em caso de descongelação
acidental, por exemplo, devido a falta de
electricidade, se a alimentação estiver
desligada por mais tempo que aquele
mostrado na tabela de características
técnicas em "tempo de reinício", os
alimentos descongelados têm de ser
consumidos rapidamente ou cozinhados
imediatamente e depois, novamente
congelados (depois de arrefecerem).
Sugestões e conselhos úteis
Conselhos para poupar energia
• Não abra muitas vezes a porta nem a deixe
aberta mais tempo do que o necessário.
• Se a temperatura ambiente for alta, o regulador de temperatura encontra-se na
definição mais alta e o aparelho está completamente cheio, o compressor pode
funcionar continuamente, causando gelo
no evaporador. Se isto acontecer, rode o
regulador de temperatura para as definições mais baixas para permitir a descongelação automática poupando assim no
consumo de electricidade.
Conselhos para a refrigeração de
alimentos frescos
Para obter o melhor desempenho:
• não guarde alimentos quentes ou líquidos
que se evaporam no frigorífico
• cubra ou embrulhe os alimentos, particularmente se tiverem um cheiro forte
• posicione os alimentos de modo a que o
ar possa circular livremente em redor
Conselhos para a refrigeração
Conselhos úteis:
Carne (todos os tipos): embrulhe em sacos
de politeno e coloque na prateleira de vidro
acima da gaveta de vegetais.
Por motivos de segurança, guarde desta forma por um dia ou dois no máximo.
Alimentos cozinhados, pratos frios, etc...:
estes devem estar cobertos e podem ser colocados em qualquer prateleira.
Fruta e vegetais: estes devem ser minuciosamente limpos e colocados nas gavetas especiais fornecidas.
Manteiga e queijo: estes devem ser colocados em recipientes herméticos especiais ou
embrulhados em folha de alumínio ou sacos
Descongelação
Os alimentos congelados, antes de serem
utilizados, podem ser descongelados no
compartimento do frigorífico ou à temperatura ambiente, dependendo do tempo disponível para esta operação.
Os pedaços pequenos podem mesmo ser
cozinhados ainda congelados, directamente
do congelador: neste caso, a confecção irá
demorar mais.
de politeno para excluir o máximo de ar possível.
Garrafas de leite: estas devem ter uma tampa e devem ser armazenadas na prateleira
de garrafas na porta.
Bananas, batatas, cebolas e alho, se não estiverem embalados, não devem ser guardados no frigorífico.
Conselhos para a congelação
Para o ajudar a tirar partido do processo de
congelação, eis alguns conselhos importantes:
• a quantidade máxima de alimentos que
pode ser congelada em 24h. está mostrada na placa de dados;
• o processo de congelação demora 24 horas. Não devem ser adicionados mais alimentos para congelação durante este período;
• congele apenas alimentos de alta qualidade, frescos e extremamente limpos;
• Prepare os alimentos em pequenas quantidades para permitir que sejam rápida e
completamente congeladas e para tornar
possível subsequentemente descongelar
apenas a quantidade necessária;
• embrulhe os alimentos em folha de alumínio ou politeno e certifique-se de que as
embalagens são herméticas;
• não permita que os alimentos frescos e
descongelados entrem em contacto com
os alimentos já congelados, evitando assim o aumento de temperatura dos alimentos congelados;
• os alimentos sem gordura são melhores
para armazenar que os alimentos com
gordura; o sal reduz o tempo de armazenamento dos alimentos;
Page 66

66 electrolux
• a água congela, se for consumida imediatamente após a remoção do compartimento do congelador, pode possivelmente causar queimaduras de gelo na pele;
• é aconselhável que anote a data de congelação em cada embalagem individual
para permitir que saiba o tempo de armazenamento;
Conselhos para o armazenamento de
alimentos congelados
Para obter o melhor desempenho deste aparelho, deve:
• certificar-se de que os alimentos congelados comercialmente foram armazenados
adequadamente pelo vendedor;
• ter a certeza que os alimentos congelados
são transferidos do supermercado para o
congelador no tempo mais curto possível;
• não abra muitas vezes a porta nem a deixe
aberta mais tempo do que o necessário.
• Uma vez descongelados, os alimentos degradam rapidamente e não podem tornar
a ser congelados.
• Não exceda o período de armazenamento
indicado pelo fabricante de alimentos.
Como usar o dispensador de água com o cartucho filtrante BRITA
MAXTRA
Unidade de filtragem de água BRITA
Componentes internos:
6
3
5
Componentes externos:
1
2
2
1
4
1 Reservatório da água
2 Funil
3 Tampa do reservatório
4 Válvula + vedante
5 Incluindo o cartucho filtrante
6 BRITA Memo - indicador electrónico de
troca de cartucho
3
1Dispensador
2 Nível da água
3 Tabuleiro recolhe gotas
Operações iniciais para utilizar o
dispensador de água
1. Remova a fita adesiva e qualquer outro
sistema de protecção do conjunto do reservatório
2. Limpe os componentes, tal como descri-
to em "Limpeza do dispensador de
água", para eliminar eventuais resíduos.
Page 67

electrolux 67
Limpeza do dispensador de água
1. Destrave os dois elementos de bloqueio
nos lados do reservatório tal como indicado nas figuras abaixo:
– Retire o cartucho BRITA MAXTRA da
unidade de filtragem da água
– Pressione os elementos de bloqueio
no meio e eleve-os
– Desloque o bloqueador em direcção
ao centro do reservatório.
2. Puxe o reservatório para cima, na direcção da válvula.
3. Retire a tampa e o funil.
A
5. Lave a tampa do reservatório, a válvula
e o vedante com uma solução de água
morna e sabão neutro. Enxagúe e insira-
-os no orifício da porta durante a limpeza
dos restantes componentes (para evitar
fugas de ar frio do frigorífico).
6. Lave o reservatório e o funil na máquina
de lavar louça ou com uma solução de
água morna e sabão neutro, por fim, enxagúe-os.
7. Após a limpeza, volte a retirar a válvula
da porta do frigorífico e monte o reservatório pela ordem inversa (4;3;2;1) à da
desmontagem (tenha atenção à posição
do vedante da válvula).
8. Coloque o reservatório montado na porta, na direcção da válvula.
9. Trave os elementos de bloqueio pela ordem inversa à da destravagem.
10. Volte a colocar o cartucho BRITA MAXTRA no funil.
Como usar o cartucho filtrante BRITA
MAXTRA
Passo 1: Preparar o cartucho
Para preparar o cartucho filtrante BRITA retire o invólucro protector (nota: o cartucho e
o interior do invólucro podem apresentar humidade, trata-se apenas de condensação).
Coloque o cartucho em água fria e abane-o
ligeiramente para remover quaisquer bolhas
de ar. O filtro está agora pronto a ser usado.
Ao contrário de outros cartuchos filtrantes
para água, não é necessário embeber previamente o novo cartucho Maxtra.
4. Desenrosque a válvula, rodando-a para
a esquerda (tenha atenção para não soltar o vedante da válvula, pois este é necessário para o correcto funcionamento
da unidade).
Passo 2: Inserir no reservatório da água
Page 68

68 electrolux
Retire a tampa do reservatório. Antes de inserir o cartucho, retire o funil, lave-o, enxagúe-o e seque-o bem.
A seguir, limpe bem o interior do reservatório
da água com um pano húmido e seque-o.
Coloque o cartucho no reservatório do filtro
e empurre para baixo, até fazer 'click'.
Ao virar o funil para baixo o cartucho deverá
ficar no lugar.
Deixe escorrer os dois primeiros enchimentos para o lava-louça. Estes dois primeiros
enchimentos servem para limpar o cartucho
filtrante.
A seguir, volte a colocar o funil na unidade de
filtragem da água BRITA.
Volte a colocar a tampa e pressione cuidadosamente para garantir que esta fica bem
fechada.
Passo 4: Encher o reservatório da água
Para encher o reservatório com água fria,
basta abrir a tampa no topo e despejar um
jarro de água da torneira tal como indicado
na figura (utilize a tampa de cada vez que
desejar encher com água).
Importante Para evitar derramamentos de
água quando fecha e abre a porta do
frigorífico, recomendamos a não encher
totalmente o reservatório de água, mas a
deixar um espaço de ar até acima.
Caso não tenha usado toda a água filtrada
no reservatório dentro de 1 a 2 dias, despeje
a água restante antes de voltar a encher a
unidade de filtragem da água BRITA.
Passo 3: Limpar o cartucho
2x 3x=ok
Retire o funil da unidade de filtragem da água
BRITA, encha-o à torneira com água fria e
aguarde que esta seja filtrada.
Aguarde até que a água seja filtrada e repita
o "Passo 4" tantas vezes até que a unidade
de filtragem da água BRITA esteja cheia.
Page 69

Retirar o cartucho com a pega em forma
de anel
Para trocar o cartucho, passadas quatro semanas, basta puxá-lo pela pega em forma
de anel para o retirar do funil e repetir os
passos 1 a 3 acima descritos.
O Memo BRITA
Para obter o máximo desempenho e um sabor ideal, é importante trocar regularmente o
cartucho BRITA. A BRITA recomenda que
troque o cartucho na unidade de filtragem da
água BRITA do seu frigorífico a cada quatro
semanas.
O Memo BRITA lembra-o automaticamente quando deve trocar o cartucho.
electrolux 69
START
%
100
75
50
25
O original Memo BRITA mede o tempo de
uso recomendado do cartucho.
O Memo é fácil de usar e lembra-o automaticamente quando trocar o cartucho.
O Memo BRITA encontra-se na tampa do
reservatório da água. O seu funcionamento
é muito simples.
Iniciar o visor do Memo
Para iniciar o Memo, prima o botão na tampa
e mantenha-o premido até surgirem as quatro barras no visor e estas piscarem duas
vezes. O Memo está agora configurado.
Page 70

70 electrolux
START
%
100
75
50
25
Controlar o funcionamento
O ponto intermitente no canto inferior direito
do Memo indica que este está a funcionar.
START
%
100
75
50
25
Mudar o visor
START
%
100
75
50
25
Page 71

electrolux 71
Em cada semana desaparece uma barra para indicar a vida útil restante do cartucho.
Após quatro semanas todas as barras terão
desaparecido. Isto e uma seta intermitente
indicam que o cartucho deve ser agora trocado.
Insira um cartucho novo de acordo com as
instruções e reactive o Memo tal como acima
descrito.
START
%
100
75
50
25
Quando for visível apenas uma barra, deverá
verificar se possui um cartucho filtrante BRITA MAXTRA novo disponível.
Importante O Memo foi concebido para ser
usado apenas com cartuchos filtrantes
BRITA.
Memo BRITA: O indicador electrónico de troca de cartucho tem uma vida útil de aproximadamente 5 anos. No fim da vida útil do
Memo lembre-se de que se trata de um dispositivo electrónico, devendo ser eliminado
de acordo com as disposições e regulamentos aplicáveis.
Para retirar o Memo gasto, insira uma chave
de fendas na ranhura junto ao Memo e puxe-
-o para fora.
Não se esqueça que o Memo não deve ser
retirado por qualquer outro motivo que não
seja a sua eliminação.
Informações importantes
• O orifício da válvula da porta do frigorífico
tem de estar fechado com a válvula da
água durante o normal funcionamento do
aparelho.
• Utilize apenas água potável. A utilização
de outro tipo de bebida pode deixar resíduos, sabor ou cheiro no reservatório e na
torneira.
• É possível ouvir alguns ruídos provocados
pela entrada de ar durante a saída da água
do reservatório.
• Se a água não sair correctamente, volte a
pressionar a alavanca de accionamento.
Mantenha o copo debaixo da torneira durante alguns instantes para assegurar que
este recolhe toda a água.
• Não utilize bebidas gaseificadas, como sejam refrigerantes. A bebida pode verter
devido à pressão do gás.
• Lembre-se de que a água é um produto
alimentar. Consuma a água filtrada dentro
de um a dois dias.
• Caso não use a unidade de filtragem da
água BRITA durante um período de tempo
prolongado (p. ex. férias), recomendamos
a despejar toda a água existente no sistema e a deixar o cartucho dentro do reservatório do filtro.
Antes de voltar a usar o sistema, retire o
cartucho e repita os passos 1 a 4 de "Como usar o cartucho filtrante BRITA MAXTRA".
Page 72

72 electrolux
• A unidade de filtragem da água BRITA foi
concebida para ser usada apenas com
água municipal da torneira (nota: esta
água é constantemente controlada, sendo
apta para beber de acordo com os regulamentos legais) ou com água de fontes
privadas, que tenham sido testadas e declaradas aptas para beber.
Caso sejam recebidas instruções das autoridades no sentido de ferver a água da
torneira, a água filtrada BRITA terá igualmente de ser fervida. Quando as instru-
Manutenção e limpeza
Cuidado Retire a ficha da tomada antes
de efectuar qualquer operação de
manutenção.
Este aparelho contém hidrocarbonetos
na sua unidade de arrefecimento; a manutenção e a recarga devem, por isso,
ser efectuadas exclusivamente por técnicos autorizados.
Limpeza periódica
O equipamento tem de ser limpo regularmente:
• limpe o interior e os acessórios com água
morna e sabão neutro.
• verifique regularmente os vedantes de
porta e limpe-os para se certificar de que
estão limpos e sem resíduos.
• lave e seque minuciosamente.
Importante Não puxe, desloque nem
danifique quaisquer tubos e/ou cabos dentro
do armário.
Nunca utilize detergentes, pós abrasivos,
produtos de limpeza muito perfumados ou
cera de polir para limpar o interior, pois isto
irá danificar a superfície e deixar um odor forte.
Limpe o condensador (grelha preta) e o compressor no fundo do aparelho com uma escova ou um aspirador. Esta operação irá melhorar o desempenho do aparelho e poupar
o consumo de electricidade.
Importante Tenha cuidado para não
danificar o sistema de arrefecimento.
Muitos agentes de limpeza de superfícies de
cozinhas contêm químicos que podem atacar/danificar os plásticos usados neste aparelho. Por esta razão é aconselhável que a
ções para ferver a água deixarem de estar
em vigor, todo o sistema de filtragem tem
de ser limpo e inserido um novo cartucho.
Pode encontrar mais informações sobre os
cartuchos filtrantes BRITA e o Memo no manual informativo BRITA.
Pode adquirir novos cartuchos filtrantes
BRITA e o Memo através da rede de assistência ao consumidor da Electrolux
ou da BRITA.
estrutura exterior deste aparelho seja limpa
apenas com água morna com um pouco de
solução de limpeza adicionada.
Após a limpeza, volte a ligar o equipamento
à tomada de alimentação.
Descongelar o frigorífico
O gelo é automaticamente eliminado do evaporador do compartimento do frigorífico
sempre que o compressor de motor pára,
durante a utilização normal. A água resultante da descongelação é descarregada por um
canal para um recipiente especial, colocado
na parte traseira por cima do aparelho, sobre
o compressor de motor, onde evapora.
É importante limpar periodicamente o orifício
de descarga da água resultante da descongelação no centro do canal do compartimento do frigorífico para evitar que um fluxo
excessivo de água pingue sobre os alimentos. Utilize o agente de limpeza fornecido,
que irá encontrar já inserido no orifício de
descarga.
Page 73

Descongelar o congelador
O compartimento do congelador deste modelo, por sua vez, é do tipo "no frost". Isto
significa que não há qualquer formação de
gelo durante o seu funcionamento, quer nas
paredes interiores, quer nos alimentos.
A ausência de gelo deve-se à circulação
contínua de ar frio no interior do compartimento, accionado por um ventilador controlado automaticamente.
Períodos de inactividade
Quando o aparelho não é utilizado por longos períodos, observe as seguintes precauções:
• desligue o aparelho da tomada da
electricidade
• retire todos os alimentos
•
descongelação
dos os acessórios
• deixe a(s) porta(s) aberta(s) para evitar
cheiros desagradáveis.
Se o armário for mantido ligado, peça a alguém para o verificar esporadicamente, para
evitar que os alimentos no interior se estraguem em caso de falha eléctrica.
Substituir o filtro Taste Guard
O filtro Taste Guard ajuda a reduzir os odores
no interior do frigorífico, limitando o risco de
aromas indesejados em alimentos sensíveis
16)
e limpe o aparelho e to-
electrolux 73
Para obter o melhor desempenho, o filtro
Taste Guard deve ser substituído todos os
anos.
Podem ser adquiridos novos filtros de ar activo junto do representante local.
• O filtro de ar é colocado atrás da aba e
pode ser alcançado puxando a aba para
fora (1).
• Puxe o filtro de ar usado para fora da ranhura.
• Introduza o novo filtro de ar na ranhura (2).
• Feche a aba.
O filtro de ar é um acessório consumível, não
estando abrangido pela garantia.
2
1
Importante Durante o funcionamento,
mantenha sempre fechada a aba da
ventilação de ar.
O filtro de ar deve ser manuseado com cuidado, para que a superfície não seja arranhada.
16) Se previsto.
Page 74

74 electrolux
O que fazer se…
Advertência Antes da resolução de
problemas, retire a ficha da tomada.
A resolução de problemas que não se
encontram no manual só deve ser efectuada por um electricista qualificado ou
uma pessoa competente.
Problema Possível causa Solução
O aparelho não funciona.
A lâmpada não funciona.
A ficha não está correctamente
O aparelho não tem alimentação.
A lâmpada não funciona.
O compressor funciona
continuamente.
A porta não está fechada correc-
A porta foi aberta muitas vezes. Não mantenha a porta aberta mais
A temperatura do produto está
A temperatura ambiente está
Fluxos de água na placa
traseira do frigorífico.
Fluxos de água no frigorífico.
Os produtos evitam que a água
Fluxos de água no chão.
A temperatura no aparelho está demasiado baixa.
A temperatura no aparelho está demasiado alta.
A porta não está fechada correc-
A temperatura do produto está
Muitos produtos armazenados
A máquina desliga-se. Ligue o aparelho.
inserida na tomada.
Não existe tensão na tomada.
A lâmpada está defeituosa. Consulte "Substituir a lâmpada".
A temperatura não está regulada
correctamente.
tamente.
muito alta.
muito alta.
Durante o processo de descon-
gelação automático, o gelo é
descongelado na placa traseira.
A saída de água está obstruída. Limpe a saída da água.
escorra para o colector de água.
A saída de água derretida não es-
corre no tabuleiro de evaporação
acima do compressor.
O regulador de temperatura não
está regulado correctamente.
O regulador de temperatura não
está regulado correctamente.
tamente.
muito alta.
ao mesmo tempo.
Importante Existem alguns ruídos durante
a utilização normal (compressor, circulação
de refrigerante).
Ligue a ficha do aparelho correctamente à tomada de alimentação.
Ligue um aparelho eléctrico diferente à tomada.
Contacte um electricista qualificado.
Defina uma temperatura mais elevada.
Consulte "Fechar a porta.
tempo do que o necessário.
Deixe que a temperatura do pro-
duto diminua até à temperatura
ambiente antes de o guardar.
Diminua a temperatura ambiente.
Isto está correcto.
Certifique-se de que os produtos
não tocam na placa traseira.
Engate a saída de água derretida
no tabuleiro de evaporação.
Defina uma temperatura mais elevada.
Defina uma temperatura mais baixa.
Consulte "Fechar a porta.
Deixe que a temperatura do produto diminua até à temperatura
ambiente antes de o guardar.
Armazene menos produtos ao
mesmo tempo.
Page 75

Problema Possível causa Solução
A temperatura no frigorífico está demasiado alta.
A temperatura no congelador está demasiado alta.
Existe demasiado gelo. Os alimentos não estão embala-
A porta não está fechada correc-
O regulador de temperatura não
Substituir a lâmpada
1. Desligue a ficha da tomada.
2. Prima o gancho traseiro da tampa da
lâmpada com uma chave de fendas e, ao
mesmo tempo, rode a tampa na direcção
da seta.
3. Substitua a lâmpada por uma com a
Não existe circulação de ar frio no
aparelho.
Os produtos estão demasiado
perto uns dos outros.
dos correctamente.
tamente.
está regulado correctamente.
Fechar a porta
1. Limpe as juntas da porta.
2. Se necessário, ajuste a porta. Consulte
"Instalação".
3. Se necessário, substitua as juntas de
porta defeituosas. Contacte o Centro de
Assistência.
mesma potência (a potência máxima está indicada na cobertura da lâmpada).
4. Instale a tampa da lâmpada fixando-a na
sua posição original.
5. Ligue a ficha do aparelho à tomada de
alimentação.
6. Abra a porta. Certifique-se de que a lâmpada se acende.
electrolux 75
Certifique-se de que existe circulação de ar frio no aparelho.
Armazene os produtos de forma a
haver circulação de ar frio.
Embale os alimentos correctamente.
Consulte "Fechar a porta.
Defina uma temperatura mais elevada.
A
max 25 W
B
Dados técnicos
Dimensão do nicho de instalação
Altura 1800 mm
Largura 695 mm
Profundidade 669 mm
Tempo de reinício 20 h
Page 76

76 electrolux
As informações técnicas encontram-se na
placa de dados no lado esquerdo interno do
aparelho e na etiqueta de energia.
Instalação
Leia as "Informações de segurança"
cuidadosamente para a sua segurança
e funcionamento correcto do aparelho
antes de o instalar.
Posicionamento
Instale este aparelho num local com uma
temperatura ambiente que corresponde à
classe climática indicada na placa de dados
do aparelho:
Classe
climáti-
ca
SN +10 °C a + 32 °C
N +16 °C a + 32 °C
ST +16 °C a + 38 °C
T +16 °C a + 43 °C
Local
O aparelho deve ser instalado afastado de
fontes de calor, como sejam radiadores, termoacumuladores, luz solar directa, etc. Certifique-se de que o ar pode circular livremente na traseira do aparelho. Para garantir o
melhor desempenho, se o aparelho estiver
sob um armário suspenso, a distância mínima entre o topo do aparelho e o armário é
de 100 mm. No entanto, o aparelho não deve
ser colocado sob armários suspensos. O nivelamento preciso é garantido por um ou
mais pés ajustáveis na base do aparelho.
Advertência Tem de ser possível
desligar o aparelho da fonte de corrente;
Assim, a ficha tem de estar facilmente
acessível após a instalação.
Temperatura ambiente
100 mm
AB
10 mm
Ligação eléctrica
Antes de ligar, certifique-se de que a tensão
e a frequência indicadas na placa de dados
correspondem à fonte de alimentação doméstica.
O aparelho deve ter uma ligação à terra. A
ficha do cabo de alimentação é fornecida
com um contacto para este objectivo. Se a
tomada da fonte de alimentação doméstica
não estiver ligada à terra, ligue o aparelho a
uma ligação à terra separada, em conformidade com as normas actuais, consultando
um electricista qualificado.
O fabricante declina toda a responsabilidade
caso as precauções de segurança acima
não sejam cumpridas.
Este aparelho cumpre com as directivas.
E.E.C.
Separadores traseiros
No interior do aparelho, existem dois se-
paradores que devem ser instalados
conforme ilustrado.
Desaperte os parafusos, introduza o separador debaixo da cabeça do parafuso e volte
a apertar os parafusos.
10 mm
Page 77

Instalação do filtro Taste Guard
O filtro Taste Guard Filter é um filtro de carvão activo que absorve os maus odores e
permite preservar o melhor sabor e aroma
para todos os alimentos, sem o risco de contaminação de odores entre géneros alimentícios.
Aquando da entrega, o filtro de carvão está
num saco de plástico para manter a respectiva longevidade e características. O filtro deve ser colocado atrás da aba antes de ligar
o aparelho.
1. Puxe a aba para fora (1)
2. Retire o filtro do saco de plástico
3. Introduza o filtro na ranhura existente na
parte posterior da tampa da aba (2)
4. Feche a aba
electrolux 77
2
1
Importante Durante o funcionamento,
mantenha sempre fechada a aba da
ventilação de ar.
O filtro deve ser manuseado com cuidado,
para que não se soltem fragmentos da superfície.
Reversibilidade da porta
Advertência Antes de executar
qualquer operação retire a ficha da
tomada.
Importante Recomendamos que execute
as seguintes operações com outra pessoa,
que irá segurar as portas do aparelho
durante as operações.
Para alterar o sentido de abertura, faça o seguinte:
1. Retire a dobradiça superior com cuidado para que a porta superior não caia e
guarde-a para utilização futura.
2. Retire a porta superior.
3. Retire o suporte superior e monte-o no
lado oposto.
Page 78

78 electrolux
4. Desaparafuse a dobradiça do meio (H).
Desaparafuse os tampões de plástico
localizados no lado oposto da dobradiça
central e introduza-os nos orifícios ocupados anteriormente pela dobradiça.
H
5. Retire a porta inferior.
6. Retire a grelha de ventilação, que está
fixada por dois parafusos.
11. Com cuidado, volte a colocar o aparelho
na sua posição de funcionamento e
ajuste o nível do aparelho aparafusando/
desaparafusando o pé ajustável no fundo com os seus dedos ou uma ferramenta.
12. Retire a cobertura do orifício da grelha
de ventilação, puxando-a na direcção da
seta, e volte a instalá-la no lado oposto.
13. Volte a colocar a grelha de ventilação e
aperte os parafusos.
14. Volte a instalar a porta inferior.
15. Volte a instalar a dobradiça central (H) no
lado oposto.
16. Volte a instalar a porta superior.
17. No saco da documentação poderá encontrar a dobradiça superior necessária
para efectuar esta reversibilidade. Coloque o parafuso no lugar.
7. Com cuidado, coloque o aparelho deitado de costas, desaparafuse totalmente o pé ajustável e aparafuse-o no lado
oposto.
8. Retire a dobradiça do fundo desenroscando os parafusos que a fixam.
9. Com uma chave de bocas de 12 mm,
desaparafuse o pino da dobradiça e volte a instalá-lo no lado oposto da dobradiça.
10. Volte a instalar a dobradiça inferior no
lado oposto com os parafusos que retirou anteriormente.
Page 79

Faça uma verificação final para se certificar
de que:
Preocupações ambientais
O símbolo no produto ou na embalagem
indica que este produto não pode ser tratado
como lixo doméstico. Em vez disso, deve ser
entregue ao centro de recolha selectiva para
a reciclagem de equipamento eléctrico e
electrónico. Ao garantir uma eliminação
adequada deste produto, irá ajudar a evitar
eventuais consequências negativas para o
meio ambiente e para a saúde pública, que,
de outra forma, poderiam ser provocadas
por um tratamento incorrecto do produto.
Para obter informações mais
pormenorizadas sobre a reciclagem deste
produto, contacte os serviços
municipalizados locais, o centro de recolha
selectiva da sua área de residência ou o
estabelecimento onde adquiriu o produto.
electrolux 79
• Todos os parafusos estão apertados.
• A junta magnética está colada ao aparelho.
• A porta abre e fecha correctamente.
Se a temperatura ambiente for fria (por ex. no
Inverno), pode acontecer que a junta não
adira perfeitamente ao aparelho. Neste caso,
aguarde até que a junta adira naturalmente
ou acelere o processo aquecendo a parte
afectada com um secador de cabelo convencional.
Caso não queira executar as operações acima mencionadas, contacte o Centro de
Apoio ao Cliente mais perto. Os custos da
execução da reversibilidade das portas pelo
técnico do Centro de Apoio ao Cliente serão
suportados por si.
Page 80

www.electrolux.com
www.electrolux.com.tr
Para comprar acessórios e consumiveis na nossa loja web, por favor, visite:
www.electrolux.pt
222351472-00-122008
 Loading...