

Page 1
User Manual
Brukerhåndbok
Manuale per l’utente
Käyttöohje
Användarmanual
Brugervejledning
Microwave oven
Mikrobølgeovn
Forno a microonde
Mikroaaltouuni
Mikrovågsugn
Mikrobølgeovn
EMS26415
Page 2
We were thinking of you
when we made this product
Page 3

electrolux
3
GB
Welcome to the world of
Electrolux
You’ve chosen a first class product
from Electrolux, which hopefully will
provide you with lots of pleasure in
the future. Electrolux ambition is to
offer a wide variety of quality
products that would make your life
even more comfortable. You can
look at some examples on the cover
in this manual. But now it’s time to
study this manual and start using
and enjoying the benefits from your
new machine. We promise that it’ll
make your life a little easier. Good
luck!
I
N
Velkommen til Electrolux
verden
Takk for at du valgte et
kvalitetsprodukt fra Electrolux. Vi håper
det vil gi deg mye glede i årene som
kommer. Electrolux ambisjon er å tilby
et bredt og variert utvalg av
kvalitetsprodukter som gjør livet mer
behagelig. På forsiden av denne
bruksanvisningen finner du noen
eksempler på hva du kan velge i. Ta
deg noen minutter til å lese gjennom
innholdet i denne bruksanvisningen,
slik at du kan dra nytte av alle
fordelene med den nye maskinen din.
Vi lover at den vil gi deg en
enestående brukeropplevelse og gjøre
hverdagen din litt enklere. Lykke til!
FI
Tervetuloa Electroluxin
maailmaan
Hyvä asiakkaamme, olet tehnyt hyvän
päätöksen valitessasi ensiluokkaisen
Electrolux-tuotteen, joka tuottaa sinulle
varmasti paljon iloa tulevaisuudessa.
Electrolux tarjoaa laajan valikoiman
laadukkaita tuotteita, jotka helpottavat
elämääsi. Pyydämme sinua tutustumaan
uuden laitteesi käyttöohjeeseen, jotta voit
käyttää sen kaikkia toimintoja ja saat siitä
parhaan hyödyn.
Page 4

4
electrolux
S
Välkommen till Electrolux !
Du har valt en högklassig produkt från
Electrolux som vi lovar kommer att göra
livet lite enklare för dig! Du får lite mer tid
över till annat och lite mer frihet att leva
det liv du vill leva. Electrolux ambition är
att tillhandahålla ett brett urval
kvalitetsprodukter som kan förenkla ditt
liv. För att du ska få största möjliga nytta
och glädje av ditt nyförvärv föreslår vi att
du börjar med att noggrannt läsa igenom
den här bruksanvisningen innan du
använder produkten. Lycka till !
GB
Safety information 6
Product description 10
Before first use 12
Operation 13
Programme charts 20
Recipes 26
Care & cleaning 32
What to do if . . . 33
Specifications 33
Installation 34
Environmental information 36
European guarantee 37
Contents
DK
Velkommen i
Electrolux´s verden
Du har valgt et første klasses produkt,
som forhåbentlig vil være til glæde og
gavn for dig i fremtiden. Vor ambition er
at tilbyde en bred vifte af produkter, som
forenkler dit liv. Du kan se nogle
eksempler på forsiden af denne
brugsanvisning. Nu er det tid til at læse
brugsanvisningen, og nyde de fordele,
som dit nye produkt giver dig. Vi lover, at
det vil gøre livet lettere for dig.
N
Sikkerhetsinformasjon 38
Produktbeskrivelse 42
Før den brukes første gang 44
Betjening 45
Tabeller programmer 52
Oppskrifter 58
Vedlikehold og rengjøring 64
Hva du gjør hvis . . . 65
Spesifikasjoner 65
Installering 66
Miljøinformasjon 68
Garanti / Kundeservice 69
Innhold
Page 5

I
Indice
FI
electrolux
Sisällysluettelo
5
Informazioni sulla sicurezza 71
Descrizione del prodotto 75
Prima dell’uso 77
Funzionamento 78
Schemi dei programmi 87
Ricette 93
Manutenzione & pulizia 101
Cosa fare se . . . 102
Dati tecnici 102
Installazione 103
Informazioni ambientali 105
Garanzia / Servizio clienti 106
S
Säkerhetsinformation 146
Produktbeskrivning 150
Innan första användning 152
Skötsel 153
Programtabeller 160
Recept 166
Skötsel & rengöring 172
Vad gör jag om . . . 173
Specifikationer 173
Installation 174
Miljöinformation 176
Garanti / Kundtjänst 177
Innehåll
Tärkeitä turvaohjeita 112
Tuotekuvaus 116
Ennen käyttöä 118
Käyttöä 119
Ohjelmakaaviot 127
Reseptit 133
Hoito & puhdistus 140
Ongelmatilanteet . . . 141
Tekniset tiedot 141
Asennus 142
Ympäristöä koskevia tietoja 144
Takuu / Huolto 145
DK
Sikkerhedsoplysninger 178
Produktbeskrivelse 182
Før ibrugtagning 184
Betjening 185
Programskemaer 192
Opskrifter 198
Vedligeholdelse & rengøring 205
Hvad skal jeg gøre, hvis . . . 206
Specifikationer 206
Installering 207
Miljøoplysninger 209
Garanti / Kundeservice 210
Indholdsfortegnelse
Page 6

6
electrolux safety information
Important safety instructions: Read carefully & keep
for future reference
To avoid the danger of fire
The microwave oven should not
be left unattended during operation.
Power levels that are too high or
cooking times that are too long may
overheat foods resulting in a fire.
The electrical outlet must be readily
accessible so that the unit can be
unplugged easily in an emergency.
The AC power supply must be
230 V, 50 Hz, with a minimum 16 A
distribution line fuse, or a minimum 16 A
distribution circuit breaker.
Itisrecommended thata separate circuit
serving only this appliance be provided.
Do not store or use the oven outdoors.
If food being heated begins to
smoke, DO NOT OPEN THE DOOR.
Turn off and unplug the oven and wait
until the food has stopped smoking.
Opening the door while food is
smoking may cause a fire.
Only use microwave-safe
containers and utensils.
Do not leave the oven unattended
when using disposable plastic, paper
or other combustible food containers.
Clean the waveguide cover, the
oven cavity, the turntable and
turntable support after use. These
must be dry and free from grease.
Built-up grease may overheat and
begin to smoke or catch fire.
Do not place flammable materials near
the oven or ventilation openings. Do not
block the ventilation openings.
Remove all metallic seals, wire twists,
etc., from food and food packages. Arcing
on metallic surfaces may cause a fire.
Do not use the microwave oven to heat
oil for deep frying. The temperature cannot
be controlled and the oil may catch fire.
To make popcorn, only use special
microwave popcorn makers.
Do not store food or any other items
inside the oven.
Check the settings after you start the
oven to ensure the oven is operating as
desired.
See the corresponding hints in this
operation manual.
To avoid the possibility of injury
Warning: Do not operate the oven
if it is damaged or malfunctioning.
Check the following before use:
a) The door; make sure the door
closes properly and ensure it is not
misaligned or warped.
b) The hinges and door safety latches;
check to make sure they are not
broken or loose.
c) The door seals and sealing
surfaces; ensure that they have
not been damaged.
d) Inside the oven cavity or on the
door; make sure there are no dents.
e) The power supply cord and plug;
ensure that they are not damaged.
Never adjust, repair or modify the
oven yourself. It is hazardous for
anyone other than a competent
person to carry out any service or
repair operation which involves the
removal of a cover which gives
protection against exposure to
microwave energy.
Page 7

electrolux safety information
7
Donot operate the oven with the door
open or alter the door safety latches in any
way.
Donot operate the oven if there is an
object between the door seals and sealing
surfaces.
Do not allow grease or dirt to build
up on the door seals and adjacent
parts. Follow instructions for “Care &
cleaning”. Failure to maintain the
oven in a clean condition could lead
to a deterioration of the surface that
could adversely affect the life of the
appliance and possibly result in a
hazardous situation.
Individuals with PACEMAKERS should
check with their doctor or the manufacturer
of the pacemaker for precautions regarding
microwave ovens.
To avoid the possibility of electric
shock
Under no circumstances should you
remove the outer cabinet.
Never spill or insert any objects into the
door lock openings or ventilation openings.
In the event of a spill, turn off and unplug the
oven immediately and call an authorised
ELECTROLUX service agent.
Do not immerse the power supply cord
or plug in water or any other liquid. Do not
allow the power supply cord to run over any
hot or sharp surfaces, such as the hot air
vent area at the top rear of the oven.
Do not attempt to replace the oven
lamp yourself or allow anyone who is not
authorised by ELECTROLUX to do so. If the
oven lamp fails, please consult your dealer
or call an authorised ELECTROLUX service
agent.
If the power supply cord of this
appliance is damaged, it must be replaced
with a special cord. The exchange must be
made by an authorised ELECTROLUX
service agent.
To avoid the possibility of explosion
and sudden boiling
Warning:Liquidsandother foods
must not beheated in sealedcontainers
since they are liable toexplode.
Never use sealed containers. Remove
seals and lids before use. Sealed
containers can explode due to a build up
of pressure even after the oven has been
turned off.
Take care when microwaving liquids.
Use a wide-mouthed container to allow
bubbles to escape.
Microwave heating of beverages
can result in delayed eruptive boiling,
therefore care has to be taken when
handling the container.
To prevent sudden eruption of boiling
liquid and possible scalding:
1. Stir liquid prior to heating/reheating.
2. It is advisable to insert a glass rod or
similar utensil into the liquid whilst
reheating.
3. Let liquid stand for at least 20 seconds
in the oven at the end of cooking time to
prevent delayed eruptive boiling.
Do not cook eggs in their shells
and whole hard boiled eggs should
not be heated in microwave ovens
since they may explode even after
microwave cooking has ended. To
cook or reheat eggs which have not
been scrambled or mixed, pierce the
yolks and the whites, or the eggs may
explode. Shell and slice hard boiled
eggs before reheating them in the
microwave oven.
Pierce the skin of such foods as
potatoes, sausages and fruit before
cooking, or they may explode.
Page 8

8
electrolux safety information
To avoid the possibility of burns
Use pot holdersor ovengloves when
removingfood fromthe oven to prevent
burns.
Always open containers, popcorn
makers, oven cooking bags, etc., away from
the face and hands to avoid steam burns.
To avoid burns, always test food
temperature and stir before serving
and pay special attention to the
temperature of food and drink given
to babies, children or the elderly.
Temperature of the container is not a
true indication of the temperature of the food
or drink; always check the food temperature.
Always stand back from the ovendoor
when opening to avoid burns from escaping
steam and heat.
Slice stuffed baked foods after heating to
release steam and avoid burns.
Keep children away from the door and
accessible parts that may become hot when
the grill is in use. Children should be kept
away to prevent them burningthemselves.
Do not touch the oven door, outer
cabinet, rear cabinet, oven cavity, ventilation
openings, accessories and dishes during
GRILL mode, DUAL GRILL mode and
AUTO COOK operation as they will become
hot. Before cleaning make sure they are not
hot.
To avoid misuse by children
Warning: Only allow children to use
the oven without supervision when
adequate instructionshave been given
so that the child is able to use the oven
in a safe way and understands the
hazardsof improper use.
This appliance is not intended for use
by persons (including children) with
reduced physical, sensory or mental
capabilities, or lack of experience and
knowledge, unless they have been given
supervision or instruction concerning use
of the appliance by a person responsibile
for their safety.
Children should be supervised to ensure
that they do not play with the appliance.
Do not lean or swing on the oven door.
Do not play with the oven or use it as a toy.
Children should be taught all important
safety instructions: use of pot holders,
careful removal of food coverings; paying
special attention to packaging (e.g. selfheating materials) designed to make food
crisp, as they may be extra hot.
Other warnings
Never modify the oven in any way.
This oven is for home food preparation
only and may only be used for cooking
food. It is not suitable for commercial or
laboratory use.
To promote trouble-free use of
your oven and avoid damage
Never operate the oven when it is
empty except where recommended in the
operation manual, see page 17 note 2.
Doing so may damage the oven.
When using a browning dish or selfheating material, always place a heatresistant insulator such as a porcelain plate
under it to prevent damage to the turntable
and turntable support due to heat stress.
The preheating time specified in the dish’s
instructions must not be exceeded.
Do not use metal utensils, which reflect
microwaves and may cause electrical
arcing. Do not put cans in the oven.
Page 9

Only use the turntable and the turntable
support designed for this oven. Do not
operate the oven without the turntable.
To prevent the turntable from breaking:
a) Before cleaning the turntable with water,
leave the turntable to cool.
b) Do not put hot foods or hot utensils on
a cold turntable.
c) Do not put cold foods or cold
utensils on a hot turntable.
Do not place anything on the outer
cabinet during operation.
Do not use plastic containers for
microwaving if the oven is still hot from
using the GRILL mode, DUAL GRILL mode
and AUTO COOK operation because they
may melt. Plastic containers must not be
used during above modes unless the
container manufacturer says they are
suitable.
Important:
If you are unsure how to connect your oven,
please consult an authorised, qualified
electrician.
Neither the manufacturer nor the dealer
can accept any liability for damage to the
oven or personal injury resulting from failure
to observe the correct electrical connection
procedure.
Water vapour or drops may occasionally
form on the oven walls or around the door
seals and sealing surfaces. This is a normal
occurrence and is not an indication of
microwave leakage or a malfunction.
electrolux safety information
9
Page 10
10
electrolux product description
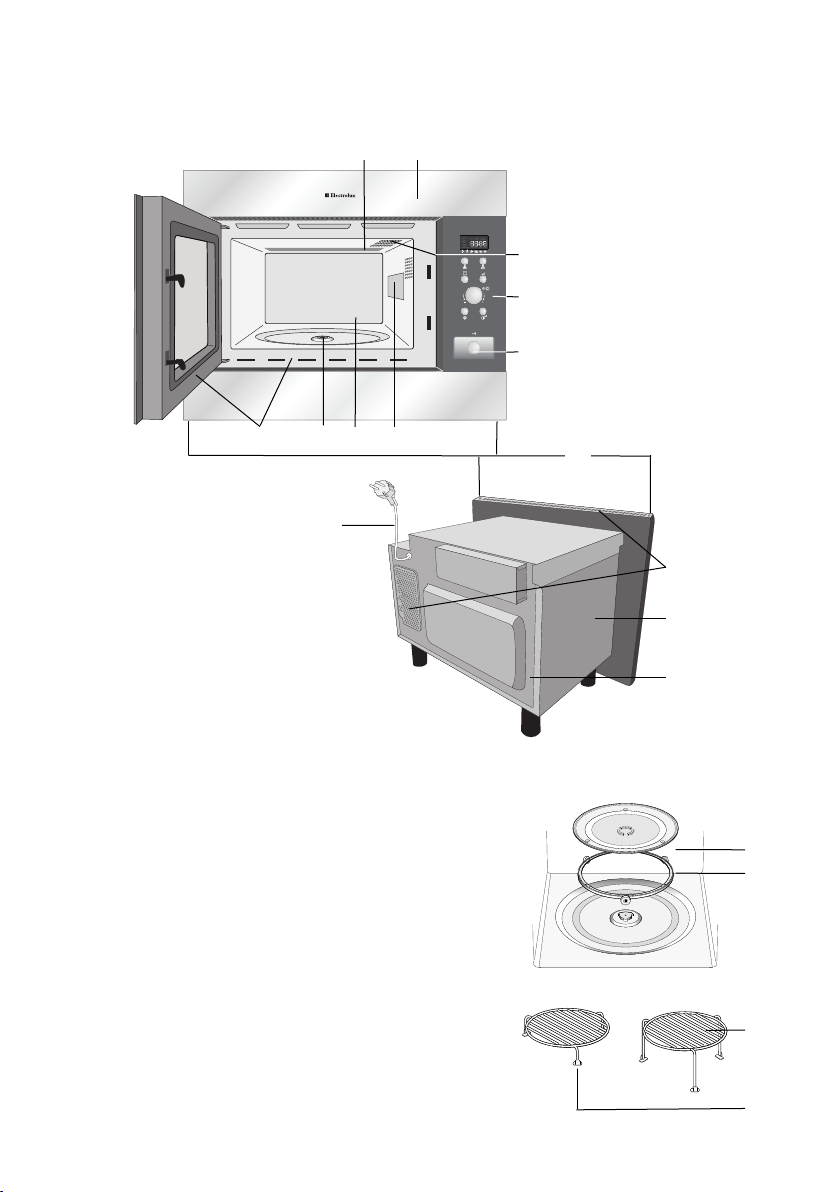
Product description
1 2
3
4
5
9876
1 Grill heating element
2 Front trim
3 Oven lamp
4 Control panel
14
5 Door opening button
6 Waveguide cover
7 Oven cavity
8 Seal packing
9 Door seals and sealing
surfaces
10 Fixing points (4 points)
11 Ventilation openings
12 Outer cover
13 Rear cabinet
14 Power supply cord
Check to make sure the following accessories are
provided:
(1) Turntable (2) Turntable support
(3) High rack (4) Low rack
(5) 4 fixing screws (not shown)
• Place the turntable support in the seal packing
on the floor of the cavity.
• Then place the turntable on the turntable
support.
• To avoid turntable damage, ensure dishes or
containers are lifted clear of the turntable rim
when removing them from the oven.
Important:
When you order accessories, please mention two
items: part name and model name to your dealer
or an authorised ELECTROLUX service agent.
10
11
12
13
1
2
3
4
Page 11
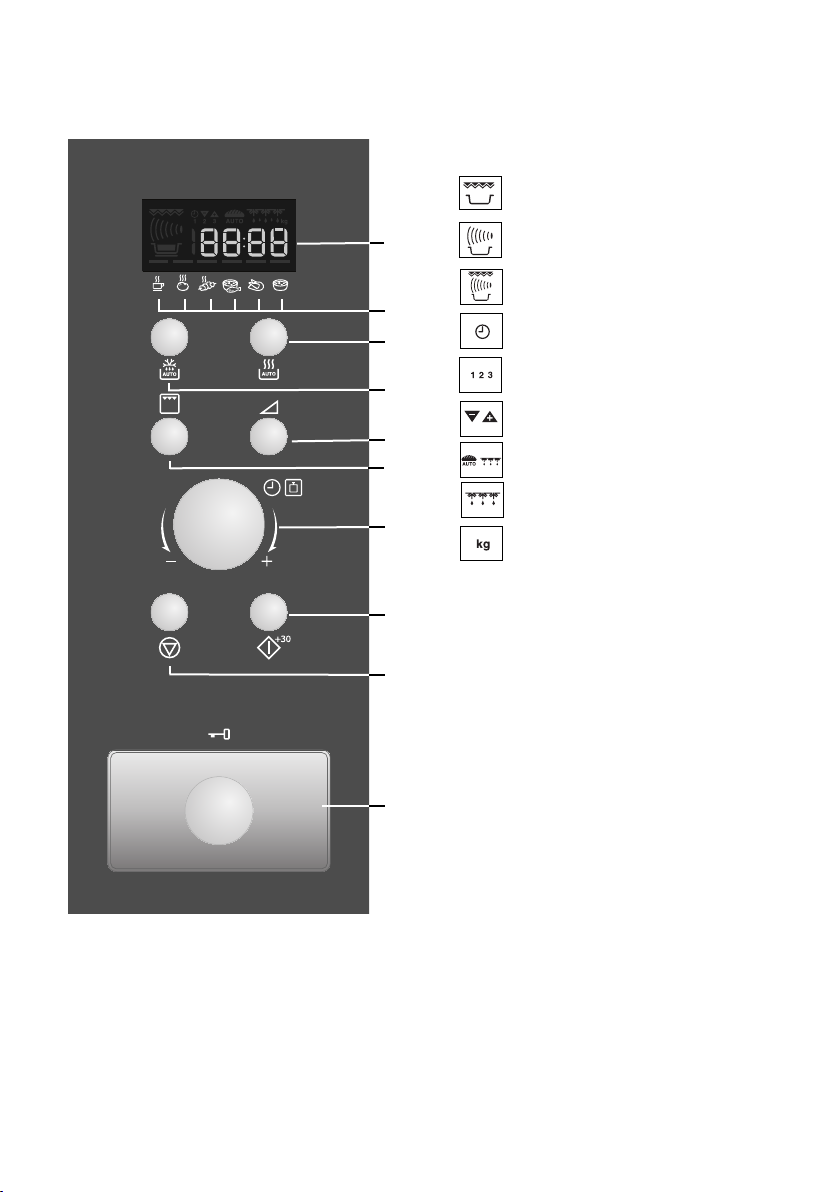
Control panel
electrolux product description
1 Digital display indicators
Grill
11
1
2
3
4
5
6
7
2 AUTO COOK indicators
8
3 AUTO COOK button
4 AUTO DEFROST button
9
5 POWER LEVEL button
6 GRILL button
7 TIMER/WEIGHT KNOB
8 START/+30 button
9 STOP button
10
10 DOOR OPENING button
Microwave
Dual
Clock
Cooking stages
Plus/Minus
Auto Defrost bread
Auto Defrost
Weight
Page 12
12
electrolux before first use
Before first use
Econ mode
The oven is set in ‘ENERGY SAVE’
mode (‘Econ’).
1. Plug in the oven.
2. The display will be blank.
3. Open the door and the power
comes on.
4. Close the door and ‘Econ’ will be
displayed.
5. The display will count down from
3:00 to zero.
6. When zero is reached, the oven
goes into ‘Econ’ mode and the
display goes blank.
7. To cancel ‘Econ’ mode, set the
clock.
8. To set ‘Econ’ mode when the
clock is set, open the door, press
start for 5 seconds, press stop
then close the door.
Setting the clock
The oven has a 12 hour clock.
Example: To set the clock to 11:30.
1. Plug in the oven.
2. The display will be blank.
3. Open the door and the power
comes on.
4. Whilst the door is open, rotate the
TIMER/WEIGHT knob to adjust the
hour.
5. Press the START/+30 button once
then rotate the TIMER/WEIGHT
knob to adjust the minutes.
6. Press the START/+30 button.
7. Check the display:
8. Close the door.
Important:
1. You can rotate the TIMER/WEIGHT
knob clockwise or anti-clockwise.
2. ENERGY SAVE mode cannot be
set when the clock is set.
Adjusting the time when the
clock is set or oven is in
‘Econ’ mode
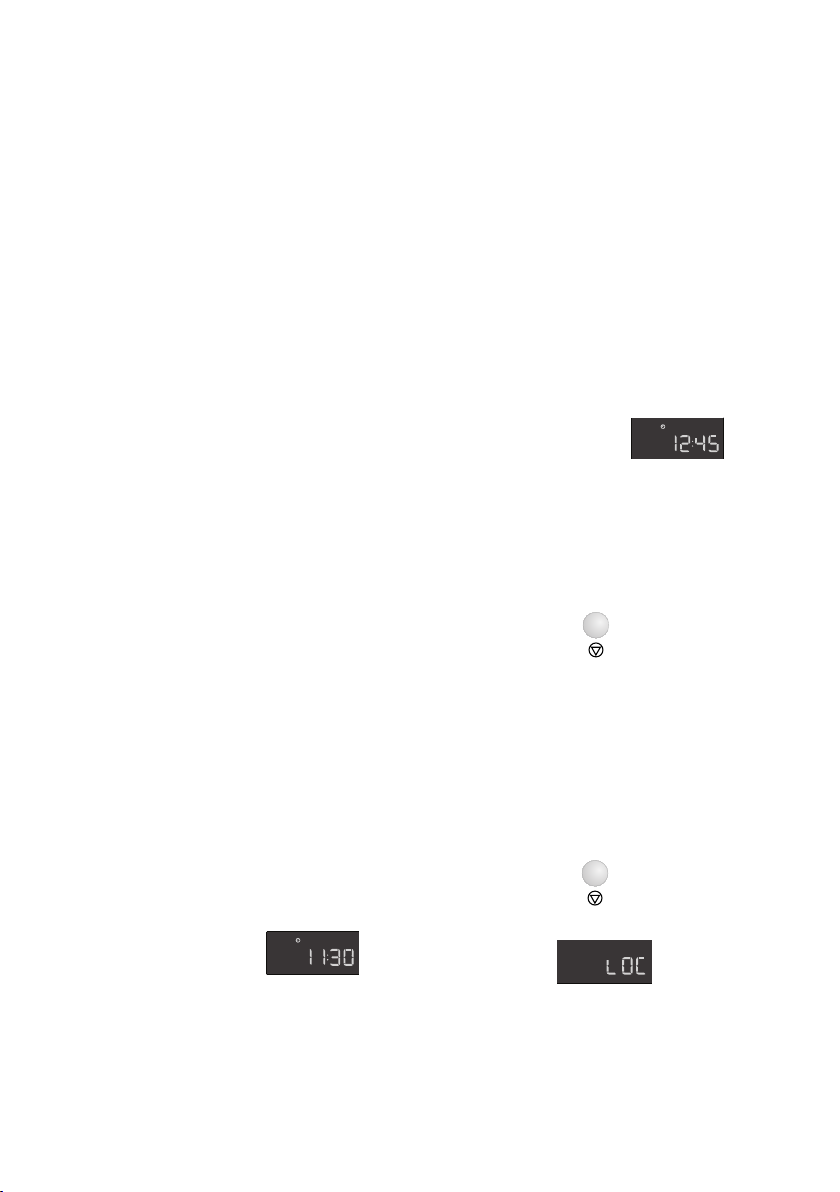
Example: To set the clock to 12:45.
1. Open the door.
2. Press and hold the START/+30
button for 5 seconds. The oven will
beep. Rotate the TIMER/WEIGHT
knob to adjust the hour.
3. Press the START/+30 button once
then rotate the TIMER/WEIGHT
knob to adjust the minutes.
4. Press the START/+30 button.
5. Check the display:
Using the STOP button
Use the STOP button to:
1. Erase a mistake during programming.
2. Stop the oven temporarily during
cooking, press once.
3. Cancel a programme during cooking,
touch twice.
Child safety lock
The oven has a safety feature which
prevents the accidental running of the
oven by a child. When the lock has been
set, no part of the microwave will operate
until the lock feature has been cancelled.
Example: To set the child safety lock.
1. Press and hold the stop button
for 5 seconds.
The oven will beep twice and ‘LOC’ will
be displayed:
Note:
• To cancel the child safety lock, press
and hold the stop button for 5
seconds, the oven will beep twice
and the time of day will be displayed.
• Child safety lock cannot be set if the
clock is not set.
Page 13

Microwave cooking advice
electrolux operation
13
To cook/defrost food in a microwave
oven, the microwave energy must be able
to pass through the container to penetrate
the food. Therefore it is important to
choose suitable cookware.
It is important to turn, rearrange or stir
food to ensure even heating.
Standing time is necessary after
cooking, as it enables the heat to disperse
equally throughout the food.
Round/oval dishes are preferable to
square/oblong ones, as the food in the
corners tends to overcook.
Food characteristics
Composition Foods high in fat or sugar (e.g. Christmas pudding,mince pies) require less heating
Density Food density will affect the amountof cooking time needed. Light porous foods, such
Quantity The cooking time must be increased as the amount of food placed in the oven
Size Small foods and small pieces cook faster than large ones, as microwaves can pen-
Shape Foods which are irregular in shape, such as chicken breasts or drumsticks, take
Temperature The initial temperature of food affects the amount of cooking time needed. Chilled
of food foods will take longer to cook than food at room temperature. Cut into foods with
time. Care should be taken as overheating can lead to fire.
as cakes or bread, cook more quickly than heavy, densefoods, such as roasts and
casseroles.
increases. E.g. Four potatoes will take longer to cook than two.
etrate from all sides to the centre. For even cooking makeall the pieces the same size.
longer to cook in the thicker parts. Round shapes cook more evenly than square
shapes when microwave cooking.
fillings,for example jam doughnuts, to release heat or steam.
Cooking techniques
Arrange Place the thickest parts of food towards the outside of the dish. E.g. Chicken
Cover Use vented microwave cling film or a suitable lid.
Pierce Foodswith a shell, skin or membrane must be pierced in several placesbefore cooking
Stir, turn and For even cooking it is essential to stir, turn and rearrange food during cooking. Always
rearrange stir and rearrange from the outside towards the centre.
Stand Standing time is necessary after cooking to enable the heat to disperse equally
Shield Some areas of food being defrosted may become warm. Warm areas can be shielded
drumsticks.
or reheating as steam will build up and may cause food to explode, e.g. Potatoes, Fish,
Chicken, Sausages.
IImmppoorrttaanntt::
even after cooking has ended, e.g. poached, hard boiled.
throughout the food.
with small pieces of foil, which reflect microwaves, e.g. legs and wings on a chicken.
Eggs
should not be heated using microwave power as they may explode,
Page 14

14
electrolux operation
Microwave safe cookware
Cookware Microwave Comments
safe
Aluminium foil/ / Small pieces of aluminium foil can be used to shield food from
foil containers overheating. Keep foil at least 2 cm from the oven walls, as
Browning Always follow the manufacturers instructions. Do not exceed
dishes heating times given. Be very careful as these dishes become
China and ceramics / Porcelain, pottery, glazed earthenware and bone china are
Glassware Care should be taken if using fine glassware as it can break or
e.g. Pyrex ® crack if heated suddenly.
Metal It is not recommended to use metal cookware when using
Plastic / polystyrene Care must be taken as some containers warp, melt or
e.g. fast food discolour at high temperatures.
containers
Cling film Should not touch the food and must be pierced to let the
Freezer / roasting Must be pierced to let steam escape. Ensure bags are
bags suitable for microwave use. Do not use plastic or metal ties,
Paper - plates, cups Only use for warming or to absorb moisture. Care must be
and kitchen paper taken as overheating may cause fire.
Straw and wooden Always attend the oven when using these materials as
containers overheating may cause fire.
Recycled paper and May contain extracts of metal which will cause ‘arcing’ and
newspaper may lead to fire.
arcing may occur. Foil containers are not recommended
unless specified by the manufacturer, e.g. Microfoil ®, follow
instructions carefully.
very hot.
usually suitable, except for those with metallic decoration.
microwave power as it will arc, which can lead to fire.
steam escape.
as they may melt or catch fire due to the metal arcing.
Page 15

electrolux operation
AUTO
+
AUTO
15
Microwave cooking
Your oven can be programmed for
up to 90 minutes.The input unit of
cooking time varies from 10 seconds to
five minutes. It depends on the total
length of the cooking time as shown in
Manual defrosting
For manual defrosting (without
operating the Auto Defrost feature), use
270 W. The defrost symbol appears in
the window display whenever the
power level is selected.
the table.
Cooking time Increasing unit
0-5 minutes 10 seconds
5-10 minutes 30 seconds
10-30 minutes 1 minute
30-90 minutes 5 minutes
Microwave power levels
Your oven has 6 power levels:
Power Suggested use
setting
900 W/ Used for fast cooking or reheating e.g. soup, casseroles, canned food, hot beverages,
HIGH vegetables, fish, etc.
630 W Used for longer cooking of dense foods such as roast joints, meat loaf and plated meals,
450 W For dense foods which require a long cooking time when cooked conventionally,
270 W/ To defrost, select this power setting, to ensure that the dish defrosts evenly. This
DEFROSTsetting is also ideal for simmering rice, pasta, dumplings and cooking egg
90 W For gentle defrosting, eg. cream gateaux or pastry.
0 W For standing/kitchen timer.
W = WATT
Example: To heat soup for 2 minutes
and 30 seconds on 630 W microwave
power.
1. Press the power level button twice.
also for sensitive dishes such as cheese sauce and sponge cakes. At this reduced setting,
the sauce will not boil over and food will cook evenly without over cooking at the sides.
e.g. beef dishes, it is advisable to use this power setting to ensure the meat will be tender.
custard.
3. Press the START/+30 button.
x1
4. Check the display:
x2
2. Enter the time by rotating the
TIMER/WEIGHT knob
clockwise/anti-clockwise until 2:30
is displayed.
Important:
If the power level is not selected,
HIGH/900 W is automatically set.
Page 16
16
1
AUTO
+
AUTO
electrolux operation
Note:
• When the door is opened during the
cooking process, the cooking time
on the digital display stops
automatically. The cooking time
starts to count down again when the
door is closed and the START/+30
button is pressed.
• If you wish to know the power level
during cooking, press the POWER
button once.
• You can increase or decrease the
cooking time during cooking by
rotating the TIMER/WEIGHT knob.
• You can change the POWER level
during cooking by pressing the
power button.
• To cancel a programme during
cooking, touch the STOP button twice.
Kitchen timer
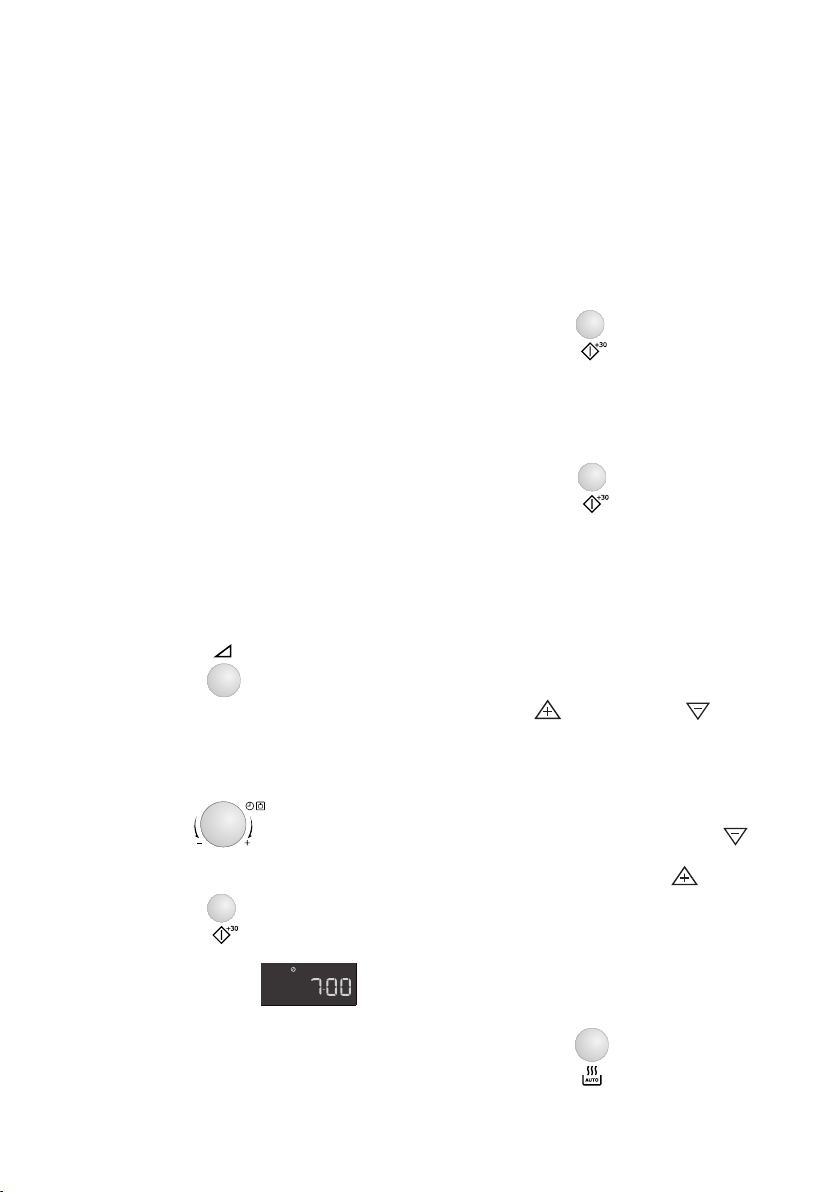
Example: To set the kitchen timer for
7 minutes.
1. Press the power level button 7
times.
x7
Add 30 seconds
The START/+30 button allows you to
operate the two following functions:
1. Direct Start
You can directly start cooking on
900 W/HIGH microwave power
level for 30 seconds by pressing
the START/+30 button.
x1
2. Extend the cooking time
You can extend the cooking time
for multiples of 30 seconds if the
button is pressed while the oven is
in operation.
x1
Note:
• You can also use +30 seconds
during grill mode.
• You cannot use this function during
AUTO COOK or AUTO DEFROST.
Plus & minus
2. Enter the time by rotating
the TIMER/WEIGHT knob
clockwise/anti-clockwise until 7:00
is displayed.
3. Press the START/+30 button.
x1
4. Check the display:
Note:
• To pause the timer, press the STOP
button. To resume the timer press
START/+30, to exit press STOP
again.
The PLUS and MINUS
function enables you to decrease or
increase the cooking time when using
the automatic programmes.
If you prefer boiled potatoes which are
cooked but still firm, use MINUS .
Alternatively, if you prefer boiled
potatoes softer, use PLUS .
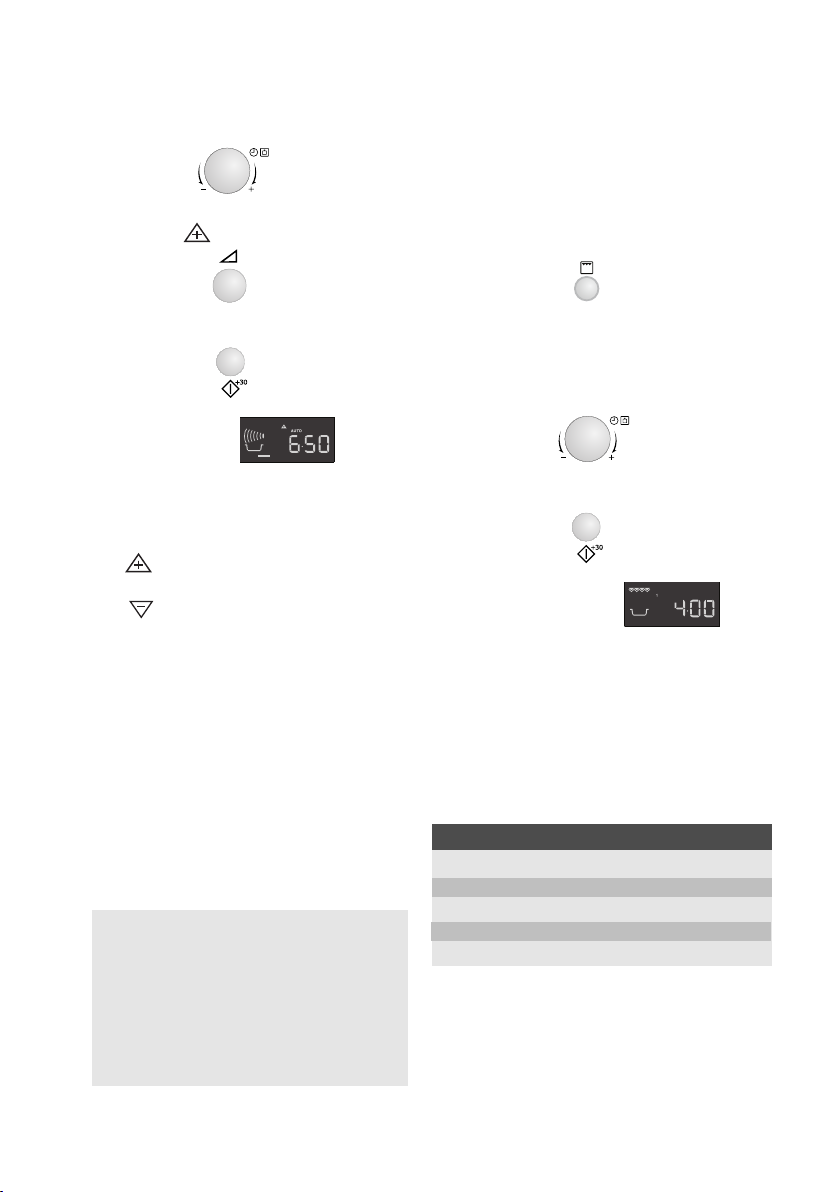
Example: To cook 0.3 kg of boiled
potatoes, well done.
1. Select the menu required by pressing
the AUTO COOK button twice.
x2
Page 17
electrolux operation
1
1
1
1 2
2
AUTO
+
AUTO
1 2
1
1
1
AUTO
+
AUTO
17
2. Turn the TIMER/WEIGHT knob until
0.3 kg is displayed.
3. Touch the power button once to select
the PLUS adjustment.
x1
4. Press the START/+30 button.
x1
5. Check the display:
Note:
To cancel PLUS/MINUS, press the
power level key 3 times.
If you select PLUS the display will
show .
If you select MINUS, the display will
show .
Grill & dual grill cooking
This microwave oven has two
GRILL cooking modes:
1. Grill only.
2. Dual Grill (grill with microwave).
Important:
1. The high or the low rack is
recommended for grilling.
2. You may detect smoke or a
burning smell when using the grill
for the first time, this is normal and
does not indicate a fault with the
oven. To avoid this problem, when
using the oven for the first time,
operate the grill without food for 20
minutes.
Grill only cooking
This mode can be used to Grill/Brown
food.
Example: To make toast for 4 minutes.
1. Press the grill button once.
x1
2. Enter the time by rotating the
TIMER/WEIGHT knob
clockwise/anti-clockwise until 4:00
is displayed.
3. Press the START/+30 button.
x1
4. Check the display:
Dual grill cooking
This mode uses a combination of
Grill power and Microwave power (90
W to 630 W). The microwave power
level is preset to 270 W.
Button Power setting
Grill x 1 0 W
Grill x 2 270 W
Grill x 3 450 W
Grill x 4 630 W
Grill x 5 0 W
Page 18
18
1
1
1
1 2
2
AUTO
+
AUTO
1
1
1 2
1
1
1
1 2
2
AUTO
+
AUTO
1
1
1 2
1
1
1
1 2
2
AUTO
+
AUTO
1
1
1 2
electrolux operation
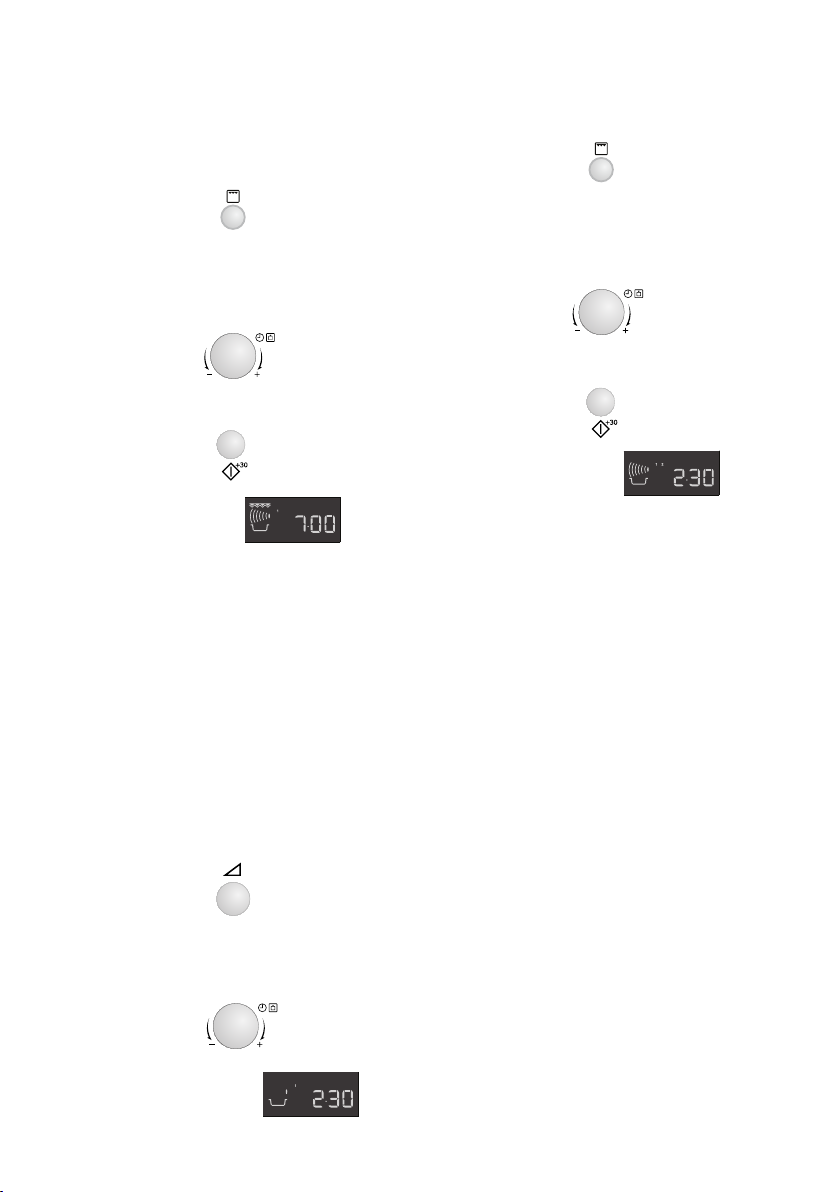
Example: To cook grill skewers for 7
minutes on DUAL GRILL (450 W).
1. Press the grill button 3 times.
x3
2. Enter the time by rotating the
TIMER/WEIGHT knob clockwise/anticlockwise until 7:00 is displayed.
3. Press the START/+30 button.
x1
4. Check the display:
Multiple sequence cooking
A sequence of 3 stages (maximum)
can be programmed using
combinations of MICROWAVE, GRILL
or DUAL GRILL.
Stage 2
1. Press the grill button once.
x1
2. Enter the desired cooking time by
rotating the TIMER/WEIGHT knob
clockwise until 5:00 is displayed.
3. Press the START/+30 button.
x1
4. Check the display:
The oven will begin to cook for
2 minutes and 30 seconds at 630 W,
and then for 5 minutes on Grill only.
Example: To cook:
2 minutes and 30 seconds on 630 W
power (Stage 1)
5 minutes grill only (Stage 2)
Stage 1
1. Press the power button twice.
x2
2. Enter the desired time by rotating
the TIMER/WEIGHT knob
clockwise until 2:30 is displayed.
3. Check the display:
Page 19
electrolux operation
1
1
1
1 2
2
AUTO
+
AUTO
1 2
1
1
1
1 2
2
AUTO
+
AUTO
AUTO
1
1
1 2
19
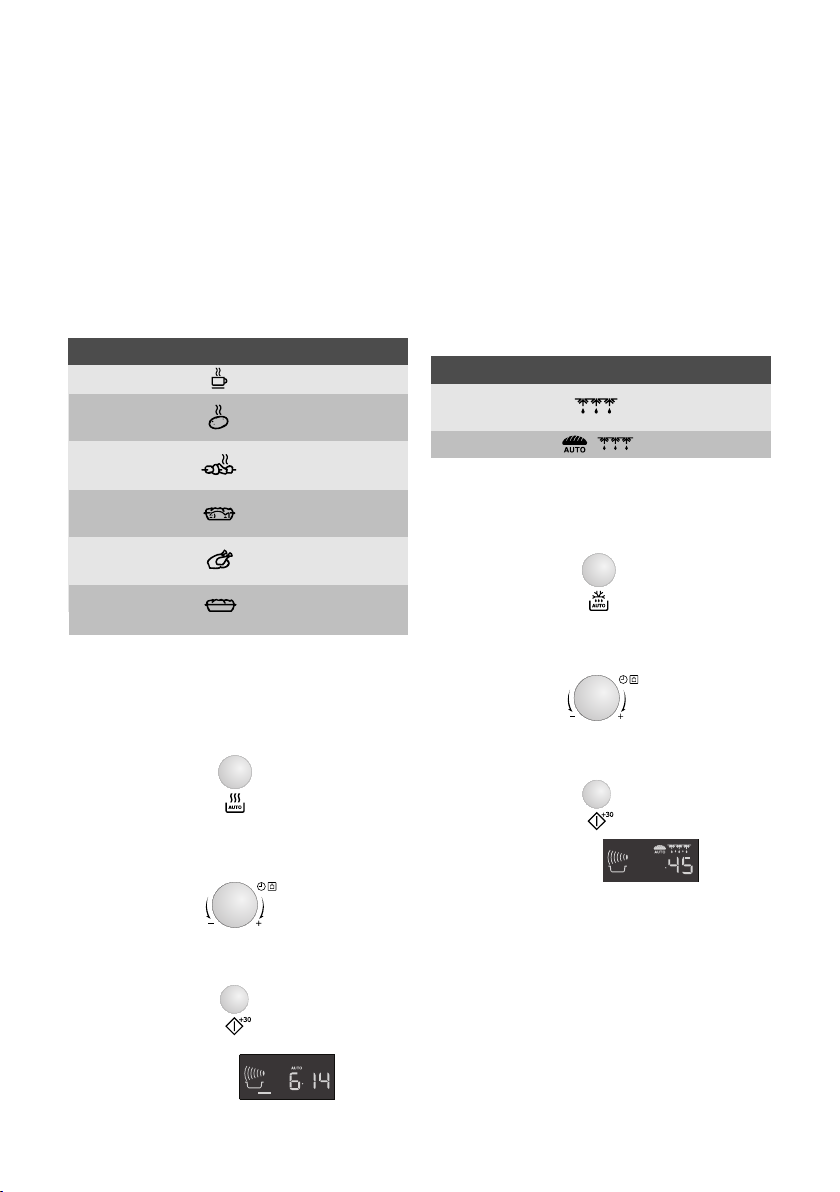
Auto cook & auto
defrost operation
AUTO COOK and AUTO DEFROST
automatically work out the correct
cooking mode and cooking time. You
can choose from 6 AUTO COOK and 2
AUTO DEFROST menus.
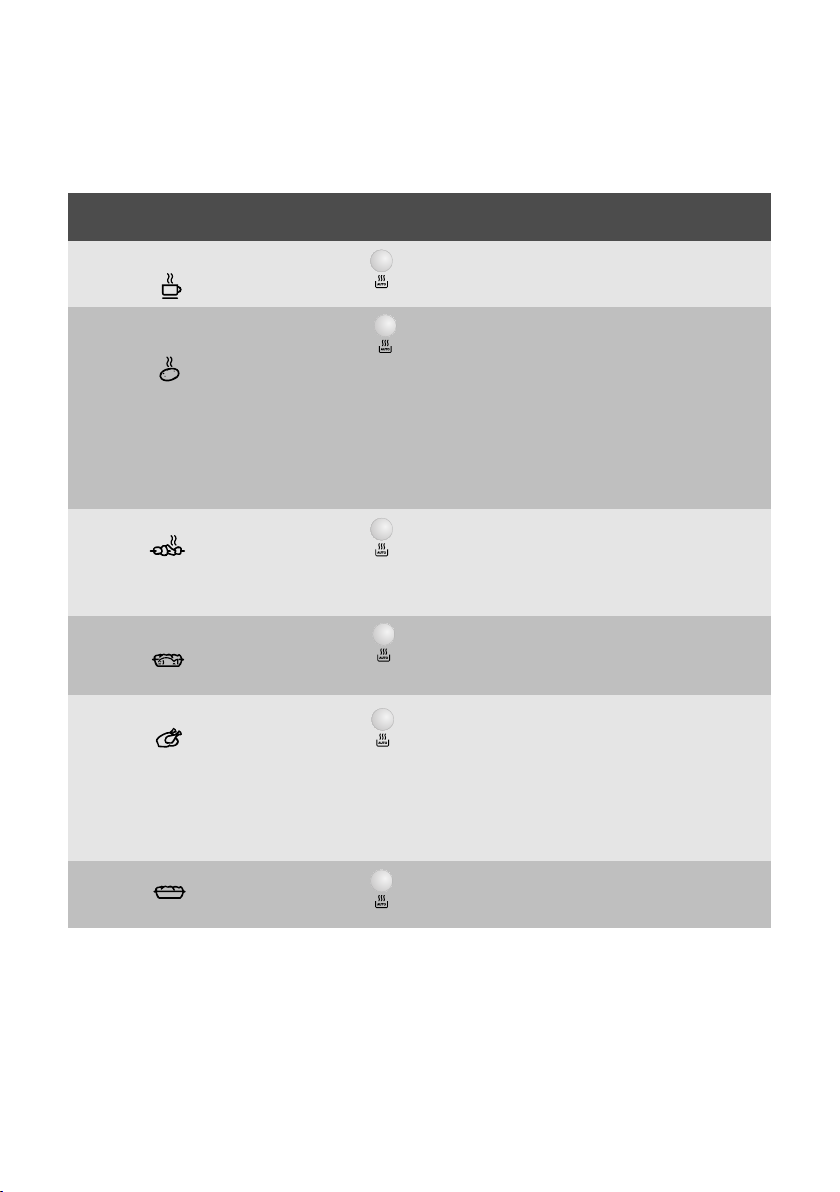
Auto Cook
Auto cook Symbol Setting
Beverage Microwave
Boiled Potatoes/ Microwave
Jacket Potatoes
Grilled Microwave
Skewers + grill
Gratinated Microwave
Fish Fillet + grill
Grilled Microwave
Chicken + grill
Gratin Microwave
+ grill
Example: To cook 0.3 kg of boiled
potatoes.
When action is required (e.g. to turn
food over) the oven stops and the
audible bell sounds, remaining cooking
time and the indicator will flash on the
display. To continue cooking, press the
START/+30 button. At the end of the
Auto cook time, the programme will
automatically stop. The audible bell
sounds and the cooking symbol will flash.
After 1 minute and a reminder beep, the
time of day will be displayed.
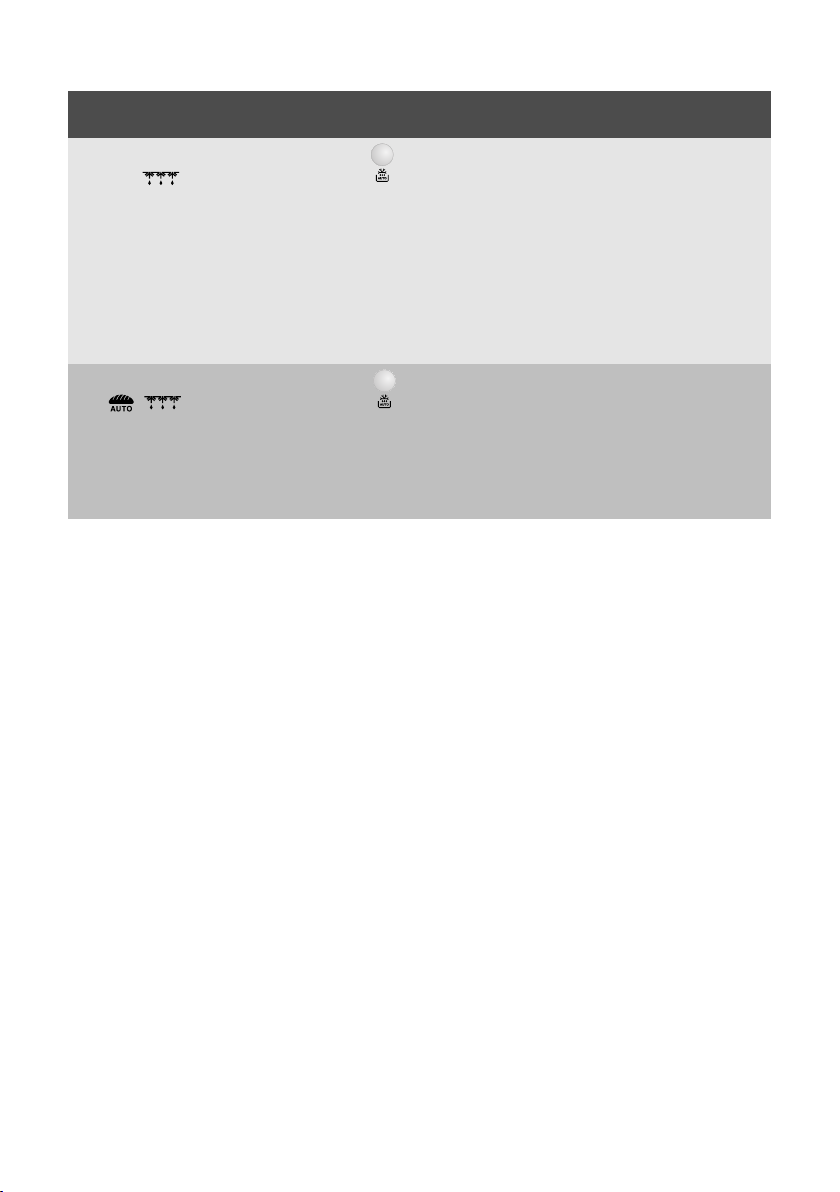
Auto Defrost
Auto defrost Symbol Setting
Meat/Fish/ Microwave
Poultry
Bread Microwave
Example: To defrost 0.2 kg of bread.
1. Select the menu required by pressing
the AUTO DEFROST button twice.
x2
2. Turn the TIMER/WEIGHT knob until
0.2 is displayed.
1. Select the menu required by pressing
the AUTO COOK button twice.
x2
2. Turn the TIMER/WEIGHT knob until
0.3 kg is displayed.
3. Press the START/+30 button.
x1
4. Check the display:
3. Press the START/+30 button.
x1
4. Check the display:
When action is required (e.g. to turn
food over) the oven stops and the
audible bell sounds, remaining cooking
time and the indicator will flash on the
display. To continue cooking, press the
START/+30 button. At the end of the
Auto defrost time, the programme will
automatically stop. The audible bell
sounds and the cooking symbol will flash.
After 1 minute and a reminder beep, the
time of day will be displayed.
Page 20
20
electrolux programme charts
Programme charts
Auto cook & auto defrost charts
Auto Weight (increasing Button Procedure
cook unit) / Utensils
Beverage 1-6 cups • Place cup towards edge of turntable.
(Tea/Coffee) 1 cup = 200 ml
Boiled and 0,2 - 1,0 kg (100 g) Boiled Potatoes: Peel the potatoes and cut
jacket potatoes Bowl and lid them into similar sized pieces.
Grill skewers 0,2 - 0,8 kg (100 g) • See recipe for “Grill skewers” on page 22.
High rack • Place on the high rack and cook.
Gratinated 0,5 - 1,5 kg* (100 g) • See recipes for “Gratinated fish fillet” on page
fish fillet Gratin dish 22.
Low rack
Grilled chicken 0,9 - 1,8 kg (100 g) • Mix together 2 tbsp oil, 1 tsp paprika, salt
Flan dish and pepper and spread on the chicken.
Low rack • Pierce the skin of the chicken.
Gratin 0,5 - 1,5 kg* (100 g) • See recipes for “Gratin” on page 23.
Gratin dish
Low rack * Total weight of all ingredients.
x1
x2
Jacket Potatoes: Choose potatoes of similar
size and wash them.
• Put the boiled or jacket potatoes into a bowl.
• Add the required amount of water (per 100 g),
approx 2 tbsp and a little salt.
• Cover with a lid.
• When the audible bell sounds, stir and re-cover.
• After cooking, stand for approx. 2 min.
x3
• When the audible bell sounds, turn over.
• After cooking, remove and put on a plate for
serving.
x4
* Total weight of all ingredients.
x5
• Put chicken breast side down in a flan dish.
• Place on the low rack and cook.
• When the audible bell sounds, turn over.
• After cooking, leave for approx. 3 min in the
oven, remove and put on a plate for serving.
x6
Important: Chilled foods are cooked from 5 oC, frozen foods are cooked from -18 oC.
Page 21
electrolux programme charts
Auto Weight (increasing Button Procedure
defrost unit) / Utensils
Meat, fish 0,2 - 1,0 kg (100 g) • Place the food in a flan dish in the centre of
poultry Flan dish the turntable.
(Whole fish, fish
steaks, fish fillets,
chicken legs,
chicken breast,
minced meat,
steak, chops,
burgers, sausages)
Bread 0,1 - 1,0 kg (100 g) • Distribute in a flan dish in the centre of the
Flan dish turntable. For 1,0 kg distribute directly on the
Important: Chilled foods are cooked from 5 oC, frozen foods are cooked from -18 oC.
x1
• When the audible bell sounds, turn the food
over, rearrange and separate. Shield thin parts
and warm spots with aluminium foil.
• After defrosting, wrap in aluminium foil for 15-
45 min, until thoroughly defrosted.
Note: Not suitable for whole poultry.
• Minced meat: When the audible bell
sounds, turn the food over. Remove the
defrosted parts if possible.
x2
turntable.
• When the audible bell sounds, turn over,
rearrange and remove defrosted slices.
• After defrosting cover in aluminium foil and
stand for 5-15 min, until thoroughly defrosted.
21
Note:
• Enter the weight of the food only. Do
not include the weight of the
container.
• For food weighing more or less than
weights/quantities given in the Auto
cook & defrost charts, use manual
operation.
• The final temperature will vary
according to the initial temperature.
Check food is piping hot after
cooking.
• When action is required (e.g. to turn
food over) the oven stops and the
audible bell sounds, remaining
cooking time and the indicator will
flash on the display. To continue
cooking, press the START/+30
button.
• After Micro/Grill/Dual grill modes the
cooling fan may come on.
• If the clock is not set the ‘Econ’
mode will come on approx 3 minutes
after cooking is finished.
Important: Auto defrost
1. Steaks and Chops should be frozen
in one layer.
2. Minced meat should be frozen in a
thin shape.
3. After turning over, shield the
defrosted portions with small, flat
pieces of aluminium foil.
4. The poultry should be processed
immediately after defrosting.
Page 22

22
electrolux programme charts
Recipes for auto cook
Grill skewers
4 pieces
400 g pork cutlets, cubed
100 g streaky bacon
100 g onions, quartered
250 g tomatoes, quartered
100 g green pepper, cubed
2 tbsp oil
4 tsp paprika
salt
1 tsp cayenne pepper
1 tsp worcester sauce
Gratinated fish fillet, ‘Esterhazy’
0,5 kg 1,0 kg 1,5 kg
230 g 450 g 680 g fish fillet
100 g 200 g 300 g leeks (cut into rings)
20 g 40 g 60 g onion (finely sliced)
40 g 100 g 140 g carrot (grated)
10 g 10 g 20 g butter or margarine
salt, pepper and
1
1 tbsp 1
50 g 100 g 150 g crème fraiche
50 g 100 g 150 g Gouda (grated)
/2tbsp 2 tbsp lemon juice
nutmeg
1. Thread meat and vegetables
alternately on 4 wooden skewers.
2. Mix the oil with the spices and brush
over the kebabs.
3. Place the kebabs on the high rack
and cook on AUTO COOK “Grill
skewers”.
1. Put vegetables, butter and the spices
into a casserole dish and mix well.
Cook for 2-6 min on 900 W
depending on weight.
2. Wash the fish, dry and sprinkle with
lemon juice and salt.
3. Mix the crème fraiche with the
vegetables and season again.
4. Put half of the vegetables in a gratin
dish. Place the fish on top and cover
with the remaining vegetables.
5. Spread the Gouda over the top, place
on the low rack and cook on AUTO
COOK “Gratinated fish fillet”.
6. After cooking, stand for approx. 5 min.
Gratinated fish fillet, ‘Italian’
0,5 kg 1,0 kg 1,5 kg
200 g 430 g 630 g fish fillet
1
/2tbsp 1 tbsp 11/2tbsp lemon juice
1
/2tbsp 1 tbsp 11/2tbsp anchovy butter
30 g 50 g 80 g Gouda (grated)
salt and pepper
150 g 300 g 450 g fresh tomatoes
1 tbsp 1
100 g 180 g 280 g Mozzarella
1
/2tbsp3/4tbsp 1 tbsp basil (chopped)
1
/2tbsp 2 tbsp chopped mixed
herbs
1. Wash and dry the fish and sprinkle
with lemon juice, salt and anchovy
butter.
2. Place in a gratin dish.
3. Sprinkle the Gouda over the fish.
4. Place the tomatoes on top of the
cheese.
5. Season with salt, pepper and the
mixed herbs.
6. Drain the Mozzarella, cut into slices
and place on the tomatoes. Sprinkle
the basil over the cheese.
7. Place the gratin dish on the low rack
and cook on AUTO COOK
“Gratinated fish fillet”.
8. After cooking, stand for approx. 5 min.
Page 23

electrolux programme charts
23
Spinach gratin
0,5 kg 1,0 kg 1,5 kg
150 g 300 g 450 g leaf spinach
15 g 30 g 45 g onion (finely
5 g 10 g 15 g butter or margarine
150 g 300 g 450 g boiled potatoes
35 g 75 g 110 g cooked ham (diced)
50 g 100 g 150 g crème fraiche
123eggs
40 g 75 g 115 g grated cheese
(cooked)
chopped)
salt, pepper and
nutmeg
(to grease the dish)
(sliced)
Potato and courgette gratin
0,5 kg 1,0 kg 1,5 kg
5 g 10 g 15 g butter or margarine
200 g 400 g 600 g boiled potatoes
115 g 230 g 345 g courgette (finely
75 g 150 g 225 g crème fraiche
123eggs
1
/
12clove of garlic
2
40 g 80 g 120 g grated Gouda
10 g 20 g 30 g sunflower kernels
(to grease the dish)
(sliced)
sliced)
(crushed)
salt and pepper
cheese
1. Mix together the leaf spinach with the
onion and season with salt, pepper and
nutmeg.
2. Grease the gratin dish. Place alternate
layers of potato slices, diced ham and
spinach in the dish. The top layer should
be spinach.
3. Mix the eggs with crème fraiche, add
salt and pepper and pour over the
gratin.
4. Cover the gratin with the grated cheese.
5. Place on the low rack and cook on
AUTO COOK “Gratin”.
6. After cooking, stand for 5-10 min.
1. Grease the gratin dish and place
alternate layers of potato slices and
courgette in the dish.
2. Mix the eggs with crème fraiche,
season with salt, pepper and garlic and
pour over the gratin.
3. Sprinkle the Gouda cheese over the
gratin.
4. Finally sprinkle the gratin with sunflower
kernels.
5. Place on the low rack and cook on
AUTO COOK “Gratin”.
6. After cooking, stand for 5-10 min.
Page 24

24
electrolux programme charts
Cooking charts
Abbreviations used
tbsp = tablespoon
tsp = teaspoon
Food / Drink Quantity Setting Power Time Method
Milk 1 cup 150 Micro 900 W approx. 1 do not cover
Water 1 cup 150 Micro 900 W approx. 2 do not cover
6 cups 900 Micro 900 W 8-10 do not cover
1 dish 1000 Micro 900 W 9-11 do not cover
One plate meal 400 Micro 900 W 4-6 sprinkle some water onto the sauce,
(vegetables, meat cover, stir halfway through heating
and trimmings)
Soup / stew 200 Micro 900 W 1-2 cover, stir after heating
Vegetables 200 Micro 900 W 2-3 if necessary add some water, cover,
Meat, 1 slice* 200 Micro 900 W approx. 3 thinly spread sauce over the top, cover
Fish fillet* 200 Micro 900 W 3-5 cover
Cake, 1 slice 150 Micro 450 W
Baby food, 1 jar 190 Micro 450 W
Melting Margarine 50 Micro 900 W
or Butter*
Melting chocolate 100 Micro 450 W 3-4 stir occasionally
* from chilled
Food Quantity Setting Power Time Method Standing
Goulash 500 Micro 270 W 8-9 stir halfway through defrosting 10-30
Cake, 1 slice 150 Micro 270 W 1-3 place in a flan dish 5
Fruit e.g. cherries, 250 Micro 270 W 3-5 spread out evenly, turn over 5
strawberries, halfway through defrosting
raspberries, plums
The times shown in the table are guidelines which may vary according to freezing temperature, quality
and weight of the foodstuffs.
Food Quantity Setting Power Time Added Method Standing
-g- -Level- -Min- water time
Fish fillet 300 Micro 900 W 9-11 - cover 2
One plate 400 Micro 900 W 8-10 - cover, stir after 6 minutes 2
meal
Broccoli 300 Micro 900 W 6-8 3-5 cover, stir halfway through cooking 2
Peas 300 Micro 900 W 6-8 3-5 cover, stir halfway through cooking 2
Mixed 500 Micro 900 W 9-11 3-5 cover, stir halfway through cooking 2
vegetables
Cup = cupful
kg = kilogram
g = gram
l = litre
ml = millilitre
cm = centimetre
min = minutes
Heating food & drink
-g/ml- -Level- -Min-
500 Micro 900 W 3-5 stir halfway through heating
1
/2-1 place in a flan dish
1
/2-1 transfer into a suitable microwaveable
container, after heating stir well and
test the temperature
1
/
cover
2
Defrosting
-g- -Level- -Min- time
Defrosting & cooking
-tbsp- -Min-
-Min-
Page 25

electrolux programme charts
Cooking, grilling & browning
Food Quantity Setting Power Time Method Standing
Broccoli 500 Micro 900 W 6-8 add 4 - 5 tbsps water, cover, stir -
Peas 500 Micro 900 W 6-8 cover, add 4 - 5 tbsps water, stir -
Carrots 500 Micro 900 W 9-11 cut into rings, add 4 - 5 tbsps water, -
Roasts 1000 Micro 450 W 16-18 season to taste, place on the low 10
(pork, veal, Dual Grill 450 W 5-7 * rack, turn over after *
lamb) Micro 450 W 14-16
Roast beef 1000 Micro 630 W 5-8 season to taste, place on the low rack, 10
(medium) Dual Grill 630 W 8-10 * turn over after *
Chicken legs 200 Dual Grill 450 W 6-7 * season to taste, place skin side down 3
Rump steaks 400 Grill 11-12 * place on the high rack, turn over
2 pieces, Grill 6-8 after *, season after grilling
medium
Browning of Grill 8-13 place dish on the low rack
gratin dishes
Cheese 1 piece Micro 450 W
toastie Grill 5-6 butter, top with a slice of cooked ham,
Frozen pizza 300 Micro 450 W 4-6 place on the low rack
-g- -Level- -Min- time
-Min-
halfway through cooking
halfway through cooking
cover, stir halfway through cooking
Dual Grill 450 W 4-6
1500 Micro 450 W 26-28 10
Dual Grill 450 W 5-8 *
Micro 450 W 26-28
Dual Grill 450 W 4-5
Dual Grill 630 W 3-5
1500 Micro 630 W 12-15 10
Dual Grill 630 W 12-15 *
Dual Grill 630 W 4-6
Grill 4-6 on the high rack, turn over after *
1
/2toast the bread and spread with
4 pieces Micro 450 W
1
/2-1 a slice of pineapple and a slice of
Grill 5-6 cheese
Dual Grill 450 W 4-6
400 Micro 450 W 6-7
Dual Grill 450 W 5-7
25
Page 26

26
electrolux recipes
Recipes
All the recipes in this book are
calculated on the basis of 4 servings
unless otherwise stated.
Adapting recipes for the microwave
oven
If you would like to adapt your favourite
recipes for the microwave, you should take
note of the following: Shorten cooking
times by a third to a half. Follow the
example of the recipes in this book.
Foods which have a high moisture content such as meat, fish, poultry, vegetables,
fruit, stews and soups can be prepared in
your microwave without any difficulty.
Onion soup
Utensils: Bowl with lid (2 l capacity)
4 soup bowls (200 ml)
Ingredients
10 g butter or margarine
100 g onions, sliced
800 ml meat stock
salt and pepper
2 slices bread
40 g grated cheese
Foods which have little moisture, such
as platters of food, should have the surface
moistened prior to heating or cooking.
The amount of liquid to be added to
raw foods, which are to be braised, should
be reduced to about two thirds of the
quantity in the original recipe. If necessary,
add more liquid during cooking.
The amount of fat to be added can be
reduced considerably. A small amount of
butter, margarine or oil is sufficient to
flavour food. For this reason your
microwave is excellent for preparing low-fat
foods as part of a diet.
1. Grease the bowl, add the sliced
onion, meat stock and the seasoning.
Cover and cook.
9-11 min. 900 W
2. Toast the slices of bread, cut them
into cubes and divide them among
the soup bowls. Pour the soup over
the toast cubes and sprinkle on the
cheese.
3. Place the bowls on the turntable, and
grill.
6-7 min. Grill
Page 27

electrolux recipes
27
Aubergines stuffed with minced
meat
Utensils: Bowl with lid (1 l capacity)
Shallow flan dish
(approx. 30 cm long)
Ingredients
250 g aubergines
200 g tomatoes
1 tbsp olive oil to grease the dish
100 g onions, chopped
4 mild green chillies, seeds
removed
200 g minced beef
2 garlic cloves, crushed
2 tbsp parsley, chopped
salt and pepper
paprika
60 g Feta cheese, cubed
Mushrooms with rosemary
Utensils: Bowl with lid (1 l capacity)
Shallow round dish with lid
(approx. 22 cm diameter)
Ingredients
8 large mushrooms
(approx. 225 g), whole
20 g butter or margarine
50 g onion, finely chopped
50 g bacon, finely diced
black pepper
fresh rosemary, chopped
125 ml dry white wine
125 ml cream
20 g flour
1. Cut the aubergines in half lengthways.
Scoop out the flesh with a teaspoon
to leave a shell about 1 cm thick. Dice
the scooped-out flesh.
2. Remove the skin from the tomatoes
and chop.
3. Grease the bottom of the bowl with
the olive oil. Add the onions, cover and
cook.
2 min. 900 W
4. Cut the chillies into rings. Retain a third
for the garnish. Mix the minced meat
with the diced aubergines, onions,
tomatoes, chilli rings, garlic and
parsley. Season to taste.
5. Dry the aubergine halves. Fill with half
of the mince mixture, spread the feta
cheese on top, and then add the rest
of the filling.
6. Arrange the aubergine halves in the
greased oven proof dish, place the
dish on the low rack and cook.
11-13 min. Dual Grill (630 W)
Garnish the aubergine halves with the
chilli rings and continue cooking.
4-7 min. Dual Grill (630 W)
After cooking, stand for approx. 2 min.
1. Remove the stalks from the
mushrooms. Chop the stalks into
small pieces.
2. Grease the shallow dish. Add the
onions, the diced bacon and the
mushroom stalks. Season with pepper
and rosemary, cover and cook.
3-5 min. 900 W
Leave to cool.
3. Heat the cream and 100 ml of the
wine in the bowl.
1-3 min. 900 W
4. Mix the remaining wine with the flour,
stir into the hot liquid, cover and cook.
Stir once during cooking.
approx. 1 min. 900 W
5. Fill the mushrooms with the bacon
mixture and put in shallow dish. Pour
the sauce over the mushrooms and
cook on the low rack.
6-8 min. Dual Grill (270 W)
After cooking, stand for approx. 2 min.
Page 28

28
electrolux recipes
Sole fillets
Utensils: Shallow oval oven dish with
microwave cling film
(approx. 26 cm long)
Ingredients
400 g sole fillets
1 lemon, whole
150 g tomatoes
10 g butter
1 tbsp vegetable oil
1 tbsp parsley, chopped
salt and pepper
4 tbsp white wine
20 g butter or margarine
Fish fillet with cheese sauce
Utensils: Bowl with lid (1 l capacity)
Shallow round gratin dish
(approx. 25 cm diameter)
Ingredients
800 g fish fillets
2 tbsp lemon juice
salt
10 g butter or margarine
50 g onion, finely chopped
20 g flour
100 ml white wine
1 tsp vegetable oil to grease the dish
100 g Emmental cheese, grated
2 tbsp parsley, chopped
1. Wash the fish and pat dry. Remove
any bones.
2. Cut the lemon and the tomatoes into
thin slices.
3. Grease the oven dish with butter.
Place the fish fillets in the dish and
drizzle with vegetable oil.
4. Sprinkle parsley over the dish, place
the tomato slices on top and season.
Place the lemon slices on top of the
tomatoes and pour the white wine
over them.
5. Place small pats of butter on top of the
lemon, cover and cook.
11-13 min. 630 W
After cooking, stand for approx. 2 min.
1. Wash the fish, pat dry and sprinkle
with lemon juice. Rub with salt.
2. Grease the bowl. Add the diced onion,
cover and cook.
1-2 min. 900 W
3. Sprinkle the flour over the onions and
white wine and mix.
4. Grease the gratin dish and place the
fish in it. Pour the sauce over the fish
and sprinkle with cheese. Place on the
low rack and cook.
7-8 min. 450 W
14-16 min. Dual Grill (450 W)
After cooking, stand for approx. 2 min.
Almond trout
Utensils: Shallow oval gratin dish
(approx. 32 cm long)
Ingredients
4 trout (200 g), trimmed
juice of one lemon
salt
30 g butter or margarine
50 g flour
10 g butter or margarine to grease
the dish
50 g almond flakes
1. Wash and dry the trout and sprinkle
with lemon juice. Rub salt to the
interior and exterior of the fish and
leave to stand for 15 min.
2. Melt the butter.
1 min. 900 W
3. Dry the fish, spread with butter and roll
in the flour.
4. Grease the dish. Put the trout in the
dish and cook on the low rack. Two
thirds through the cooking turn the trout
and scatter the almonds over them.
15-18 min. Dual Grill (450 W)
After cooking, stand for approx. 2 min.
Page 29

electrolux recipes
29
Zürich veal stew
Utensils: Dish with lid (2 l capacity)
Ingredients
600 g veal fillet
10 g butter or margarine
50 g onion, finely chopped
100 ml white wine
seasoned gravy browning, for
approx. 1/2 l gravy
300 ml cream
1 tbsp parsley, chopped
Veal cutlets with mozzarella
Utensils: Shallow square gratin dish
with lid (approx. 25 cm long)
Ingredients
150 g Mozzarella cheese, sliced
500 g tinned tomatoes, drained
4 veal cutlets (600 g)
20 ml olive oil
2 cloves of garlic, chopped
20 g capers
oregano
salt and pepper
1. Cut the veal into strips.
2. Grease the dish with the butter. Put
the meat and onion into the dish,
cover and cook. Stir once during
cooking.
6-9 min. 900 W
3. Add the white wine, gravy browning
and cream, stir, cover and continue
cooking. Stir occasionally.
3-5 min. 900 W
4. Stir the mixture after cooking, stand for
approx. 5 min. Garnish with parsley.
1. Wash the veal, dry and beat flat. Place
in the dish.
2. Puree the tomatoes, add the garlic, oil,
salt and pepper, capers and oregano
and pour over the veal. Cover and
cook.
15-19 min. 630 W
Turn the cutlets over.
3. Place slices of mozzarella on each
cutlet, season and cook uncovered on
the high rack.
9-12 min. Dual Grill (630 W)
After cooking, stand for approx. 5 min.
Stuffed ham
Utensils: Bowl with lid (2 l capacity)
Oval gratin dish (approx. 26 cm
long)
Ingredients
150 g leaf spinach, chopped
150 g fromage frais
50 g Emmental cheese, grated
pepper and paprika
8 slices cooked ham (400 g)
125 ml water
125 ml cream
20 g flour
20 g butter or margarine
10 g butter or margarine to grease
the dish
1. Mix the spinach with the cheese and
fromage frais, season to taste.
2. Place a tablespoon of the filling on top
of each slice of the cooked ham, and
roll up. Secure the ham with a wooden
skewer.
3. Make a béchamel sauce; to do this,
pour the water and cream into a bowl
and heat.
2-4 min. 900 W
Mix the flour and butter to make a
roux, add to the liquid, and whisk until
dissolved. Cover, cook until thick.
1-2 min. 900 W
Stir and taste.
4. Place the sauce into the greased dish,
place the filled rolls of ham into sauce
and cook with lid.
10-12 min. Dual Grill (630 W)
After cooking, stand for approx. 5 min.
Page 30

30
electrolux recipes
Lasagne
Utensils: Bowl with lid (2 I capacity)
Shallow square dish with lid
(approx. 20 x 20 x 6 cm)
Ingredients
300 g tinned tomatoes
50 g ham, chopped
50 g onion, finely chopped
1 clove of garlic, crushed
250 g minced beef
2 tbsp tomato puree
salt and pepper
150 ml crème fraiche
100 ml milk
50 g Parmesan cheese, grated
1 tsp mixed chopped herbs
1 tsp olive oil
1 tsp vegetable oil to grease the dish
125 g lasagne verde
1 tbsp Parmesan cheese, grated
Courgette and noodle gratin
Utensils: Gratin dish (approx. 26 cm long)
Ingredients
80 g macaroni, cooked
400 g tinned tomatoes, chopped
150 g onion, finely chopped
basil, thyme, salt and pepper
1 tbsp oil to grease the dish
450 g courgettes, sliced
150 g sour cream
2 eggs
100 g Cheddar cheese, grated
1. Chop the tomatoes, mix with the ham
and onion, garlic, minced beef and
tomato puree. Season, cover and cook.
5-8 min. 900 W
2. Mix the crème fraiche with the milk,
Parmesan cheese, herbs, oil and
spices.
3. Grease the dish and cover the bottom
1
with about
/3of the pasta. Put half of
the minced meat mixture on the pasta
and pour on some sauce. Repeat and
finish with the remaining pasta on top.
Cover the pasta with lots of sauce and
sprinkle with Parmesan cheese. Cook
with the lid on.
13-17 min. 630 W
After cooking, stand for approx. 5-10
min.
1. Mix the tomatoes with the onions and
season well. Add the macaroni. Pour
the tomato sauce over the macaroni
and spread the courgette slices on top.
2. Beat the sour cream and the eggs and
pour over the gratin. Sprinkle the
grated cheese on top. Place on the low
rack and cook.
18-21 min. 900 W
7-8 min. Dual Grill (630 W)
After cooking, stand for approx. 5-10
min.
Pears in chocolate sauce
Utensils: Bowl with lid (2 I capacity)
Bowl with lid (1 I capacity)
Ingredients
4 whole pears, peeled (600 g)
60 g sugar
10 g vanilla sugar
1 tbsp pear liqueur
150 ml water
130 g dark chocolate, chopped
100 g crème fraiche
1. Place the sugar, vanilla sugar, pear
liqueur and water into the bowl, stir,
cover and cook.
1-2 min. 900 W
2. Place the pears in the liquid, cover
and cook.
5-8 min. 900 W
Take the pears out of the cooking
liquid, and place in the refrigerator.
3. Put 50 ml of the cooking liquid into the
smaller bowl. Add the chocolate and
crème fraiche, cover and cook.
2-3 min. 900 W
4. Stir the sauce well, pour over the
pears to serve.
Page 31

electrolux recipes
31
Semolina pudding with raspberry
sauce
Utensils: Bowl with lid (2 I capacity)
4 Ramekin dishes
Ingredients
500 ml milk
40 g sugar
15 g chopped almonds
50 g semolina
1 egg yolk
1 tbsp water
1 egg white
250 g raspberries
50 ml water
40 g sugar
Cheesecake
Utensils: Spring form tin
(approx. 26 cm diameter)
Ingredients
Base:
300 g flour
1 tbsp cocoa
10 g baking powder
150 g sugar
1 egg
10 g butter or margarine to grease
the tin
Filling:
150 g butter or margarine
100 g sugar
10 g vanilla sugar
3 eggs
400 g fromage frais
40 g powdered vanilla pudding mix
1. Put the milk, sugar and almonds in the
bowl, cover and cook.
3-5 min. 900 W
2. Add the semolina, stir, cover and cook.
10-12 min. 270 W
3. Beat the egg yolk with the water in a
cup, and stir into the hot mixture. Beat
the egg white until it is stiff, and fold it
into the mixture. Pour the pudding
mixture into ramekins.
4. To make the sauce, wash the
raspberries, dab them dry carefully, and
place them in a bowl with the water
and sugar. Cover and heat.
2-3 min. 900 W
5. Purée the raspberries and serve either
hot or cold with the semolina pudding.
1. In a bowl, mix together the flour,
cocoa, baking powder and sugar.
2. Add the egg and butter and mix in a
food processor.
3. Grease the tin. Roll out the dough
and line the tin, leaving 2 cm around
the edges to form a rim. Bake the
pastry.
6-8 min. 630 W
4. Whisk the butter and sugar until light
and fluffy. Slowly whisk in the eggs.
Add the fromage frais and the
powdered vanilla pudding mix.
5. Spread the mixture over the
cheesecake base and cook.
15-19 min. 630 W
Page 32

32
electrolux care & cleaning
Care & cleaning
CAUTION: DO NOT USE
COMMERCIAL OVEN CLEANERS,
STEAM CLEANERS, ABRASIVE,
HARSH CLEANERS, ANY THAT
CONTAIN SODIUM HYDROXIDE OR
SCOURING PADS ON ANY PART OF
YOUR MICROWAVE OVEN.
CLEAN THE OVEN AT REGULAR
INTERVALS AND REMOVE ANY FOOD
DEPOSITS. Failure to maintain the
oven in a clean condition could lead to
a deterioration of the surface that
could adversely affect the life of the
appliance and possibly result in a
hazardous situation.
Oven exterior
The outside of your oven can be
easily cleaned with mild soap and water.
Make sure that the soap is wiped off
with a moist cloth, and dry the exterior with
a soft towel.
Control panel
Open the door before cleaning to
deactivate the control panel. Care should
be taken in cleaning the control panel.
Using a cloth dampened with water
only, gently wipe the panel until it becomes
clean. Avoid using excessive amounts of
water. Do not use any sort of chemical or
abrasive cleaner.
Oven interior
1. For cleaning, wipe any spatters or spills
with a soft damp cloth or sponge after
each use while the oven is still warm.
For heavier spills, use mild soap and
wipe several times with a damp cloth
until all residues are removed.
2. Make sure that mild soap or water do
not penetrate the small vents in the
walls which may cause damage to the
oven.
3. Do not use spray type cleaners on the
oven interior.
4. Heat up your oven regularly by using
the grill. Remaining food or fat splashed
can cause smoke or a bad smell.
Turntable & turntable support
Remove the turntable and turntable
support from the oven. Wash the
turntable and turntable support in mild
soapy water. Dry with a soft cloth. Both
the turntable and the turntable support
are dishwasher safe.
Door
To remove all trace of dirt, regularly
clean both sides of the door, the door seals
and surfaces with a soft, damp cloth. Do
not use harsh abrasive cleaners or sharp
metal scrapers to clean the oven door glass
since they can scratch the surface, which
may result in shattering of the glass.
Racks
These should be washed in a mild
washing up liquid solution and dried. The
rack is dishwasher safe.
Important: A steam cleaner should not
be used.
Reduced power level
Important:
If you cook the food over the
standard time with only the same
cooking mode, the power of the oven
will lower automatically to avoid
Cooking mode Standard time Reduced power level
Microwave (900 W) 20 minutes Microwave - 630 W
Grill 20 minutes Grill - 50 %
Dual Grill Grill - 20 minutes Grill - 50 %
overheating. (The microwave power level
will be reduced or the grill heating
element will begin to light on and off.)
After pausing for 90 seconds, full power
can be reset.
Page 33

electrolux what to do if . . & specifications
What to do if . .
Problem Check if . . .
The microwave appliance - The fuses in the fuse box are working,
is not working properly? - There has not been a power outage,
The microwave mode is - The door is properly closed,
not working? - The door seals and their surfaces are clean,
The turntable is not turning? - The turntable support is correctly connected to the drive,
The microwave will not - Isolate the appliance from the fuse box.
switch off? - Call an authorised ELECTROLUXservice agent.
The interior light is not - Call your local ELECTROLUX service agent. The interior light bulb
working? can be exchanged only by a trained ELECTROLUX service agent.
The food is taking longer - Set a longer cooking time (double quantity = nearly double time) or
to heat through and cook - If the food is colder than usual, rotate or turn from time to time or
than before? - Set a higher power setting.
- If the fuses continue to blow, please contact a qualified electrician.
- The START/+30-button has been pressed.
- The ovenware does not extend beyond the turntable,
- Food does not extend beyond the edge of the turntable preventing
it from rotating,
- There is nothing in the well beneath the turntable.
Specifications
AC Line Voltage
Distribution line fuse/circuit breaker
AC Power required: Microwave
Microwave/Grill
Output power: Microwave
Microwave Frequency
Outside Dimensions EMS26415
Cavity Dimensions
Oven Capacity
Turntable
Weight
Oven lamp
* This Product fulfils the requirement of the European standard EN55011.
In conformity with this standard, this product is classified as group 2 class B equipment.
Group 2 means that the equipment intentionally generates radio-frequency energy in the form of
electromagnetic radiation for the heat treatment of food.
Class B equipment means that the equipment is suitable to be used in domestic establishments.
** Internal capacity is calculated by measuring maximum width, depth and height.
Actual capacity for holding food is less.
This oven complies with the requirements of Directives 2004/108/EC and 2006/95/EC.
SPECIFICATIONS ARE SUBJECT TO CHANGE WITHOUT NOTICE AS
PART OF CONTINUOUS IMPROVEMENT
: 230 V, 50 Hz, single phase
: Minimum 16 A
: 1.37 kW
Grill
: 1.00 kW
: 2.35 kW
: 900 W (IEC 60705)
Grill
: 1000 W
: 2450 MHz * (Group 2, Class B)
: 594 mm (W) x 459mm (H) x 404 mm (D)
: 342 mm (W) x 207 mm (H) x 368 mm (D) **
: 26 litres **
: ø 325 mm, glass
: approx. 19.5 kg
: 25 W/240 - 250 V
33
Page 34

34
D
4 mm
electrolux installation
Installation
The microwave can be fitted in
position A or B:
Position Niche Size
A 560x550x450
B 560x500x450
Measurements in (mm)
Position A
Conventional
oven
W D H
Position B
Installing the appliance
1. Remove all packaging and check
carefully for any signs of damage.
2. Fit the appliance into the kitchen cupboard slowly, and without force, until
the front frame of the oven seals
against the front opening of the
cupboard.
3. Ensure the appliance is stable and
not leaning. Ensure that a 4 mm gap
is kept between the cupboard door
above and the top of the frame (see
diagram).
Fixing Option 1:
Fix the oven in position with the screws
provided. The fixing points are located on
the top and bottom corners of the oven.
Fixing Option 2:
Please see the template sheet supplied
with this oven.
Important:
Ensure the bottom of the oven is
85 cm or more above the floor.
It is important to ensure that the
installation of this product conforms
to the instructions in this operation
manual and the conventional oven
manufacturer’s installation
instructions.
Page 35

electrolux installation
35
Connecting the appliance to
the power supply
• The electrical outlet should be
readily accessible so that the unit
can be unplugged easily in an
emergency. Or it should be
possible to isolate the oven from
the supply by incorporating a
switch in the fixed wiring in
accordance with the wiring rules.
• The socket should not be
positioned behind the cupboard.
• The best position is above the cupboard, see (A).
(A)
• Connect the appliance to a single
phase 230 V/50 Hz alternating
current via a correctly installed earth
socket. The socket must be fused
with a 16 A fuse.
• The power supply cord may only
be replaced by an electrician.
• Before installing, tie a piece of string
to the power supply cord to facilitate
connection to point (A) when the
appliance is being installed.
• When inserting the appliance into
the high-sided cupboard, DO NOT
crush the power supply cord.
• Do not immerse the power supply
cord or plug in water or any other
liquid.
Electrical connections
WARNING: THIS APPLIANCE
MUST BE EARTHED.
The manufacturer declines
any liability should this safety
measure not be observed.
If the plug that is fitted to your
appliance is not suitable for your
socket outlet, you must call your local
Electrolux service agent.
Page 36

36
electrolux environmental information
Environmental information
Ecologically responsible disposal
of packaging materials and old
appliances
Packaging materials
Electrolux microwave ovens
require effective packaging to protect
them during transportation. Only the
minimum packaging necessary is
used. Packaging materials (e.g. foil or
styrofoam) can place children at risk.
Danger of suffocation. Keep
packaging material away from
children.
All packaging materials used are
environment friendly and can be
recycled. The cardboard is made
from recycled paper and the wooden
parts are untreated. Plastic items are
marked as follows:
«PE» polyethylene eg packaging film
«PS» polystyrene eg packaging
(CFC-free)
«PP» polypropylene eg packaging
straps
By using and re-using the packaging,
raw materials are saved and waste
volume is reduced. Packaging should
be taken to your nearest recycling
centre. Contact your local council for
information.
The symbol on the product or
on its packaging indicates that this
product may not be treated as
household waste. Instead it should be
taken to the appropriate collection point
for the recycling of electrical and
electronic equipment. By ensuring this
product is disposed of correctly, you
will help prevent potential negative
consequences for the environment and
human health, which could otherwise
be caused by inappropriate waste
handling of this product. For more
detailed information about recycling of
this product, please contact your local
council, your household waste disposal
service or the shop where you
purchased the product.
Disposal of old appliances
Old appliances should be made safe
before disposal by removing the plug,
and cutting off and disposing of the
power cable.
It should then be taken to the
nearest recycling centre. Check with
your local Council or Environmental
Health Office to see if there are facilities
in your area for recycling the appliance.
Page 37

European guarantee
This appliance is guaranteed by
Electrolux in each of the countries
listed at the back of this user manual,
for the period specified in the
appliance guarantee or otherwise by
law. If you move from one of these
countries to another of the countries
listed below the appliance guarantee
will move with you subject to the
following qualifications:-
• The appliance guarantee starts
from the date you first purchased
the appliance which will be
evidenced by production of a valid
purchase document issued by the
seller of the appliance.
• The appliance guarantee is for the
same period and to the same
extent for labour and parts as
exists in your new country of
residence for this particular model
or range of appliances.
• The appliance guarantee is
personal to the original purchaser
of the appliance and cannot be
transferred to another user.
• The appliance is installed and used
in accordance with instructions
issued by Electrolux and is only
used within the home i.e. is not
used for commercial purposes.
• The appliance is installed in
accordance with all relevant
regulations in force within your new
country of residence.
The provisions of this European
Guarantee do not affect any of the
rights granted to you by law.
electrolux european guarantee
37
Page 38

38
electrolux sikkerhetsinformasjon
VIKTIGE SIKKERHETSINSTRUKSJONER: LES NØYE
OG OPPBEVAR FOR FREMTIDIG REFERANS
For å unngå brannfare
Mikrobølgeovnen bør holdes
under oppsyn mens den er i bruk.
For høye effektnivåer eller for lange
tilberedningstider kan føre til
overoppheting av matvarer og
resultere i brann.
Strømuttaket må være lett
tilgjengelig, slik at enheten lettkan kobles
fra strømnettet i nødstilfeller.
Vekselstrømsuttaket må være på 230 V,
50 Hz, med minimum 16 A fordelingssikring, eller minimum 16 A fordelingskretsbryter. Det anbefales at man
benytter en separat strømkrets for kun
dette apparatet.
Ovnen må ikke oppbevares eller
brukes utendørs.
Hvis det begynner å ryke av
maten som varmes, MÅ MAN IKKE
ÅPNE DØREN. Slå av ovnen, trekk ut
kontakten og vent til maten ikke
ryker lenger. Å åpne døren mens det
ryker av maten, kan føre til brann.
Bruk kun beholdere og utstyr
som er beregnet på bruk i
mikrobølgeovn. Ikke la ovnen stå
uten tilsyn ved bruk av
engangsbeholdere i plast, papir eller
andre brennbare matbeholdere.
Rengjør bølgelederdekselet,
ovnsrommet, dreieplaten og
dreieplatestativet etter bruk. Disse
må være tørre og frie for fett.
Fettavsetninger kan overoppvarmes
og begynne å ryke eller ta fyr.
Ikke plasser antennelige materialer
nær ovnen eller ventilasjonsåpninger.
Ikke blokker ventilasjonsåpningene.
Fjern alle metallforseglinger,
metalltråder osv. fra mat og
matemballasje.
Gnistoverslag på metalliske overflater
kan forårsake brann.
Mikrobølgeovnen må ikke brukes til å
varme opp olje for fritering.
Temperaturen kan ikke kontrolleres
og oljen kan ta fyr.
Ved tilberedning av popkorn må man
kun bruke popkornbeholdere beregnet
på bruk i mikrobølgeovn.
Man må ikke oppbevare mat eller
andre gjenstander inne i ovnen.
Kontroller innstillingene etter at du
starter ovnen for å sikre at den fungerer
som ønsket. Se tipsene og rådene i
denne brukerhåndboken og i
kokebokdelen.
For å unngå fare for skader
ADVARSEL! Ikke bruk ovnen om
den er skadet eller har
feilfunksjoner. Før bruk, sjekk
følgende punkter:
a) Døren: Pass på at døren lukkes
ordentlig og sjekk at den ikke er
skjev eller vridd.
b) Hengslene og sikkerhetsdør-
sperren: Sjekk at de ikke er
brukket eller løse.
c) Dørtetning og frontramme: Pass
på at de ikke er skadet.
d) Inne i ovnsrommet eller på døren:
Pass på at det ikke finnes bulker.
e) Strømledning og stikkontakt: Pass
på at de ikke er skadet.
Page 39

electrolux sikkerhetsinformasjon
39
Du må aldri justere, reparere
eller modifisere ovnen selv. Det er
farlig for alle andre enn faglært
personell å utføre eventuell service
eller reparasjon som innebærer å
fjerne dekslet som beskytter mot
eksponering for mikrobølgeenergi.
Ikke bruk ovnen med døren åpen,
eller endre dørens sikkerhetssperrer på
noen måte.
Ikke bruk ovnen hvis det finnes en
gjenstand mellom dørforseglingene og
lukkeflatene.
Ikke la det bygge seg opp fett
eller smuss på dørtetningen eller
tilstøtende deler. Følg
instruksjonene for “Vedlikehold og
rengjøring”. Hvis man ikke holder
ovnen ren kan dette føre til
forringelse av overflaten, noe som
videre kan redusere apparatets
levetid. Det kanogsåføretil en farlig
situasjon.
Personer med PACEMAKER bør
sjekke med lege eller produsenten av
pacemaker for forholdsregler
vedrørende mikrobølgeovner.
For å unngå fare for elektrisk støt
Ikke under noen omstendigheter må
du fjerne den ytre kassen. Ikke søl eller
før inn gjenstander i dørlåsåpningene
eller ventilasjonsåpningene. Ved slikt søl,
slå av ovnen, trekk ut kontakten med en
gang, og ring en autorisert
ELECTROLUX servicerepresentant. Ikke
senk strømledningen eller kontakten i
vann eller andre væsker. Ikke la
strømledningen ligge over varme eller
skarpe overflater, så som
varmluftsventilasjonsåpningen bakerst
på toppen av ovnen.Ikkeprøvå skifte ut
ovnslampen selv, eller la noen som ikke
er autorisert av ELECTROLUX gjøre
dette. Hvis ovnslampen slutter å lyse, ta
kontakt med din forhandler eller en
autorisert ELECTROLUX servicerepresentant. Hvis strømledningen til
denne ovnen skades, må den erstattes
med en spesiell ledning. Dette må
utføres av en autorisert ELECTROLUX
servicerepresentant.
For å unngå fare for eksplosjon og
plutselig koking
ADVARSEL! Væsker og andre
matvarer må ikke varmes opp i
forseglede beholdere, da de kan
eksplodere.
Bruk aldri forseglede beholdere.
Fjern forseglinger og lokk før bruk.
Forseglede beholdere kan eksplodere
pga. oppbygging av trykk selv etter at
man har slått av ovnen. Utvis forsiktighet
ved oppvarming av væsker i
mikrobølgeovn. Bruk en beholder med
vid åpning, slik at bobler kan slippe ut.
Oppvarming av væsker i
mikrobølgeovn kan føre til forsinket
eksplosjonsartet koking, derfor må
man utvise forsiktighet ved
håndtering av beholderen.
For å forhindre plutselig erupsjon
av kokende væske og mulig skålding:
1.Rør i væsken før oppvarming/
gjenoppvarming.
2.Det anbefales at man plasserer en
glass-stang eller liknende redskap i
væsken under oppvarming.
3.La væsken stå i ovnen i minst 20
sekunder etter tilberedning for å
unngå forsinket, eksplosjonsartet
sprut fra kokekaret.
Page 40

40
electrolux sikkerhetsinformasjon
Kok ikke egg i skallene, og hele,
hardkokte egg bør ikke varmes opp
i mikrobølgeovn fordi de kan
eksplodere selv etter at
mikrobølgeovnstilberedningen er
avsluttet. Forå kokeeller varmeopp
egg som ikke har blitt rørt eller
blandet, stikk hull på plommer og
hviter, hvis ikke kan eggene
eksplodere. Ta av skallet og del opp
hardkokte egg før de varmes i
mikrobølgeovn.
Stikk hull på skall/skinn på matvarer
som poteter, pølser og frukt før
tilberedning i mikrobølgeovn, hvis ikke
kan de eksplodere.
For å unngå fare for brannskader
Bruk grytelapper eller -hansker når
du tar mat ut av ovnen, for å unngå
brannsår. Åpne alltid beholdere,
popkornposer, stekeposer osv.vendt fra
ansikt og hender for å unngå brannsår
fra damp.
For å unngå brannsår bør du
alltid teste matens temperatur og
røre i den før den serveres. Vær
spesielt oppmerksom på
temperaturen i mat og drikke som
gis til spedbarn, barn eller eldre.
Temperaturen til beholderen er ikke
nødvendigvis den samme som
temperaturen på maten eller drikken;
sjekk alltid temperaturen på selve
matvaren.
Hold litt avstand fra ovnsdøren når
du åpner den, for å unngå brannsår fra
damp og varme som kommer ut fra
døråpningen.
Del opp fylte bakervarer etter
oppvarming for å slippe ut damp og
unngå brannsår. Hold barn unna døren
og tilgjengelige deler som kan bli varme
når man bruker grillen.
Barn bør holdes på avstand for å
hindre dem i å brenne seg. Ved bruk av
GRILL- , DOBBEL GRILL- og
AUTOTILBEREDNING-modus blir både
kassen, ovnsrommet, ventilasjonsåpningene, tilbehør og former varme.
For å unngå at barn bruker
mikrobølgeovnen feil
ADVARSEL! Barn må kun få lov å
bruke ovnen uten oppsyn når de har
fått tilstrekkelig instruksjon, slik at
barneter i stand til å bruke ovnenpå
en sikker måteog forstår farene ved
ukorrekt bruk.
Dette apparatet er ikke beregnet for
bruk av personer (inkludert barn) med
begrenset fysiske, sensoriske eller
mentale evner eller som mangler erfaring
og kunnskap, med mindre de er under
oppsyn eller har blitt gitt opplæring i bruk
av apparatet av en person som er
ansvarlig for deres sikkerhet.
Barn bør være under oppsyn for å
sikre at de ikke leker med apparatet.
Ikke len deg eller sving på
ovnsdøren. Ikke lek med ovnen eller
bruk den som et leketøy. Barn bør lære
alle viktige sikkerhetsinstruksjoner: bruk
av grytelapper, forsiktig fjerning av lokk
over mat og å være spesielt forsiktig
med emballasje (f. eks.
selvoppvarmende materialer) som er
utformet for å lage sprø mat, da disse
kan være ekstra varme.
Page 41

electrolux sikkerhetsinformasjon
41
Andre advarsler
Ovnen må ikke modifiseres på
noen måte. Denne ovnen er kun
beregnet på mattilberedning i
private hjem, og skal kun brukes for
tilberedning av mat. Den er ikke
egnet for profesjonell bruk eller bruk
i laboratorier.
For å fremme problemfri bruk av
ovnen og unngå skade
Ovnen må aldri brukes mens den
er tom, unntatt når dette anbefales i
brukerhåndboken, se side 49,
merknad 2. Dersom man gjør dette,
kan det føre til skade på ovnen.
Ved bruk av en bruningsform eller
selvoppvarmende materiale, må du
alltid plassere en varmemotstandig
isolering, f. eks. en porselenstallerken,
under, for å unngå skade på
dreieplaten og dreieplatestativet pga.
termospenning. Oppvarmingstidene
som er spesifisert i
oppskrifter/instruksjoner må ikke
overstiges.
Ikke bruk metallredskaper som
reflekterer mikrobølger og kan føre til
elektrisk gnistoverslag. Ikke plasser
hermetikkbokser i ovnen.
Bruk kun dreieplaten og
dreieplatestativet som er beregnet for
denne ovnen. Ikke bruk ovnen uten
dreieplaten.
For å unngå at dreieplaten knuses:
(a)La dreieplaten avkjøles før du rengjør
den med vann.
(b)Ikke plasser varm mat eller varme
redskaper på en kald dreieplate.
(c)Ikke plasser kald mat eller kalde
redskaper på en varm dreieplate.
Ikke plasser noe på den ytre
kassen under bruk.
Ikke bruk plastbeholdere beregnet
på bruk i mikrobølgeovn dersom
ovnen fortsatt er varm etter bruk av
GRILL, DOBBELGRILL og
AUTOTILBEREDNING modus, da de
kan smelte. Plastbeholdere må ikke
benyttes i bruk av ovennevnte
moduser, med mindre produsenten
av beholderen sier den er egnet for
dette.
Merknad:
Hvis du ikke er sikker på hvordan du
kan koble til ovnen, kontakt en
autorisert, kvalifisert elektriker.
Verken produsent eller forhandler
kan påta seg ansvar for skade på ovnen
eller personskader som oppstår fordi
man ikke har koblet ovnen til elektrisk
strømkilde på korrekt måte.
Vanndamp eller -dråper kan fra tid til
annen dannes på ovnsveggene eller
rundt dørforseglinger og lukkeoverflater.
Dette er normalt, og er ikke tegn på at
mikrobølgelekkasje eller feilfunksjon.
Page 42

42
electrolux produktbeskrivelse
Produktbeskrivelse
1 2
3
4
5
9876
1 Grillvarmeelement
2 Frontkant
3 Ovnslampe
4 Kontrollpanel
14
5 Døråpner
6 Plate som beskytter bølgeleder
7 Ovnsrom
8 Pakning for dreietallerken
9 Dørpakning og lukkeflater
10 Festepunkter (4 punkter)
11 Ventilasjonsåpninger
12 Ytre kasse
13 Bakre kasse
14 Strømledning
Sjekk at følgende tilbehør medfølger:
(1) Dreieplate (2) Dreieplatestativ
(3) Høy rist (4) Lav rist
(5) 4 festeskruer (ikke vist)
• Plasser dreieplatestativet i fordypningen i
bunnen av ovnsrommet.
• Plasser så dreieplaten oppå
dreieplatestativet.
• For å unngå skade på dreieplaten bør du
sørge for at fat og beholdere løftes over
kanten på dreieplaten når du tar dem ut av
ovnen.
MERKNAD: Når du bestiller tilbehør, gir du to
referanser til forhandler eller autorisert Electrolux
serviceagent: produktnummer og modellnavn.
10
11
12
13
1
2
3
4
Page 43

Kontrollpanel
electrolux produktbeskrivelse
1 Digitalt display indikatorer
Grill
43
1
2
3
4
5
6
7
2 AUTOTILBEREDNING indikatorer
8
3 AUTOTILBEREDNING knapp
4 AUTOTINING knapp
9
5 EFFEKTNIVÅ knapp
6 GRILL knapp
7 TID/VEKT knappen
8 START/+30 knapp
10
9 STOPP knapp
10 DØRÅPNINGS knapp
Mikrobølger
Dobbel grill
Klokken
Tillagningstadier
Pluss/minus
Autotining brød
Autotining
Vekt
Page 44

44
electrolux før den brukes første gang
Før den brukes første gang
Econ. instillinger
Ovnen er innstilt på
energisparingsmodus – ”Econ.”
1. Sett ovnens støpsel i stikkontakten.
2. Displayet vil være tomt.
3. Åpne døren og strømmen kobles til.
4. Steng døren og ”Econ.” vil vises.
5. Displayet vil telle ned fra 3:00 til null.
6. Når nedtellingen er fullført, vil ovnen
gå over i ”Econ.”-modus og
skjermen blir blank igjen.
7. For å kansellere ”Econ.”-modus, still
inn klokken.
8. For å stille til ”Econ."-modus når
klokken er innstilt, åpne døren, trykk
på Start i fem sekunder, trykk
deretter stopp og steng døren.
Stille klokken
Ovnen har en tolv timers klokke.
Eksempel: For å stille klokken til 11:30.
1. Sett ovnens støpsel i stikkontakten.
2. Skjermen vil være blank.
3. Åpne døren og strømmen kobles til.
4. Mens døren er åpen, roter TID/
VEKT-knotten for å justere time.
5. Trykk på START/+30-knappen
(start/hurtig) én gang og roter
TID/VEKT-knotten for å justere
minutter.
6. Tryk på START/+30 knappen.
7. Kontroller displayet:
8. Steng døren.
Viktig:
1. Du kan dreie TID/VEKT knappen
med eller mot klokken.
2. Energisparingsmodus kan ikke stilles
inn etter at klokken er innstilt.
Justere tiden når klokken er
stilt inn eller ovnen er i
‘Econ’-modus
Eksempel: For å stille klokken til 12:45.
1. Åpne døren.
2. Trykk på START/+30-knappen
(start/hurtig) i fem sekunder. Ovnen
vil pipe. Roter TID/VEKT-knotten for
å justere timen.
3. Trykk på START/+30-knappen
(start/hurtig) én gang og roter
TID/VEKT-knotten for å justere
minuttene.
4.Tryk på START/+30 knappen.
5.Kontroller displayet:
Bruke STOPP-knappen
Bruk STOPP knappen for å:
1. Slette en feil under programmering.
2. Stanse ovnen midlertidig under
tilberedning.
3. Annullere et program under
tilberedning, trykk to ganger.
Sikkerhetslås
Ovnen har en sikkerhetsfunksjon som
forhindrer at ovnen kan startes utilsiktet
av et barn. Når låsen er innstilt, vil ingen
del av mikrobølgeovnen fungere før
sikkerhetsfunksjonen har blitt kansellert.
Eksempel: Stille inn sikkerhetslåsen.
1. Trykk og hold inne STOPP-knappen
i 5 sekunder.
Page 45

Ovnen vil pipe og ”LOC” vil vises.
Merknad:
• For å kansellere sikkerhetslåsen,
trykk på Stopp-knappen i fem
sekunder, ovnen vil pipe to ganger
og klokkeslett vil vises.
• Sikkerhetslåsen kan ikke stilles
inn hvis klokken ikke er innstilt.
Mikrobølger tining råd
electrolux betjening
45
For å lage/tine mat i en
mikrobølgeovn må mikrobølgeenergien
kunne gå gjennom beholderen for å
trenge inn i maten. Derfor er det viktig å
velge passende kokekar.
Runde/ovale skåler er å foretrekke
maten i hjørnene har en tendens til å bli
varmet for mye.
Det er viktig å snu, flytte på eller røre
i maten for å sikre jevn oppvarming.
Maten må stå litt etter oppvarming,
slik at varmen fordeles jevnt i maten.
fremfor firkantede eller avlange, siden
Kjennetegn
Ingredienser Matvarer medmye fett eller sukker (f.eks. fetesauser ellereplepai) trenger kortere
Kompakthet Hvor kompakt maten er vil påvirke oppvarmingstiden. Lette,porøse matvarersom
Mengde Oppvarmingstidenøkesmed mengden mat som plasseres i ovnen. Dettar lenger tid
Størrelse Små matvarer og små biter varmesraskereenn store, siden mikrobølgene kan
Fasong Matvarer medujevn fasong, som foreksempel kyllingbryst eller lårstykker bruker
Temperatur Starttemperaturen på maten vilpåvirkeoppvarmingstiden.Avkjølte matvarertrenger
oppvarming. Manbør være forsiktig da overoppheting kan forårsakebrann.
kaker og brød varmes raskere opp enn tunge, kompaktematvarer somf.eks. en stek
eller gryterett.
å koke fire poteter enn to.
trenge innfra alle sider og motmidten.For jevn oppvarming børallebitene være like
store.
lenger tidpåde tykkeste partiene. Runde fasongervarmes jevnere enn firkantede
fasonger.
lenger tidenn matvarermed romtemperatur. Skjær i mat med fyll, for eksempel
berlinerboller, for å slippeut varme eller damp.
Page 46

46
Anrette Plasser de tykkeste bitene av maten mot kantene på skålen. f.eks.lårstykker av
Dekke til Brukplastfolie med luftehull formikrobølgeovn eller et passende lokk.
Stikke hull Matvarermed skall,skinn eller hinne måstikkeshulli flere steder før oppvarming,
Rør, vend Forå få jevn oppvarming er det viktigå røre,vende og flytte påmaten under
ogflytt på oppvarmingen. Røring og flytting skal alltid skje fra kanten mot midten.
Hvile Hviletidernødvendigetteroppvarming, slik at varmen fordeles jevnti maten.
Dekke Noenområderpå matvarer somtines kan blivarme. Varmeområderf.eks. på
electrolux betjening
Oppvarmingsteknikker
kylling.
siden dampensom dannerseg kan fåmaten til å eksplodere,f.eks. poteter, fisk,
kylling, pølser.
Viktig:Egg børikke kokesi mikrobølgeovn, siden de kan eksplodere selv etter at
oppvarmingenerferdig, for eksempelposjerte egg, speilegg ellerkokte egg.
lårstykker og kyllingvinger kan dekkes med foliebiter somreflekterer mikrobølgene.
Mikrobølgesikre kokekar
Kokekar Mikrobølg- Kommentarer
esikker
Aluminiumsfolie/ / Små stykker med aluminiumsfolie kanbrukes tilå beskytte
foliebeholdere matvarermot overoppheting. Folienmåplasseresminst
Bruningspanner Følg alltid produsentens veiledning.Oppvarmingstidene som
Porselen og / Porselen, keramikk,glaserte leirvarer og benporselenkan
keramikk vanligvis brukes, bortsettfra de somhar metalldekor.
Glasstøy,f.eks. Man bør være forsiktig medbruk av glasstøy, sidendet kan
Pyrex ® knuseeller sprekke dersom det varmesopp raskt.
Metall Man anbefaler ikkebruk av metallkokekari kombinasjon med
Plast/styrenplast, Man bør være forsiktig medbruk av disse, siden noen
f.eks. hurtigmat- beholdere deformeres, smelter eller misfarges vedhøye
beholdere temperaturer.
Plastfolie Den bør ikke berøre maten, og må stikkes hull i for å slippe
Fryse-/ Demåstikkeshulli forå slippe ut damp. Pass på at posene
stekeposer er egnet forbruk i mikrobølgeovn. Bruk ikkeplast- eller
Papir - tallerkener, Brukes kun til forsiktig oppvarming eller forå absorbere
kopper og tørkerull fuktighet. Manbør være forsiktig, overopphetingkan
Halm- og Pass alltid på når dissematerialene brukes, overoppheting
trebeholdere kan forårsake brann.
Resirkulert papir Dissekan inneholde resteravmetall,noe somkan
ogavispapir forårsake overslag og brann.
2 cm fraveggene på ovnen, siden overslag kanforekomme.
Foliebeholdereanbefales ikke hvis ikke det er spesielt oppgitt
fra produsenten, f.eks. Microfoil®.Følgveiledningennøye.
oppgis må ikke overstiges. Vær svært forsiktig, disse
panneneblirsvært varme.
mikrobølgeenergi.Overslagkan oppstå, og detkanforårsake
brann.
utdamp.
metallklips,disse kan smelte eller ta fyrpågrunn av overslag.
forårsakebrann.
Page 47

electrolux betjening
47
Mikrobølger tilberedning
Ovnen din kan programmeres for
inntil 90 minutter. Økningsenhetene
man kan bruke for matlaging varierer fra
10 sekunder til fem minutter. Det
Manuell tining
For manuell tining (uten bruk av
autotiningsfunksjonen), bruk 270 W.
Etter at effektnivået er valgt vises
symbolet for tining på skjermen.
avhenger av den totale tilberedningstid,
som vist i tabellen.
Tilberedningstid Økningsenhet
0-5 minutter 10 sekunder
5-10minutter 30 sekunder
10-30 minutter 1 minutt
30-90 minutter 5 minutter
Mikrobølgeeffektnivåer
Mikrobølgeovnen din har 6 nivåer:
Effekt- Forslag til bruk
innstilling
900 W / Brukes til hurtig matlaging eller oppvarming,f.eks. supper, gryteretter, hermetiske
HØY matvarer,varmedrikker, grønnsaker, fiskoglignende.
630 W Brukestil lengre matlagingavtetterematvarer somstek, kjøttpudding, og ferdigmåltider,
450 W For tette matvarer somkrever lang tilberedningstid når det tilberedes på tradisjonell
270 W / Forå tine,velg denneeffektinnstillingenfor å sikre at rettentines jevnt.Denne innstillingen
TINING er ogsåideell forå tilberede ris, pasta,melbolleroglage eggekrem.
90W Forforsiktigtining,for eksempel kremkaker eller butterdeig.
0 W Fornedtellingsinnstilling.
W = WATT
ogsåfor ømtålige retter som ostesaus og sukkerbrød.Ved denne lavere innstillingenvil
ikke sausen koke over og mat vil tilberedes jevnt uten å overkoke på sidene.
måte, f.eks.retter medstorfekjøtt,anbefalesdet å bruke denne innstillingenfor å sikre at
kjøttetblirmørt.
Eksempel: Varme opp suppe i to
minutter og 30 sekunder på 630 W
mikrobølgeeffektnivå.
1. Trykk to ganger på EFFEKTNIVÅ
knapp.
x2
2. Angi ønsket tid ved å dreie på
TID/VEKT knappen med eller mot
klokken 2:30 displayet.
3. Tryk på START/+30 knappen.
x1
4. Kontroller displayet:
Viktig:
Hvis du ikke stiller inn effektnivå, stilles
det automatisk til HØY/900 W.
Page 48

48
electrolux betjening
Merknad:
• Tilberedningstiden på det digitale
displayet stopper automatisk hvis
døren åpnes under
tilberedningsprosessen.
Tilberedningstiden telles ned igjen når
døren lukkes og man trykker på
START/+30 knappen.
• Hvis du vil se effektnivået under
tilberedningen, trykk på EFFEKTNIVÅ
knappen.
• Du kan øke eller redusere
tilberedningstiden under tilberedning
ved å rotere TID/VEKT-knotten.
• Du kan endre effektnivået under
tilberedning ved å trykke på
strømknappen.
• For å kansellere et program under
tilberedning, berør STOPP-knappen
to ganger.
Tidsur
Eksempel: For å stille inn sju minutters
nedtelling.
1. Tryk på EFFEKTNIVÅ knapp 7 .
x7
2. Angi ønsket tid ved å dreie på
TID/VEKT knappen med eller mot
klokken 7:00 displayet.
Legg til 30 sekunder
START/+30 knappen gjør det mulig å
bruke de følgende to funksjonene:
1. Direktestart
Du kan starte tilberedningen på
900 W mikrobølgeeffektnivå i 30
sekunder ved å trykke på
START/+30 knappen.
x1
2. Forlenge tilberedningstiden
Du kan forlenge tilberedningstiden
under manuell tilberedning for flere
sekvenser à 30 sekunder hvis du
trykker på knappen mens ovnen er
i gang.
x1
Merknad:
• Du kan ikke bruke denne funksjonen
ved AUTOTILBEREDNING eller
AUTOTINING.
• Du kan også bruke +30 sekunder
ved grillmodus.
Pluss og minus
PLUSS- og MINUS -funksjonen
gir deg muligheten til å øke eller redusere
tilberedningstiden ved bruk av
automatiske programmer.
3. Tryk på START/+30 knappen.
x1
4. Kontroller displayet:
Merknad:
• For å stoppe nedtellingen, trykk på
STOPP-knappen. For å fortsette
nedtellingen, trykk på START/+30,
for å avslutte, trykk på STOPP igjen.
Hvis du foretrekker faste kokte poteter
bruk MINUS .
Hvis du foretrekker myke kokte poteter,
bruk PLUSS .
Eksempel: For godt kokte poteter, 0.3
kg:
1. Velg ønsket meny ved å trykke 2
ganger på AUTOTILBEREDNING
knappen.
x2
Page 49

electrolux betjening
49
2. Ved å dreie på TID/VEKT knappen
0.3 displayet.
3. Trykk på strømknappen én gang for
å velge PLUSS -justering.
x1
4. Tryk på START/+30 knappen.
x1
5. Kontroller displayet:
Merknad:
For å kansellere PLUSS/MINUS, trykk på
strømknappen tre ganger.
Hvis du velger PLUSS, vil skjermen vise
.
Hvis du velger MINUS, vil skjermen vise
.
Tilberedning med grill &
dobbel grill
Denne mikrobølgeovnen har
GRILL-moduser:
1. Kun grill.
2. Dobbel grill (grill med mikrobølge).
Merknader:
1. Det anbefales at man bruker den høye
eller lave risten ved grilling.
2. Første gangen du bruker grillen kan
det hende at du merker røyk eller en
brent lukt. Dette er normalt, og betyr
ikke at ovnen er i ustand. For å unngå
dette problemet, bør du bruke grillen
uten mat i ovnen i 20 minutter første
gang du bruker ovnen.
Tilberedning med kun grill
Denne funksjonen kan brukes for å
grille/brune mat.
Eksempel: For å lage ristet brød på fire
minutter.
1. Velg ønsket meny ved å trykke 1
ganger på GRILL knappen.
x1
2. Angi ønsket tid ved å dreie på
TID/VEKT knappen med eller mot
klokken 4:00 displayet.
3. Tryk på START/+30 knappen.
x1
4. Kontroller displayet:
Tilberedning med dobbel grill
Denne funksjonen kombinerer
grilleffekt og mikrobølgeeffekt (90 W til
630 W). Effektnivået for
mikrobølgeeffekten er forhåndsinnstilt til
270 W.
Knapp Makt innstillingen
Grill x 1 0 W
Grill x 2 270 W
Grill x 3 450 W
Grill x 4 630 W
Grill x 5 0 W
Page 50

50
electrolux betjening
Eksempel: For å lage kebab på 7
minutter på DOBBEL GRILL (450 W).
1. Velg ønsket meny ved å trykke 3
ganger på GRILL knappen.
x3
2. Angi ønsket tid ved å dreie på
TID/VEKT knappen med eller mot
klokken 7:00 displayet.
3. Tryk på START/+30 knappen.
x1
4. Kontroller displayet:
Tilberedning i flere trinn
Det kan programmeres en sekvens på
tre stadier (maks.) med kombinasjon av
MIKROBØLGE, GRILL eller DOBBEL
GRILL.
Eksempel: For å tilberede:
2 minutter og 30 sekunder på 630 W
effekt (trinn 1)
5 minutter kun grill (trinn 2)
Trinn 2
1. Velg ønsket meny ved å trykke 1
ganger på GRILL knappen.
x1
2. Angi ønsket tid ved å dreie på
TID/VEKT knappen med eller mot
klokken 5:00 displayet.
3. Tryk på START/+30 knappen.
x1
4. Kontroller displayet:
Ovnen starter tilberedingen med 2
minutter og 30 sekunder ved 630 W,
og deretter med 5 minutter på kun
grill.
Trinn 1
1. Velg ønsket meny ved å trykke 1
ganger på EFFEKTNIVÅ knappen.
x2
2. Angi ønsket tid ved å dreie på
TID/VEKT knappen med eller mot
klokken 2:30 displayet.
3. Kontroller displayet:
Page 51

electrolux betjening
51
Automatisk tilberedning
og tining
Funksjonen AUTOTILBEREDNING
og AUTOTINING regner automatisk ut
den korrekte tilberedningsmodus og
tilberedningstid. Du kan velge mellom
syv AUTOTILBEREDNING menyer og
fem AUTOTINING menyer.
Autotilberedning
Autotilberedning Symbol Innstilling
Drikke Mikrobølge
Kokte ogbakte Mikrobølge
poteter
Grillspyd Mikrobølge
+ grill
Gratinert Mikrobølge
fiskefilet + grill
Grillet Mikrobølge
kylling + grill
Grateng Mikrobølge
+ grill
Eksempel: For kokte poteter, 0.3 kg:
1. Velg ønsket meny ved å trykke 2
ganger på AUTOTILBEREDNING
knappen.
x2
Når det kreves handling (f. eks. å snu
maten), stopper ovnen, man hører en
signallyd, resterende tilberedningstid og
eventuell indikator vil blinke i displayet.
For å fortsette tilberedningsprosessen,
trykk på START/+30 knappen. Ved
slutten av tilberedningstiden vil
programmet stoppe automatisk. Et
signal lyder, og tilberedningssymbolet vil
blinke. Etter ett minutt og et
påminnelsespip, vil klokkeslettet vises.
Autotining
Autotilberedning Symbol Innstilling
Kjøtt/fisk/ Mikrobølge
fugl
Brød Mikrobølge
Eksempel: For tining 0.2 kg brød.
1. Velg ønsket meny ved å trykke 2
ganger på AUTOTINING knappen.
x2
2. Ved å dreie på TID/VEKT knappen
0.2 displayet.
3. Tryk på START/+30 knappen.
2. Ved å dreie på TID/VEKT knappen
0.3 displayet.
3. Tryk på START/+30 knappen.
x1
4. Kontroller displayet:
x1
4. Kontroller displayet:
Når det kreves handling (f. eks. å snu
maten), stopper ovnen, man hører en
signallyd, resterende tilberedningstid og
eventuell indikator vil blinke i displayet.
For å fortsette tilberedningsprosessen,
trykk på START/+30 knappen. Ved
slutten av den automatiske tiningstiden vil
programmet stoppe automatisk. Et
signal lyder, og tilberedningssymbolet vil
blinke. Etter ett minutt og et
påminnelsespip, vil klokkeslettet vises.
Page 52

52
electrolux tabeller programmer
Tabeller programmer
Tabeller automatisk tilberedning og tining
Autotilbere- Vekt / Utstyr Knapp Fremgangsmåte
dning nr.
Drikke 1-6kopper •Plasser koppen nær kanten av det roterende
(Kaffe/te) 1 kopp=200 ml fatet.
Kokte og bakte 0,2 - 1,0kg(100g) Kokte poteter:Skrell poteteneogdel demopp i
poteter Bolle og lokk mindrebiter.
Grillspyd 0,2- 0,8 kg (100g) •Lag grillspydene som beskrevet i oppskriften
Høy rist på side54.
Gratinertfiskefilet 0,5 - 1,5 kg*(100 g) •Se oppskrifter for “gratinert fiskefilet” på sid
Gratineringsform 54.
Lav rist
Grilletkylling 0,9 - 1,8 kg (100 g) •Bland ingrediensene2 ss olje, 1 ts paprika,
Lav rist salt og pepper og spre dem på kyllingen.
Ildfastform •Stikk hull på skinnet på kyllingen.
Grateng 0,5 - 1,5 kg*(100g) •Seoppskriftfor “grateng” på side55.
Gratineringsform
Lav rist * Samlet vektfor alle ingrediensene.
Viktig:Avkjøltmat tilberedes fra 5 °C, frossen mattilberedes fra -18°C.
x1
x2
Bakepotet: Velgpoteter på omtrent samme
størrelseogvask dem.
•Leggpotetene somskal kokeseller bakes i en
bolle.
•Tilsett nødvendigmengde vann (pr. 100g), ca.
2 ts og litt salt.
•Dekktil medetlokk.
•Når du høreretlydsignal, rør om og dekk til
igjen.
•La rettenhvilei ca. 2 minutter etter at dener
ferdig.
x3
•Plasser dempåenhøy rist og start oven.
•Når duhører lydsignalet, venddem.
•Etter tilberedning,tadem ut og legg dem på
etfatfor servering. (Ingen hviletider nødvendig.)
x4
* Samlet vektfor alle ingrediensene.
x5
•Leggkyllingenmed brystsiden nedi en ildfast
form.
•Settformen rett på detroterende fatet, og stek
kyllingen.
•Vendkyllinglårene nårduhører lydsignalet.
•La kyllingenstå og hvile i ca.3 minutteri
ovnen. Ta denderetter ut og legg denpået
serveringsfat.
x6
Page 53

electrolux tabeller programmer
Autotinin Vekt / Utstyr Knapp Fremgangsmåte
nr.
Kjøtt, fisk, 0,2 - 1,0kg(100g) • Leggmaten i enildfast form, og settdennepå
fugl Ildfast form detroterende fateti ovnen.
(Hel fisk, fiskeskiver,
fiskefilet, kyllinglår,
kyllingbryst,
kjøttdeig, biff,
koteletter, burgere,
pølser)
Brød 0,1- 1,0kg(100g) • Leggbrødskiveneienildfast form,og settdenne
Ildfast form pådetroterendefatet i ovnen. Hvisdet er
x1
• Vendmatennårduhørerlydsignalet,ogpass
påat alle stykkene ligger hverfor seg. Beskytt
tynnere deler og spesielt varme delermed
aluminiumsfolie.
• Når tineprogrammet er fullført,pakkerdu
mateninni aluminiumsfoliei 15-45 minutter til
den erferdigtint.
Viktig:Passer ikke forhel fugl.
• Kjøttdeig: Vendkjøttdeigen nårduhører
lydsignalet. Fjern ogsåeventuellferdigtint
kjøttdeig.
x2
snakkommengder på over1 kg, legges
brødet direktepå detroterendefateti ovnen.
roterende fatet i ovnen.
• Vendbrødskivenenårduhørerlydsignalet, og
pass på at allestykkene liggerhver for seg.
• Når tineprogrammet er fullført,pakkerdu
brødet inn i aluminiumsfolie i 5–15 minutter til
det erferdigtint.
53
Viktig:Avkjøltmat tilberedes fra 5 °C, frossen mattilberedes fra -18°C.
Viktig:
• Legg kun inn matens vekt. Ikke
inkluder beholderens vekt.
• For mat som veier mer eller mindre
• Hvis klokken ikke er innstilt, vil
”Econ.”-modus aktiveres omtrent tre
minutter etter at tilberedningen er
ferdig.
enn det som oppgis i
tilberedningstabellene, bruk manuelle
programmer.
• Sluttemperaturen varierer avhengig av
starttemperaturen.
• Når det kreves handling (f. eks. å snu
maten), stopper ovnen, man hører en
signallyd, resterende tilberedningstid
og eventuell indikator vil blinke i
displayet. For å fortsette
tilberedningsprosessen, trykk på
Viktig: Autotining
1. Biffer og koteletter bør fryses ned
flatpakket.
2. Kjøttdeig bør presses flat før den
fryses ned.
3. Etter å ha snudd maten, beskytt
tinte deler med små biter
aluminiumsfolie.
4. Fjærfe bør brukes umiddelbart
etter at det er tint.
START/+30 knappen.
• Etter modusene micro/grill/dobbelt
grill, kan kjøleviften bli aktivert.
Page 54

54
electrolux tabeller programmer
Oppskrifter
Grillspyd
4 trespidd
400 g svinekoteletter i terninger
100 g bacon
100 g løk, delt i fire
250 g tomater, delt i fire
100 g grønn paprika, i terninger
2 ss olje
4 ts paprika
salt
1 ts kajennepepper
1 ts worcestersaus
1. Træ henholdsvis kjøtt og grønnsaker
på fire grillspyd av tre.
2. Bland oljen med krydderet, og
pensle grillspydene.
3. Legg spydene på risten, og velg
programmet AUTOTILBEREDNING,
“Grillspyd”.
Gratinert fiskefilet, ‘Esterhazy’
0,5 kg 1,0 kg 1,5 kg
230 g 450 g 680 g fiskefilet
100 g 200 g 300 g purreløk (skåret i
20g 40 g 60 g løk (i tynne skiver)
40g 100 g 140 g gulrot (revet)
10g 10 g 20 g smør eller
1
1 ss 1
50g 100 g 150 g crème fraîche
50g 100 g 150 g Gouda(revet)
/2ss 2 ss sitronsaft
ringer)
margarin
salt, pepper og
muskat
Gratinert fiskefilet, ‘Italia’
0,5 kg 1,0 kg 1,5 kg
200 g 430 g 630 g fiskefilet
1
/2ss 1 ss 11/2ss sitronsaft
1
/2ss 1 ss 11/2ss ansjossmør
30g 50 g 80 g Gouda (revet)
salt ogpepper
150 g 300 g 450 g friske tomater
1 ss 1
100 g 180 g 280 g Mozzarella
1
1
/2ss 2 ss hakkede,
/2ss3/4ss 1 ss basilikum (hakket)
blandede urter
1. Ha grønnsaker, smør og krydder i en
gryte, og bland godt. Kok i 2–6
minutter på 900 W, avhengig av
mengde.
2. Vask fisken, tørk, drypp med sitronsaft
og tilsett salt.
3. Bland crème fraiche med grønnsakene
og krydre igjen.
4. Legg halvparten av grønnsakene i en
gratineringsform. Legg fisken på toppen
og dekk med resten av grønnsakene.
5. Fordel Gouda på toppen, plasser
formen på den lave risten og still ovnen
på AUTOTILBEREDNING, “Gratinert
fiskefilet”.
6. Når maten er kokt, tas den ut av ovnen.
La den få hvile i 5 minutter før servering.
1. Skyll og tørr fisken. Ha over sitronsaft og
salt, og smør den inn med ansjossmør.
2. Plasser fisken i en gratineringsform
(størrelsen avhenger av vekten).
3. Strø Gouda over fisken.
4. Legg tomatene over osten.
5. Krydre med salt, pepper og
urteblandingen.
6. La mozzarellaosten dryppe av seg,
skjær den i skriver og plasser den oppå
tomatene. Strø basilikum over osten.
7. Plasser gratineringsformen på den lave
risten og still ovnen på
AUTOTILBEREDNING, “Gratinert
fiskefilet”.
8. Når maten er kokt, tas den ut av ovnen.
La den få hvile i 5 minutter før servering.
Page 55

electrolux tabeller programmer
55
Spinatgrateng
0,5 kg 1,0 kg 1,5 kg
150 g 300 g 450 g bladspinat (tint og
15g 30 g 45 g løk (finhakket)
5 g 10g 15 g smør eller
150 g 300 g 450 g kokte poteter (i
35g 75 g 110g kokt skinke (i
50g 100 g 150 g crème fraîche
123eggs
40g 75 g 115g revet ost
avrent)
salt, pepper og
muskat
margarin (till å
smøre formen)
skiver)
terninger)
Potet og squash-grateng
0,5 kg 1,0 kg 1,5 kg
5 g 10 g 15 g smør eller
200 g 400 g 600 g kokte poteter (i
115 g 230 g 345 g squash (i tynne
75 g 150 g 225 g crème fraîche
123eggs
1
/
12hvitløksfedd
2
40 g 80 g 120 g revet Gouda
10 g 20 g 30 g solsikkekjerner
margarin (till å
smøre formen)
skiver)
skiver)
(presset)
salt og pepper
1. Bland bladspinaten med løken og
krydre med salt, pepper og muskat.
2. Smør inn gratineringsformen. Plasser
potetskiver, skinke og spinat i lag oppå
hverandre i formen. Det øverste laget
bør være spinat.
3. Visp sammen egg, crème fraiche, salt
og pepper, og hell blandingen over
gratengen.
4. Dekk gratengen med den revne osten.
5. Plasser på den lave risten og stek på
AUTOTILBEREDNING, “Grateng”.
6. Når maten er kokt, tas den ut av
ovnen. La den få hvile i 5–10 minutter
før servering.
1. Smør inn gratineringsformen og legg
lag av potetskiver og squash oppå
hverandre i formen.
2. Visp sammen egg, crème fraiche, salt,
pepper og hvitløk, og hell blandingen
over gratengen.
3. Ha over revet gulost.
4. Dryss til slutt med solsikkefrø.
5. Plasser på den lave risten og stek på
AUTOTILBEREDNING, “Grateng”.
6. Når maten er kokt, tas den ut av
ovnen. La den få hvile i 5–10 minutter
før servering.
Page 56

56
electrolux tabeller programmer
Tilberedningstabell
Forkortelser som brukes
ss = spiseskje
ts = teskje
Mat/drikke Mengde Inns- Effektnivå Tid Tips
Melk 1kopp 150 Micro 900 W ca. 1 skal ikke dekkestil
Vann 1 kopp 150 Micro 900 W ca. 2 skal ikke dekkes til
6 kopper 900 Micro 900 W 8-10 skal ikke dekkes til
1 bolle 1000 Micro 900 W 9-11 skal ikke dekkestil
Tallerkenretter 400 Micro 900W 4-6 skvettlitt vann over sausen og dekk til;
(Grønnsaker,kjøtt rør etter halvgåttprogram
ogtilbehør)
Stuing / suppe 200 Micro 900 W 1-2 til, rør etter oppvarming
Grønnsaker 200 Micro 900 W 2-3 ha i littvann, om nødvendig og dekktil;
Kjøtt, 1 stykke* 200 Micro 900W ca. 3 dekk med ettynt lag saus, og dekk til
Fiskefilet* 200 Micro 900W 3-5 dekk til
Kake, 1 stykke 150 Micro 450W
Babymat, 1 glass 190 Micro 450W
Smelte margarin 50 Micro 900 W
eller smør*
Smelte sjokolade 100 Micro 450 W 3-4 rør med jevne mellomrom
kopp = en full
kopp
KG = kilogram
g = gram
l = liter
ml = milliliter
cm = centimeter
Varme opp mat og drikke
-g/ml- tilling -Innstilling- -Min-
500 Micro 900 W 3-5 rør etterhalvgått program
1
/2-1 leggi en ildfast form
1
/2-1 hai en beholder beregnet på
mikrobølgeovner, og rør godtetter
oppvarming; sjekkatmaten ikkeerfor
varm
1
/
dekktil
2
min = minutter
* Kjøleskapstemperatur
Tining
Mat Mengde Inns- Effektnivå Tid Tips Hviletid
-g- tilling-Innstilling--Min- -Min-
Gulasj 500 Micro 270 W 8-9 rør etterhalvgått program 10-30
Kaker, pr. stykke 150 Micro 270 W 1-3 legg i enildfastform 5
Frukt f.eks.kirsebær 250 Micro 270 W 3-5 fordel frukten jevnt, og vendden etter 5
jordbær, halvgått program
bringebær, plommer
Tidenesom oppgisi denne tabellen er kun retningslinjerogkan variere avhengig avstarttemperatur,
sammensetning ogvekt.
Page 57

electrolux tabeller programmer
Tining & Tilberedning
Mat Mengde Inns- Effektnivå Tid Tilsett Tips Hviletid
Fiskefilet 300 Micro 900 W 9-11 - dekk til 2
Tallerkenretter400 Micro 900 W 8-10 - dekktil, rør etter 6 minutter 2
Brokkoli 300 Micro 900 W 6-8 3-5 dekk til, og røretterhalvgått program 2
Erter 300 Micro 900 W 6-8 3-5 dekktil, og rør etter halvgåttprogram 2
Blandede 500 Micro 900 W 9-11 3-5 dekk til,ogrør etter halvgått program 2
gr.saker
Mat Mengde Inns- Effektnivå Tid Tips Hviletid
Brokkoli 500 Micro 900 W 6-8 del i små buketter, tilsett 4–5 ss vann, -
Erter 500 Micro 900 W 6-8 dekk til, tilsett 4–5 ss vann, rør av og til -
Gulrøtter 500 Micro 900 W 9-11 skjær i skiver, tilsett 4–5 ss vann, dekk til, -
Stek 1000 Micro 450 W 16-18 smak til med krydder, plasser på den 10
(Svin, kalv, Dobbelt 450 W 5-7 * lave risten snu etter *
lam) Micro 450 W 14-16
Oksestek 1000 Micro 630 W 5-8 krydre, og legg på den lave risten; 10
(medium) Dobbelt 630 W 8-10 * vend etter *
Kyllinglår 200 Dobbelt 450 W 6-7 * smak til medkrydder, plasser med 3
Rumpsteak 400 Grill 11-12 * plasser på den høye risten, snu etter *,
2 stk., Grill 6-8 krydre etter grilling
medium
Bruning av Grill 8-13 sett formen på den lave risten
gratengretter
Croque 1 stk. Micro 450 W
Monsieur Grill 5-6 legg på en skive kokt skinke, en
Pizza 300 Micro 450 W 4-6 plassere på den lave risten
-g- tilling-Innstilling--Min- vann -Min-
-ss/ml-
Koking/steking, grilling & bruning
-g- tilling -Innstilling- -Min- -Min-
dekk til, rør av og til under tilberedning
under tilberedning
rør av og til under tilberedning
Dobbelt 450 W 4-6
1500 Micro 450 W 26-28 10
Dobbelt 450 W 5-8 *
Micro 450 W 26-28
Dobbelt 450 W 4-5
Dobbelt 630 W 3-5
1500 Micro 630 W 12-15 10
Dobbelt 630 W 12-15 *
Dobbelt 630 W 4-6
Grill 4-6 skinnsiden ned på den høye risten, snu etter *
1
/2rist brødet og smør med smør
4 stk. Micro 450 W
1
/2-1 ananasring og en osteskive
Grill 5-6
Dobbelt 450 W 4-6
400 Micro 450 W 6-7
Dobbelt 450 W 5-7
57
Page 58

58
electrolux oppskrifter
Oppskrifter
Alle oppskriftenei denne kokeboken er
for4 porsjoner – hvisikke annet er oppgitt.
Tilpasse oppskrifter for
mikrobølgeovn
Hvis du vil tilpasse din favorittoppskrift
for mikrobølgeovn, bør du legge merke til
følgende:
Kort ned tilberedningstiden med en
tredjedel til halvparten. Følg eksemplene til
oppskriftenei denne kokeboken. Matvarer
som har høyt væskeinnhold, slik som
kjøtt, fisk, fjærkre, grønnsaker, frukt,
stuinger og supper kan tilberedes i
mikrobølgeovnen uten noen problemer.
Løksuppe
Redskaper:Bolle med lokk
(kapasitet på 2 l)
4 suppeboller (200 ml)
Ingredienser
10 g smør eller margarin
100 g løk, i skiver
800 ml kjøttkraft
salt, pepper
2 brødskiver
40 g revet ost
Overflaten på matvarer som inneholder lite
fuktighet, slik som fat med mat, bør fuktes
før oppvarming eller tilberedning.
Mengden væske som tilsettes rå matvarer
som breseres, bør reduseres til ca. to
tredjedeler av den mengden som oppgis i
originaloppskriften. Tilsett mer væske
under tilberedning om det er nødvendig.
Mengden fett som skal tilsettes kan
reduseres vesentlig.
En liten mengde smør, margarin eller
olje er nok til å sette smak på maten.
Derfor er mikrobølgeovnen perfekt for å
tilberede mat med lite fett som en del av
en slankekur.
1. Smør formen, ha i løkringene,
kjøttkraften og krydderet. Dekk til og
kok.
9-11 min. 900 W
2. Rist brødskivene, skjær dem i terninger
og fordel dem i suppebollene. Hell
suppen over det ristede brødet, og
strø ost på toppen.
3. Sett bollene på det roterende fatet, og
grill toppen.
6-7 min. Grill
Page 59

electrolux oppskrifter
59
Auberginer fylt med kjøttdeig
Redskaper:Bolle med lokk
(kapasitet på 1 l)
Lav ildfast form
(ca. 30 cm lang)
Ingredienser
250 g auberginer
200 g tomater
1 ts olivenolje for å smøre inn
formen
100 g løk, opphakket
4 milde grønne chillier uten frø
200 g kjøttdeig
2 fedd hvitløk, pressede
2 ss hakket persille
salt, pepper
paprika
60 g fetaost i terninger
Sopp med rosmarin
Redskaper:Bolle med lokk
(kapasitet på 1 l)
Grunn, rund form med lokk
(ca. 22 cm i diameter)
Ingredienser
8 store sopp (ca. 225 g), hele
20 g smør eller margarin
50 g løk (50 g), finhakket
50 g bacon, i små terninger
svart pepper, malt
frisk rosmarin, hakket
125 ml tørr hvitvin
125 ml fløte
20 g mel
1. Del auberginene i to på langs. Grav
ut innmaten med en teskje til skallet
er ca. 1 cm tykt. Skjær innmaten i
terninger.
2. Fjern skinnet på tomatene og hakk
dem opp.
3. Smør bunnen av formen med
olivenolje. Ha i løken, og kok.
2 min. 900 W
4. Skjær chilliene i ringer. Sett av en
tredel til pynt. Bland kjøttdeigen med
aubergin-eterningene, løk,
tomater, chilliringer, hvitløk og persille.
Krydre etter smak.
5. Tørr aubergineskallene. Fyll dem med
halvparten av kjøttblandingen, legg
på et lag fetaost, og fullfør med
resten av kjøttblandingen.
6. Plasser de halverte auberginene i den
lave, ildfaste formen, plasser formen
på lav rist og tilbered.
11-13 min. Dobbelt Grill (630 W)
Pynt med chilliringer, og fortsett
stekingen.
4-7 min. Dobbelt Grill (630 W)
La maten få hvile i ca. 2 minutter før
servering.
1. Fjern stilkene fra soppen, og hakk
dem deretter i små biter.
2. Smør en lav form. Ha i løk, baconterninger og soppstilkene. Krydre med
pepper og rosmarin, dekk til, og kok.
3-5min. 900W
Avkjøl.
3. Varm fløten og 1 dl av vinen i bollen.
1-3min. 900W
4. Ha resten av vinen og melet i den
varme væsken, rør, dekk til, og kok.
Rør én gang under koking.
approx.1 min. 900 W
5. Fyll soppene med baconblandingen
og plasser dem i en lav form. Hell
sausen over soppene og tilbered dem
på lav rist.
6-8min. DobbeltGrill (630W)
La maten få hvile i ca. 2 minutter før
servering.
Page 60

60
electrolux oppskrifter
Sjøtungefilet
Redskaper:Lav ildfast form og plastfolie
beregnet på mikrobølgeovn
(ca. 26 cm lang)
Ingredienser
400 g filet av sjøtunge
1 sitron
150 g tomater
10 g smør
1 ss vegetabilsk olje
1 ss persille, finhakket
salt ogpepper
4 ss hvitvin
20 g smør eller margarin
Fiskefilet med ostesaus
Redskaper:Bollemedlokk (kapasitetpå1 l)
Lav, rund gratengform
(ca.25 cm lang)
Ingredienser
800 g fiskefileter
2 ss sitronsaft
salt
10 g smør eller margarin
50 g løk, finhakket
20 g mel
100 ml hvitvin
1 ts vegetabilsk olje til smøring av
form
100 g revet emmentalost
2 ss hakket persille
1. Vask fisken og tørk av den. Fjern evt.
bein.
2. Skjær sitron og tomater i tynne skiver.
3. Smør formen med smør. Legg filetene
i formen, og hell over vegetabilsk olje.
4. Dryss over persille, legg på tomatskiver, og krydre. Legg sitronskivene
på toppen, og hell hvitvin over dem.
5. Legg små smørklatter over
sitronskivene, dekk til, og kok.
11-13min. 630W
La maten få hvile i ca. 2 minutter før
servering.
1. Skyll fisken, tørr den, og ha over
sitronsaft. Gni den inn med salt.
2. Smør formen. Ha i hakket løk, dekk
til, og kok.
1-2 min. 900 W
3. Sikt melet over løk- og hvitvinsblandingen, og rør sammen.
4. Smør gratineringsformen og plasser
fisken i den. Hell sausen over fisken
og dryss over ost. Plassere på den
lave risten og start ovnen.
7-8 min. 450 W
14-16min. Dobbelt Grill (450 W)
La maten få hvile i ca. 2 minutter før
servering.
Mandelørret
Redskaper:Grunn oval gratineringsform
(ca. 32 cm lang)
Ingredienser
4 ørreter (200 g), renset
saften fra 1 sitron
salt
30 g smør eller margarin
50 g mel
10 g smør eller margarin for å
smøre formen
50 g mandelflak
1. Vask og tørk ørreten og stenk med
sitronsaft. Gni inn- og utsiden av fisken
med salt, og la hvile i 15 minutter.
2. Smelt smøret.
1 min. 900W
3. Tørk av fisken, smør inn med smør og
rull i melet.
4. Smør inn formen. Legg ørreten i
formen og tilbered på den lave risten.
Når to tredjedeler av tilberedningstiden
har forløpt, snur du ørreten
og strør mandlene over dem.
15-18 min. Dobbelt Grill (450 W)
La maten få hvile i ca. 2 minutter før
servering.
Page 61

electrolux oppskrifter
61
Kalvestuing fra Zürich
Redskaper: Form med lokk (kapasitet på 2 l)
Ingredienser
600 g kalvefilet
10 g smør eller margarin
50 g løk, finhakket
100 ml hvitvin
sukkerkulør til ca.1/2liter saus
300 ml fløte
1 tbsp persille, finhakket
Kalvekotelett med mozzarella
Redskaper: Grunn,firkantet gratinerings
formmedlokk (ca. 25 cmlang)
Ingredienser
150 g mozzarellaost i skiver
500 g hermetiske tomater uten juice
4 kalvekoteletter (600 g)
20 ml olivenolje
2 hakkede fedd hvitløk
20 g pepper, nykvernet
kapers
salt, pepper
Fylt skinke
Redskaper: Bollemed lokk (kapasitet på 2 l)
Oval gratengform (ca. 26 cm
lang)
Ingredienser
150 g hakkede spinatblader
150 g fromage frais med et fettinnhold
på 20 %
50 g revet emmentalost
pepper og paprika
8 slices kokt skinke (300 g)
125 ml vann
125 ml fløte
20 g mel
20 g smør eller margarin
10 g smør eller margarin for
å smøre formen
1. Skjær kalvekjøttet i avlange biter.
2. Smør formen med smør. Ha kjøtt og
løk i formen, dekk til, og kok. Rør én
gang under koking.
6-9 min. 900 W
3. Ha i hvitvin, sukkerkulør og fløte, rør
sammen, dekk til, og fortsett
kokingen. Rør med jevne mellomrom.
3-5 min. 900 W
4. Rør i blandingen etter koking, og la
den få hvile i ca. 5 minutter. Dryss
over persille før servering.
1. Skyll kalvekjøttet, tørr og flatbank det.
Leggkjøttet i formen.
2. Mos tomatene, ha i hvitløk, olje, salt,
pepper, kapers og oregano, og hell
blandingen over kjøttet. Dekk til, og kok.
15-19 min. 630W
Vend biffene.
3. Leggnoen skiver mozzarellaost over
hver biff, krydre og stekpådenhøye
risten, uten å dekke til.
9-12 min. DobbeltGrill (630W)
La maten få hvile i ca. 5 minutterfør
servering.
1. Bland sammen spinat, ost og
fromage frais, og
krydre etter smak.
2. Legg en spiseskje med fyll på hver
skinkeskive og rull sammen. Fest
skinkerullen med en cocktailpinne e.l.
3. Lag hvit saus: Hell vann og fløte i en
bolle, og varm opp.
2-4 min. 900 W
Smuldresmøret i melet, ha i væsken,og
rørtildufåren jevnsaus.Dekk til, og kok
tilsausen tykner.
1-2 min. 900 W
Rør, og smak til med krydder.
4. Ha sausen i den smurte formen, legg
skinkerullene på sausen, ha på lokk
og tilbered.
10-12min. Dobbelt Grill (630W)
La maten få hvile i ca. 5 minutter før
servering.
Page 62

62
electrolux oppskrifter
Lasagne
Redskaper: Bollemed lokk (kapasitet på 2 l)
Grunn, firkantetgratineringsform
med lokk (ca. 20 x 20 x 6 cm)
Ingredienser
300 g hermetiske tomater
50 g opphakket skinke
50 g løk, finhakket
1 fedd hvitløk,presset
250 g kjøttdeig
2 ss tomatpuré
salt ogpepper
150 ml crème fraiche
100 ml melk
50 g revet parmesanost
1 ts blandet opphakkede urter
1 ts olivenolje
1 ts vegetabilsk olje til å smøre
formen
125 g grønne lasagneplater
1 ss revetparmesan
Squash og pastagrateng
Redskaper: Gratineringsform (ca. 26 cm
lang)
Ingredienser
80 g makaroni, kokt
400 g hakkede hermetiske tomater
150 g løk, finhakket
basilikum, timian, salt, pepper
1 ss olivenolje for å smøre inn
formen
450 g squash, i skiver
150 g rømme
2 eggs
100 g revet gulost
1. Hakk tomatene, og bland dem med
skinke, løk, hvitløk, kjøttdeig og
tomatpuré. Krydre, dekk
til, og kok.
5-8 min. 900 W
2. Bland sammen crème fraiche, melk,
parmesanost, urter, olje og krydder.
3. Smør formen og dekk bunnen med
cirka en tredel av pastaen. Ha over
halvparten av kjøttblandingen og litt
saus. Gjenta og avslutt
med resten pastaen. Hell resten av
sausen over pastaen og dryss over
parmesanost. Legg på
lokk og tilbered.
13-17min. 630W
La maten få hvile i 5–10 minutter før
servering.
1. Bland tomater og løk, og krydre godt.
Ha i makaronien. Hell tomatsausen
over makaronien, og fordel
squashskivene på toppen.
2. Visp sammen rømmen og eggene,
og hell blandingen over gratengen.
Ha revet ost på toppen. Sett formen
på den lave risten, og kok.
18-21 min. 900 W
7-8min. DobbeltGrill (630 W)
La maten få hvile i 5–10 minutter før
servering.
Pærer I sjokoladesaus
Redskaper: Bolle med lokk (kapasitet på
2 l)
Bolle med lokk (kapasitet på 1l)
Ingredienser
4 skrelte, hele pærer (600 g)
60 g sukker
10 g pakke vaniljesukker
1 ss pærelikør
150 ml vann
130 g hakket kokesjokolade
100 g crème fraiche
1. Ha sukker, vaniljesukker, pærelikør og
vann i bollen, dekk til, og kok.
1-2min. 900W
2. Ha pærene i væsken, dekk til, og kok.
5-8min. 900W
Ta pærene ut av den varme væsken,
og legg dem i kjøleskapet.
3. Ha50ml av denvarme væsken i en
mindre bolle.Tilsett sjokolade og crème
fraiche,dekk til,ogkok.
2-3min. 900W
4. Rørgodti sausen, og hell over pærene
førservering.
Page 63

electrolux oppskrifter
63
Semulepudding med bringebærsaus
Redskaper: Bolle med lokk (kapasitet på
2 liter)
4 Porsjonsformer
Ingredienser
500 ml melk
40 g sukker
15 g hakkede mandler
50 g semule
1 eggeplomme
1 ss vann
1 eggehvite
250 g bringebær
50 ml vann
40 g sukker
Ostekake
Redskaper: Kakeform (ca. 26 cm i
diameter)
Ingredienser
Bunn:
300 g mel
1 tbsp kakao
10 g bakepulver
150 g sukker
1 egg
10 g smør eller margarintil å smøre
formen
Fyll:
150 g smør eller margarin
100 g sukker
10 g pakke vaniljesukker
3 eggs
400 g fromage frais med 20 %
fettinnhold
40 g pulverisert blanding til
vaniljepudding
1. Ha melk, sukker og mandler i bollen,
dekk til, og kok.
3-5 min. 900 W
2. Tilsett semulegryn, dekk til, og kok.
10-12min. 270W
3. Visp eggeplommen med litt vann i en
kopp og rør den inn i den varme
blandingen. Pisk eggehviten til den er
stiv og skjær den inn i blandingen.
Hell blandingen i porsjonsformer.
4. Lag saus: Vask bringebærene og tørr
dem lett. Ha dem i en bolle sammen
med vann og sukker. Dekk til og varm
opp.
2-3 min. 900 W
5. Mos bringebærene og server med
semulepuddingen.
1. Ha mel, kakao, bakepulver og sukker
i en bolle.
2. Tilsett egg og smør, og kjør
blandingen gjennom en
foodprosessor.
3. Smør formen. Kjevle ut deigen og ha
den over i formen. La det være en
kant på ca. 2 cm. Stek bunnen.
6-8min. 630W
4. Visp sammen smør og sukker til en
lys og lett blanding. Visp inn ett og ett
egg. Tilsett fromage fraisen og
vaniljepulverblandingen.
5. Bre blandingen over bunnen, og stek.
15-19 min. 630 W
Page 64

64
electrolux vedlikehold og rengjøring
Vedlikehold og rengjøring
Innsiden av ovnen
1. For rengjøring: tørk bort sprut eller søl
ADVARSEL! IKKE BRUK
KOMMERSIELLE OVNRENSERE,
DAMPRENGJØRING, SLIPENDE,
GROVE VASKEMIDLER, MIDLER
SOM INNEHOLDER KAUSTISK
SODA ELLER SKUREPUTER PÅ
NOEN DELER AV MIKROOVNEN.
RENGJØR OVNEN MED JEVNE
MELLOMROM OG FJERN
EVENTUELLE MATRESTER. Hvis
ovnen ikke holdes ren kan dette føre
til at overflaten skades,noe somigjen
kan redusere apparatets levetid og
muligvis forårsake en farlig situasjon.
Utsiden
Du kan enkelt gjøre ren utsiden av
ovnen med mild såpe og vann. Tørk av
såpen med en fuktig klut, og tørk av
utsiden med et mykt håndkle.
Ovnens kontrollpanel
Åpne døren før du gjør rent
kontrollpanelet, slik at det deaktiveres.
Vær forsiktig ved rengjøring av
kontrollpanelet. Bruk en klut som bare er
lett fuktet med vann, tørk forsiktig av
panelet inntil det er rent. Ikke bruk for mye
vann. Ikke bruk noen form for kjemisk eller
slipende rengjøringsmiddel.
med en myk, fuktig klut eller svamp
etter hver bruk, mens ovnen fortsatt er
varm. Ved mye søl: bruk mild såpe og
tørk over flere ganger med en fuktig klut
inntil alle matrester er borte.
2. Pass på at det ikke kommer inn såpe
eller vann gjennom de små
ventilåpningene i veggen, dette kan
føre til skade på ovnen.
3. Ikke bruk rengjøringsmidler i sprayform
inne i ovnen.
4. Varm jevnlig opp ovnen ved hjelp av
grillen. Matrester eller fettsprut kan føre
til røyk eller vond lukt.
Dreieplate og dreieplatestøtte
Ta dreieplaten og dennes støtte ut av
ovnen. Vask dreieplaten og støtten i mildt
såpevann. Tørk med en tørr klut. Både
dreieplaten og støtten kan vaskes i
oppvaskmaskin.
Dør
For å fjerne alle spor av smuss, rengjør
bådeut-oginnsidenavdøren, dørforsegling
og lukkeflater regelmessig med en myk,
fuktig klut.Ikke bruk sterkerengjøringsmidler
med slipende effekt eller skarpe
metallskraper til å rengjøre glasset i
ovnsdøren,dadissekanlageriperoverflaten
og føre til at glasset knuses.
Ristene
Disse bør vaskes med et mildt,
flytende oppvaskmiddel og tørkes.
Ristene kan vaskes i oppvaskmaskin.
Merk: Man bør ikke bruke
damprengjørere.
Redusert effektnivå
Viktig:
Hvisdutilbereder mat lengerenn
standardtid med barebaredetlikt
tilberedningsmodus, vil ovnenautomatisk
senke effektnivået for å unngå
Tilberedningsmodus Standardtid Redusert effektnivå
Mikrobølge (900 W) 20 minutter Mikrobølge - 630 W
Grill 20 minutter Grill - 50 %
Dobbelt grill Grill- 20 minutter Grill - 50 %
overoppvarming. (Effektnivået for
mikrobølgenevilblireduserteller det grill vil nå
langt påogav.)Etter en pausepå 90
sekunder,kandustille tilbake til høyt
effektnivå.
Page 65

electrolux Hva du gjør hvis . . . & spesifikasjoner
Hva du gjør hvis...
Hvis Kontroll/råd
Mikrobølgeovnen ikke - Sjekksikringene i sikringsskapet.
virker som den skal? - Ikke strømmen har gått.
Mikrobølgemodus ikke - Døren er lukket godt igjen.
virker som den skal? - Dørtetningen og frontrammen er rene.
Dreieplatenikke dreier? - Dreieplatestativet er korrekt koblet til drevet.
Mikrobølgene ikke - Koble ovnen fra sikringsboksen.
kan slås av? - Kontakt en autorisert ELECTROLUX -serviceagent.
Lyset inne i ovnen ikke - Ring en autorisert ELECTROLUX serviceagent. Lyspæren inne i
lyser som det skal? ovnen må kun skiftes av en autorisert ELECTROLUX-serviceagent.
Det tar lengre tid å - Still inn en lengre tilberedningstid (dobbel mengdemat = nesten dobbel
varme opp og tilberede tilberedningstid) eller,
mat enn før? - Hvis maten er kaldere enn normalt, roter eller snu fratid til annen eller,
- Hvis sikringene fortsetter å gå,kontakt en kvalifisert elektriker.
- Det er trykket på START/+30-knappen.
- Formene ikke går utover kanten av dreieplaten.
- Maten ikke gårutover kanten av dreieplatenslik atden ikke kan rotere.
- Det ikke er noe i fordypningen under dreieplaten.
- Still inn et høyere effektnivå.
Spesifikasjoner
Nettspenning med vekselstrøm
Sikring/kretsbryter for fordelingsledning:
Nødvendig vekselstrømsspenning: Mikrobølge
Dobbelt Grill
Utgangseffekt: Mikrobølge
Mikrobølgefrekvens
Utvendige dimensjoner: EMS26415
Innvendige dimensjoner
Ovnskapasitet
Dreieplate
Vekt
Ovnslampe
* Dette produktet oppfyller kravene i den europeiske standarden EN55011.
I tråd med standarden er produktet klassifisert som ustyr i gruppe 2, klasse B.
Gruppe 2 betyr at utstyret med overlegg genererer radiofrekvent energi i form av
elektromagnetisk stråling for varmebehandling av mat.
Klasse B betyr at utstyret er egnet for bruk i private husholdninger.
** Innvendig kapasitet er beregnet ved å måle maksimal bredde, dybde og høyde.
Faktisk kapasitet for mat er mindre enn dette.
Denne ovnen er i overensstemmelse med kravene i direktiv 2004/108/EC og
SPESIFIKASJONEN KAN ENDRES UTEN FORVARSEL SOM EN DEL AV VÅRT ARBEID
FOR KONTINUERLIG FORBEDRING.
: 230V,50 Hz, enfaset
: Minimum 16 A
: 1.37 kW
Grill
: 1.00 kW
: 2.35 kW
: 900W (IEC 60705)
Grill
: 1000 W
: 2450 MHz* (Gruppe 2 / Klasse B)
: 594mm(W) x 459 mm (H) x 404 mm (D)
: 342mm(W) x 207 mm (H) x 368 mm (D)**
: 26 liter**
: ø 325 mm, glass
: ca.19.5kg
: 25 W/240- 250V
2006/95/EC.
65
Page 66

66
D
4 mm
electrolux installering
Installering
Eksempler på tillatt installasjon A
eller B:
Stilling Størrelse på åpningen
A 560x550x450
B 560x500x450
Mål i (mm)
StillingA
Stekeovn
W D H
StillingB
Installere ovnen
1. Fjern all emballasje og kontroller om
det er tegn på skade.
2. Før ovnen sakte og forsiktig inn i
kjøkkenskapet, inntil ovnens fremre
ramme sitter tett mot
skapåpningen.
3. Sikre at enheten er stabil og ikke
sitter skrått. Pass på at det er en
åpning på 4 mm mellom skapdøren
og toppen av rammen (se diagram).
Innstillingsalternativ 1:
Fest ovnen med medfølgende skruer.
Festepunktene finnes i ovnens øvre og
nedre hjørner.
Innstillingsalternativ 2:
Se malene som følger med denne
ovnen.
Important:
Sett eller fest ovnen slik at bunnen
på ovnen kommer 85 cm eller mer
over gulvet. Det er viktig at du
forsikrer deg om at installeringen
av produktet er i overensstemmelse
med instruksjonene i denne
brukerhåndboken og instruksjonene
til produsenten av stekeovnen.
Page 67

electrolux installering
67
Tilkoble ovnen til
strømforsyning
• Strømuttaket bør være lett
tilgjengelig, slik at enheten lett
kan kobles fra strømnettet i
nødstilfelle. Hvis det ikke er
tilfelle, skal det være mulig å
bryte strømforsyningen til
ovnen ved å montere en bryter
på den faste ledningen i
overensstemmelse med
regelverk for elektriske
tilkoblinger.
• Stikkontakten bør ikke være
plassert bak skapet.
• Den beste plasseringen er over
skapet, se (A).
• Koble ovnen til enfaset vekselstrøm
på 230 V / 50 Hz via et korrekt
installert og jordet uttak.
Uttaket må være utstyrt med
sikring på 16 A.
• Strømledningen kan bare
skiftes ut av en autorisert
elektriker.
• Før installering binder man en
hyssing til strømledningen for å
gjøre det lettere å koble til punkt
(A) når ovnen er installert.
• Pass på at strømledningen IKKE
kommer i klem når ovnen settes
inn i skapet.
• Ikke senk strømledningen eller
kontakten i vann eller andre
væsker.
Elektriske tilkoblinger
ADVARSEL! DENNE
OVNEN MÅ JORDES
Produsenten fraskriver seg
erstatningsansvar dersom
denne forholdsregelen ikke
følges.
Hvis støpselet som finnes på
ovnens strømledning ikke passer til
strømuttaket, kontakt din lokale,
autoriserte Electrolux-serviceagent.
Page 68

68
electrolux miljøinformasjon
Miljøinformasjon
Økologisk forsvarlig avhending av
emballasje og gammelt utstyr
Emballasje
Electrolux mikrobølgeovner krever
effektiv emballasje som beskyttelse
under transport. Kun minimalt med
emballasje er brukt.
Emballeringsmaterialer (f. eks. folie eller
polystyren) kan utgjøre en fare for
barn.
Kvelningsfare. Hold
emballeringsmaterialer
utilgjengelig for barn.
Det er kun brukt miljøvennlig
emballeringsmateriale som kan
resirkuleres. Pappen er laget av
resirkulert papir, og deler av tre er
ubehandlet. Plastartikler er merket
som følger:
«PE» polyetylen, f. eks.
emballeringsfilm
«PS» polystyren, f. eks. emballering
(uten klorflurkarbonder – CFC)
«PP» polypropylen, f. eks.
emballeringsremmer
Ved bruk og gjenbruk av
emballasjen, sparer man råmaterialer
og reduserer avfallsvolum.
Emballasjen bør tas med til
nærmeste resirkuleringssenter.
Kontakt lokale myndigheter for mer
informasjon.
Symbolet på produktet eller
på emballasjen viser at dette
produktet ikke må behandles som
husholdningsavfall. Det skal derimot
bringes til et mottak for resirkulering
av elektrisk og elektronisk utstyr. Ved
å sørge for korrekt avhending av
apparatet, vil du bidra til å forebygge
de negative konsekvenser for miljø og
helse som gal håndtering kan
medføre. For nærmere informasjon
om resirkulering av dette produktet,
vennligst kontakt kommunen,
renovasjonsselskapet eller
forretningen der du anskaffet det.
Avhending av gammelt utstyr
Gammelt utstyr bør gjøres sikkert
før avhending ved å fjerne støpselet
og kutte av og kaste ledningen.
Den bør deretter tas med til
nærmeste resirkuleringssenter. Sjekk
med lokale myndigheter eller din
elektohandler om det finnes fasiliteter
for resirkulering av utstyret i ditt
nærområde.
Page 69

Garanti / Kundeservice
electrolux garanti / kundeservice
69
Service
Ved behov for service på ditt produkt, bør
du kontakte din lokale forhandler for å få
opplysninger om vår lokale reparatør.
Du kan også besøke vår
internettadresse www.electrolux.no der
du finner frem til din nærmeste reparatør
eller ringe 815 30 222 for opplysninger
vedrørende dette.
Service og reservedeler
Husk alltid å oppgi modellbetegnelse,
produktnummer, serienummer og
kjøpsdato ved bestilling av service eller
reservedeler. Dette finner du på
dataskiltet på produktet og som kan
være lurt og skrive opp nedenfor. Husk at
kjøpsbevis må fremvises til servicemann
ved en eventuell reklamasjon.
Modell betegnelse ...............................
Produktnummer ..................................
Serienummer: .....................................
Kjøpsdato ...........................................
Reservedeler
Som forbruker kan du bestille deler
hos E-Service Oslo AS på:
Telefon: 22 72 58 30
Fax: 23 20 74 41
Internett: post@e-serviceoslo.no
Leveringsbetingelser
Produkter solgt til forbruker i
Norge, er underlagt Lov om
forbrukerkjøp.
Dersom det inntreffer feil eller
mangler som omfattes av loven innen
lovens frister, utbedres dette uten
omkostninger for deg. Feil eller skader
som oppstår, som er brukerbetinget
eller ligger utenfor leverandørens
kontroll, omfattes ikke av loven. En
reparasjon vil da normalt belastes
bruker. All service/reparasjon skal
utføres av serviceverksteder godkjent
av leverandør. Inngrep/reparasjo-ner
skal kun utføres av fagperson og i
henhold til gjeldende forskrifter.
Ved næringskjøp mellom to
profesjonelle parter gjelder egne
bestemmelser i hht. NEL’s
leveringsbetingelser og Lov om kjøp.
Leverandør:
Electrolux Home Products Norway A/S
Risløkkveien 2
0508 Oslo
Tlf. 81530222
E-mail: kundeservice@electrolux.no
Internett: www.electrolux.no
Page 70

70
electrolux garanti / kundeservice
Europeisk Garanti
Dette apparatet er dekket av
garantien fra Electrolux i alle de landene
som er oppført på baksiden av denne
håndboken for den tidsperioden som er
spesifisert i apparatets garanti eller ellers
gjennom kjøpsloven. Hvis du flytter fra et
av disse landene til et annet land som er
oppført på listen nedenfor, vil apparatets
garanti flytte sammen med deg, forutsatt
at følgende betingelser overholdes:
• Apparatets garanti starter fra den
dato du først kjøpte apparatet,
som bekreftes ved fremleggelse av
gyldig kjøpsdokument, som
utstedes av den som solgte deg
apparatet.
• Apparatets garanti gjelder for
samme periode og i samme
utstrekning for arbeid og deler for
denne spesifikke modellen eller
typen apparat, som er i handelen i
det nye landet du bor i.
• Apparatets garanti gjelder personlig
for den som opprinnelig kjøpte
apparatet og kan ikke overdras til
annen bruker.
• Apparatet installeres og brukes i
overensstemmelse med
instruksjonene som er utstedt av
Electrolux og må kun brukes i
vanlig husholdning, dvs. må ikke
brukes til kommersielle formål.
• Apparatet installeres i
overensstemmelse med alle
relevante forskrifter som gjelder i
det nye landet du bor i.
Bestemmelsene i denne
europeiske garantien har ingen
innflytelse på de rettighetene du
innrømmes gjennom loven.
Page 71

electrolux informazioni sulla sicurezza
IMPORTANTE: ISTRUZIONI PER LA SICUREZZA
PERSONALE DA LEGGERE ATTENTAMENTE E
CONSERVARE PER OGNI RIFERIMENTO FUTURO
Per evitare pericolo d'incendi
Il forno a microonde non deve
rimanere incostudito durante il
funzionamento. I livelli di potenza
troppoalti o i tempi di cotturatroppo
lunghi possono surriscaldare il cibo
e causare un incendio.
La presa di corrente deve essere
facilmente accessibile, in modo da poter
staccare facilmente il cavo di
alimentazione in caso d'emergenza.
La tensione di alimentazione del
forno deve essere di 230 V, 50 Hz, con
un fusibile del quadro di distribuzione o
un salvavita di un minimo di 16 A.
Si raccomanda di usare un circuito
elettrico di alimentazione separato
esclusivamente per questo prodotto.
Il forno non deve essere usato o
lasciato all’aperto.
Se il cibo che si riscalda nel forno
comincia a sprigionare fumo, NON
APRITE LO SPORTELLO. Spegnete
il forno, staccate il cavo di
alimentazione. Prima di riaprire lo
sportello accertatevi che non ci sia
più fumo all’interno del forno Se si
apre lo sportello mentre il cibo sta
ancora fumando c’è il pericolo
d’incendio.
Usate esclusivamente recipienti
e utensili adatti per forni a
microonde.
Non lasciate il forno incustodito
usando plastica, carta od altro
recipiente infiammabile a perdere.
Dopo l'uso, pulite sempre il
coperchio guida onde, la cavità del
forno, il piatto girevole e il sostegno
rotante. Essi devono essere asciutti
ed esenti da grasso. Gli accumuli di
grasso possono surriscaldarsi,
fumare o infiammarsi.
Non mettete materiali infiammabili
vicino al forno o alle aperture di
ventilazione.
Nonbloccatele aperture diventilazione.
Togliete dal cibo e dal suo involucro i
sigilli e fili di chiusura metallici. La
formazione di scintille sulle superfici
metalliche può causare incendi.
Non usate il forno a microonde per
friggere o riscaldare l'olio di frittura. La
temperatura in tal caso non può essere
controllata e può causare un incendio.
Per fare il granoturco soffiato
(popcorn), usate esclusivamente le
confezioni apposite per microonde.
Non conservate cibo od oggetti
all'interno del forno.
Controllate le regolazioni dopo aver
avviato il forno, per accertarvi che esso
funzioni nel modo desiderato.
Usate questo manuale d’istruzioni.
Per evitare danni alle persone
Attenzione! Non usate il forno
se è danneggiato o non funziona
normalmente. Controllate quanto
segue prima di continuare ad
usarlo:
71
Page 72

72
electrolux informazioni sulla sicurezza
a) Che lo sportello si chiuda
correttamente e che non sia
deformato.
b) Che le cerniere e i dispositivi di
chiusura dello sportello non siano
rotti o allentati.
c) Che la guarnizioni e le superfici
tenuta dello sportello non siano
danneggiate.
d) Che la cavità del forno o lo
sportello non siano ammaccati.
e) Che il cavo di alimentazione e la
sua spina non siano danneggiati.
Non cercare mai di adattare,
riparare o modificare il forno
personalmente. Qualsiasi intervento
di assistenza o riparazione
dell'apparecchio che richieda la
rimozione della copertura di
protezione dall'esposizione diretta
alle microonde deve essere
effettuato esclusivamente da
personale specializzato.
Non fate funzionare il forno con lo
sportello aperto, e non modificate in
alcun modo le chiusure a scatto del
forno.
Non fate funzionare il forno se c'è
un oggetto tra le guarnizioni e le
superfici di tenuta dello sportello.
Evitare che si accumulino grasso
e sporco sulle guarnizioni dello
sportello o nelle parti adiacenti.
Seguire le istruzioni riportate nella
sezione "Manutenzione & pulizia".
Se il forno non viene mantenuto
pulito, la superficie potrebbe
deteriorarsi compromettendo la
durata dell'apparecchio e
comportando possibili situazioni di
rischio.
Chi porta uno STIMOLATORE
CARDIACO deve rivolgersi al medico o
al fabbricante dello stimolatore cardiaco
riguardo alle precauzioni da prendere
per l'uso del forno a microonde.
Per evitare le scosse elettriche
Il mobile del forno non deve
assolutamente essere smontato.
Non inserite alcun oggetto nelle
aperture di ventilazione del forno.
Se vi cade accidentalemte del liquido
all’interno del forno, spegnetelo
Immediatamente, staccate il cavo di
alimentazione e chiamate un tecnico del
servizio ELECTROLUX autorizzato.
Non immergete il cavo di
alimentazione o la sua spina nell’acqua
od altro liquido.
Tenete il cavo di alimentazione
lontano da superfici riscaldate,
compresa la parte posteriore del forno.
Non cercate di sostituire da soli la
lampadina del forno, e non fatela
sostituire se non da personale
autorizzato.
Se la lampadina si guasta, rivolgetevi
al rivenditore o ad un tecnico di servizio
ELECTROLUX autorizzato.
Se il cavo di alimentazione del forno
dovesse danneggiarsi, fatelo sostituire
da un tecnico autorizzato.
Per evitare esplosioni o bolliture
improvvise
Attenzione ! Non riscaldare
liquidi o altri cibi in contenitori
sigillati, perché potrebbero
esplodere.
Non usate mai recipienti sigillati.
Togliete i sigilli e coperchi prima dell'uso.
I recipienti sigillati possono esplodere a
causa dell'aumento della pressione,
anche dopo lo spegnimento del forno.
Fate attenzione usando il forno a
microonde con i liquidi. Usate recipienti
con grandi aperture che permettano la
fuoriuscita delle bolle d’aria.
Page 73

electrolux informazioni sulla sicurezza
73
Il riscaldamento delle bevande
nel microonde può provocare
un'ebollizione ritardata, si consiglia
la massima attenzione quando si
toglie il recipiente dal forno.
Per evitare le improvvise eruzioni del
liquido bollente con possibli bruciature:
1. Rigirate il liquido prima di
scaldarlo/riscaldarlo.
2. Si consiglia di inserire nel liquido
un’asticciola di vetro od altro oggetto
similare durante il riscaldamento.
3. Lasciate riposare il liquido nel forno alla
fine del tempo di cottura per almeno 20
secondi, per evitare la bollitura con
eruzioni ritardate.
Non usare il forno a microonde
per cuocere le uova con il guscio né
per riscaldare le uova sode intere,
perché potrebbero esplodere dopo
la fase di riscaldamento. Per
cucinare o riscaldare le uova che
non sono state strapazzate,
foratene il tuorlo e l'albume.
Sgusciate e affettate le uova sode
prima di riscaldarle nel forno a
microonde.
Forate la buccia delle patate,
salcicce e frutta prima di cucinarle,
perché altrimenti possono esplodere.
Per evitare scottature
Mai toccare o alzare la resistenza
quando è calda.
Usare presine o guanti da cucina
per togliere il cibo dal forno.
Per evitare le ustioni causate dal
vapore, aprire sempre contenitori,
recipienti per pop-corn, sacchetti da
forno, ecc. tenendoli lontani dal viso e
dalle mani.
Per evitare bruciature,
controllare sempre la temperatura
del cibo e rimescolarlo prima di
servirlo, facendo particolarmente
attenzione alla temperatura dei cibi
e delle bevande prima di imboccare
neonati, bambini ed anziani.
La temperatura del contenitore non
corrisponde necessariamente a quella
del cibo controllare sempre la
temperatura del cibo.
Perevitare le scottaturecausate dalla
fuoriuscita del vapore e del calore,
allontanarsi dallo sportello del forno
durante l’apertura.
Tenere i bambini lontani dallo
sportello e dalle altre parti accessibili che
possono surriscaldarsi durante l'utilizzo
del grill. I bambini devono essere tenuti
lontani per evitare che possano
bruciarsi.
Utilizzando le funzioni GRILL,
COTTURA COMBINATA e COTTURA
AUTOMATICA non toccare lo sportello
del forno, il mobile esterno, resistenza, le
prese d’aria, gli accessori e i piatti,
perché diventano molto caldi. Prima di
pulirli, è bene verificarne la temperatura.
Per evitare che i bambini usino il
forno in modo sbagliato
Attenzione! Permettere ai
bambini di usare il forno a
microonde senza controllo di
adulti solo quando sono state
fornite adeguate istruzioni in
modo che questi possano farlo in
modo sicuro ed abbiano ben
compreso i rischi derivanti da un
uso non appropriato.
Questo apparecchio non è stato
progettato per essere utilizzato da
bambini, persone con capacità fisiche,
sensoriali o mentali ridotte o inesperte
senza la supervisione o senza istruzioni
da parte di una persona responsabile
della loro sicurezza.
Tenere lontano dalla portata dei
bambini.
I bambini devono usare il forno
soltanto in presenza di un adulto.
Page 74

74
electrolux informazioni sulla sicurezza
Non lasciare che i bambini si
appoggino o si dondolino contro lo
sportello del forno. Inoltre, non
permettere loro di usare il forno comeun
giocattolo.
Illustrare ai bambini le norme di
sicurezza: insegnare loro ad usare le
presine per togliere i piatti dal forno, a
rimuovere con precauzione i coperchi e,
in particolare, gli involucri (ad esempio i
materiali autoriscaldanti) usati per
rendere il cibo croccante, in quanto
possono diventare estremamente caldi.
Altri avvertimenti
Non modificate il alcun modo il
forno. Questo forno serve alla
preparazione dei cibi in casa e deve
essere usato esclusivamente per la
loro cottura. Esso non è adatto per
l'uso commerciale o in laboratorio.
Per evitare difetti di funzionamento
o danni al forno
Maimettere in funzione il forno vuoto,
se non nel caso indicato nel manuale di
istruzioni (vedere nota 2 a pagina 83), in
quanto si potrebbe danneggiare il forno.
Usando un piatto per rosolare i cibi,
o del materiale autoriscaldante, mettete
sempre sotto di esso del materiale
isolante resistente al calore, come un
piatto di porcellana, per evitare danni al
piatto rotante e al sostegno rotante. Non
dovete inoltre superare il tempo di
preriscaldamento specificato nelle
istruzioni del piatto.
Non usate utensili metallici, perché
riflettono le microonde e causano la
formazione di scintille. Non mettete
barattoli nel forno.
Usate soltanto il piatto rotante e il
sostegno rotante progettati per questo
forno. Non utilizzare il forno senza il
piatto girevole.
Per evitare che il piatto rotante si
rompa:
(a)Prima di pulire il piatto rotante con
acqua, lasciatelo raffreddare.
(b)Non mettete cibi o utensili caldi sul
piatto rotante freddo.
(c)Non mettete cibi o utensili freddi sul
piatto rotante caldo.
Non usate contenitori di plastica se il
forno è ancora caldo dopo aver usato il
GRILL, la COTTURA COMBINATA o la
COTTURA AUTOMATICA, perché
potrebbero fondersi. I contenitori di
plastica non devono essere usati con le
funzioni sopra indicate, a meno che il
loro fabbricante non assicuri che sono
adatti allo scopo.
Non mettete alcun oggetto sul
mobile esterno durante il funzionamento
del forno.
Nota:
Se non siete sicuri sul modo di
collegare il forno, rivolgetevi ad un
elettricista qualificato.
Il fabbricante e il rivenditore non
possono essere ritenuti responsabili per
i danni al forno e/o alle persone causati
da un non corretto collegamento
elettrico.
Sulle pareti del forno, o intorno alle
guarnizioni e superfici di tenuta dello
sportello, potrebbero formarsi vapore o
gocce d'acqua. Ciò è normale e non
indica una perdita o un difetto del forno
.
Page 75

Descrizione del prodotto
1 2
electrolux descrizione del prodotto
3
4
5
75
9876
1 Resistenza del grill
2 Cornice
3 Luce del forno
4 Pannello di controllo
14
5 Pulsante apertura sportello
6 Coperchio guida onde
7 Cavità del forno
8 Perno del piatto rotante
9 Guarnizioni e superfici di
tenuta sportello
10 Punti di fissaggio (4 punti)
11 Aperture di ventilazione
12 Copertura esterna
13 Struttura posteriore
14 Cavo di alimentazione
Accertarsi che la confezione contenga i
seguenti accessori:
(1) Piatto rotante (2) Supporto per piatto rotante
(3) Griglia alta (4) Griglia bassa
(5) 4 viti di fissaggio (non indicato)
• Posizionare il supporto del piatto rotante
sull'apposito perno che si trova sulla base
della cavità del forno.
• Inserirvi quindi il piatto rotante.
• Onde evitare di danneggiare il piatto rotante,
accertarsi di sollevare perfettamente i piatti o
i contenitori dal bordo del piatto rotante
quando li si toglie dal forno.
NOTA: Per ordinare gli accessori rivolgersi al
proprio rivenditore o al tecnico di servizio
Electrolux autorizzato ed indicare il nome della
parte e del modello.
10
11
12
13
1
2
3
4
Page 76

76
electrolux descrizione del prodotto
Pannello di controllo
1 Display digitale indicatori
Grill
1
2
3
4
5
6
7
2 Indicatori COTTURA AUTOMATICA
8
3 Pulsante COTTURA AUTOMATICA
4 Pulsante SCONGELAMENTO
9
5 Pulsante LIVELLO DI POTENZA
6 Pulsante GRILL
7 Manopola TIMER/PESO
10
8 Pulsante di START/+30
9 Pulsante di STOP
10 Pulsante di APERTURA SPORTELLO
Microonde
Cottura combinata
Orologio
Fasi di cottura
Più/meno
Cottura automatica pane
Cottura automatica
Peso
AUTOMATICO
Page 77

Prima dell’uso
electrolux prima dell’uso
77
Funzione Econ
Il forno è impostato nella funzione a
“RISPARMIO ENERGETICO” (“Econ”).
1. Collegare il forno.
2. Sul display non apparirà nulla.
3. Aprire lo sportello e si avvierà la
corrente.
4. Chiudere lo sportello e sul display
apparirà la scritta “Econ”.
5. Sul display apparirà il conto alla
rovescia da 3:00 a zero.
6. Raggiunto lo zero il forno entrerà
nella funzione “Econ” ed il display
ritornerà privo di scritte.
7. Per uscire dalla funzione “Econ”
regolare l’orologio.
8. Per inserire la funzione “Econ” dopo
aver regolato l’orologio aprire lo
sportello, premere il pulsante
START per 5 secondi, premere il
pulsante STOP e chiudere lo
sportello.
Come impostare l'orologio
L’orologio del forno è di 12 ore.
Esempio:Perimpostare 11:30 sull'orologio.
1. Collegare il forno.
2. Sul display non apparirà nulla.
3. Aprire lo sportello e si avvierà la
corrente.
4. Con lo sportello aperto ruotare la
manopola TIMER/PESO per
regolare l’ora.
5. Premere una volta il pulsante
START/+30 e ruotare la
manopola TIMER/PESO per
regolare i minuti.
6. Premere il pulsante START/+30 .
7. Controllare il display:
8. Chiudere lo sportello.
Nota:
1. La manopola TIMER/PESO si può
ruotare in senso orario o antiorario.
2. Quando è inserito l’orologio non è
possibile avviare la funzione a
RISPARMIO ENERGETICO.
Regolare l’ora quando
l'orologio è impostato o il
forno è in modalità
"Risparmio energetico”
Esempio:Perimpostare 12:45 sull'orologio.
1. Aprire lo sportello.
2. Tenere premuto per 5 secondi il
pulsante START/+30 . Il forno
emetterà un segnale acustico.
Ruotare la manopola TIMER/PESO
per regolare l’ora.
3. Premere una volta il pulsante
START/+30 e ruotare la
manopola TIMER/PESO per
regolare i minuti.
4. Premere il pulsante START/+30 .
5. Controllare il display:
Il pulsante di STOP serve
Il pulsante di STOP serve per:
1. Cancellare un errore durante la
programmazione.
2. Fermare temporaneamente il forno a
microonde durante la cottura.
3. Premendo il pulsante due volte,
cancellare un programma durante la
cottura.
Page 78

78
electrolux funzionamento
Blocco di sicurezza per
bambini
Il forno è dotato di un dispositivo di
sicurezza che previene l’uso
accidentale del forno da parte dei
bambini. Quando è inserito il blocco di
sicurezza, non funziona nessuna parte
del forno fino al suo successivo
disinserimento.
Esempio: Inserimento del blocco di
sicurezza per bambini.
1. Tenere premuto per 5 secondi il
tasto STOP.
Il forno emetterà un segnale acustico
e sul display apparirà la scritta
“LOC”.
Nota:
• Per disinserire il blocco di
sicurezza tenere premuto per 5
secondi il pulsante STOP: il forno
emetterà due segnali acustici e sul
display sarà visualizzata l’ora.
• Se non è inserito l’orologio non è
possibile inserire il dispositivo di
blocco di sicurezza per bambini.
Consigli e suggerimenti
Per cuocere/scongelare alimenti in
un forno a microonde, è necessario che
l’energia delle microonde possa
passare attraverso il contenitore e
penetrare negli alimenti stessi.
Per questo, è importante scegliere
un contenitore adatto.
I piatti rotondi/ovali sono preferibili
rispetto a quelli quadrati/oblunghi,
perché il cibo che si trova negli angoli
tende a cuocere troppo.
Per garantire una cottura uniforme,
è importante girare, ridisporre o
rimescolare gli alimenti.
A questo punto, è necessario
lasciare riposare brevemente gli alimenti
per consentire al calore di diffondersi
uniformemente attraverso gli alimenti
stessi.
Page 79

electrolux funzionamento
Tecniche di cottura
Disposizione Posizionareleparti più spesse dell’alimento versolaparte esterna del vassoio di
cottura. Ad esempio,nel caso di cosce di pollo.
Copertura Utilizzare pellicola protettiva, forandola per la ventilazione,o un coperchio adatto.
Foratura Primadella cottura o del riscaldamento, glialimenti conguscio,pelle o membrana
devono essere foratiindiversipunti, poiché la formazione interna di vapore potrebbe
causare l’esplosionedell’alimento stesso. Ad esempio, nel casodi patate, pesce,
pollo,salsicce.
Importante: Nonutilizzare il forno a microonde per cuocere uova poiché queste
potrebbero esplodere, anche dopo la cottura.Adesempio, nel caso di uovain
camicia, fritteo sode.
Rimescolare, Per unacotturauniforme,è necessario rimescolare, girareo ridisporre gli alimenti.
girare e Rimescolare e ridisporre sempre gli alimenti dalla parte esterna verso il centro.
ridisporre gli
alimenti
Tempo di Dopo la cottura, è necessario lasciare riposarebrevemente gli alimenti per consentire
riposo alcalore di diffondersi uniformemente attraversogli alimenti stessi.
Schermatura Alcune parti dell’alimentoinfase di scongelamento possono riscaldarsi. È possibile
schermarelearee caldecon pezzetti di carta stagnola, cheriflettono le microonde, ad
esempio nel caso di cosce e ali di pollo.
Caratteristiche degli alimenti
Composizione Gli alimenti con un elevato contenuto di grassi ozuccheri (ad esempio, un dolce
natalizioo unatorta ripiena di fruttasecca) richiedono un tempo di cottura inferiore.
Occorreprestare molta attenzione perché il surriscaldamento può costituire un
principiodiincendio.
Densità La densità del ciboinfluisce sul tempodicotturanecessario. Gli alimenti porosi leggeri,
come dolci o pane,cuociono più rapidamentedegli alimenti pesanti,compatti,come
gli arrosti o glisformati.
Quantità Se la quantità di alimenti inseriti nel forno aumenta, è necessario aumentareanche il
tempo di cottura, ad esempio, il tempodicotturadi quattro patate sarà superioreal
tempo di cottura di due patate.
Dimensioni Glialimenti piccoli o a piccoli pezzi cuociono più rapidamente, perchélemicroonde
possonopenetrareinessi da ogni lato. Per una cottura uniforme, ottenere pezzi delle
stesse dimensioni.
Forma Gli alimentidi forma irregolare,come ipetti o le cosce di pollo, hanno bisogno di una
cotturapiù lunga per le parti piùspesse.Nella cottura a microonde, glialimenti di
forma rotondeggiante cuociono piùuniformemente di quelli a forma quadrata.
Temperatura La temperatura iniziale degli alimenti influisce sultempo di cottura necessario.Gli
alimenti congelati impiegano più tempo acuocererispetto a quelli a temperatura
ambiente.Nel caso di alimenti conripieno, ad esempio,bomboloni alla marmellata,
occorrepraticareinessi piccoli tagli,per consentire la fuoriuscita di caloreo vapore.
79
Page 80

80
electrolux funzionamento
Recipienti per una cottura a microonde sicura
Recipienti Sicurezza Commenti
di cottura con le
microonde
Carta stagnola / // Per proteggere gli alimenti dal surriscaldamento, è possibile
Contenitori in utilizzare fogli di carta stagnola. Mantenere la carta stagnola
carta stagnola a una distanza minima di 2 cm dalle pareti del forno poiché,
Teglie per Seguire sempre le istruzioni del produttore. Non superare i
rosolatura tempi di cottura specificati. Prestare attenzione, perché le
Porcellana e // D
ceramica ceramica, in vetro e in porcellana fine, se non presentano
Recipienti in Se si utilizzano recipienti in vetro sottile occorre fare molta
vetro,ad esempio attenzione, perché, se riscaldati in modo improvviso,
Pyrex ® possono rompersi o scheggiarsi.
Metallo Nella cottura a microonde si sconsiglia l'utilizzo di recipienti
Plastica/Polistirene, Occorre prestare molta attenzione, perché ad elevate
ad esempio, temperature alcuni contenitori possono deformarsi, fondersi
contenitori da o scolorirsi.
Fast Food
Pellicola protettiva La pellicola non deve stare a contatto con gli alimenti e
Sacchetti per Devono essere forati per consentire la fuoriuscita del vapore.
congelamento Verificare che i sacchetti siano adatti per l’utilizzo in forno a
/ rosolatura microonde. Non utilizzare legacci in plastica o in metallo,
Carta - sottocoppe Utilizzare solo per il riscaldamento o per assorbire l’umido.
e carta da cucina Occorre prestare molta attenzione, perché il
Contenitori in Quando si utilizzano questi materiali, è necessario sempre
paglia e legno sorvegliare il forno, perché il surriscaldamento può portare
Carta riciclata Possono contenere estratti di metallo, i quali possono
e carta di provocare la formazione di archi elettrici e causare incendi.
giornale
in caso contrario, potrebbero formarsi archi elettrici. Si
sconsiglia l’utilizzo di contenitori in carta stagnola, se non
specificati dal produttore (in questo caso Microfoil®) e
seguire attentamente le istruzioni.
teglie possono diventare molto calde.
i norma, è possibile utilizzare i contenitori in porcellana, in
decorazioni metalliche.
in metallo, poiché causano la formazione di archi elettrici e
possono essere causa di un principio di incendio.
deve essere forata per consentire la fuoriuscita del vapore.
perché possono fondersi o provocare incendi a causa della
formazione di archi elettrici.
surriscaldamento può portare allo sviluppo di incendi.
allo sviluppo di incendi.
Page 81

electrolux funzionamento
81
Cuocere a microonde
Il forno si può programmare fino a
90 minuti. Il tempo di cottura può
essere aumentato dai 10 secondi ai
5 minuti, a seconda della durata
totale della cottura, come mostra la
tabella riportata qui sotto.
Tempo di cottura Incremento
0-5 minuti 10 secondi
5-10 minuti 30 secondi
10-30 minuti 1 minuto
30-90 minuti 5 minuti
Scongelamento manuale
Per lo scongelamento manuale
(senza utilizzare la funzione di
scongelamento automatico) regolare il
forno a 270 W. Quando si seleziona la
potenza, sul display appare il simbolo di
scongelamento.
Livello di potenza delle microonde
Questo forno dispone di 6 livelli di potenza:
Impostazione Utilizzo consigliato
della potenza
900 W / Utilizzato per una cottura rapida o per riscaldare le vivande (ad esempio minestre,
ALTA casseruole, cibi in scatola, bevande calde, verdure, pesce, ecc.).
630 W Utilizzato per la cottura più prolungata di alimenti densi, quali arrosti, polpettoni
450 W Per cibi densi che richiedono una cottura prolungata quando cucinati in modo
270 W / Scongelare, selezionare questa potenza. L’alimento viene scongelato in maniera
SCONGELARE uniforme. Questo livello di potenza è ideale anche per cuocere lentamente riso,
90 W Per scongelare lentamente (ad esempio torte alla crema o altra pasticceria).
0 W Per forno inattivo/timer
di carne, pasti preconfezionati e per pietanze delicate quali salse al formaggio e
dolci tipo pan di Spagna. Grazie a questa impostazione ridotta, le salse
bollendo non fuoriescono dal loro contenitore e il cibo viene cucinato in maniera
uniforme, evitando di cuocere eccessivamente le estremità.
tradizionale (ad esempio la carne di manzo). Si raccomanda di utilizzare questa
potenza per ottenere una carne tenera.
pasta, dolcetti di frutta e creme pasticcere.
W = WATT
Page 82

82
AUTO
+
AUTO
1
AUTO
+
AUTO
electrolux funzionamento
Esempio: Voler scaldare una minestra per 2
minuti e 30 secondi ad una potenza di 630 W.
1. Premere due volte il pulsante di
regolazione del LIVELLO DI
POTENZA.
x2
2. Impostare il tempo di cottura
desiderato ruotando in senso orario
o antiorario la manopola
TIMER/PESO fino a 2:30 il display.
3. Premere il pulsante START/+30 .
x1
4. Controllare il display:
Nota:
Se non si seleziona il livello, viene
automaticamente regolato il livello del
ALTA/900 W.
Nota:
• Se si apre lo sportello durante la
fase di cottura, il tempo di cottura
sul display digitale si ferma
automaticamente. Il conteggio del
tempo di cottura riprende
quando si richiude lo sportello e si
preme il pulsante START/+30 .
• Se durante la cottura si desidera
controllare il livello di potenza,
premere il pulsante LIVELLO DI
POTENZA.
• Per aumentare o diminuire il tempo di
cottura mentre il cibo sta cuocendo
ruotare la manopola TIMER/PESO.
• Per modificare il livello di potenza
durante la cottura premere il pulsante
di regolazione della potenza.
• Per cancellare un programma durante
la cottura premere due volte il pulsante
STOP.
Timer
Esempio: Impostare il timer su 7 minuti.
1. Premere il pulsante LIVELLO DI
POTENZA 7 volte.
x7
2. Impostare il tempo di cottura
desiderato ruotando in senso orario
o antiorario la manopola
TIMER/PESO fino a 7:00 il display.
3. Premere il pulsante START/+30 .
x1
4. Controllare il display:
Nota:
• Per interrompere il timer premere il
pulsante STOP; premere il pulsante
START/+30 per riattivarlo, oppure
premere nuovamente il pulsante
STOP per spegnerlo e cancellare la
funzione.
Aggiungere 30 secondi
Il pulsante START/+30 consente di
attivare le due funzioni seguenti:
1. Accensione diretta
Si può avviare direttamente la
cottura al livello di potenza
microonde di 900 W/ALTA per 30
secondi premendo il pulsante
START/+30 .
x1
Page 83

electrolux funzionamento 83
1
1
1
AUTO
+
AUTO
2. Prolungare il tempo di cottura
Si può prolungare il tempo di
cottura durante il funzionamento
manuale per multipli di 30 secondi
premendo il pulsante mentre
il forno è in funzione.
x1
Nota:
• NelLa funzione GRILL è inoltre
possibile prolungare la cottura di 30
secondi.
• Questa funzione non è possibile nelle
funzioni di COTTURA AUTOMATICA e
SCONGELAMENTO AUTOMATICO.
Più & meno
La funzione PIÙ e MENO
consente di diminuire o aumentare il
tempo di cottura quando si utilizzano
programmi automatici.
Se preferite patate lesse che risultino cotte
ma ancora un po’ dure, premete MENO
.
Se invece le preferite più morbide,
premete PIÙ .
Esempio: Cuocere 0.3 kg di patate, ben
lessate.
1. Selezioni il menu richiesto premendo
il pulsante COTTURA AUTOMATICA
due volte.
x2
2. Ruotare la manopola TIMER/PESO
fino a 0.3 il display.
3. Premere una volta il pulsante di
regolazione della potenza per
selezionare PIÙ .
x1
4. Premere il pulsante START/+30.
x1
5. Controllare il display:
Nota:
Per cancellare la funzione PIÙ/MENO
premere tre volte il pulsante di
regolazione della potenza.
Selezionando PIÙ, sul display apparirà
.
Selezionando MENO, sul display apparirà
.
Cottura con grill e
cottura combinata
Questo forno a microonde
prevede due modalità per la cottura
con il GRILL:
1. Solo grill.
2. Dual Grill (Grill e microonde.)
Nota:
1. Per arrostire si consiglia di utilizzare la
griglia alta.
2. Quando si mette in funzione per la
prima volta il grill è possibile che si
produca fumo o cattivo odore, ma
ciò non significa che il forno sia
guasto.Per eliminare la causa di tale
fenomeno, prima di usare il forno per l
a prima volta, metterlo in funzione
vuoto per 20 minuti, selezionando la f
unzione di cottura GRILL.
Page 84

84
1
1
1
1 2
2
AUTO
+
AUTO
1 2
1
1
1
1 2
2
AUTO
+
AUTO
1
1
1 2
electrolux funzionamento
Cottura con grill
Utilizzare questa modalità per arrostire
o rosolare i cibi.
Esempio: grigliare per 4 minuti.
1. Premere il pulsante GRILL una
volta.
x1
2. Impostare il tempo di cottura
desiderato ruotando in senso orario
o antiorario la manopola TIMER/
PESO fino a 4:00 il display.
3. Premere il pulsante START/+30 .
x1
4. Controllare il display:
Cottura combinata
Questo modo di cottura combina le
potenze del grill e delle microonde (da
90 W a 630 W). Il livello di potenza
microonde è preimpostato a 270 W.
Pulsante Regolazione di
potenza
Grill x 1 0 W
Grill x 2 270 W
Grill x 3 450 W
Grill x 4 630 W
Grill x 5 0 W
Esempio: Cuocere spiedini misti per 7
minuti con l'impostazione COTTURA
COMBINATA 450 W.
1. Premere il pulsante GRILL 3 volta.
x3
2. Impostare il tempo di cottura
desiderato ruotando in senso orario
o antiorario la manopola
TIMER/PESO fino a 7:00 il display.
3. Premere il pulsante START/+30 .
x1
4. Controllare il display:
Altre funzioni utili
Grazie ad una combinazione di
MICROONDE, GRILL o COTTURA
COMBINATA si ha la possibilità di
programmare una sequenza che prevede
3 fasi (al massimo).
Esempio: Per cuocere:
2 minuti e 30 secondi con potenza
630 W (Fase 1)
5 minuti con grill(Fase 2)
Fase 1
1. Premere il pulsante LIVELLO DI
POTENZA due volte.
x2
Page 85

2. Impostare il tempo di cottura
1
1
1
1 2
2
AUTO
+
AUTO
1
1
1 2
1
1
1
1 2
2
AUTO
+
AUTO
1
1
1 2
desiderato ruotando in senso orario
o antiorario la manopola
TIMER/PESO fino a 2:30 il display.
3. Controllare il display:
Fase 2
1. Premere il pulsante GRILL una
volta.
x1
2. Impostare il tempo di cottura
desiderato ruotando in senso orario
o antiorario la manopola
TIMER/PESO fino a 5:00 il display.
electrolux funzionamento
85
3. Premere il pulsante START/+30 .
x1
4. Controllare il display:
Il forno comincia a cuocere per 2
minuti e 30 secondi a 630 W, e per i
restanti 5 minuti passa al
funzionamento con il solo grill.
Page 86

86
1
1
1
1 2
2
AUTO
+
AUTO
1 2
1
1
1
1 2
2
AUTO
+
AUTO
AUTO
1
1
1 2
electrolux funzionamento
Funzioni cottura automatica
& scongelamento
automatico
Con COTTURA AUTOMATICA e
SCONGELAMENTO AUTOMATICO si
definisce automaticamente l'esatta
modalità di cottura ed il tempo
necessario. Con COTTURA
AUTOMATICA si ha la possibilità di
scegliere tra 6 menu diversi e
SCONGELARE AUTOMATICA si ha la
possibilità di scegliere tra 2 menu diversi.
Cottura automatica
Alimenti Simbolo Regolazione
Bevande Microonde
Patate lesse e Microonde
con la buccia
Spiedini di Microonde
carne + grill
Gratin di Microonde
Pesce + grill
Pollo alla Microonde
griglia + grill
Gratin Microonde
+ grill
Esempio: Cuocere 0.3 kg di patate.
1. Selezioni il menu richiesto premendo
il pulsante COTTURA AUTOMATICA
due volte.
x2
Se, ad esempio, è necessario girare ciò
che sta cuocendo il forno si blocca ed
emette un segnale acustico, il tempo di
cottura rimanente e tutti gli altri indicatori
lampeggiano sul display. Per continuare la
cotture, premere il pulsante START/+30 .
Al termine del ciclo di cottura automatico il
programma si fermerà automaticamente,
verra' emesso il segnale acustico e sul
display lampeggerà il simbolo di cottura.
Dopo 1 minuto ed un nuovo segnale
acustico, sul display apparirà l’ora.
Scongelamento automatico
Alimenti Simbolo Regolazione
Carne/Pesce/ Microonde
Pollame
Pane Microonde
Esempio: Scongelare 0.2 kg di pane.
1. Selezioni il menu richiesto premendo
il pulsante SCONGELAMENTO
AUTOMATICO due volte.
x2
2. Ruotare la manopola TIMER/PESO
fino a 0.2 il display.
3. Premere il pulsante START/+30.
x1
2. Premere il pulsante TIMER/PESO.
3. Press the START/+30 button.
x1
4. Controllare il display:
4. Controllare il display:
Se, ad esempio, è necessario girare ciò
che sta cuocendo il forno si blocca ed
emette un segnale acustico, il tempo di
cottura rimanente e tutti gli altri indicatori
lampeggiano sul display. Per continuare la
cotture, premere il pulsante START/+30 .
Al termine del ciclo di scongelamento
automatico il programma si fermerà
automaticamente, verra' emesso il segnale
acustico e sul display lampeggerà il simbolo
di cottura. Dopo 1 minuto ed un nuovo
segnale acustico, sul display apparirà l’ora.
Page 87

electrolux schemi dei programmi
Schemi dei programmi
Tabelle cottura automatica & scongelamento automatico
Cottura Quantità (Unità di Pulsante Procedimento
Automatica incremento) / Utensili
Bevande 1-6 tazze • Porre la tazza verso il bordo del piatto
(Tè/Caffè) 1 tazza=200 ml girevole.
Patate lesse e 0,2 - 1,0 kg (100 g) Patate lesse: pelare le patate e tagliarle a pezzi
con la buccia Ciotola e coperchio digrandezza simile.
Spiedini di 0,2 - 0,8 kg (100 g) • Preparare gli spiedini come indicato nella
carne Griglia alta ricetta a pag. 89.
Gratin 0,5 - 1,5 kg* (100 g) • Per “Gratin di Pesce”, vedere le ricette a
di Pesce
Pollo alla 0,9 - 1,8 kg (100 g) • Mescolare gli ingredienti e distribuire il tutto
griglia Griglia bassa sulle cosce di pollo.
Gratin 0,5 - 1,5 kg* (100 g) • Per “Gratin”, vedere le ricette a pagina 90.
Nota: Gli alimenti refrigerati vengono cotti da 5 °C, gli alimenti surgelati vengono cotti da –18 °C.
Piatto per gratin
Griglia bassa
Piatto • Punzecchiare la pelle delle cosce di pollo.
Piatto per gratin
Griglia bassa * Peso totale degli ingredienti.
x1
x2
Patate con la buccia: scegliere patate di
grandezzasimile e lavarle.
• Mettere le patate pelate o con la buccia in
un ciatola.
• Aggiungere la quantità di acqua necessaria
(per 100 g) circa due cucchiai e un pizzico di
sale.
• Coprire con un coperchio.
• Quando sentite il segnale acustico, girare e
rimettere il coperchio.
• Al termine della cottura, lasciare riposare le
patate per 2 minuti.
x3
• Mettere sulla griglia e cuocere..
• Quando viene emesso un segnale acustico,
girare gli spiedini.
• A fine cottura, togliere dal forno e disporre
sul piatto di portata. (Non richiede tempi di
attesa.)
x4
x5
x6
pagina 89.
* Peso totale degli ingredienti.
• Mettere il pollo in una pirofila con il petto
rivolto verso il fondo.
• Mettere la pirofila direttamente sul piatto
girevole e avviare la cottura.
• Al segnale acustico, girare il cibo.
• A cottura ultimata, togliere dal microonde e
lasciar riposare per circa 5 min.
87
Page 88

88
Scongelare Quantità (Unità di Pulsante Procedimento
Automatica incremento) / Utensili
Carne, pesce, 0,2 - 1,0 kg (100 g) • Disporre il tutto su un piatto al centro
pollame Piatto del piatto rotante.
(Pesci interi, tranci
di pesce, filetti di
pesce, cosce di
pollo, petti di pollo,
carne macinata,
bistecche, braciole,
hamburger,
salsicce)
Pollame 0,1 - 1,0 kg (100 g) • Distribuire in una pirofila al centro del
Nota: Gli alimenti refrigerati vengono cotti da 5 °C, gli alimenti surgelati vengono cotti da –18 °C.
Nota:
• Indicare il peso del cibo, escludendo
electrolux schemi dei programmi
Piatto piatto girevole. Fino a 1,0 kg distribuire
il peso del contenitore.
x1
• Quando il forno si blocca e viene
emesso un segnale acustico, girare la
carne, quindi risistemare e separare.
Proteggete le parti sottili e i punti caldi
con fogli d’alluminio.
• Terminata l'operazione, avvolgere nella
stagnola e lasciare riposare per 15 - 45
minuti, fino al completo scongelamento.
Nota: Non idoneo per polli interi.
• Carne macinata: Quando il forno si
arresta e viene emesso il segnale
acustico, rigirate il the cibo. Se possibile,
rimuovete le parti scongelate.
x2
direttamente sul piatto girevole.
• Al segnale acustico, girare, ridisporre e
togliere le, fette scongelate.
• Dopo lo scongelamento, coprire con la
pellicola di alluminio e lasciar riposare per
5 -15 min, fino a scongelamento ultimato.
• Se non è inserito l’orologio, dopo
circa 3 minuti dal termine della
cottura si inserirà la funzione “Econ”.
• Per alimenti il cui peso è superiore od
inferiore ai valori indicati nella tabella
per la cottura in automatica, usare
programmi manuali.
• La temperatura finale dipende dalla
temperatura iniziale. Controllare che il
cibo mantenga il calore a fine cottura.
• Se, ad esempio, è necessario girare
ciò che sta cuocendo il forno si
blocca ed emette un segnale
acustico, il tempo di cottura
Nota: Scongelamento rapido
1. Bistecche e braciole dovrebbero
essere congelati in uno strato.
2. La carne macinata deve essere
congelata in spessori sottili.
3. Girare e mettere tra le singole
porzioni scongelate un foglio liscio
di stagnola.
4. Il pollame va cucinato mmediatamente
dopo lo scongelamento.
rimanente e tutti gli altri indicatori
lampeggiano sul display. Per
continuare la cotture, premere il
pulsante START/+30.
• Al termine della cottura nelle funzioni
Micro/Grill/Dual Grill potrà avviarsi la
ventola.
Page 89

electrolux schemi dei programmi
Ricette per la cottura automatica
Spiedini misti
4 fetta
400 g di lombata di maiale, a tocchetti
100 g di pancetta striata
100 g cipolle, tagliate in quattro
250 g pomodori, tagliati in quattro
100 g di peperone verde, a dadini
2 CM olio
4 CU paprica
sale
1 CU pepe di Caienna
1 CU salsa Worcestershire
Filetto di pesce gratinato
0,5 kg 1,0 kg 1,5 kg
230 g 450 g 680 g filetti di pesce
100 g 200 g 300 g di porro (affettato)
20 g 40 g 60 g cipolla (tagliare
40 g 100 g 140 g carote
10 g 10 g 20 g burro o margarina
1
1 CU 1
50 g 100 g 150 g di panna
50 g 100 g 150 g Gouda
/2CU 2 CU succo di limone
finemente)
(grattugiate)
sale, pepe e noce
moscata
(grattugiato)
Gratin di pesce all’italiana
0,5 kg 1,0 kg 1,5 kg
200 g 430 g 630 g filetti di pesce
1
/2CU 1 CU 11/2CU succo di limone
1
/2CU 1 CU 11/2CU burro di
30 g 50 g 80 g Gouda
150 g 300 g 450 g pomodori
1 CU 1
100 g 180 g 280 g Mozzarella
1
/2CU3/4CU 1 CU basilico (tritato)
1
/2CU 2 CU erbe miste tritate
accuiughe
(grattugiato)
sale a pepe
1. Infilare i pezzetti di carne e di verdure,
2. Aggiungere le spezie all’olio e
3. Disporre i kebab sulla griglia e
1. Mettere in una casseruola le verdure, il
2. Lavare e asciugare il pesce, spruzzarlo
3. Unire la panna alle verdure e aggiungere
4. Porre metà delle verdure in un piatto
5. Cospargere con il formaggio Gouda,
6. A fine cottura, lasciar riposare per ca. 5
1. Lavare e asciugare il pesce,
2. Collocare su un piatto ovale per gratin.
3. Cospargere il pesce con il formaggio
4. Disporre i pomodori sopra il formaggio.
5. Aggiungere sale, pepe e le erbe miste.
6. Sgocciolare la Mozzarella, tagliarla a
7. Collocare il gratin sulla griglia bassa e
8. A fine cottura, lasciar riposare per ca. 5
89
alternandoli, su 4 spiedini di legno.
spennellare i kebab.
cuocere in modalità COTTURA
AUTOMATICA, “Spiedini Misti”.
burro e le spezie e mescolare bene.
Cuocere per 2-6 min a 900 W, a
seconda del peso.
con il limone e salare.
ancora sale, pepe e noce moscata.
ovale da gratin, collocarvi sopra il pesce
e coprire con la parte restante delle
verdure.
collocare sulla griglia bassa e cuocere
usando la funzione COTTURA
AUTOMATICA, “Gratin di Pesce”.
min.
cospargerlo con il succo di limone,
salare e ungere con il burro all’acciuga.
Gouda.
fettine e distribuirla sul pomodoro.
Cospargere di basilico.
cuocere usando COTTURA
AUTOMATICA, “Gratin di Pesce”.
min.
Page 90

90
electrolux schemi dei programmi
Spinaci gratin
0,5 kg 1,0 kg 1,5 kg
150 g 300 g 450 g spinaci
15 g 30 g 45 g cipolla (tagliare
5 g 10 g 15 g di burro o
150 g 300 g 450 g patate cotte
35 g 75 g 110 g prosciutto cotto
50 g 100 g 150 g crème fraîche
123uovo
40 g 75 g 115 g formaggio
(scongalare)
finemente)
sale, pepe, noce
moscata
margarina
(per imburrare la
pirofila)
(affettate)
(tagliare
finemente)
(panna)
(grattugiato)
Patae-zucchine gratinate
0,5 kg 1,0 kg 1,5 kg
5 g 10 g 15 g di burro o
200 g 400 g 600 g patate lesse
115 g 230 g 345 g zucchine
75 g 150 g 225 g crème fraîche
123uovo
1
/
12spicchio d’aglio
2
40 g 80 g 120 g Gouda
10 g 20 g 30 g semi di girasole
margarina (per
imburrare la pirofila)
(affettate)
(affettate)
(panna)
(schiacciato)
sale, pepe
(grattuggiato)
1. Mescolare gli spinaci con la cipolla e
insaporire con sale, pepe e noce
moscata.
2. Ungere lo stampo. Disporre le patate,
prosciutto e gli spinaci a strati alterni.
L’ultimo strato dovrà essere di spinaci.
3. Sbattere le uova con la crème fraiche,
aggiungere sale e pepe e versare
sopra il gratin.
4. Cospargere il gratin con formaggio.
5. Collocare sulla griglia bassa e cuocere
usando la funzione COTTURA
AUTOMATICA, “Gratin”.
6. A fine cottura, lasciar riposare per ca.
5-10 min.
1. Ungere il recipiente e disporre a strati
alternati patate e zucchine tagliate a
fette.
2. Sbattere le uova con la crème fraiche,
aggiungere sale, pepe e aglio e
versare sopra il gratin.
3. Cospargere il gratin di formaggio
Gouda.
4. Completare con i semi di girasole.
5. Collocare sulla griglia bassa e cuocere
usando la funzione COTTURA
AUTOMATICA, “Gratin”.
6. A fine cottura, lasciar riposare per ca.
5-10 min.
Page 91

electrolux schemi dei programmi
Schede cottura
Abbreviazioni usate nelle ricette
CU = cucchiaino
Ta. = tazza
Bevanda/Cibo Quantità Regol-Potenza Durata Suggerimenti
Latte 1 tazza 150 Micro 900 W ca. 1 non coprire
Water 1 tazza 150 Micro 900 W ca. 2 non coprire
6 tazze 900 Micro 900 W 8-10 non coprire
1 zuppiera 1000 Micro 900 W 9-11 non coprire
Piatto pronto 400 Micro 900 W 4-6 aggiungere una spruzzata d'acqua
(verdure, carne e all'intingolo, coprire e mescolare di
contorno) tanto in tanto
Stufato / zuppe 200 Micro 900 W 1-2 coprire, mescolare dopo il
Verdure 200 Micro 900 W 2-3 aggiungere eventualmente un po’
Carne, 1 fetta* 200 Micro 900 W ca. 3 coprire, cospargere con un po’ di
Filetto di pesce* 200 Micro 900 W 3-5 coprire
Dolce (torta) 1 fetta 150 Micro 450 W
Omogeneizzati 190 Micro 450 W
1 vasetto mescolare e controllare la temperatura
Per sciogliere il burro 50 Micro 900 W
o la margarina*
Per sciogliere 100 Micro 450 W 3-4 mescolare di tanto in tanto
il cioccolato
* temperatura di frigorifero
kg = chilogrammo
g = grammo
l = litro
ml = millilitro
cm = centimetro
min. = minuti
CM = cucchiaio
da minestra
Riscaldamento di cibi & bevande
-g/ml- azione-Livello- -Min-
riscaldamento
500 Micro 900 W 3-5 d’acqua a metà riscaldamento
mescolare
intingolo
1
/2-1 adagiare su una gratella per dolci
1
/2-1 mescolare e controllare la temperatura
1
/
coprire
2
91
Scongelamento
Alimenti Quantità Regol-PotenzaDurataSuggerimenti Tempo di
-g- azione-Livello--Min- attesa
-Min-
Spezzatino 500 Micro 270 W 8-9 a metà scongelamento mescolare e 10-30
separare i pezzi di carne
Torta, 1 fetta 150 Micro 270 W 1-3 adagiare su un piatto per dolci 5
Frutta: fragole, 250 Micro 270 W 3-5 collocarle l'una di fianco all'altra e a 5
lamponi, metà scongelamento voltarle
ciliegie, prugne
I tempi forniti sono puramente indicativi e possono variare a seconda della temperatura di
congelamento, della consistenza e del peso dei cibi.
Page 92

92
Filetto di pesce300 Micro 900 W 9-11 - coprire 2
Piatto pronto 400 Micro 900 W 8-10 - coprire, mescolare dopo 6 minuti 2
Broccoli 300 Micro 900 W 6-8 3-5 coprire, mescolare a metà cottura 2
Piselli 300 Micro 900 W 6-8 3-5 coprire, mescolare a metà cottura 2
Verdura mista 500 Micro 900 W 9-11 3-5 coprire, mescolare a metà cottura 2
Alimenti Quantità Regol-PotenzaDurata Suggerimenti Tempo di
Broccoli 500 Micro 900 W 6-8 aggiungere 4-5 cucchiai d'acqua, coprire, -
Piselli 500 Micro 900 W 6-8 coprire, aggiungere 4-5 cucchiai d'acqua, -
Carote 500 Micro 900 W 9-11 tagliare a rondelle, coprire, aggiungere -
Arrosto 1000 Micro 450 W 16-18 insaporire a piacere, adagiare sulla 10
(maiale, vitello, Dual Grill 450 W 5-7 * griglia più bassa e voltare dopo *
agnello) Micro 450 W 14-16
Roastbeef 1000 Micro 630 W 5-8 condire a piacere, disporre sulla griglia in 10
media cottura Dual Grill 630 W 8-10 * basso, girare dopo *
Cosce di pollo 200 Dual Grill 450 W 6-7 * insaporire a piacere, adagiare con il petto 3
Costate di 400 Grill 11-12 * disporre sulla griglia alta, girare dopo *,
manzo, 2 a Grill 6-8 insaporire dopo la cottura
cottura ura media
Cottura di Grill 8-13 collocare il piatto sulla griglia in basso
sformati
Croque 1 fetta Micro 450 W
Monsieur Grill 5-6 una fetta di prosciutto cotto, una fetta di
Pizza 300 Micro 450 W 4-6 adagiare sulla griglia bassa
electrolux schemi dei programmi
Scongelamento & cottura
Alimenti Quantità Regol- Potenza Durata Aggiunta Suggerimenti Tempo di
-g- azione -Livello- -Min- d’acqua attesa
Come cucinare carne, pesce e pollame
-g- azione-Livello- -Min- attesa
Dual Grill 450 W 4-6
1500 Micro 450 W 26-28 10
Dual Grill 450 W 5-8 *
Micro 450 W 26-28
Dual Grill 450 W 4-5
Dual Grill 630 W 3-5
1500 Micro 630 W 12-15 10
Dual Grill 630 W 12-15 *
Dual Grill 630 W 4-6
Grill 4-6 sulla griglia più alta e voltare dopo *
4 fette Micro 450 W1/2-1 ananas e una fetta di formaggio
Grill 5-6
Dual Grill 450 W 4-6
400 Micro 450 W 6-7
Dual Grill 450 W 5-7
-tbsp- -Min-
girare di tanto in tanto durante la cottura
girare occasionalmente durante la cottura
4-5 cucchiai d'acqua, coprire, girare di
tanto in tanto durante la cottura
1
/2tostare il pane, spalmarvi il burro e disporvi
-Min-
Page 93

Ricette
electrolux ricette
93
In tutte le seguenti ricette vengono
indicate le quantità per 4 persone, salvo
indicazione contraria.
Adattamento di ricette tradizionali
Per adattare le ricette già
"sperimentate" alla cottura nel forno a
microonde, è necessario tener conto
delle seguenti indicazioni:
I tempi di cottura andranno ridotti di
un terzo o della metà circa. Orientarsi
eventualmente secondo le durate
indicate nelle seguenti ricette.
I cibi e i piatti ricchi d'acqua, come la
carne, il pesce, il pollame, le verdure, la
frutta, gli stufati e le minestre possono
essere facilmente preparati con l'aiuto
del forno a microonde. Nel caso di cibi e
dei piatti a basso contenuto di acqua
invece, come per esempio i piatti pronti,
Zuppa di cipolle
Utensili:
Tegame con coperchio
(capacità 2 l)
4 piatti fondi da minestra
(da 200 ml)
Ingredienti
10 g burro o margarina
100 g cipolle, affettate
800 ml brodo di carne
sale, pepe
2 fette di pane
40 g formaggio grattugiato
è consigliabile inumidirne la superficie
prima d'iniziare la cottura.
La quantità d'acqua da aggiungere
per la cottura di cibi da stufare andrà
ridotta di circa un terzo rispetto a quanto
indicato nella ricetta originale. Durante la
cottura si potrà aggiungere, se
necessario, altra acqua.
La quantità di burro o grasso da
usarsi può essere sensibilmente ridotta.
Una piccola noce di burro o margarina o
un goccio d'olio, saranno sufficienti per
dare sapore al piatto. Il forno a
microonde è quindi particolarmente
adatto per chi deve rispettare una
determinata dieta o per chi intende
semplicemente mangiare in modo più
salutare, con meno grassi.
1. Imburrare la terrina, aggiungere la
cipolla a fette, il brodo di carne e il
condimento.
Coprire e cuocere.
9-11 min. 900 W
2. Tostare il pane, tagliarlo a cubetti e
disporlo nei piatti fondi. Versarvi sopra
la zuppa e cospargerla di formaggio
grattugiato.
3. Mettere le terrine sul piatto girevole e
selezionare la cottura a grill.
6-7 min. Grill
Page 94

94
electrolux ricette
Melanzane ripiene
Utensili: Terrina con coperchio (capacità 1 l)
Pirofila a bordi bassi (ca. 30 cm di
lunghezza)
Ingredienti
250 g di melanzane
200 g pomodori
1 tbsp olio di oliva per oliare lo stampo
100 g cipolle, tritate
4 peperoncini verdi non piccanti,
privati dei semi
200 g manzo tritato
2 spicchi d'aglio spremut
2 tbsp prezzemolo tritato
sale, pepe
paprica
60 g di feta a dadini
1. Tagliare le melanzane a metà nel senso
della lunghezza. Svuotare le melanzane
con un cucchiaino fino a ottenere gusci
dello spessore di circa 1 cm e tagliare la
polpa a dadini.
2. Privare i pomodori della buccia e tagliarli
a pezzi.
3. Ungere il fondo della terrina con olio
d'oliva. Aggiungere le cipolle, coprire e
cuocere.
2 min. 900 W
4. Tagliare i peperoncini a rondelle.
Tenerne da parte un terzo per la
guarnizione. Unire alla carne trita le
melanzane a dadini, le cipolle, i
pomodori, i peperoncini a rondelle,
l'aglio e il prezzemolo. Condire a piacere.
5. Asciugare le metà melanzane. Farcire
con metà del ripieno, cospargere con i
dadini di feta e infine coprire con il resto
del ripieno.
6. Disporre le melanzane tagliate a metà
nella pirofila, collocare quest'ultima sulla
griglia bassa e cuocere.
11-13 min. Dual Grill (630 W)
Guarnire le metà melanzane con le
rondelle di peperoncino e continuare la
cottura.
4-7 min. Dual Grill (630 W)
A fine cottura, lasciar riposare per ca. 2
min.
Page 95

electrolux ricette
95
Prataioli farciti al rosmarino
Utensili: Terrina con coperchio (capacità 1 l)
Terrina bassa e tonda
(dm. ca. 22 cm)
Ingredienti
8 prataioli grandi ca. 225 g), interi
20 g burro o margarina
50 g cipolla, tritata finemente
50 g prosciutto, a dadini
pepe nero, macinato
rosmarino fresco, tritato
125 ml vino bianco secco
125 ml panna
20 g farina
1. Staccare i gambi dei funghi e tagliarli a
pezzetti.
2. Imburrare la pirofila a bordi bassi.
Aggiungere le cipolle, la pancetta a
dadini e i gambi dei funghi. Condire con
pepe e rosmarino, coprire e cuocere.
3-5 min. 900 W
Lasciar raffreddare.
3. Riscaldare la panna e 100 ml di vino
nella terrina.
1-3 min. 900 W
4. Incorporare la farina nel vino rimasto,
aggiungere mescolando al liquido
bollente, coprire e cuocere.
Mescolare una volta durante la cottura.
approx. 1 min. 900 W
5. Farcire i funghi con il ripieno alla
pancetta e disporre in una pirofila a
bordi bassi. Versare la salsa sui funghi e
cuocere sulla griglia bassa.
6-8 min. Dual Grill (630 W)
A fine cottura, lasciar riposare per ca. 2
min.
Filetti di sogliola
Utensili: Stampo basso e ovale con
coperchio (lunghezza circa
26 cm)
Ingredienti
400 g filetti di sogliola
1 limone (possibilmente di
coltura biodinamica)
150 g pomodori
10 g burro
1 CM olio vegetale
1 CM prezzemolo tritato
sale e pepe
4 CM vino bianco
20 g burro o margarina
1. Lavare i filetti di sogliola e asciugarli
con un canovaccio o della carta da
cucina. Togliere le lische.
2. Tagliare il limone e i pomodori a
fettine sottili.
3. Imburrare lo stampo, disponervi i
filetti di sogliola e versarvi sopra
l'olio.
4. Cospargere di prezzemolo i filetti di
pesce, disponervi sopra e fettine di
pomodoro e aggiustare di sale e
pepe. Mettere le fettine
di limone sui pomodori e dare una
spruzzata di vino.
5. Mettere poi alcuni riccioli di burro
sul limone a fette, coprire e
mandare in forno.
11-13 min. 630 W
A cottura terminata far riposare il
tutto per ancora 2 minuti circa.
Page 96

96
electrolux ricette
Filetto di pesce in salsa di
formaggio svizzero
Utensili: Terrina con coperchio (capacità 1 l)
Pirofila rotonda a bordi bassi per
gratin (ca. 25 cm di lunghezza)
Ingredienti
800 g filetti di pesce
2 CM succo di limone
sale
10 g burro o margarina
50 g cipolla, tritata finemente
20 g farina
100 ml vino bianco
1 CU di olio vegetale per ungere la
pirofila
100 g di Emmental grattugiato
2 CM di prezzemolo tritato
Trota alle mandorle
UtensilI: Casseruola ovale a sponda
bassa (ca. 32 cm di lunghezza)
Ingredienti
4 trote (da 200 g), già pulite
il succo di un limone
sale
30 g burro o margarina
50 g farina
10 g burro o margarina per ungere lo
stampo
50 g mandorle a foglioline
1. Lavare il pesce, asciugarlo tamponando
e spruzzarlo con succo di limone.
Strofinare con il sale.
2. Imburrare la terrina. Aggiungere la
cipolla a dadini, coprire e cuocere.
1-2 min. 900 W
3. Spolverizzare le cipolle con la farina,
aggiungere il vino bianco e mescolare.
4. Imburrare lo stampo e adagiarvi i filetti di
pesce. Versarvi sopra la salsa,
cospargere con il formaggio svizzero e
mandare in forno collocando la terrina
sulla griglia inferiore.
7-8 min. 450 W
14-16 min. Dual Grill (450 W)
A fine cottura, lasciar riposare per ca. 2
min.
1. Lavare le trote, asciugarle e irrorarle
con succo di limone. Salare il pesce
all’interno e all’esterno, lasciandolo
quindi riposare per 15 minuti.
2. Fondere il burro.
1 min. 900 W
3. Asciugare nuovamente il pesce,
imburrarlo e passarlo nella farina.
4. Ungere lo stampo, disporvi le trote e
mettere a cuocere sulla graticola
inferiore. Girare a due terzi del tempo
di cottura e coprire le trote con le
mandorle a foglioline.
15-18 min. Dual Grill (450 W)
A fine cottura, lasciar riposare per ca.
2 min.
Page 97

electrolux ricette
97
Vitello alla zurighese
Utensili: Terrina con coperchio (capacita 2 l)
Ingredienti
600 g filetto di vitello
10 g burro o margarina
50 g cipolla, tritata finemente
100 ml vino bianco
farina o fecola per legare
1
circa
/2 l di salsa
300 ml panna
1 CM prezzemolo tritato
Scaloppe alla pizzaiola
Utensili: Casseruola rettangolare con
coperchio (ca. 25 cm di
lunghezza)
Ingredienti
150 g di mozzarella a fette
500 g di pomodori in scatola, scolati
4 scaloppe di vitello (600 g)
20 ml olio d’oliva
2 spicchi d’aglio tritato
20 g capperi (20 g)
origano
sale, pepe
1. Tagliare il filetto in listarelle larghe circa
un dito.
2. Imburrare uniformemente la terrina,
versarvi la cipolla e le listarelle di
carne, coprire e mandare a cottura
in forno. Durante la cottura
mescolare una volta.
6-9 min. 900 W
3. Aggiungere il vino, la farina (o fecola)
e la panna, mescolare e rimettere in
forno, a coperto. Durante la cottura
mescolare una volta.
3-5 min. 900 W
4. Assaggiare, mescolare di nuovo il
cibo e lasciarlo riposare per circa 5
minuti. Servire poi con una
decorazione di prezzemolo.
1. Lavare le fette di vitello, asciugarle e
spianarle con il batticarne. Disporre
nella pirofila.
2. Frullare i pomodori, aggiungere l’aglio,
l’olio, il sale e il pepe, i capperi e
l’origano e versare la salsa
così ottenuta sopra il vitello. Coprire e
cuocere.
15-19 min. 630 W
Girare le bistecche.
3. Disporre le fette di mozzarella su ogni
bistecca, condire e cuocere senza
coprire sulla griglia superiore.
9-12 min. Dual Grill (630 W)
A fine cottura, lasciar riposare per ca.
5 min.
Page 98

98
electrolux ricette
Cannoli di Prosciutto Ripieni
Utensili:Terrina con coperchio (capacità 2 l)
stampo ovale a sponda bassa con
coperchio (ca. 26 cm di lunghezza)
Ingredienti
150 g spinaci senza gambi
150 g ricotta, 20 % di grasso
50 g emmental grattugiato
pepe e paprica dolce
8 fette di prosciutto cotto (300 g)
125 ml acqua
125 ml panna
20 g farina
20 g burro o margarina
10 g burro o margarina per
imburrare lo stampo
Lasagne al forno
Utensili: Terrina con coperchio (capacità
circa 2 l)
stampo da sformati quadrato a
bordo basso
con coperchio (circa 20 x 20 x 6 cm)
Ingredienti
300 g pomodori pelati in scatola
50 g prosciutto crudo tagliato a
dadini
50 g cipolla, tritata finemente
1 spicchio d'aglio spremuto
250 g carne di manzo tritata
2 CM concentrato di pomodoro
sale e pepe
150 ml crema di latte
100 ml latte
50 g formaggio grana grattugiato
1 CU erbe miste tritate
1 tCU olio d'oliva
1 CU olio vegetale per oliare lo
stampo
125 g lasagne
1 CU formaggio grana gratuggiato
1.Tagliare finemente le foglie di
spinaci, mescolarle alla ricotta e
all'emmental, aggiungendo odori a
piacere.
2.Stendere su ogni fetta di prosciutto
un cucchiaio della farcia e formare i
cannoli, fermandoli con uno spiedino
di legno o stuzzicadenti.
3. Preparazione della besciamella:
versare l'acqua nella terrina e farla
riscaldare.
2-4 min. 900 W
Impastare la farina al burro e
aggiungerla all'acqua,
stemperandola fino che si sarà ben
amalgamata. Coprire, portare ad
ebollizione e far restringere.
1-2 min. 900 W
Mescolare ed aggiustare di sale.
4. Versare la besciamella nello stampo
imburrato, riunirvi i cannoli e
mandare in forno a coperto.
10-12 min. Dual Grill (630 W)
A cottura terminata lasciar riposare i
cannoli per altri 5 minuti circa.
1. Fare il ragù mettendo nella terrina i
pomodori, la cipolla, il prosciutto,
l'aglio, la carne di manzo tritata e il
concentrato di pomodoro. Coprire e
mettere in forno.
5-8 min. 900 W
2. Mescolare la crema di latte con il
latte, il grana, le erbe e l'olio.
Insaporire di sale e pepe.
3. Imburrare lo stampo e distribuire un
terzo delle lasagne sul fondo.
Versare sulle lasagne prima la metà
del ragù e poi un po' della
besciamella. Passare poi al secondo
strato di pasta e continuare a fare
gli strati come il primo. Terminare
con la besciamella, cospargendola
poi con il parmigiano. Concludere
con qualche ricciolo di burro,
coprire e mandare in forno.
13-17 min. 630 W
A cottura terminata far riposare per
5-10 minuti circa.
Page 99

electrolux ricette
99
Timballo di pasta con zucchine
Utensili: Casseruola da forno (ca. 26 cm
di lunghezza)
Ingredienti
80 g di maccheroni
400 g di pomodori in scatola, a pezzi
150 g cipolle, tagliate fini
basilico, timo, sale, pepe
1 CM olio per ungere lo stampo
450 g zucchine tagliate a fettine
150 g panna acida
2 uova
100 g di Cheddar grattugiato
Pere alla cioccolata
Utensili: Terrina con coperchio (capacità 2 l)
Terrina con coperchio (capacità 1 l)
Ingredienti
4 pere intere, pelate (600 g)
60 g zucchero
10 g bustina di zucchero vanigliato
1 tbsp liquore alle pere
150 ml acqua
130 g di cioccolato fondente, a pezzetti
100 g crema di latte
1. Unire i pomodori alle cipolle e condire
abbondantemente. Aggiungere i
maccheroni. Versare la salsa di
pomodori sui maccheroni e disporvi le
fette di zucchina.
2. Sbattere la panna acida con le uova e
versare sopra il gratin. Cospargere con
formaggio grattugiato. Mettere in forno
sulla griglia in basso e cuocere.
18-21 min. 900 W
7-8 min. Dual Grill (630 W)
A fine cottura, lasciar riposare per ca. 5-
10 min.
1. Versare lo zucchero, lo zucchero
vanigliato, il liquore alla pera e l’acqua
nella terrina, mescolare, coprire e
cuocere.
1-2 min. 900 W
2. Aggiungere le pere al liquido, coprire e
cuocere.
5-8 min. 900 W
Togliere le pere dal liquido di cottura e
metterle in frigorifero.
3. Versare 50 ml del liquido di cottura
nella terrina più piccola. Aggiungere il
cioccolato e la crème fraiche, coprire e
cuocere.
2-3 min. 900 W
4. Dare un'ultima mescolata, versare la
crema di cioccolato sulle pere e servire.
Page 100

100
electrolux ricette
Budino di semolino con sciroppo
di lamponi
Utensili: Terrina con coperchio (capacità 2 l)
4 Piatti per ramekin
Ingredienti
500 ml latte
40 g zucchero
15 g mandorle tritate
50 g semolino
1 tuorlo d'uovo
1 CM acqua
1 albume
250 g lamponi
50 ml acqua
40 g zucchero
Torta al formaggio
Utensili: Stampo per torte
(ca. 26 cm di diametro)
Ingredienti
Base:
300 g farina
1 tbsp cacao in polvere
10 g lievito in polvere
150 g zucchero
1 uovo
10 g di burro o margarina per
imburrare la tortiera
Ripieno:
150 g burro o margarina
100 g zucchero
10 g bustina di zucchero vanigliato
3 uova
400 g ricotta, 20 % di grasso
40 g sacchetto di polvere di budino
alla vaniglia
1. Versare il latte, lo zucchero e le
mandorle nella terrina, coprire e
cuocere.
3-5 min. 900 W
2. Aggiungere il semolino, mescolare,
coprire e cuocere.
10-12 min. 270 W
3. Sbattere il tuorlo d’uovo con l'acqua
in una tazza e versare, mescolando,
nel composto caldo. Montare a neve
l’albume e incorporarlo al composto.
Versare il composto dentro gli
stampini per ramekin.
4. Per preparare la salsa, lavare i
lamponi e asciugarli, quindi disporli in
una terrina con acqua e zucchero.
Coprire e riscaldare.
2-3 min. 900 W
5. Passare i lamponi e servire con il
dolce al semolino.
1. In una terrina, mescolare la farina, il
cacao, il lievito e lo zucchero.
2. Aggiungere l’uovo e il burro e passare
il tutto nel frullatore.
3. Imburrare la tortiera. Stendere la
pasta e foderare la tortiera, lasciando
2 cm per il bordo. Cuocere la pasta.
6-8 min. 630 W
4. Sbattere il burro con lo zucchero fino
a ottenere un composto spumoso.
Incorporare lentamente le uova.
Aggiungere il fromage frais e il
preparato per budino alla vaniglia e
mescolare.
5. Versare il composto sopra la base del
cheesecake e cuocere.
15-19 min. 630 W
 Loading...