

Slate Elite
Quick Start Guide
Slate Elite is a self-stabilizing hand-held three-axis gimbal camera that can be used to
shoot high-definition videos and take high-definition photos, and realtime preview is
possible when the App is used as a viewfinder.
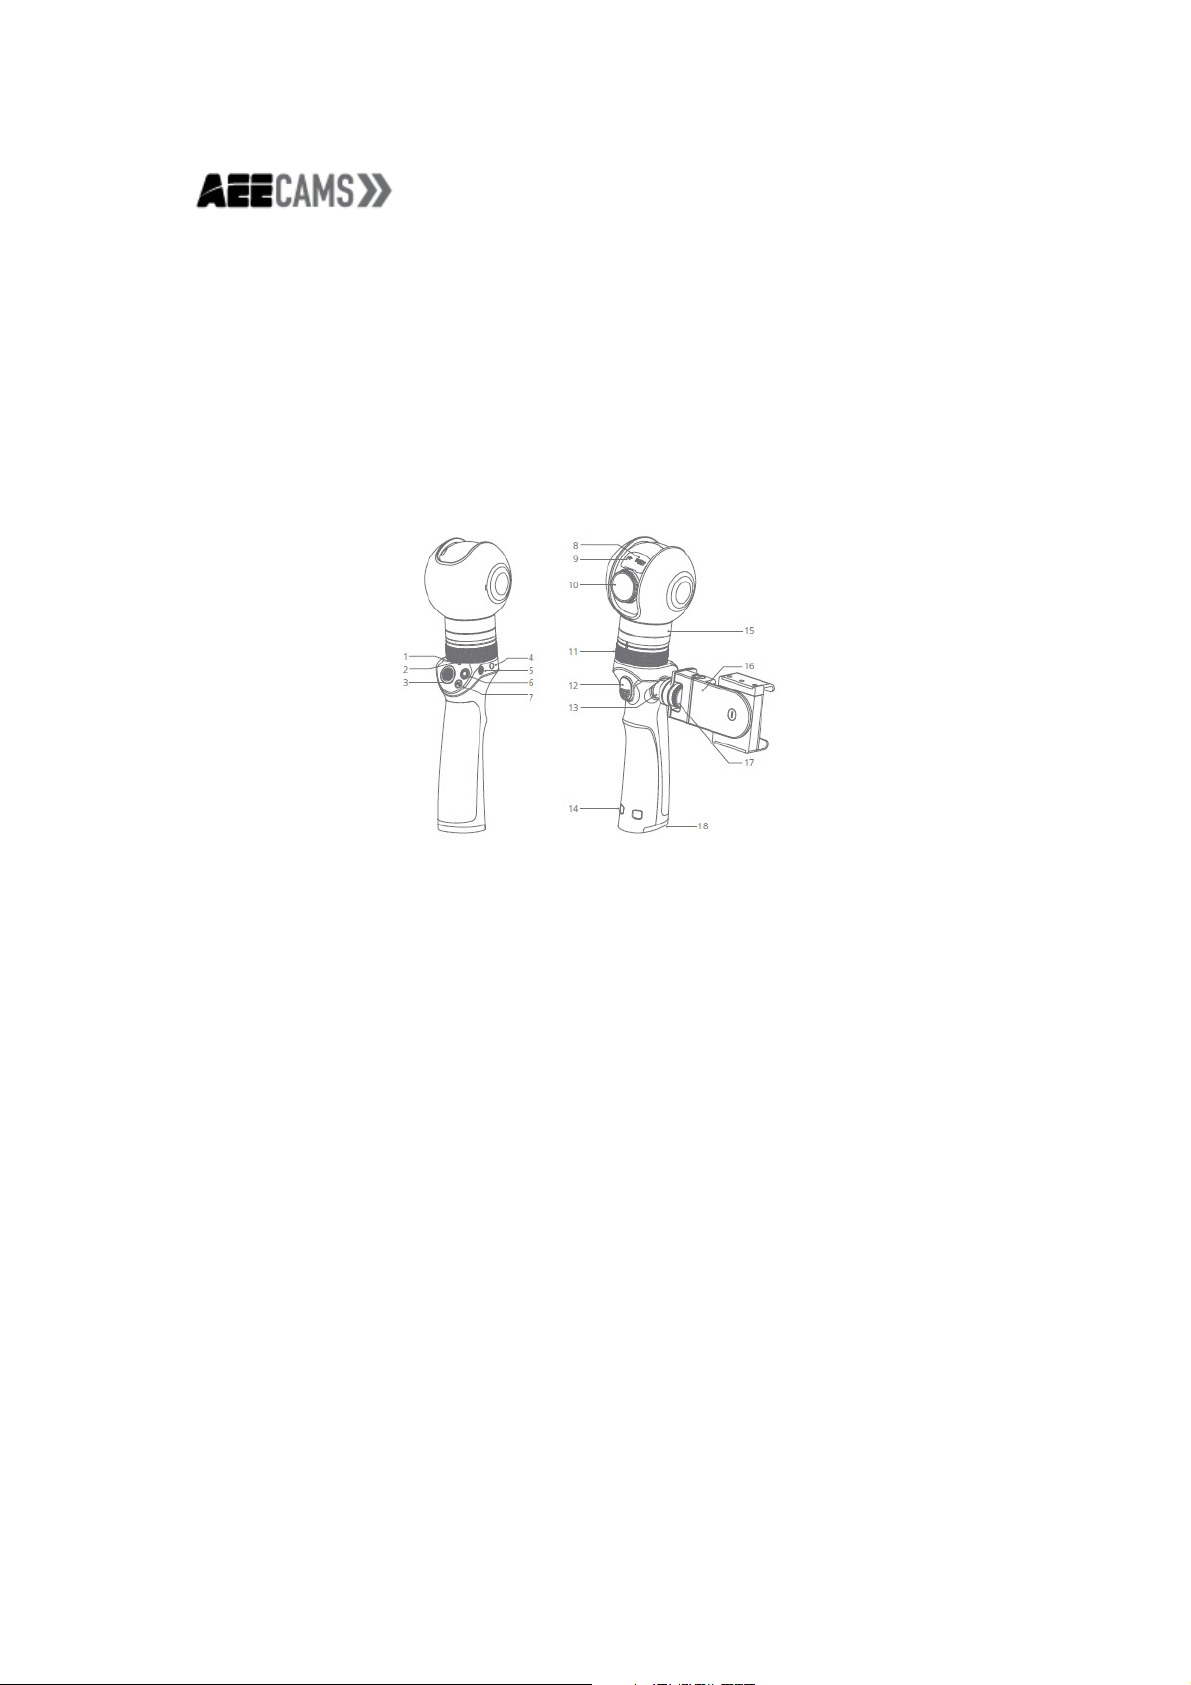
1. Power status indicator
2. Working status indicator
3. Joystick
4. Charging port
5. Power key
6. Video recording key
7. Shutter key
8. MicroSD card slot
9. Micro USB
10. Lens
11. Gimbal clamping ring
12. Mode switching key
13. Disk gear
14. Strap hole
15. Panning axis motor
16. Mobile device bracket
17. Bracket nut
18. Battery chamber lid
English
1. Installing the battery and charging
• Switch the unlock key on the battery chamber lid to “
chamber lid towards the mark “OPEN”. Vertically place the battery in the battery chamber,
and close the battery chamber lid.
• Please use a standard adapter and data cable to connect to the charging port to charge
the gimbal. During charging, the red indicator will flash slowly. When charging is
completed, the red indicator will remain lit.
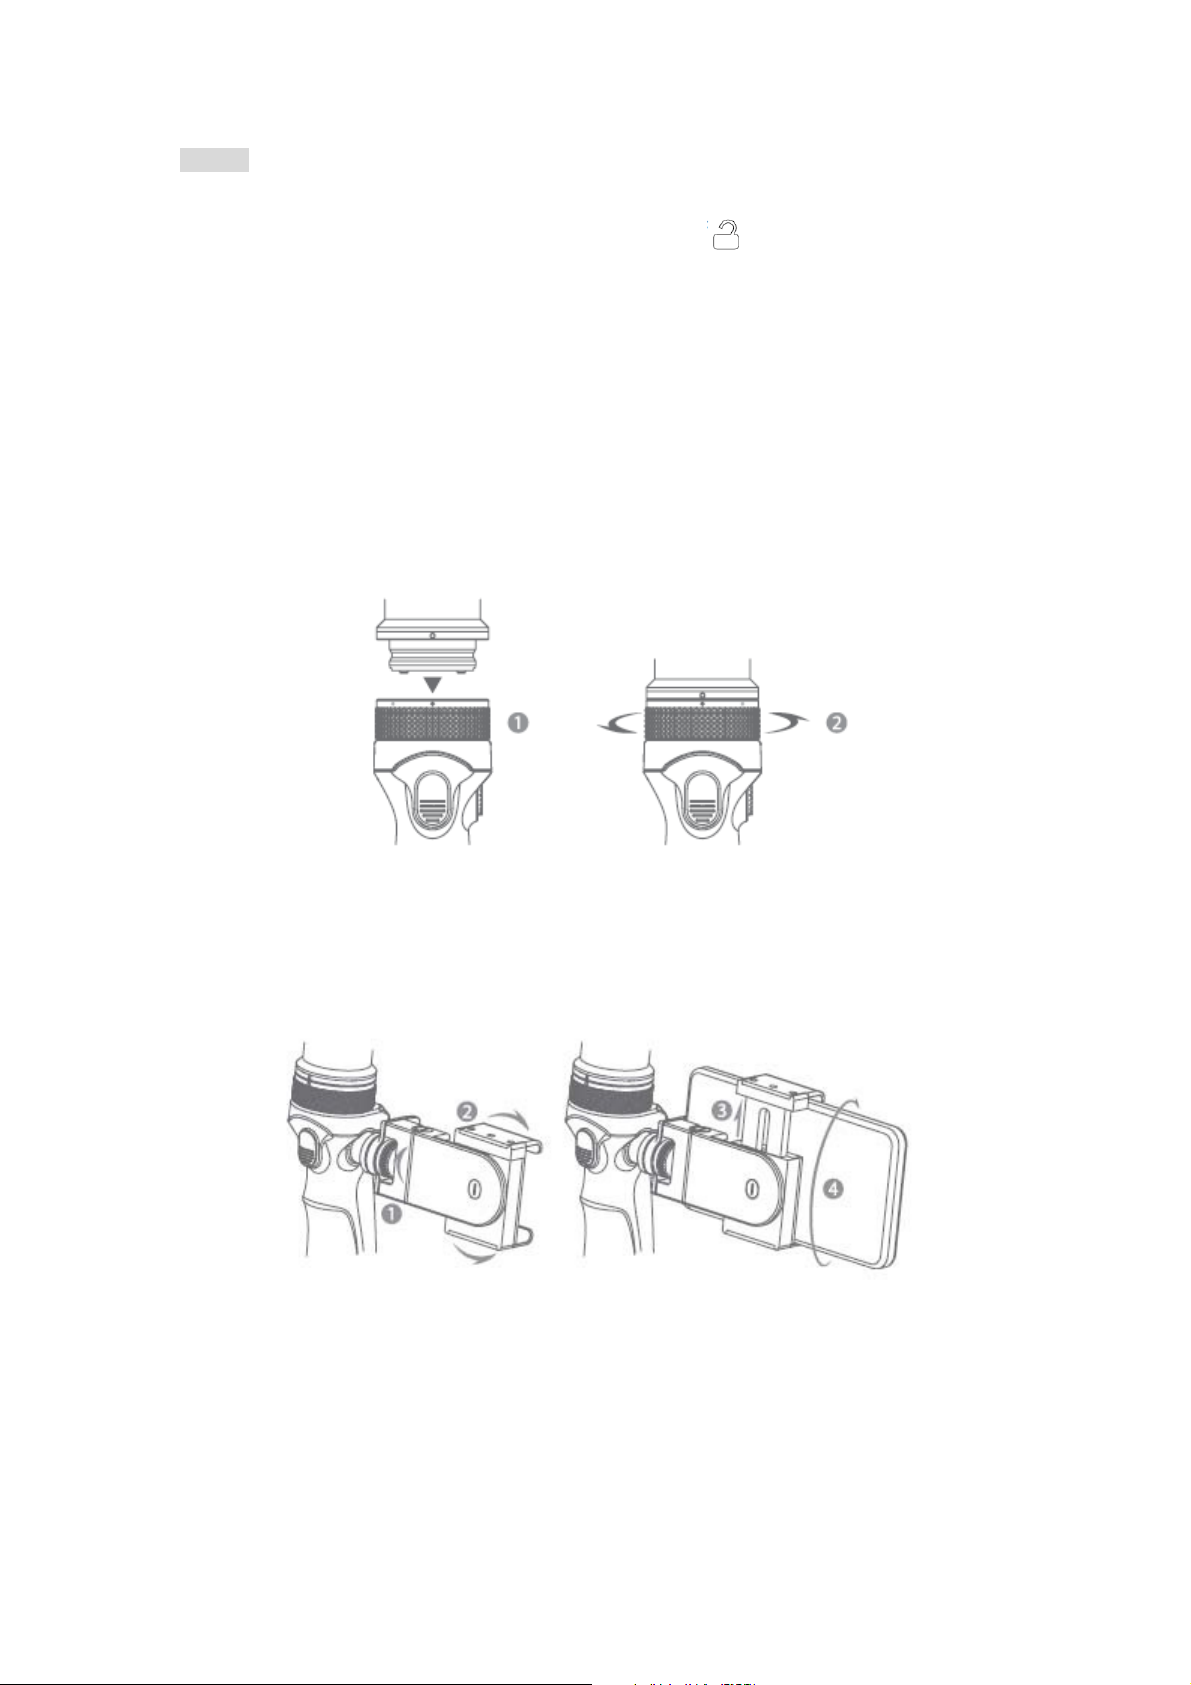
2. Installing the gimbal
• Properly insert the gimbal into the clamping ring of the gimbal, and then rotate the gimbal
clamping ring in the direction as indicated by the arrow.
• To remove the gimbal, first rotate the gimbal clamping ring, and then pull the gimbal out.
”, and then push the battery
3. Mobile device bracket
• Point the bracket nut to the disk gear and tighten the nut, and then rotate the adjustable
bracket.
• Adjust the adjustable bracket to fix the mobile device, and rotate mobile device bracket
to a proper angle.
4. Installing the memory card and switching on the gimbal
• When the gimbal is switched off, insert the memory card into the TF card slot. When a
“click” is heard, the card is installed properly.
• Press and hold the power key for three seconds to switch on the gimbal, and then the
red indicator will remain lit.
Note: It is recommended that you use a TF card that is U3 rated or faster, so as to shoot
videos smoothly.

5. Operating instructions
• Joystick: Move the joystick up, down, right, or left to control the rotation of the gimbal.
• Video recording key: Press this key briefly to start video recording. Press it briefly again
to stop video recording.
• Shutter key: Press the photographing key briefly to photograph.
6. Switching between modes
• Pressing and holding: The camera lens will remain facing towards the current direction.
• Double clicking: The camera lens will move from the current position to the central
position; double click again, and camera lens will be in the selfie angle.
7. Downloading and using the AEE ZONE APP
• The AEE ZONE APP can be downloaded from Apple APP Store or Google Play.
• Turn on the WiFi, and search for and connect to the WiFi signal source named “Slate”
(default password: AEE12345).
Open the AEE ZONE APP, and click the hand-held gimbal icon in the APP.
Use the AEE ZONE APP to control your gimbal camera.
Parts list
Before using this product, please check if the product package contains all the following
articles:
Gimbal head Device bracket Battery
Adapter Quick Start Guide

Technical specifications
Gimbal head
Power input: AC100-240V 50/60Hz
Power output: DC12.6V; 4A
Weight: 230g
Battery capacity: 1,000mAh
Duration of continuous use: 1h
Range of rotation: Tilting: -10°- +90°;
Panning: -210° - +135°;
Rolling: ±35°;
Operating modes: selfie mode, central mode, locking mode, automatic following mode
Maximum rotating speed of the motor: 120°/S
Camera
Angle of view: 100°
Video recording resolution: 4K, 1440p, 1080P, 960P, 720P
Image resolution: 16MP, 12MP, 8MP
Video recording format: MP4
Image format: JPG
Audio recording format: AAC
Precautions
Please observe the following points when using this gimbal:
1. This product is a precision electronic device. Do not drop it from a height or subject it to
strong physical shock.
2. Do not expose this product to high temperatures or directly to sunlight.
3. Should this product fall into water and be immersed in water for a long time, please
immediately call our Customer Service Center and consult an authorized servicing center.
Should water splash onto this product in daily use, please immediately wipe off the water
drops using a dry cloth.
4. If this product overheats, smokes or smells during charging, please disconnect the
power supply immediately.
5. Keep this product out of the reach of children during charging, as the power cord may
cause accidental suffocation or electric shock.
6. Keep this product in a cool, dry and dust-free place.
7. Keep the memory card away from strong electromagnetic sources, such as TVs,
speakers or magnets. Do not keep it in any place where static electricity may accumulate,
as the data stored may be lost.

Warning
This device complies with part 15 of the FCC Rules. Operation is subject to the following
two conditions: (1) This device may not cause harmful interference, and (2) this device
must accept any interference received, including interference that may cause undesired
operation.
FCC Radiation Exposure Statement:
This equipment complies with FCC radiation exposure limits set forth for an uncontrolled
environment
This transmitter must not be co-located or operating in conjunction with any other antenna
or transmitter.
Any Changes or modifications not expressly approved by the party responsible for
compliance could void the user's authority to operate the equipment.
Note: This equipment has been tested and found to comply with the limits for a Class B
digital device, pursuant to part 15 of the FCC Rules. These limits are designed to provide
reasonable protection against harmful interference in a residential installation. This
equipment generates, uses and can radiate radio frequency energy and, if not
installed and used in accordance with the instructions, may cause harmful interference to
radio communications. However, there is no guarantee that interference will not occur in
a particular installation. If this equipment does cause harmful interference to radio or
television reception, which can be determined by turning the equipment off and on, the
user is encouraged to try to correct the interference by one or more of the following
measures:
—Reorient or relocate the receiving antenna.
—Increase the separation between the equipment and receiver.
—Connect the equipment into an outlet on a circuit different from that to which the
receiver is connected.
—Consult the dealer or an experienced radio/TV technician for help.
 Loading...