

AEE
A10
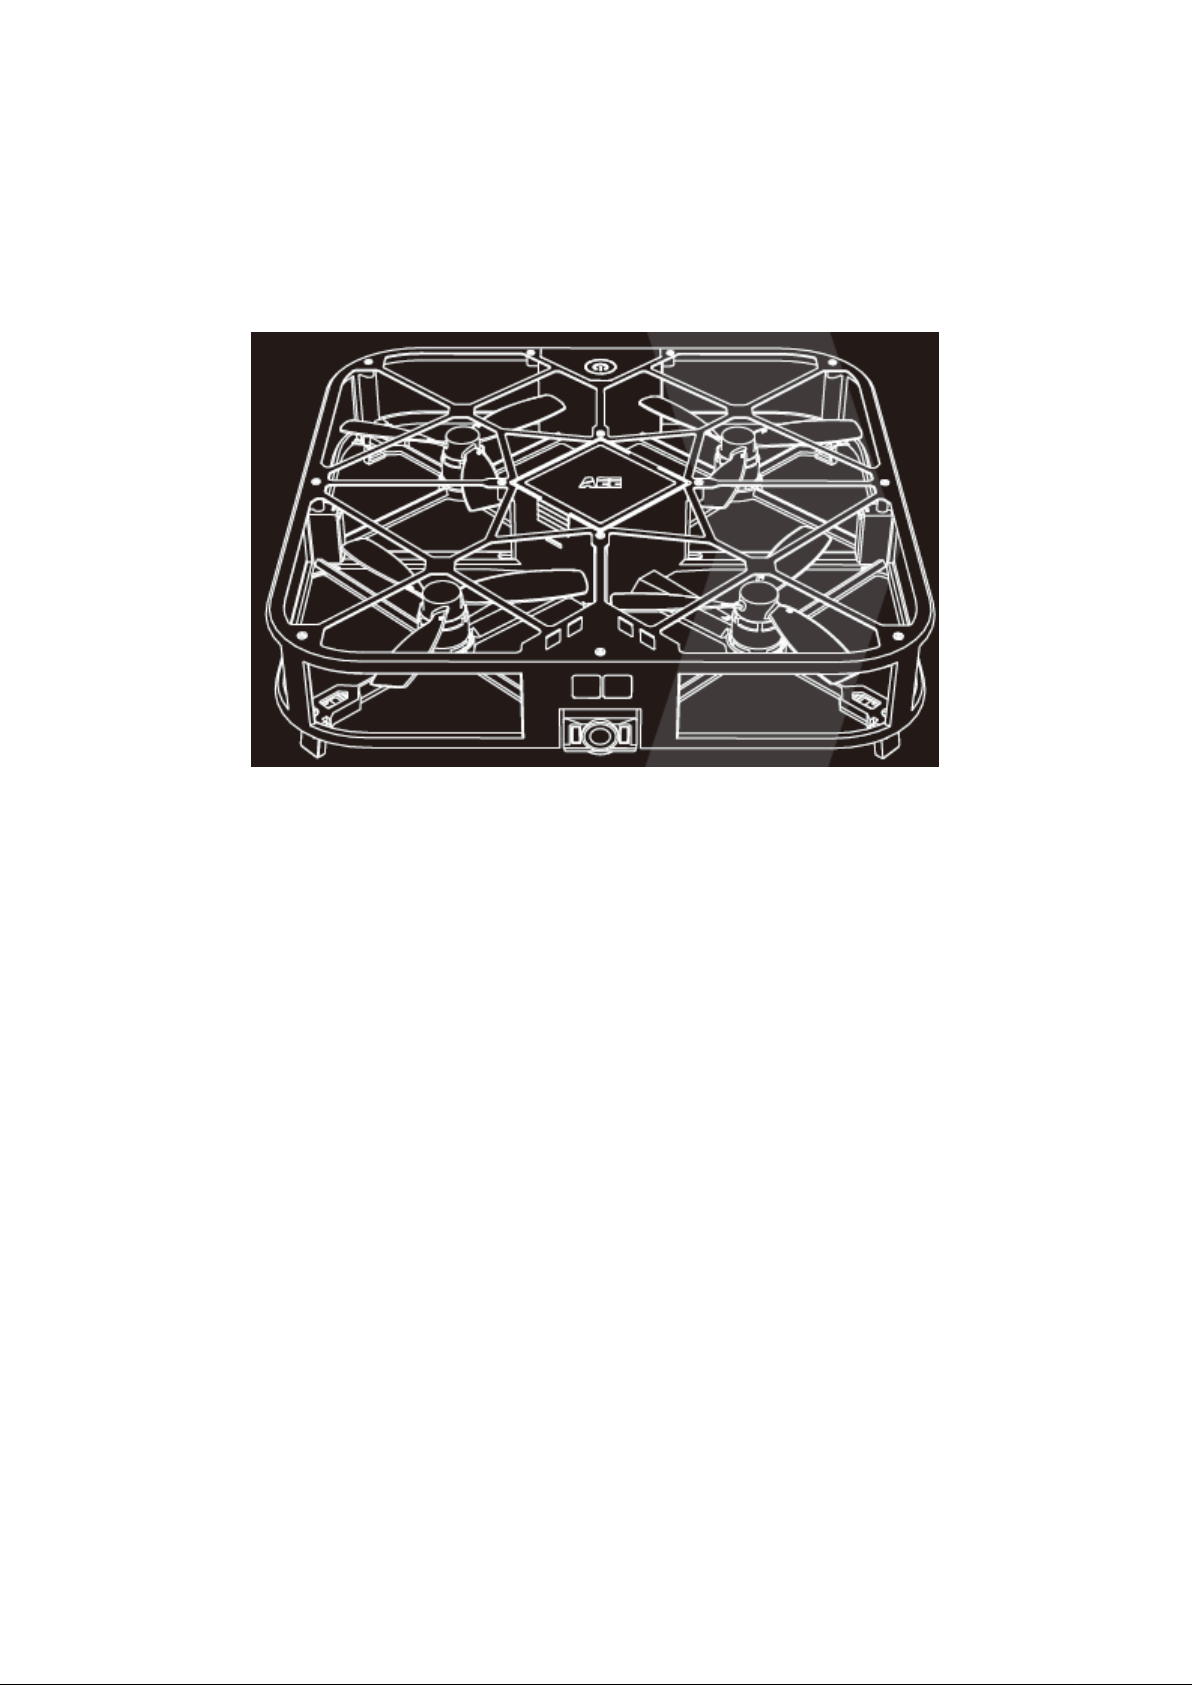
Aerial photography equipment
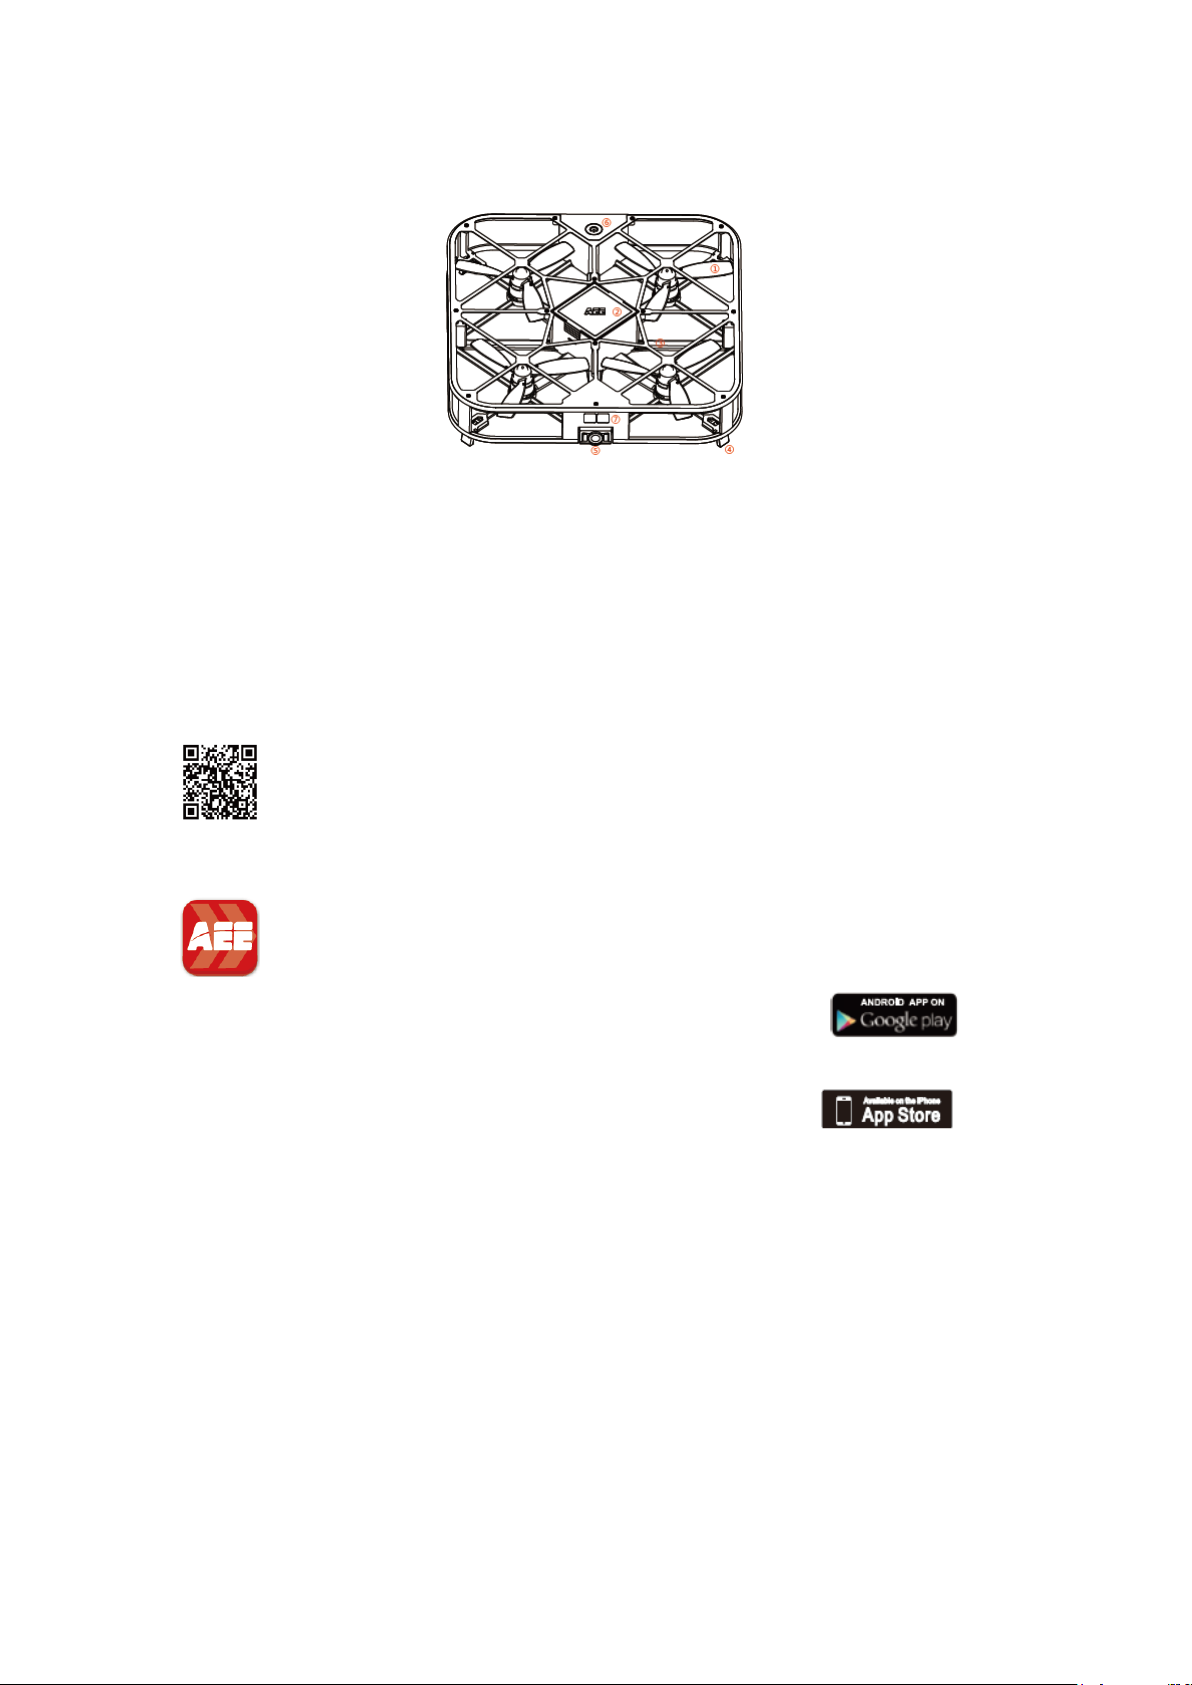
(1) Blade × 4
(2) Battery compartment
(3) Optical flow module (bottom)
(4) Undercarriage
(5) Lens
(6) Power switch
(7) IR obstacle avoidance
sensor × 4
(8) TF card slot
(9) Micro USB port
Components
Working Temperature:0℃~50℃.
I. APP Installation
1. Where to Download
Search the latest APP on our official website.
Scan the QR code for a link and follow the instructions to download and install AEE ZONE
onto your mobile device.
Download the APP from an APP market:
** Android 4.0 or above user: search “AEE ZONE” in Google Play ( ) and
download and install it onto your mobile device.
** iOS 8.0 or above user: search “AEE ZONE” in App Store ( ) and
download and install it onto your mobile device.
Compatible mobile devices:
iOS 8.0 or above: iPhone 5/5s/5c/6/6s/6 Plus/6s Plus/7/7 Plus.
Android 4.0 or above: all dominant devices.
※ AEE shall continue to update the APP in order to support more types of mobile devices.
II. APP Connection
Power on the UAV. Enable the Wi-Fi function of the mobile phone and connect to the
hotspot named “SPARROW_XXXXXXX”. Start the APP and select [UAV Connect] to
receive the UAV image. Long press the power switch of the UAV for 3s. If the power
indicator remains on without flashing, the UAV has been connected to the APP
successfully.
Step 1: Enable the Wi-Fi function of the mobile phone and find the relevant hotspot as
No.
Icon
Description
1
Return to the home page
2
Flash on/off
3
Headless mode on/off
4
Select a remote control mode: motion mode or joystick mode
shown in Fig. 2. Enter the password “00000000” and tap [Connect].
Fig. 2 Fig. 3
Step 2: Visit the downloaded AEE ZONE as shown in Fig. 3 and select the relevant
interface for connection.
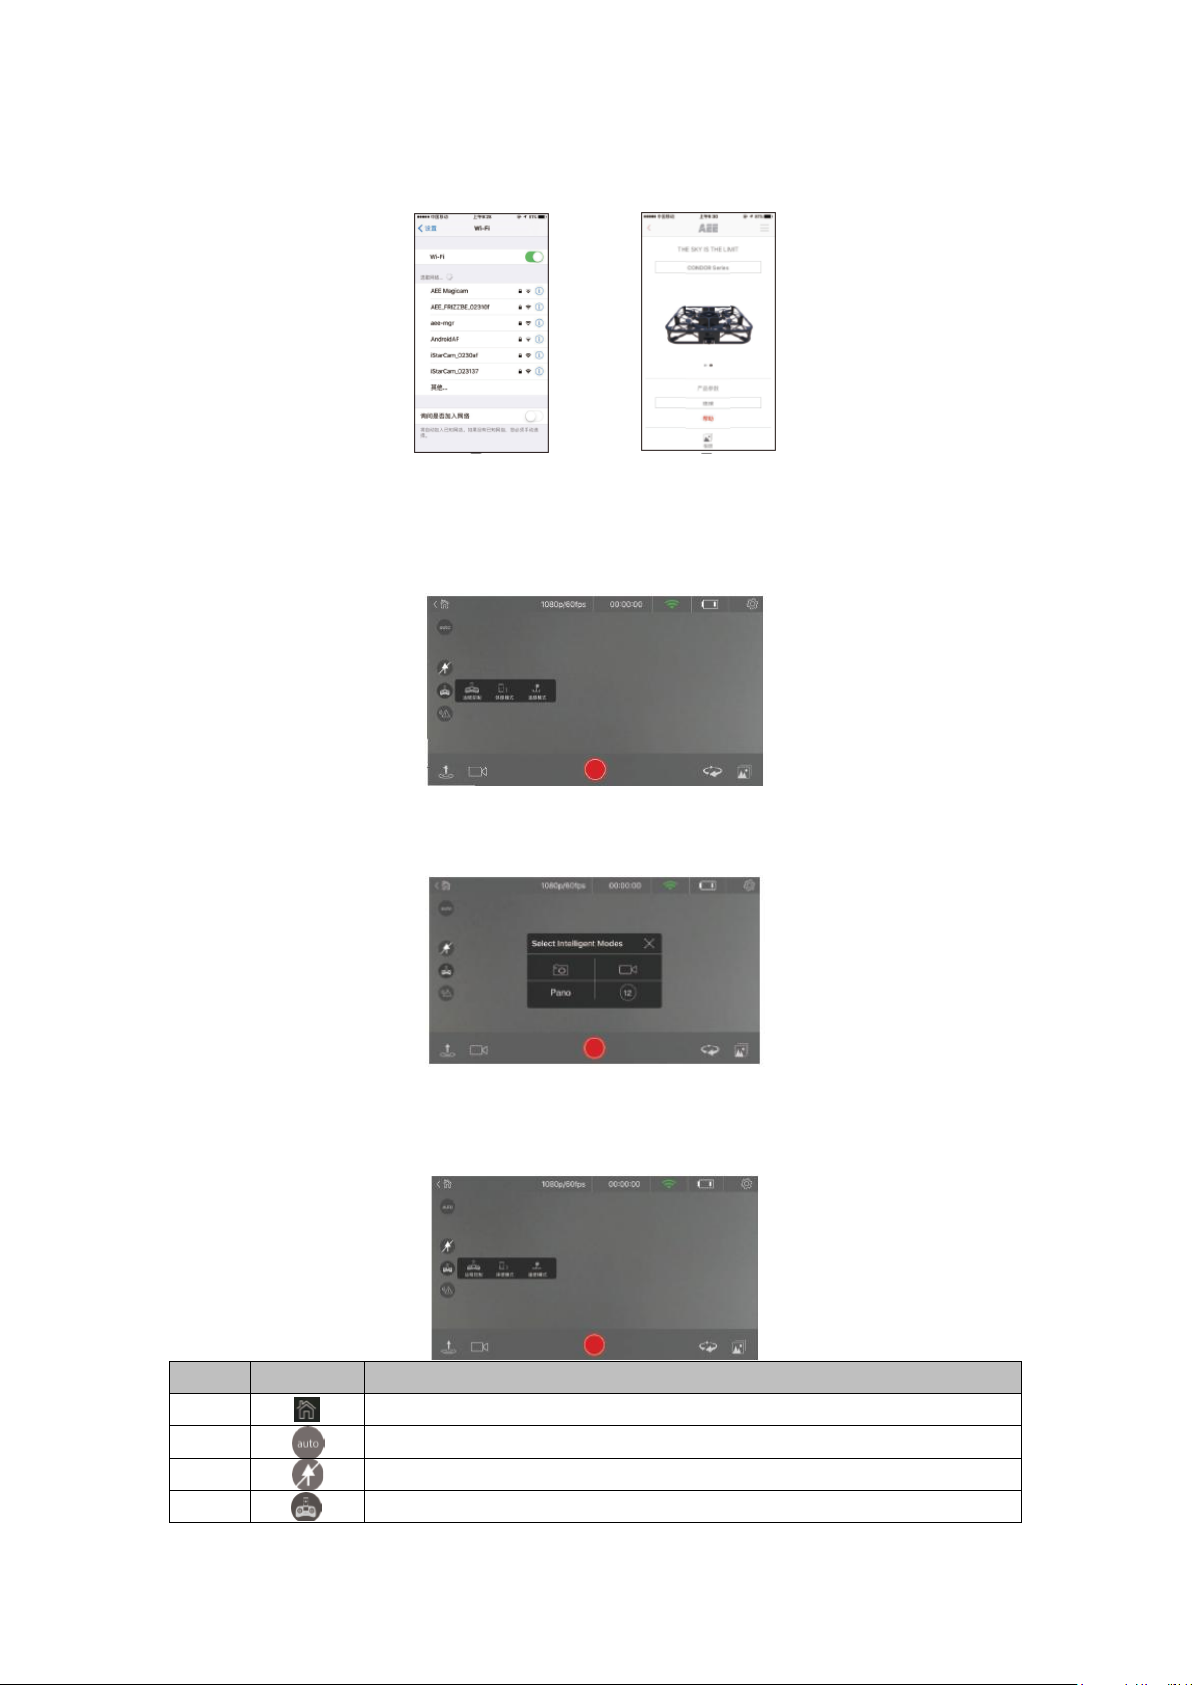
Step 3: Preview the main interface as shown in Fig. 4.
Fig. 4
Step 4: Tap the shooting/recording mode icon and select a mode as shown in Fig. 5.
Fig. 5
III. APP’s Main Interface

5
IR sensor on/off
6
Quick takeoff/landing
7
Select a shooting/recording mode: 4 modes available
8
Wi-Fi signal
9
Battery level
10
Settings
11
Start shooting/recording
12
Switch the nose direction
13
Album
Insert the battery into the
special charging base.
Blue: charging status indicator.
Flash slowly: charging…
Remain on: fully charged.
IV. Charging
The battery level is indicated by the battery level icon on the APP. Follow the figure below
to charge the battery when the battery level icon shows less than one bar of power:
Battery Charging Base
V. Battery Installation
Insert the battery into the battery compartment as directed by the 8 pins as shown below:
VI. Flight
1. Flight Environment
An indoor environment with calm air is recommended.
Indoor flight:
(1) Considering the optical flow positioning and all-round IR obstacle avoidance, clear
marks are required below the flight area.
(2) An indoor flight requires adequate light (illuminance>15lux), like normal fluorescent
lighting.
(3) No strong Wi-Fi interference is allowed.
2. Preflight Checks
(1) Check if the UAV has any structural damage.
(2) Check the battery level of the UAV (refer to the battery level icon on the APP).
(3) Check the battery level of the mobile phone (20% or higher).
3. Preparations for Light
(1) Prepare the UAV:
Keep the UAV in horizontal condition.
(2) Adjust the camera’s pitch angle:
As shown in the figure below, the camera supports 5 pitch angles: 0° (the lens faces the
front), 15° in elevation (push the lens up), or -30°, -60° or -90° in depression (push the
lens down).
(3) Power on the UAV:
Long press the power switch for 3s until the red power indicator is turned on.
(4) Start the flight:
(a) Take Off / Land
Tap the quick takeoff/landing icon “ ”, and the UAV will take off to the 1.5m altitude.
Tap such icon again, and the UAV will land to the takeoff point.
(b) Flight Control Mode – Joystick Mode (U.S. hand)
(c) Flight Control Mode – Motion Mode
In motion mode, tap and hold the motion button and tilt the mobile phone forward,
backward, left or right to control the UAV to fly forward, backward, left or right. Slide the
motion button up/down to increase/reduce the altitude of the UAV. Slide the motion
button left/right to change the heading of the UAV.
(d) Flight Control Mode – Headless Mode
In headless mode, the operating steps are not much different from in remote control
modes. The heading can be changed freely. No matter which angle the UAV has turned
to, the end in the same direction as the remote control will be considered as its tail by
default (easy to operate).
(5) Start shooting/recording:
The UAV supports 4 shooting/recording modes:
(a) Single shot: tap “ ” to shoot one photo.
(b) Normal video: tap “ ” to start/stop recording the video.
(c) Short video: tap “ ” to record a 12s video.
(d) Rotary camera: tap “ ” to rotate the heading clockwise by 360°, throughout which
process, the camera keeps recording the video.
VII. Sharing
Enter the album, select the photos/videos to be shared and tap [Download]. Disconnect
the mobile phone from the UAV’s Wi-Fi hotspot and connect it to your data traffic network
or Wi-Fi network. Tap the album icon on the AEE ZONE and select the photos/videos to
be shared.
1. Select [Camera Album] as shown in the left figure below.

2. Select the target photos/videos and download them onto your mobile phone as shown
in the right figure above.
3. Exit to the interface as shown in the left figure below and tap [Album].
4. Enter the local album as shown in the right figure above.
5. Select the photos to be shared and tap [Share] at the lower right corner to share them
as shown below.
VIII. Calibration
Generally the UAV requires no calibration. However, please calibrate it if the UAV deflects
or shakes.
Place the UAV in normal condition on the ground horizontally and power it on.
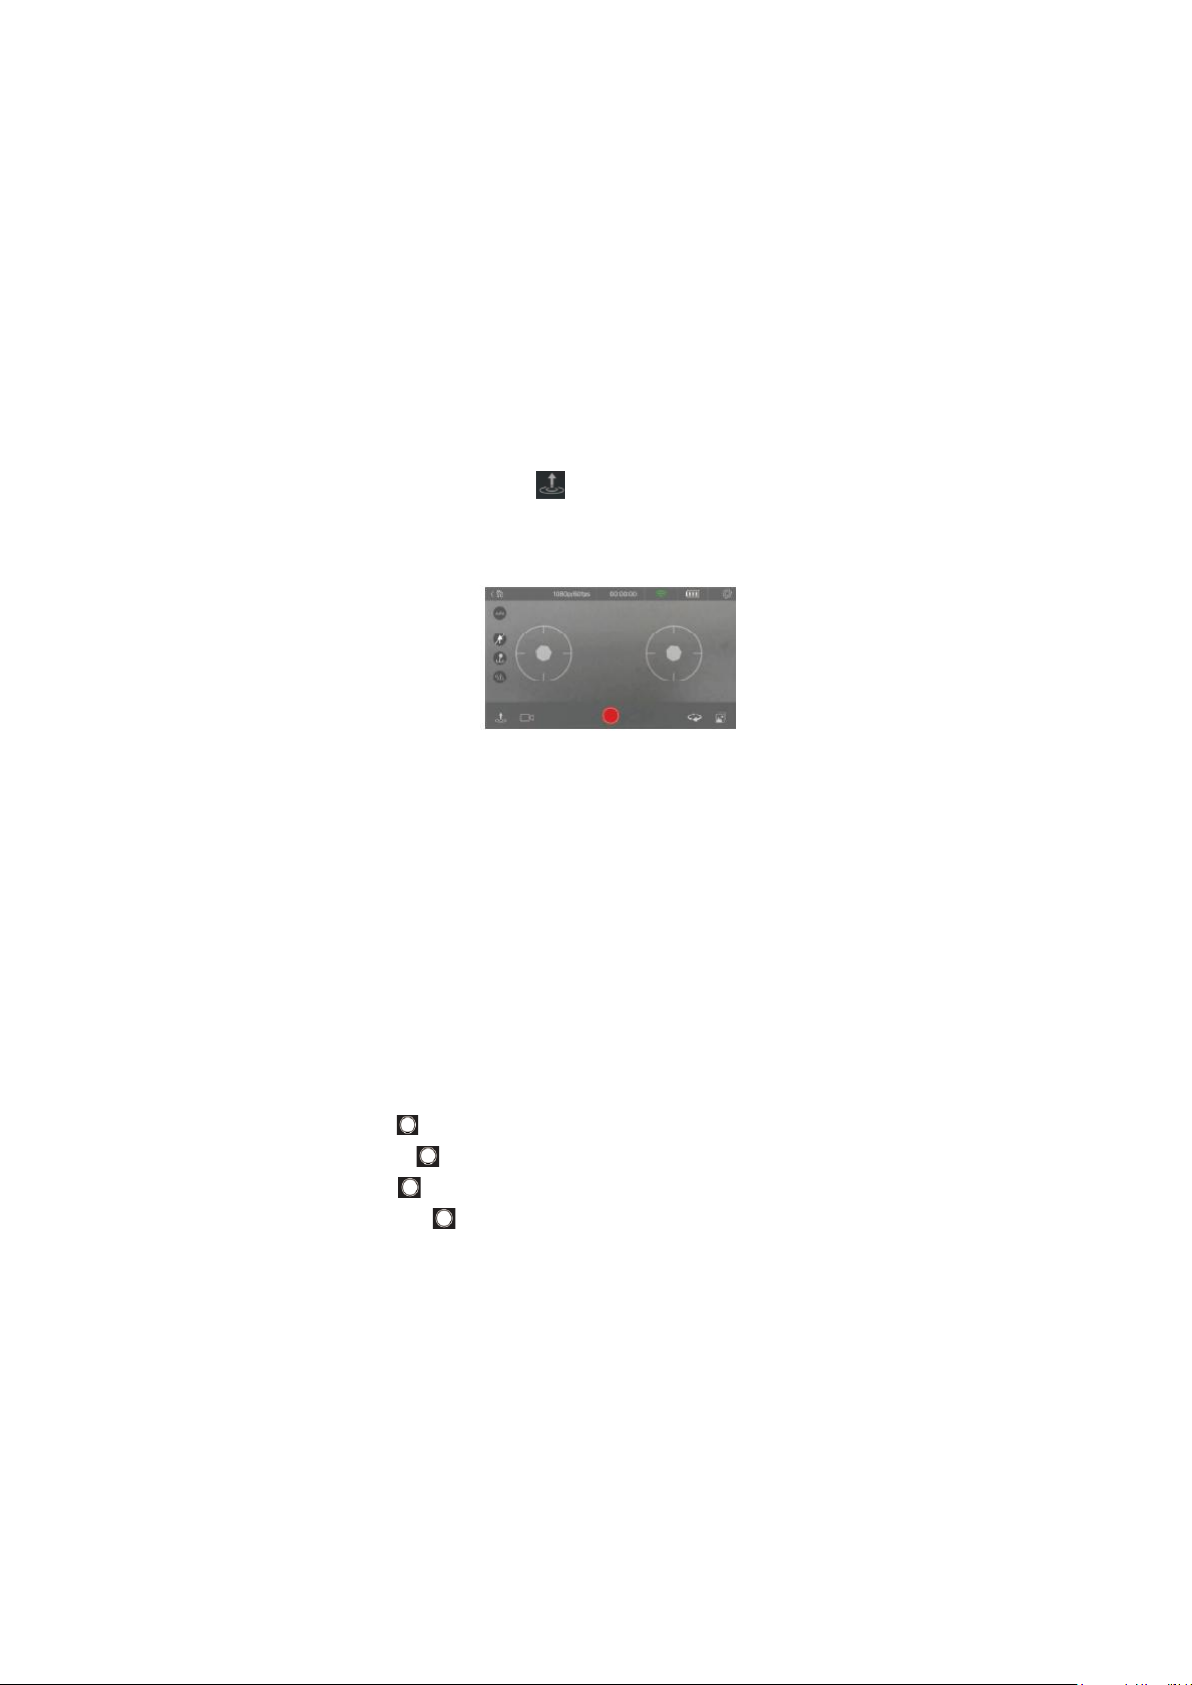
1. Start the APP connected to the UAV, tap the remote control mode icon “ ” and select
the joystick mode to enter the following interface:
2. Turn the joysticks to positions shown in the figure below. The power indicator will flash
quickly and then remain on or flash slightly. Wait 20s.

In case of successful calibration, the power indicator will remain on without flashing. If the
power indicator still flashes 20s later, it means the calibration fails. Power off the UAV and
then restart it. If the power indicator still flashes, recalibrate the UAV.
IX. Notes
1. Use the UAV in an indoor environment with calm air.
2. Disable the obstacle avoidance function in a narrow space.
3. If the image received from the UAV is displayed on the APP in an unsmooth or highly
delayed way, restart the APP.
4. Do not insert any finger or easy-to-wind object into the housing.
5. To install the battery or power on the UAV, keep the UAV in horizontal condition rather
than hold it in your hands.
6. Start the APP upon successful Wi-Fi connection. If no image is displayed in 20s, shut
down the APP thoroughly in the background and then restart it.
7. Do not walk around in headless mode.
8. To use the shooting/recording function, insert a SD card and power on the UAV.
9. If the power indicator flashes slightly after powering on the UAV and connecting it to the
APP, calibrate the UAV.
10. Calibrate it if the UAV deflects or shakes in the flight.
11. The motion mode is available in the flight only.
12. No flight is allowed in extreme weather conditions, even in an indoor environment (the
UAV tends to be unstable in extreme weather conditions where the barometric
pressure used to determine the altitude is changed).
X. Safety Instructions on Battery
Disclaimer
Providing relevant operation and maintenance safety instructions, this Guide is applicable
to AEE CONDOR360 UAV and its battery only.
Please read the precautions and warnings contained herein carefully before using the
UAV and its battery. We shall not be held liable for any consequence caused by improper
use.
Working Temperature
Charging: 0℃~40℃.
Discharging: 0℃~40℃.
Precautions
1. To prevent risks and product damage, use the original battery and charger specially
designed for SPARROW UAV and approved by AEE only.
2. Using any battery or charger other than specified above may shorten the UAV’s or
battery’s service life or cause product faults or even battery fire or explosion.
3. Never insert the battery into the UAV reversely.
4. If any electrolyte splashes onto your eyes or skin in case of battery leakage, rinse with
clear water and ask for medical help immediately.
5. Make sure the battery is fully charged before each flight.

6. The UAV will be forced to land for safety sake in case of low battery power.
Storage Time (T)
Temperature (℃)
T < 1 month
-10℃~+45℃
1 month < T < 3 months
-10℃~+35℃
7. Charge the battery for 2h at most. Overcharging may damage the battery severely.
8. Over-discharging may shorten the battery’s service life severely. Please charge the
battery in time.
9. Remove it from the UAV or charger immediately and stop using it if the battery smells,
overheats, deforms, discolors or has any other anomaly.
10. To protect the battery’s performance and maintain its service life, do not use it when
the battery is placed in an extremely hot environment (like in direct sunlight or in a car
on hot days), or it may overheat to catch fire (if ignited).
Battery Transportation and Storage
Note: to keep the battery active, please full charge and discharge it every three months.
General Instructions
1. Do not throw the battery into water or wet it.
2. Do not charge the battery near any fire source or in any extremely hot environment. Do
not use or store it near any heat source (like fire or heater).
3. Use the special charger only.
4. Do not throw the battery into fire or heat it.
5. Do not use wires or other metal objects to short-circuit the battery’s anode and cathode.
Do not transport or store the battery together with necklaces hairpins or other metal
objects.
6. Do not use nails or other sharp objects to pierce the battery housing. Never hammer or
step on the battery.
7. Do not impact or throw the battery or expose it to any mechanical shock.
8. Do not decompose the battery in any way.
9. Do not place the battery in any microwave oven or pressure vessel.
10. Do not use the battery in a combination with any other battery of different capacity,
size or type.
Disposal
Do not dispose of waste battery with regular household waste. The waste battery should
be fully discharged and returned to battery collection points according to local laws and
regulations

FCC Statement
This equipment has been tested and found to comply with the limits for a Class B digital
device, pursuant to Part 15 of the FCC Rules. These limits are designed to provide
reasonable protection against harmful interference in a residential installation. This
equipment generates, uses and can radiate radio frequency energy and, if not installed
and used in accordance with the instructions, may cause harmful interference to radio
communications. However, there is no guarantee that interference will not occur in a
particular installation. If this equipment does cause harmful interference to radio or
television reception, which can be determined by turning the equipment off and on, the
user is encouraged to try to correct the interference by one of the following measures:
· Reorient or relocate the receiving antenna.
· Increase the separation between the equipment and receiver.
· Connect the equipment into an outlet on a circuit different from that to which
the receiver is connected.
· Consult the dealer or an experienced radio/TV technician for help.
To assure continued compliance, any changes or modifications not expressly approved by
the party responsible for compliance could void the user's authority to operate this
equipment.
FCC Radiation Exposure Statement
This equipment complies with FCC RF radiation exposure limits set forth for an
uncontrolled environment. This equipment should be installed and operated with a
minimum distance of 20 centimeters between the radiator and your body.
 Loading...