

Page 1
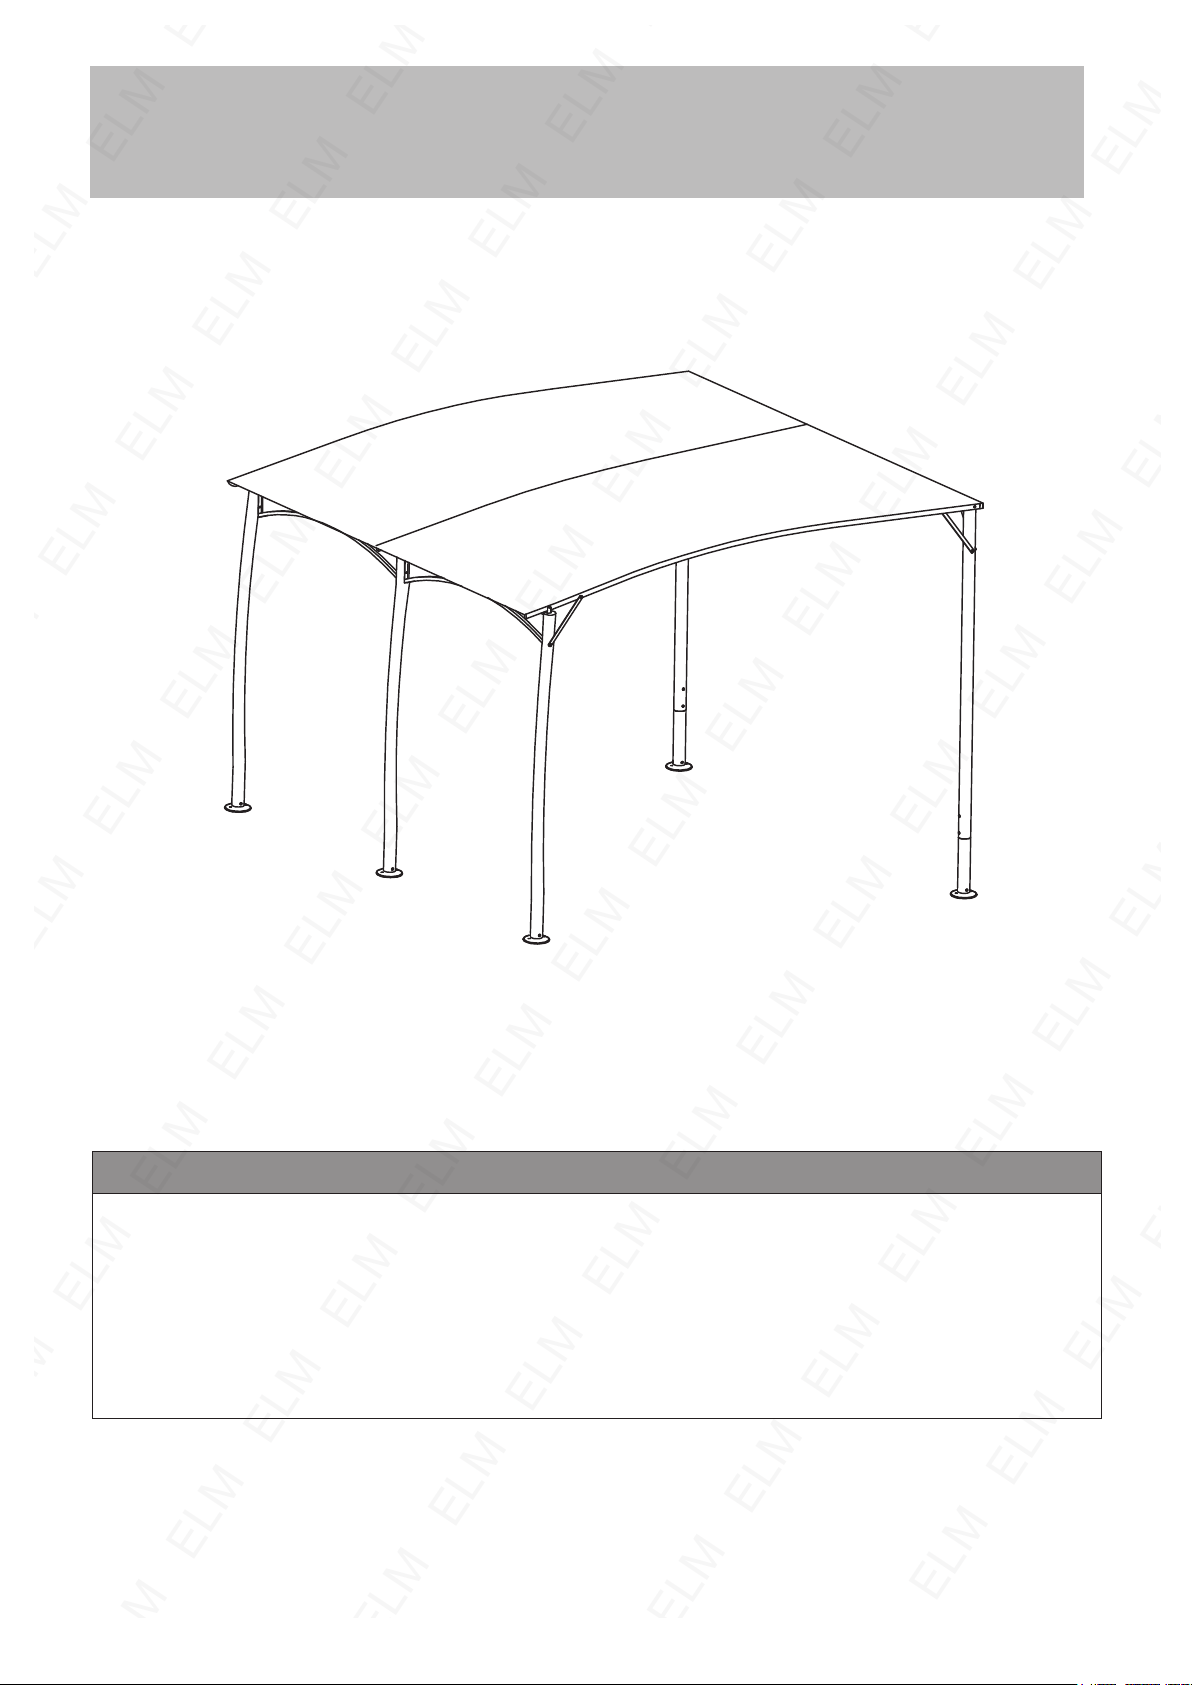
10' x 13' Patio Canopy_16089BG
Assembly Instructions
Notification
1. We care about your shopping experience, kindly contact us freely if any part missing or
defective or any other issue, we will try our best to solve it asap.
2. Recommend at least 3 persons and prepare a ladder to assemble the product.
3.The product is packed in 2 boxes. Please start assemble it after receive all boxes.
-1-
Page 2
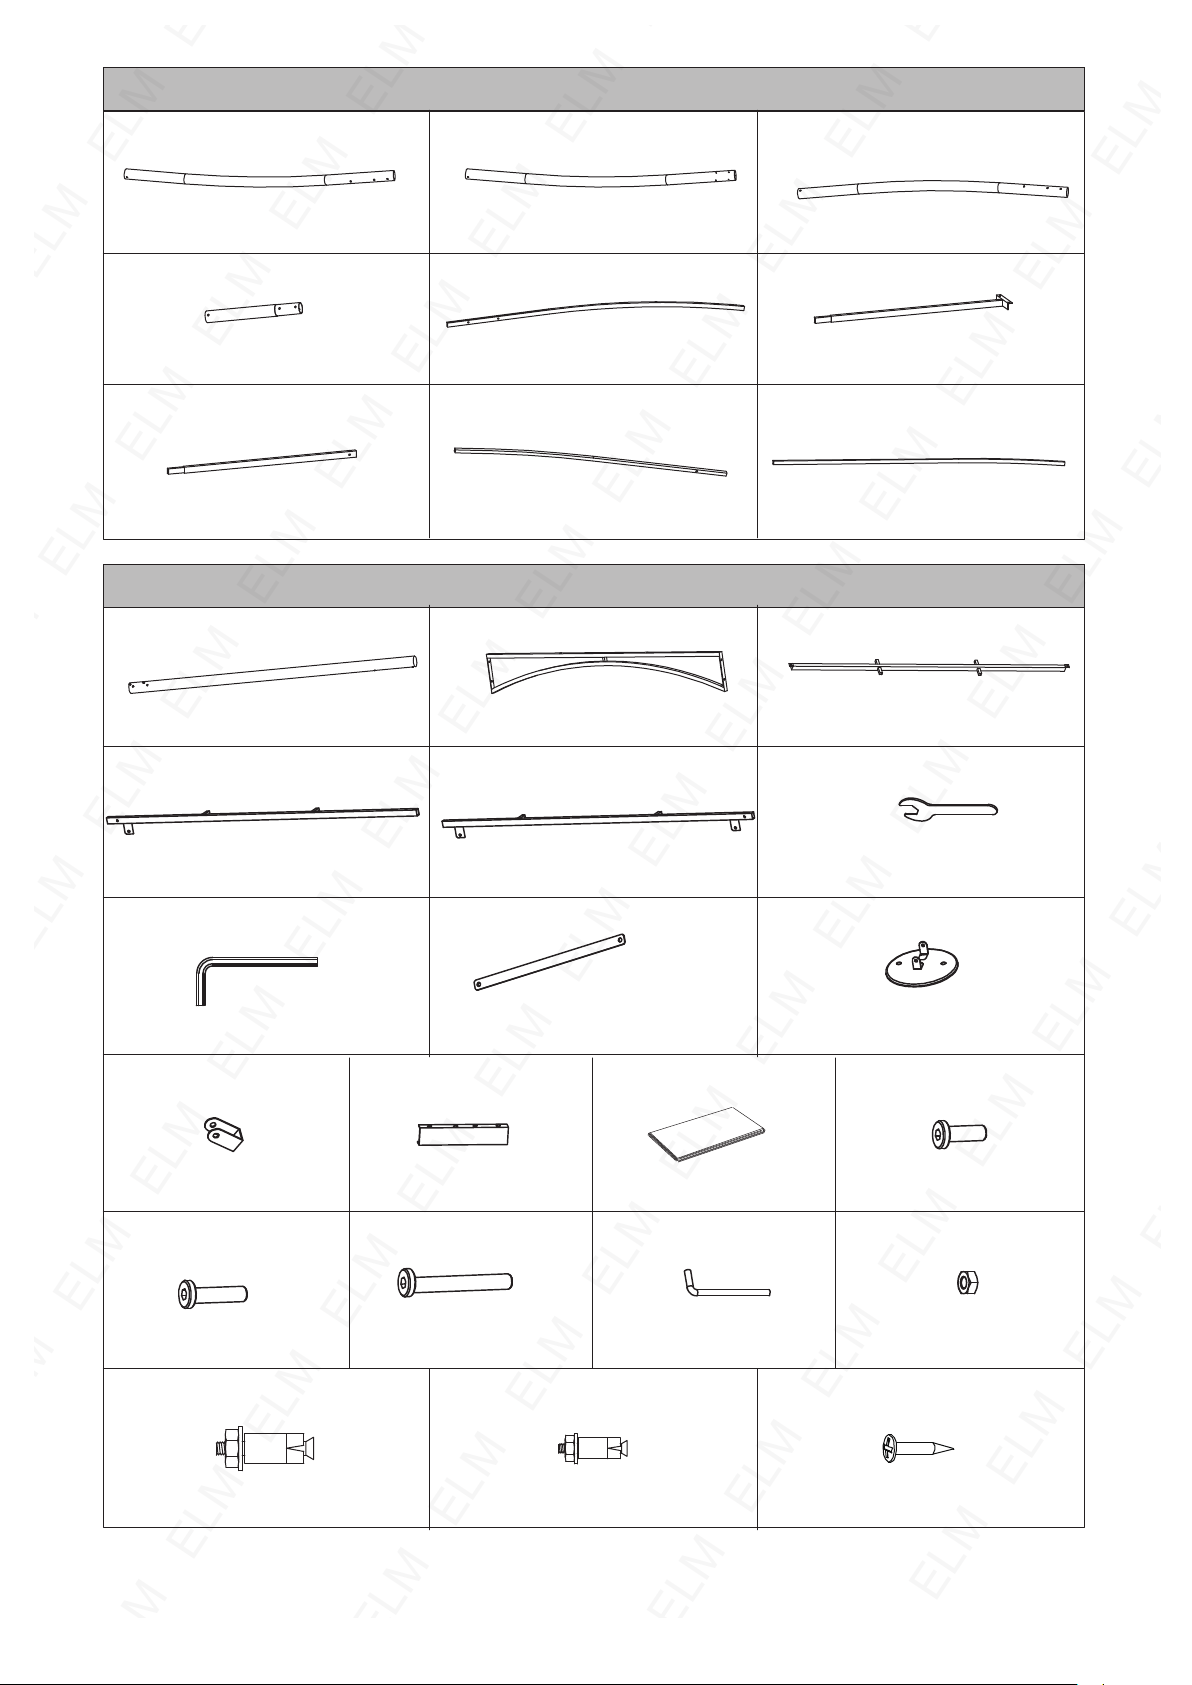
Box 1/2
A B C
1PC 1PC 1PC
E
2PCS
I
2PCS
D
2PCS
G H
3PCS 1PC
L K
4PCS
Box 2/2
F
2PCS
J
M N O
4PCS
2PCS
1PC 1PC 1PC
P
1PC
Q R
6PCS 5PCS
S T U V
4PCS
1PC 1PC
M6*15 47PCS
W X Y Z
M6*30 15PCS M6*85 2PCS 10PCS 13PCS
Z1 Z2 Z3
3PCS 10PCS 10PCS
-2-
Page 3
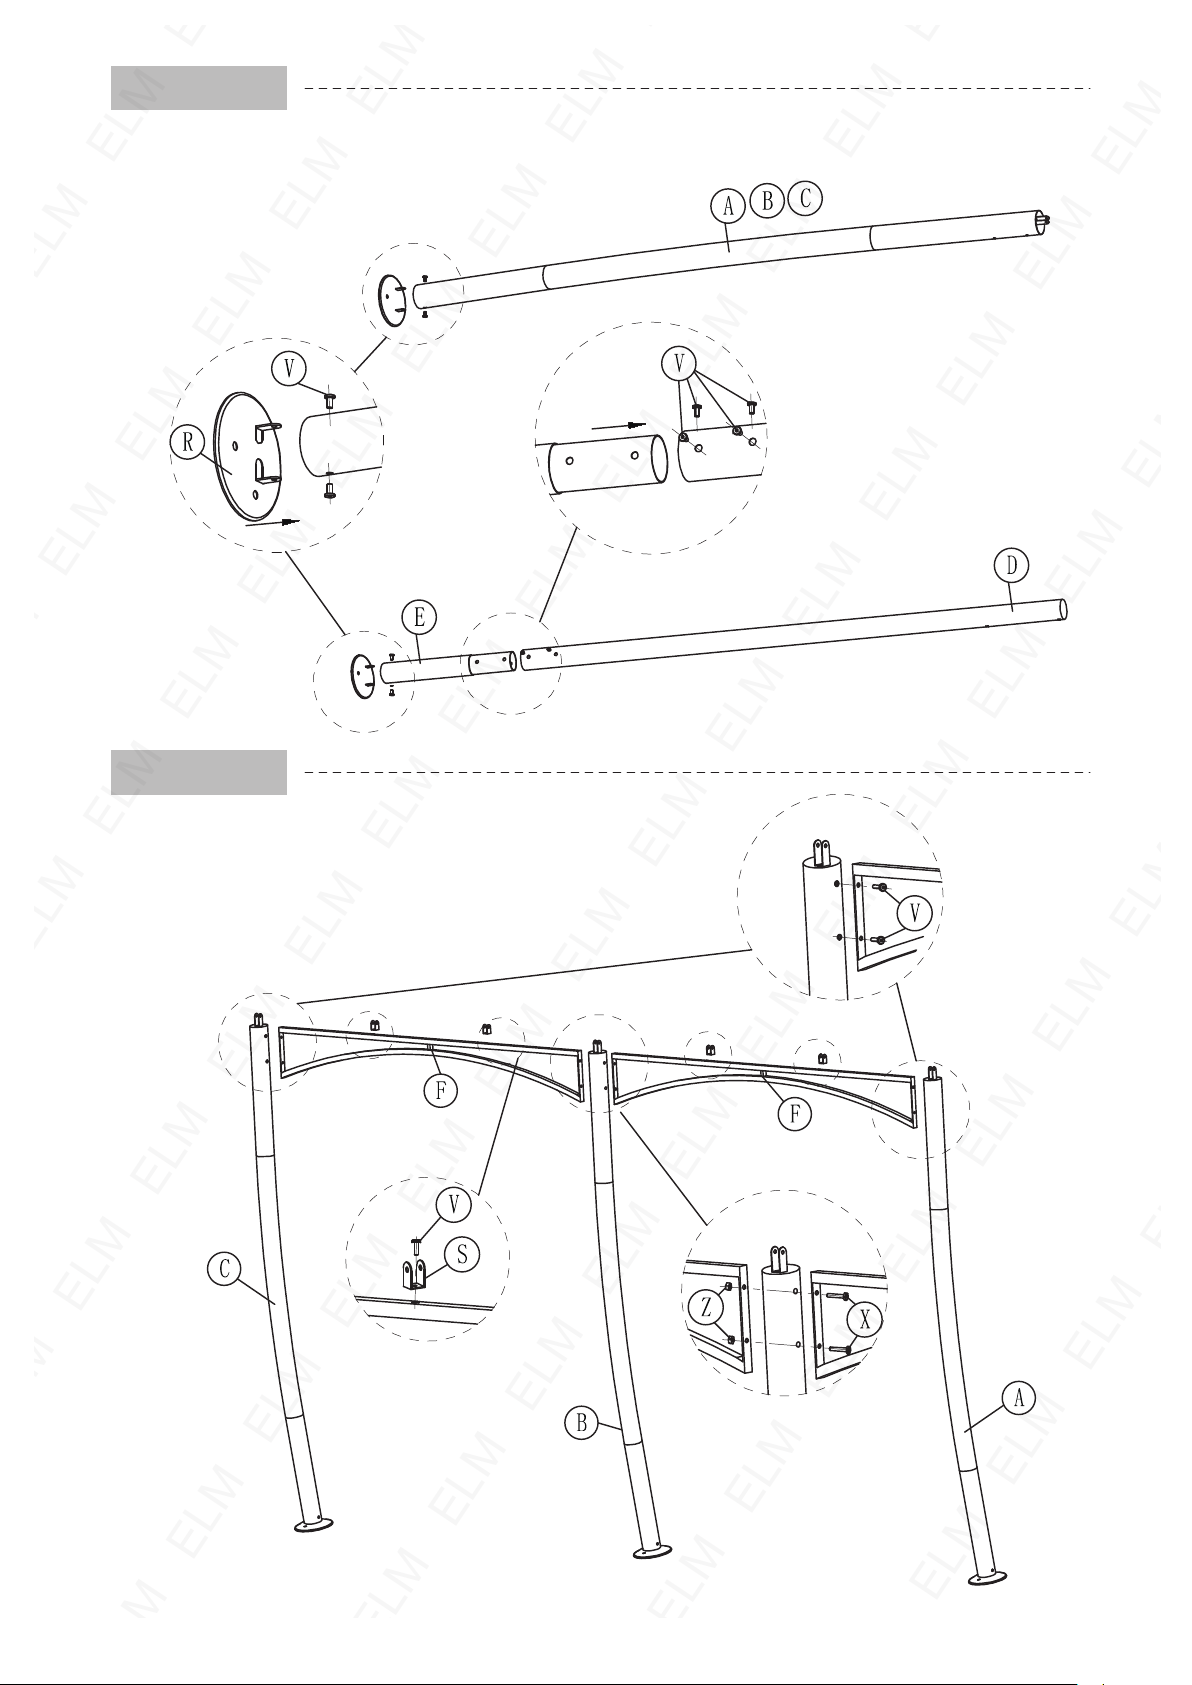
STEP 1
Connect pole D with E by bolt V, assemble part R with pole A, B, C, E with bolt V.
STEP 2
Connect frame F with pole A, B, C by bolt V, X and nut Z.
Assemble the bracket S with bolt V.
-3-
Page 4
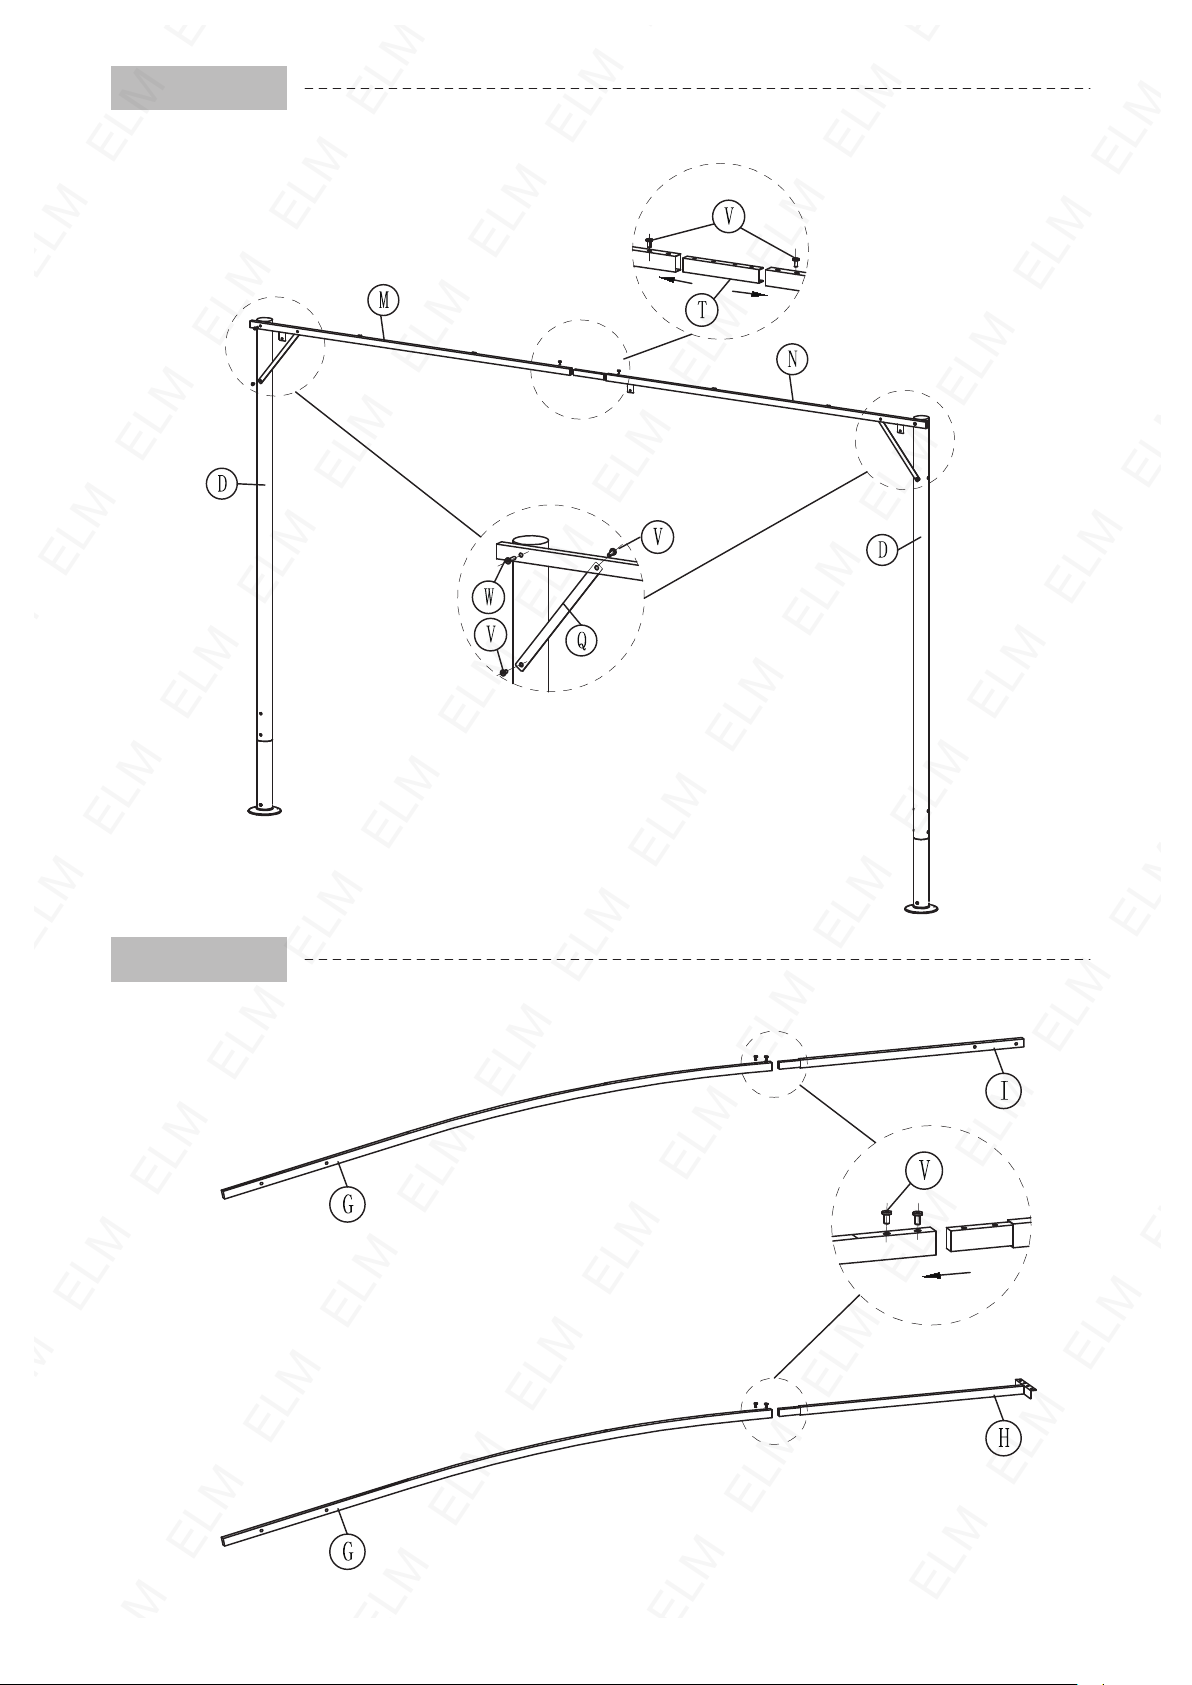
STEP 3
Assemble the frame M, N with pole D with support bracket Q, bolt V and W, connect frame M, N
with part T and bolt V.
STEP 4
Connect frame G with frame I, H by bolt V.
-4-
Page 5
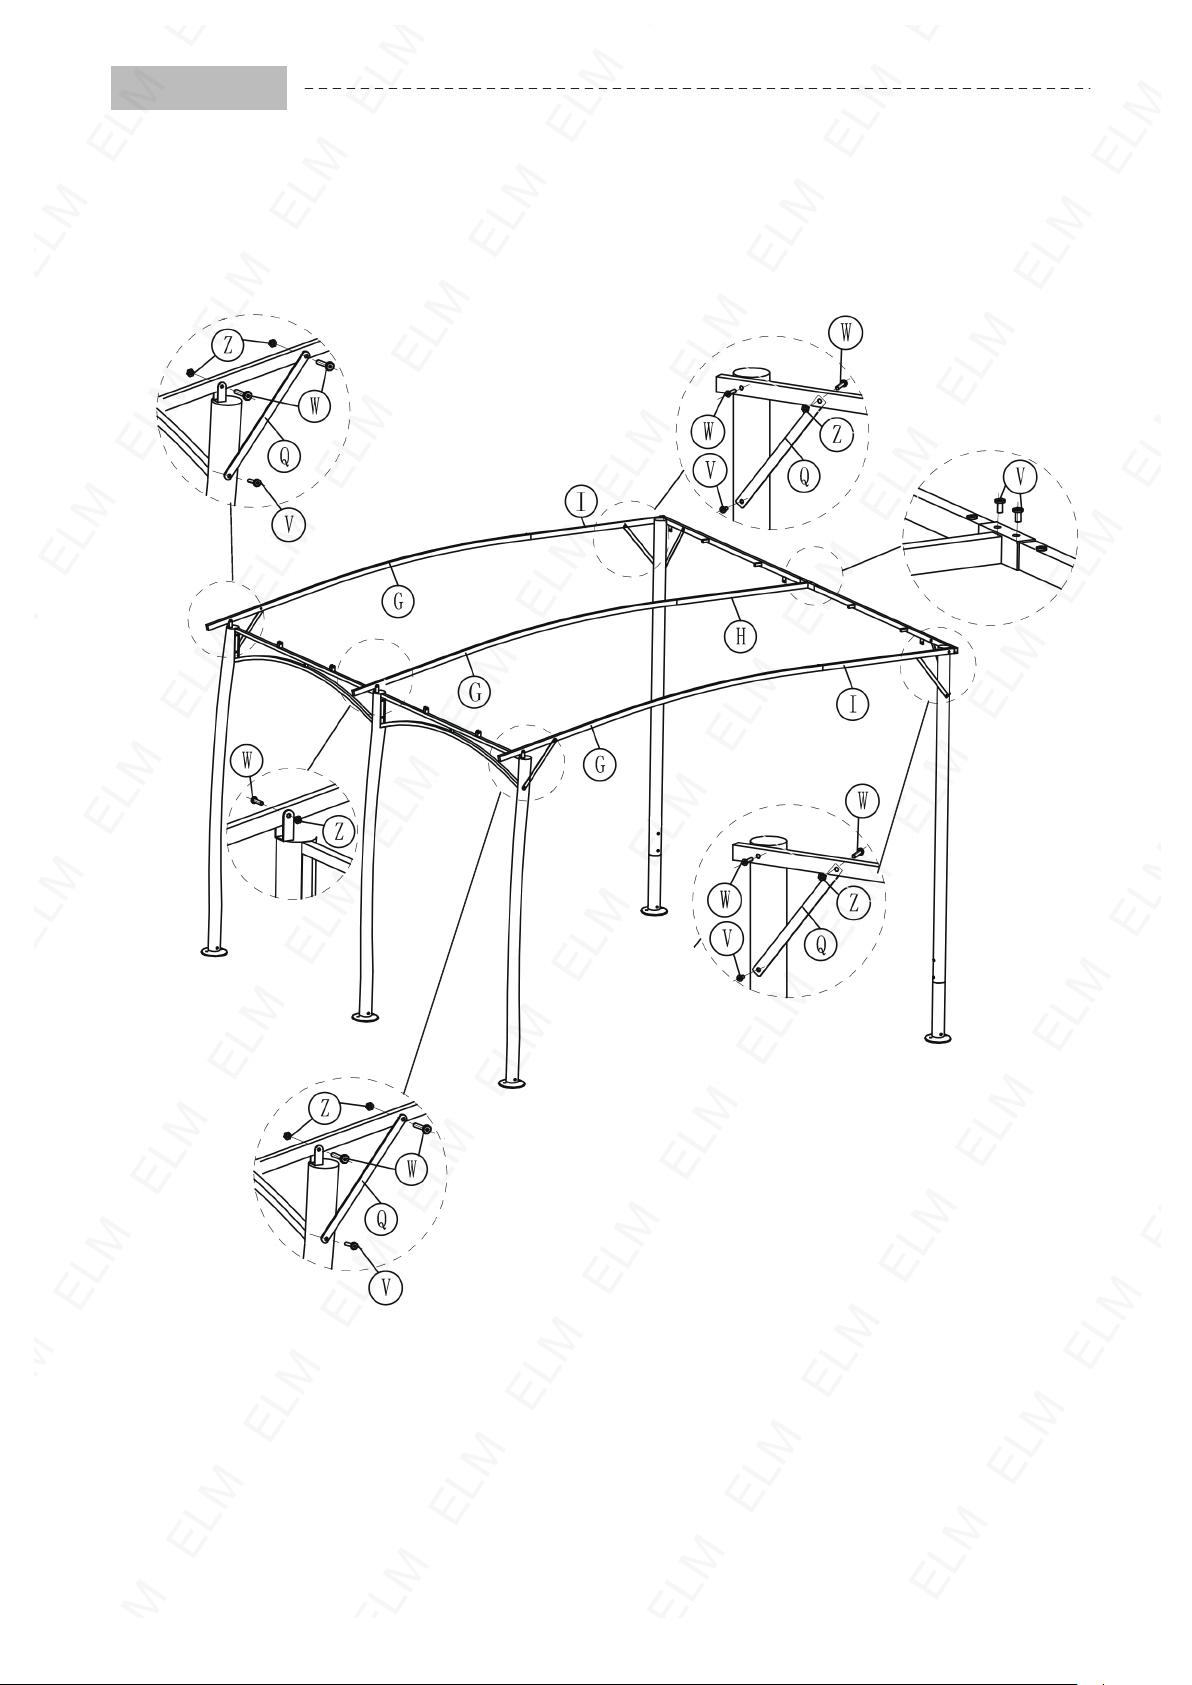
STEP 5
Connect the frame G, I with base pole by support bracket Q, bolt V, W and nut Z.
Assemble the frame G, H with pole by bolt W, V and nut Z.
-5-
Page 6
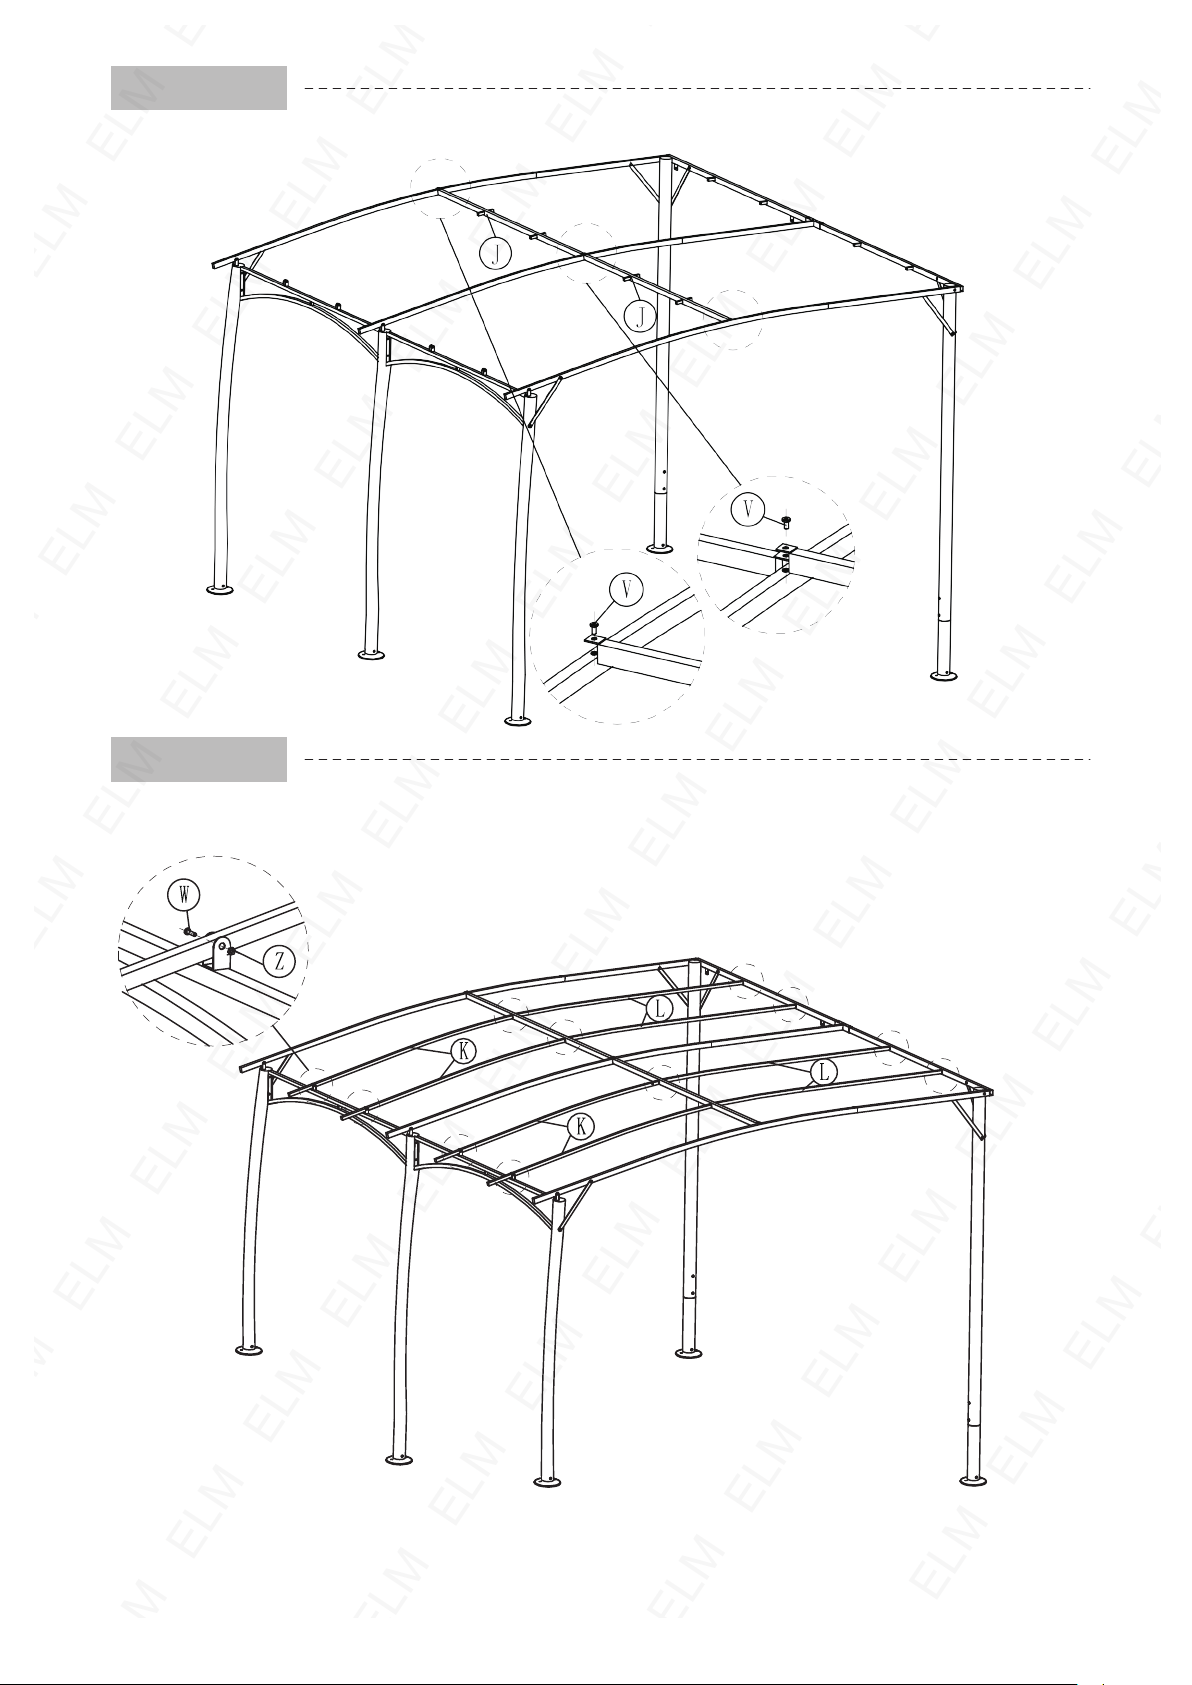
STEP 6
Connect the frame J with pole by bolt V.
STEP 7
Assemble the frame K with bolt W and nut Z, insert the frame L.
-6-
Page 7
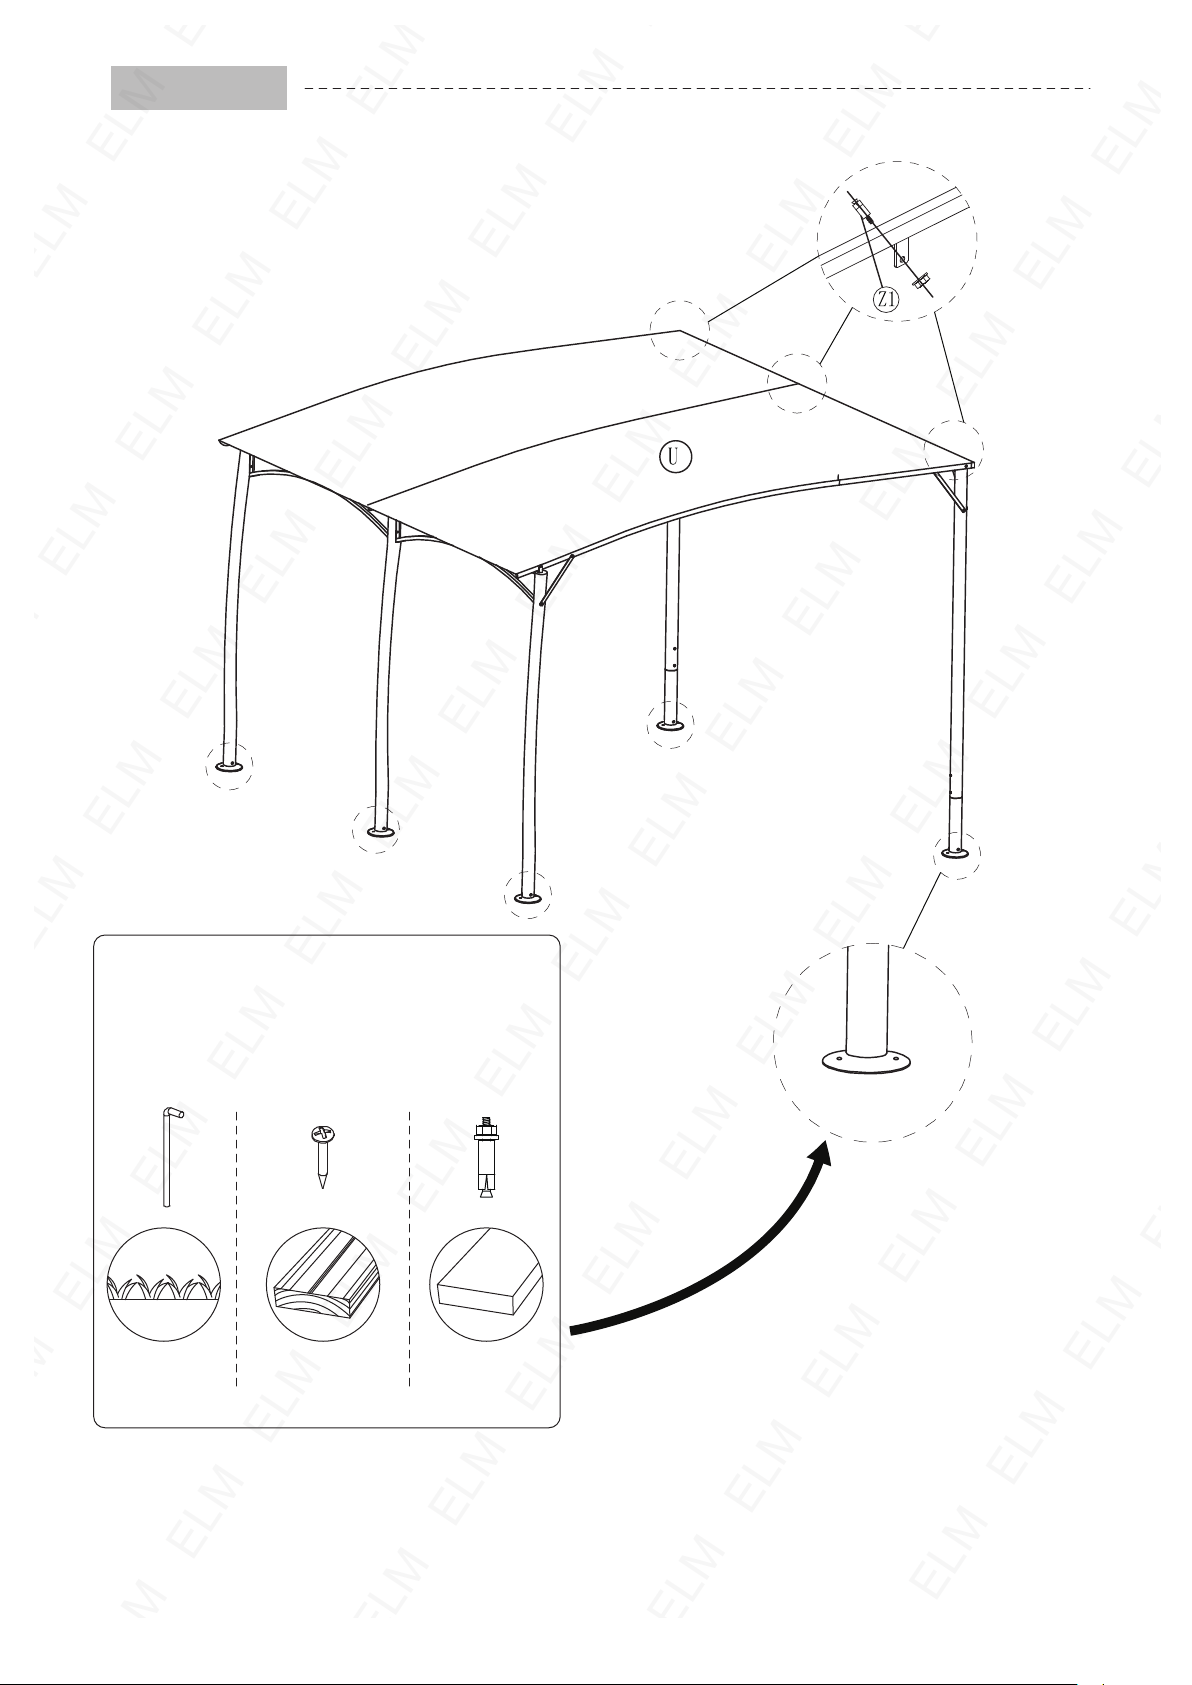
STEP 8
Connect the patio canopy with the wall by the expension screw Z1.
Fix the gazebo to the ground with part Y
when on the grass, use screw Z3 when on
the wooden floor, use expansion screw Z2
when on the cement.
Grass
Z3Y
Wooden floor Cement
Z2
-7-
 Loading...