

Page 1
www.adwainstruments.com
USER MANUAL
AD13
Waterproof ORP T ester
Dear Customer,
Thank you for choosing an Adwa product.
Please read carefully this manual before
starting operations.
This instrument is in compliance with the
EMC Directive 89/336/EEC and Low V oltage
Directive 73/23/EEC for electrical equipments.
For additional technical information, please
e-mail us at [email protected].
INTRODUCTION
AD13 is a waterproof ORP and temperature
tester. The housing has been completely
sealed against humidity.
Temperature values can be displayed in
°C or °F units.
The meter is factory calibrated both for
ORP (mV) and temperature ranges.
Measurements are highly accurate with
a unique stability indicator right on the
LCD. The model is also provided with a
low battery symbol which warns the user
when the batteries need to be replaced.
The AD13P ORP electrode, supplied with
the meter, is interchangeable and can be
easily replaced by the user.
The encapsulated temperature sensor
allows fast and accurate temperature
measurement.
The meter is supplied complete with:
• AD13P ORP electrode
• 4 x 1.5V batteries, button type
• User manual
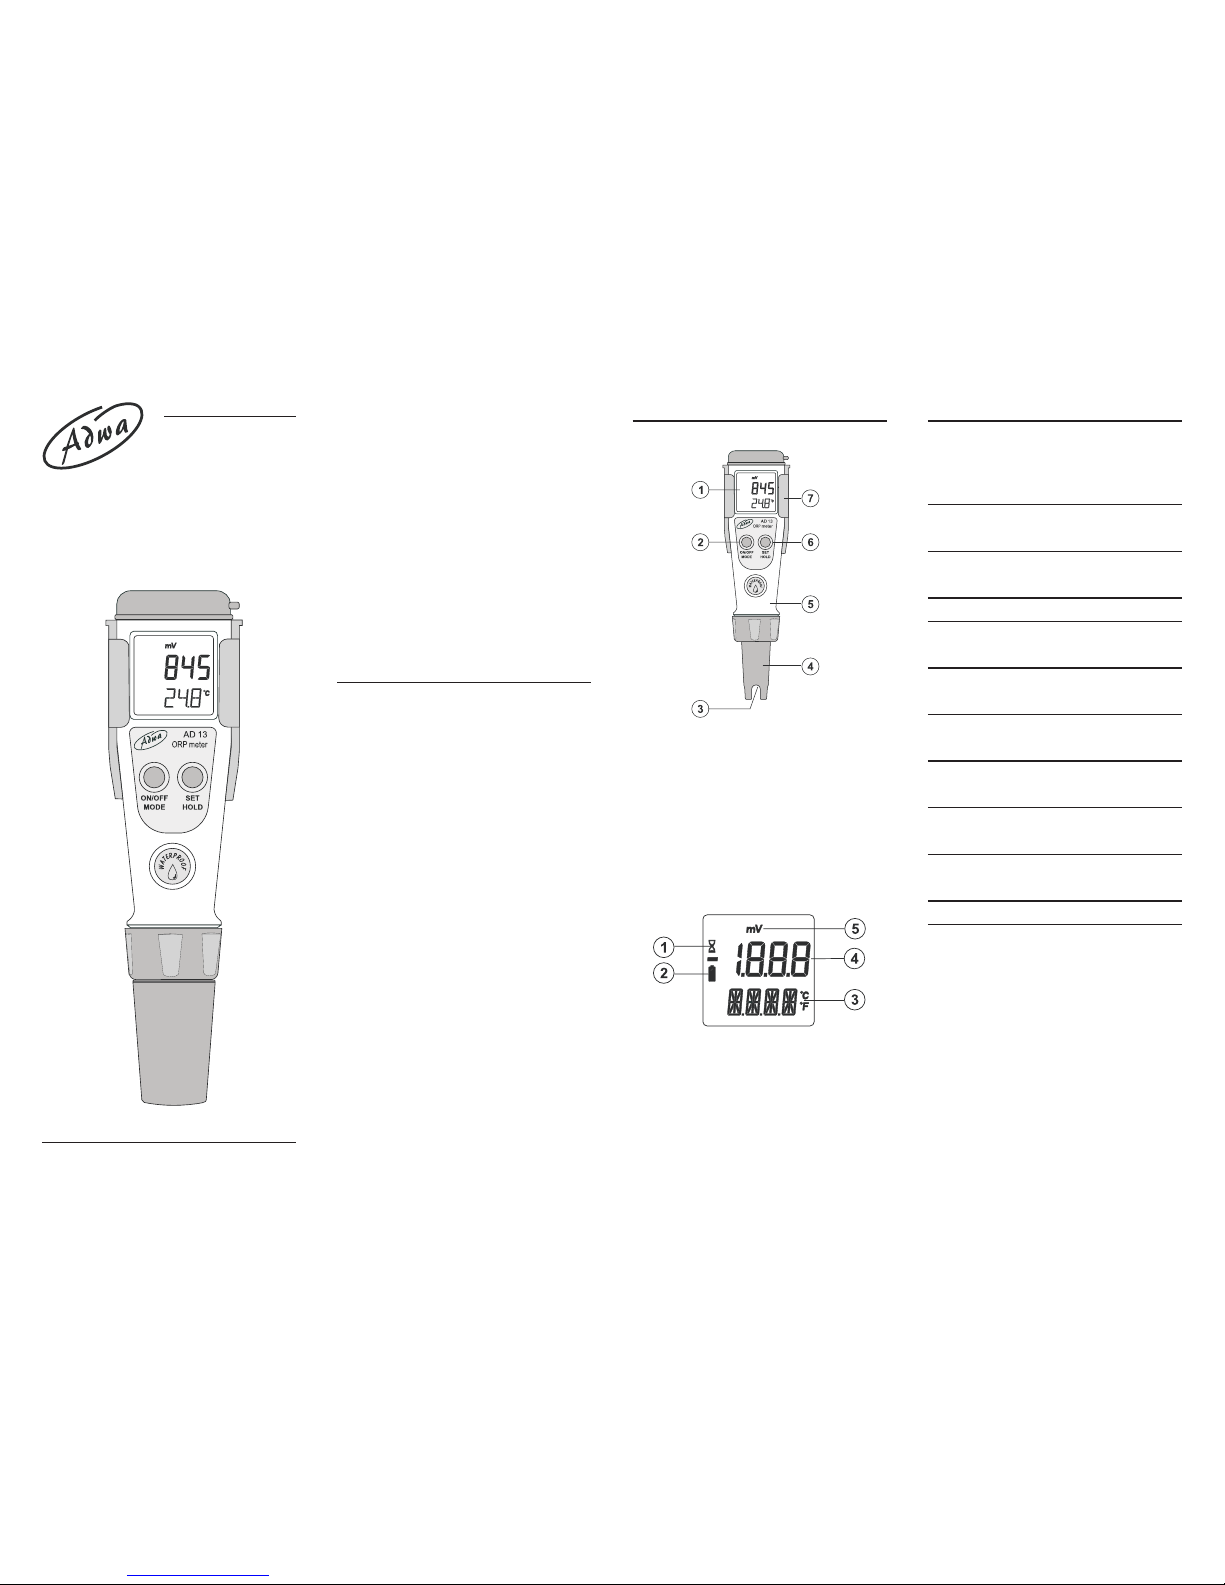
FRONT PANEL & DISPLAY
1. Dual line LCD
2. ON/OFF/ MODE button
3. ORP electrode & temperature sensor
4. Electrode body
5. Battery compartment (inside)
6. SET/HOLD button
7. Clip holder
1. Stability indicator (hourglass symbol)
2. Low battery warning indicator
3. Secondary LCD level
4. Primary LCD level
5. Measurement unit for primary level
TECHNICAL DATA
Range ±1000 mV
-5.0 to 60.0°C / 23.0 to 140.0°F
Resolution 1 mV
0.1°C / 0.1°F
Accuracy (@20°C/68°F)
±2 mV / ±0.5°C / ±1°F
Calibration Factory calibrated
Electrode
AD13P ORP electrode (included)
Battery Type
4 x 1.5V button type
Battery Life
Approx. 300 h of use
Auto-off
After 8 minutes of non-use
Environment
-5 to 50°C (23 to122°F); RH 100%
Dimensions
175.5 x 39 x 23 mm
Weight 100 g
ISTAD13R2 07/09
Page 2
Turn the meter on
• Press and hold the ON/OFF/MODE
button until the LCD lights up. All the
used segments will be visible for one
second (or as long as the button is
pressed).
Freeze the display
• While in measurement mode, press the
SET/HOLD button. The reading will
be frozen on the LCD. Press any button
to return to normal mode.
Turn the meter off
• While in measurement mode, press the
ON/OFF/MODE button. OFF will
appear on the secondary display.
Release the button.
Note:If measurements are taken in
different samples successively,
rinse the probe thoroughly to
eliminate cross-contamination.
After cleaning, rinse the probe
with some of the sample to be
measured.
OPERATIONAL GUIDE MEASUREMENT & CALIBRATION
• Submerge the electrode in the solution
to be tested while stirring it gently.
• Measurements should be taken when
the stability indicator (hourglass)
disappears.
• The ORP (mV) value is shown on the
primary LCD level while the secondary
one shows the sample temperature.
Note: The ORP (mV) range is factory
calibrated.
SETUP
Setup mode allows the selection of
temperature unit.
To enter the setup mode, press the ON/
OFF/MODE button until CAL on the
secondary display is replaced by TEMP
and the current temperature unit (e.g.
TEMP °C).
Then use the SET/HOLD button to
select the desired option.
After the temperature unit has been
selected, press the ON/OFF/MODE
button to return to the normal measuring
mode.
ELECTRODE MAINTENANCE
When not in use, rinse the electrode
with water and store it with a few drops
of A7071S electrolyte solution in the
protective cap.
NEVER STORE THE ELECTRODE
IN DISTILLED OR DEIONIZED
WATER!
• If the electrode has been left dry, soak
the tip in electrolyte solution for at least
one hour to reactivate it.
• To prolong the electrode life, it is
recommended to clean it monthly by
immersing the tip in deionized water
for 30 minutes. Afterwards, rinse it
thoroughly with tap water and
recalibrate the meter.
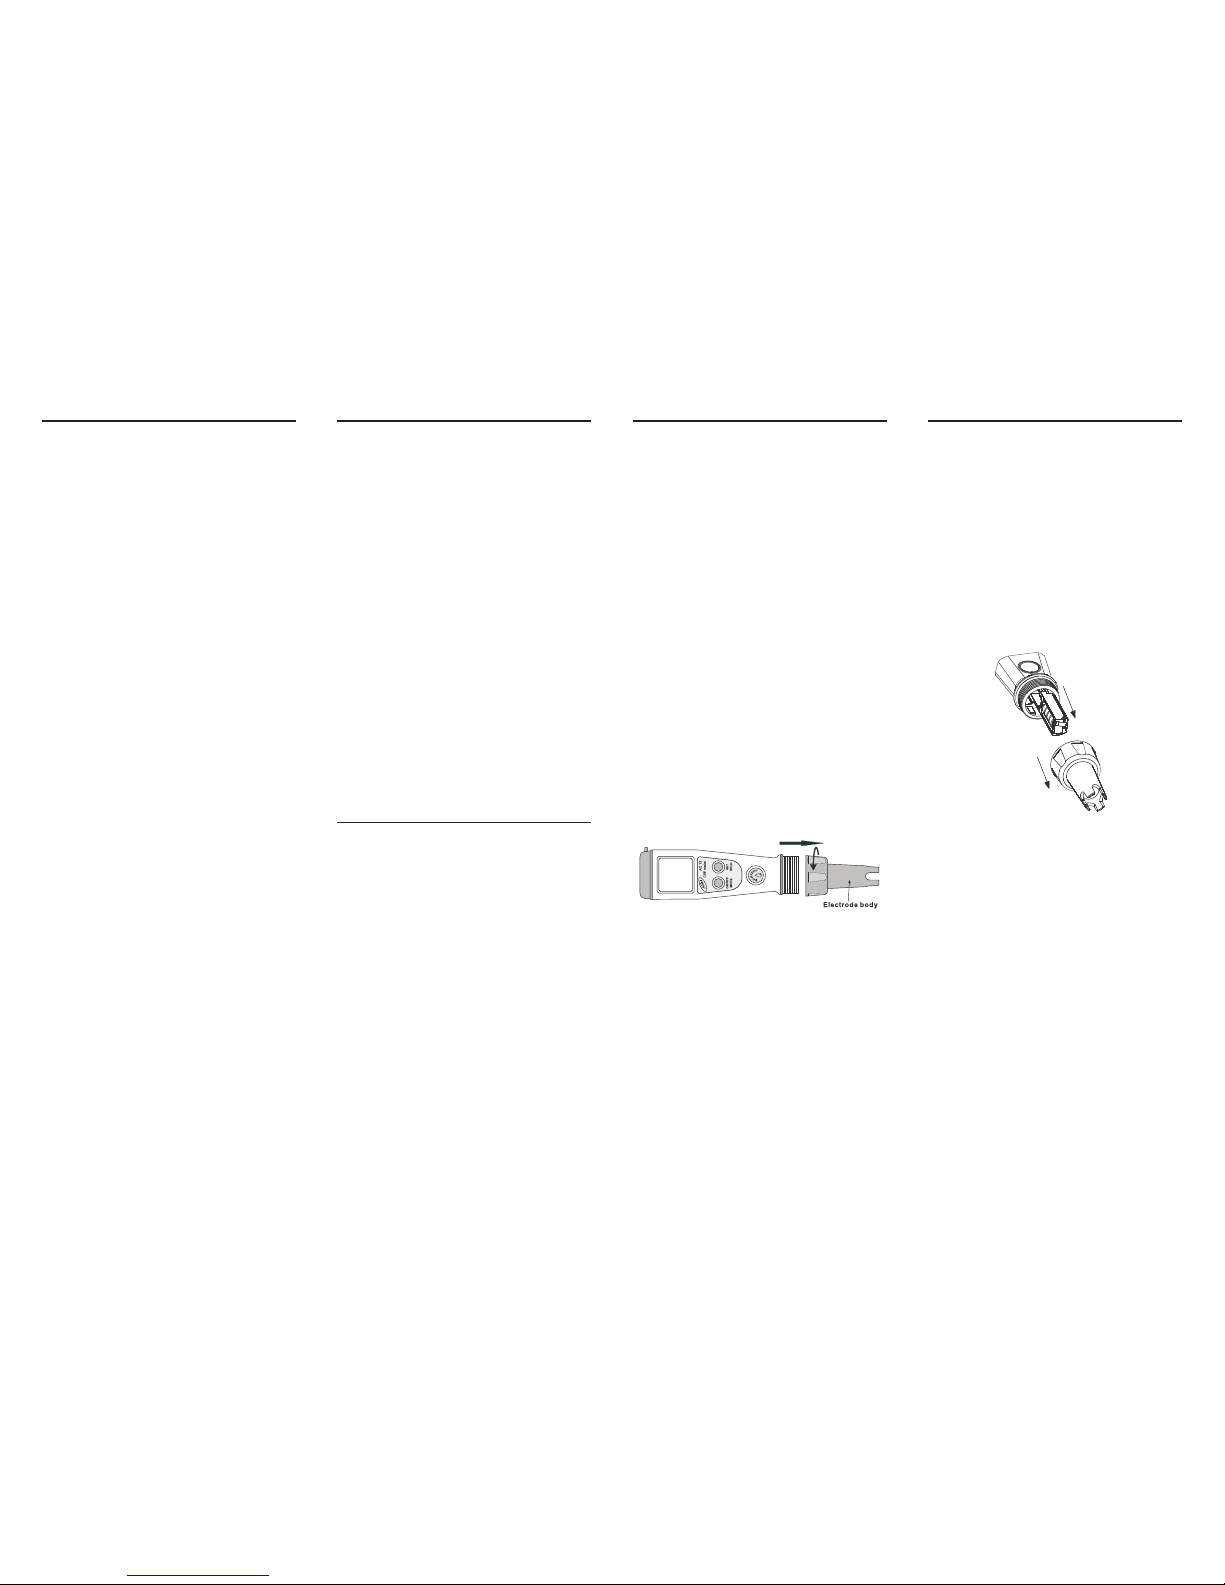
• The electrode can be easily replaced
by unscrewing the body as shown
below.
When the batteries become weak, the
battery symbol on the LCD lights up to
indicate a low battery condition. Batteries
should be replaced soon.
To change the batteries, unscrew and
release the electrode body. Take out the
battery compartment and carefully
replace all four batteries while paying
attention to their polarity.
Reattach and tighten the electrode body
properly to ensure a watertight seal.
BATTERY REPLACEMENT
 Loading...