

Page 1
Assembly Instructions for Model #’s
Stainless Steel Carts
UC-3-1827
UC-3-2433
Assembly Instructions for
Wire Utility Carts
Rubber Casters
WUC-1836R
WUC-1842R
WUC-2436R
WUC-2442R
UTILITY CARTS
Poly Casters
WUC-1836P
WUC-1842P
WUC-2436P
WUC-2442P
Edgewood, New York 11717-8380
© ADVANCE TABCO DECEMBER 2005
CHECK FOR CONCEALED DAMAGE
FILE CLAIM WITH FREIGHT CARRIER
Utility carts manufactured by ADVANCE TABCO are designed and constructed for
applications including Food Preparation, Cooking, Manufacturing, Material Handling, Laboratory
Service and the like. ADVANCE TABCO does not recommend product use for activities
employing harsh and active chemicals. Consult factory regarding unusual applications.
Page 2
CONTENTS
(2) Tubular Handles
(3) Shelves (Stainless Steel or Wire)
(4) Casters
(4) Rubber Bumpers
(4) Plastic Tapered Split sleeves (Per Shelf)
TOOLS REQUIRED
Rubber Mallet
PLEASE NOTE: The following instructions are showing a
Stainless Steel solid shelf being assembled. These instructions
apply for assembling a Wire Utility Cart as well.
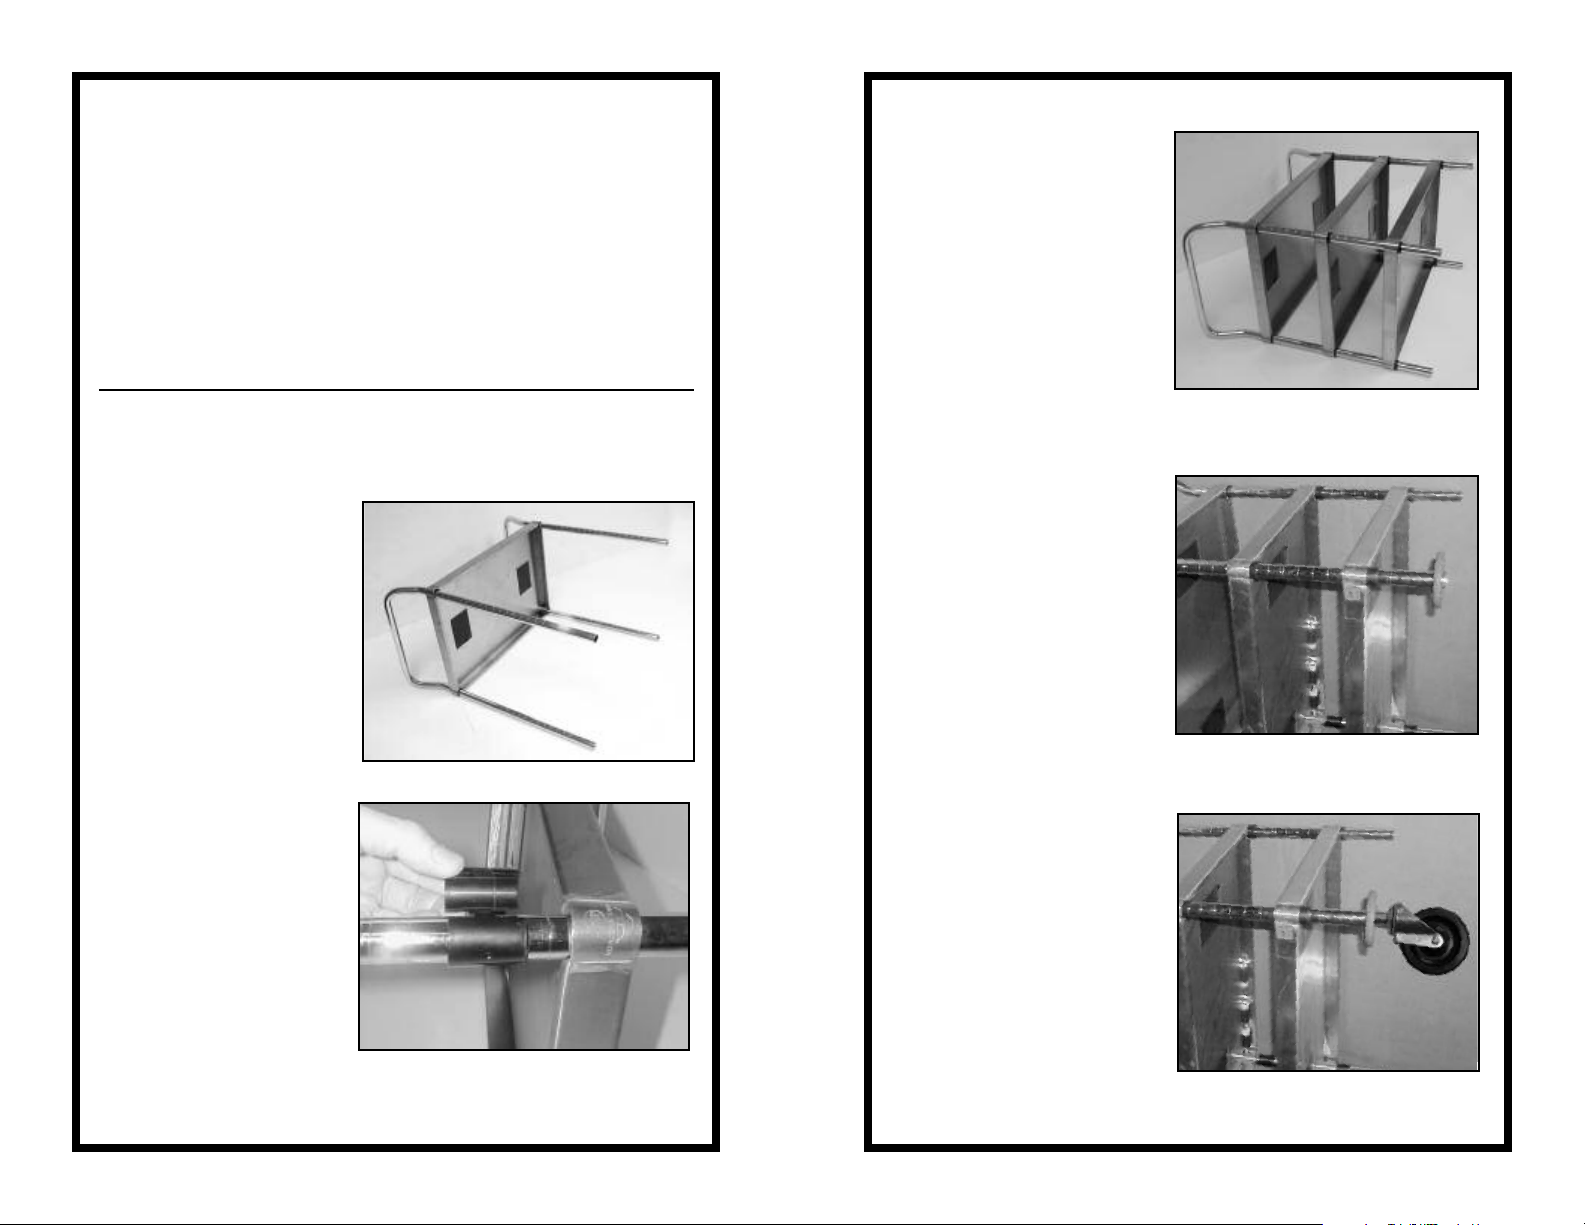
Step 3:
Repeat Step 2 for
middle and lower shelf.
(Figure 3)
Figure 3
Step 1:
Position top shelf onto
tubular handles.
(Figure 1)
Figure 1
Step 2:
Position Plastic Split
Sleeve at desired
location (4) required
and lower shelf onto
split sleeve. (Figure 2)
Figure 2
NOTE: Ensure each (4) split sleeves
are located at the same height.
Step 4:
Place rubber bumper
onto bottom
of tubular handles.
(Figure 4)
Figure 4
Step 5:
Install caster into the
bottom end of each
tubular handle (Use
rubber mallet if required).
Figure 5
 Loading...