

Page 1
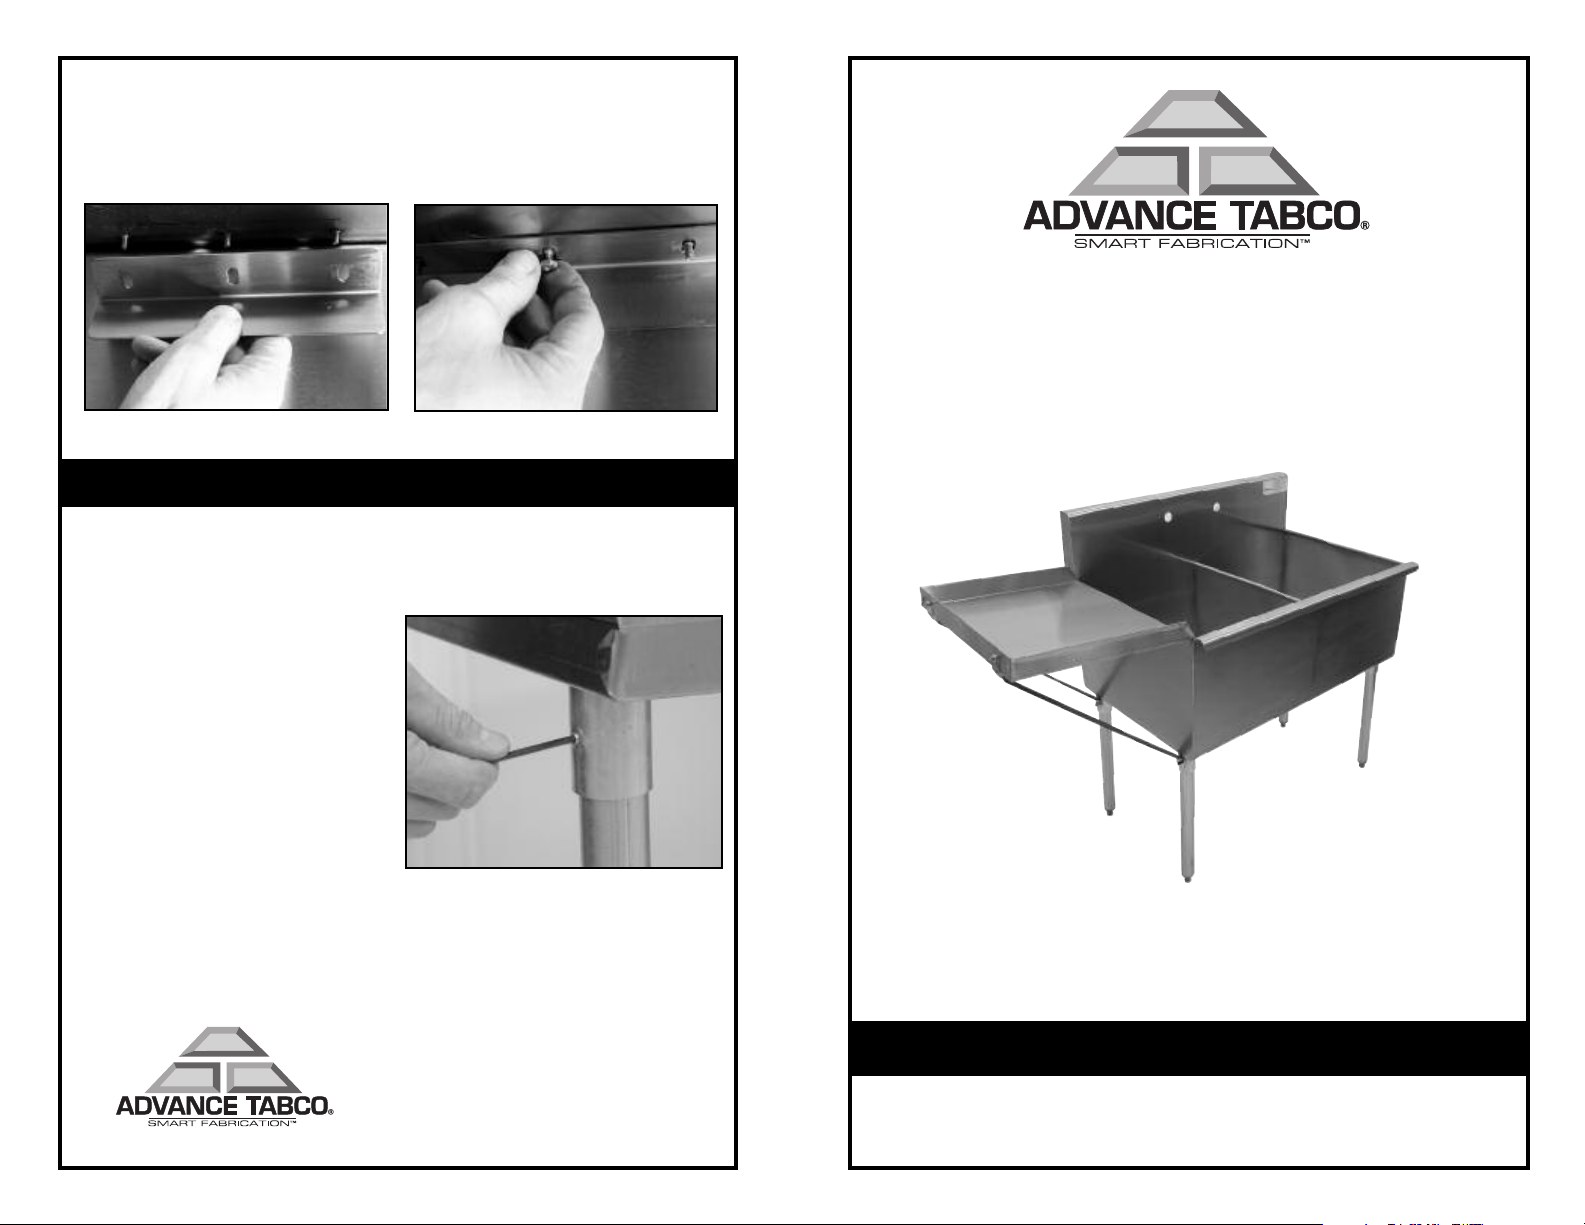
Step 4:
Position Angle Bracket onto (3) Stud Welds (Illustration 4a) and install 3
Nyloc hex Nuts onto Stud Welds (Illustration 4b) Position No-Splash Drainboard tight against sink side. Slide Angle Bracket
tight against outer sink side and tighten Nyloc Nuts.
Illustration 4a
Illustration 4b
DO NOT TIGHTEN.
36” and 48” No-Splash Drainboards
Step 1:
Install 2 Galvanized Legs into leg gussets at end of No-Splash Drainboard.
Tighten using Set screws provided (Illustration 5).
Installation Instructions for
Budget Sink
No-Splash Drainboards
Step 2:
Position No-Splash Drainboard
onto desired side of sink
And follow Step 4 Above.
Illustration 5
Step 3:
Adjust bullet foot at bottom of leg to ensure positive drainage.
Edgewood, New York 11717-8380
© ADVANCE TABCO FEB. 2005
CHECK FOR CONCEALED DAMAGE
FILE CLAIM WITH DELIVERING FREIGHT CARRIER
No Splash Drainboards manufactured by ADVANCE TABCO are designed to facilitate
drainage of utensils and wares after rinsing. ADVANCE TABCO does not recommend
drainboard surfaces be used for food preparation. Do not use bleach or harsh chemicals
when cleaning. Consult factory regarding unusual applications.
Page 2
18”-24” and 30” No-Splash Drainboards
Contents:
(1) No-Splash Drainboard
(2) Drainboard Support Braces or (2) Galvanized Legs with
Adjustable Plastic Bullet Feet (36” & 48” Units only)
(1) Angle Bracket
(2) 5/16” - 24 x 1/2” Socket Set Screws
(2) 1/4” - 20 x 3/8” Slotted Truss Screws
(2) 1/4” - 20 Hex Nuts
(2) 5/16” - 24 Hex Nuts
(3) 10 -24 Nyloc Hex Nuts
Tools Required:
7/16” Open End Wrench
3/8” Open End Wrench
1/2” Open End Wrench
Flat Head Screw Driver
5/32” Allen Wrench
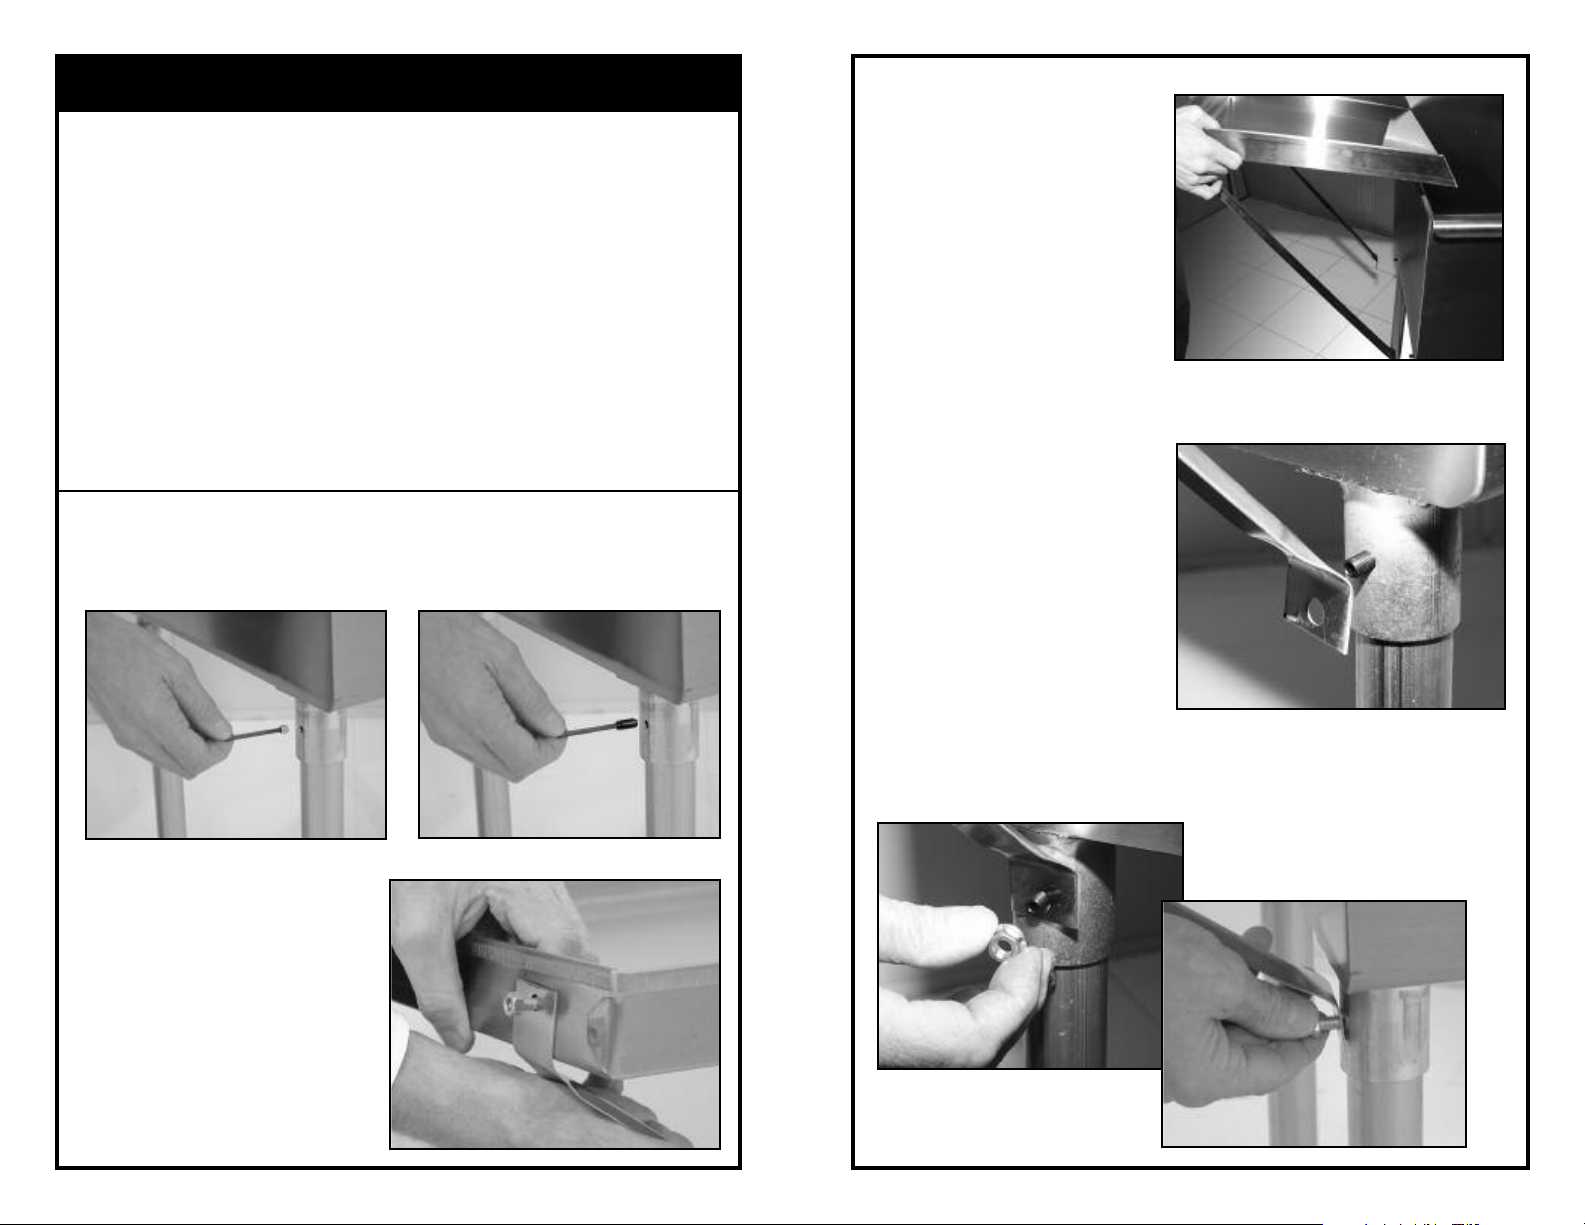
Step 3:
A) Position No-Splash
Drainboard onto Budget Sink
(Illustration 3a).
Illustration 3a
Step 1:
Remove 2 Set Screws from gussets on desired side of sink which NoSplash Drainboard is to be attached (Illustration 1). Install longer 1/2” Set
Screws & tighten (Illustration 2).
Illustration 1
Step 2:
Install Support Braces (2) to
No-Splash Drainboard using
1/4” - 20 x 3/8” screws and nuts
provided (Illustration 3).
NOTE: Longer flange attaches
to drainboard.
Illustration 2
B) Align hole at bottom of
Support Brace with 1/2”
Set Screw(Illustration 3b).
Illustration 3b
C) Attach 5/16” - 24 Hex Nut and tighten (Illustration 3c).
Illustration 3c
Illustration 3
 Loading...