

®
Installation • Operation • Maintenance
ELECTRIC & GAS
HOT FOOD UNITS MANUAL
Please read this manual completely prior to installation and/or operation. This unit is
designed for commercial use only. This manual must be retained for future reference.
CHECK FOR CONCEALED DAMAGE
FILE CLAIM WITH DELIVERING FREIGHT CARRIER
Hot food tables manufactured by ADVANCE TABCO are designed and constructed for
maintaining food temperature. Equipment not intended to cook raw food. ADVANCE
TABCO does not recommend product use for activities employing harsh and active
chemicals. Please consult factory regarding unusual applications.
© ADVANCE TABCO AUGUST 2015
RECEIVING & INSPECTING THE EQUIPMENT:
Even though most equipment is shipped crated, care should be taken during unloading so the
equipment is not damaged while being moved into the building.
1. Visually inspect the exterior of the package and skid or container. Any damage should
be noted and reported to the delivering carrier immediately.
2. If damaged, open and inspect the contents with the carrier.
3. In the event that the exterior is not damaged, yet upon opening, there is concealed
damage to the equipment notify the carrier. Notification should be made verbally as
well as in written form.
4. Request an inspection by the shipping company of the damaged equipment. This
should be done within 10 days from receipt of the equipment.
5. Freight carriers can supply the necessary damage forms upon request.
6. Retain all crating material until an inspection has been made or waived.
PARTS & SCREW PACKET LIST
Qty. Description
1 Hot Food Table Body
1 Poly Cutting Board
1 Stainless Steel Shelf
1 Stainless Steel Undershelf
2 Cutting Board Support Brace
Tools Required: Philip’s Head Screw Driver, Adjustable Wrench, 5/32” Allen Wrench
Qty. Description
4 Legs
1 Screw Pack
8 Set Screws
12 1/4-20 Nylon Tree Plugs
Qty. Description
4 1/4-20 x 1/2” Screws
2 10-32 x 3/8” Screws
2 #10 Star Washers
2 10-32 Acorn Nuts
ASSEMBLY (NOT REQUIRED FOR DROP-IN UNITS): Follow figures on page 3.
For Units With Undershelf ( For units with an enclosed base, proceed to Step 6):
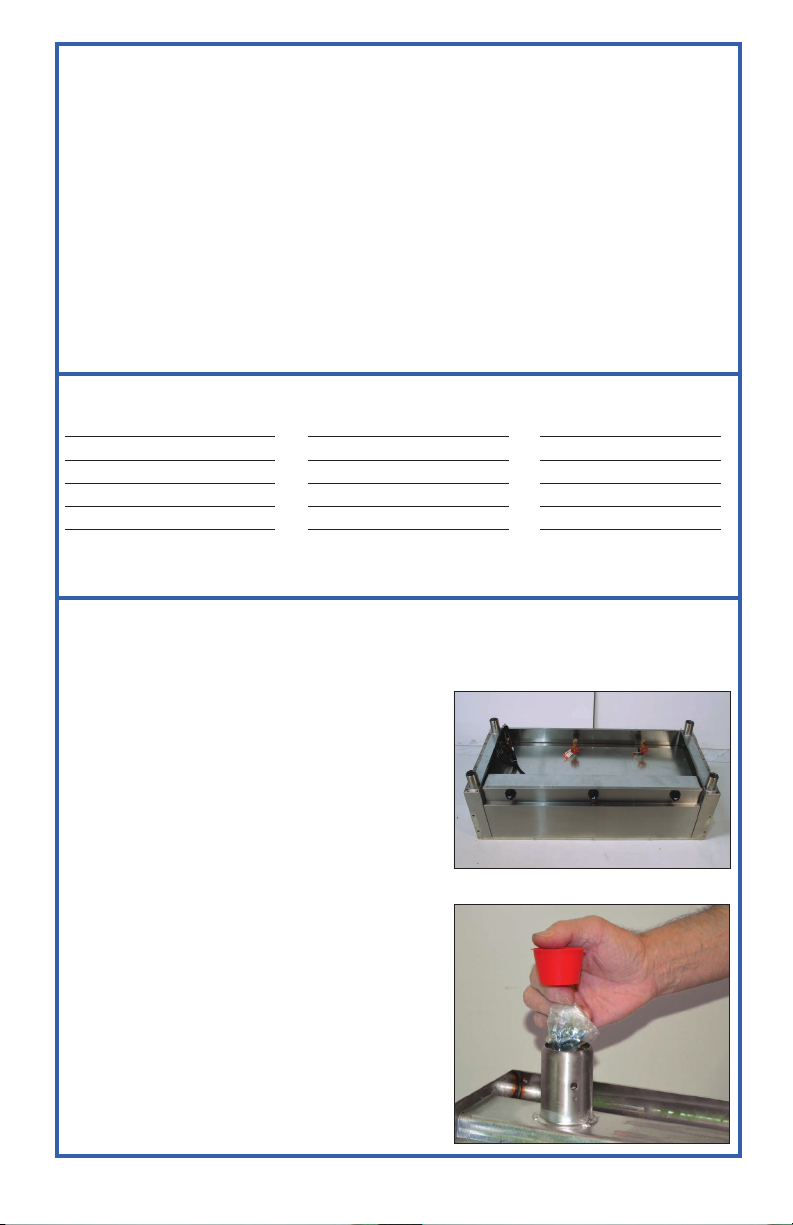
1. This unit is shipped with the Undershelf. The 4
Legs (item 6) are in a separate carton.
2. Remove the unit from the shipping box, and
place it upside down (Figure 1).
SHELF ASSEMBLY:
3. Remove Plastic Cap from Gusset. Set Screws &
Hardware located inside the Gusset (Figure 2).
(Figure 1)
(Figure 2)
2
WWW.ADVANCETABCO.COM • 800-645-3166
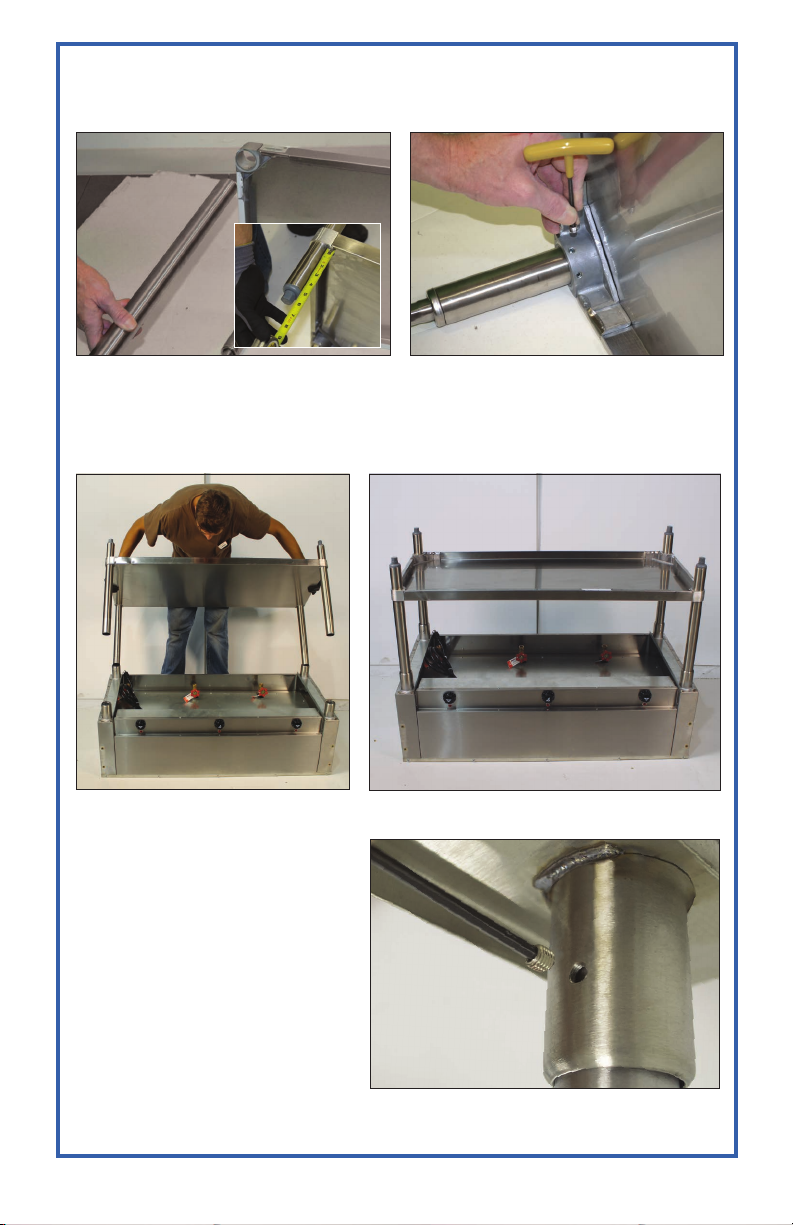
4. Insert top of Leg into adjustable shelf corner. Figure 3).
Align bottom of Shelf to approx. 6” minimum from bottom of Bullet Foot. Insert
Allen Head Set Screws into adjustable shelf corner and tighten (Figure 4).
(Figure 3) (Figure 4)
LEG ASSEMBLY:
5. Install Legs into Leg Gussets (Figure 5 & 6).
(Figure 5) (Figure 6)
6. Secure legs with set screws
(Figure 7).
WWW.ADVANCETABCO.COM • 800-645-3166
(Figure 7)
3
INSTALLING TCB SERIES POLY CUTTING BOARD
CONTENTS:
(4) 1/4-20 x 1/2” Screws
(2) 10-32 x 3/8” Screws
(2) #10 Star Washers
(2) 10-32 Acorn Nuts
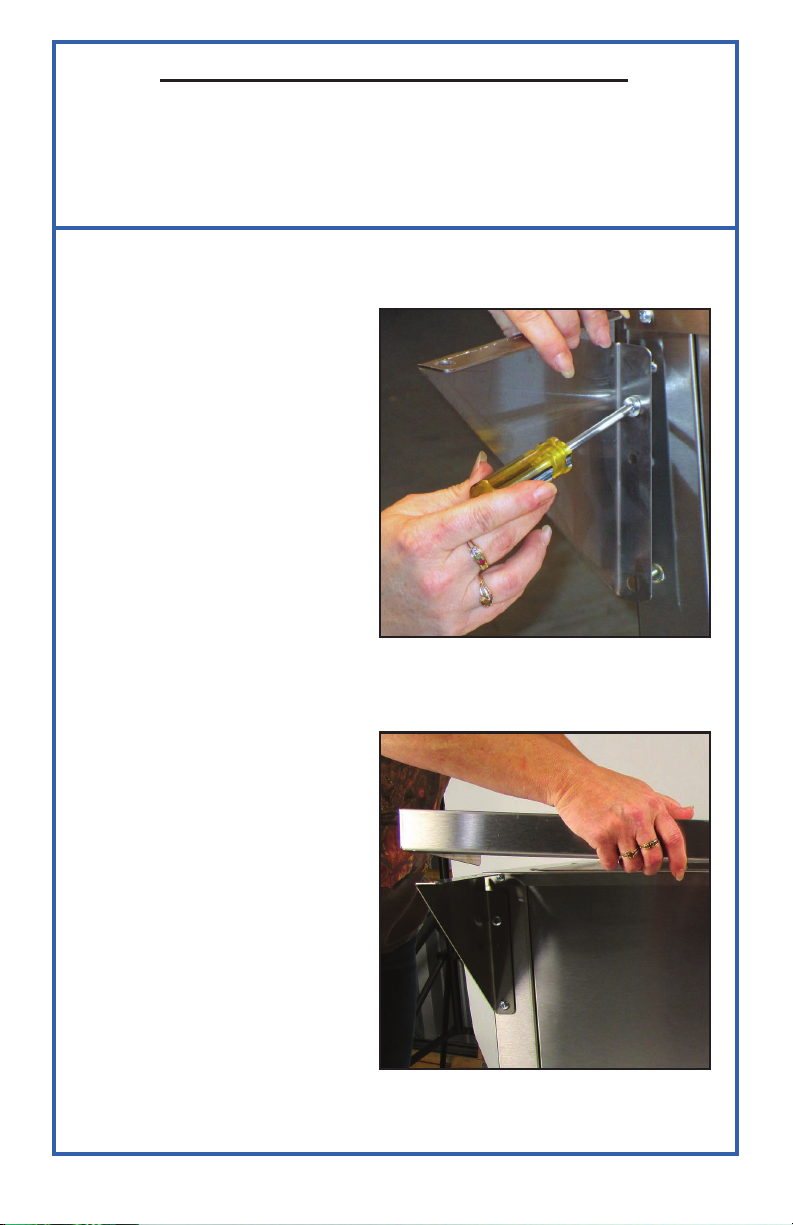
STEP 1:
Bolt on Cutting Board
Brackets using 1/4-20 x 1/2”
Screws (Figure 1).
Do not tighten completely.
TOOLS REQUIRED:
Philip’s Head Screw Driver
Adjustable Wrench
(Figure 1)
STEP 2:
Place Stainless Steel Shelf on
top of brackets (Figure 2).
4
WWW.ADVANCETABCO.COM • 800-645-3166
(Figure 2)
 Loading...