

Advance Tabco 7-PS-62 Installation Manual

CHECK FOR CONCEALED DAMAGE
FILE CLAIM WITH DELIVERING FREIGHT CARRIER
Sinks manufactured by ADVANCE TABCO®are designed and constructed for the use of
liquid containment. Suggested applications include Food Preparation, Manufacturing, Cooking,
Laboratory and Service and the like. ADVANCE TABCO®does not recommend product use for activities
employing harsh and active chemicals. Please consult factory regarding unusual applications.
Edgewood, New York 11717-8380
SEPTEMBER 2002
Installation Instructions for
7-PS-62 HAND WASHING SINK
Step 11:
Check all water and drain connections for leaks.
Step 4:
Install faucet, soap dispenser and drain to sink body.
Step 5:
Plumb connection (top outlet port) from Knee Valve to faucet.
Step 6:
Install sink body onto wall clip. Secure rear Apron flange to wall at
keyhole locations. (Hardware not provided).
Step 7:
Connect Hot and Cold water supply to Knee Valve.
Step 8:
Connect drain to waste line.
Step 9:
Remove aerator and flush water system.
Step 10:
Adjust Hot Water at front of valve. See Photo Illustration #3.
Illustration 3
Hot Water
Adjustment Screw
• (1) Hand Sink
• (1) Apron
• (1) Knee Valve
• (1) K-121 Gooseneck Faucet
• (1) K-6 Basket Drain
• (4) 1/4”x 20” x 3/4” Nuts & Hex Head Bolts
• (1) Wall Clip
• Tape Measure
• Screw Driver
• 7/16” Open End Wrench
• Adjustable Wrench
• Drill Motor & Bits
• Level
• Safety Glasses
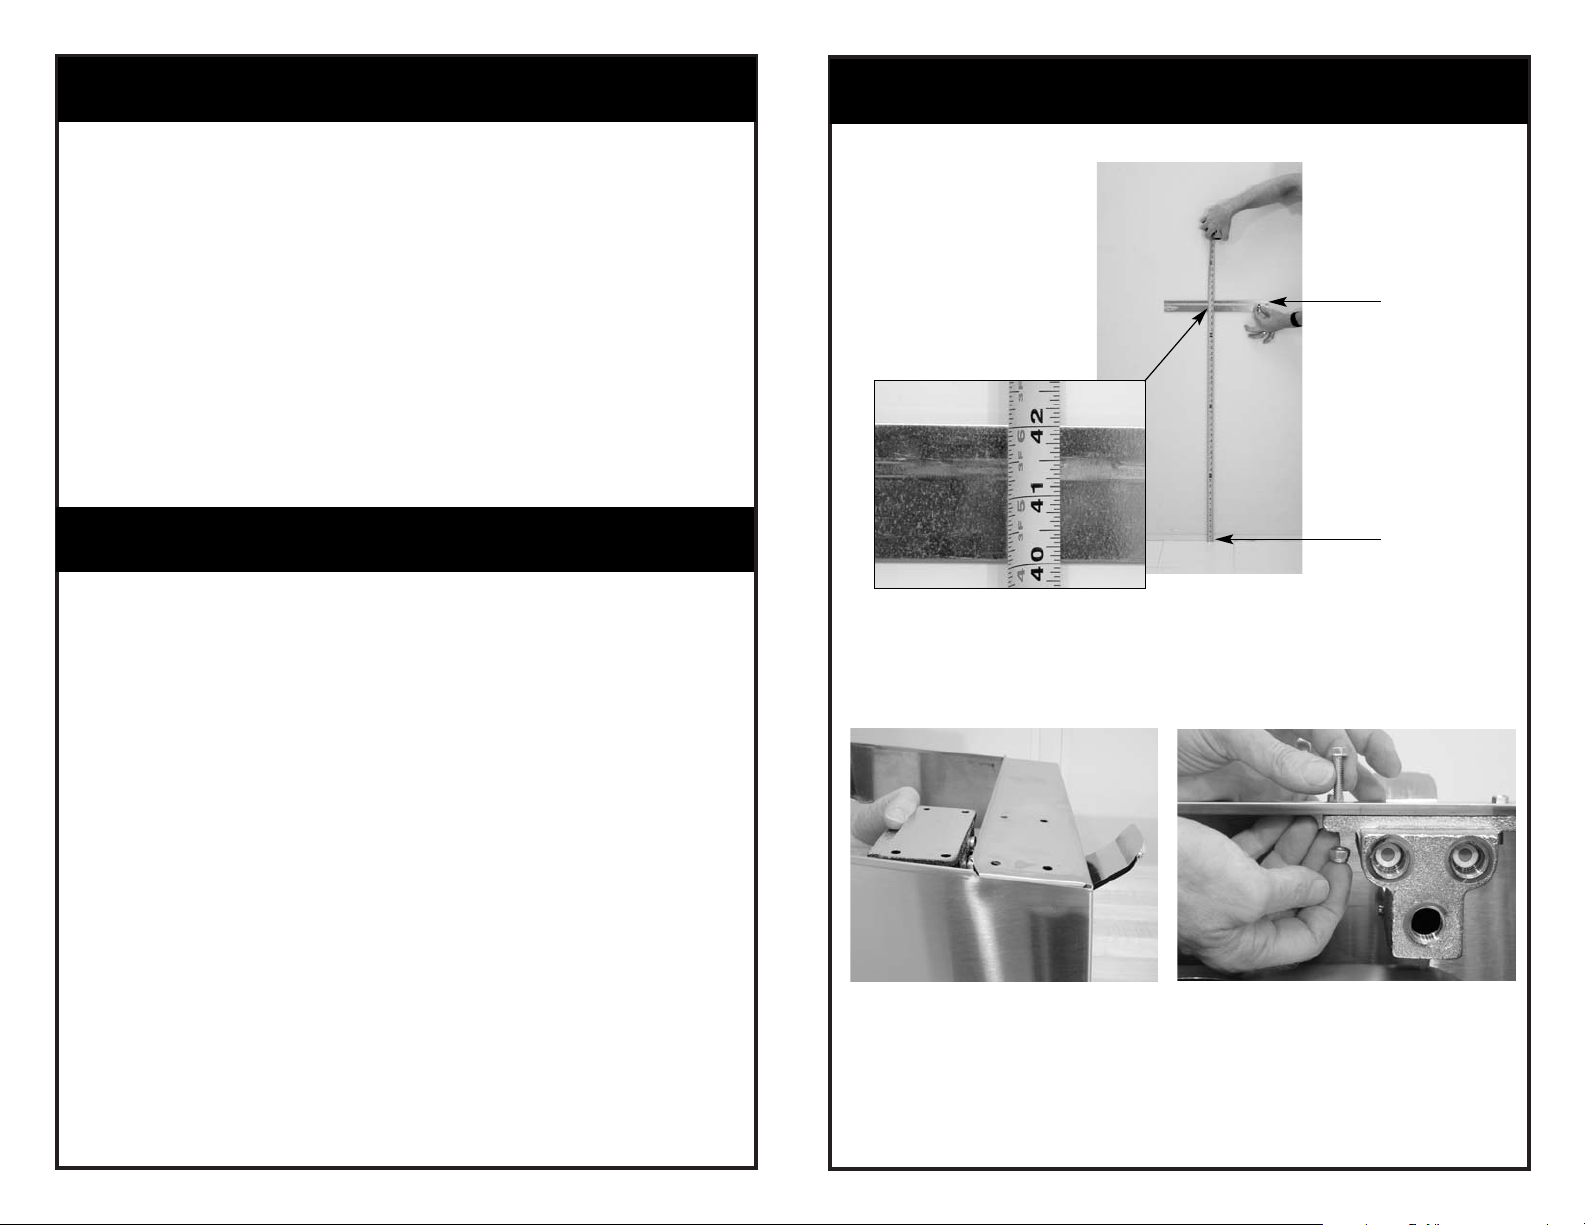
Step 1:
Position wall clip at 42”
A.F.F. (Above Finished
Floor). Ensure Wall Clip
is level.See Photo
Illustrations # 1 & 1A.
(Note: Hardware not provided.)
Step 2:
Install Knee Valve to Apron using - 1/4 x 20” x 3/4” hardware provided.
See Photo Illustrations # 2 & 2A.
Step 3:
Pre-plumb hot and cold water supply to Knee Valve (at base of valve)
according to local plumbing code.
42” Above
Finished Floor
Finished Floor
Illustration 1
Illustration 2
Illustration 2A
Continued >>
INSTALLATION INSTRUCTIONS
CONTENTS INCLUDE:
TOOLS REQUIRED:
Illustration 1A
 Loading...