

Page 1
Page 2
Page 3
Page 4
Page 5
Page 6

Page 7
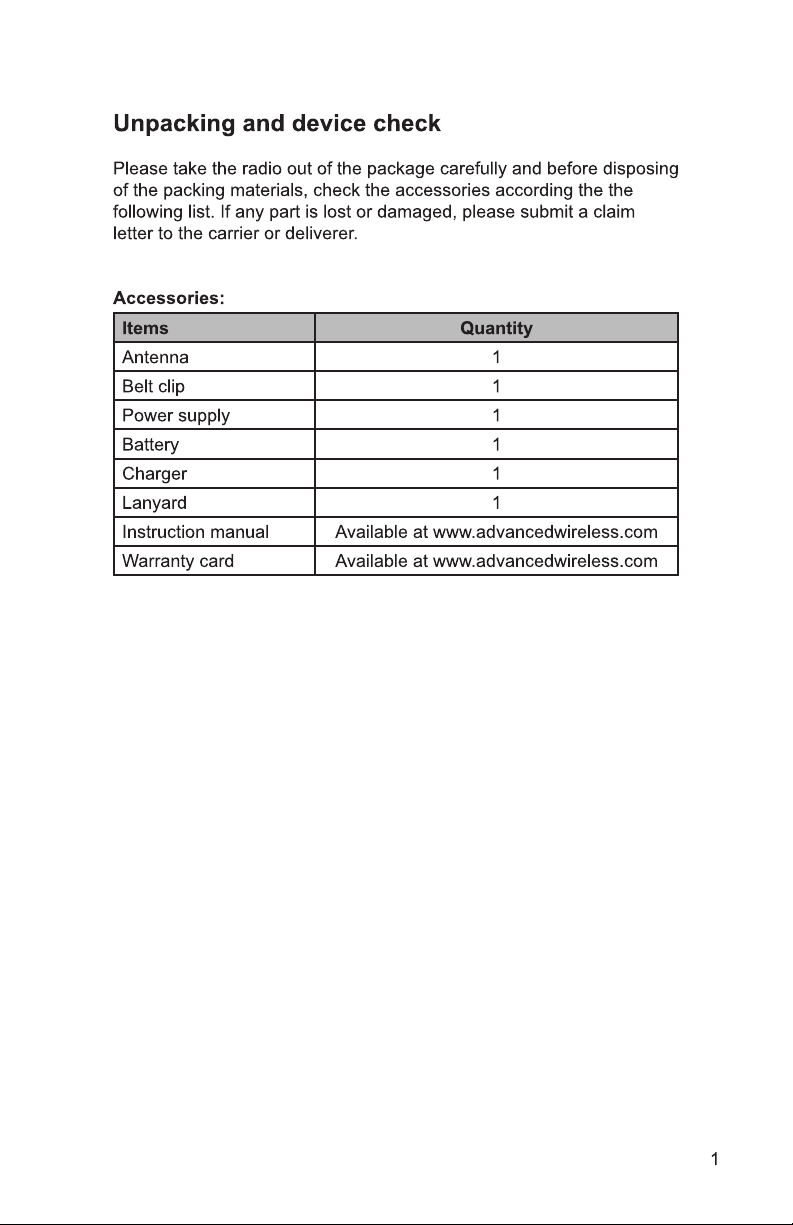
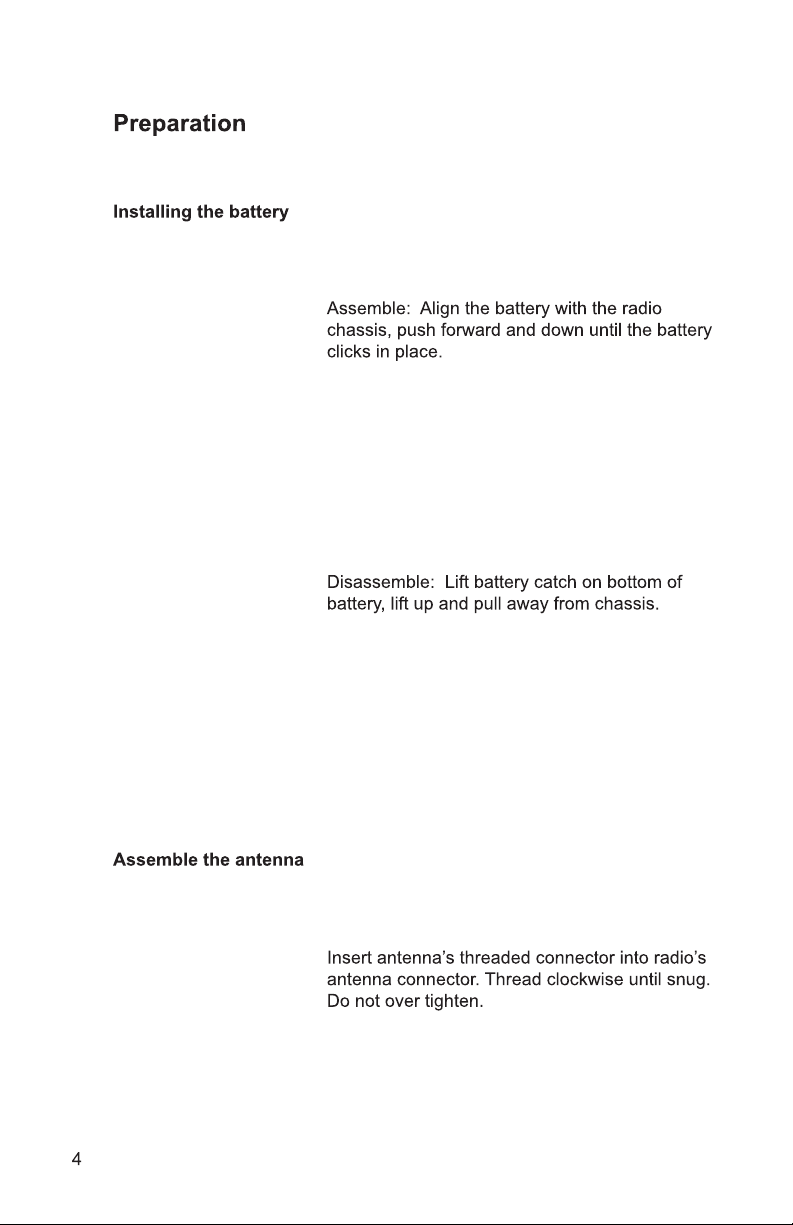
Unpacking and device check
Please take the radio out of
of the packing materials, check the accessories according the the
following list. If any part is lost or damaged, please submit a claim
letter to the carrier or deliverer.
Accessories:
Items Quantity
Antenna 1
Belt clip 1
Power supply 1
Battery 1
Charger 1
Lanyard 1
Instruction manual A
Warranty card Available at www.advancedwireless.com
the package carefully and before disposing
vailable at www.advancedwireless.com
Page 8
Page 9
Page 10
Page 11
Page 12

Page 13

Charging the Battery
Use only the charger and battery specied by
Communications. Charger LED can indicate the charging process.
Charger Indicator
Indicator Charge Status
Red ash Standby
Red glows Charging
Green glows Fully charged
Advanced Wireless
LED Indicator of T
Indicator Charge Status
Green glows 2-3S Power-on cycle
Green glows Receiving signal
Green ash Received
Red glows T
Red ash Battery low will be indicated by
ransceiver
ransmitting
the red LED ashing and an
audible beep. Please charge
or replace the battery as soon
as possible to ensure normal
operation.
Page 14

Page 15

LCD icons
Icon Name
VOX V
Emergency alarm
Battery power Display remaining battery power.
Transmitting indicator The radio is transmitting.
Signal indicator
Transmit power
Icon
Display
Status Description
oice operated function.
The radio is in an emergency alarm state or
receives an emergency alarm.
The radio is receiving signal.
No signal.
Current channel power is low power.
Current channel power is high power.
Speaker Squelch and speaker turned on.
Monitor Has enabled monitoring.
Scan The radio is in the scan state.
Lock Keyboard locked.
O-network
Signaling
The o-network function is turned on.
[some radios do not have this function]
CT has been set to transmit or receive QT.
DN has been set to transmit or receive
DQTN.
DI has boon set to transmit or receive DQTI.
Page 16

Product operation instructions
Keyboard introduction
The
AWR-D7500 has three keyboard modes: channel number mode,
DTMF mode, and call ID. Users can select dierent keyboard modes
according to their needs, thus achieving simple and fast operation.
Channel number mode: After the user selects the channel number
mode, the required channel number can be directly written through the
keyboard, and the Radio automatically jumps to this channel.
DTMF mode: After the user selects DTMF mode, the user can input
DTMF code through the keyboard.
Call ID: After the user selects the call ID, the user can input a user ID
number through the keyboard and then directly call the other party.
Working Mode
The
AWR-D7500 has three operating modes: Computer mode, debug
mode, and user mode. Each mode is entered in a dierent way.
Entry conditions for each mode:
Mode T
Computer mode Connect to Computer with write USB cable
Debug mode Enter the debug mode by CPS (the CPS
User mode Automatically enters user mode when
ype Button Description
determines whether to enter)
powered on
Page 17

Page 18

Page 19

Page 20

4. Programmable function key function
There are four programmable function keys that may be dened
in software. These buttons are noted as K1, K2, K3, and TK.
Programmable buttons can be modied by the CPS.
Programmable button function denition list
Button Status Button
No [unction; emergency alarm; cancel
emergency alarm; voice control; power switching;
steady state monitoring [analog]; transient
monitoring [analog]; steady state cancellation
Short
Press
K1
K2
K3
Long
Press
Key function description:
squelch [analog]; transient cancellation squelch
[analog]; Talk Around; o-line; scan; one-touch
call 1 (DMR); one-touch call 2 (DMR); one-touch
call 3 (DMR); one-touch call 4 (DMR); broadcast
local ID [number]; broadcast channel Number;
broadcast power; broadcast battery power;
No function; emergency alarm; cancel
emergency alarm; voice control; power switching;
steady state monitoring [analog]; transient
monitoring [analog]; steady state cancellation
squelch [analog]; transient cancellation squelch
[analog]; Talk Around; o-line; scan; one-touch
call 1 (DMR); one-touch call 2 (DMR); onetouch call 3 (DMR); one-touch call 4 (DMR);
broadcast local ID [number]; broadcast channel
Number; broadcast power; broadcast battery
power; broadcast channel type; serial port report
(production version only);
Assignment Function
1. No function: No function denition, the button is invalid and there
is an error tone.
2. Emergency alarm: Press this button to initiate an emergency alert,
which is typically associated with the top orange button. Emergency
is only supported by a short key press. A long key press is associated
with emergency o.
Page 21

Page 22

Page 23

Page 24

Page 25

Page 26

Page 27

Page 28

Page 29

Page 30

Page 31

Page 32

Page 33

FCC Statement
equipment has been tested and found to com ply with the lim its for a Class B digital device, pur suant to part 15
This
of FCC Rules. These limits are designed to provide reasonable protection against harmful interference in a
residential installation. This equipment generates and can radi ate radio frequency energy. If not ins talled and used in
accordance with the instructions, it may cause harmful interference to radio communications. However, there is no
guarantee that interference will not occur in a particular installation. Verification of harmful interference by this
equipment to radio or television reception can be determ ined by turning it off and then on. The user is encouraged to
try to correct the interference by one or more of the following measures:
Reori
Connect the equipment into an outlet on a different circuit to that of the receiver's outlet.
Consult the dealer or an experienced radio/TV technician for help.
Operation is subject to the following two conditions:
This device may not cause harmful interference.
This device must accept any interference received, including interference that may cause undesired operation.
Note: Changes or modifications to this unit not expressly approved by the party responsible for compliance could
void the user's authority to operate the equipment.
RF Exposure Compliance and Control Guidelines and
Operating Instructions
ent or relocate the receiving antenna. Increase the separation between the equipment and receiver.
o control your exposure and ensure compliance with the occupational/controlled environmental exposure limits,
T
always adhere to the following procedures.
Guidelines:
Do not remove the RF Exposure Label from the device.
User awareness instructions should accompany device when transferred to other users.
Do not use this device if the operational requirements described herein are not met.
ng Instructions:
Operati
Transmit no more than the rated duty factor of 50% of the time. To transmit (talk), push the Push-To- Talk (PTT)
key. To receive calls, release the PTT key . T ransm itting 50% of the ti me, or less, is important be cause the radio
generates measurable RF energy only when transmitting (in terms of measuring for standards compliance).
Keep the radio unit at least 2.5 cm away from the face. Keeping the radio at the proper distance is im portant as
RF exposure decreases with distance from the antenna. The antenna should be kept away from the face and
eyes.
Page 34

When worn on the body, always place the radio in a approved holder, holster, case, or body harness or
by use of the correct clip for this product. Use of non-approved accessories may result in exposure levels which
exceed the FCC's occupational/controlled environmental RF exposure limits.
Use of non-approved antennas, batteries, and accessories causes the radio to exceed the FCC RF exposure
guidelines.
Contact your local dealer for the optional accessories of the product.
ISED Statement
device has been tested and complies with SAR limits, users can obtain Canadian information on RF exposure
The
and compliance
Après examen de ce matériel aux conformité aux limites DAS et/ou aux limites d’intensité de champ RF, les
utilisateurs peuvent sur l’exposition aux radiofréquences et la conformité and compliance d’acquérir les
informations correspondantes
This device complies with Innovation, Science and Economic Development Canada Compliance license-exempt
RSS standard(s). Operation is subject to the following two conditions:
This device may not cause harmful interference.
This device must accept any interference received, including interference that may cause undesired operation.
Le présent appareil est conforme aux CNR d'Industrie Canada applicables aux appareils radio exempts de licence.
L'exploitation est autorisée aux deux conditions suivantes: (1) l'appareil ne doit pas produire de brouillage, et (2)
l'utilisateur de l'appareil doit accepter tou t brouillag e radi oélectr ique subi, m êm e si le brouill age est s usceptible d' en
compromettre le fonctionnement
 Loading...