

Advanced Global Technology HDT200 User Manual
user guide
HDT200
Important: This manual contains important safety and operating information. Please read, understand, and follow the instructions in this
manual. Failure to do so could result in personal injury, death, and/or damage to your HD PulseTMTabletop Clock Radio, accessories,
and/or to your property.


Table of Contents
2
Introduction 3
HD Pulse
TM
Tabletop Clock Radio Setup 8
Using the HD Pulse
TM
Tabletop Clock Radio 10
Setup Options 21
Customer Support 25
Warranty 29
Warranty Return Form 32

Introduction
THANK YOU FOR CHOOSING THE HD PULSE™ TABLETOP CLOCK RADIO
We have designed this product to provide you with access to the full spectrum of features
that the new HD Radio™ technology offers. Across the country, AM and FM radio
broadcasters are upgrading to digital HD Radio transmissions, which the HD Pulse receiver
is specially designed to receive. Plug-in your HD Pulse radio and you are ready to
experience the improved clarity and content of HD Radio broadcasts!
iBiquity Digital’s HD Radio technology enhances the audio quality of AM and FM
broadcasts. The digital signals allow FM stations to be enjoyed with CD-quality sound and
boosts AM quality up to the level of FM sound. The static, hiss, pops and fades heard on
today’s analog radios are virtually eliminated with HD Radio technology. Program
associated data, such as real-time song titles, artist and album information is also provided.
HD Radio technology also provides multiple programming options over a single FM channel,
known as multicasting (where available). To learn more about HD Radio technology and to
find HD Radio stations in your area, visit www.hdradio.com.
3

Introduction
IMPORTANT SAFETY INSTRUCTIONS
READ INSTRUCTIONS
All the safety and operating instructions must be read before this product is used.
RETAIN INSTRUCTIONS
The safety and operating instructions should be retained for future reference.
HEED WARNINGS
All warnings on the product and in the operating instructions should be adhered to.
FOLLOW INSTRUCTIONS
All operating and use instructions should be followed completely.
CLEANING
Unplug this product from the wall outlet before cleaning. The product should be cleaned only
with a polishing cloth or a soft dry cloth. Never clean with furniture wax, benzene or other
volatile liquids as they may corrode or damage the unit.
ATTACHMENTS
Do not use attachments or accessories not recommended by the product manufacturer as
they may create hazardous situations.
WATER AND MOISTURE
Do not use this product near water – for example, near a bathtub, washbowl, kitchen sink,
or laundry tub; in a wet basement or near a swimming pool.
ADEQUATE VENTILATION
Do not block any ventilation openings. Install in accordance with the manufacturer’s
instructions. Maintain a minimum distance of 1” (25mm) around the front, rear, and sides of
the product for sufficient ventilation. The ventilation should not be impeded by placing on or
around the product items such as newspapers, table cloths, curtains, etc.
4

Introduction
POWER SOURCES
This product should be operated only from the type of power source indicated on the
included power supply label. If you are not sure of the type of power supplied to your home,
consult your local power company.
LOCATION
This product should be installed in an interior location away from excessive heat and
moisture. The product should be placed on a stable platform such as a table, counter or
shelf.
POWER CORD PROTECTION
Power supply cords should be routed so that they are not likely to be walked on or pinched
by items placed upon or against them, paying particular attention to cords at plugs, power
outlet receptacles, and the point where they exit from the product.
LIGHTNING
For added protection for this product during a lightning storm, or when it is left unattended
and unused for long periods of time, unplug it from the wall outlet. This will prevent damage
to the product due to lightning and power line surges.
WATER AND MOISTURE
Do not use this product near water – for example, near a bathtub, washbowl, kitchen sink,
or laundry tub; in a wet basement or near a swimming pool.
OVERLOADING
Do not overload wall outlets, extension cords, or power supply receptacles as this can result
in risk of fire or electric shock.
OBJECT AND LIQUID ENTRY
Never push objects of any kind into this product through the openings as they may touch
dangerous voltage points or short circuit parts that could result in a fire or electric shock.
Avoid spilling liquids of any kind on the product.
5

Introduction
SERVICING
Do not attempt to service this product yourself as opening or removing covers may expose
you to dangerous voltage or other hazards and void the manufacturers warranty. Refer all
servicing to qualified service personnel.
DAMAGE REQUIRING SERVICE
Unplug this product from the wall outlet and refer servicing to qualified service personnel
under the following conditions:
• When the power supply cord or plug is damaged.
• If liquid has been spilled, or objects have fallen into the product.
• If the product has been exposed to rain or water.
• If the product does not operate normally by following the operating instructions.
Adjust only those controls that are covered by the operating instructions as an
improper adjustment of other controls may result in damage and will often require
extensive work by a qualified technician to restore the product to its normal
operation.
• If the product has been dropped or damaged in any way.
• If the product exhibits a distinct change in performance.
6
Introduction
HD PulseTMTabletop Clock Radio
The HD Pulse Tabletop Clock Radio includes the following:
NOTE: Actual product components may differ slightly from those illustrated.
7
HD PulseTMTabletop Clock Radio Setup
USING THE HD PULSE TABLETOP CLOCK RADIO AT HOME
Place the HD Pulse Tabletop clock radio on a secure and stable surface such as a table,
desk, counter or shelf.
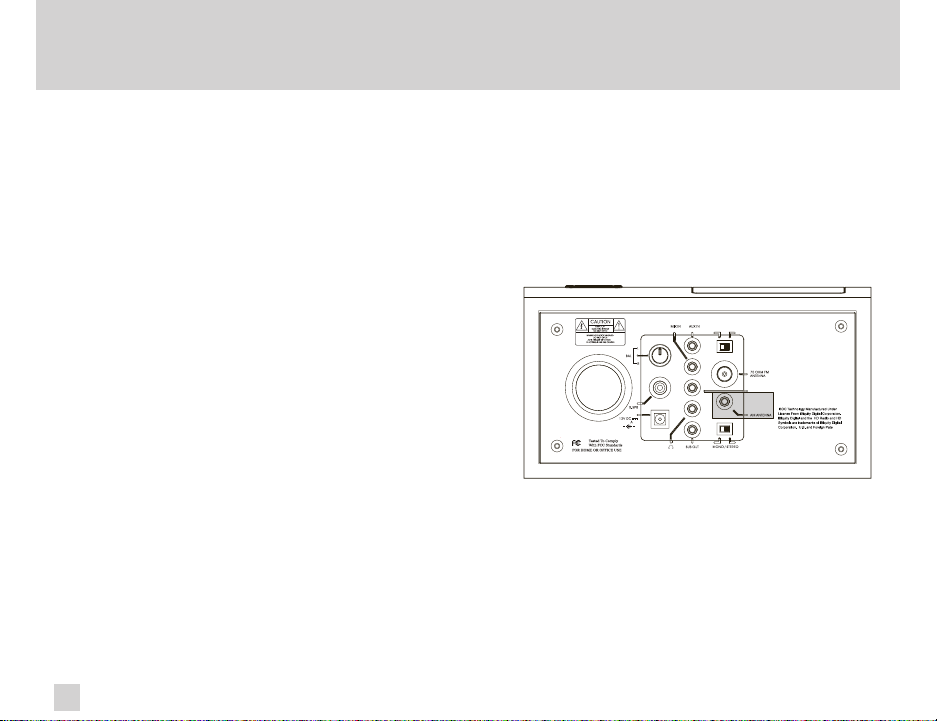
Connecting the AC/DC Adapter
1. Insert the power supply cord into the port
labeled 12V DC.
2. Plug the AC/DC adapter into a wall outlet.
Connecting the FM Antenna
1. Push the F-Type connector
plug on the end of the
antenna wire onto the
receptacle marked 75 OHM
FM ANTENNA.
2. Straighten and stretch out the antenna wire and position the antenna in a location
that provides the best FM reception.
8
HD PulseTMTabletop Clock Radio Setup
Cable Radio Signals
The FM antenna connector is a standard F-Type connector and can accept cable FM feeds
from some cable systems that provide FM programming. Contact your cable TV provider for
assistance to connect your HD Pulse Tabletop Clock radio to the FM signal, available from
some cable TV providers.
Connecting the AM Antenna
Assemble the AM loop antenna, inserting the tabs
into the base so it stands upright.
1. Push the AM Antenna connector plug on
the end of the antenna wire in to the
receptacle marked AM ANTENNA.
2. Position the antenna for best AM
reception.
9
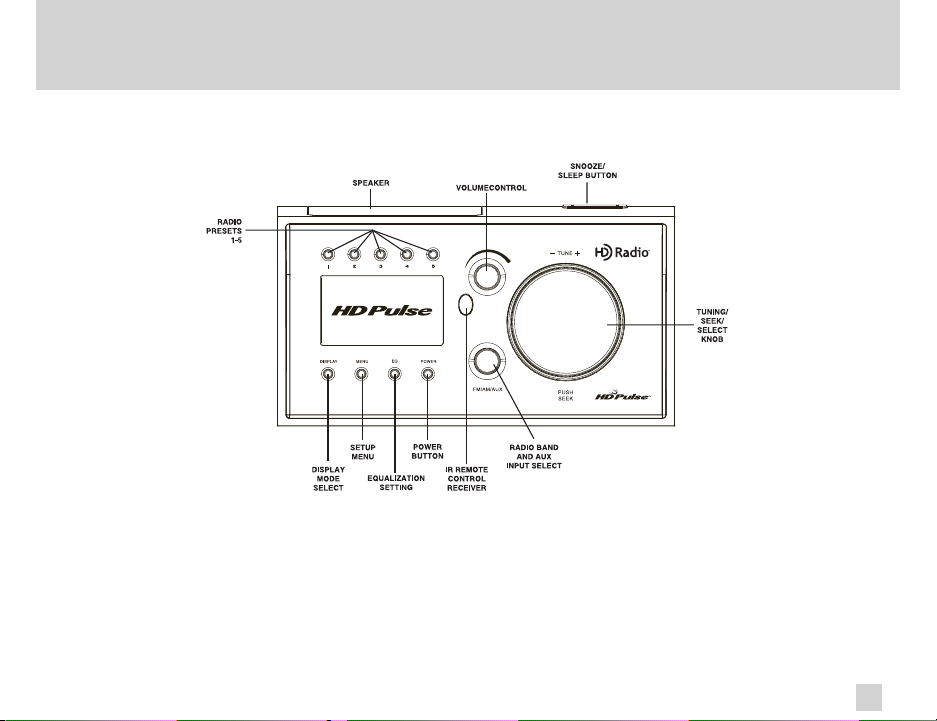
Using the HD PulseTMTabletop Clock Radio
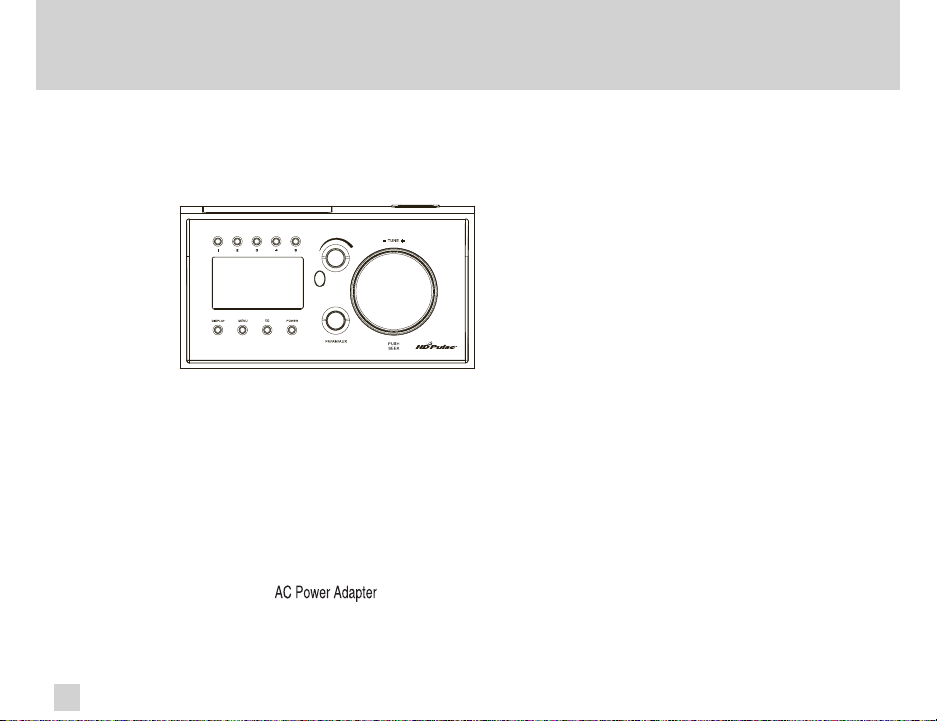
HD PULSE TABLETOP CLOCK RADIO OVERVIEW
TURNING THE HD PULSE TABLETOP CLOCK RADIO ON/OFF
• Press the POWER button to turn the radio ON/OFF.
• When the HD Pulse is Turned off, the clock is displayed. You can choose either an
analog or digital clock display (MENU: CLOCK SET).
The radio will enter the mode last used before it was turned off.
10
 Loading...